I have been using the vinyl cutter for a few years now. I find the vinyl cutter very handy for signage and decoration in my home. For example, I have created decals for my nieces' play room, which I transformed into a flower garden. It's pretty fun to take advantage of this resource and make things that always look crisp and clean. I like the flat, consistent colors that the vinyl decals provide and that the shapes are always crisp and clean. If I were to paint a mural for them, it would not only have taken me much longer, it would have been much less graphic.
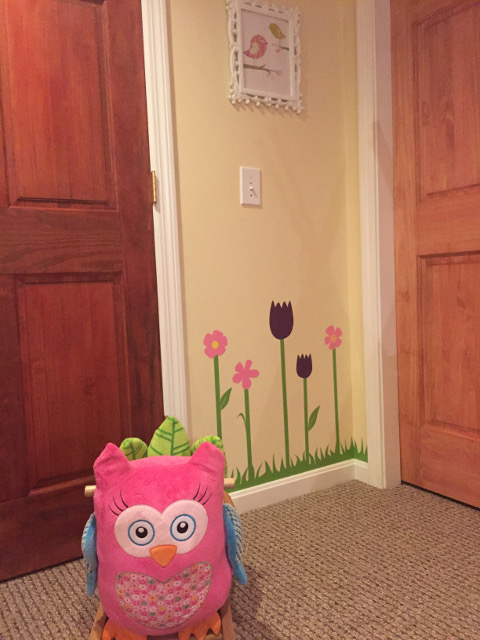
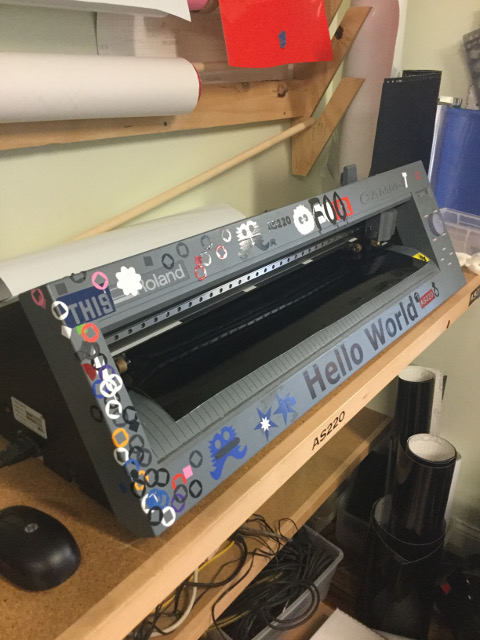
To run the vinyl cutter, I prepare my vector files to have a hairline stroke thickness and a completely red color. There should be no fill. I also prepare my document so that the length is longer than the width. From here, running those files to the vinyl cutter works like a printer. I load the roll of vinyl into the back of the cutter and feed the end of the roll through the vinyl cutter. There are small wheels that feed the vinyl through that dictate the space that the blade will work in, but they must stay underneath white areas designated for them. From here, I press down a lever in the back that locks the wheels into place so that they can guide the vinyl through. After turning on the vinyl cutter, I choose a roll or piece, depending on the size of the vinyl. The roll option assumes that there is an ample amount of vinyl to be cut, whereas the piece option measures all dimensions of the piece of vinyl before cutting it. After sending the file to the cutter, the blade runs back and forth, feeding the vinyl in and out to create the proper cuts. Once the cutting is completed, the piece can be removed and the excess vinyl that is unnecessary for the decal can be removed. Then, a piece of adhesive application tape can be applied to the vinyl and its backing. Use a sturdy plastic card or the edge of a ruler to make sure that the application tape is firmly in place with no bubbles. When the decal is ready to be applied, remove the application tape so that the vinyl decals are removed with it. Then, position the stickers in the correct place on the wall, so that the adhesive side is in contact with the wall. Then, apply pressure to the decals by scraping the plastic card along the backside of the application tape so that the adhesive side of the vinyl becomes strongly adhered to the wall. Remove the application tape by sliding it away from the decal, which should remain on the wall. The files used for the garden decals are located below.

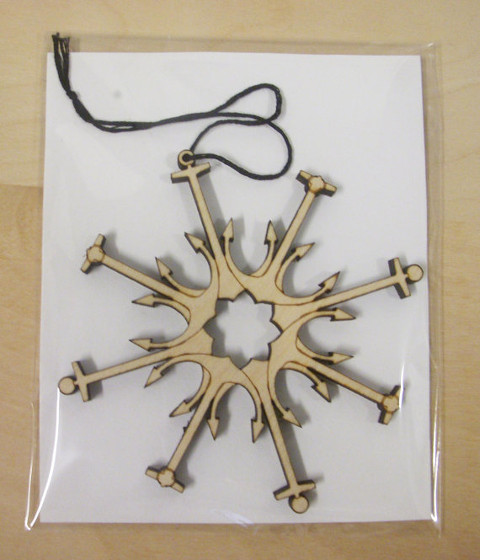
I have plenty of experience with the laser cutter as well, but have not utilized it to build 3D shapes. My work on the laser cutter has mainly been creating holiday ornaments and engraving paper for my prints. I've pushed forward on these fronts lately, but also needed to engage the prompt for this week, which was to create a parametric vector design that would yield a modular press-fit object.
I found it cumbersome at first to use Inkscape properly, as I normally work with Adobe Illustrator and the commands are slightly different. It's amazing how much those small changes can hinder one's efficency. I first attempted to create my object using the boulions such as difference and union. Through this experience, I noticed some aspects of the program that seem counter-intuitive. For example, I could not use the difference boulion if I engage two objects by creating a bounding box around them. Instead, I needed to click on one and then the other. It was not until the following day that I realized that this was where I was running into problems with these functions.
Shawn's lecture was very helpful in creating the parametric design. He showed us how to use the clone tile tool to create multiple objects that are all controlled by one master object. This is handy in case any adjustments need to be made: if you change the master object, the clones will also all simultaneously change. This is especially helpful with the size of the teeth that hold the sides of the object together in press-fit construction. Similarly, if the size of the sides need to change, they can also be controlled as well, I believe. The other very important pieces of advice given by Shawn were to use the Transform functions that allign and center your objects. This way, the tabs that become the teeth on the sides of the object can all run exactly across the edge.
In my first attempts at creating a press-fit model, I decided to take the advice given by Neil Gershenfield, and echoed by Shawn, that we should create in a spiral, meaning to start small and to work up and out from there. The first pieces that I created were two flat pieces of cardboard that simply joined together. I was successful in using parametric designs to create two joining pieces.

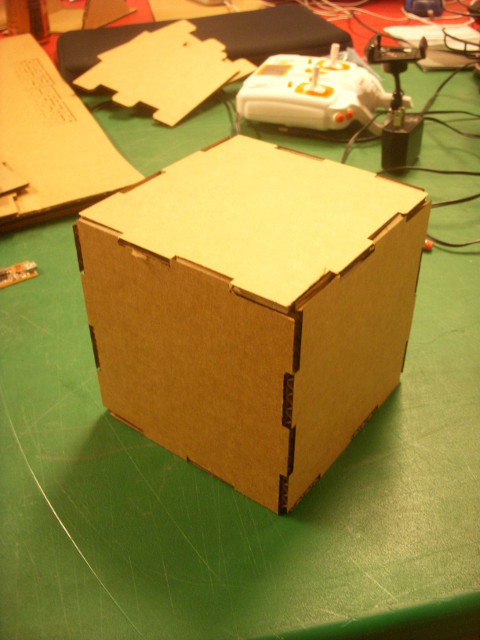
The next day, however, I ran into a problem, having not saved my file properly. Rather than trying to salvage the file, I started from scratch, figuring the more practice I could gain, the better. This time around, things went much easier. I created a design for a press-fit construction box. After expanding my model to be a cube, instead of just two conjoined cardboard squares, I ran into some problems in the way that my pieces would fit. I had to edit my design and eventually settled on faces of the cube that were five inches by five inches. Having discovered that an even number of tabs was the best way to make my pieces fit, I made four tabs measuring 1.25 inches each. The height of these tabs was the depth of the cardboard, which I measured with calipers as .1615 inches.
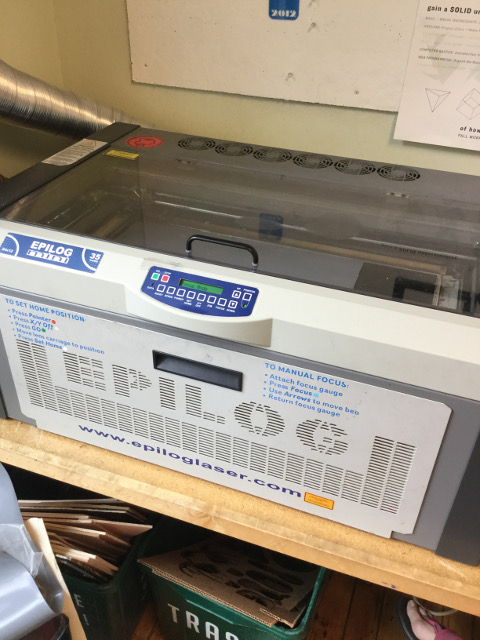
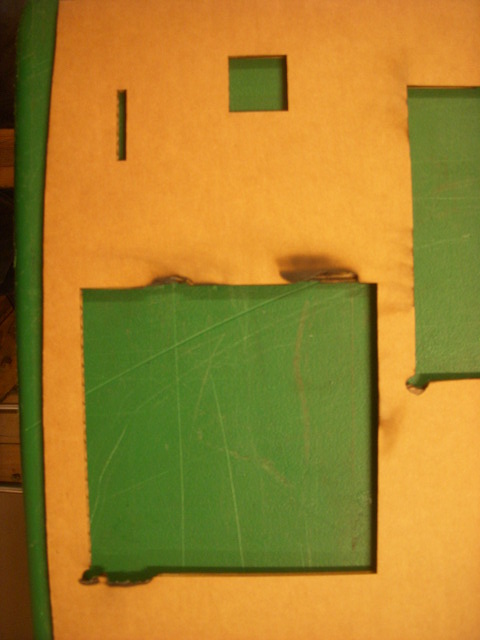
In theory, all of this should have produced a perfect press-fit box. To use our Epilog laser cutter, one must make sure the ventilation is on and never to walk away from the machine, in case of a fire. Next, it is important to put your material onto the bed of the laser and focus the laser, bringing the bed up to the correct height. To do this, there is a metal triangular fixture that can be placed on the head of the laser, pointed downward. Once this is in place, press the focus button and use the up and down buttons to bring the surface of the material up to meet the point of the triangular fixture. PDF and SVG files seem to run fine on the laser, although I have noted that there are sometimes strange discrepancies between files made in Illustrator when they are opened up with Corel Draw on the laser. It's also important to make sure that the Layout of the document is "As in document" before executing the design, otherwise it will not be an accurate placement on the material. The power, speed, and frequency settings on the laser must all be calibrated depending on the material being used and its thickness. All of this can be done in the Preferences menu before finally running the job. Although I have experience using the laser, the nature of the materials was less predictable. I started off using the pre-set settings for cardboard on the laser but quickly burned through a few pieces. I found that cardboard burns much more easily than the quarter inch baltic birch that I normally use. As a result of two small fires that I put out with the water bottle, I turned the frequency down drastically, from approximately 1300 to 500. This helped greatly, although the cut barely made it through the cardboard.
I am happy with the press-fit box that I eventually made, as it fits the requirements of the project. My first vision was to create a cube that has mazes engraved into the sides. I will see this vision through once I get more time. It's been a long week!
Parametric Design
BoxVinyl Garden Files
grass stems leaves flowers