
Introduction
During week 12 we learnt about molding and casting. It can get a little tricky because some molds have to be made out of many parts, and also there's a lot of visualization on how should the pieces be in order to make it happen.
Some very complex ideas can take several mistakes until it's done and it's not always good to make those mistakes so often because drying times are long!.
Assignment
We had to make our own mold and cast it afterwards.
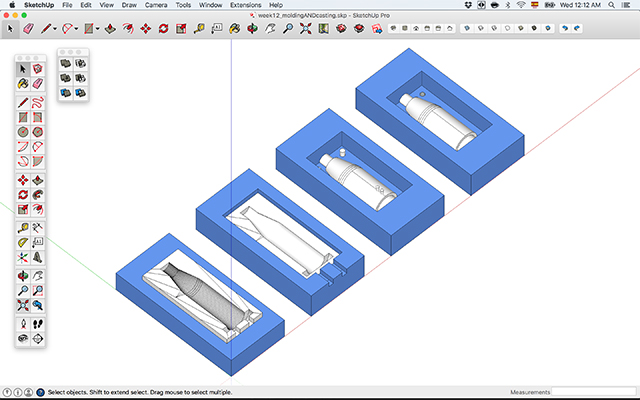
I thought of making a mini bottle and then learnt it would be a difficult process. I ended up thinking of a cylinder with an open bottom and I'd make the bottom part out of wood or something else, it'd be pretty and at the some time I'd make something a little less complex. Although it still is a complex object to make through molding and casting, at least out of the first time! This is a simple drawing of how it looks (imagine an open bottom):

To make this bottle I modelled using Sketchup 4 wax blocks that would be cut out using the milling machine. Two of them correspond to the mold of the outside surface of the bottle and the other two correspond to the insert the mold would have to generate an inside surface. This "insert" I would cast directly into the wax, whereas the outside surface I'd use the wax to make a mold to pour afterwards into and have a final object.
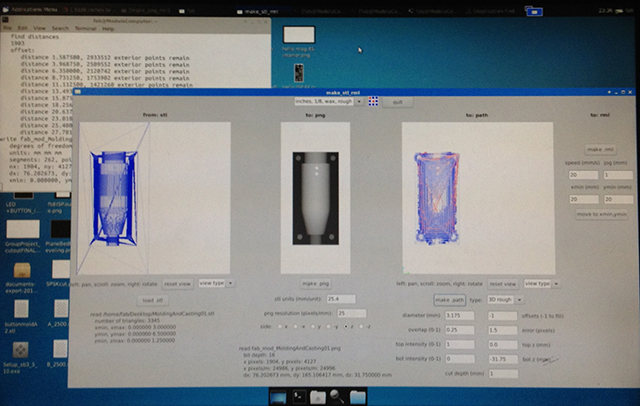
Each of these would go into MeshLab for a simple verification and also because Sketchup only exports OBJ files and not STL. Then with MeshLab I exported binary STL files that then would be the imput for the fab modules as we can see on the following screenshot.
Then the milling machine starts doing its job perfectly! I did two passes, one rough and another one fine all of them with the 1/8'' bit.

The machine would make a very precise model and I was happy with the result although not so much with the finishing.
That's why after milling all of the pieces I also sanded them so that they could be smooth. They look very nice!

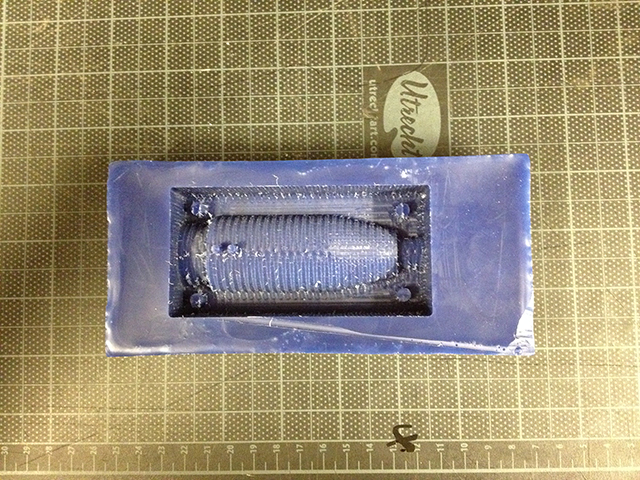
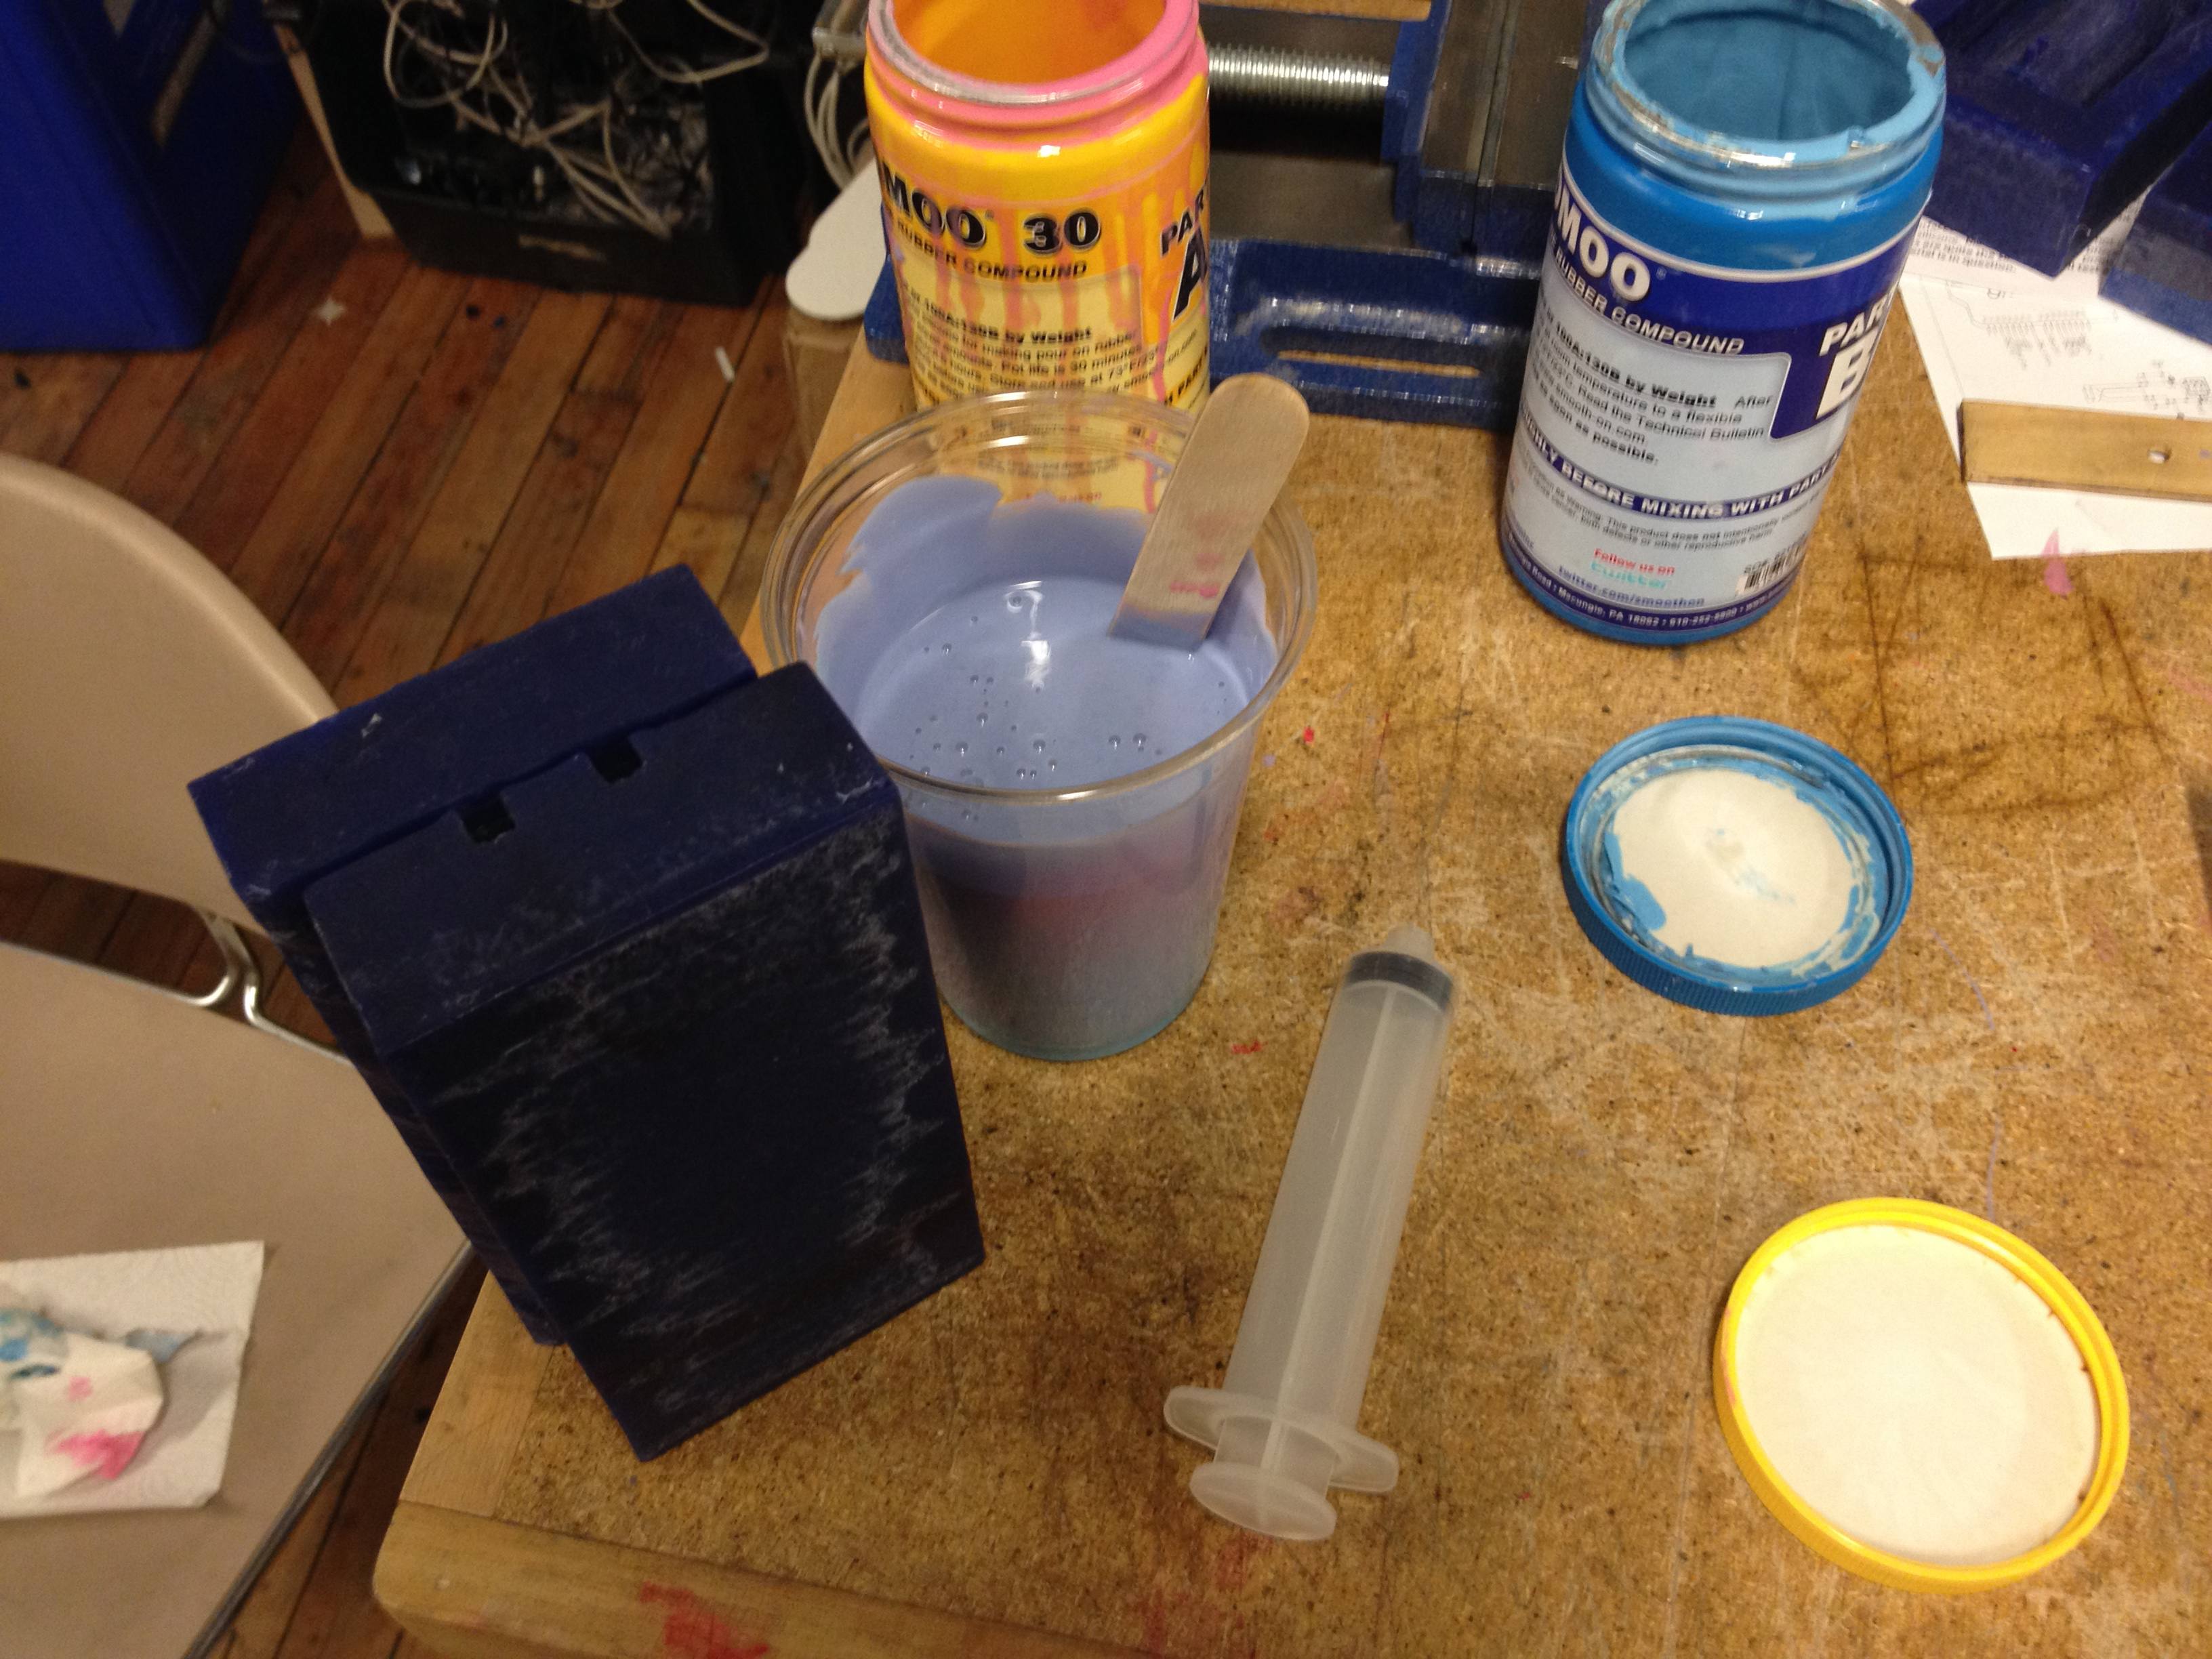
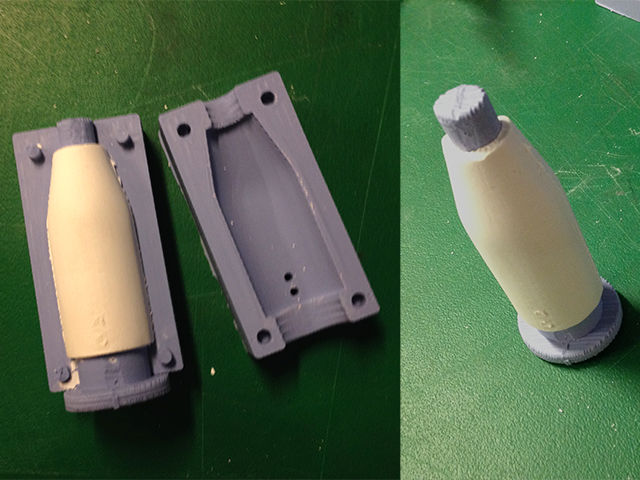
Next step was to mix the OOMOO so that I could make the first mold in order to cast into it the cylinder. VERY IMPORTANT to use gloves and to have cleaning material at hand such as paper towels. I also used a syringe for the first mold because it's a snap fit mold with two little holes on the top. The syringe the size shown in the picture worked fine!
The other molds were filled all the way to the top.

Now I have to wait 6 hours for them to be ready. I hope that I don't have to break the wax molds in order to remove the oomoo for the two to the left... I also hope that the mix was made well enough, I start to doubt about the color of it!

After waiting enough, the pieces were ready to star producing. I did not have to break the wax molds and could still use them again in the future!

Everything was very smooth BUT the point of injection that should have been more on top.
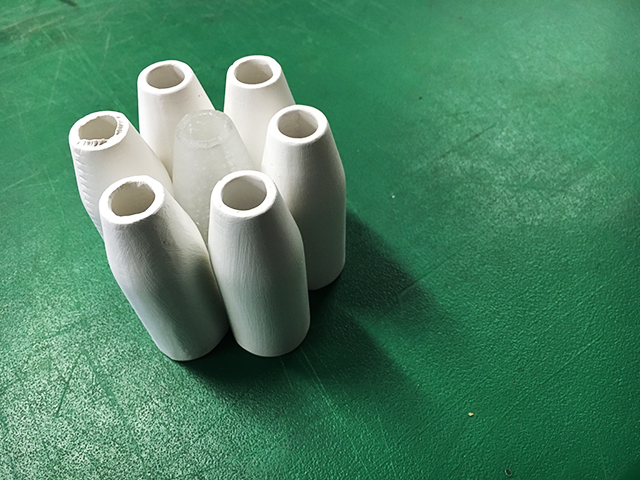
So far managed to produce 6 little white bottles and one with the translucent material.
It can be a little hard in the beginning to figure out how to design and mill your molds. It can also be a little painful to wait long times and work on them on the very precise detail. However, patience does pay and I think is worth it when the "mass" production steps start - as long as you are going to produce many pieces with your mold, take all of the time you can making the mold perfect. If you are only going to make one piece, you could have some post-production on that single piece instead of doing it to the mold.
Files
File 1: Sketchup model download here.