
Group Assignment: Week Ten
This week's task is to gain a deeper understanding of the materials that form part of the molding and casting process by readig the datasheets and trying out some test casts.The assignment in steps:
Read the datasheets
Try a test cast
Read the datasheets
The three main materials for this week are the machinable wax (specifications), urethane (Smooth-Cast 326 datasheet) and silicone (Mold Star 30 datasheet).By reading their technical information we can learn a lot Machinable wax can be recycled and used to make master molds without a release agent - this is very convenient and saves some cost. Release agents help when the two parts (positive and negative) can react during the curing phase, the agents break the reaction so that they do not mix. It is also advisable to use the same feed rate for cutting wax as one would use for aluminium.
Urethane has a very short pot life - the time it takes after mixing the two parts before it starts to cure - and as such it has to be poured quickly. This can be a big problem if the mold is very big, I would probably advise that the urethane is mixed in small increments and poured into the mold. The only problem with this is that different part of the final urethane part will harden at different times which might be a problem down the line.
Silicone is very forgiving as it has a long pot life. The downside of that is that it also has a long curing time starting from about six hours. Why silicone is a very useful negative mold is that it is quite soft when completely cured - which is useful when removing things from it.
Another thing to note here also is that the urethane mixture is exothermic - so it releases heat. It can get quite hot so it is important to pour it quickly, but also to wear safety materials.
Try a test cast
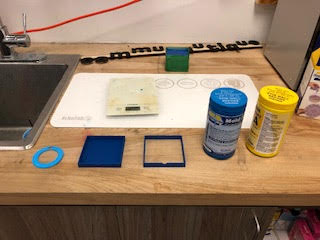
After reading up on the materials, I wanted to try a test mold job to make a negative mold from a positive part.I had read about this before and wanted to see if I could do it. First, I designed and 3D printed a mold box just to have everything in order. Then I set out the two parts of the silicone rubber in front of the sink. The positive part is on the left in the picture below.
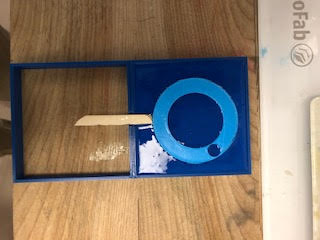
Then I poured some silicone into the mold until it was reaching the top and when it had started curing forced in the part on top of the surface creating a little depression - as shown below.
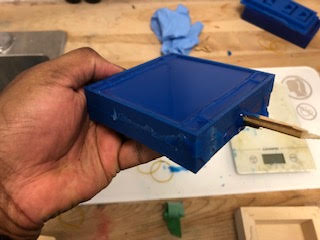
Next thing was to wait for the silicone to cure. Once that was done, I stacked the second part of the mold box - the part with two open bases - and used a band to secure them. Then again, poured silicone into the mix. Once it cured, I had a complete mold with the part inside it. One thing I had also done was use a little stick to make a sprue.

The important thing next is to break apart the mold so that we can see how good it is; you can see that below.
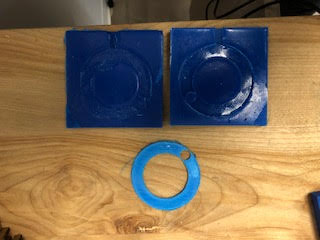
Here, one can see how the mold has been made from the original part.
Reflection: While this mold technique can be very useful, it is important to note that it may not be ideal for really thin parts like the positive here. This is because it can be difficult for the liquid to reach all parts of the mold. Another disadvantage is that the parting line may not very prominent using this method. The great thing about this however is how easy it is - with a very simple part this is definitely the way to go!