16. Wildcard Week
Design and produce something with a digital fabrication process not covered in another assignment
Embroidery CNC
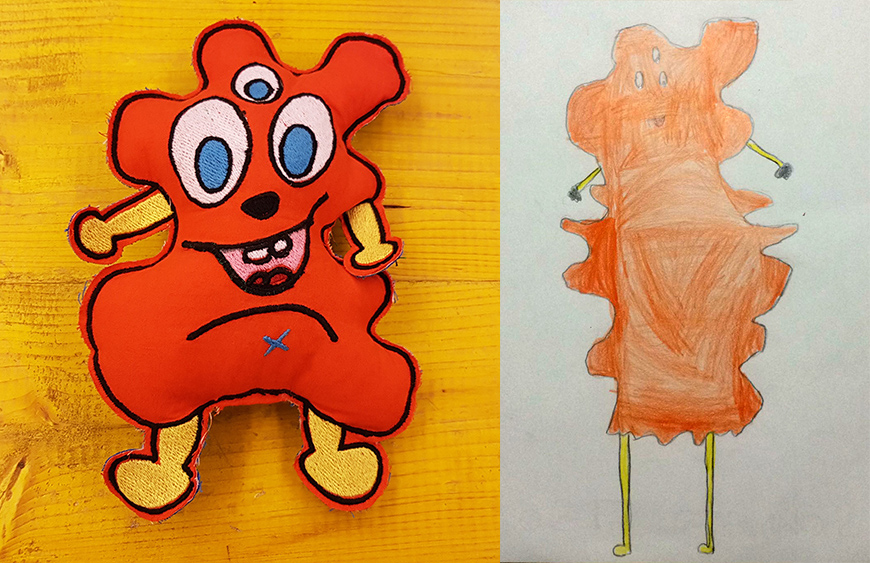
In this week, at Opendot we chose to work on Embroidery CNC. My classmate, Laura Cipriani, is one of the author of Bottega dei Dotti. Dotti are little puppets, created with Embroidery CNC machine, following the sketces of children that in this way can create their personal puppets with shapes and colors they want. Laura made us a lecture on embroidery CNC technology, and showed us how use the machine to create the puppuet. The machine is a Designer Topaz 30. So I asked my niece to send me a drawing of a nice monster she would like as puppet friend. She sent me the following drawing:
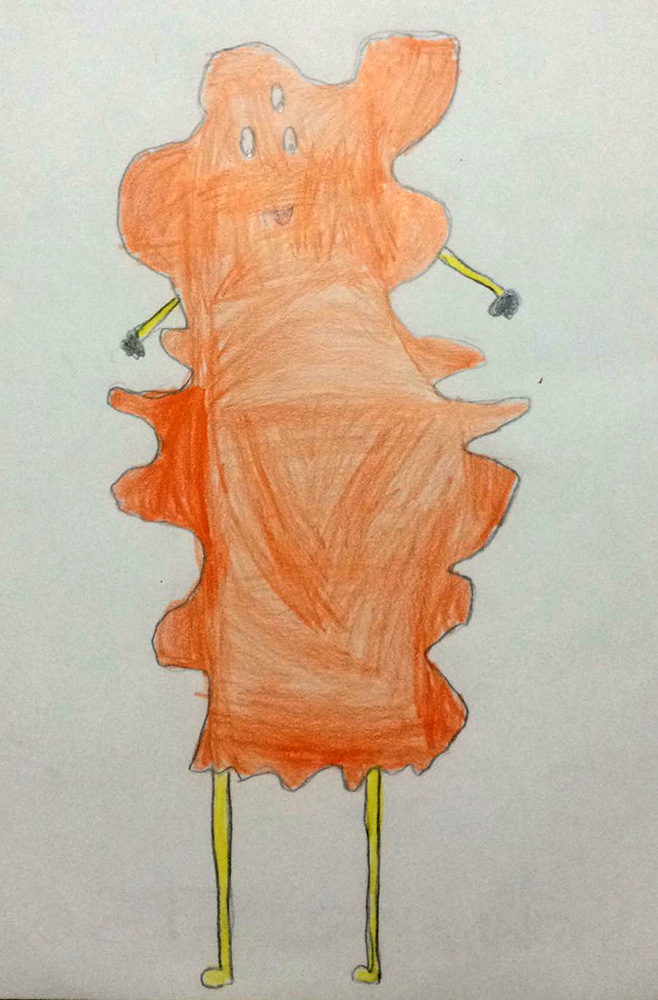
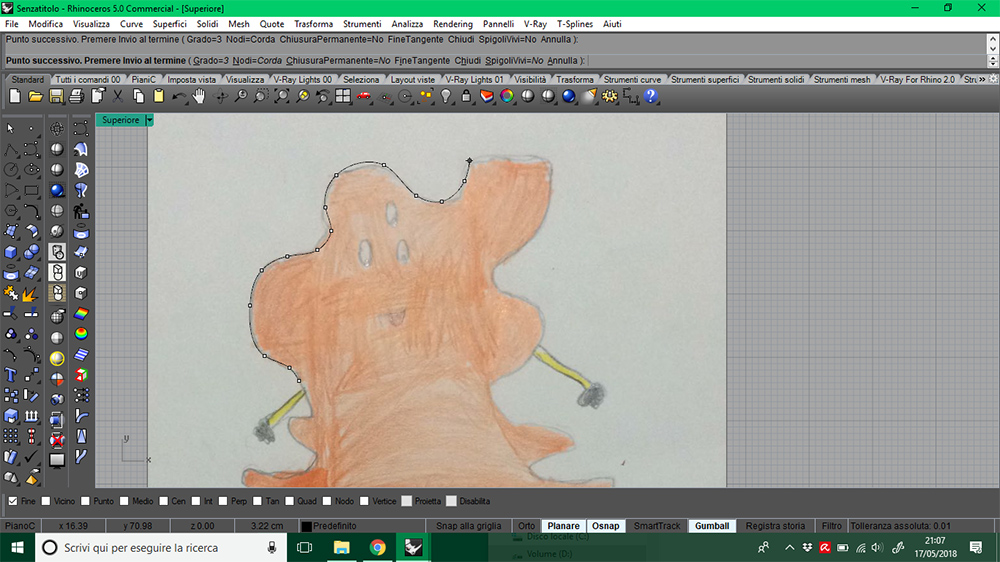
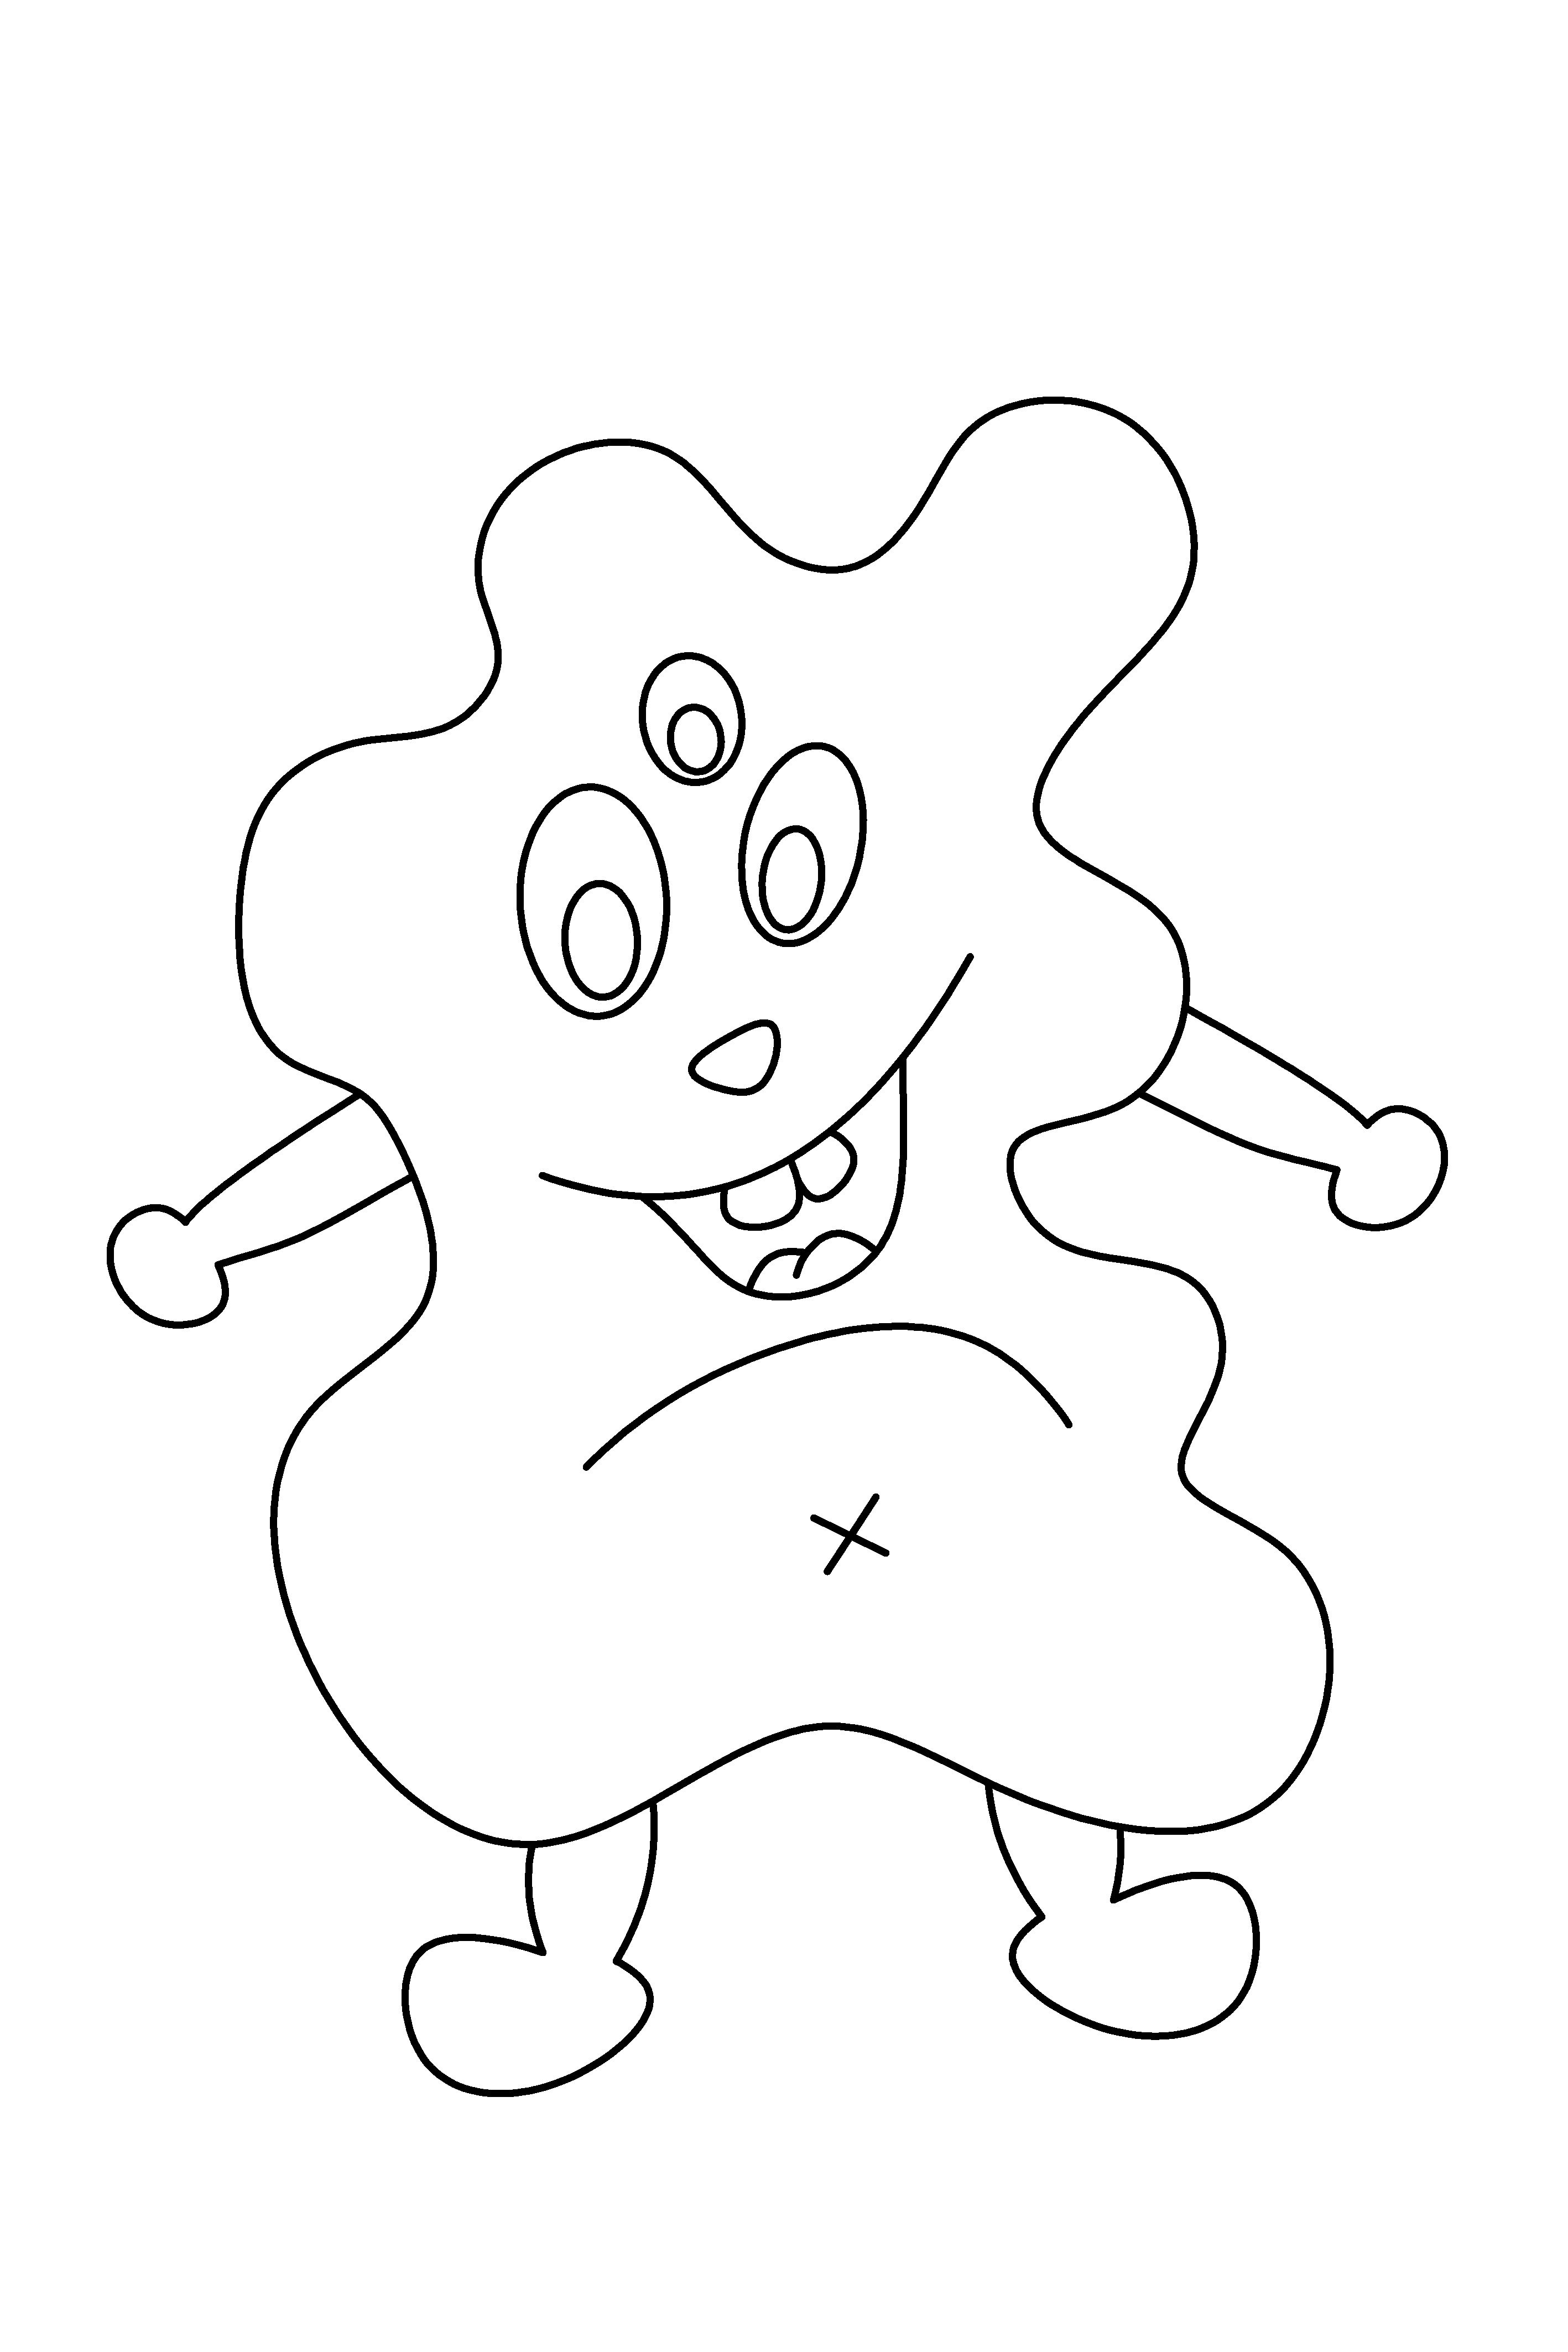
In Rhinoceros3D I re-draw and adjusted my niece's sketch with interpolated curve, to make it makeable with machine. I exported it in .png picture
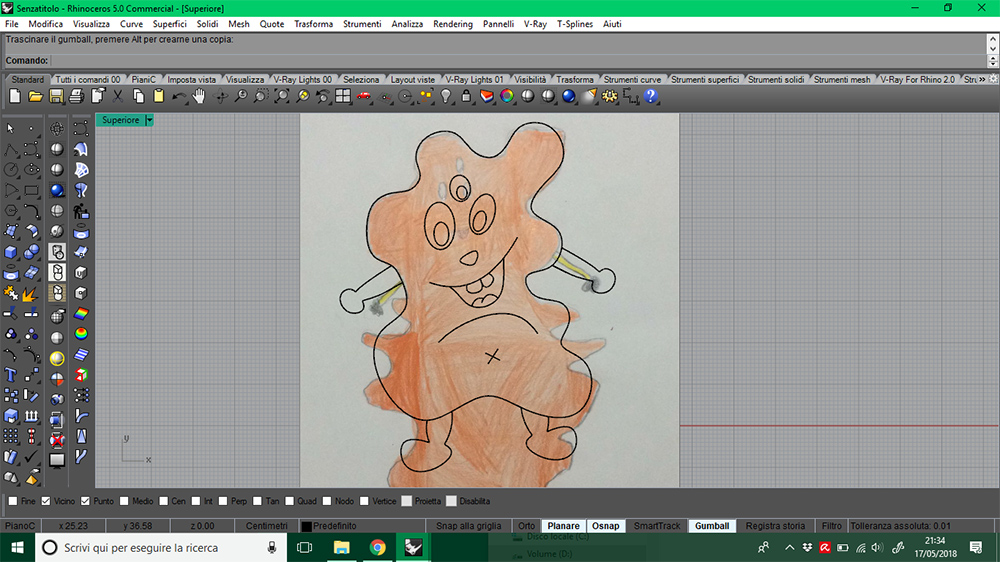
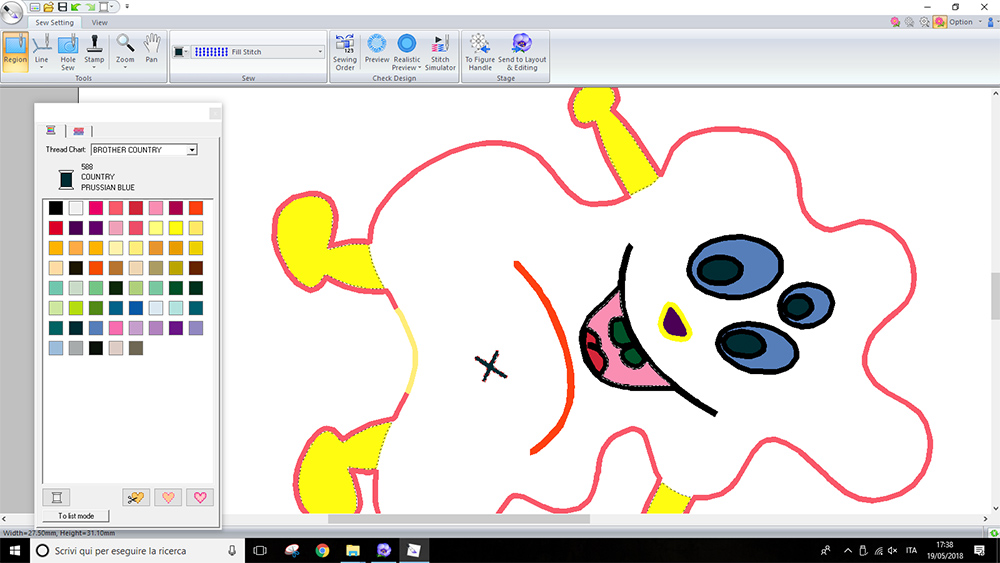
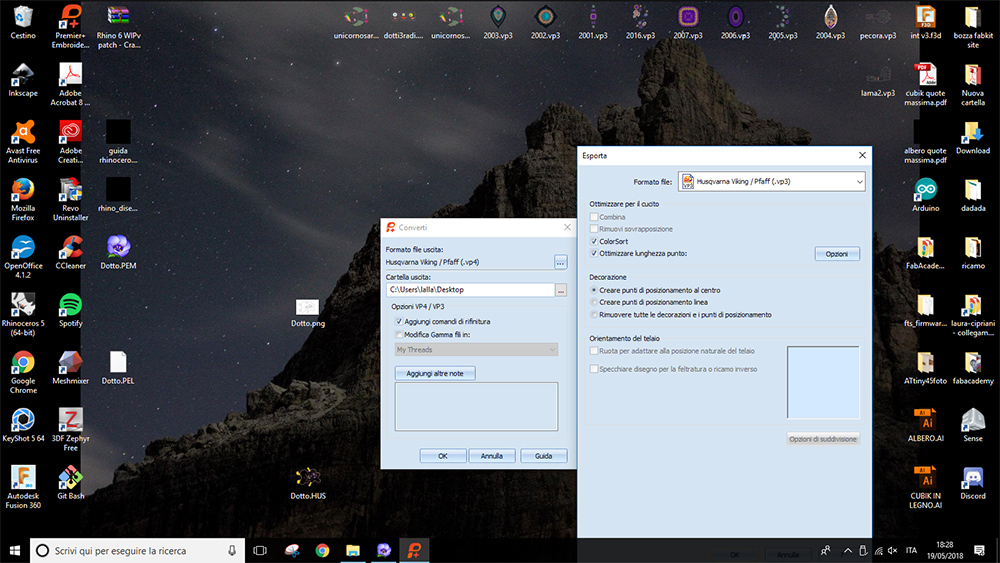
I opened the .png drawing in PE-DESIGN 10, in the "Design Centre" section, under "Line Image" menu. I converted the .png drawing in vector lines that the software can recognize and use for machine paths, by clicking on "To figure handle" button.
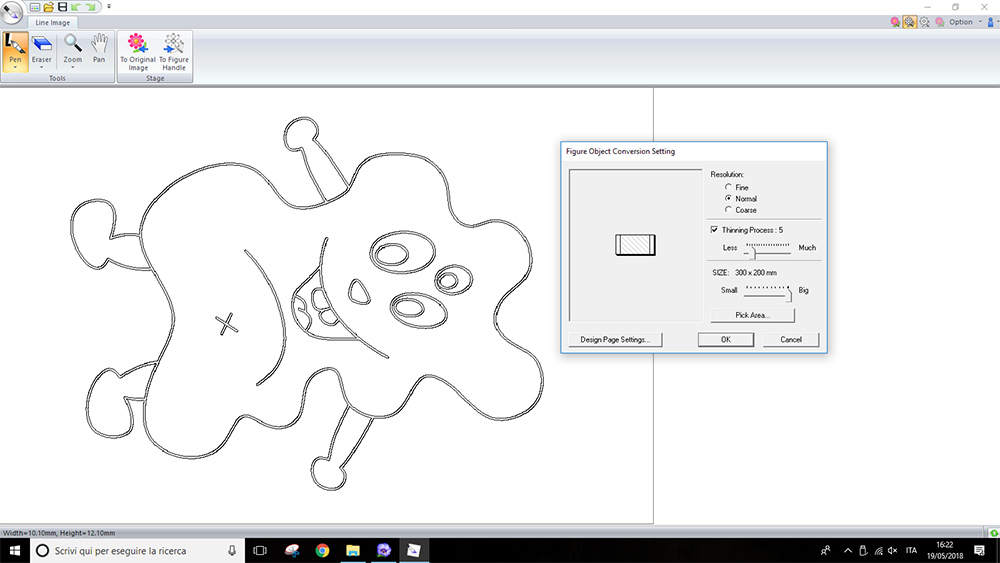
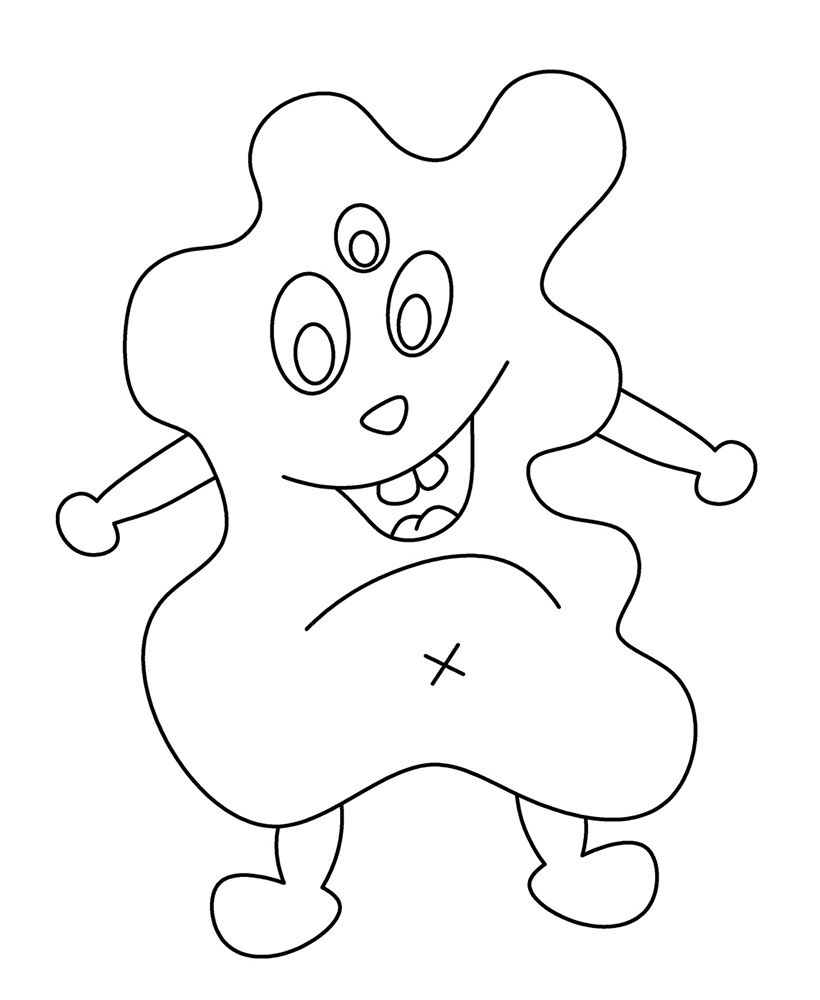
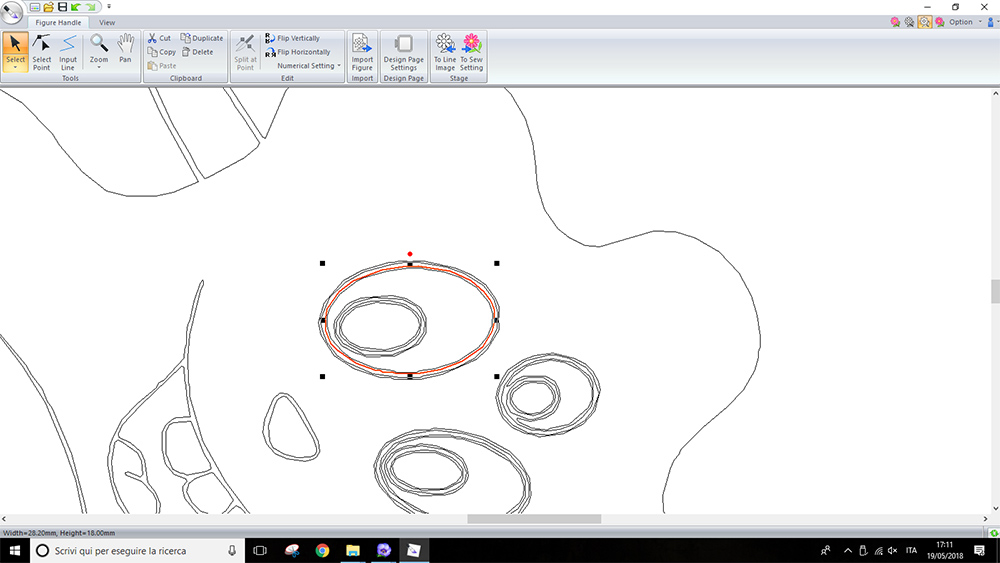
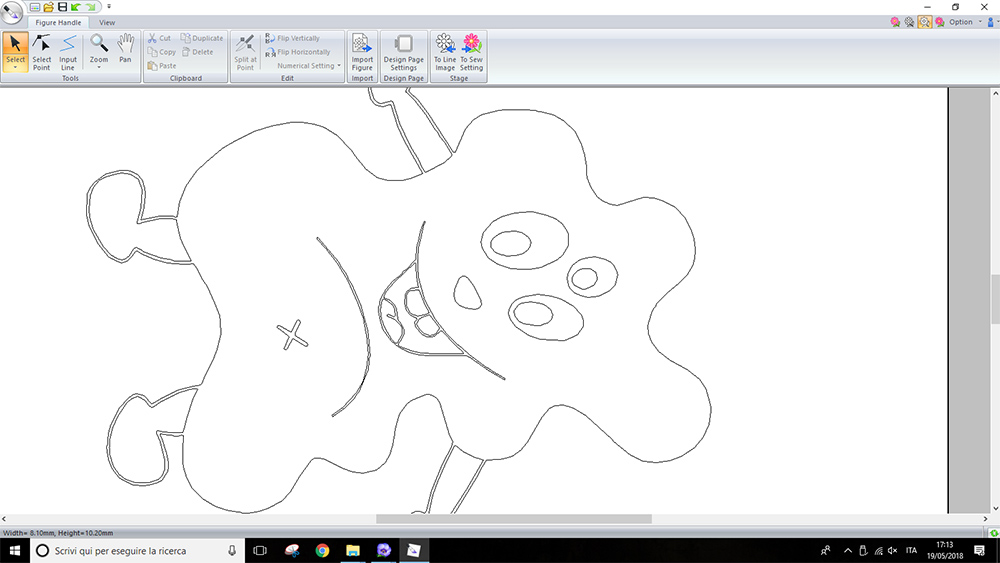
Once the program has converted the drawing in vector line, I could clean the duplicate lines left by conversion and mantein only lines useful for sew paths calculation.
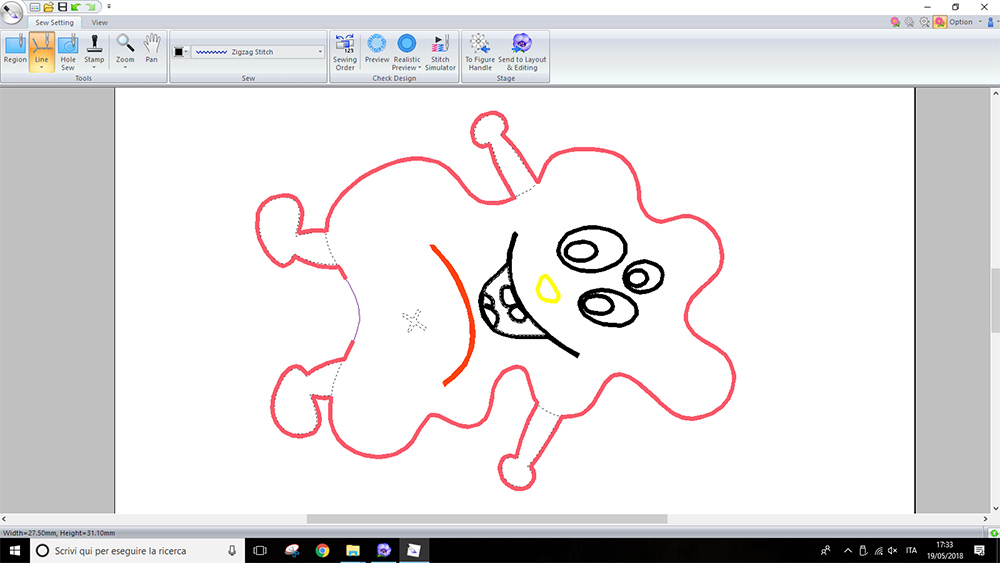
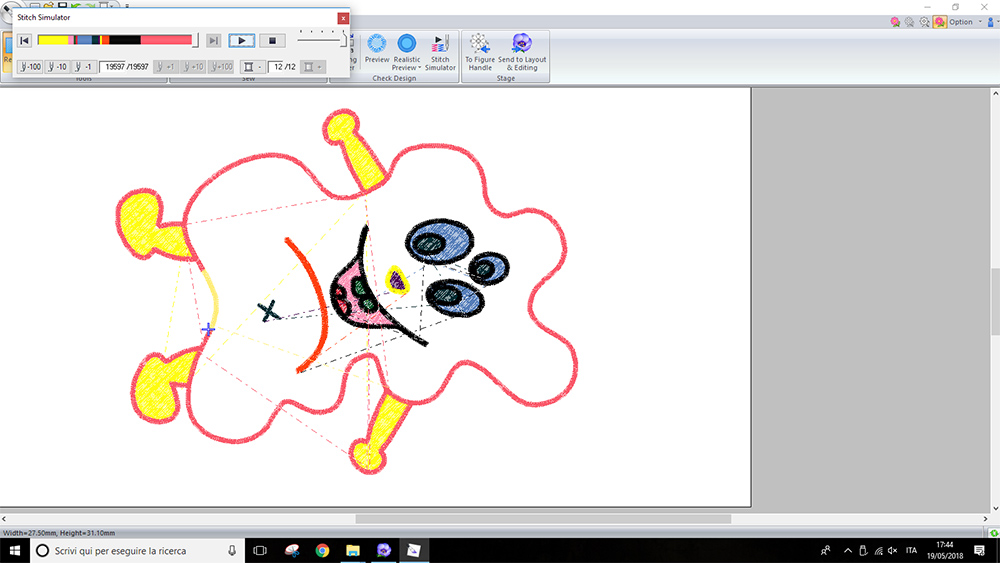
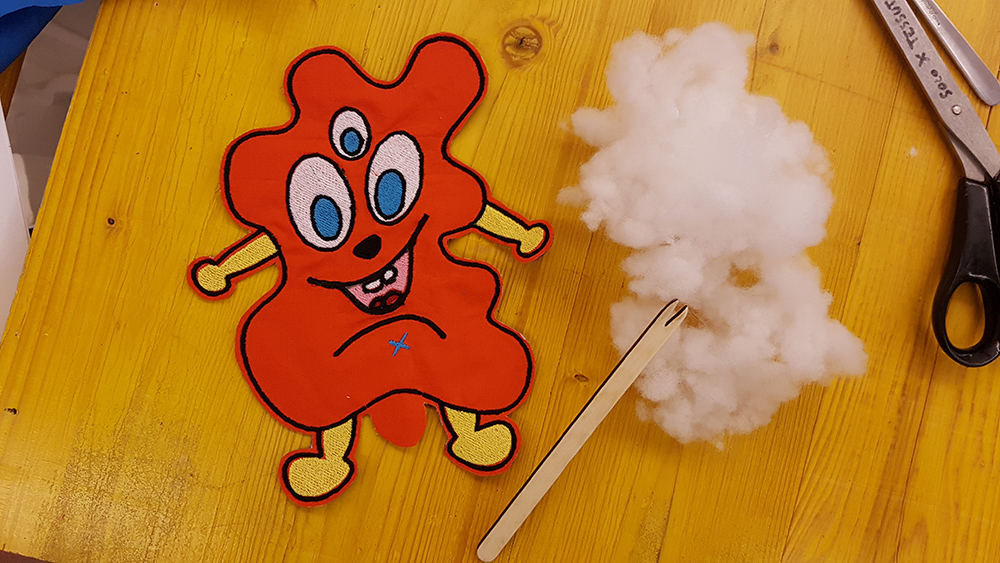
Then, under "Sew setting" I assigned different stitch kind to borders and region to infill. For "Line" I used a "Zigzag stitch", while for "Region" I used "Fill Stitch". Is not important assign the right color to the thread, because on machine you can always change the color, but is important change the color to visualize the different part in the different steps. I divided the bord at base because I want the machine stop the sewing on that line. In that region i left a piece of fabric, I've sewed it by hand, after stuffing the puppet. I could also see a simulation of machining by clicking on "Stitch simulator"
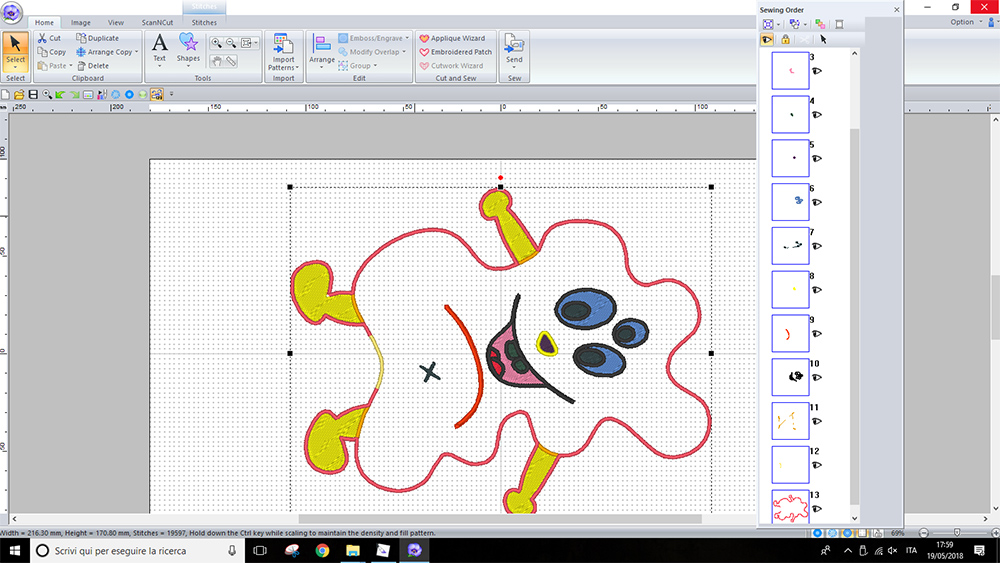
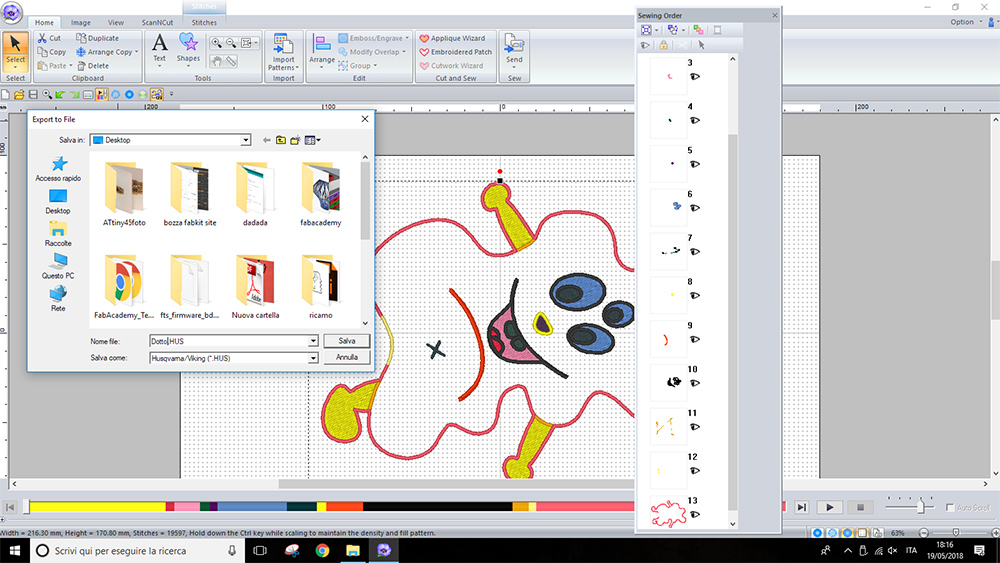
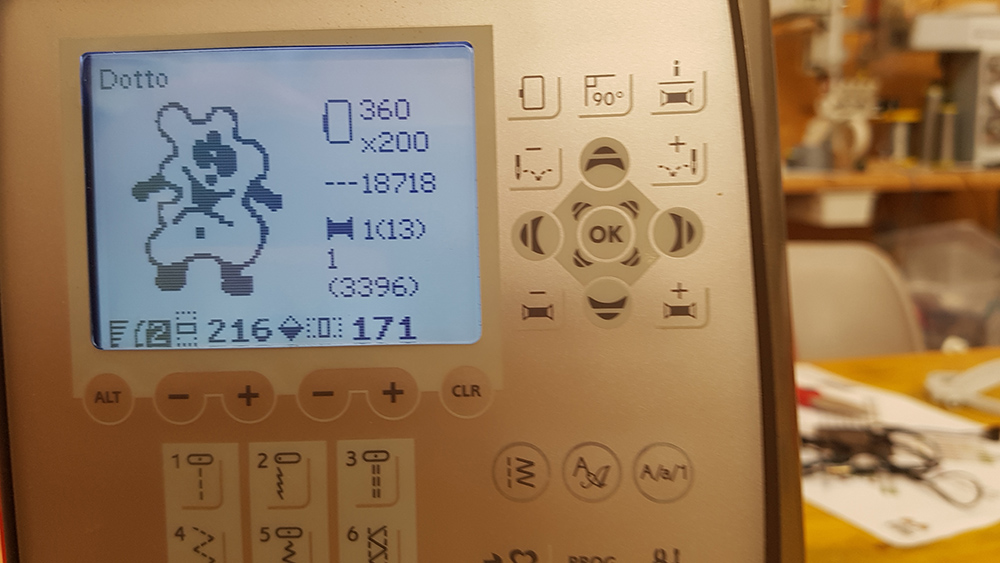
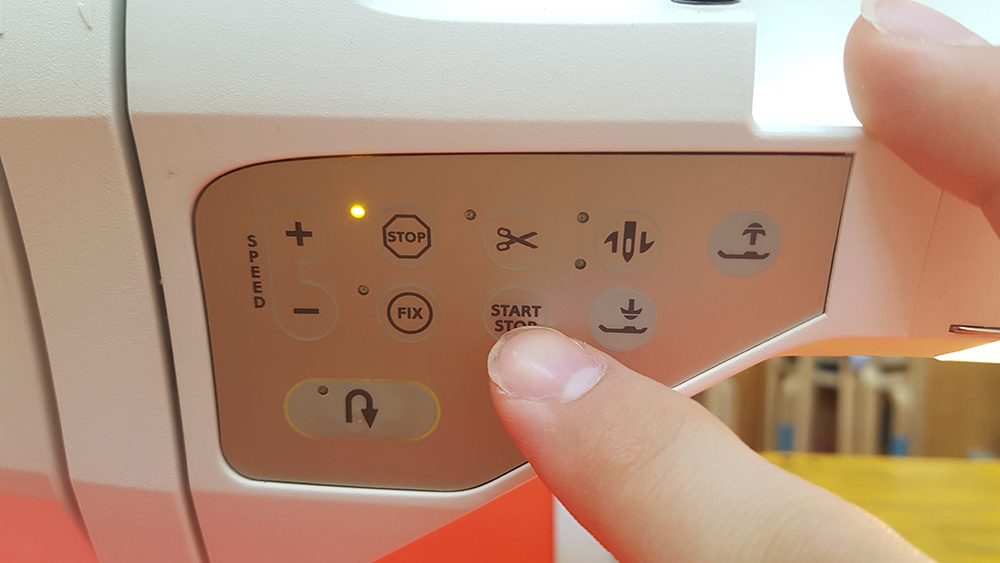
At this point I could go to "Layout & Editing" menu of the software, in which i could select the frame of machine, scale and position the figure and assign the "Sewing Order". Finally I've exported the .HUS file. This file need to be converted to a .vp3 file. I made this conversion with Premier Plus. So I saved this .vp3 file on a usb stick and move to machine
I chose the thread colors and the color of fabric I will use.
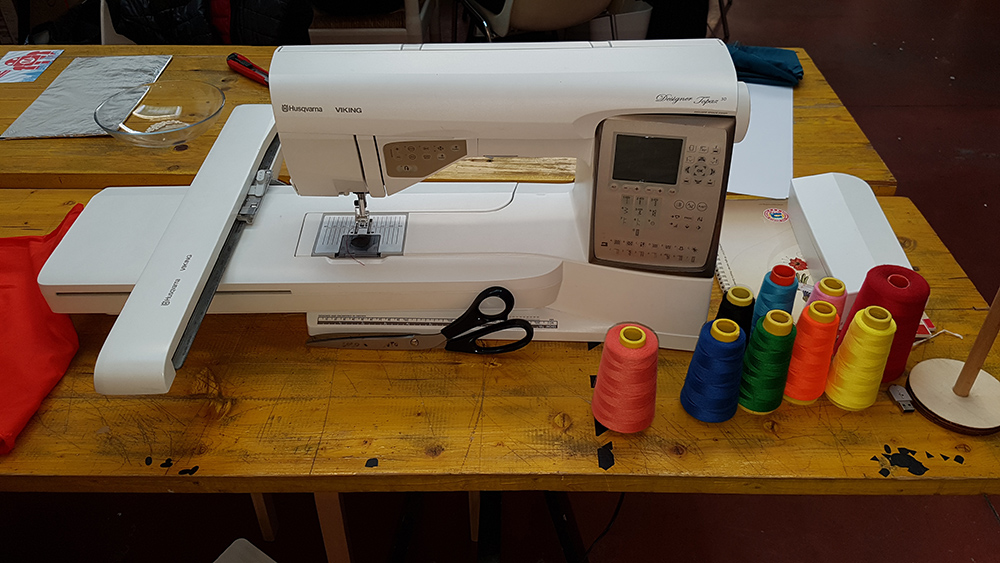
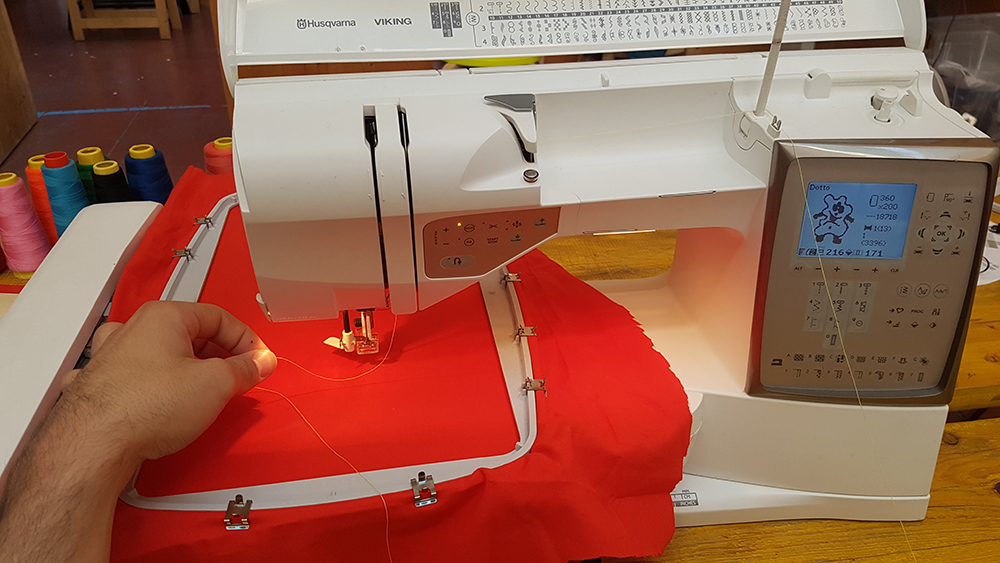
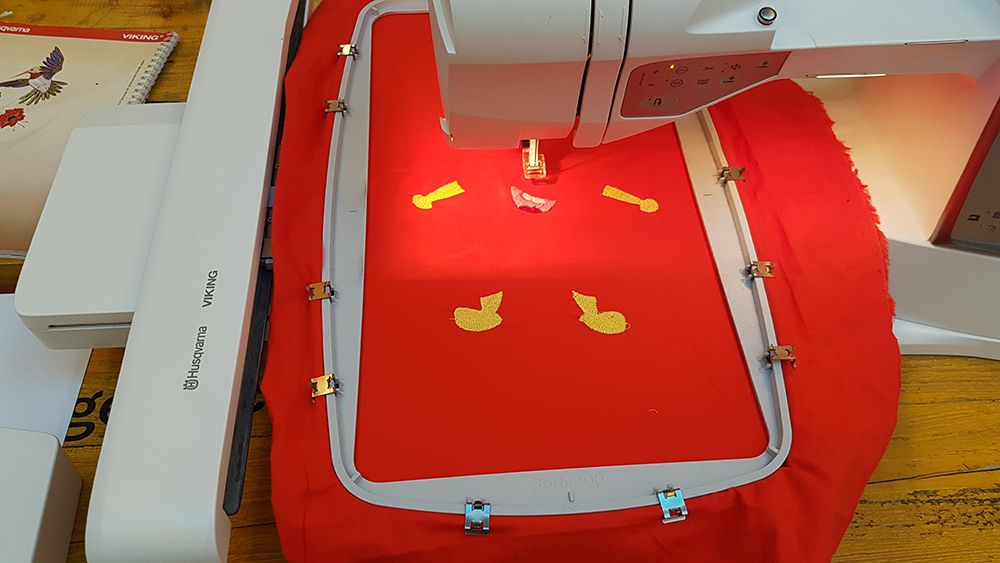
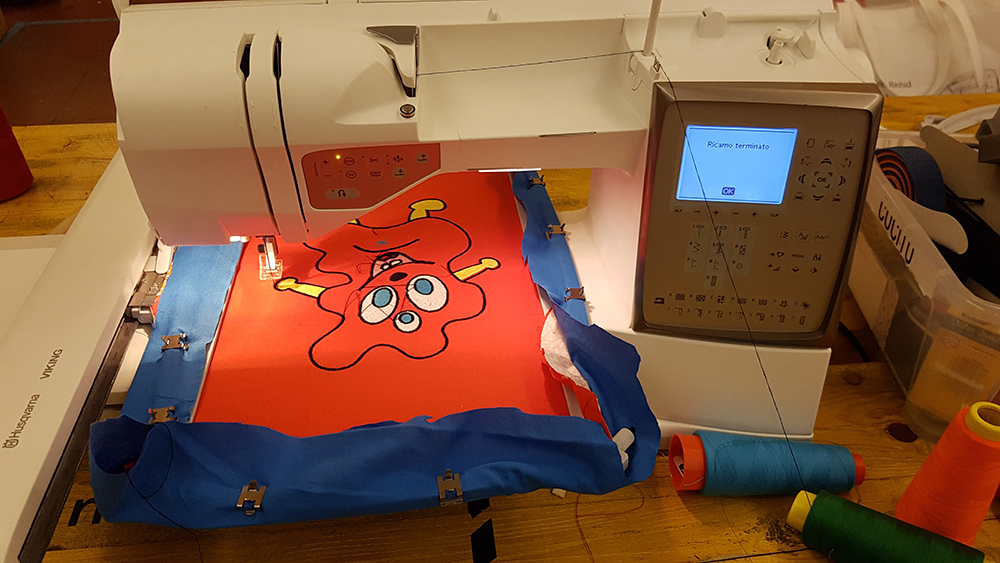
In the first step of embroidery, I only needed one fabric while for last step I will need another fabric to sewing togheter and create the puppet pocket to infill with stuffing. I chose an orange cotton fabric, in accordance with my niece's drawing, and I fixed it to the frame. The frame has a dimension of 200 x 360.
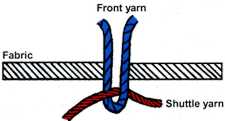
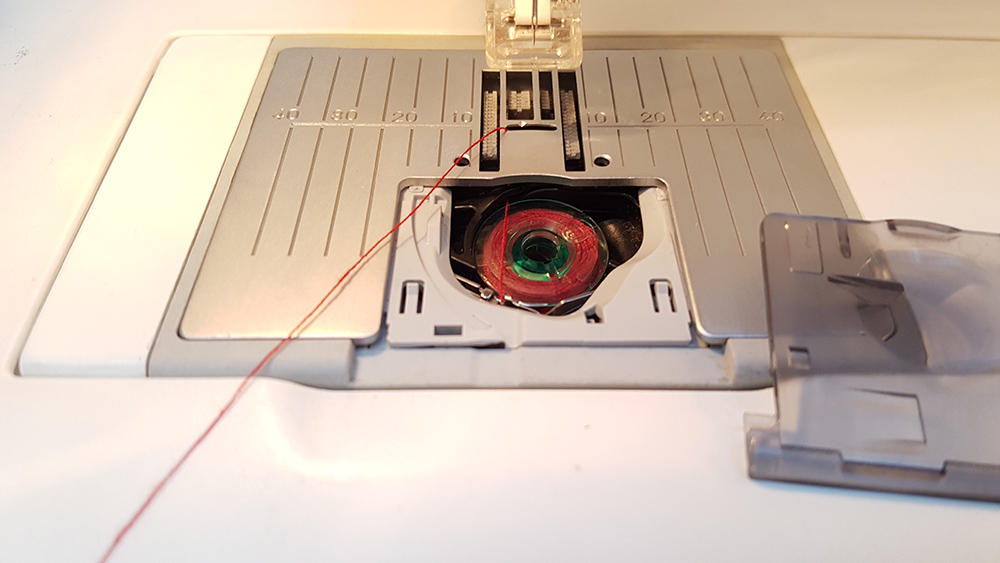
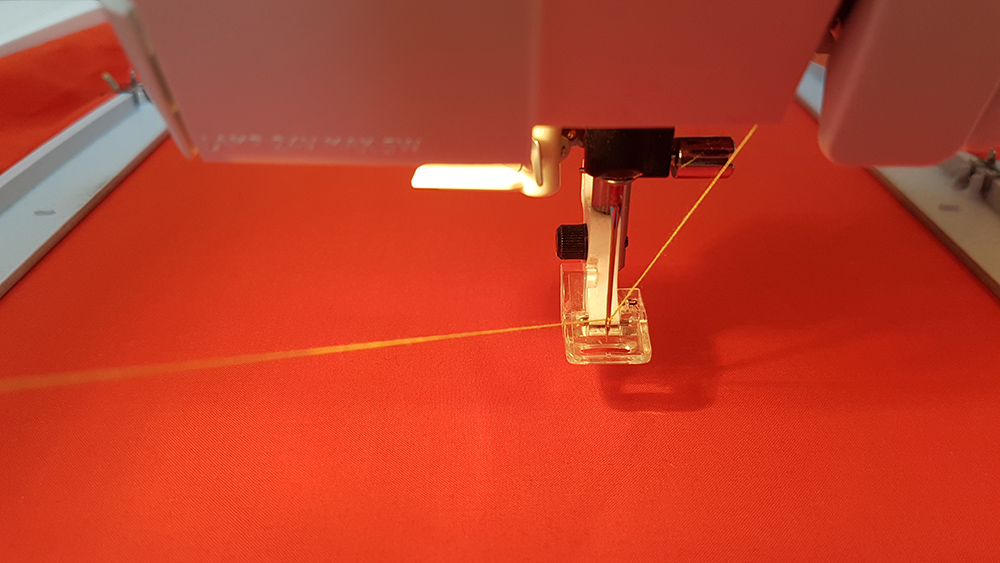
To create the embroidery you need a fabric and two thread. First thread is for the visible embroidery, on the front of fabric, for this reason is called Front Yarn, the second thread is Shuttle Yarn, and this ties the front yarn to the fabric that remain betwen two yarns. For shuttle yarn you can use a random color because it's hidden by fabric and front yarn. I chose a red thread and I've put it in the bottom location on the machine.

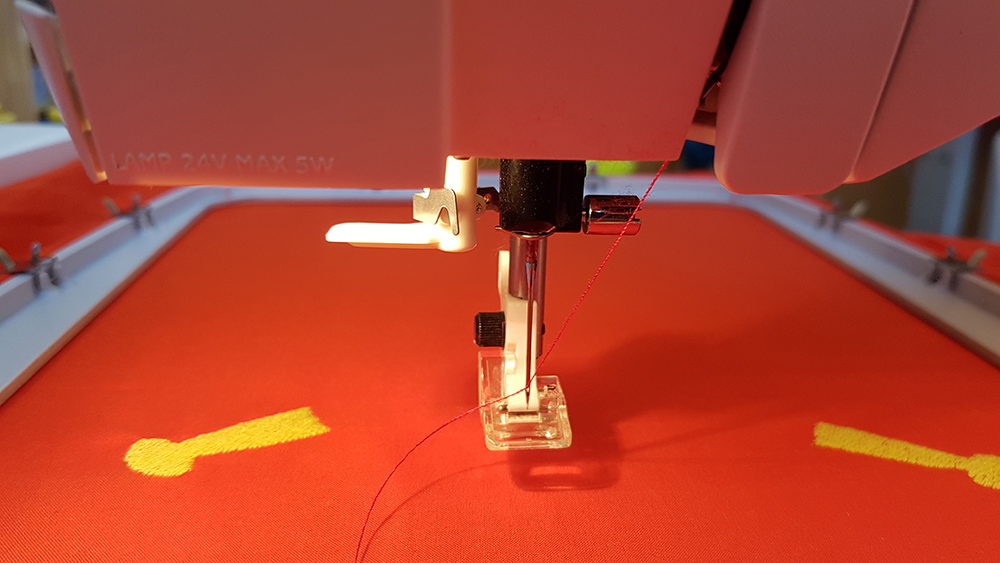
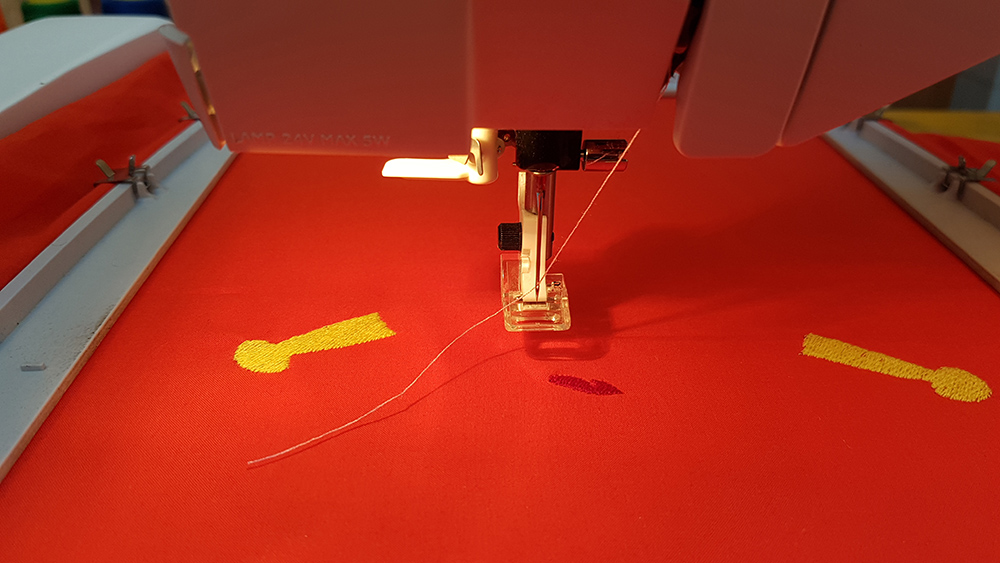
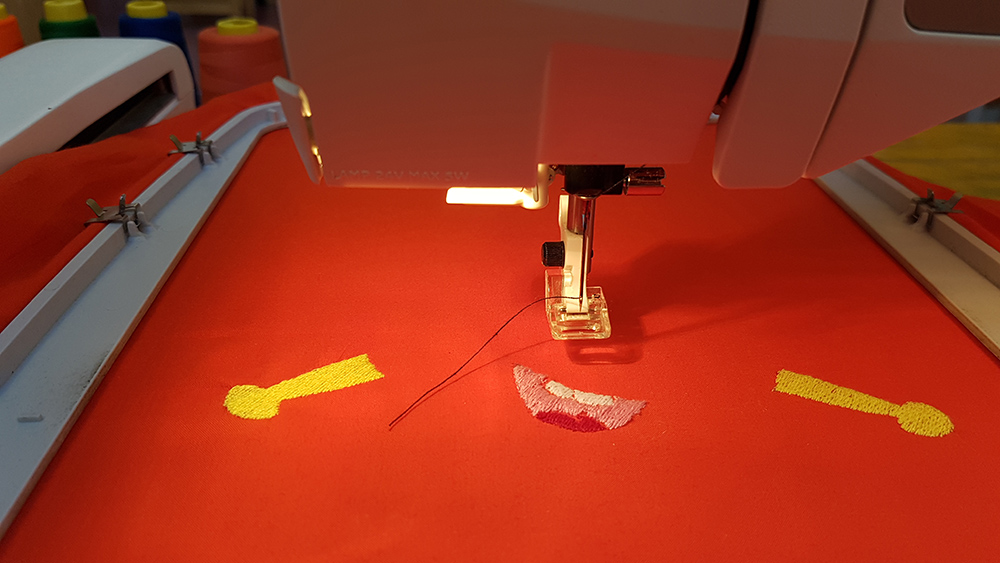
Then I uploaded the file on machine, mounted the frame to the arm of machine and put first thread. In my sewing order, legs and arms of puppet is the first step, so I've mounted a yellow thread and started the embroidery.
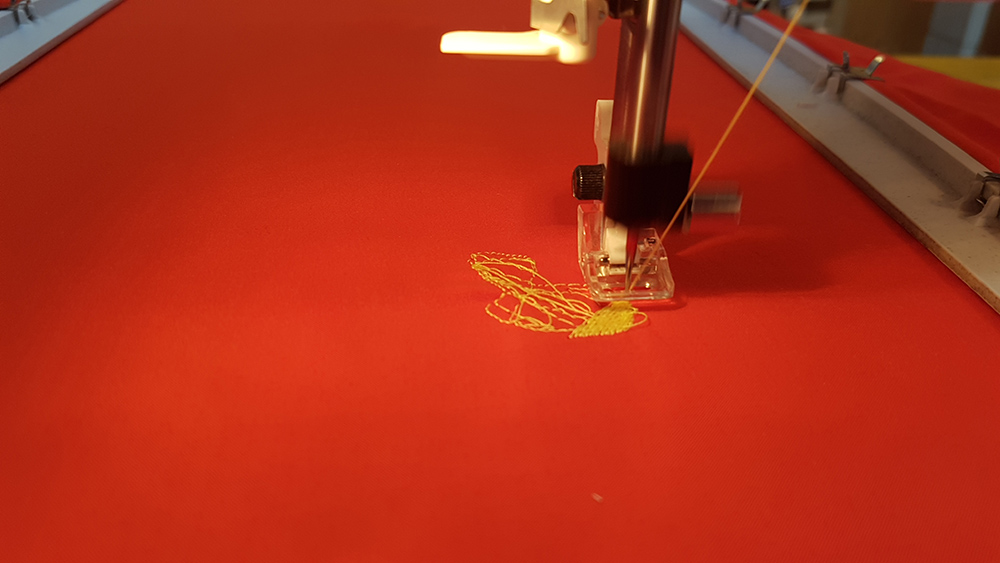
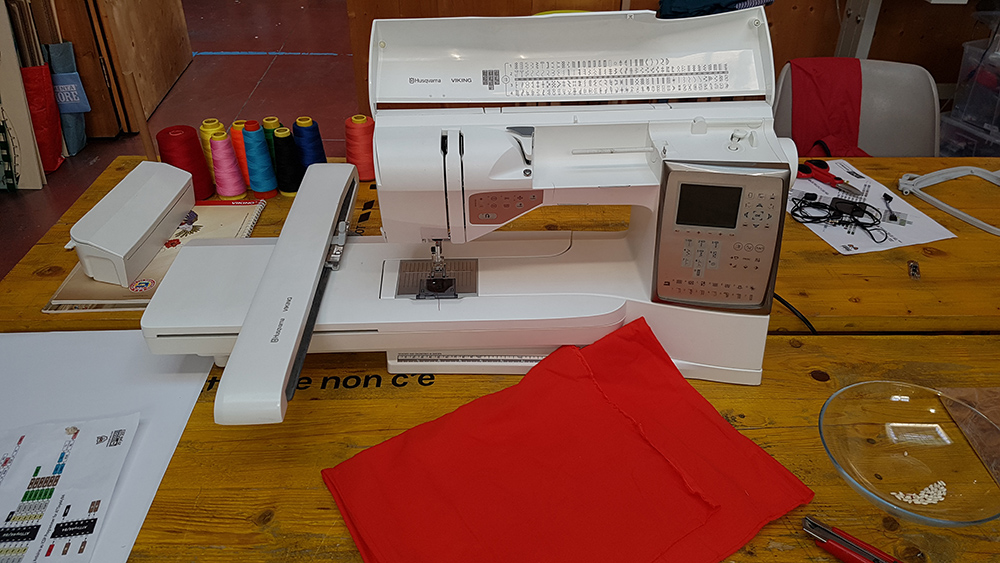
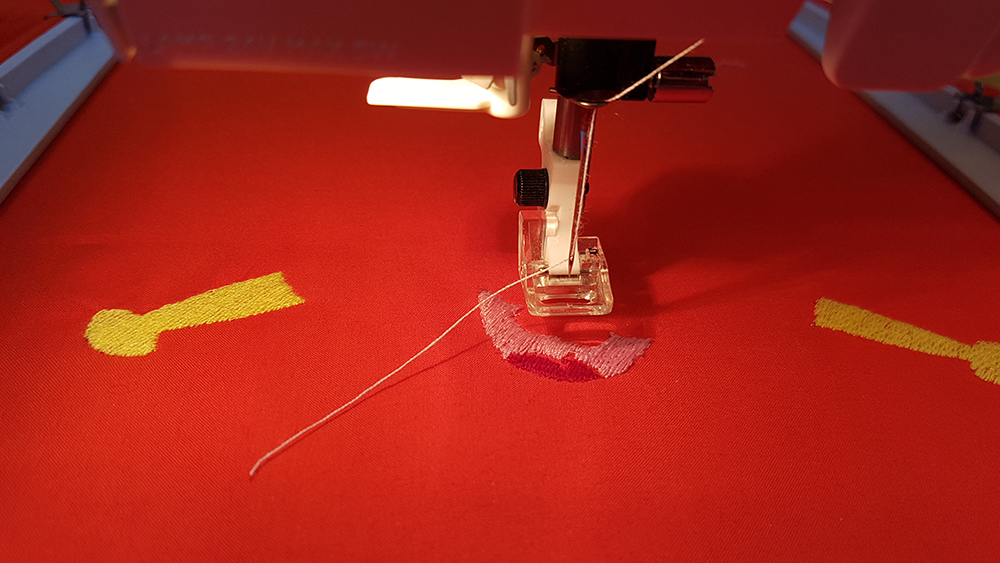
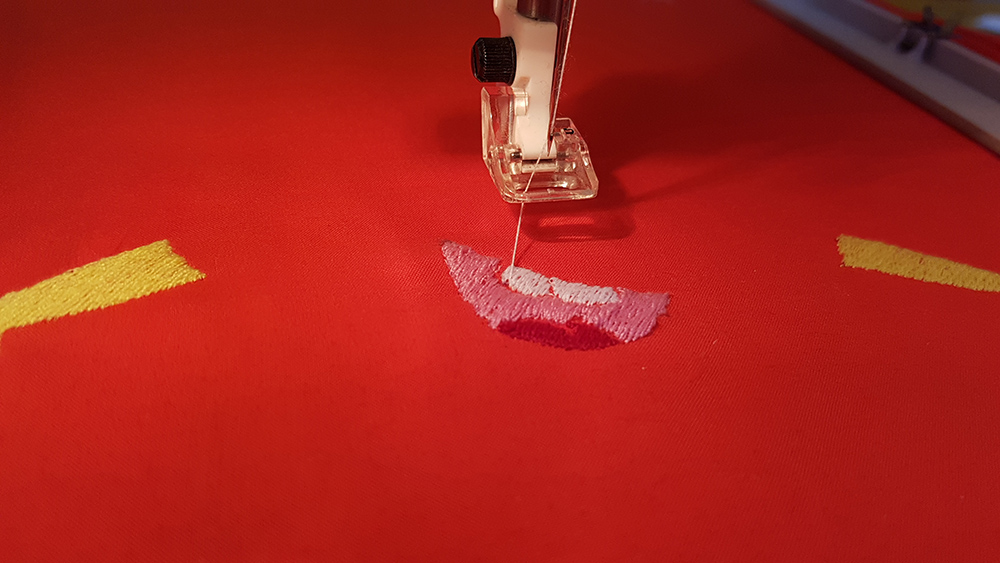
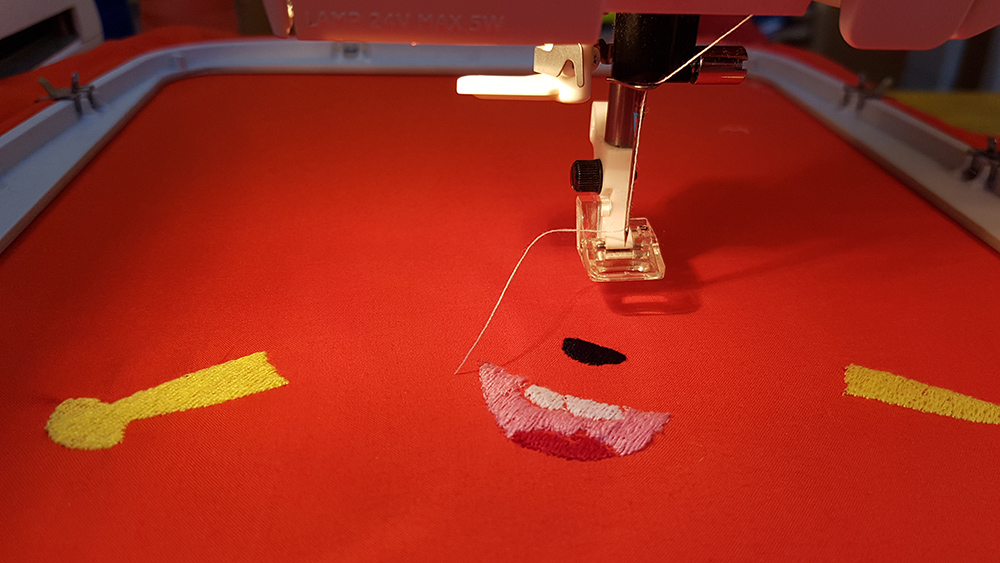
When first layer ended, I mounted the second thread, the red one, to make the tongue of puppet and then the pink one to make the mouth.
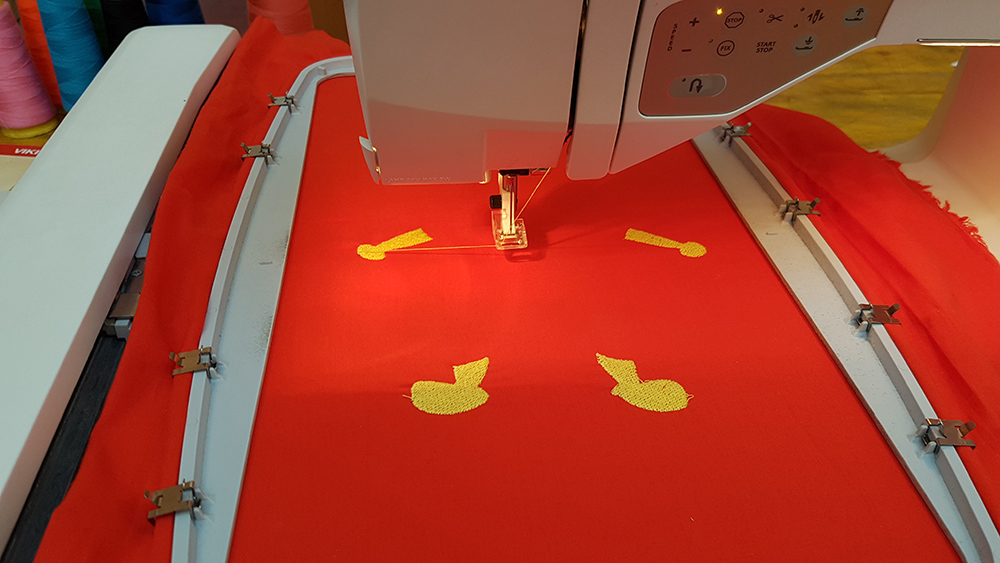
I continued with white thread to make the teeth and black thread to make the nose
Again I continued with white thread for eyes and light blue for pupils
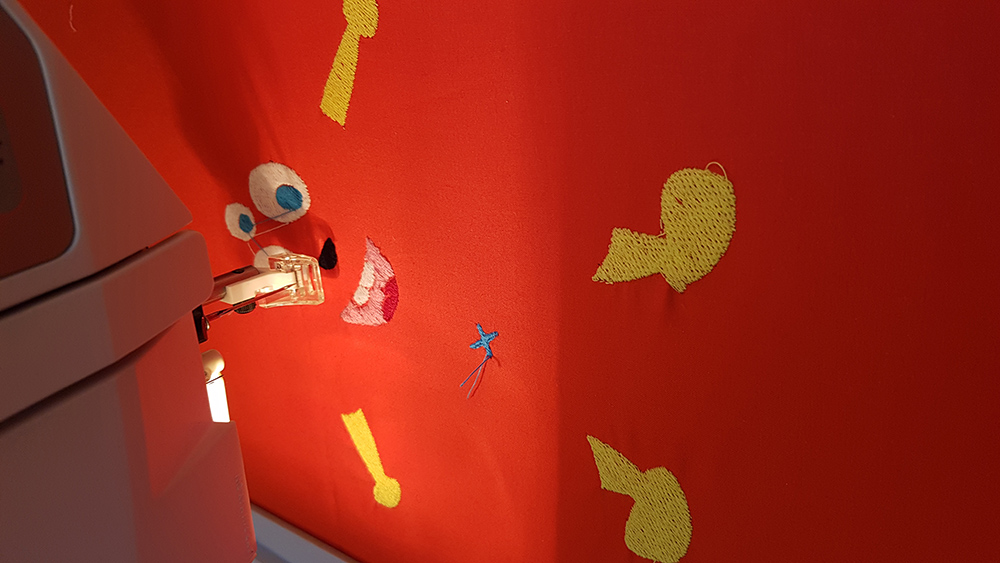
I was almost at the end of work when something in the air begun to annunce the disaster!!!. Whit black thread I was working on lines of drawing, but suddenly the thread broke.
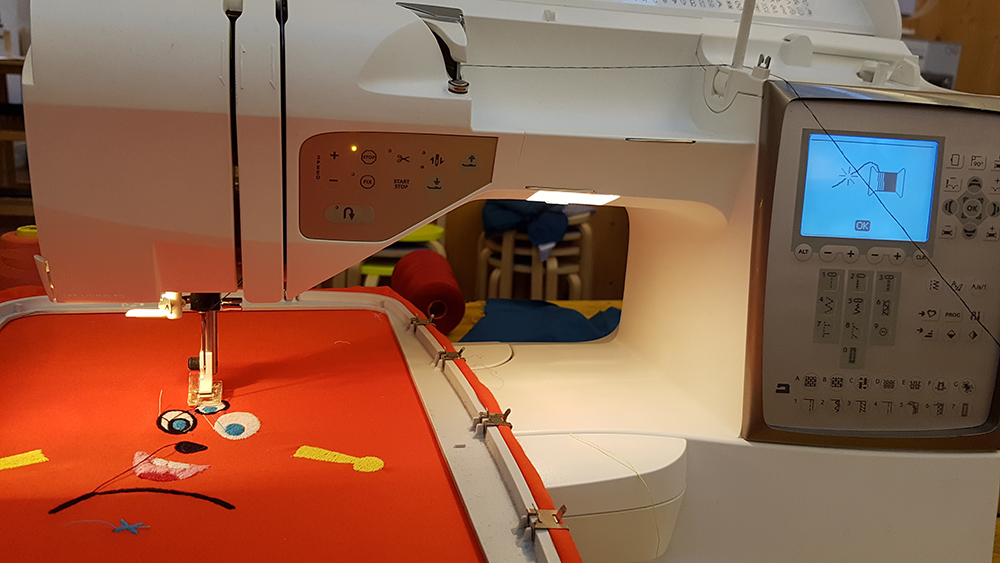
I recharged the thread and continued the embroidery. Two minutes later there was a BLACK OUT, and the machine stopped. When the electric current came back, the machine switched on and automatically went in home, breaking all my work.
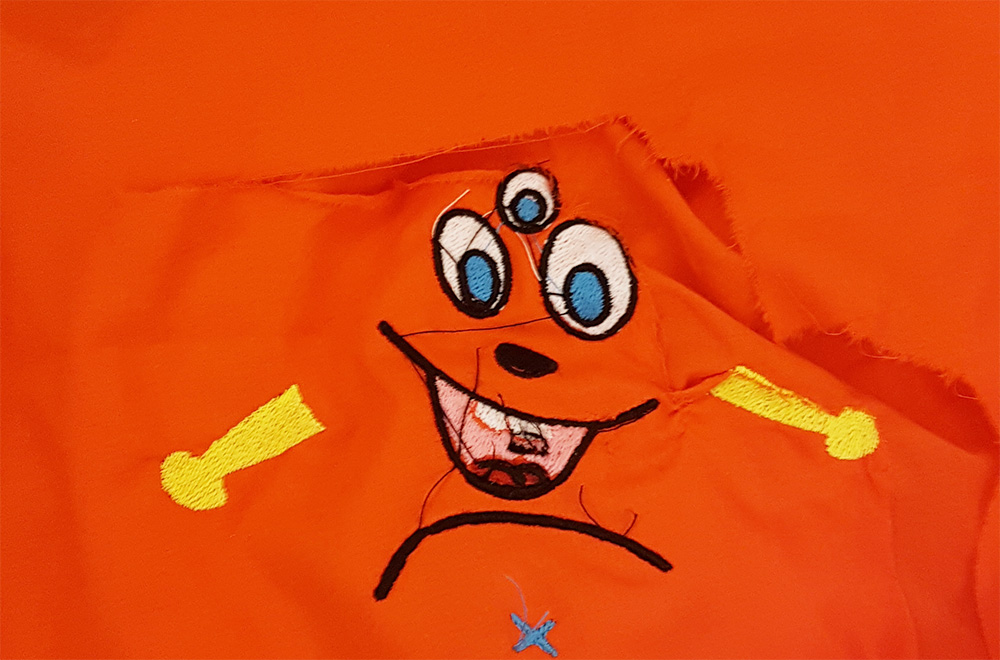
Fighting with sadness and arming with courage and pacience, i re-started all the work, but first I corrected the eyes dimension because I would like them bigger.
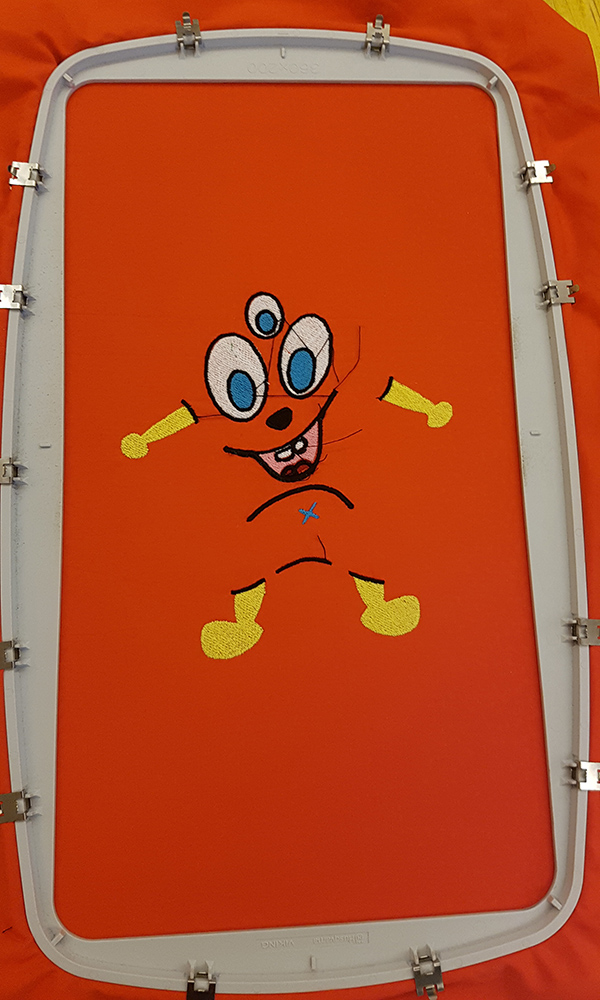
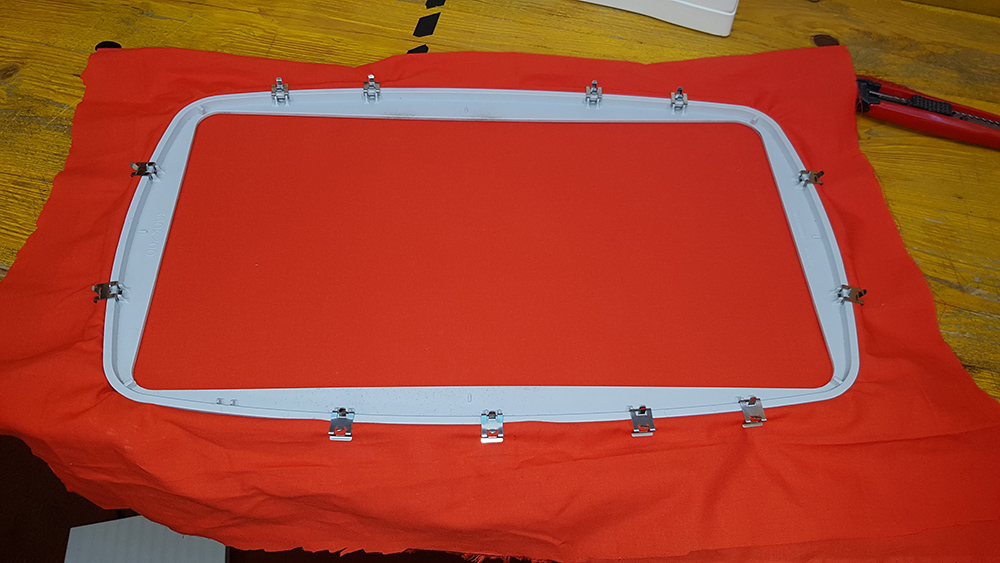
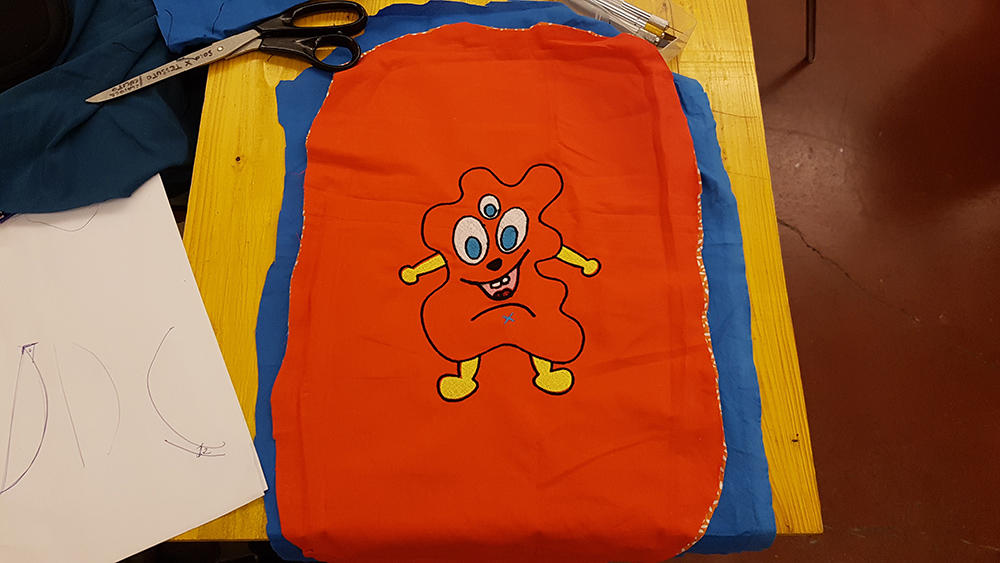
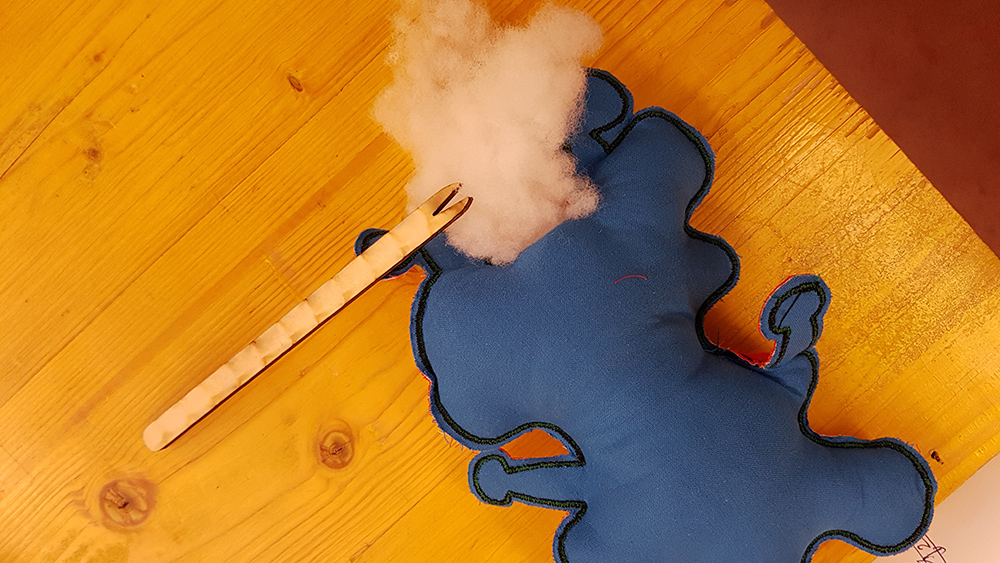
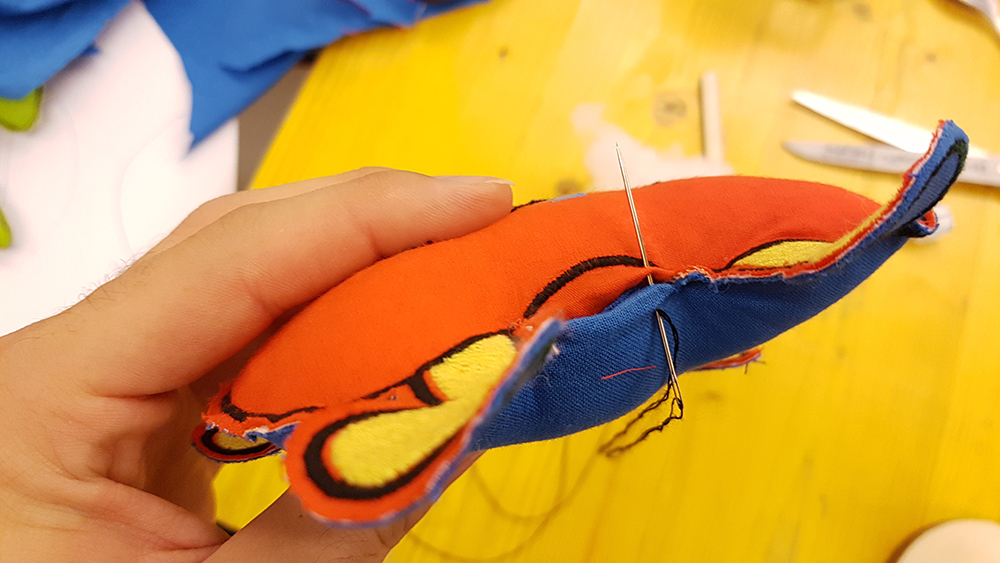
Once all the embroidery layers on front fabric was ended, I disassembled the frame and attached another fabric under the embroidered one, to sewing them togheter. for back fabric i chose e blu color.
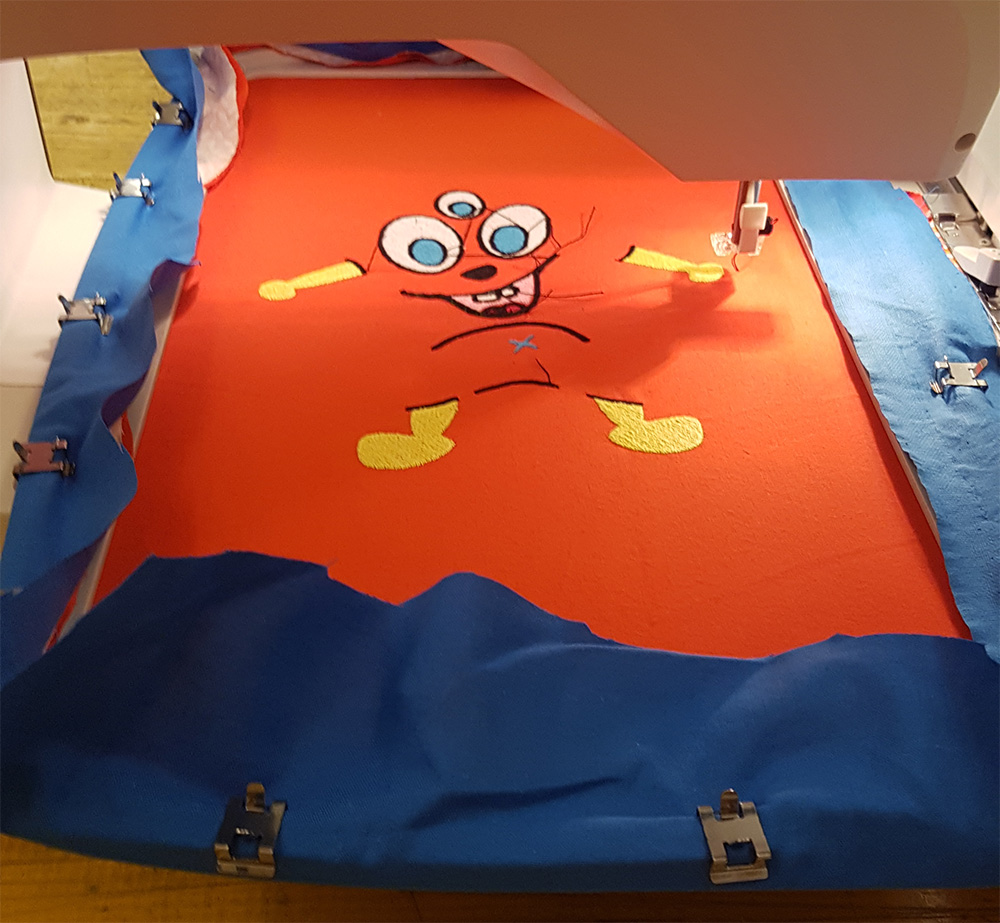

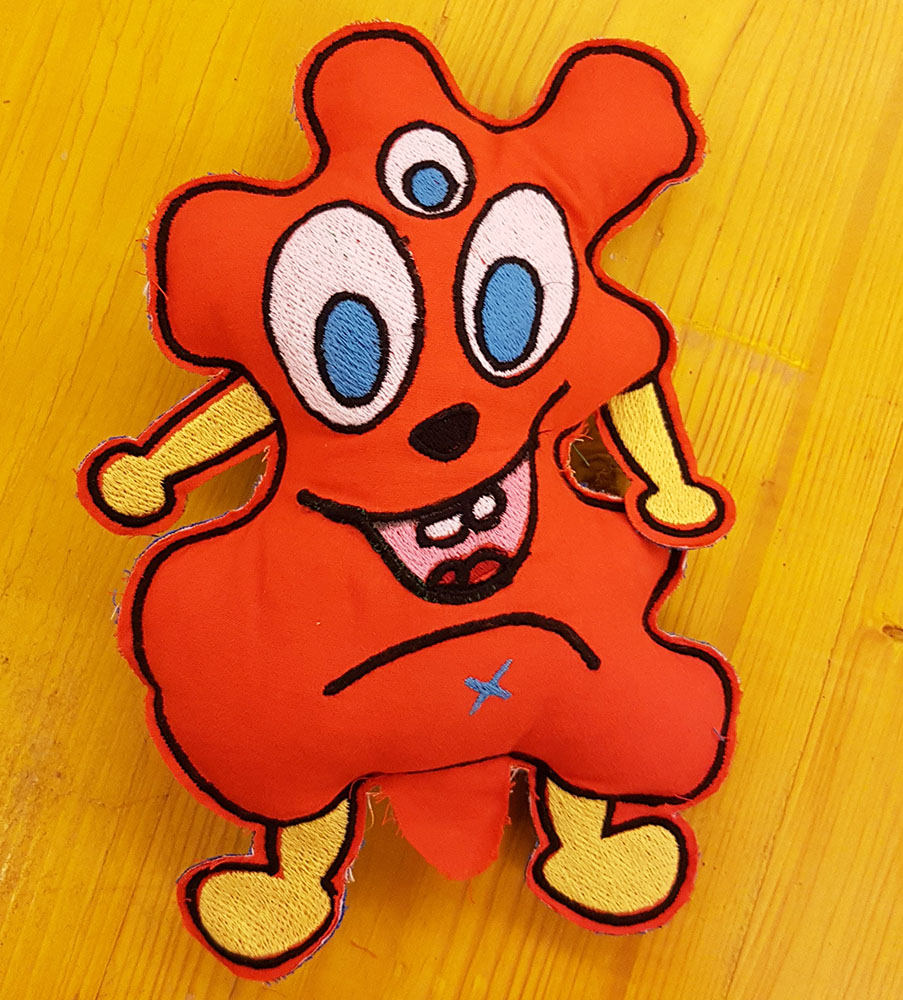
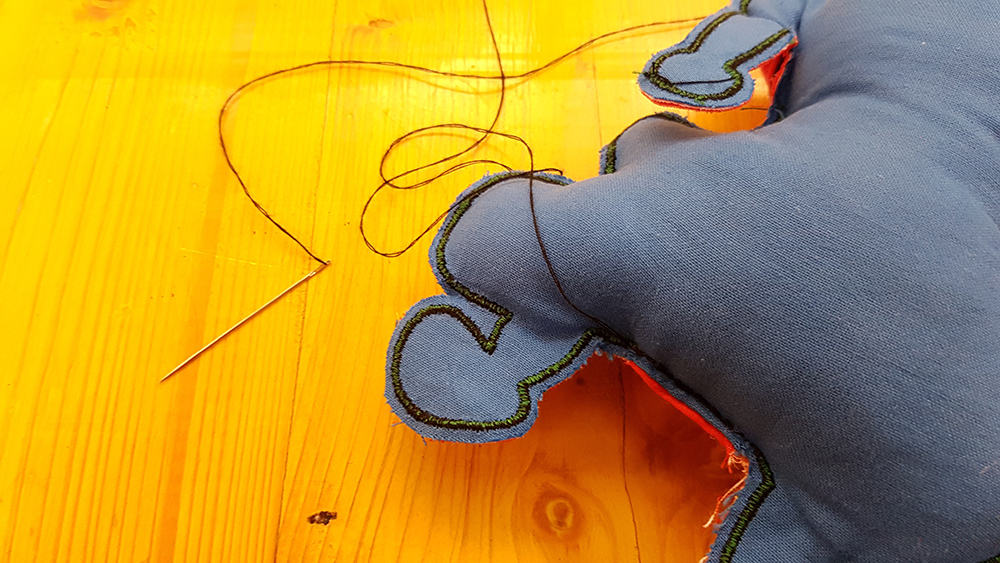
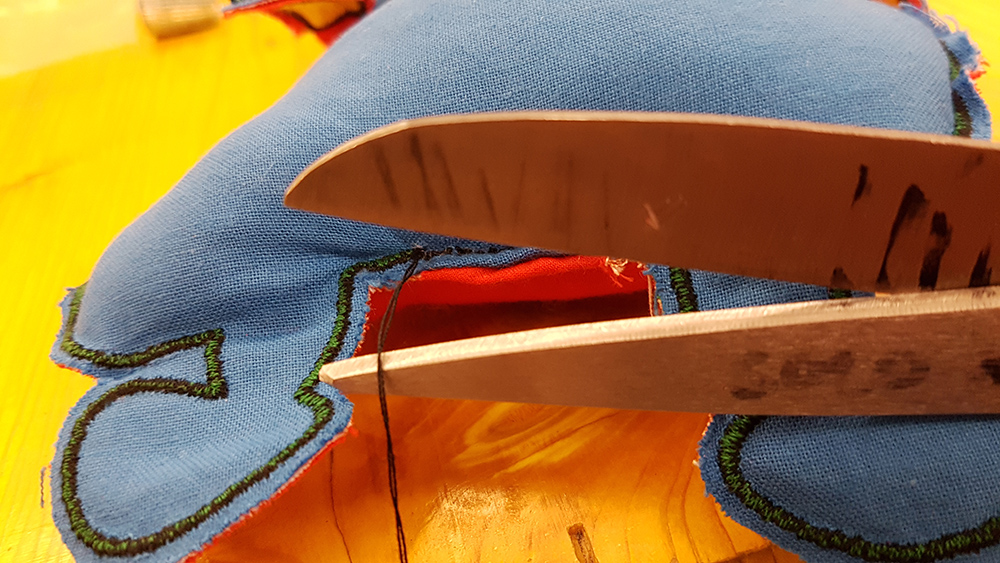
When sewing ended, I dismounted the fabrics from frame and started to cut the emroidered part from the excess of fabrics, paying attention to leave a piece of fabrics where I have to sewing by hand the puppet.
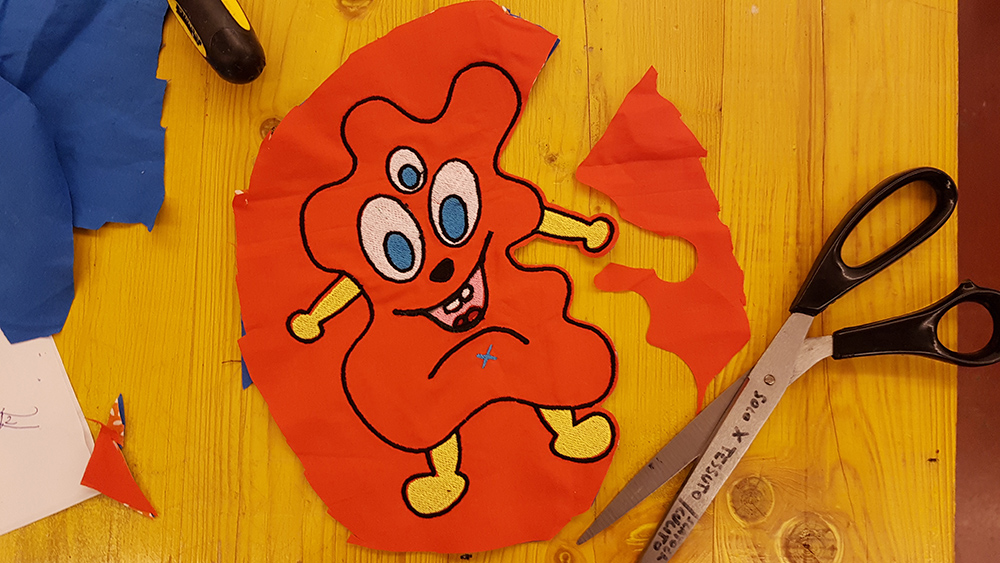
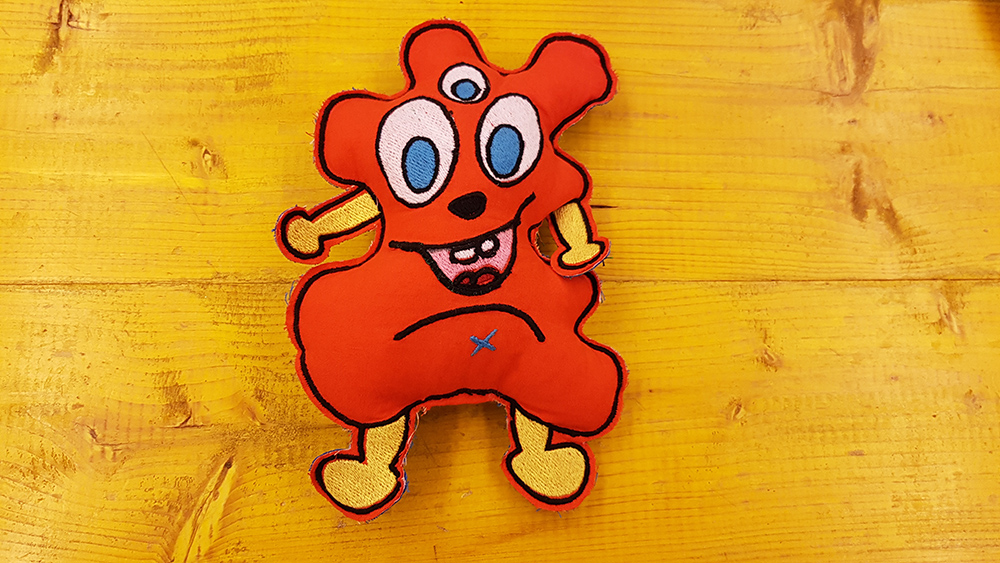
I was now ready to infill the puppet with polyester fiber stuffing
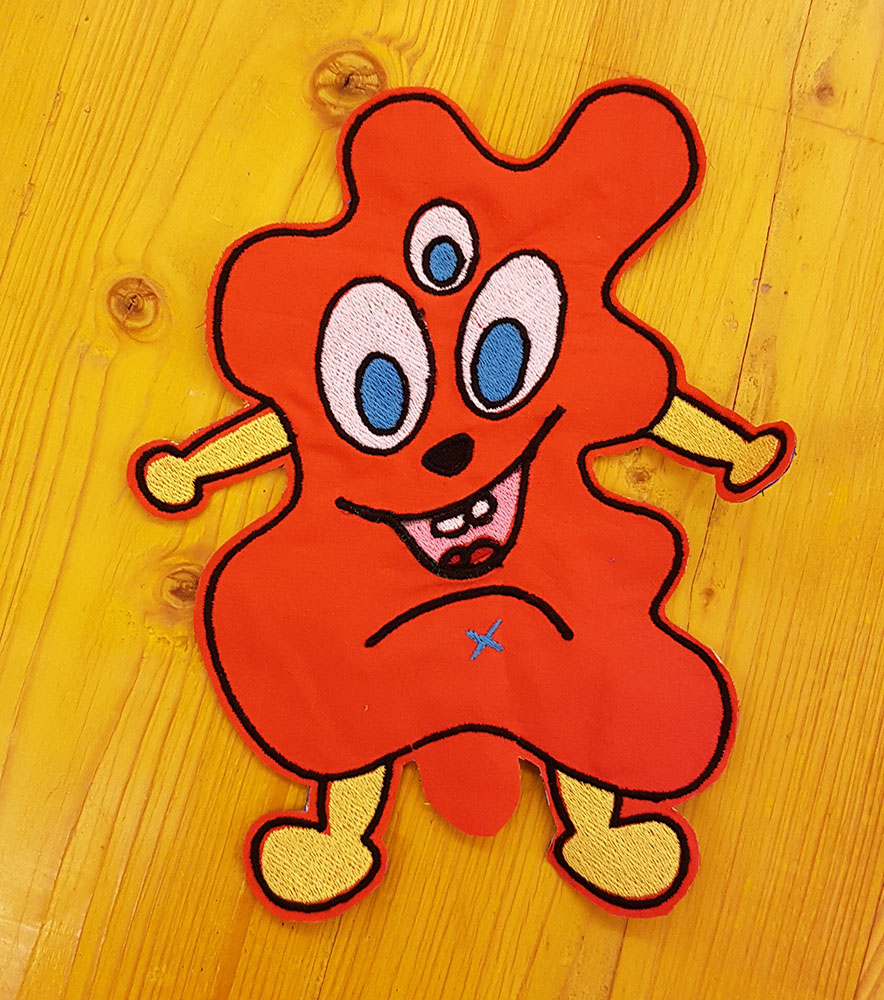
Last step of puppet fabrication was to sewing by hand the puppet closing the hole of stuffing infill.
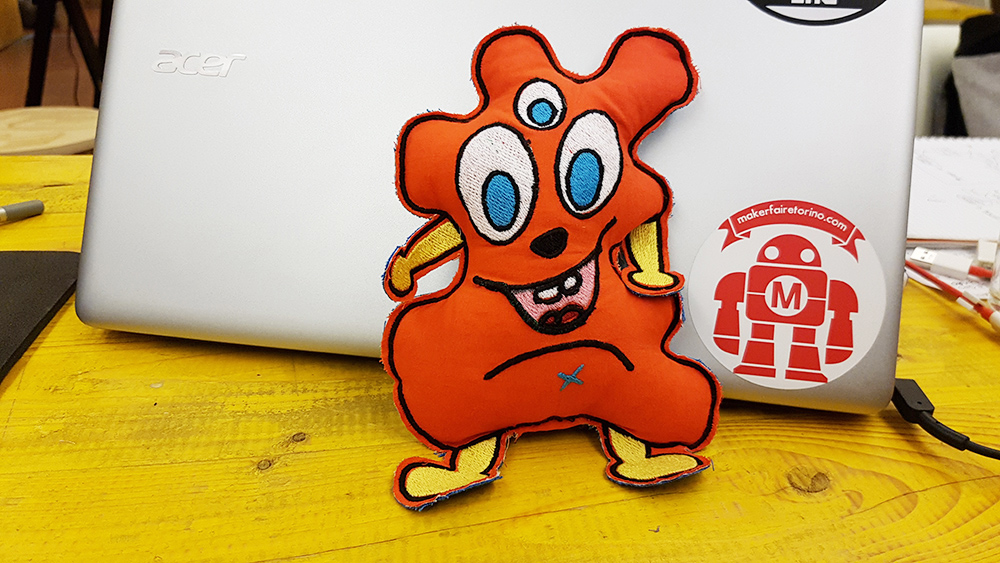
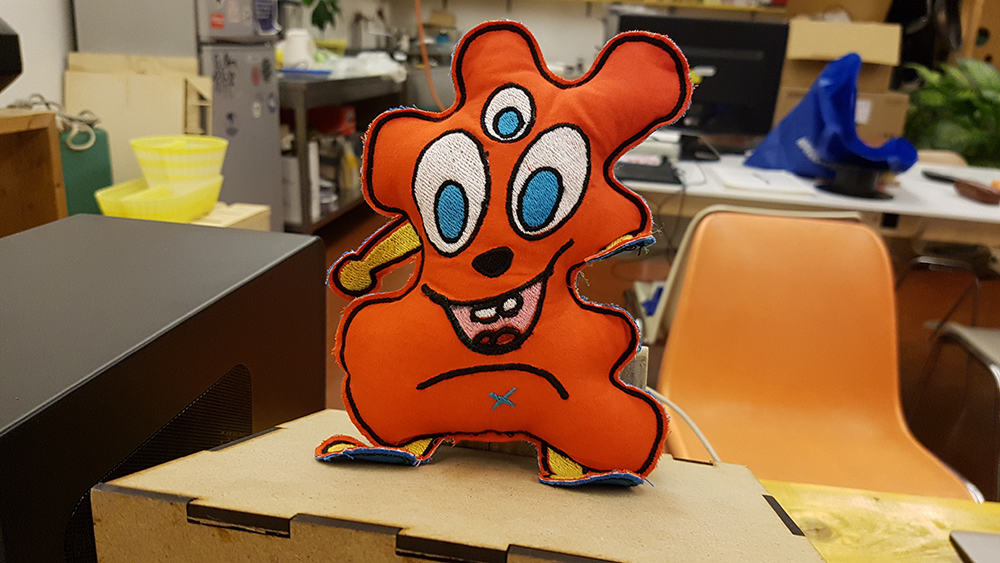
The puppet was completed. It's very cute. It's name is: "Aranciotto"
Download
You can download Arnaciotto .png file in full resolution: