Project development
Posture corrector
Index
1. Introduction
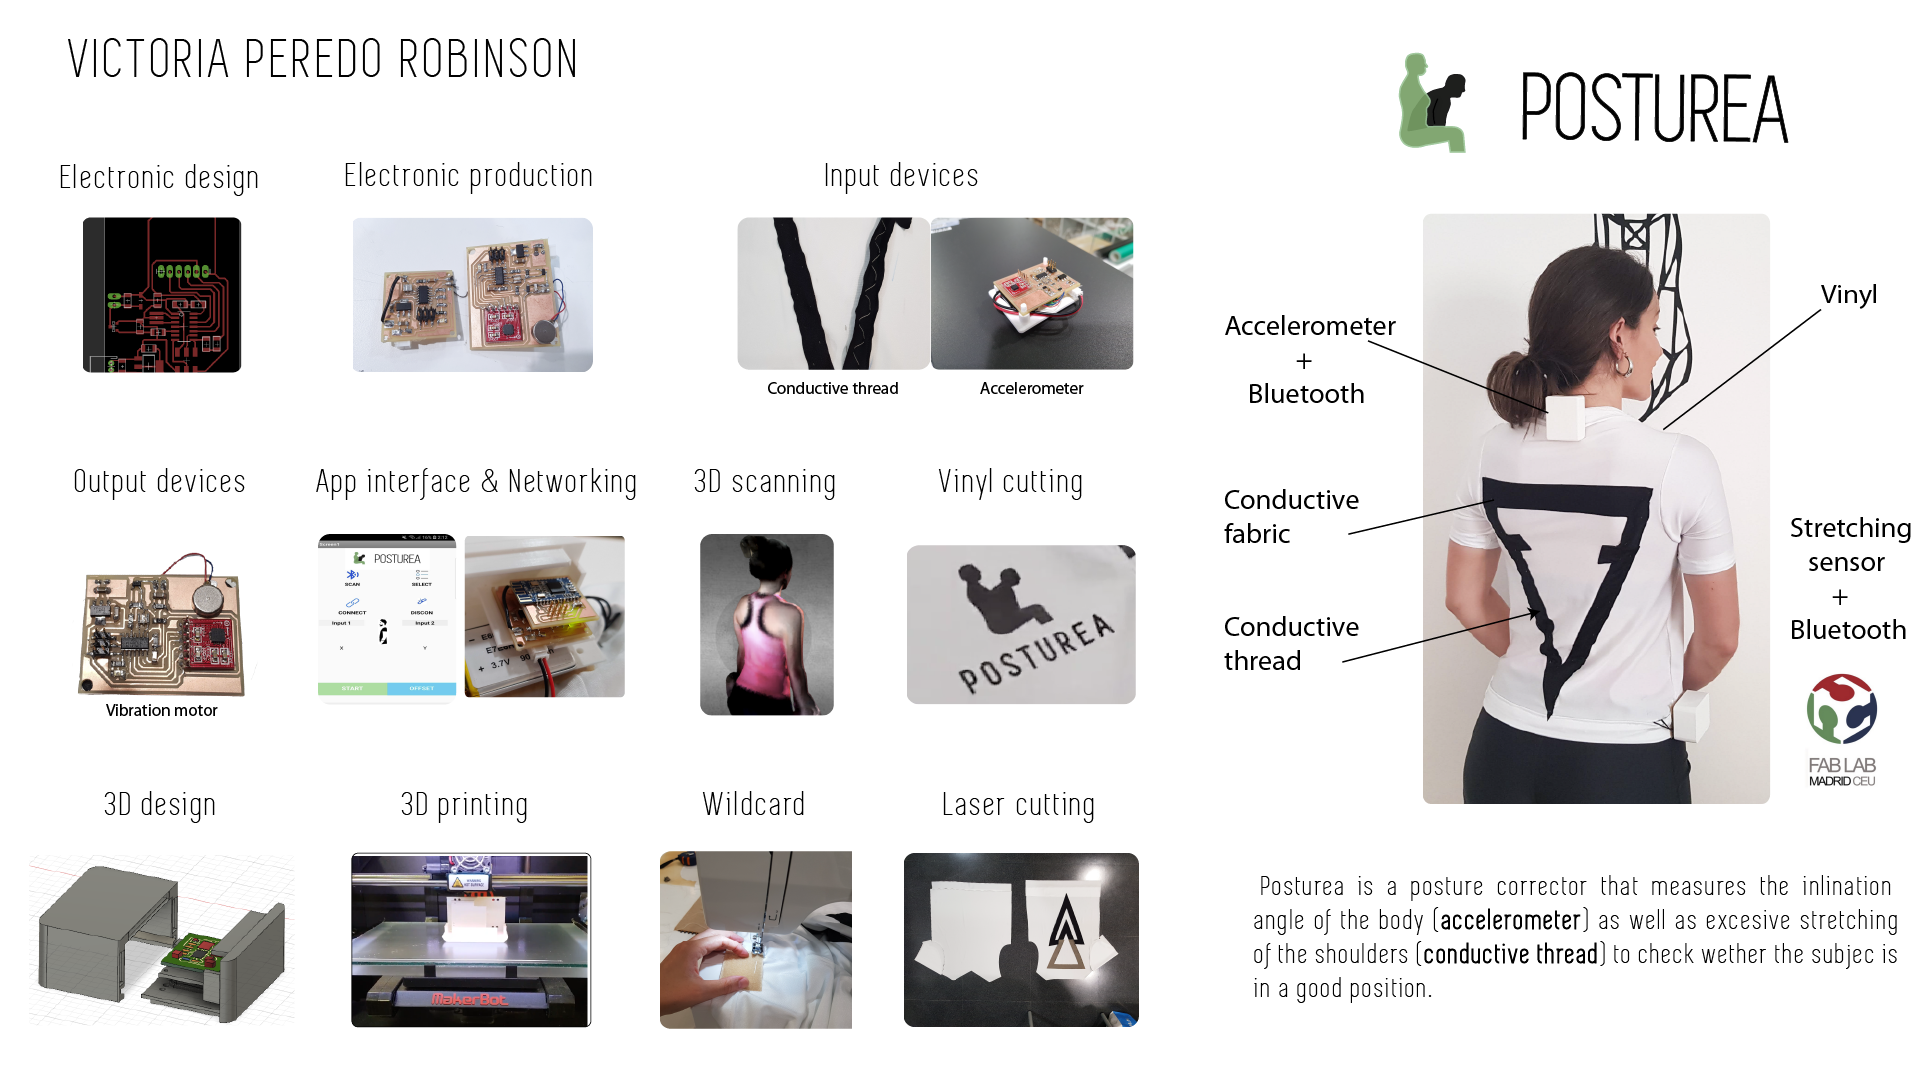
I have created a posture corrector as my final project of the FabLab academy.
I talked to some specialist and they told me that it was important not only to measure how the muscles are being stretch but also to have a sensor on the neck to check wether the head is in a good angle. That is why my project has incorporates:
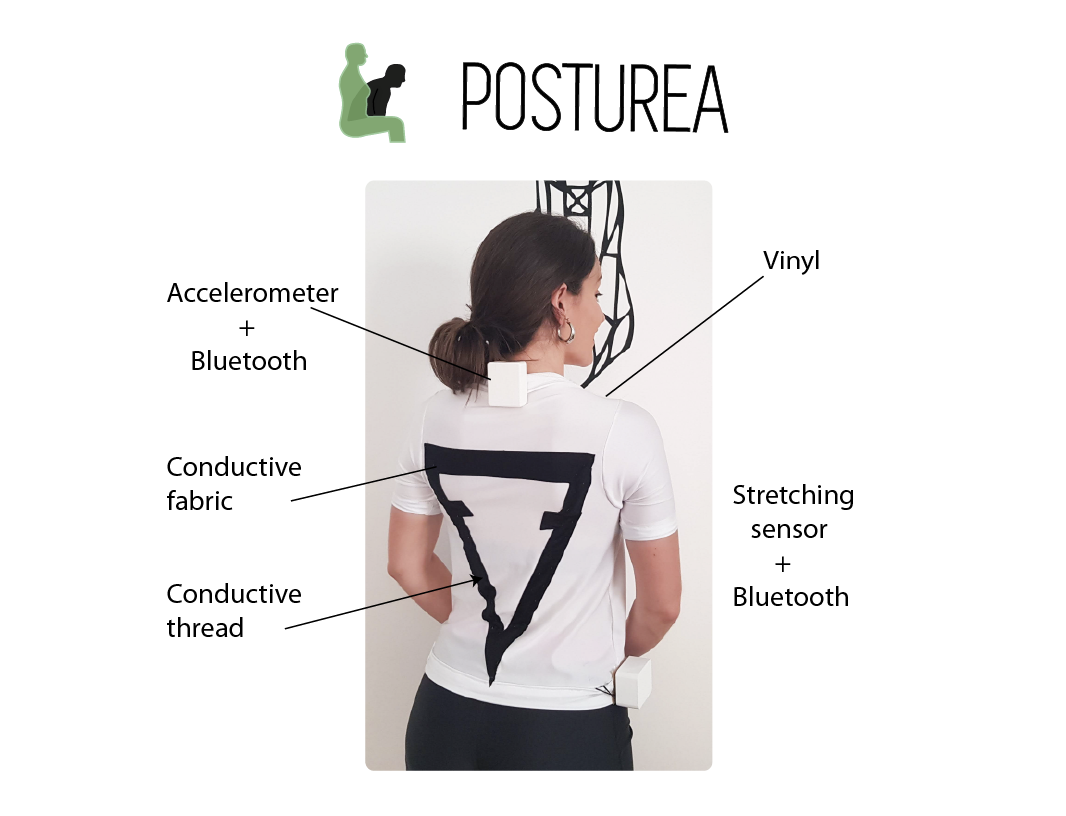
- Accelerometer board that will be placed on the neck to measure the inclination angle with a bluetooth that wil be able to communicate with a phone app.
- Vibration motor included in the accelerometer board that will send a vibration output whenever it measures a bad inclination.
- Conductive thread on a t-shirt that will measure how the muscles are being stretched
- The board to read that thread with a bluetooth to also communicate with the phone app.
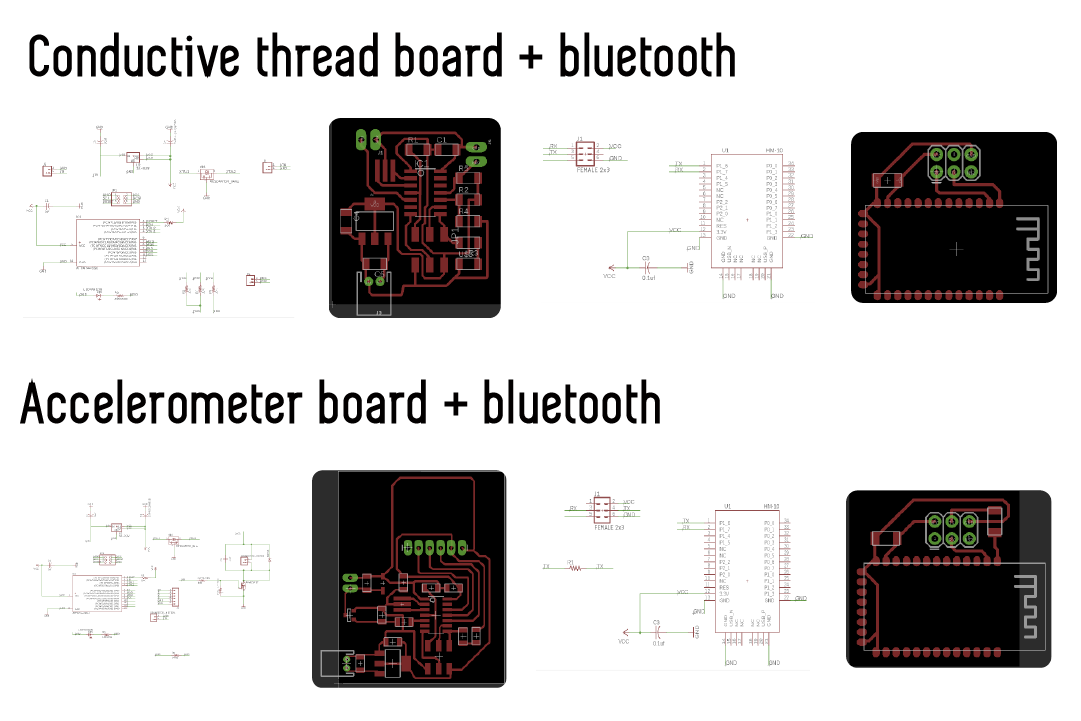
2. Electronic design
I designed the two boards that I needed for this project using Eagle. Both of them have an independent board with the Bluetooth as they are connected through the SPI connector. More information about this boards can be found on the Output week and the Networking week.
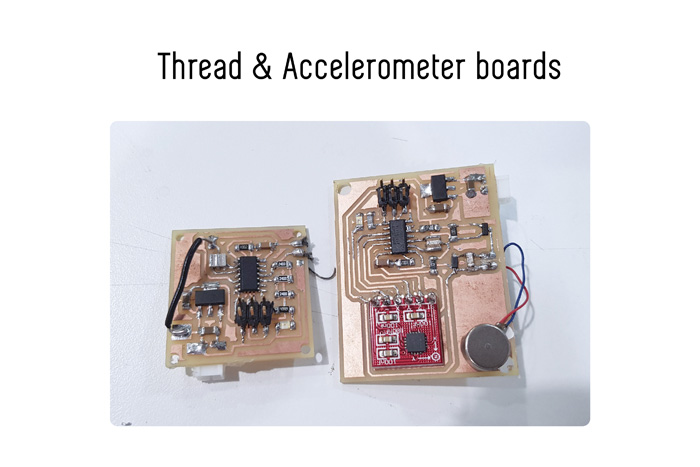
3. Electronic production
Once I had designed the board I milled them using the Modela MDX20 machine with mods and I soldered the different components.

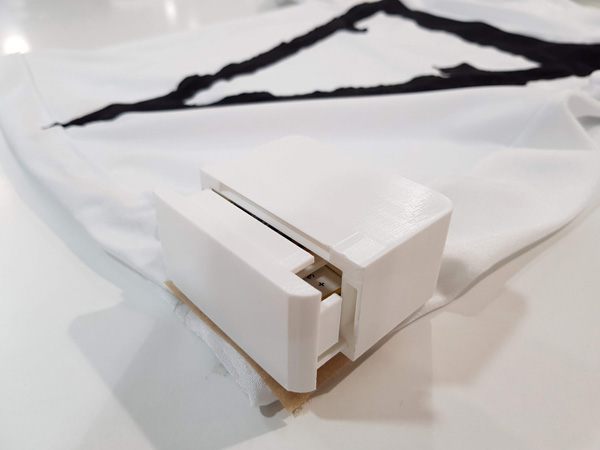
4. 3D design & 3D print
For this project I 3D designed the boxes where I was going to place. These boxes had some requirements like:
- Thread board: I needed to add a separation layer for the board not to be touching the battery as it could get hot if not.
Holes on the bottom to sew it afterwards to the velcro that will attach it to the t-shirt.
Holes to put through the conductive thread to the t-shirt. - Accelerometer: this board also needed to be separated from the battery but in this case I put four structures on the sides of the base that will lift the board.
This box also needed a clamp to be able to attach it to the top part of the t-shirt. This design makes this an independent module.
I also maded with flexible fillament for it to adapt better to the neck.
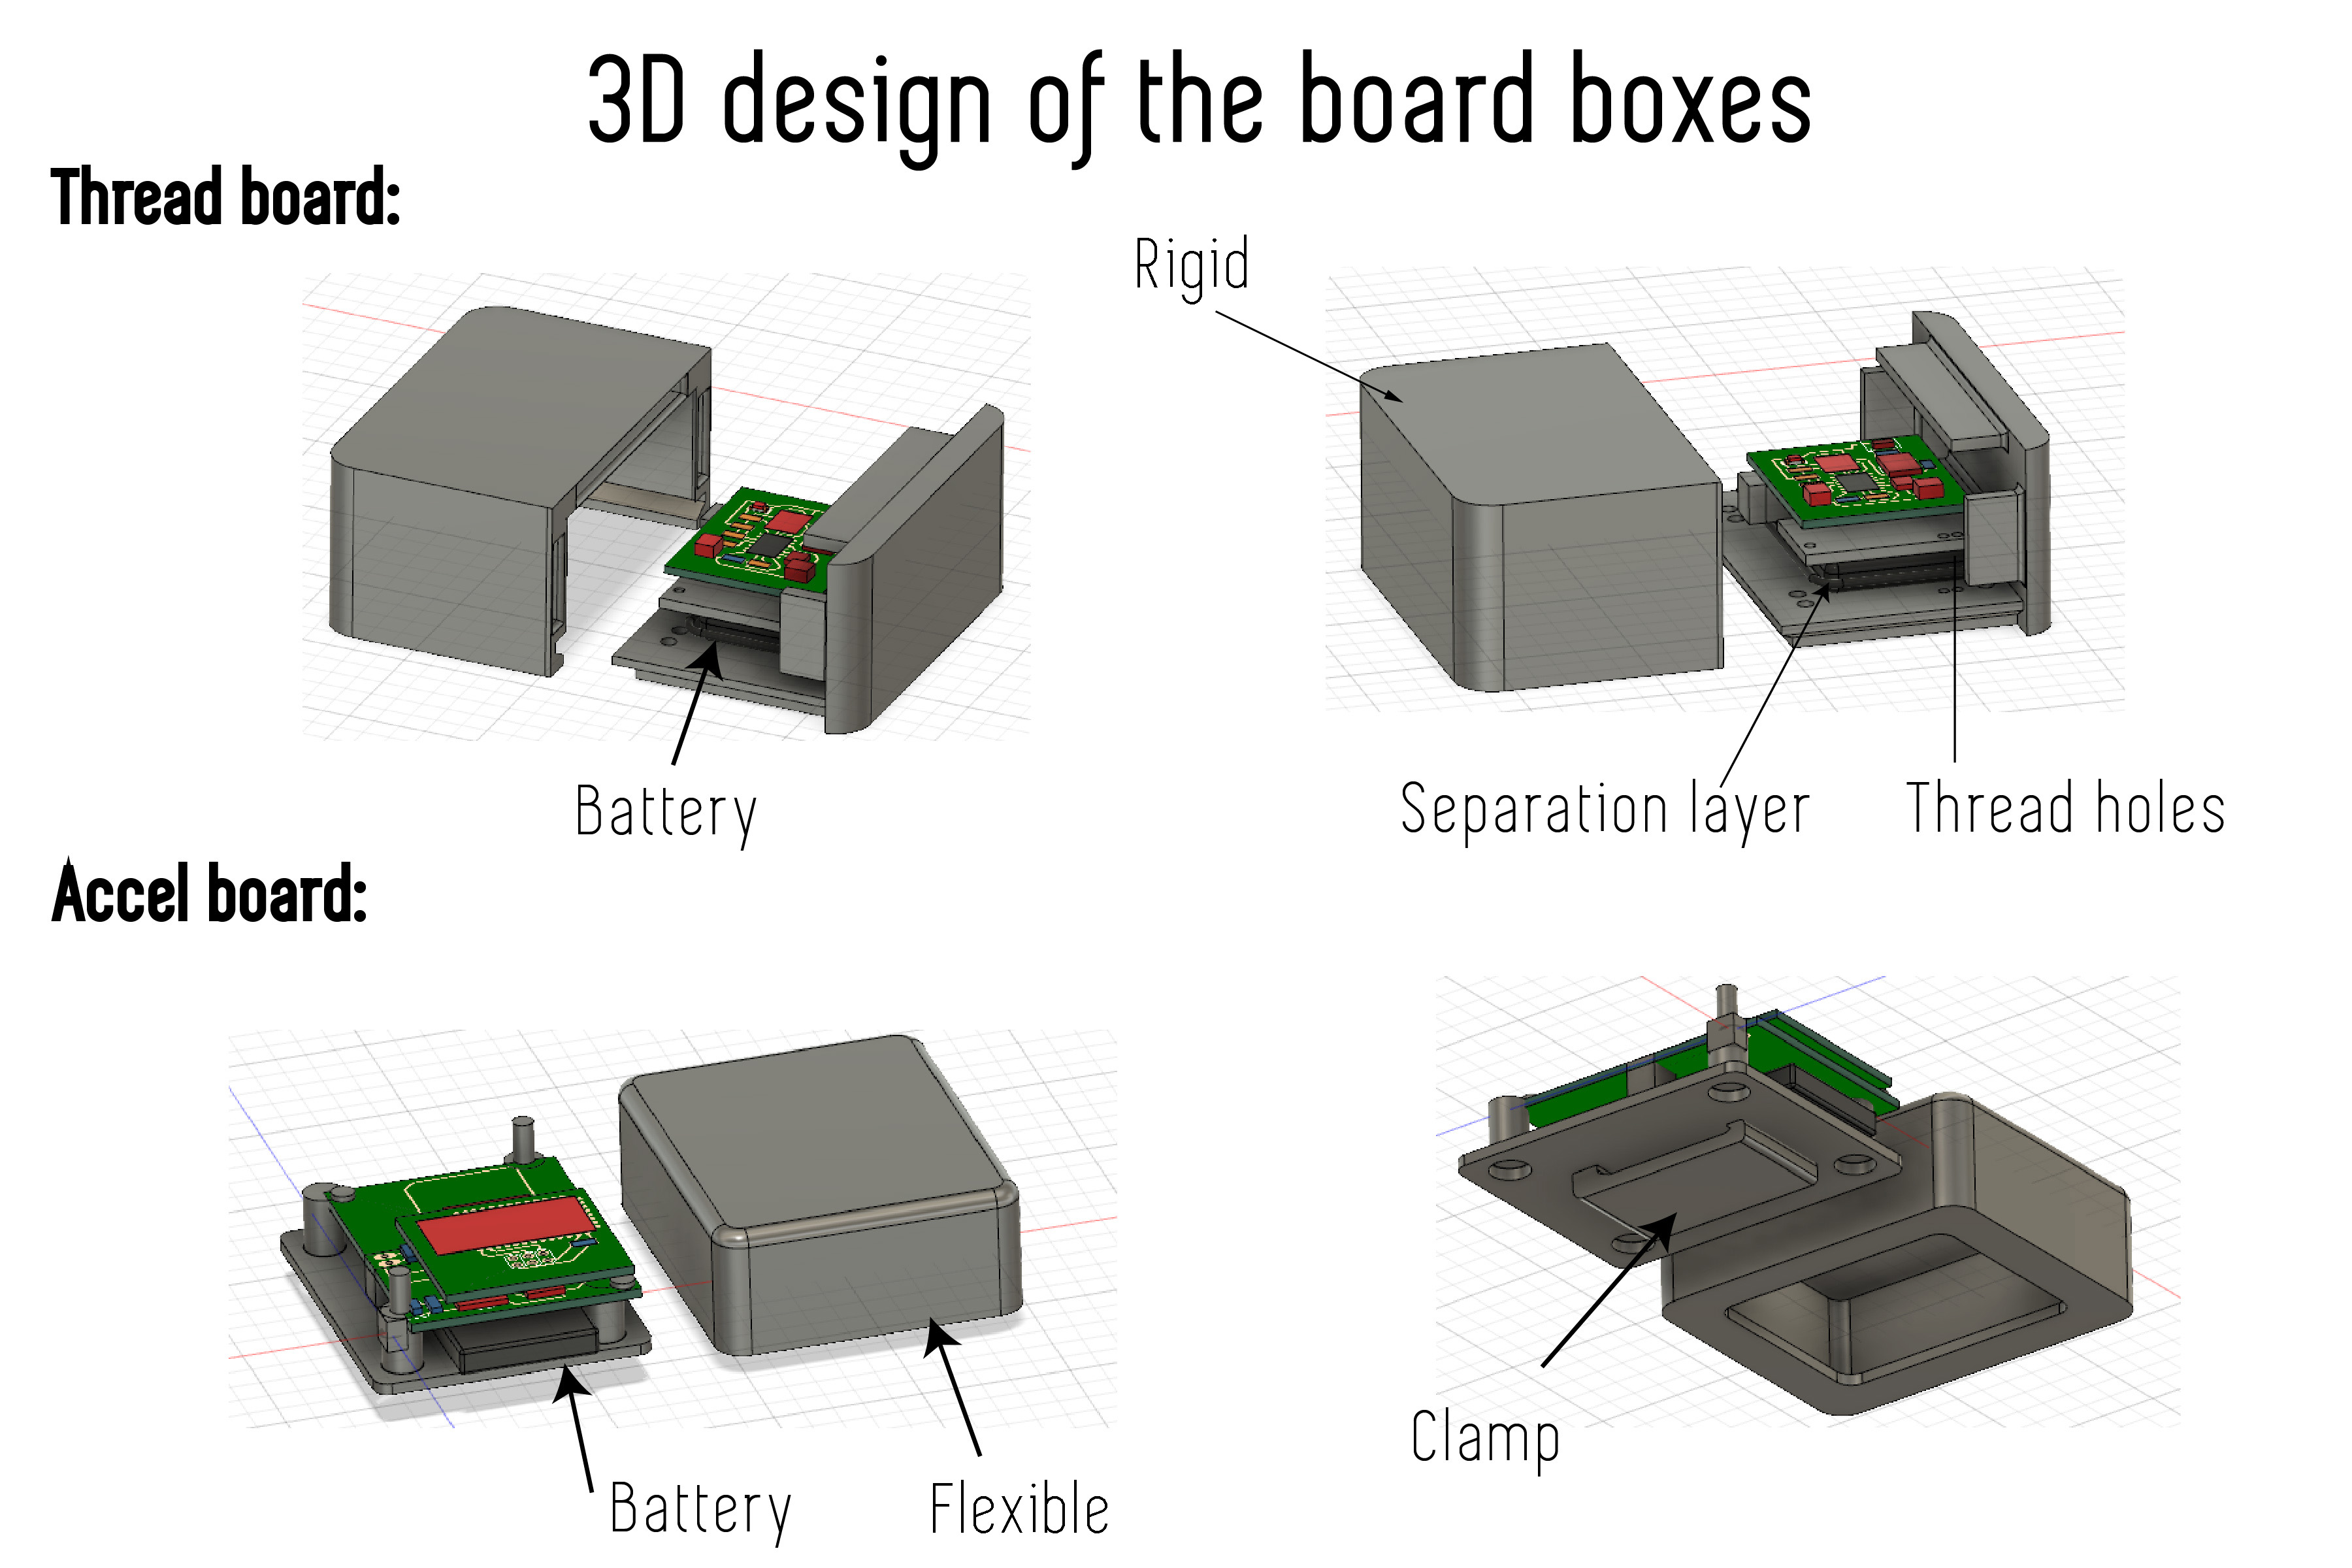 I decided to do these boxes with the 3D printer and not cast them because the boards need to be reprogramed and like this I can access them.
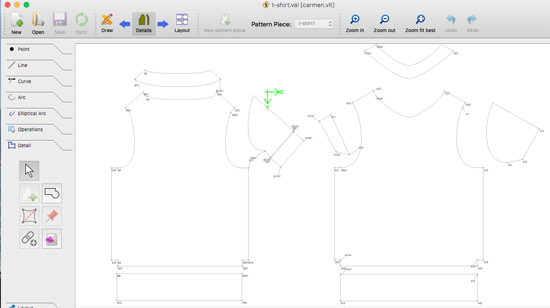
6. 2D design: t-shirt pattern
I used Seamly2D to 2D design the patterns that I needed for doing my t-shirt. More information about this process can be foudn on the Wildcard week.
7. 3D scan
One of the tools that I used to check the pattern measurements was the 3D scanner. Like this I could ensure that the measurements that I had taken were the correct ones. Also, more information can be found on the Wildcard week.
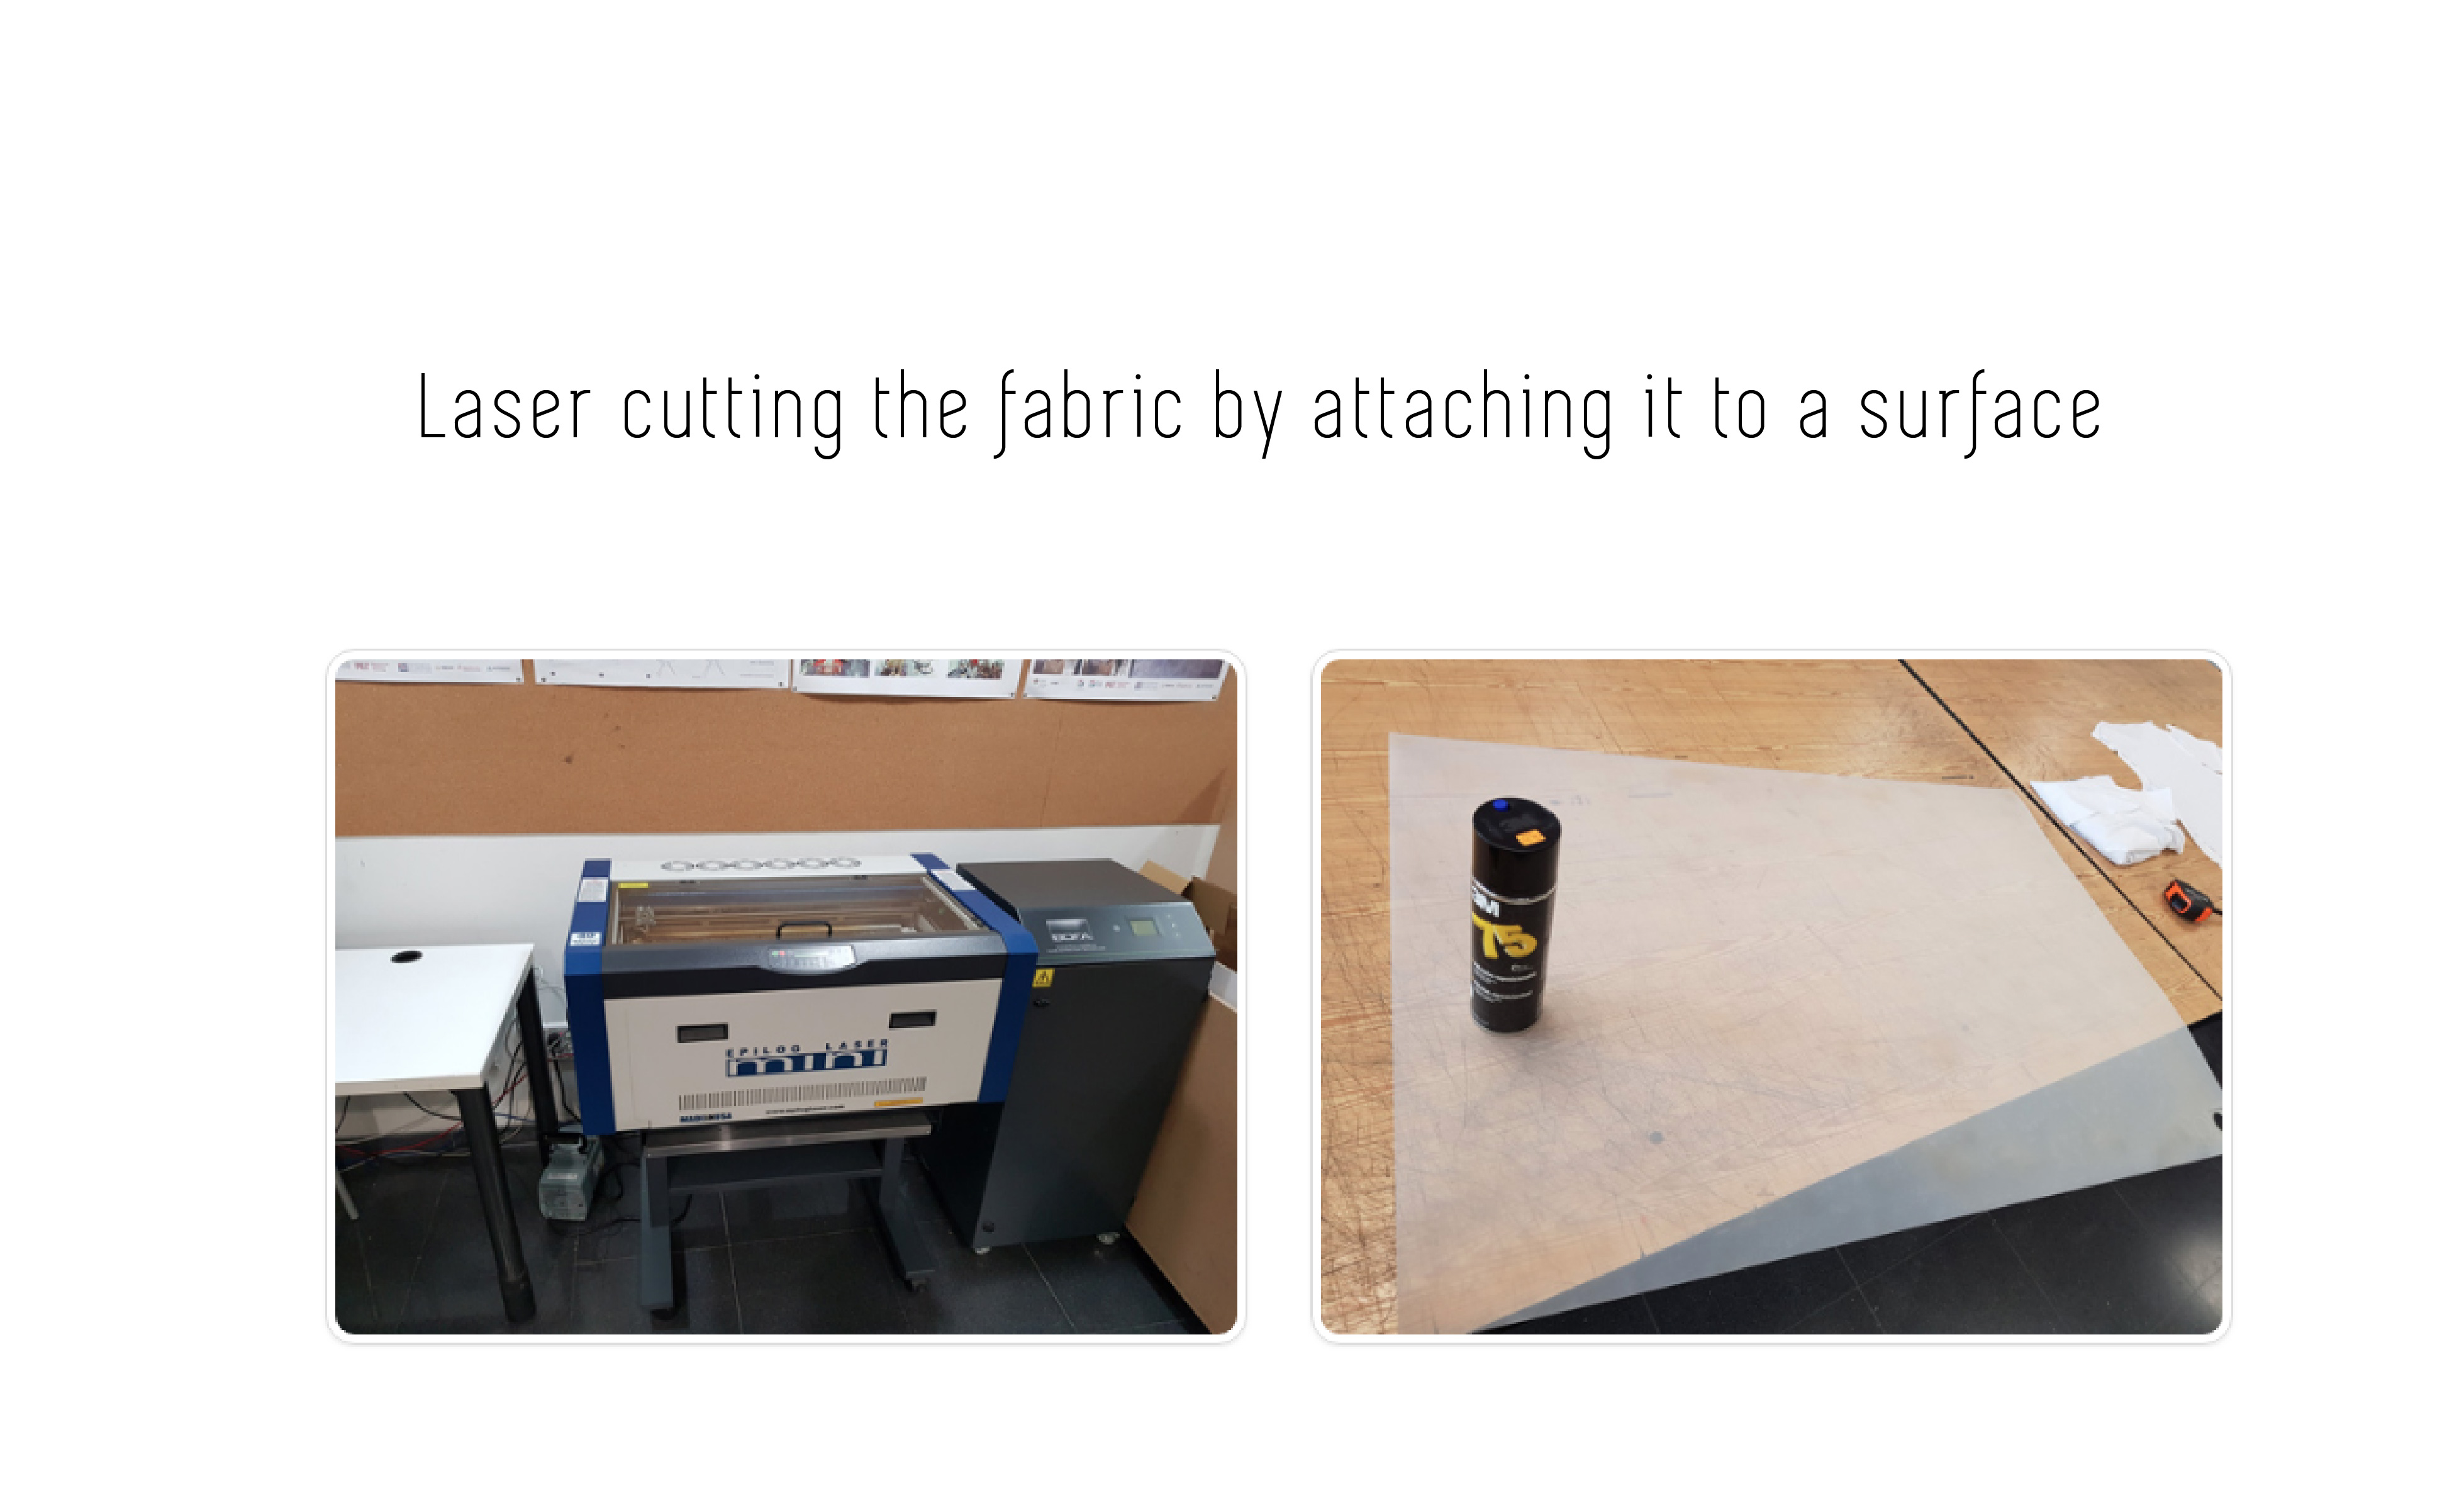
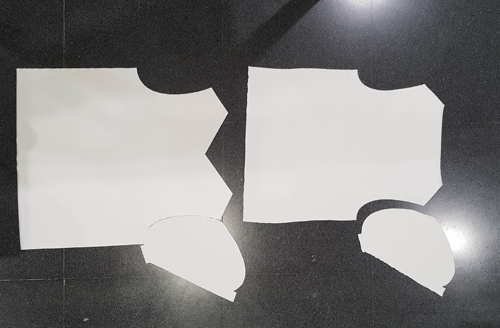
8. Laser cutting
I used the Laser cutter to cut the different components of the t-shirt. When fabric is cut with the laser cutter it tends to fold as is being cut so I used an adhesive that doesn't leave stains for it to be cut perfectly!
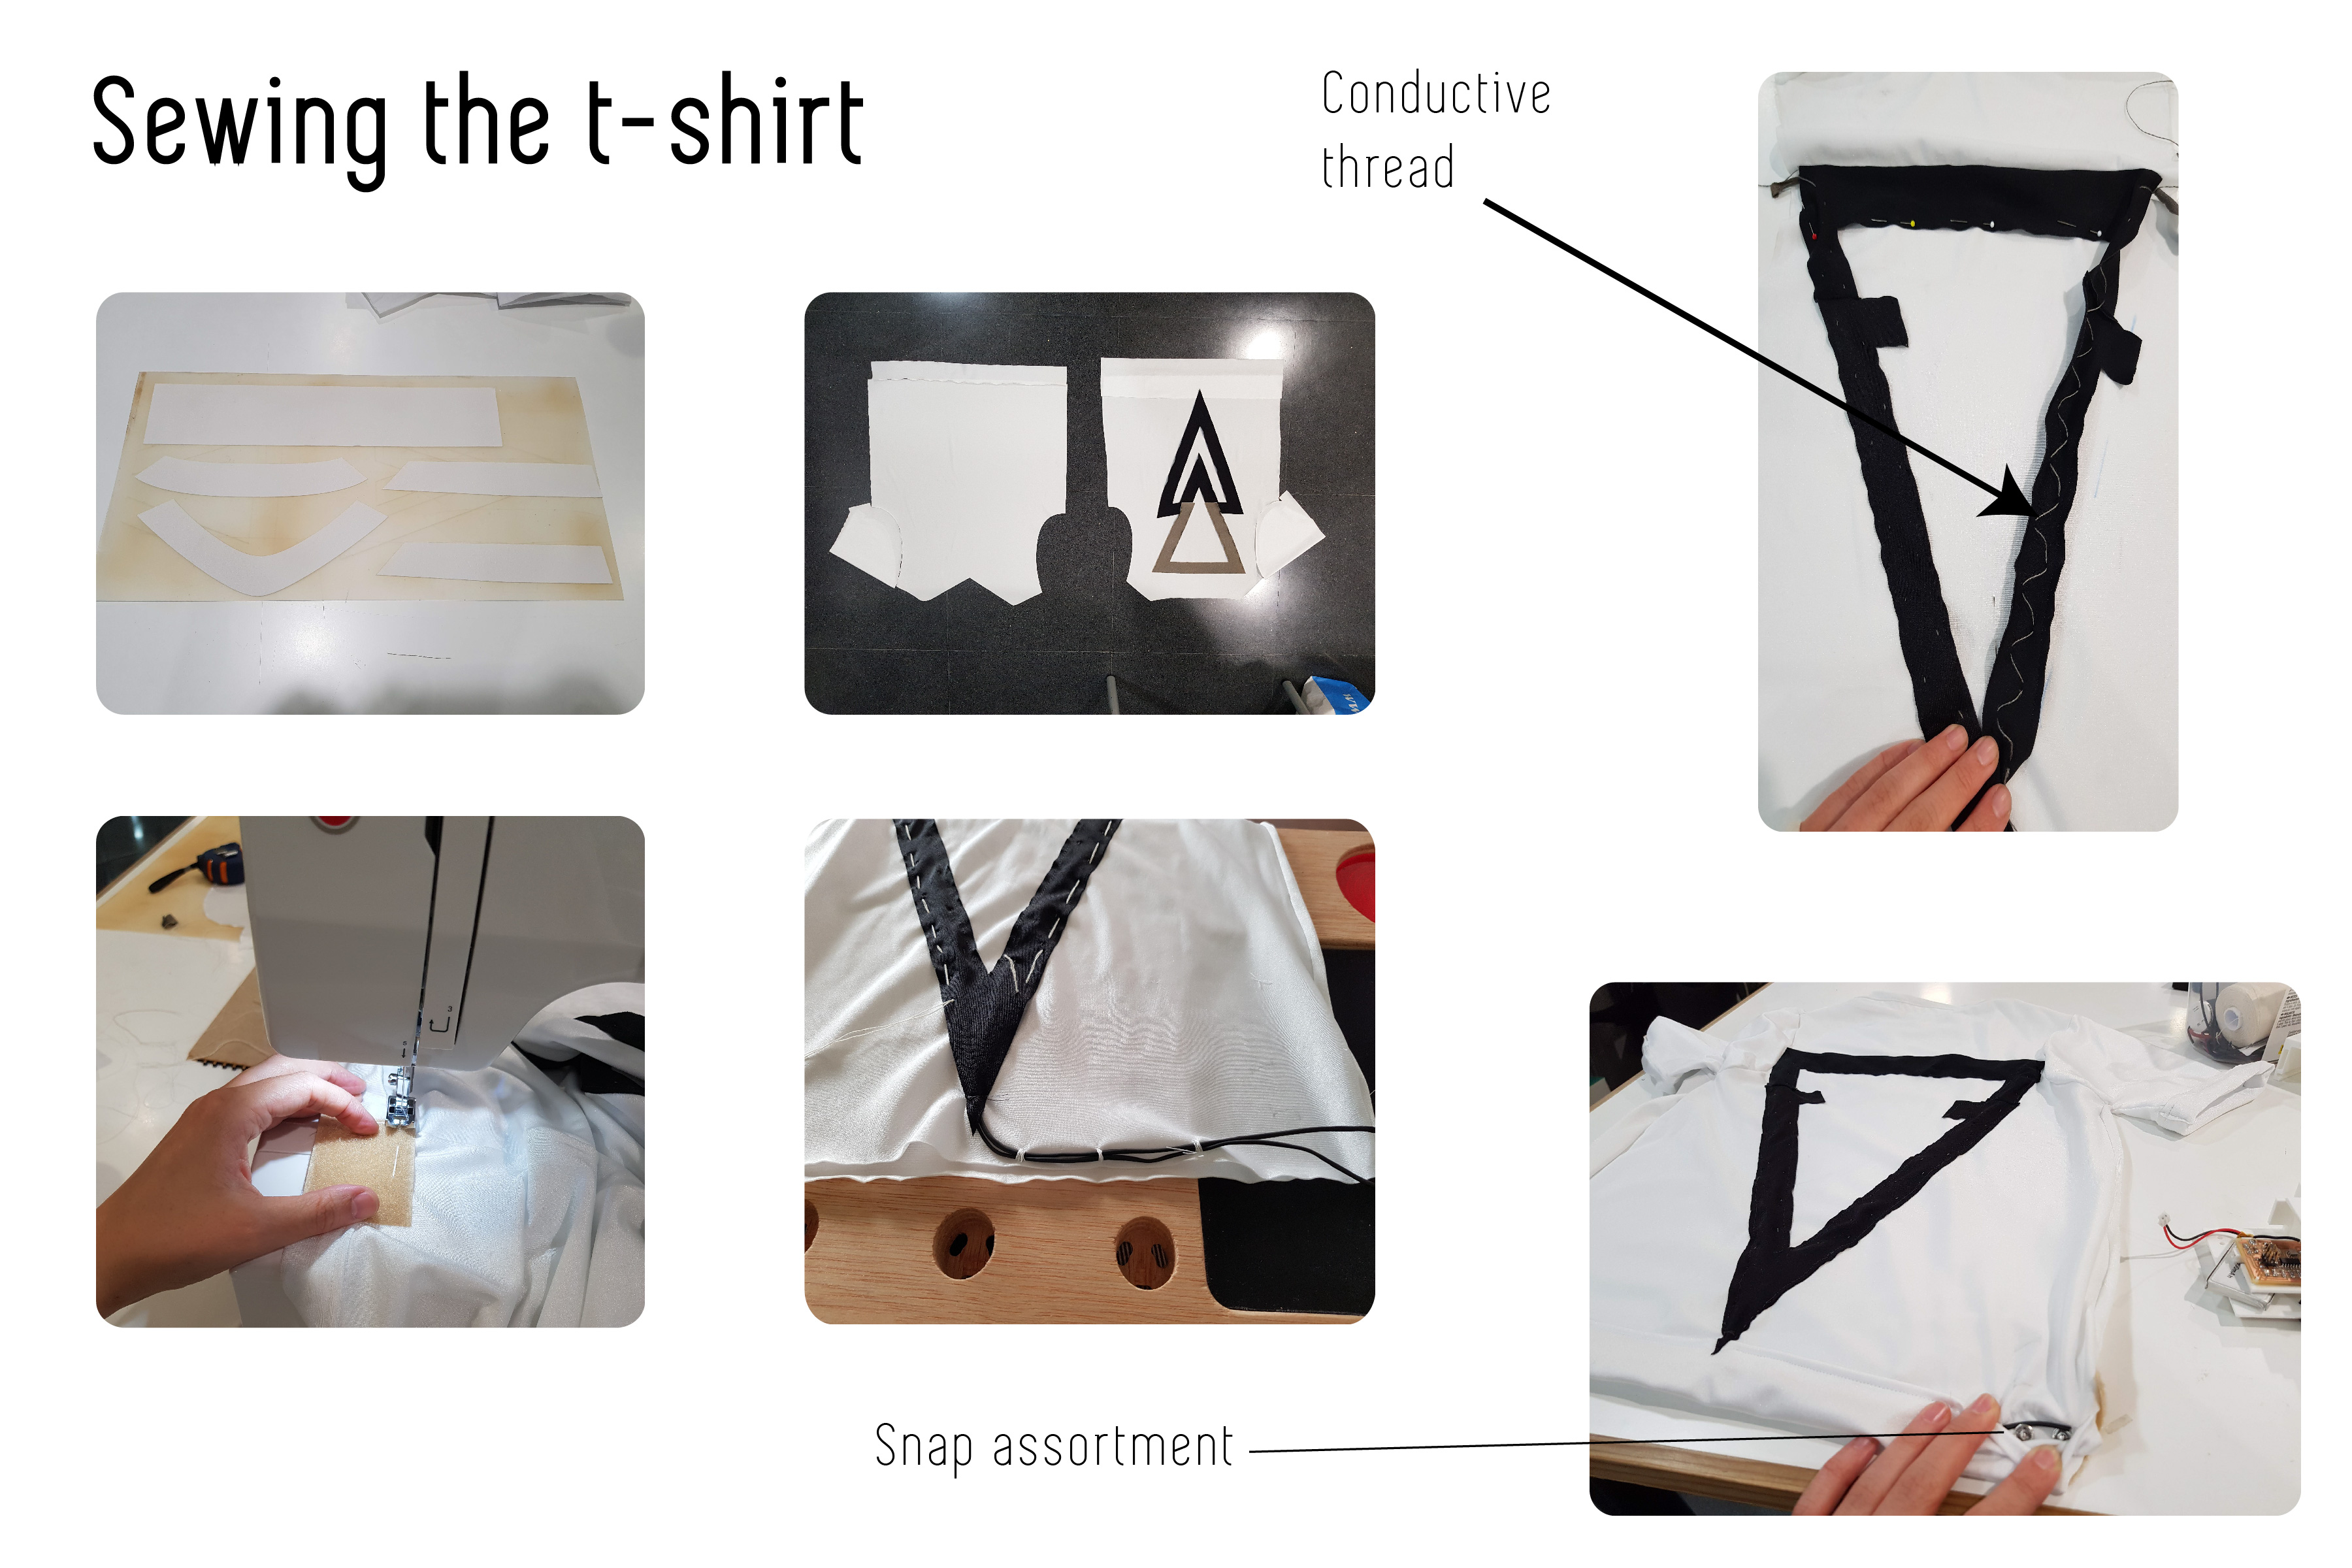
9. Sewing
I had to learn how to sew! And sew all the different components together. I first started by sewing the conductive thread on the V decoration of the back. The reason of doing it like this is to avoid the skin conact between the conductive thread and the body.
I also lef an open pocket on the bottom part of the t-shirt so I can make the thread connection between the snaps and the board.
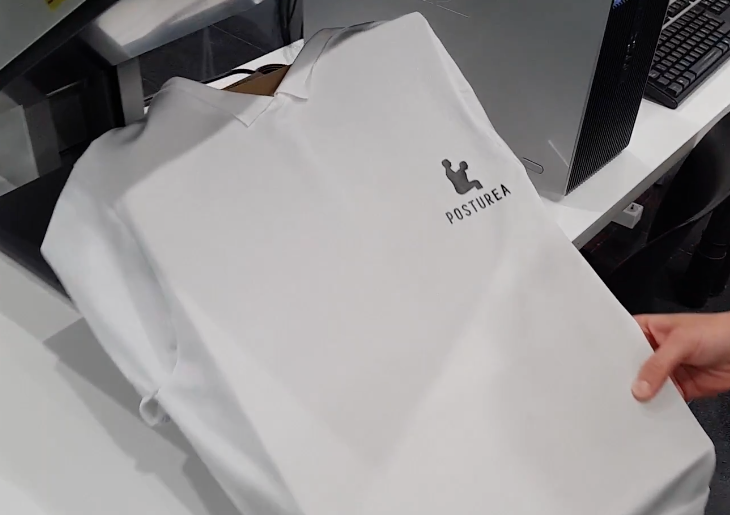
10. Vinyl logo design
As part of my t-shirt design I designed the logo of my project. At first I tried different combinations. I was trying to combine something were you could see the body posture with technology.
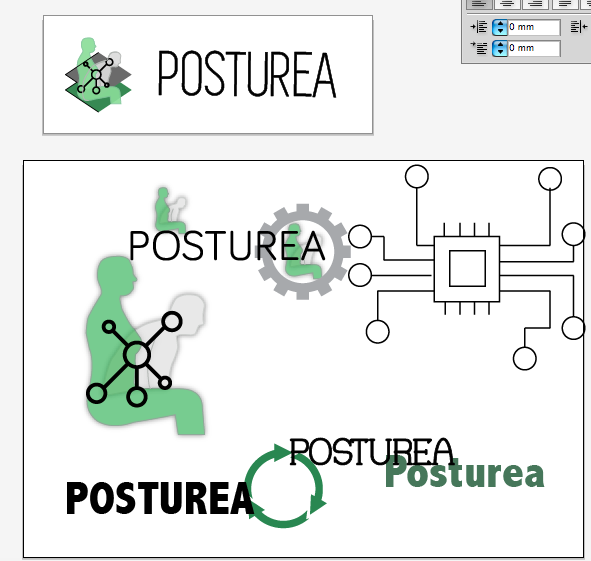 I finally decided to stay with this as the logo :
 I scaled it and I convert it to one color in order to cut it with the vinyl cutter.

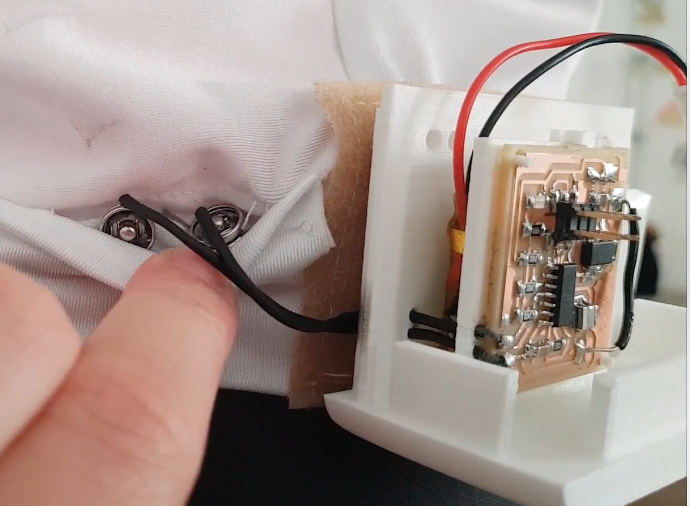
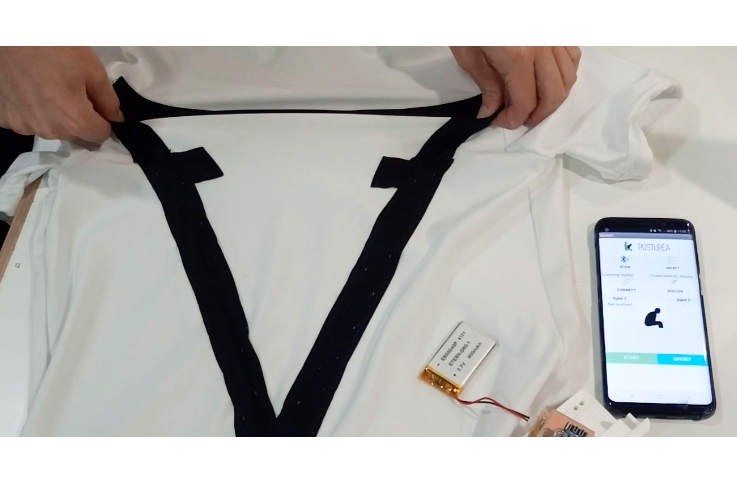
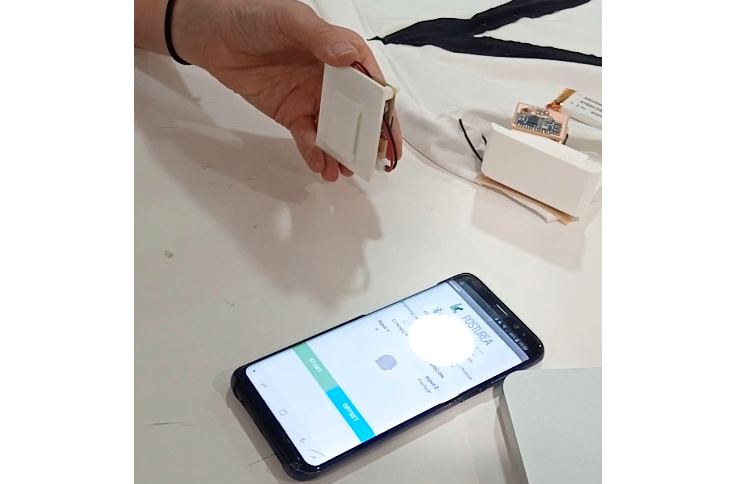
11. System integration
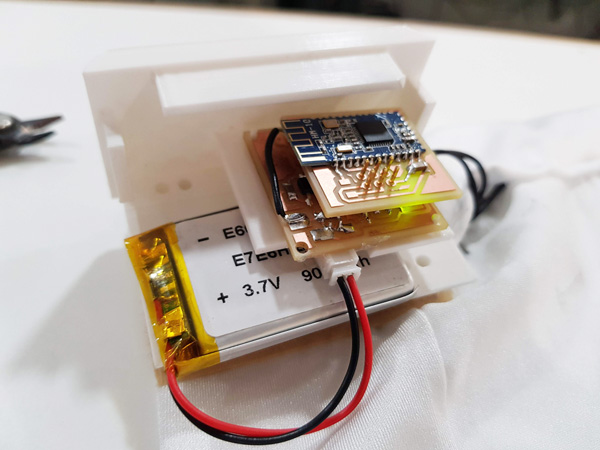
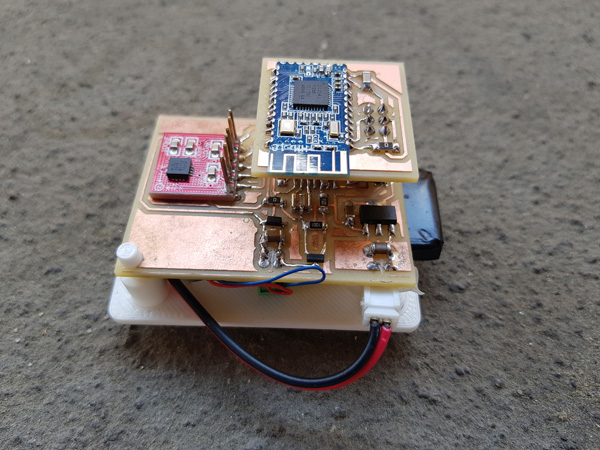
Once I had everything I started to integrate them. I placed the boards inside the boxes, putting the conductive thread through the holes of the box and connecting it to the t-shirt on the snaps.
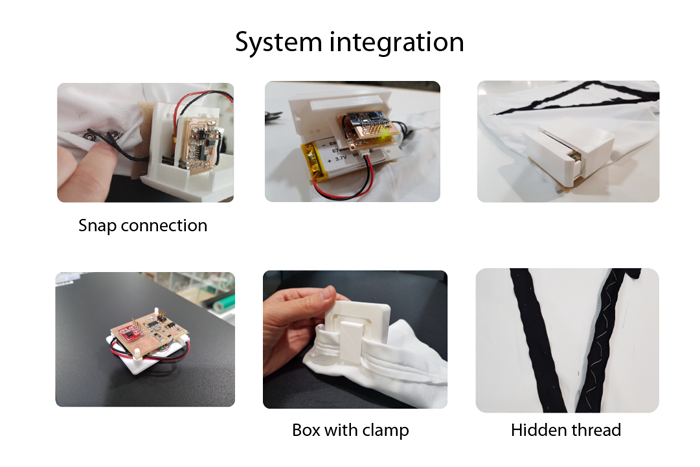 The two boxes can be separated from the t-shirt; the conductive thread one is attatched to the t-shirt with velcro and the accelerometer board with a clamp as it can be seen in the pictures.
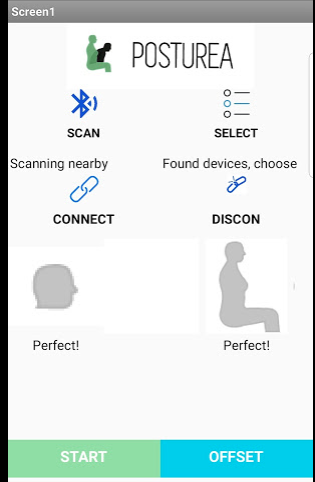
12. App interface & Networking
For the project I developed an app using App inventor. This app makes the connection with the bluetooths of the boards and is able to receive whenever the subject is in a good or in a bad position. The result of this app working can be seeing at the end of the presentation video!
Analysis
A. What tasks have been completed, and what tasks remain? What will happen when?
The project now is able to measure when the subjec is in a bad or good position in both the head and the back and I can send this information to the phone from both boards independently. What I would like to do in future approaches is to stablish the phone as the master and connect both boards at the same time to the app.
I would like to keep improving this project as this is the first prototype. I would try to reduce the size of the boards and the boxes so they are a bit more compat.
I also have in mind combining the accelerometer with a giroscope to be able to count at the same time the steps of the person when is walking.
B. What has worked? what hasn't?
The project is working for now, I would just want to make it more complete and add the different things that I had said before.
C. What questions need to be resolved?
One of the things that I would like to know is how to communicate the bluetooths with the apps of Android studio to be able to creae the app in that enviroment.
D. What have you learned?
During the FabAcademy I have learned a wide range of things. I have learned a lot from each assignment individually but in general I have learned how to put them all together and create things that I didn't think I could! I also have improved how to organize myself better when completing different tasks.
Bill of materials (BOM)
I have created with the different things that I need for my project. You can acces by clicking on this link. There I have written down all the things that I need for the project, it's value, quantity and price.
Files:
- .brd and .sch of both the accelerometer board and the bluetooth
- .png files to mill them with the Modela.
- .brd and .sch of both the accelerometer board and the bluetooth
- .png files to mill them with the Modela.