TODO LIST
- Group project : test runout, alignment, speeds, feeds, and toolpaths for your machine
- make something big
Introduction
In this week assignment, we need to learn to use a CNC machine. First we need to do a group assignment to understand some parameters of CNC machining. Then i need to design something that look big. Not only big, something useful too. CNC machines are dangerous, we always wear needed to safety gears when using CNC machines.
Computer Controlled Machining
CNC machining is a manufacturing process in which pre-programmed computer software dictates the movement of factory tools and machinery. The process can be used to control a range of complex machinery, from grinders and lathes to mills and routers. With CNC machining, three-dimensional cutting tasks can be accomplished in a single set of prompts. Short for “computer numerical control,” the limitations of manual control, where live operators are needed to prompt and guide the commands of machining tools via levers, buttons and wheels. To the onlooker, a CNC system might resemble a regular set of computer components, but the software programs and consoles employed in CNC machining distinguish it from all other forms of computation. Learn more from Here
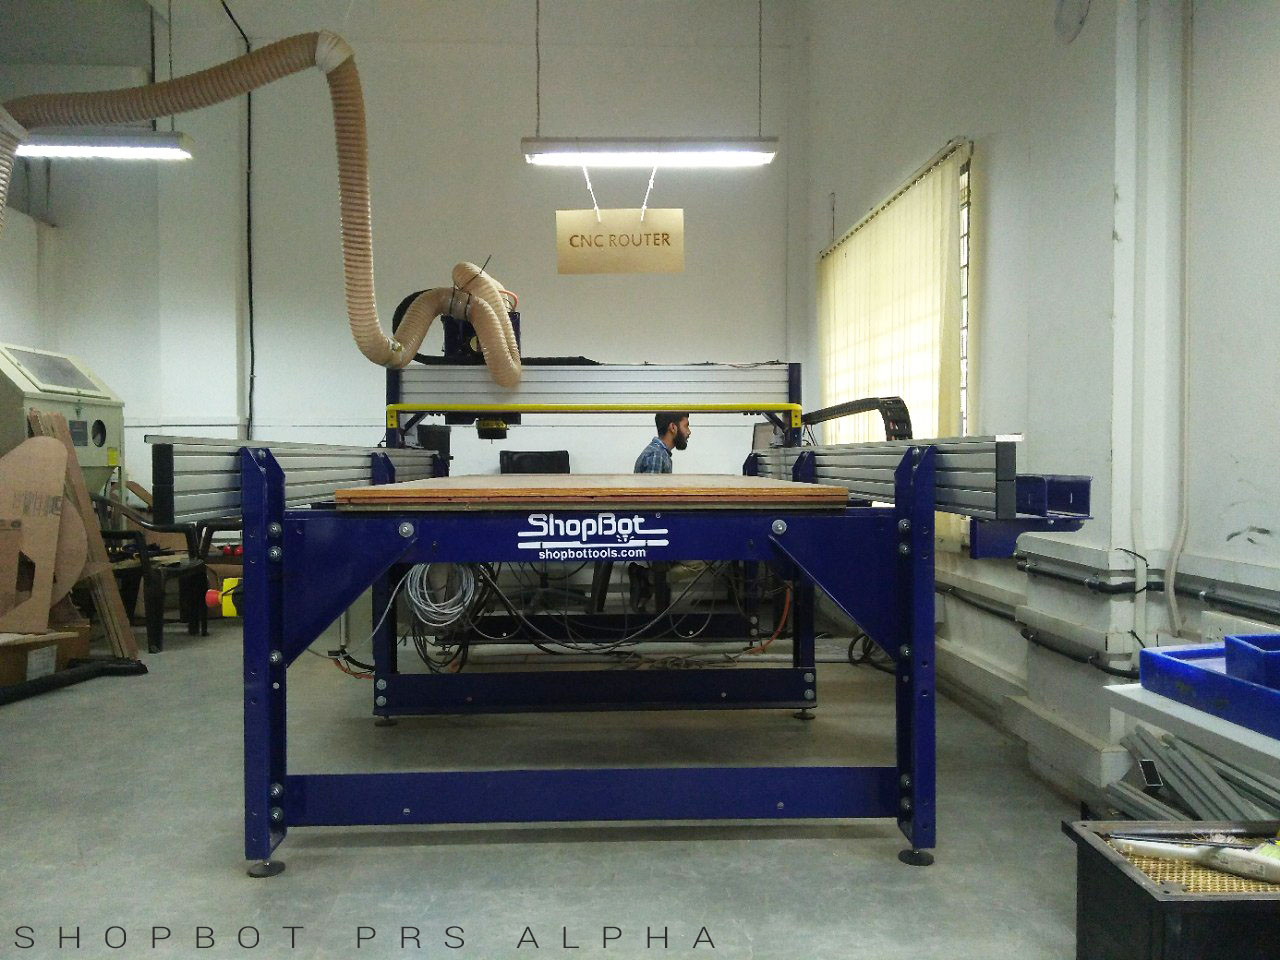
Shopbot PRS Alpha CNC Milling machine
Before designing and cutting out my final design for this week. I need to know the workflow, specification and operations of our CNC machine. Shobot PRS Alpha is one of the low cost CNC router that comes with a good specification and precisional operations today. Shobot have a big bed size. Its comes with a 8x4 feet bedsize. It is large enough to cut out large sized designs. We are using a shopbot PRS Alpha 96X48 comes with a 96 X 48 (8 x 4 feet). ShopBot PRS Alpha have a speeds of 1800 inches per minute and cutting speed up to 600 inches / minute. It is easy to configure and easy to learn and also to use the Shobot PRS Alpha CNC Machine. Shopbot is affordable, fully production performance in digital fabrication of wood, plastic, foam and other materials like aluminium.
Safety Precautions
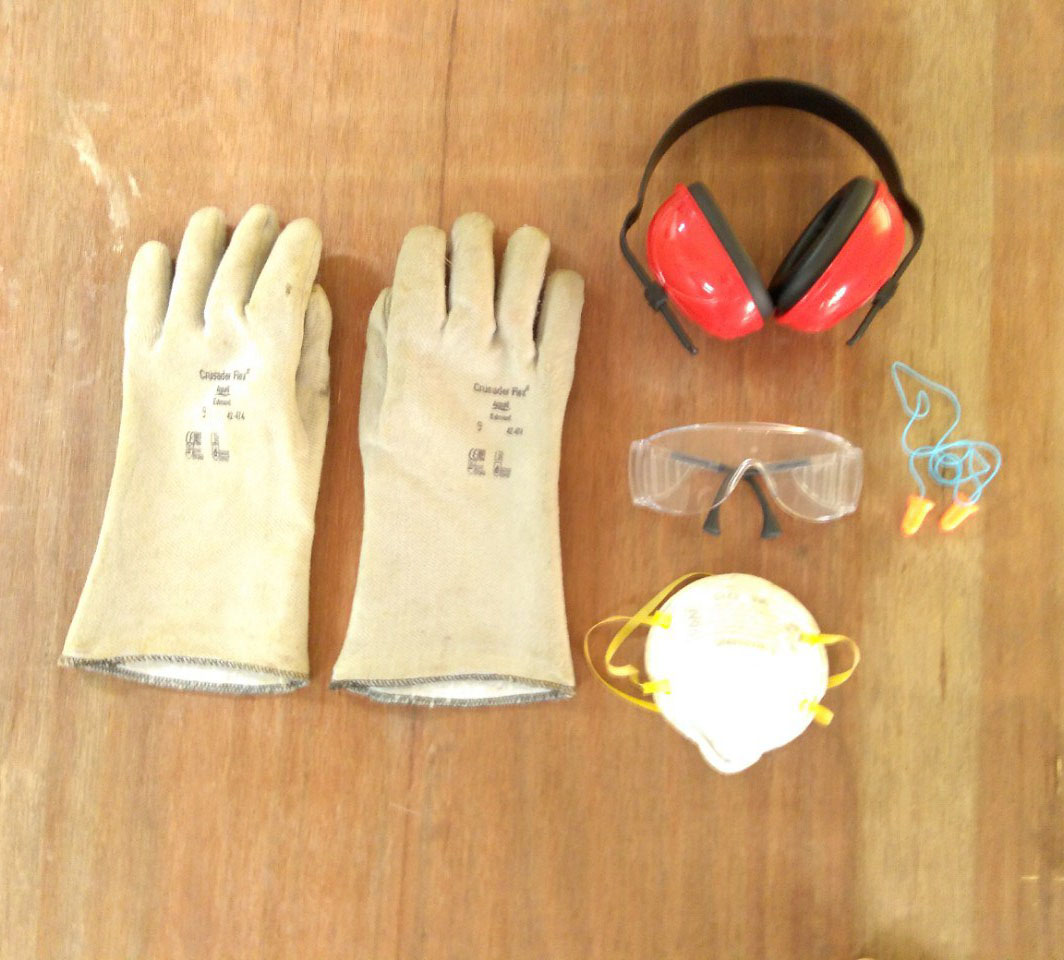
Safety is always comes first when you are gonna use CNC machines or other big machines in anywhere. We always double check the safety gears when using CNC machines in Fablab kochi. Here is the Safety Gears we use in our Fbalab.
- SAFETY GLOVES
- SAFETY GOGGLES
- EAR MUFFS PROTECTORS
- EAR PLUGS
- DUST MASKS
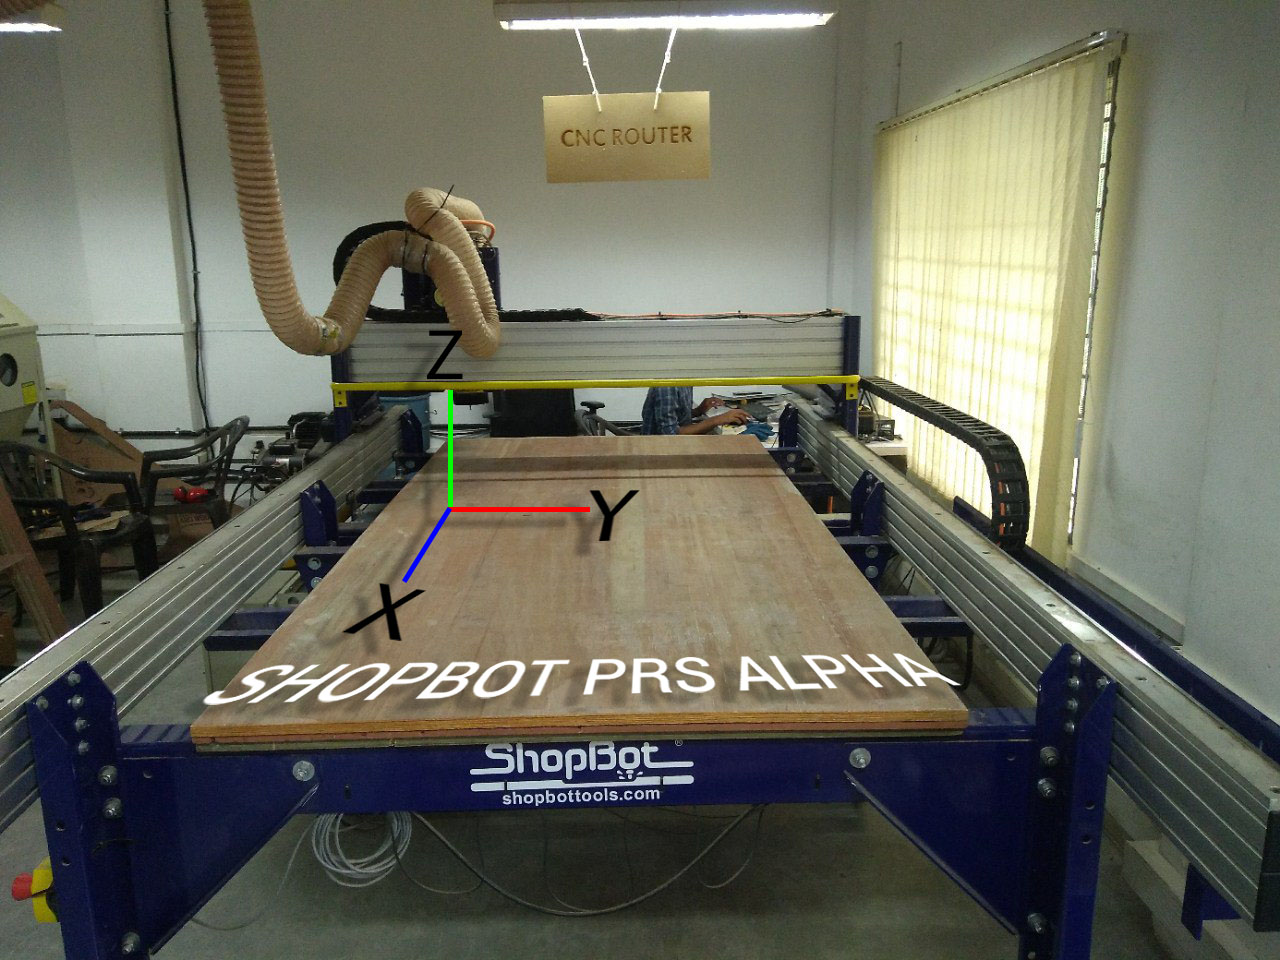
Machine overview
Inorder to use Shopbot CNC Router Machine, First i should learn about the working of the machine and machine parts. The Shopbot PRS Alpha have a 8 x 4 feet bed size (X and Y) and Z axis have 6-Inch movement area.
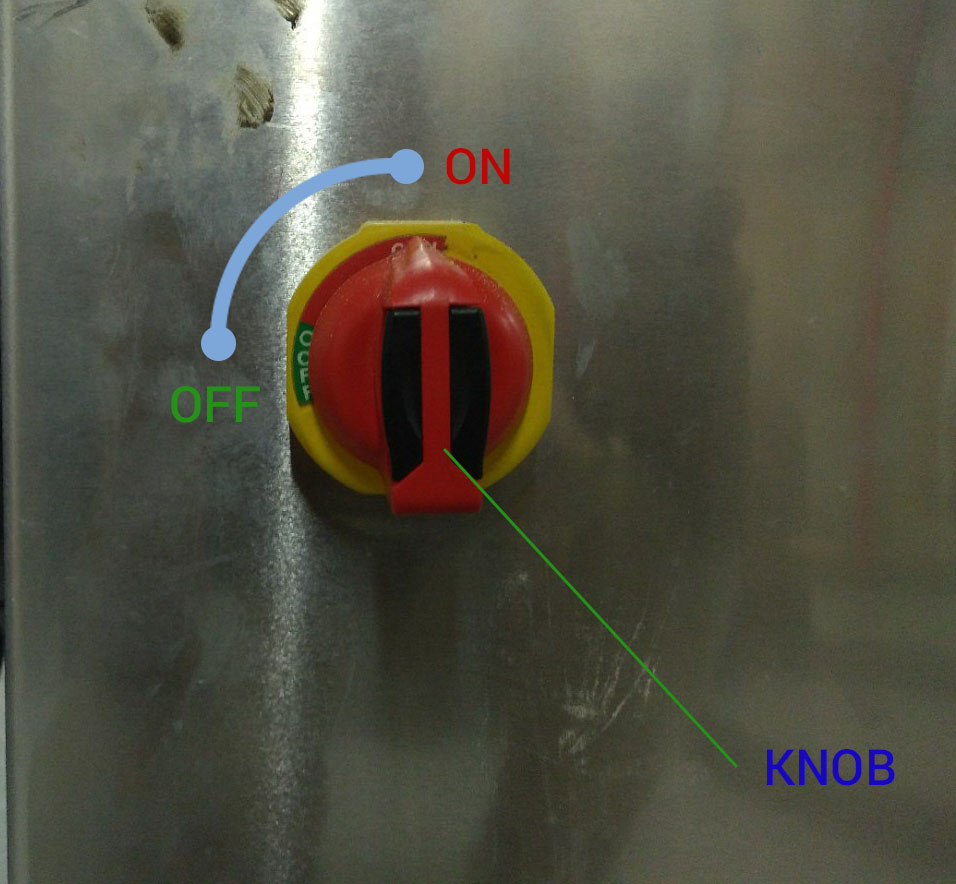
Machine ON/OFF Switch
Every machines does have a ON/OFF switch. You can find the ON/OFF Knob in the right side of the shobot. Just turn the red color knob to ON or OFF the machine
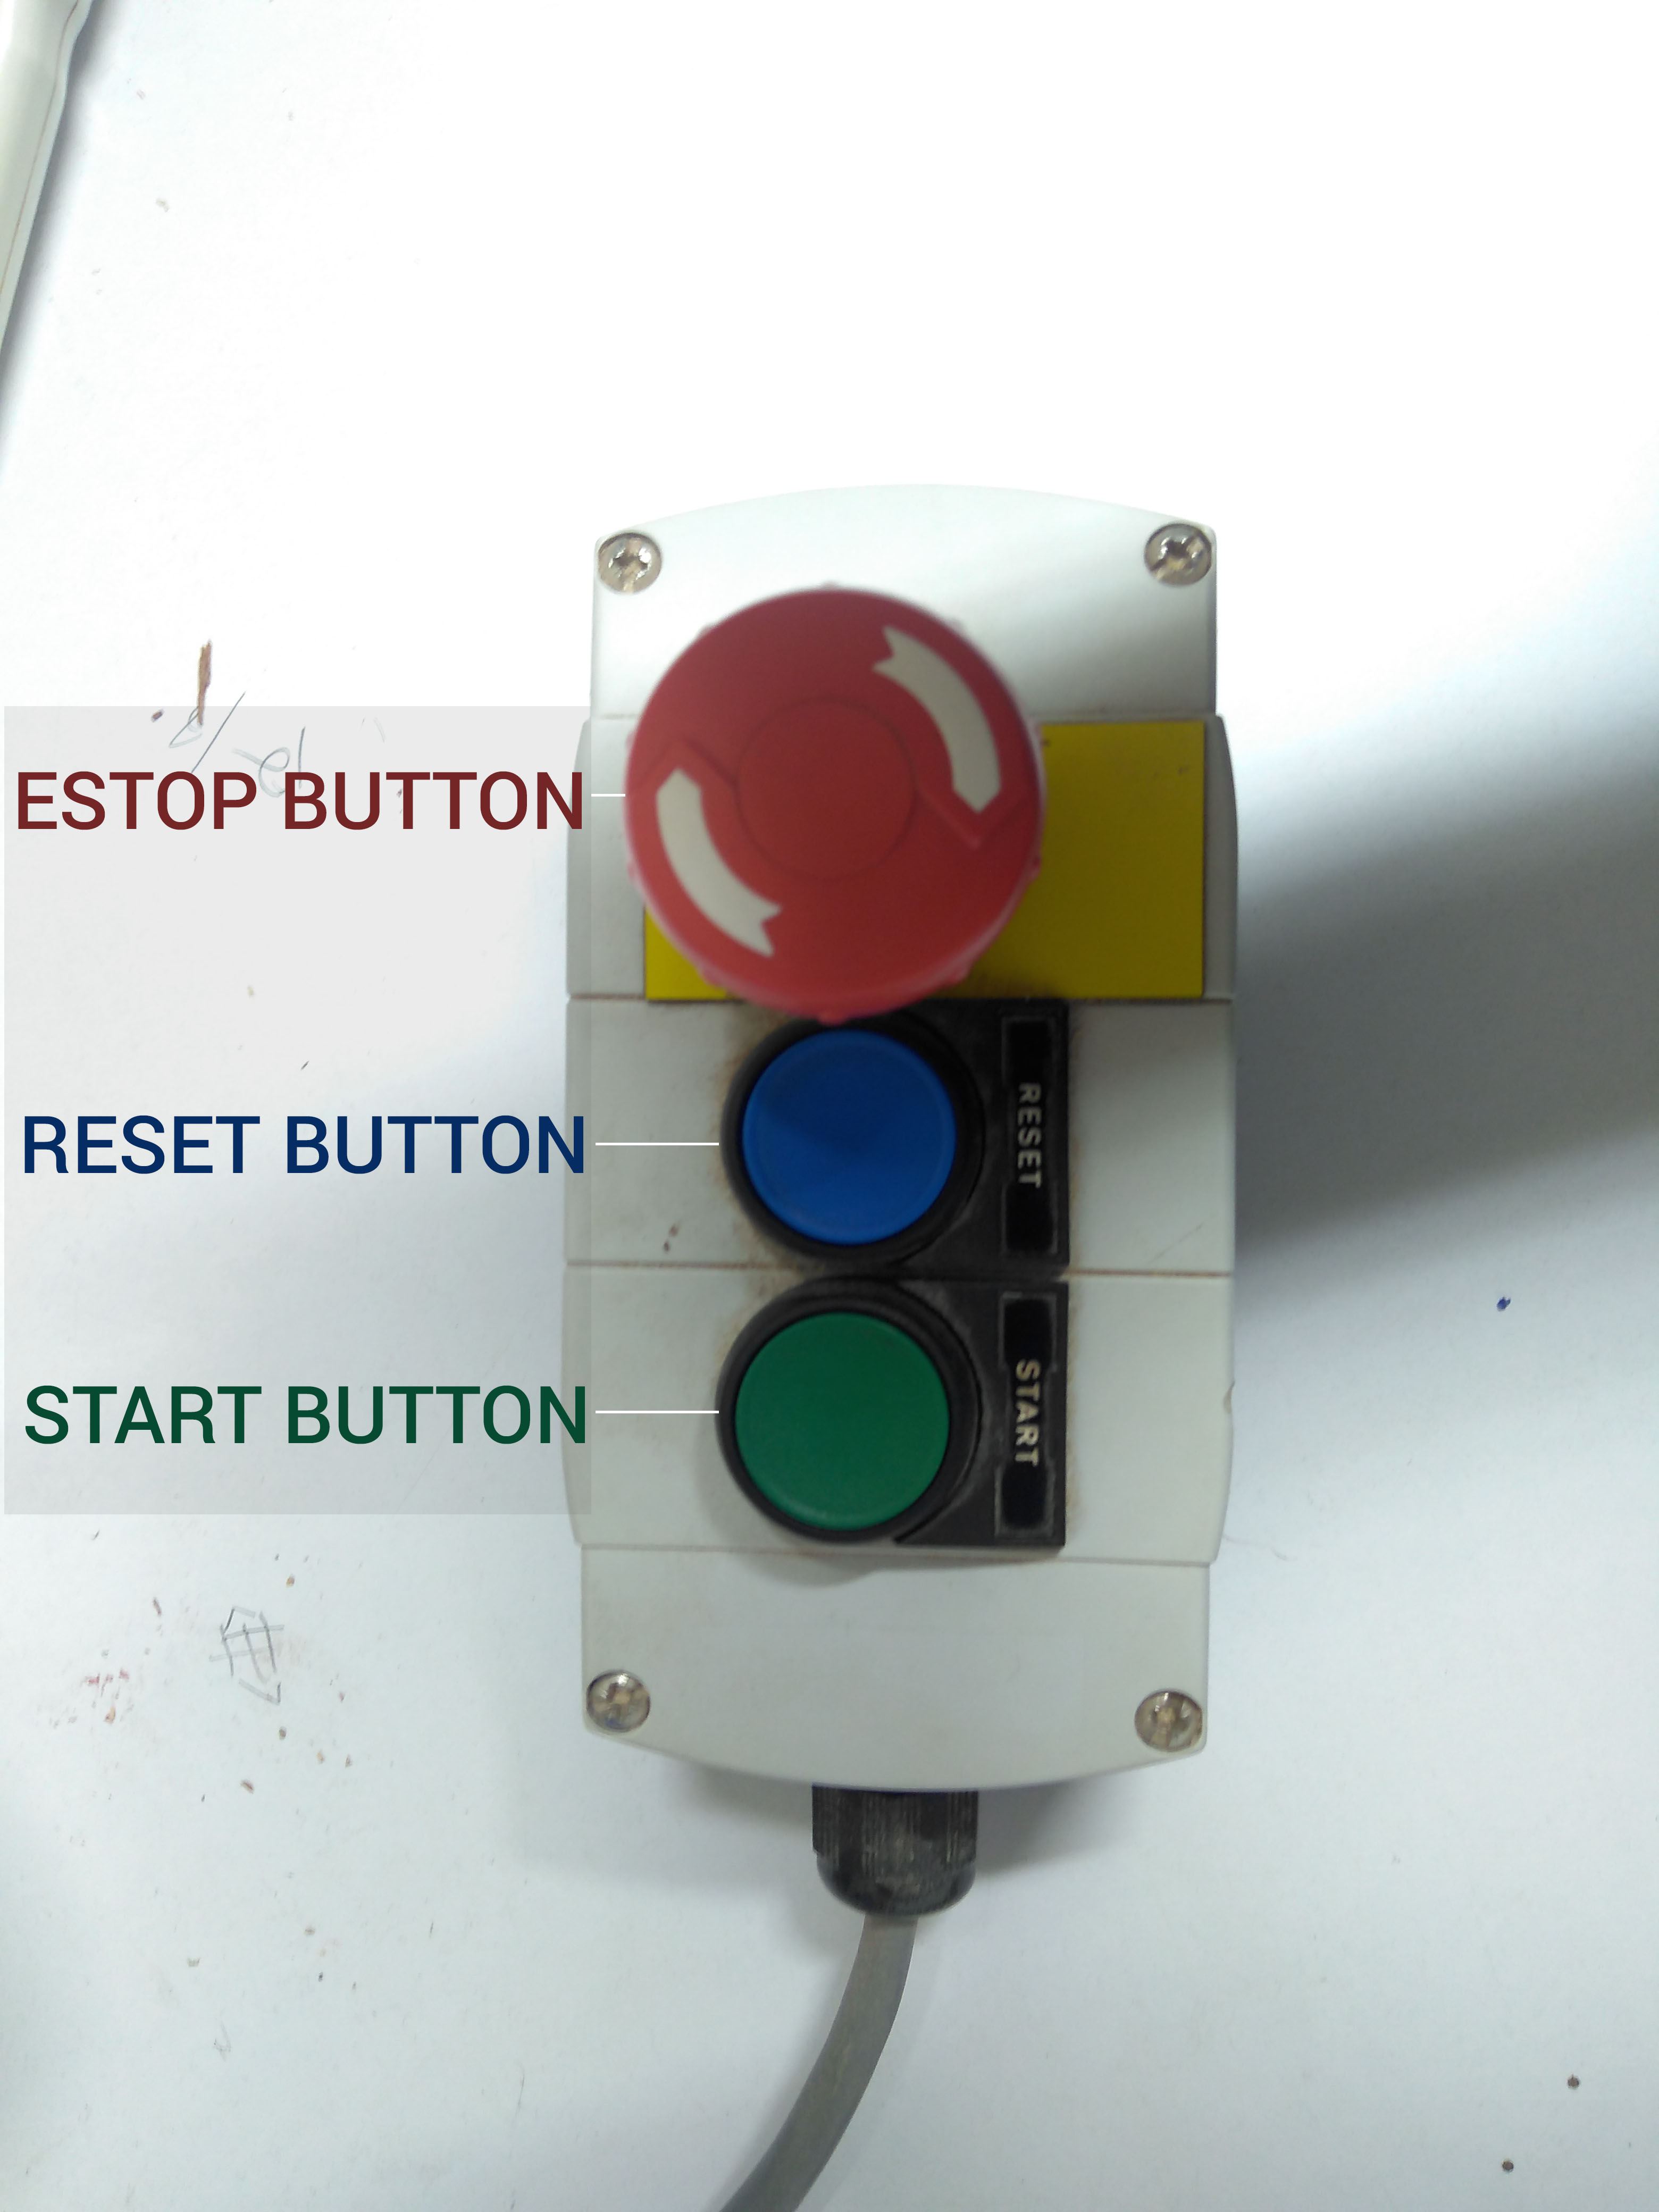
Emergancy Stop Button
While using CNC machines, Danegerous actions comes without any expectations. Wrong moves lead injuries or other serious problems and damages. We can't avoid them fully because we are working with machines. Shopbot comes with two Emergancy stop button to avoid dangers and wrong moves. One is comes along with two other push button for Reset the machine and start spindle. The other is only a emergency button. The Emergancy button is a red push button. Ensure the two emergancy STOP switches are in the OFF position by rotating the RED STOP button on the COUNTER CLOCKWISE.
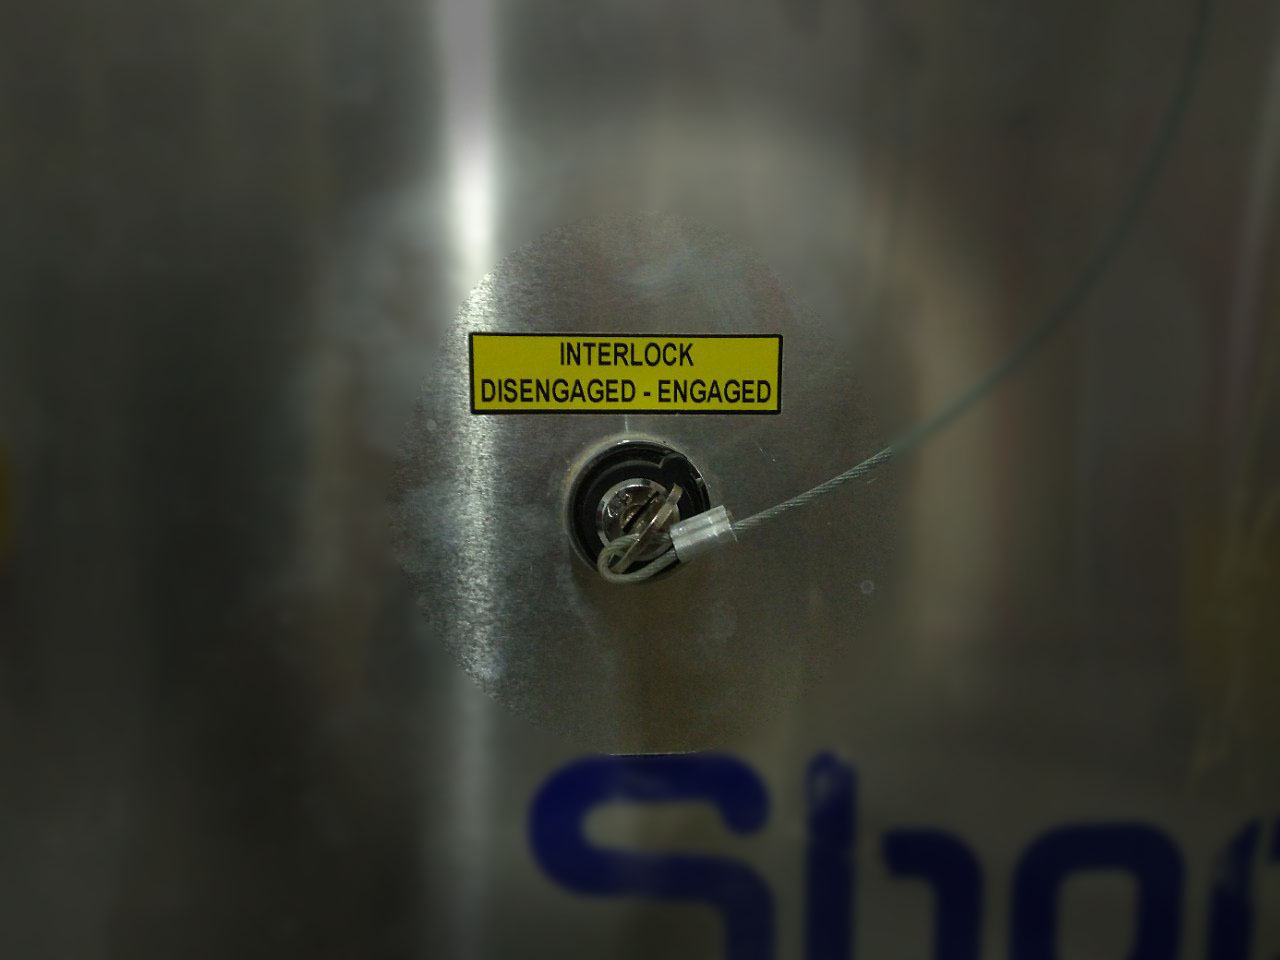
Interlock Key
Inorder to start the spindle, first you need to insert the key into the Interlocks keyhole and engage it. The Interlock key is located near to the ON/OFF button.
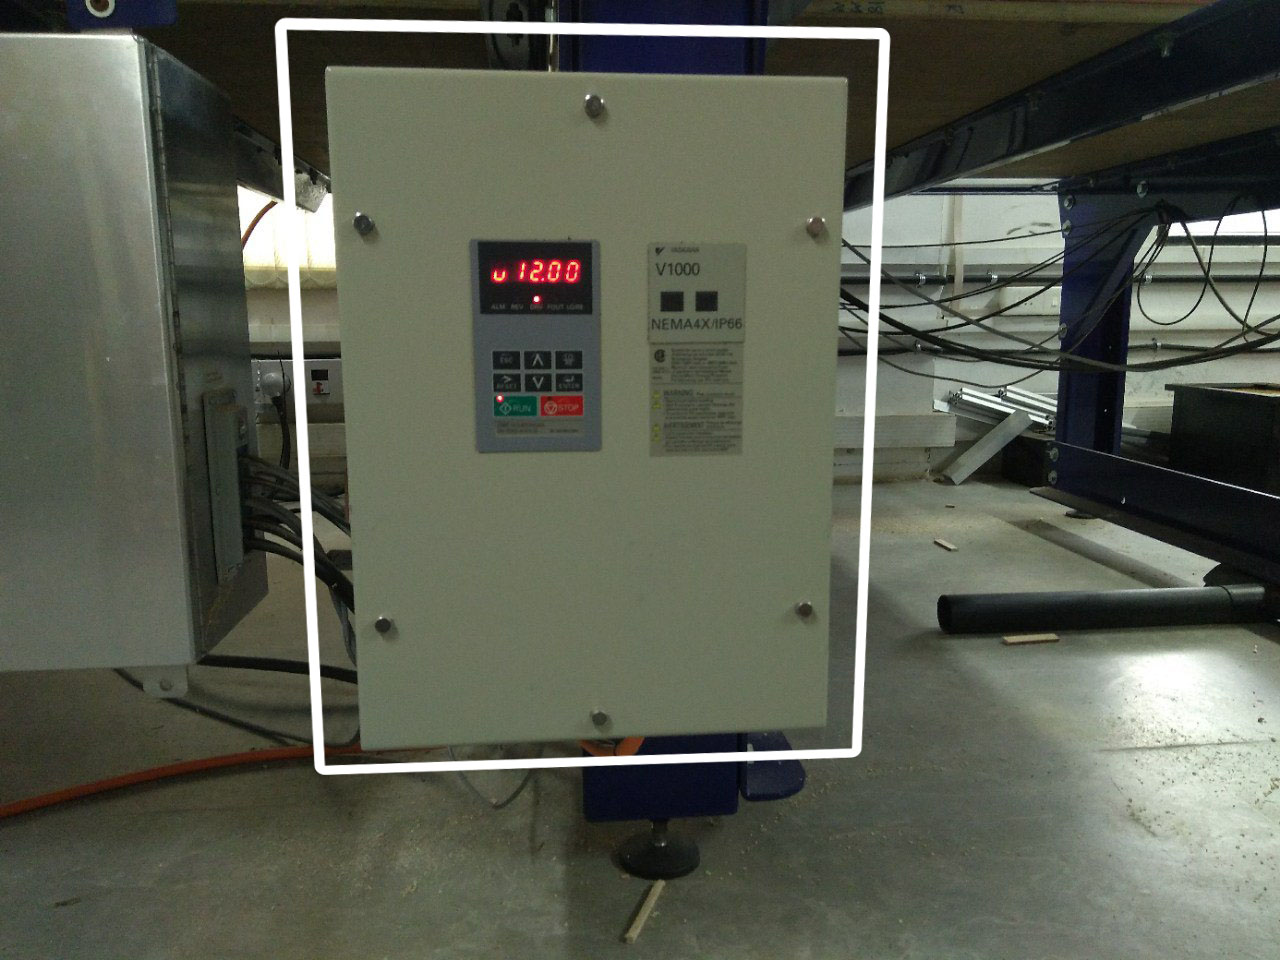
Spindle Control Box
The spindle RPM control board allows you to change the spindle rpm using the control software. The controller is wired into Variable Frequency Drive and is connected to PC via a USB. We can manually adjust the spindle speed by pressing the Up & Down buttons in the control board display.
Bit Specifications and Overview
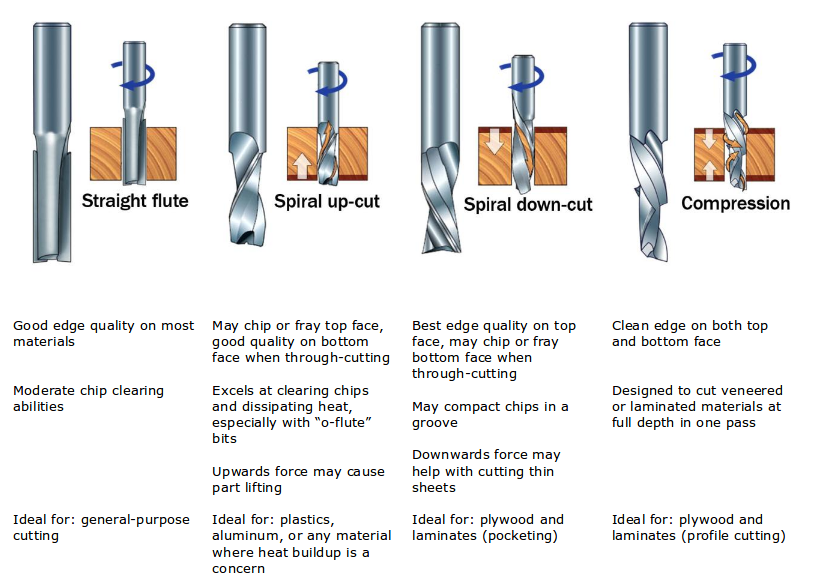
Different types of bits are available in the market for CNC. its depends on material and carving methods. Router bits are used in Shopbot machines. These are made from variety of materials such as solid carbide, carbide-tipped steel, and high-speed steel. Mainly four basic flute types are mainly used Straight, spiral up-cut, spiral down-cut, and compression.
Drill Bits and End Mills
A drill bit should need to cut straight into the material. it does have teeth at the tip. But an End mill will cut into the sides also, that means it does have a cutting edge spiraling all the way up to the flute.

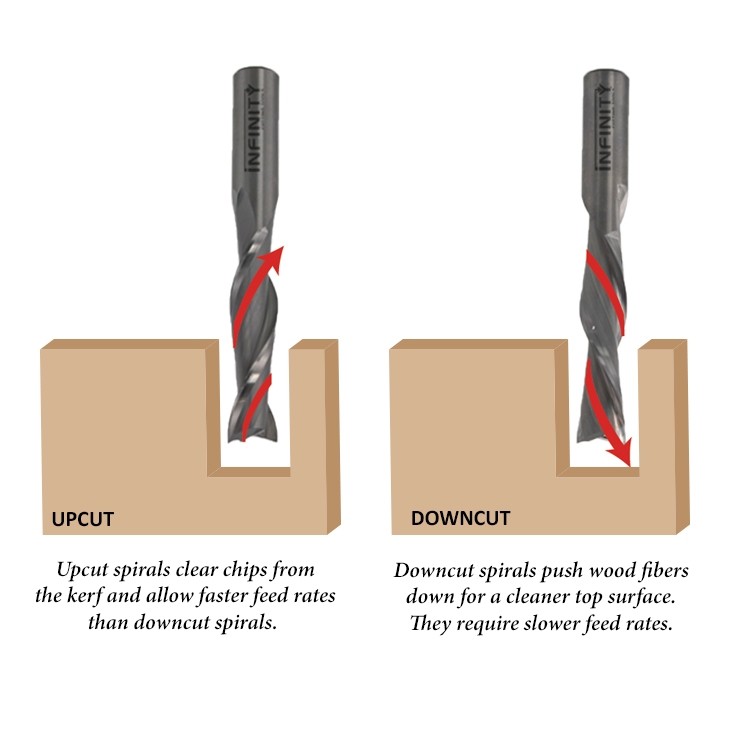
Upcut and Down Cut
A Upcut type end mill bit have the teeth on the flute will be point upwards. The end mill is cutting and milling out the material through the flute. This is good for depth cuttings. But it should also have a bad face, it is make bad surface finish on the top surface.
Downcut end mill have teeths downward on the flute. The end mill will cut and push forward the material into the stock. This will give us good surface finish on the top side But it is not efficient in carving.
Flat End and Ball End
The flat end bits are good at flatening surface profile on the stock, it is best for flateing materials. Ball end bits good for curved surfaces and it makes smooth curved finish while cutting cavities and inside cuts. They are mainly used for finishing cut outs
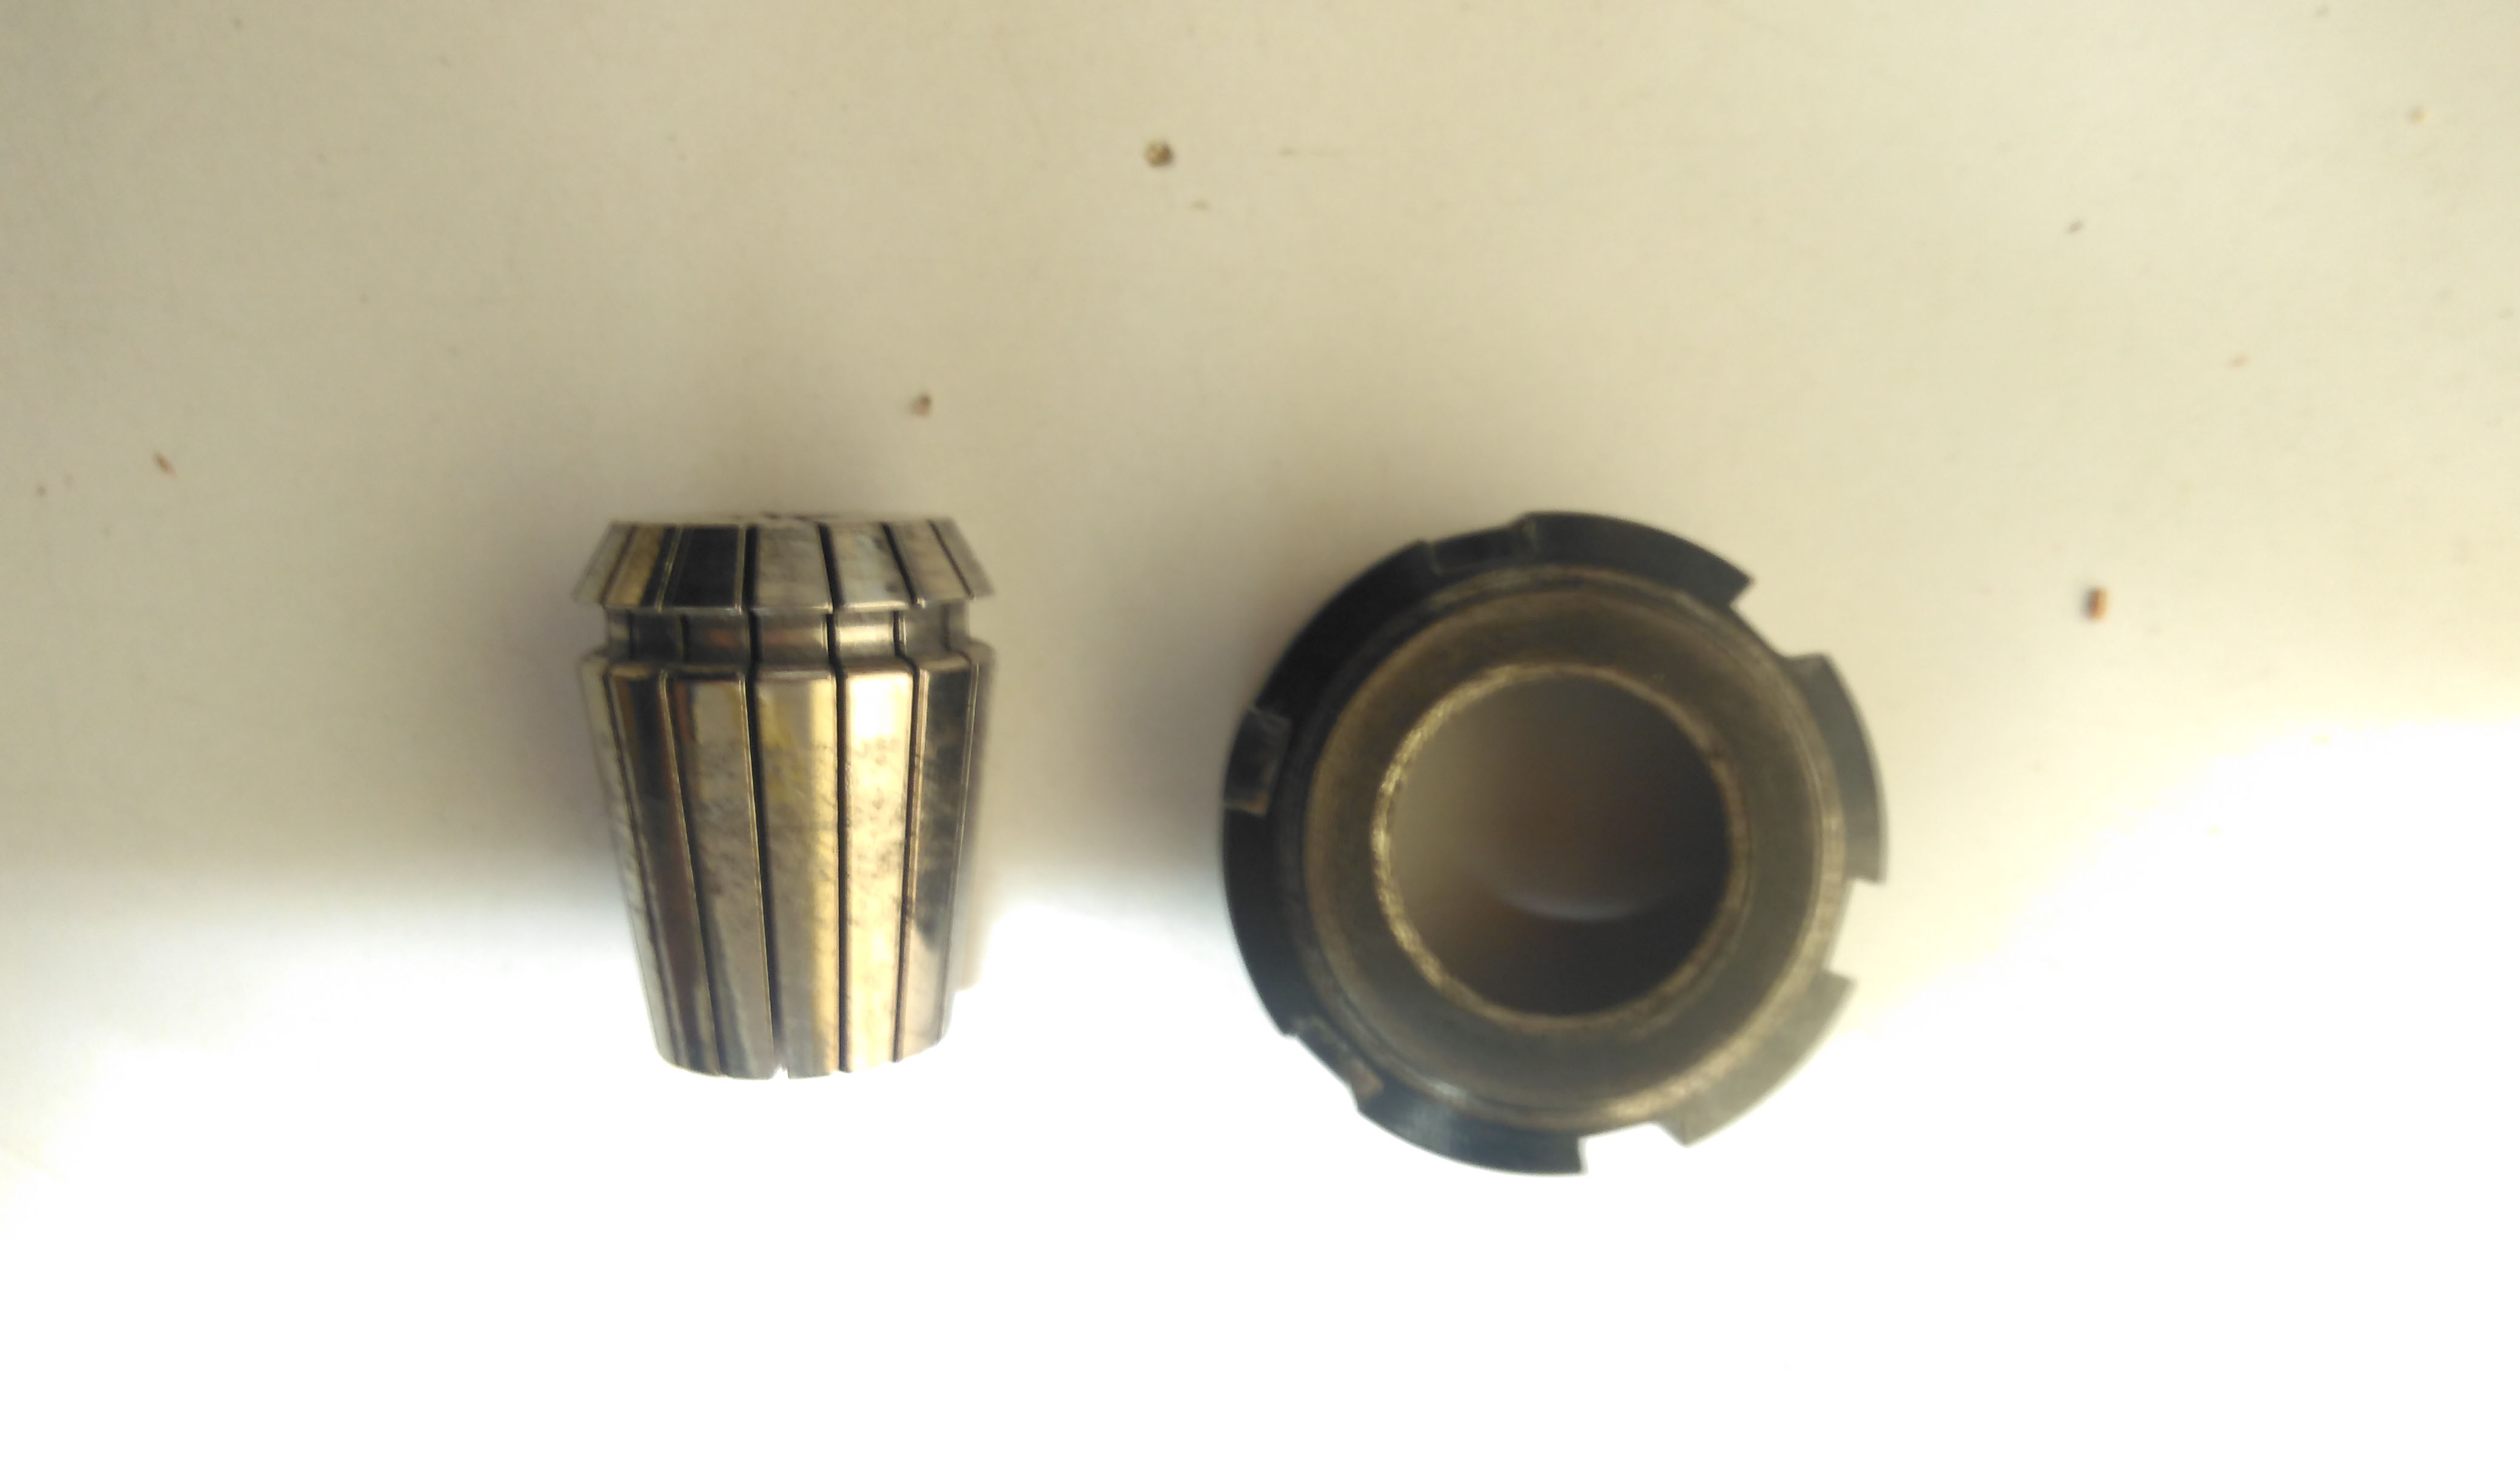
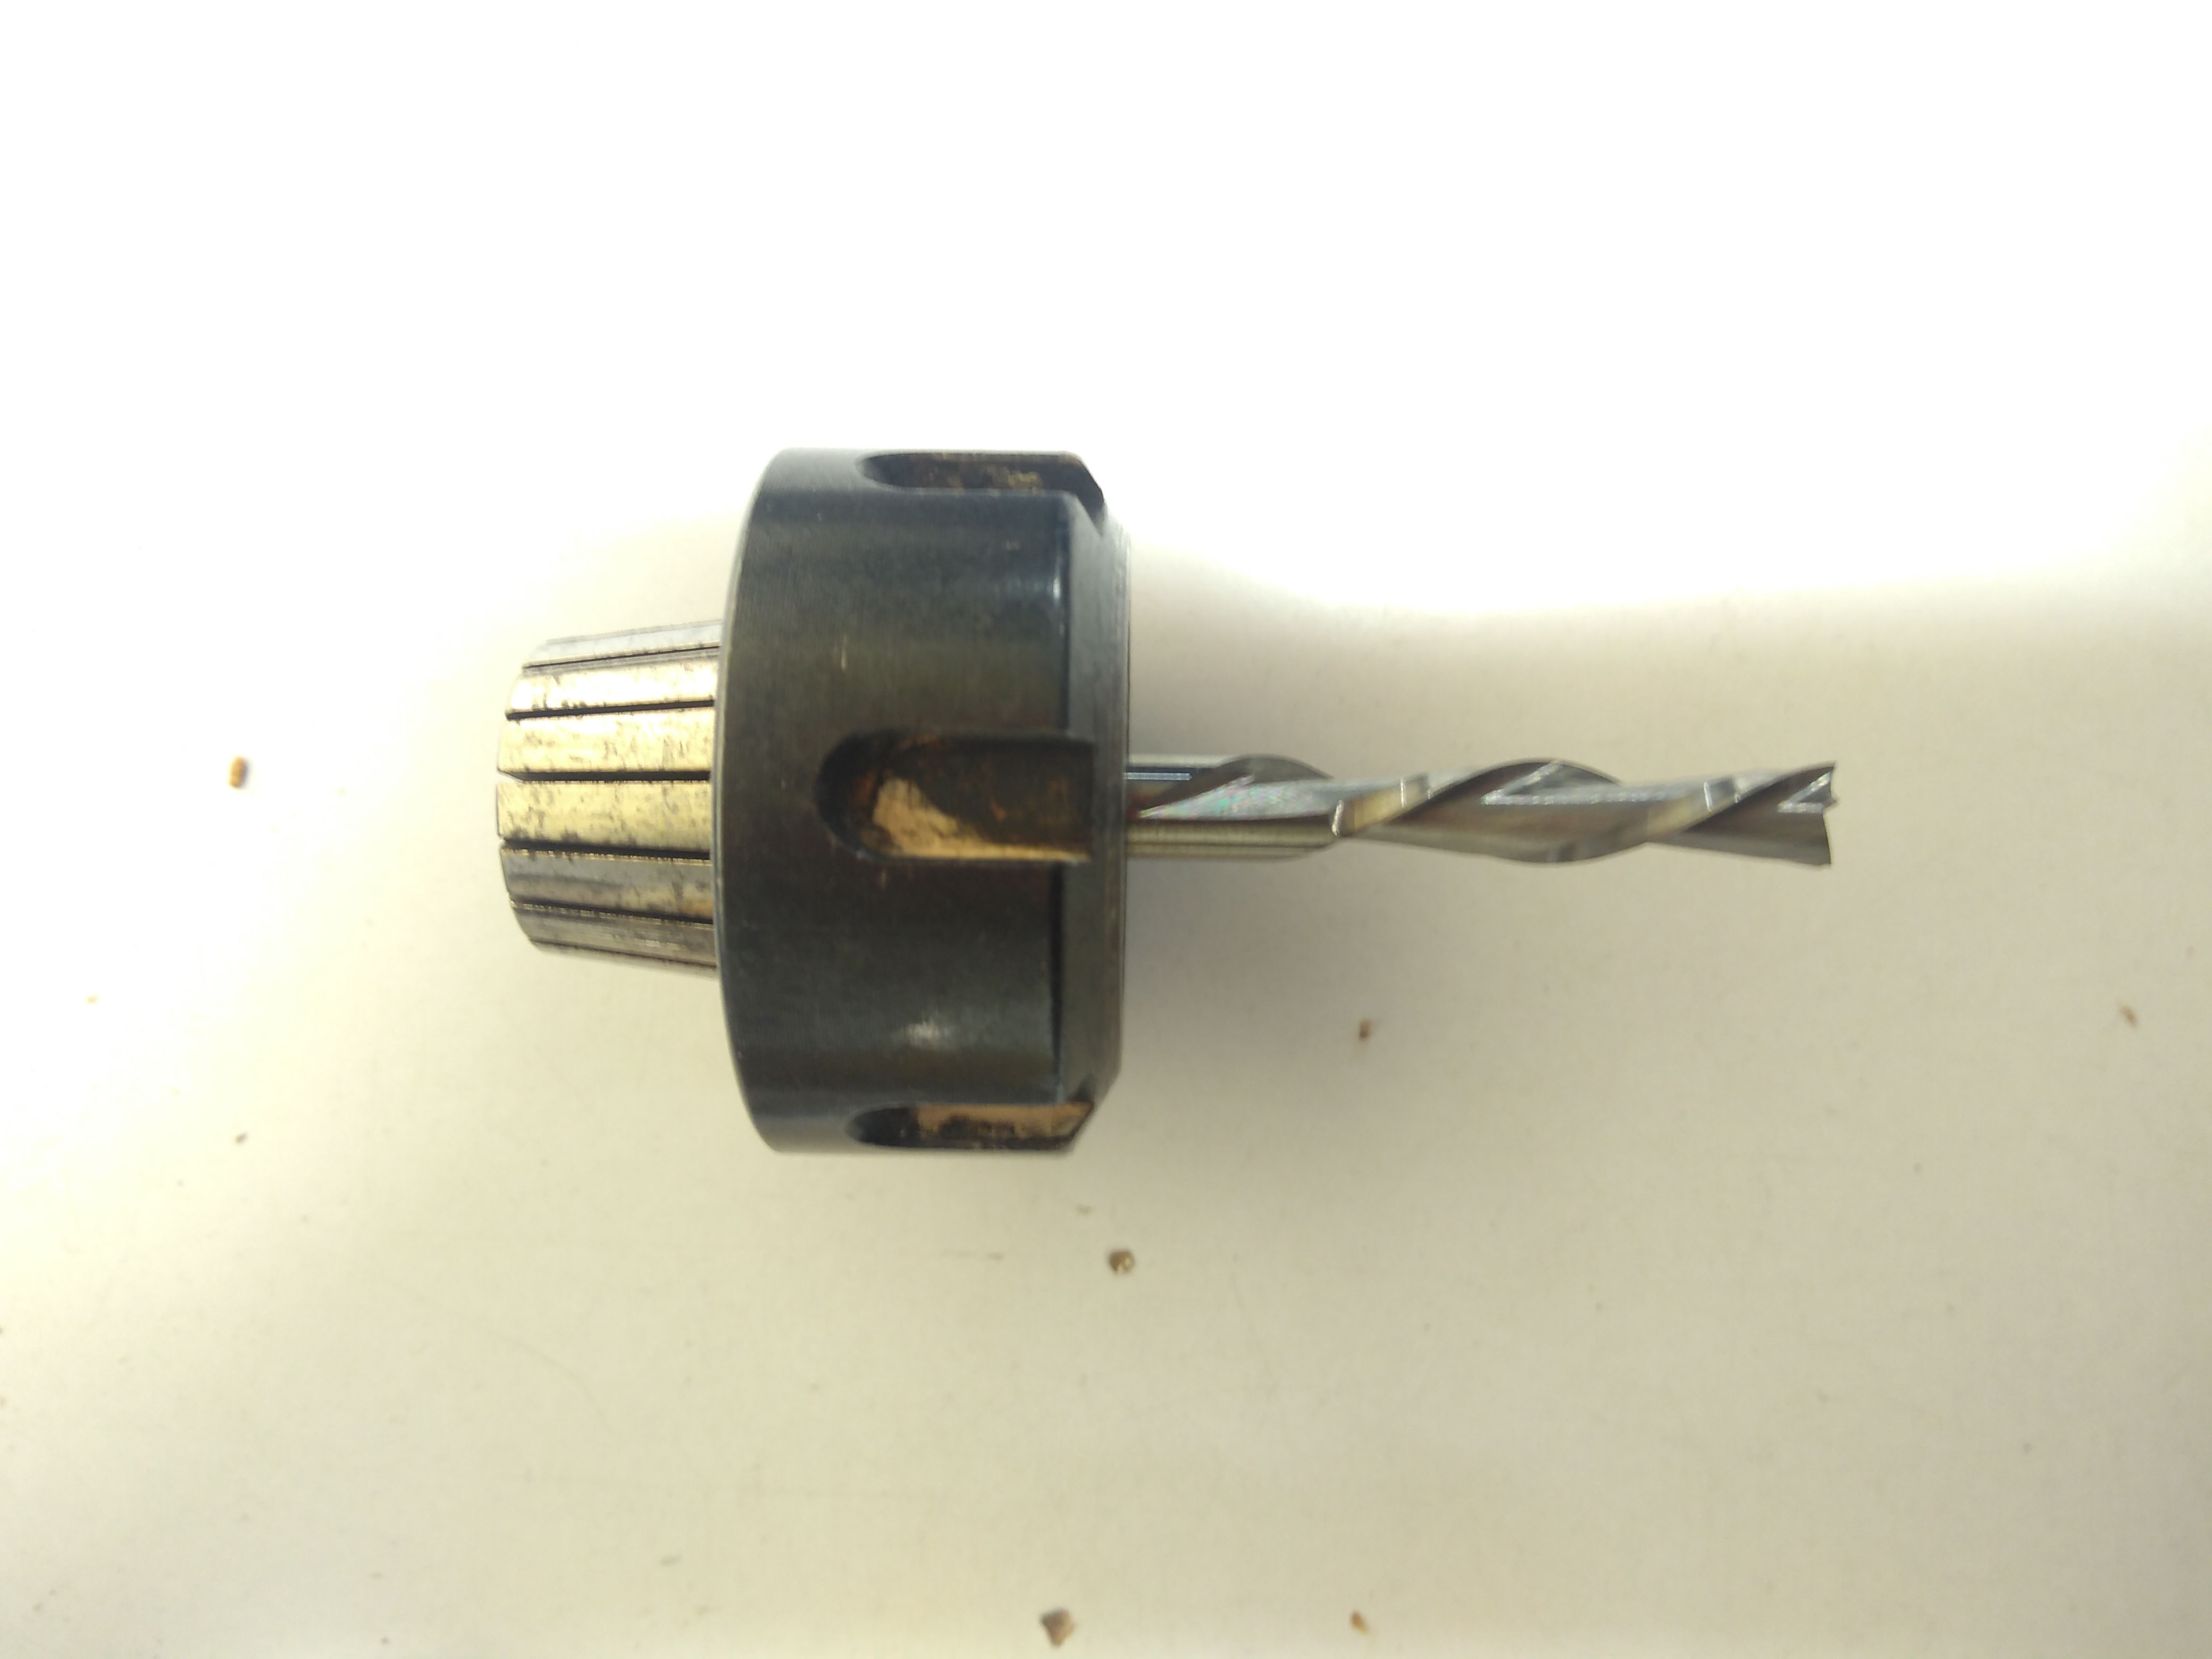
Collets and Cover Nuts
A collet is a subtype of chuck that forms a collar around an object to be held and exerts a strong clamping force on the object when it is tightened. It may be used to hold a workpiece or a tool. We are using ER25 collets, ER collets are slotted (alternately) from both ends and therefore compress onto the cutter along the whole length of the collet when tightened. This not only provides a better grip on the cutter shank but also allows some variation (typically 1mm) in shank sizes that may be used in a single collet. The smaller size collets are best used to hold cutters no more than 0.5mm below the nominal size. Collets are inserted into the covernut.
Group Assignment: Test Cut
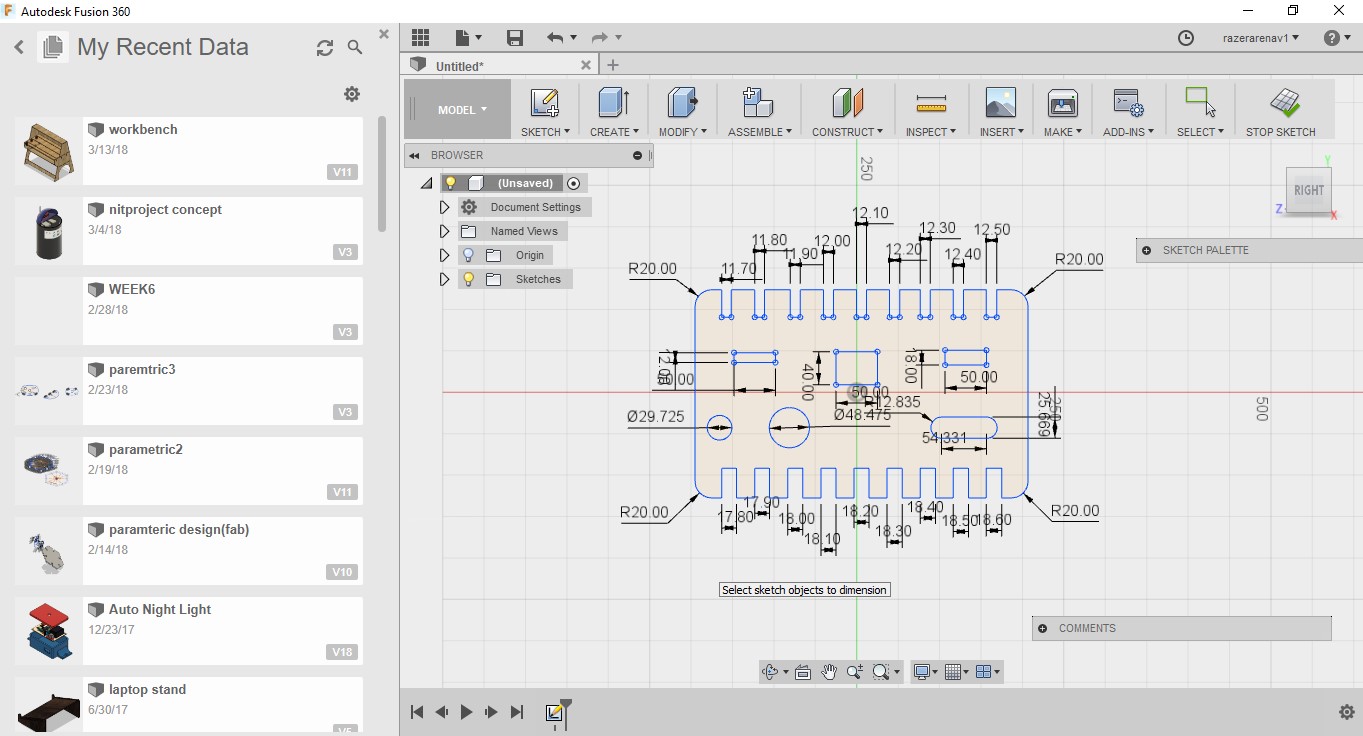
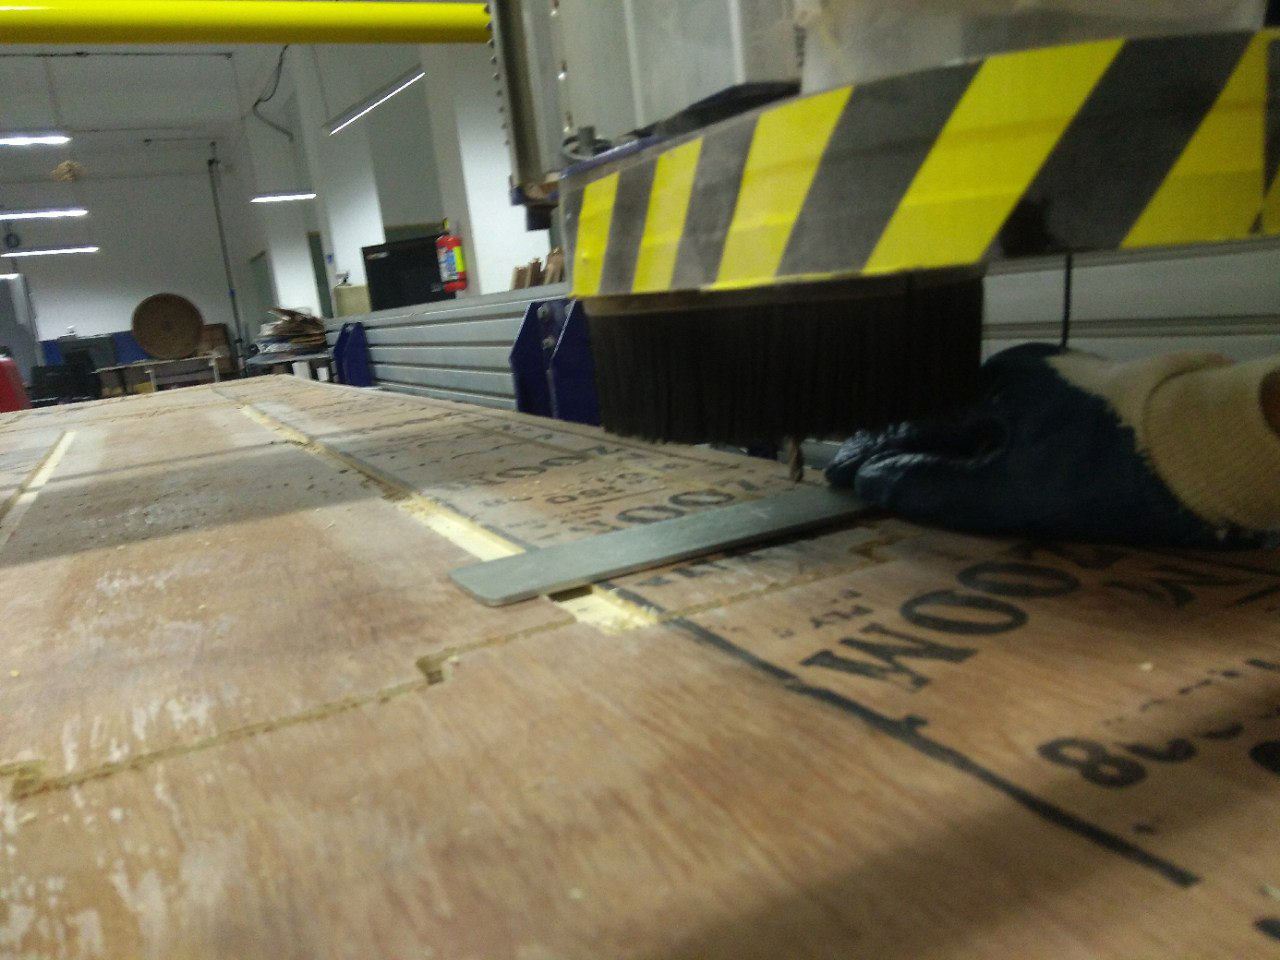
In this week group assignement is, We need to test cut a design to understand about the test runout, alignment, speeds, feeds, and toolpaths for our machine. everyone is involved in designing and cuting out the design. Here is the screenshot of the design below.
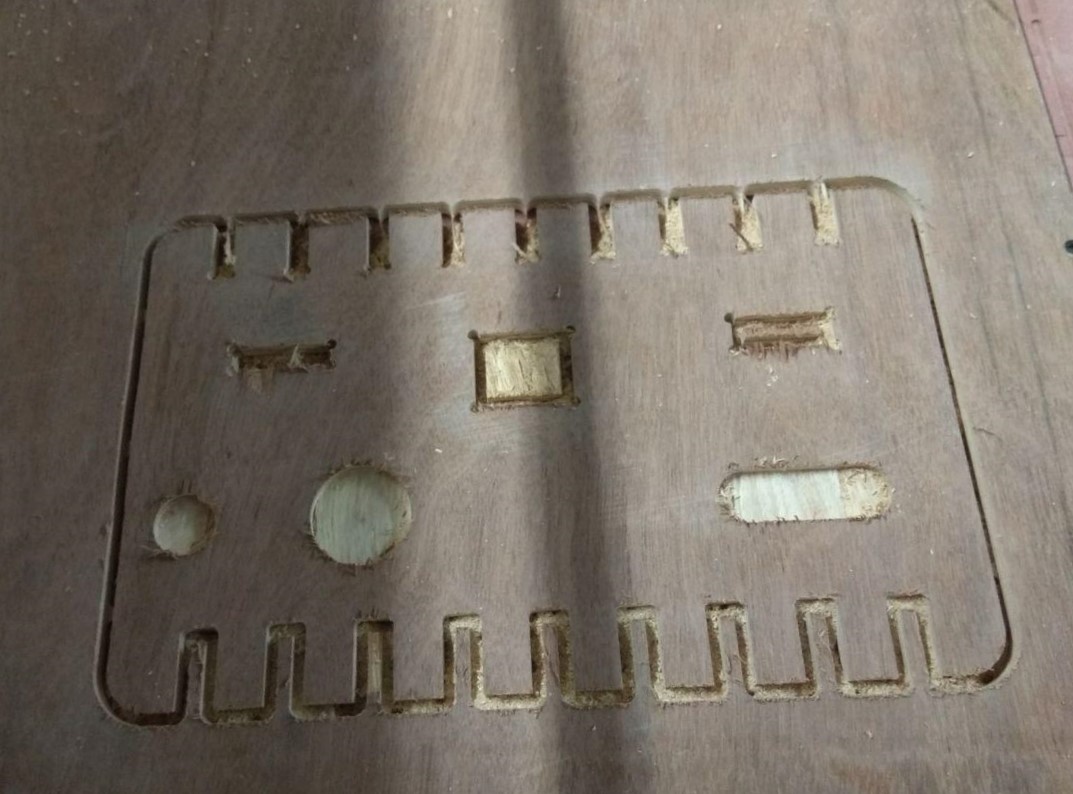
We started our cutting our design with a 6mm upcut bit. Eveyone are so carefull while giving commands to shopbot. Two of our guys are ready to press ESTOP button if anything went wrong. other two guys are given the seetings and commands to the CNC machine through the Shopbot software. others are take care of materials axis and other things.


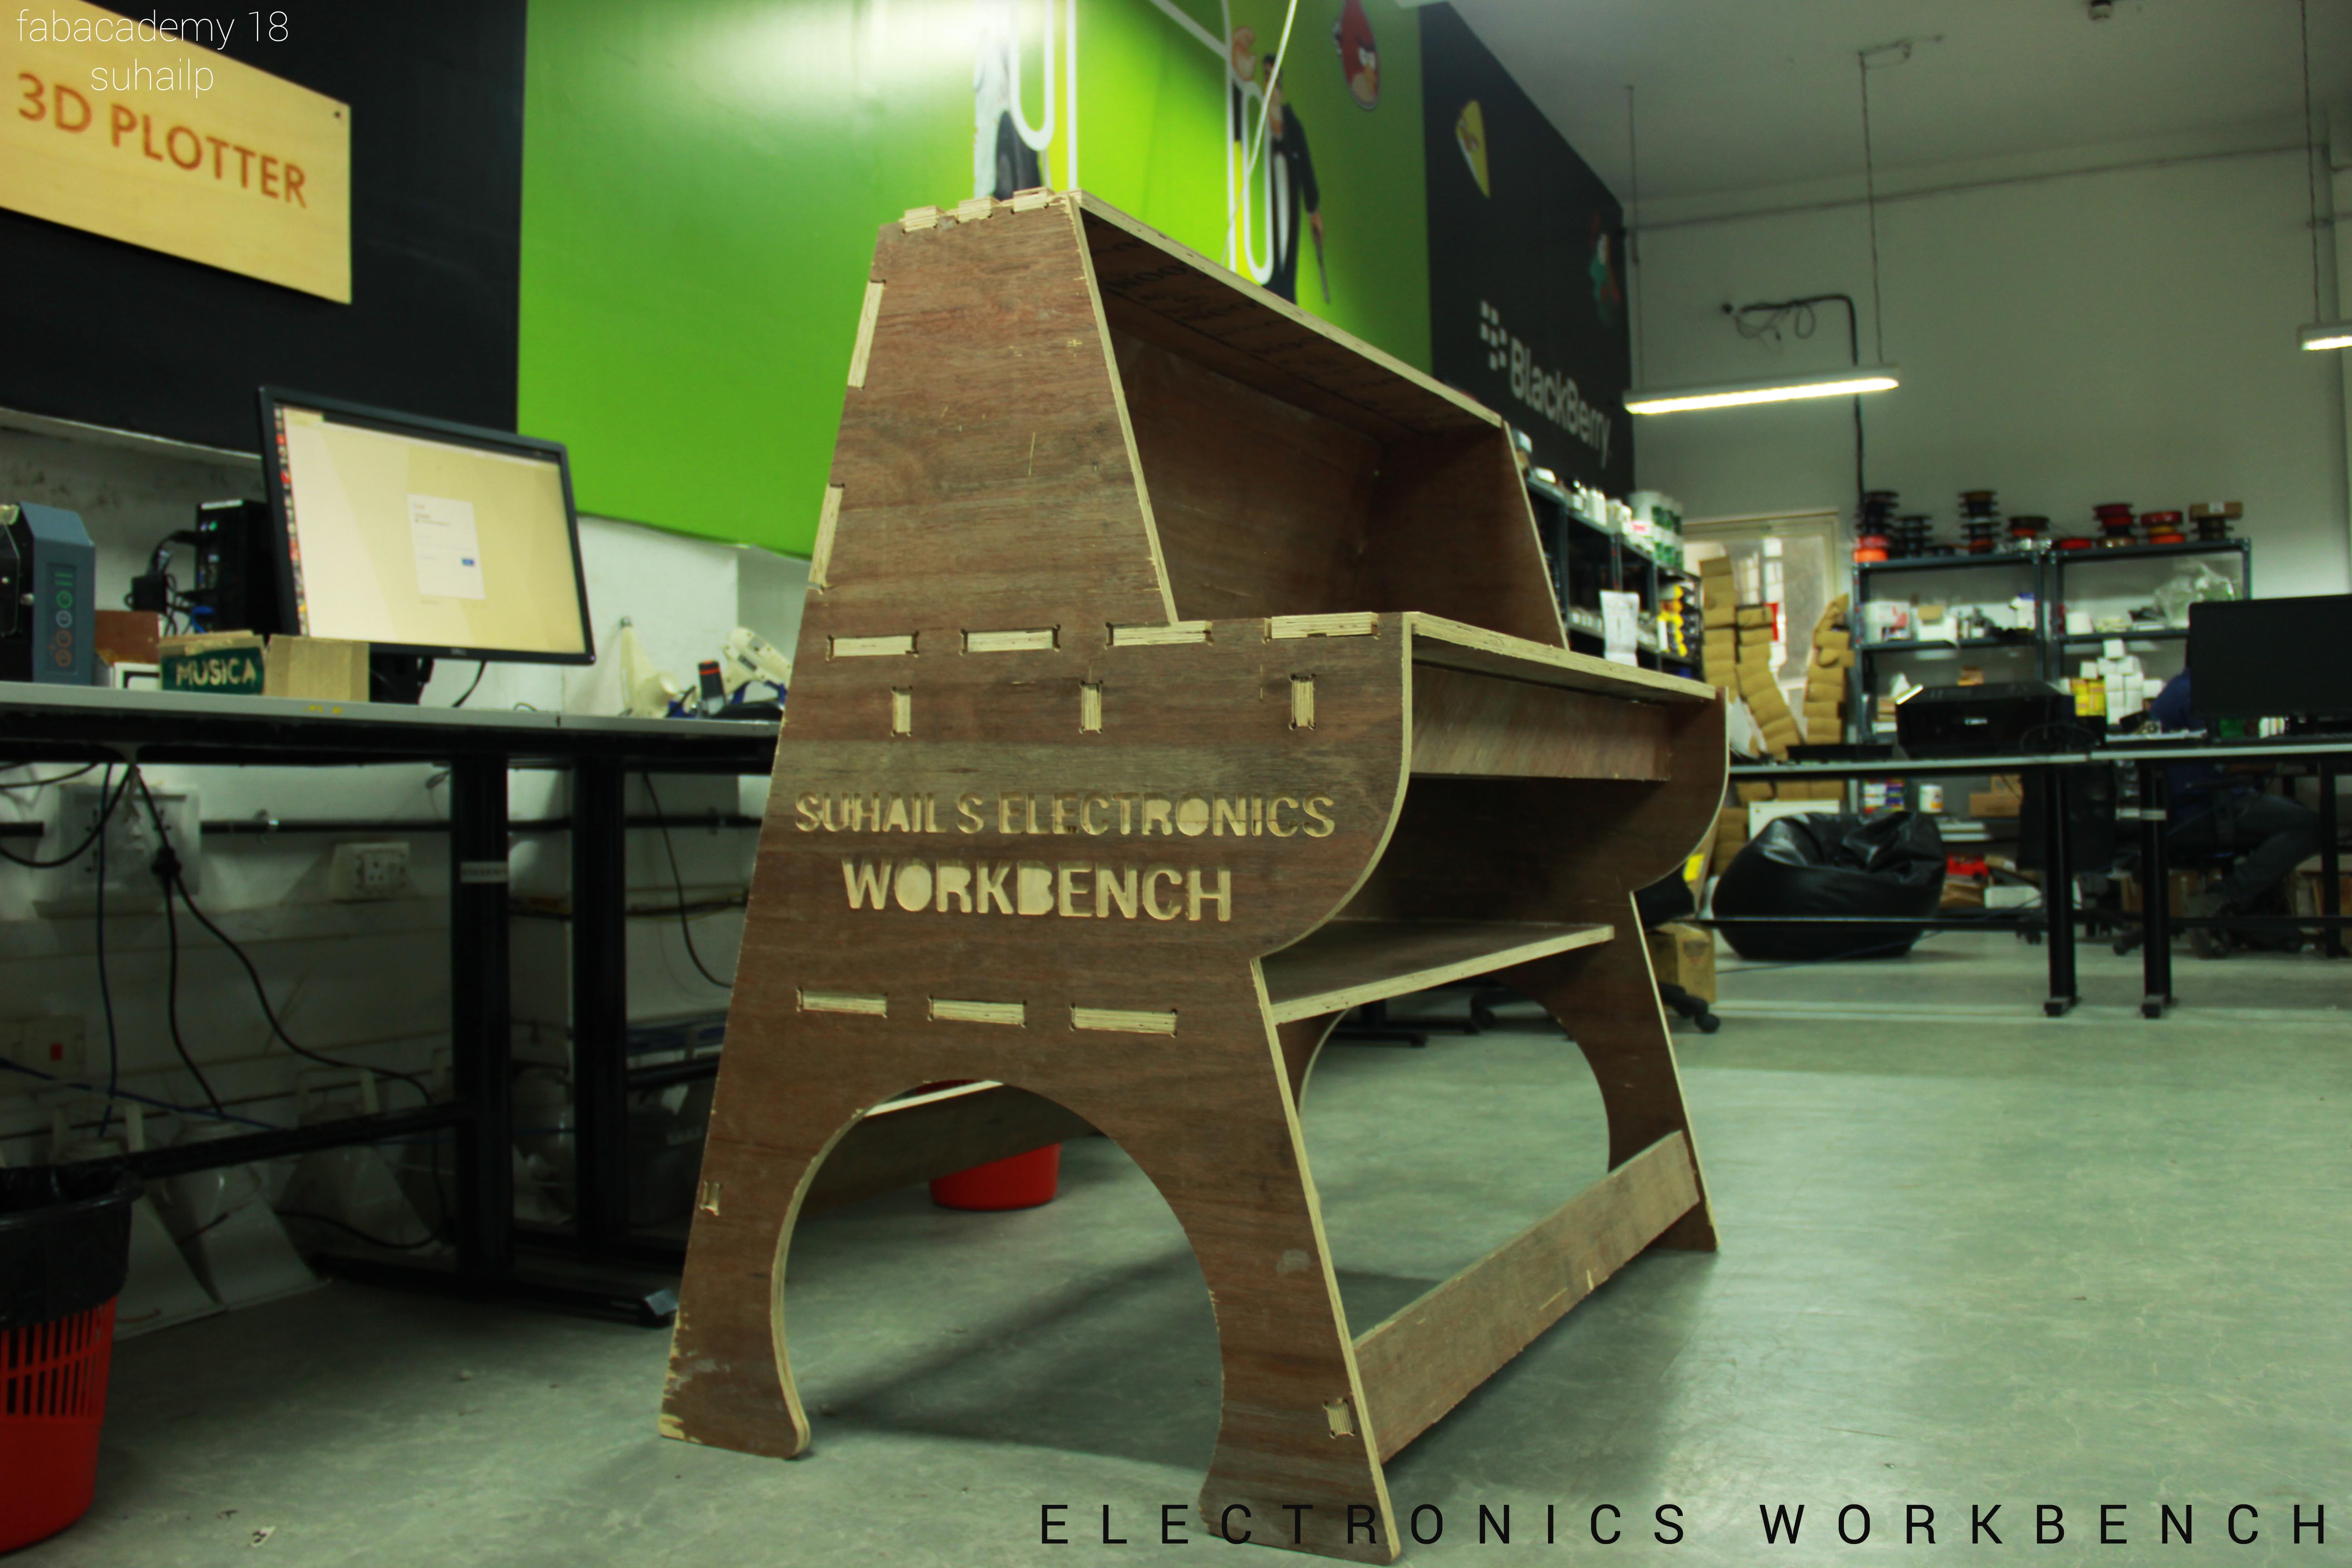
Individual Assignment : Make Something Big
This week individual project is to make something big using CNC router machine. I decided to design a electronics workbench for our lab to to rough electronics works. I designed the table in fusion 360. Then i coutout all the parts using the CNC machine.
The Designing Process
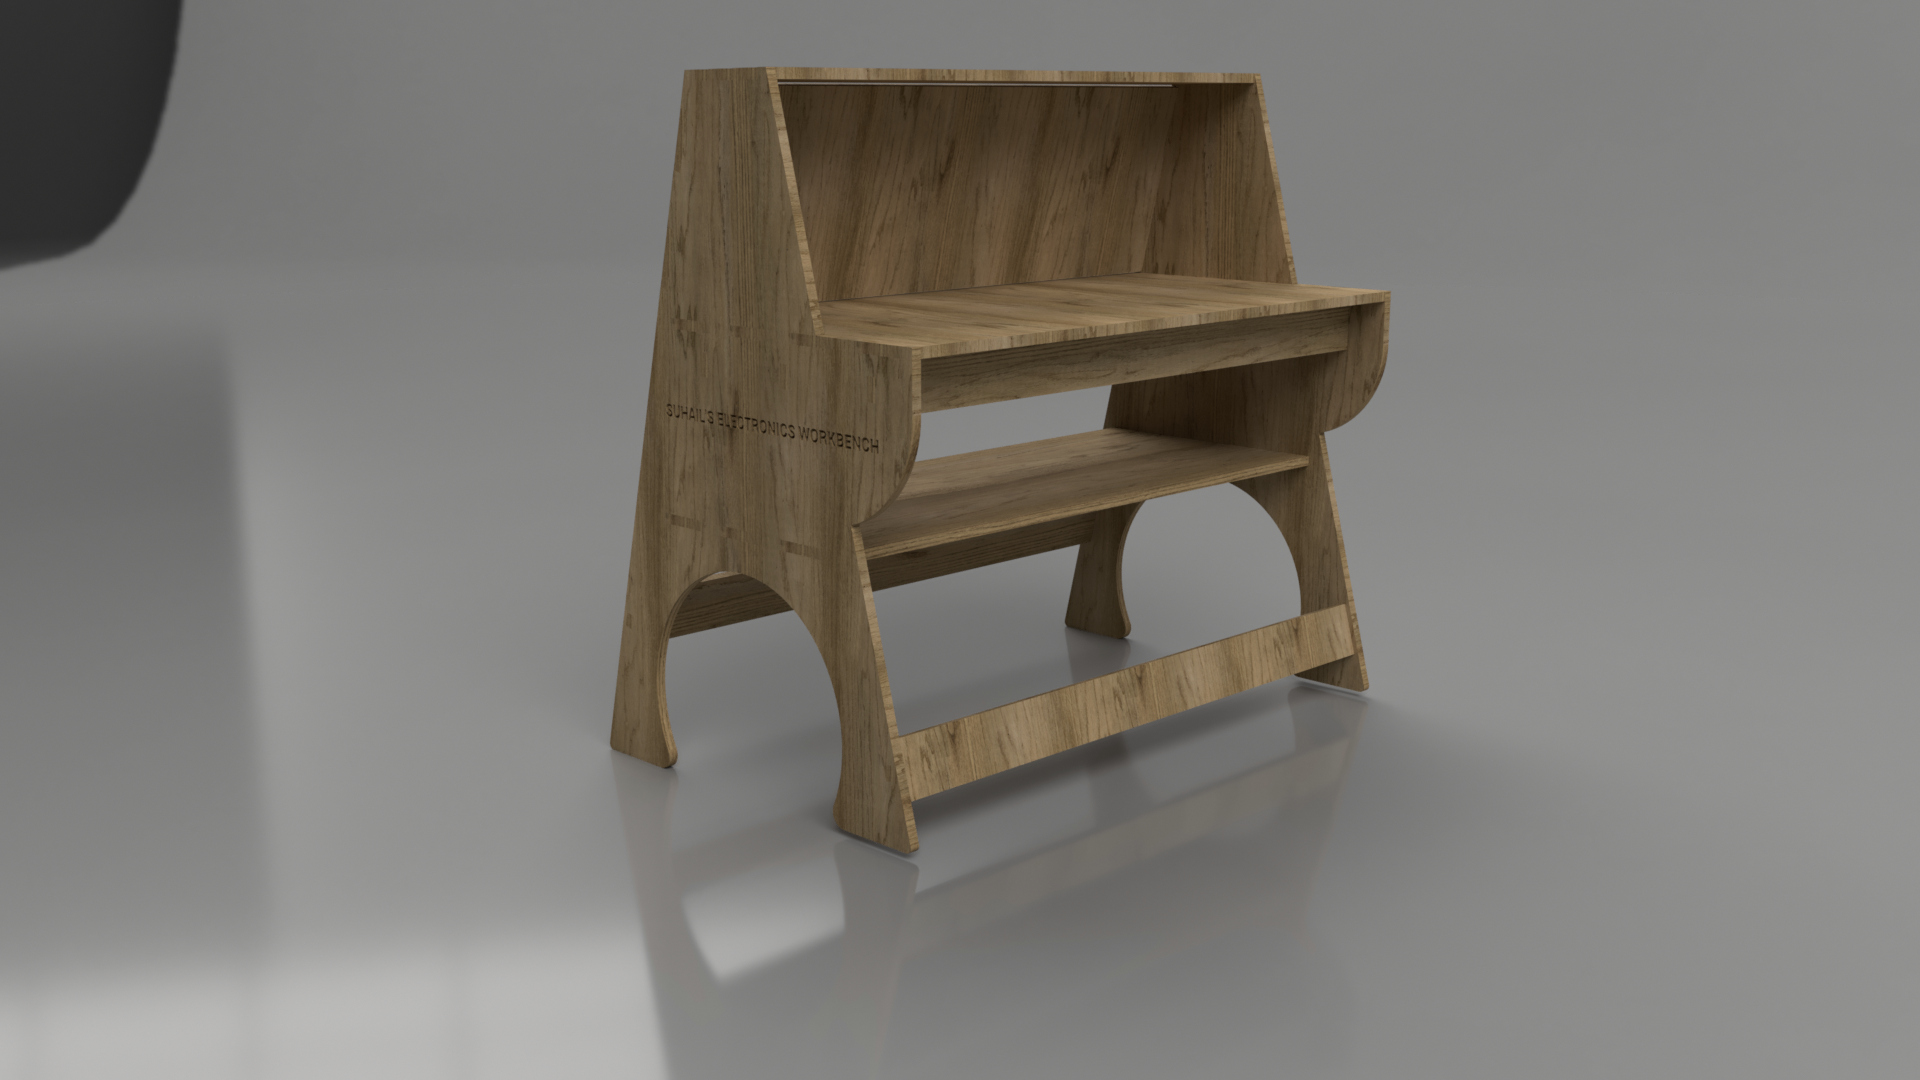
I used to fusion 360 to design the table. First i opened the fusion 360 then started to draw the sketch. i need to carefull with the dimensions of the design. if any of the dimension is wrong, the total design will ruine. to avoid this kind of mistakes i extruded the sketches and assembled the 3D parts in fusion 360. I used a 18mm Plywood as material. The material is not a good quality one so, may be i need to compromise something while i physically asseble the parts after cut out the design using CNC.
Rendered Image
Laser Cutting a Scale Down Design
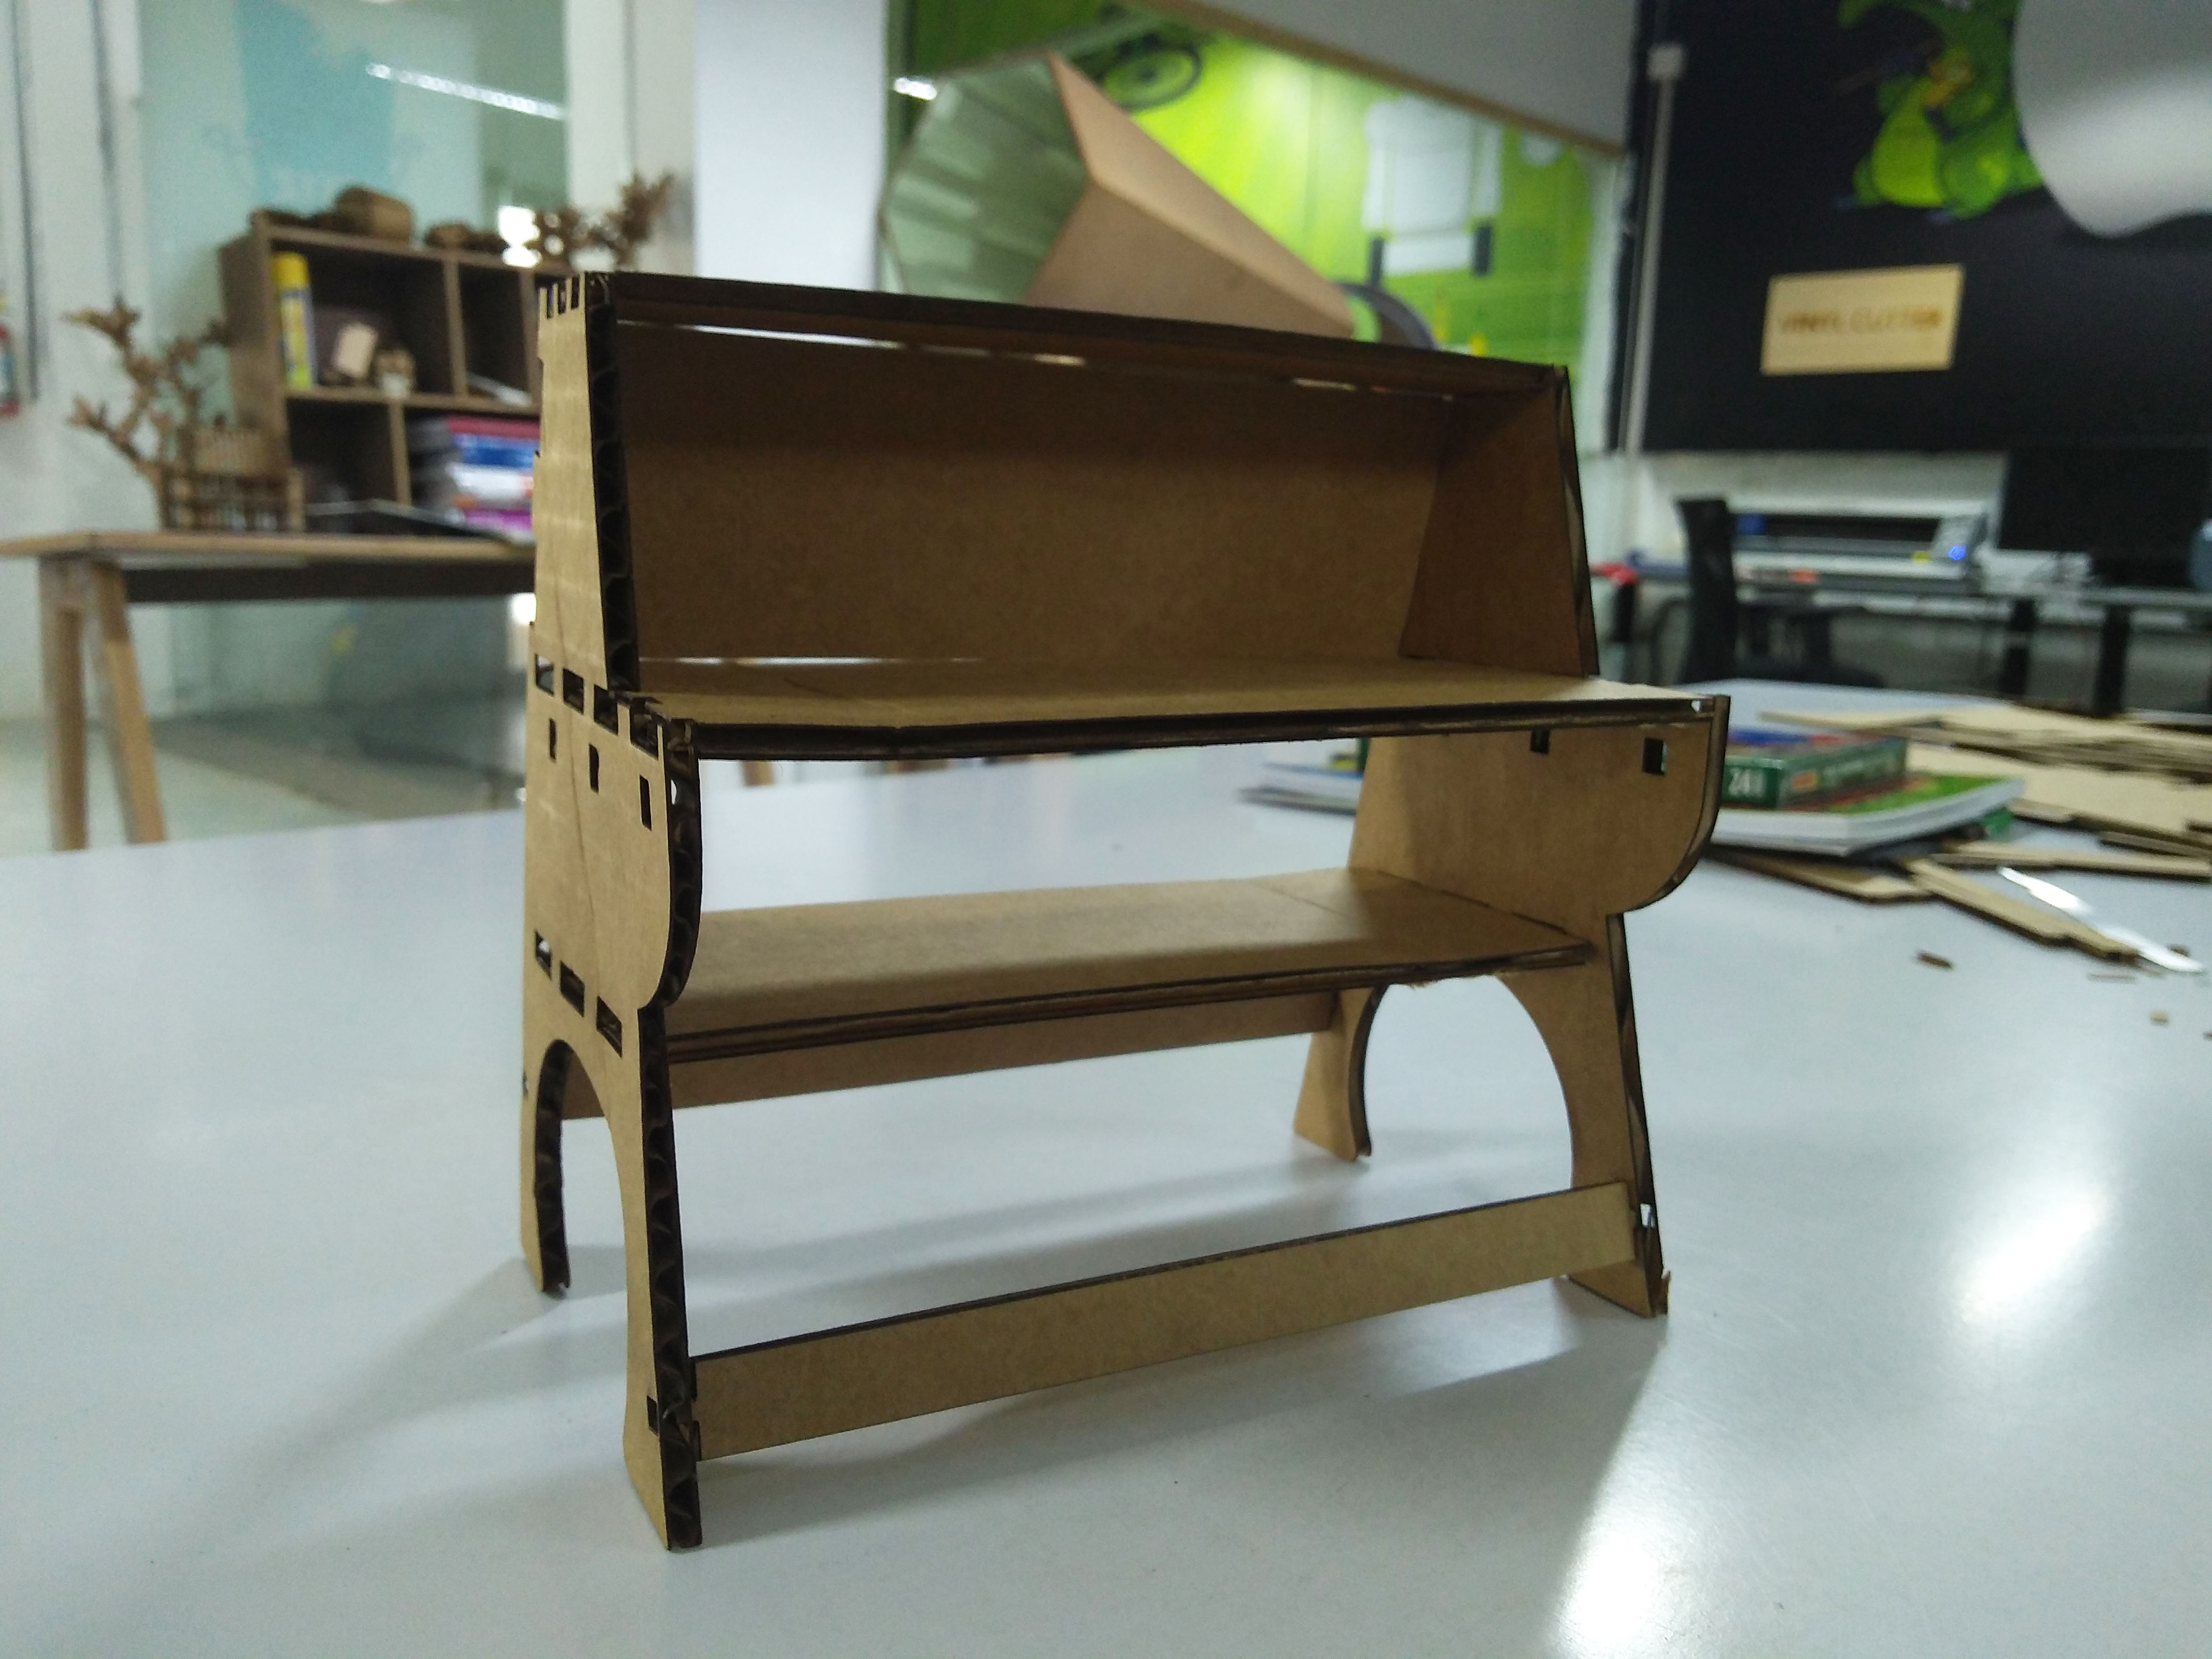
Before cutting the actual design in shopbot, I need to laser cut a minature version of my workbench inorder to check all the parts are fiting well together. So, i scale down the design then reedited the dimensions of the pressfit into 4inch thikcness, because we have 4mm Cardboard sheet is available in our lab. Here is the image after i fit the parts together.
Cutting The Design In Shobot CNC Milling Machine
Now i need to cutout the design in a 18-inch plywood using the Shobot CNC machine. But it doesn't a easy task. So first i need to turn ON the machine. Then i open the controller software for the Shobot called SHOBOT 3. First thing first, i placed my 18-inch plywood on the BED. Then i opened the X & Y position option in Shopbot 3 software to set the X&Y origin. To set the origin yourself. First Open the X7Y positioning window in Shopbot 3.

Then bring Tool head of the CNC machine by positioning the X & Y position using the D-PAD in the Window. See the image below


After you bring the Tool Head to desired position. Click on ther Set Zero button. Then you will get a new window. check the X & Y options and then clik ZERO button. Now you successfully set the Origin.
Now i need to set the Z- axis. In order to do that. Select the Z-positioning option Then You will get a message to place the Z Axis Caliberation Plate. Place the Caliberator plate in the material top surface and it should be below the toolhead. Then conect the aligator clip on the tool head. Then click ok. the Z axis start to caliberate. Make sure your hands have a clear space from the bit. The Caliberation take two times then click OK. We successfully caliberated the Z-axis.
Now I need to Give the Designfiles to the machine. We are using Vcarve software to do this. First i need to import my DXF files to the Vcarve Software then i need to give the setting to cut out the Designs then save save them all. the steps are briefly explained below.
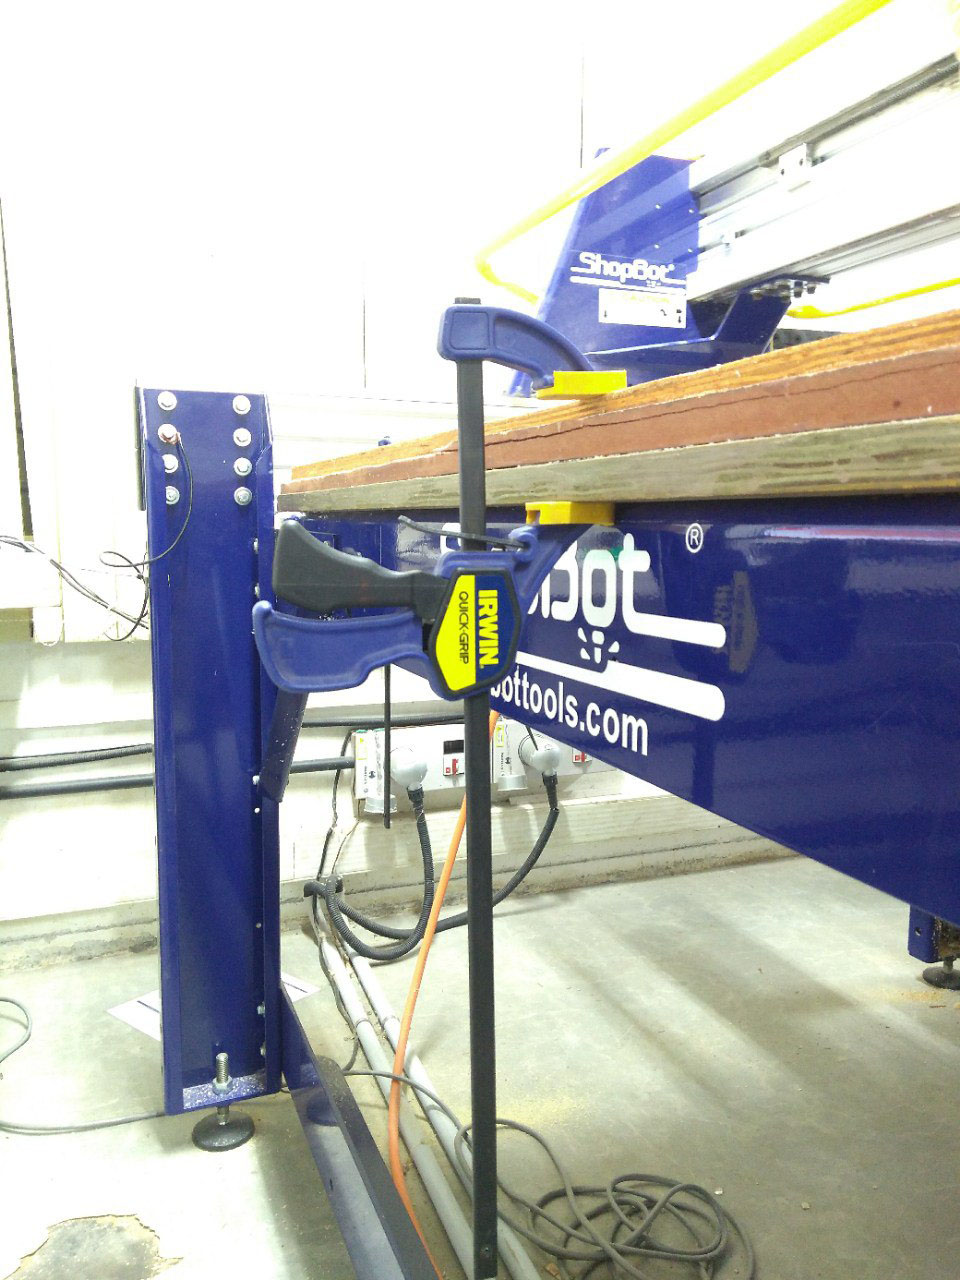
Also Secure the Material from moving using F clamps
Generating .SPB file Using Vcarve Pro
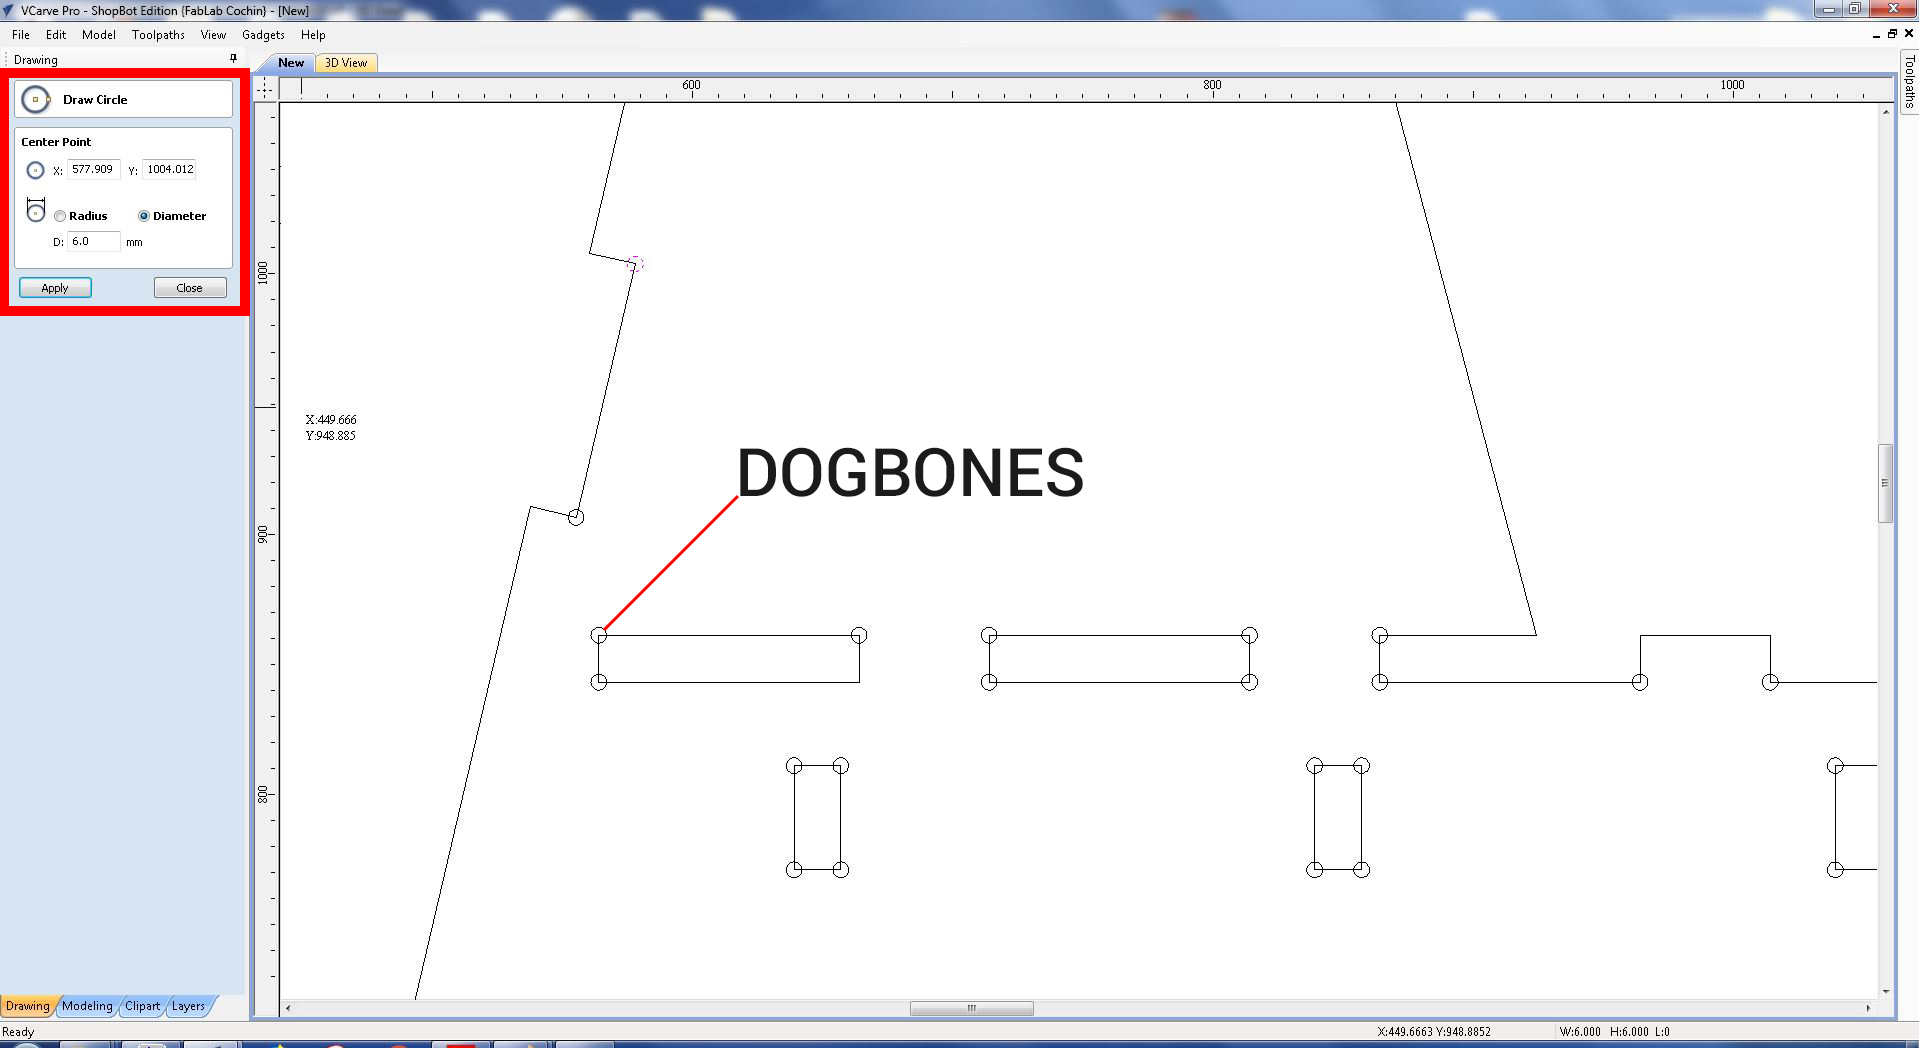
First open a new project with your bed size, mine is 8 X 4 Feet Size . Because iam using a 8 X 4 Feet Plywood. Then Drag and drop your DXF files into Vcarve Pro. Then after align your files as close enough, but not too close. After aligning them, Now we need to make the files that we need to cut, pocket etc.... To do that follow the below steps. I used to sheets because its have lot of parts. After drag and drop the files then add DOGBONES in the corners of your press fits. If you do not do this,the press fit does not fitt well. Its important to do DOGBONES.
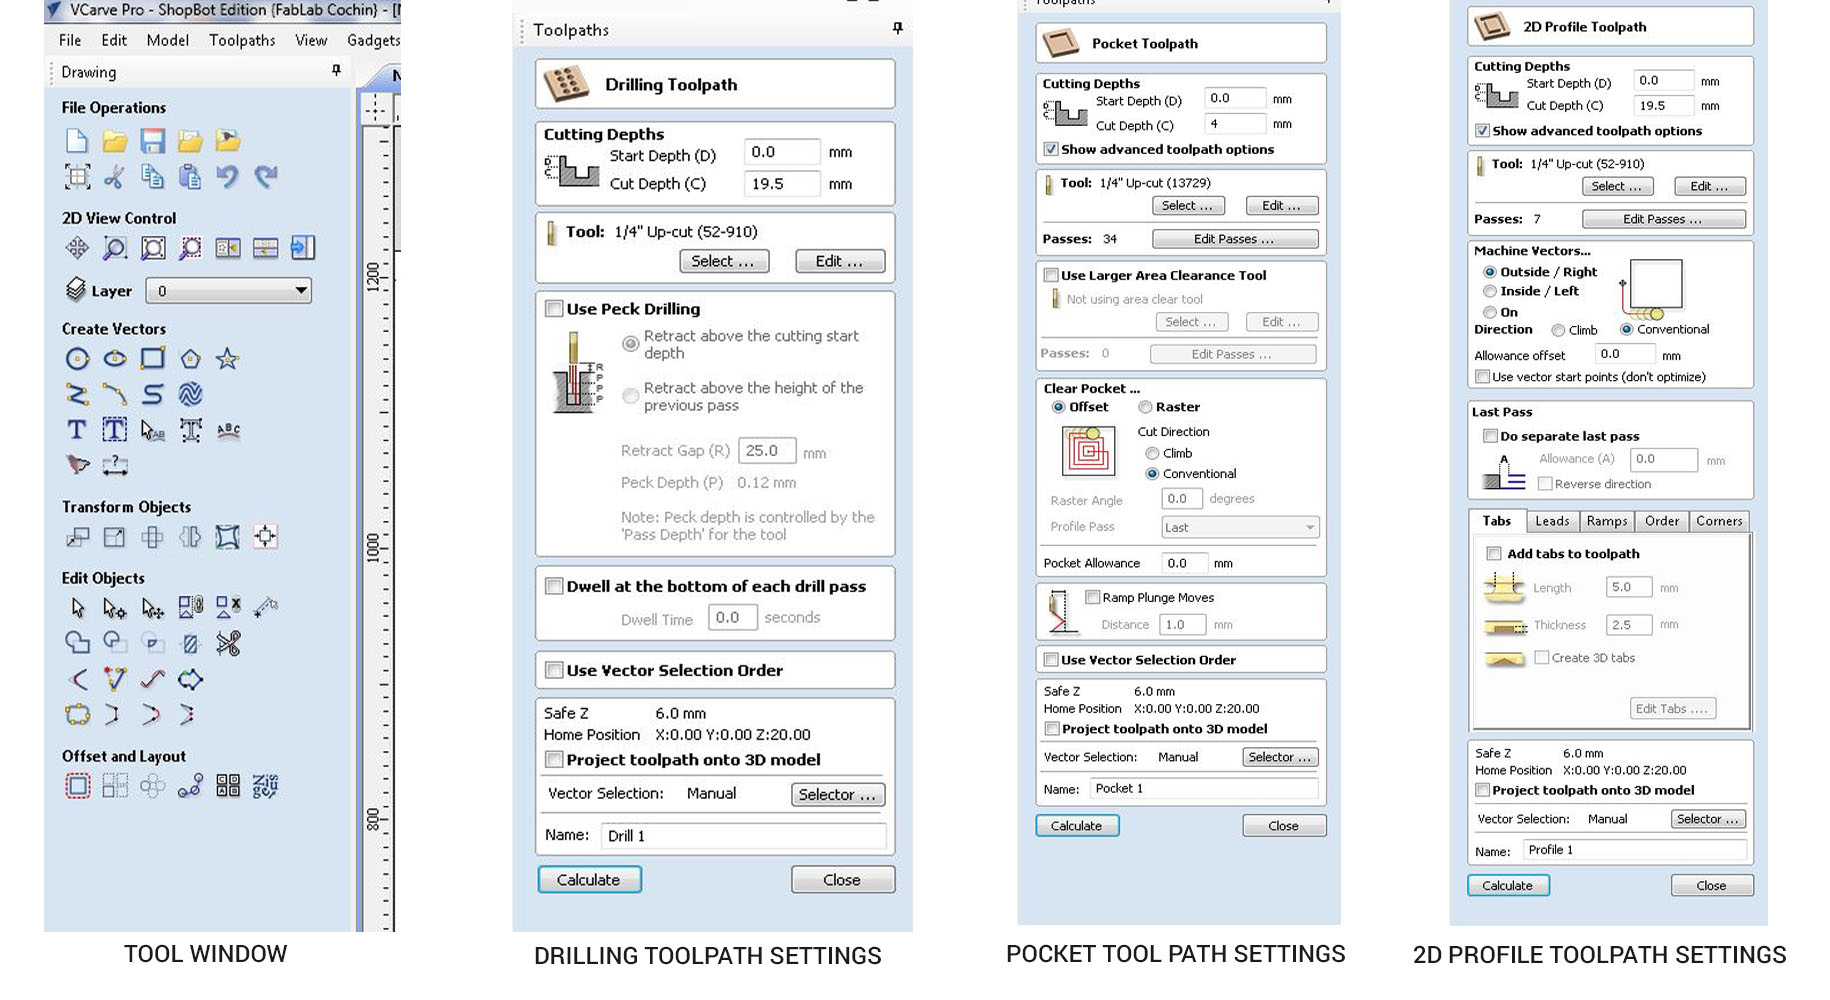
Then you need to make the cutting settings. I used Profile cuttings, Drilling and pockets to complete my designs. I used profile cutting for cutting the outsides and used profile cutting with inside cutting option to make press fit holes in them. I used drill option to make the Dogbones in the corners of the press fits. Then used pockets with a 4mm depth for making the chanels in the workbench main sheet to give the supports. After saving them in appropreate names.
Feed Rate and RPM
I used a 1/4(6.35mm) Downcut and end mill to machine all the parts using shopbot. I set the pass depth to 3mm. Then set the spindle speed to the maximum 12500RPM and the feed rate to 40.mm per second.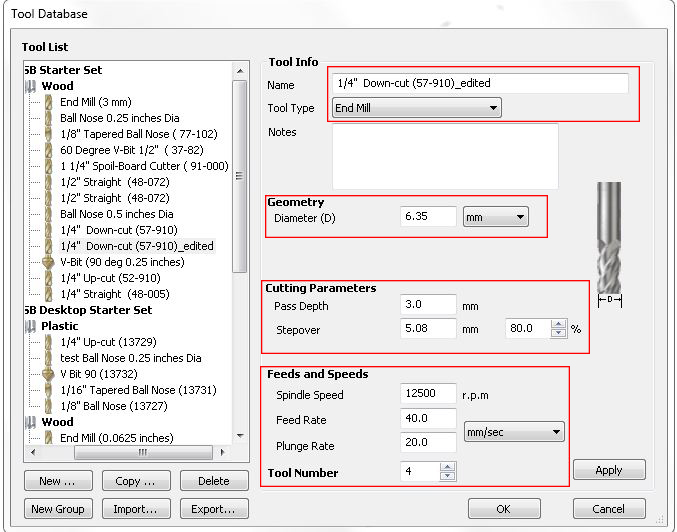
Now we all set. Open the Shopbot software and then open the cut file by selecting the Cut button. Then you take your full focus on the machine, You need to activate the Interlock key to activate the spindle. Then you need to click on the Start button, you will get pop message to turn on the spindle by pressing the start button on the ESTOP button control. after the spindle starts rotating. you are good to go. Click start in the software. Now the machine starts to do the job. But yould ready to press the ESTOP button if anything went wrong. Sometimes there is high chances to break the bit or any injuries. Always recommend to to do CNC machining with a partner.
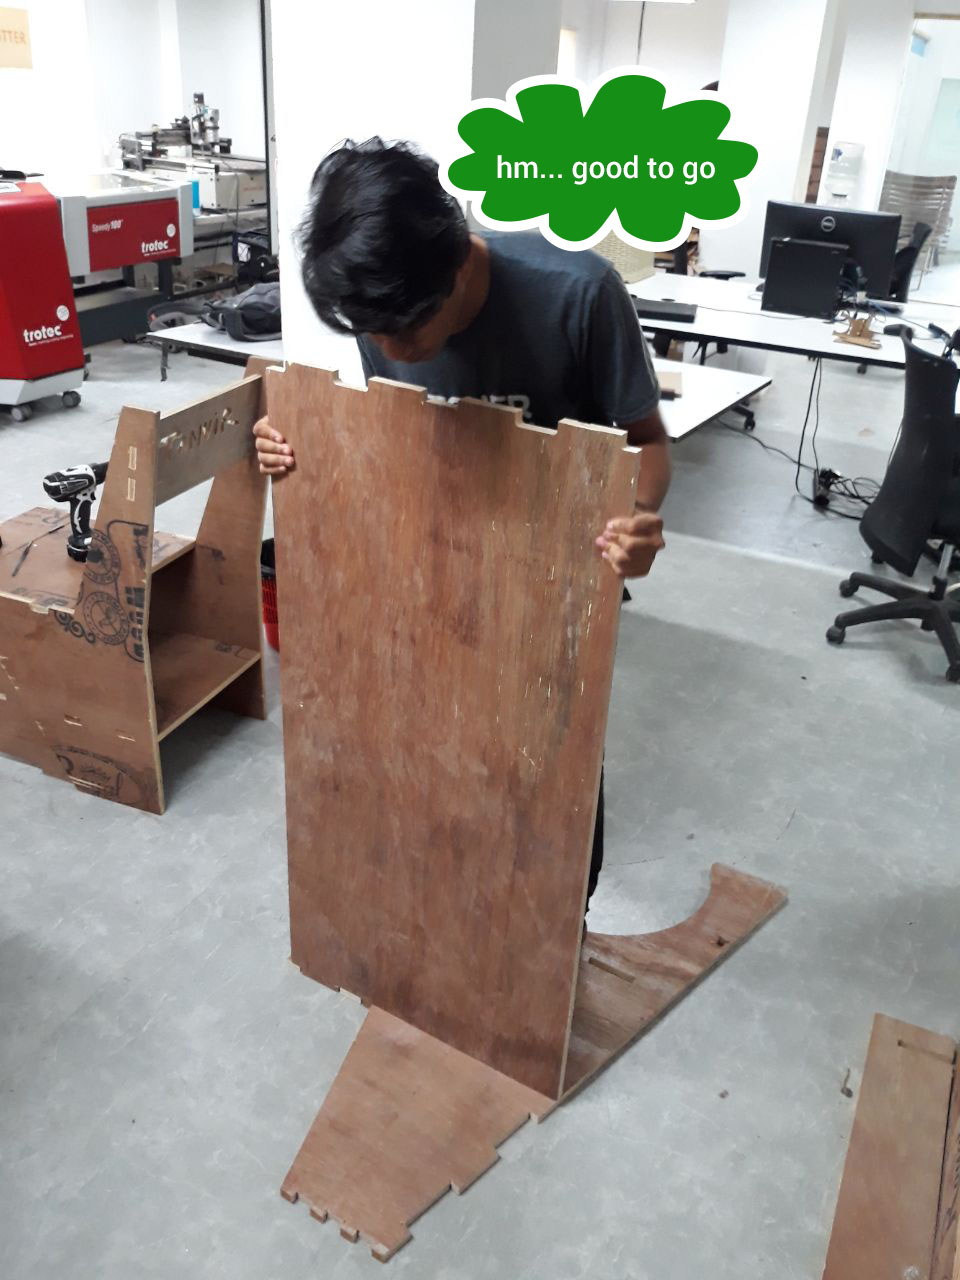
After cutting out all the parts i need to assemble them . Here is a snapshot when i assempling the parts.
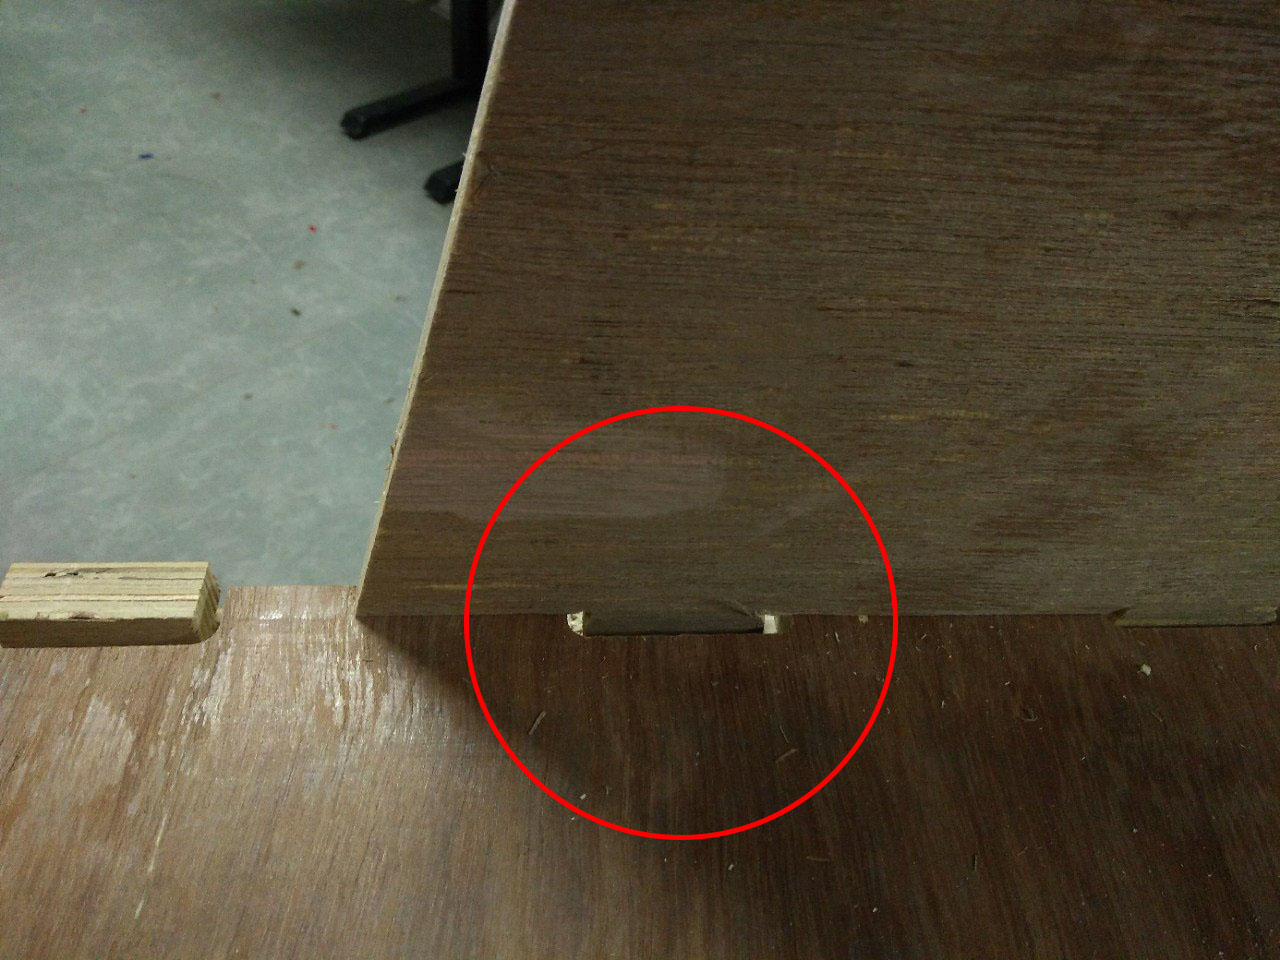
A Little Error That I Made
After assempling the parts togethor, I realized i made a big mistake in the cut settings of the table top panel. The sheet have a problem. I accidently gave inside cut setting to the outer cut of the sheet. It made a gap in between the press fits. It is loose enough to non sturdy structure. So i need to use some sealants to fill the gap and use some epoxy glue to make it fit enough. Else i need to cut out onother sheet. But my collegues doesnt cut out the designs untill now, They are waiting for the CNC machine to be free. So i decided to use some epoxy and some sealant to fill the gaps. All other parts are well fits. I design files doesnt have any problems, the mistake i made when i giving the settings to CNC cutting files in the Vcarve.
Download Resource Files

HERO SHOT