-
Fab Academy 2018
-
Design. Make. create.
-
Shape the Future
This week's assignment; is to start designing & assembling a machine that we want to build.
We were all excited about this week from the beginning of Fab Academy. We already had an idea of what we wanted to do before.
Here are the phases we went through in the past couple of weeks:
Pancake! Hey we thought it was a Qatayef Machine!!
One big part that we figured out last was that no one knows how to make the dough for Qatayef! So instead we tested it with Pancake and we'll add learning the recipe and making it to our list.

We wanted to do something that reflects our culture, so the ideas were:
We finally decided to do a Qatayef Machine.
You can think of Qatayef as a sweet dumpling that is usually filled with nuts or cream. This dessert is usually served in Ramadan.
With Ramadan being right across the corner (NEXT WEEK), this is a perfect machine to build!
Our machine will be making the dough but we will have to fill it in manually (or maybe we can think of something while we're programming it to reduce the man labour required to eat this delicious dessert!)

First we had to draw an initial sketch of how the machine is going to look like. We decided to have the plate's location steady and move the nozzle in the x and y direction as seen in the below sketch.
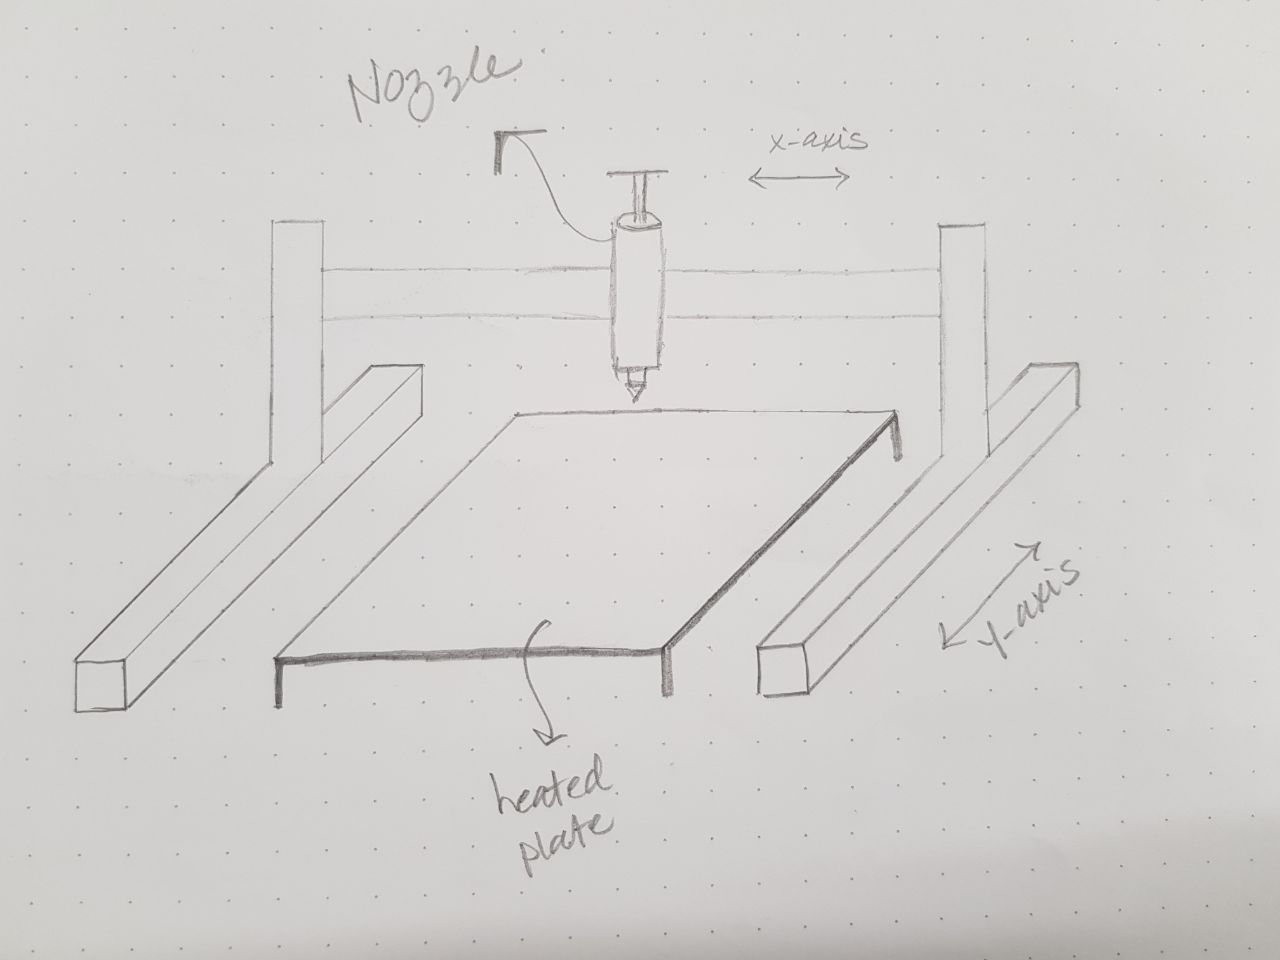
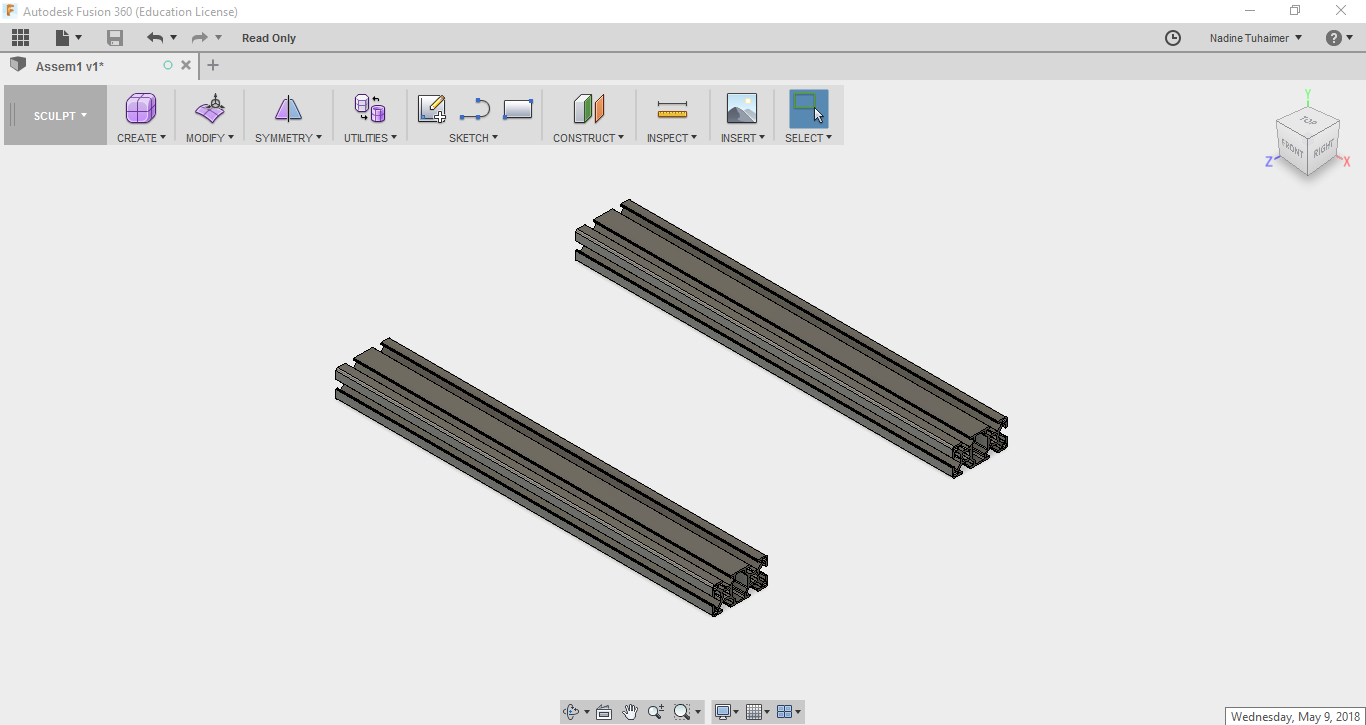
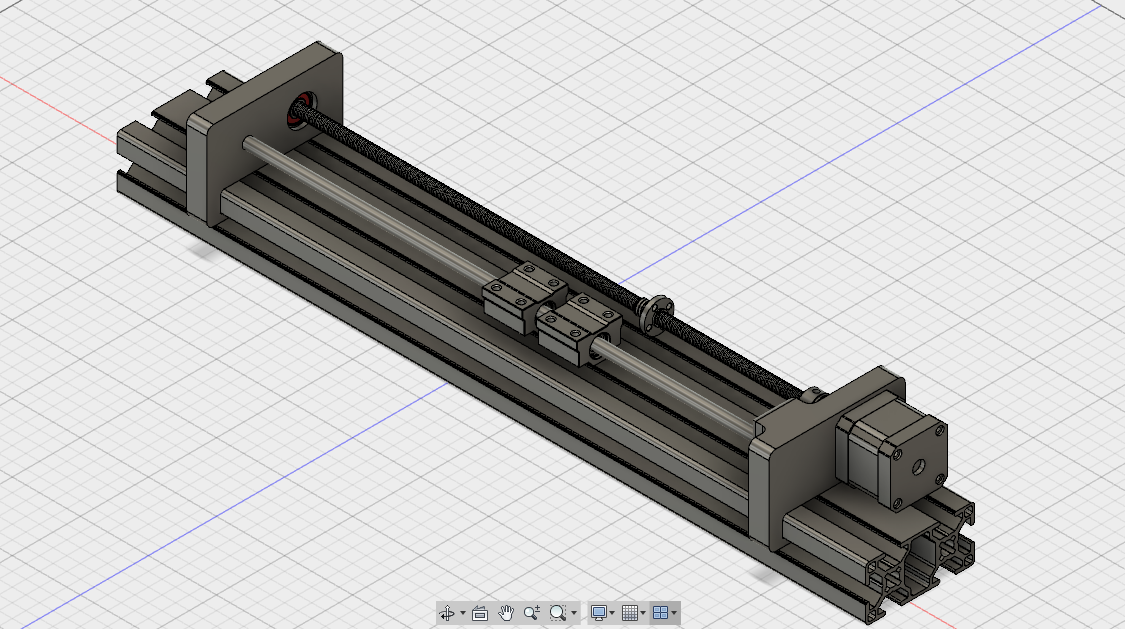
We decided to use Aluminum Linear Guides to make the y-axis as we found a few lying around in the lab and we decided to put them in good use.

We downloaded ready designs for the Aluminum Guides and imported them into our design software.
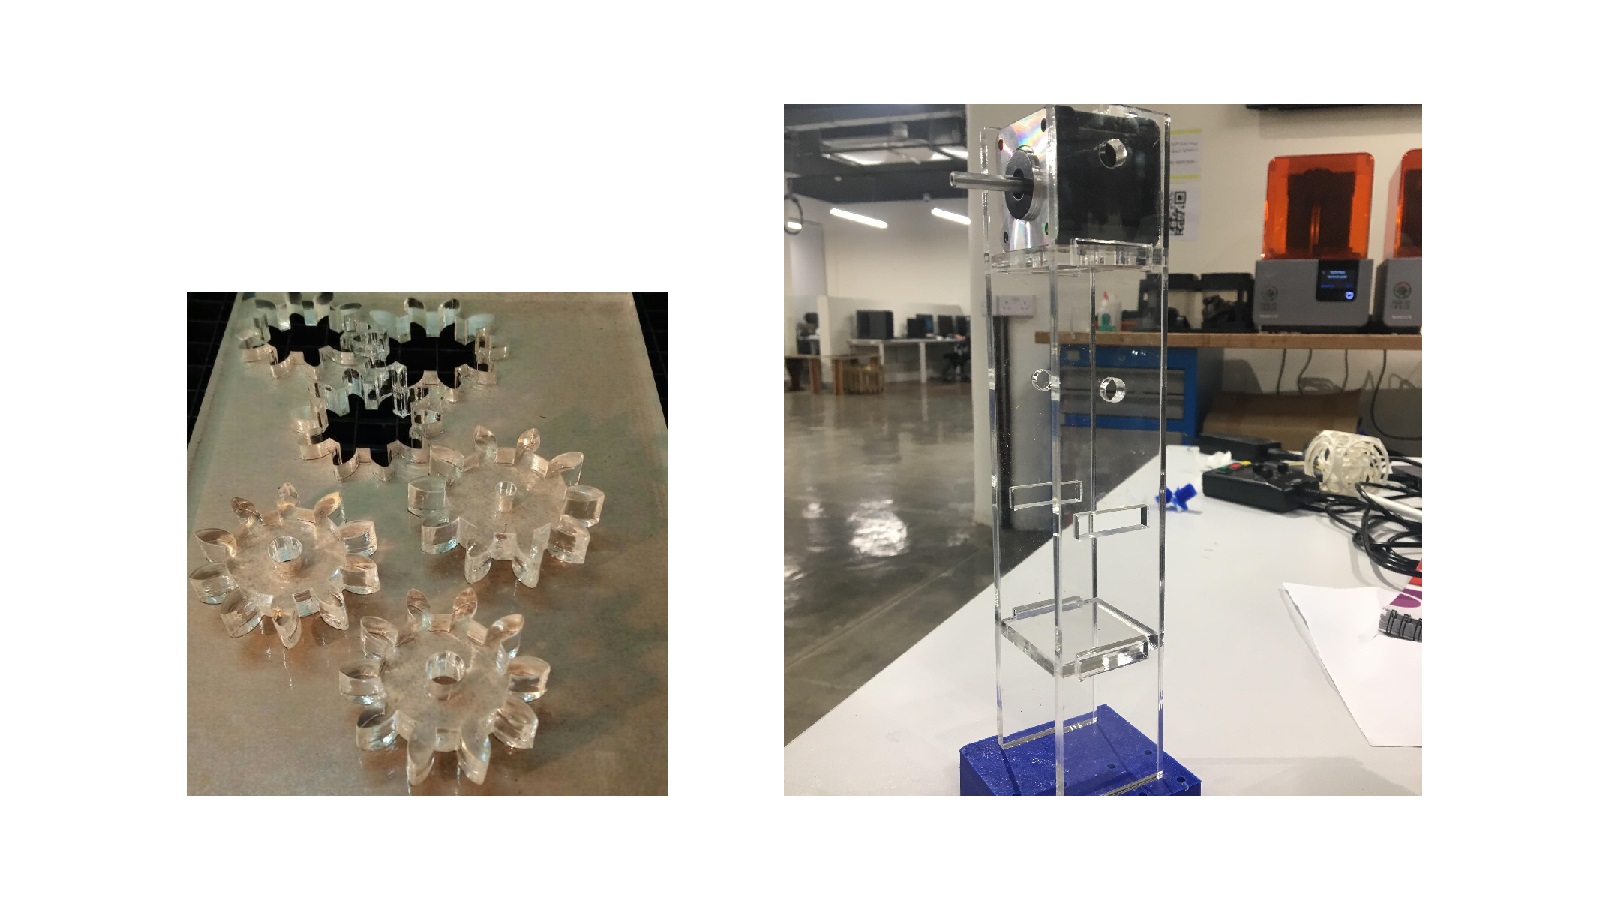
The mechanism we decided to use is the lead screw. So ar first we designed a part that will be 3D Printed and will be attached to the T-Slot Aluminum Guide. This part will also hold a stepper motor that will move the lead screw to move the nozzle in the y-axis.
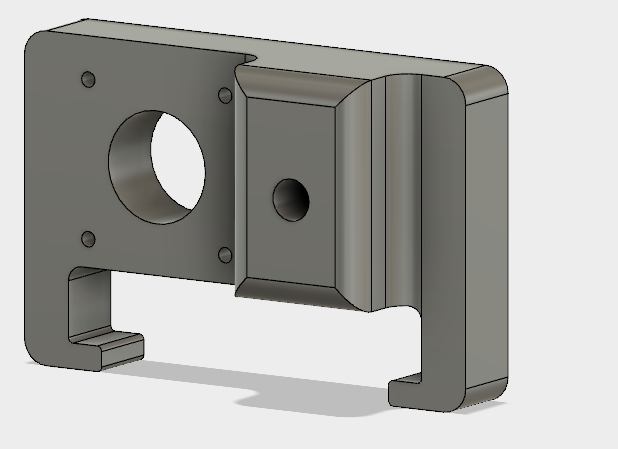
To make sure our design actually fits in everything, we assembled it to the T-Slot and added the coupler, stepper motor and lead screw to it as seen below.

Then we designed the other end of it that the leadscrew and the rod will attach to.
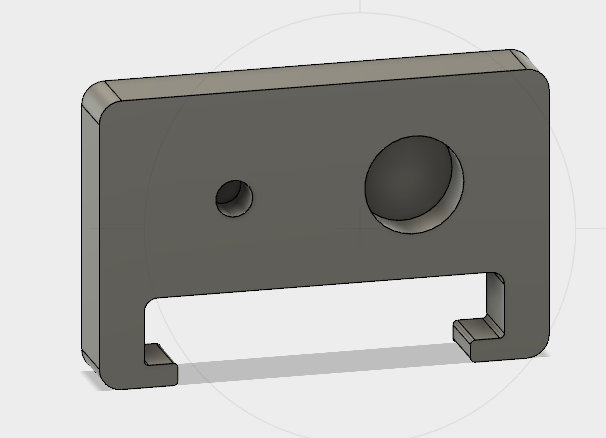
We assembled all the parts together to see if they all fit. Which they do! YAAAY!
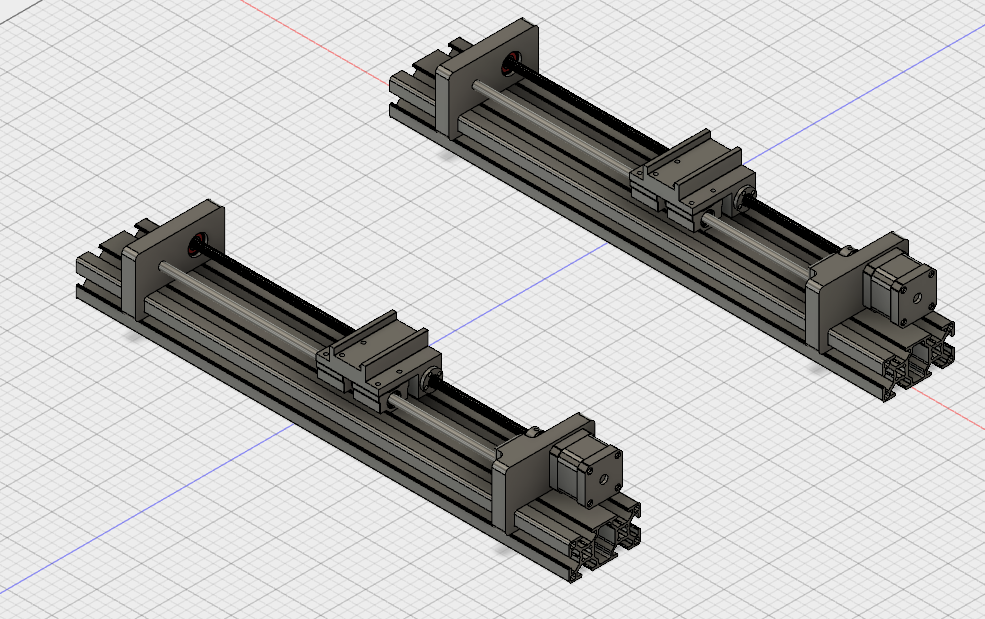
We repeated the same to create the opposite part of the axis. But later on we discovered that we made and error and we should have mirrored it for the machine to move better. We will try to fix it in the coming week.
We added the heated plate that the dough will be cooked on and the frame to have the bottom part of the machine ready.
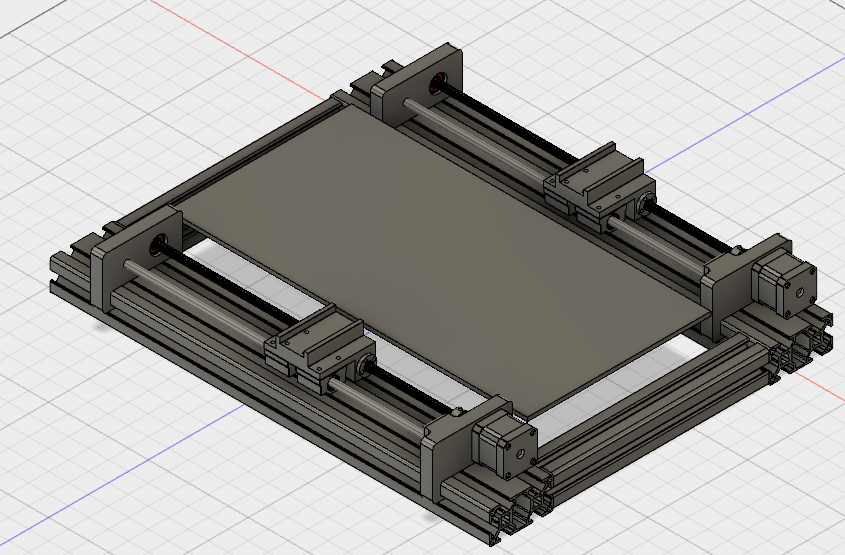
Then we designed the part that will attach on the y-axis and hold the x-axis. We designed it to be lasercut this time. We tried to use multiple techniques to build this machine.

The whole machine assembled should look like this:
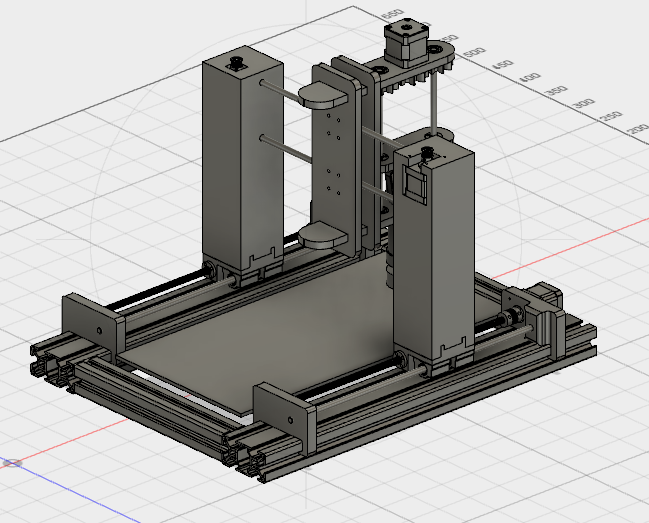
So far, we have 3D printed the parts, lasercut the towers and starting assembling as seen below.


-min.jpg)
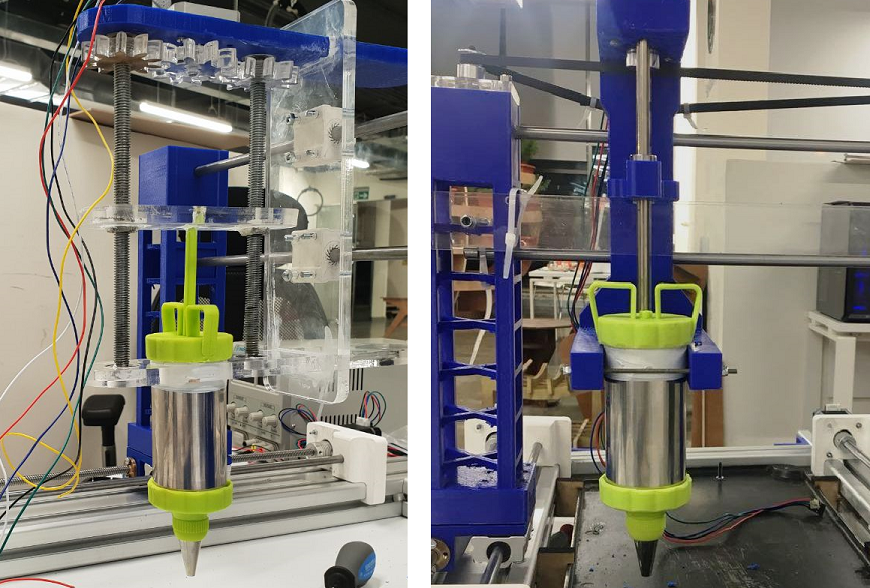
After assembling the frame, we figured out that the laser cut parts were too heavy for the motors to move, so we decided to design them into 3D Printed parts as they would be far lighter. One would hold the motor that will move the x-axis and the other will hold the pulley attached to that motor.

For the extruder, we used a ready cream pump press and built the design around. Just to have a back up plan in case one thing didn't work, we created 2 designs, one uses gears and the other is based on lead screw mechanism.
At first we decided to have a stainless steel sheet custom made for the machine, but after asking around all the experts mentioned that once the sheet is heated it'll suffer bending and tilting due to heat. So when we went back to previous years, we found that the most similar project to ours was the pancake art machine and they used a ready hot plate.
Since we couldn't find one, we decided to make one our own. One of the team mated brought an old gril from home and the other got industrial heaters.
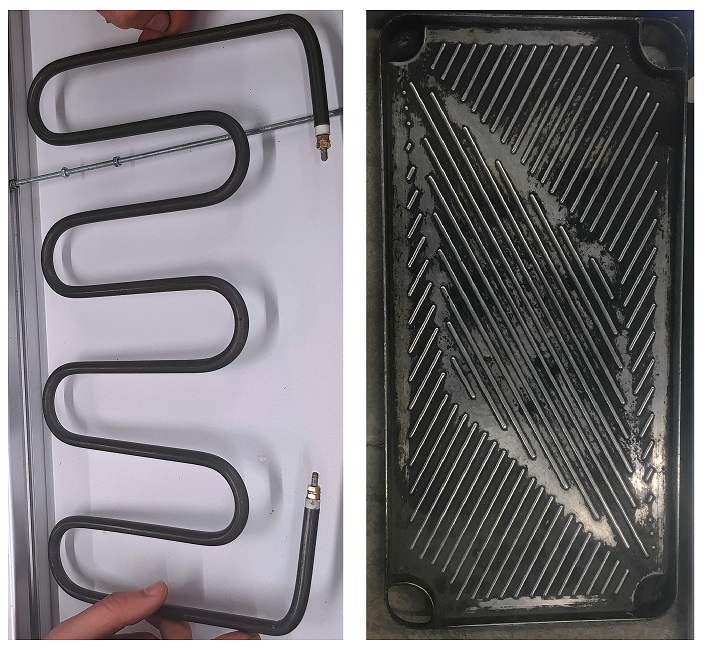
To connect these to each other, we decided to weld them together, but unfortunately welding didn't work as it punched a hole through it. So we decided to just connect them with another piece of metal and some screws.
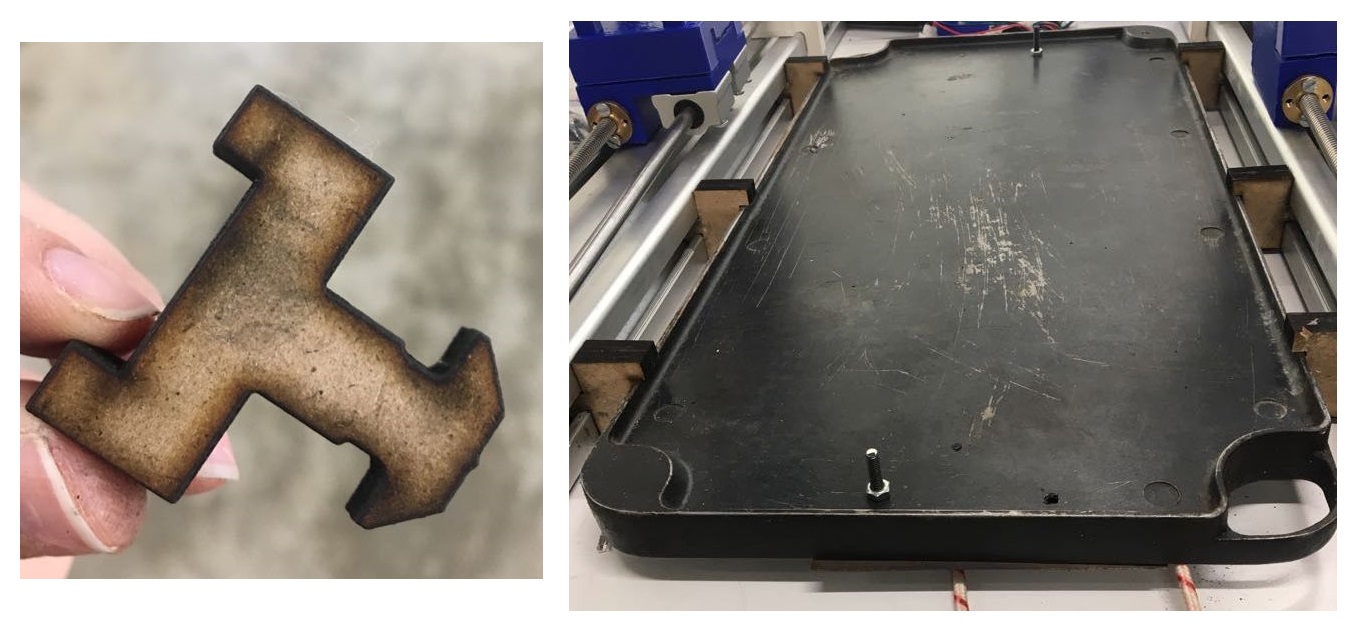
The next challange with the heated bed, was how to put it on the aluminum frame without heating everything and causing the 3D Printed parts to melt!
After brainstorming with the team, we decided that a lasercut wooden part that is inserted within the frame and attached to the bed itself would work.
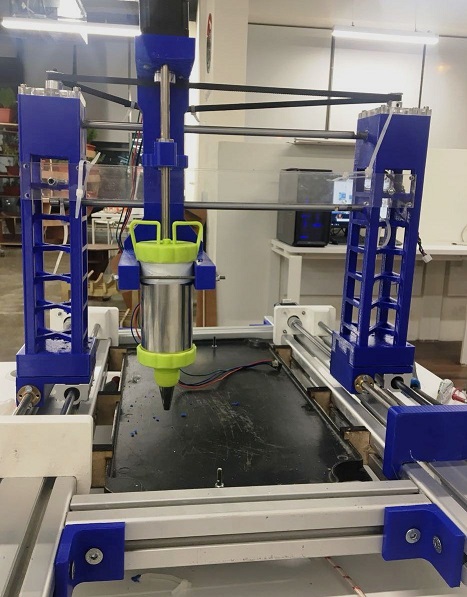
Here's the finished look for our beloved machine! Isn't it a masterpiece?!
After finally assembling the machine, and being able to move it manually, we had to automate it! Afterall no one wants a Qatayef machine that you would have to run manually!
At first we tried using a 3D Printer Open Source Firmware which is Marlin. We decided to use a 3D Printer firmware because our machine is kinda like a food printer if you think about it.
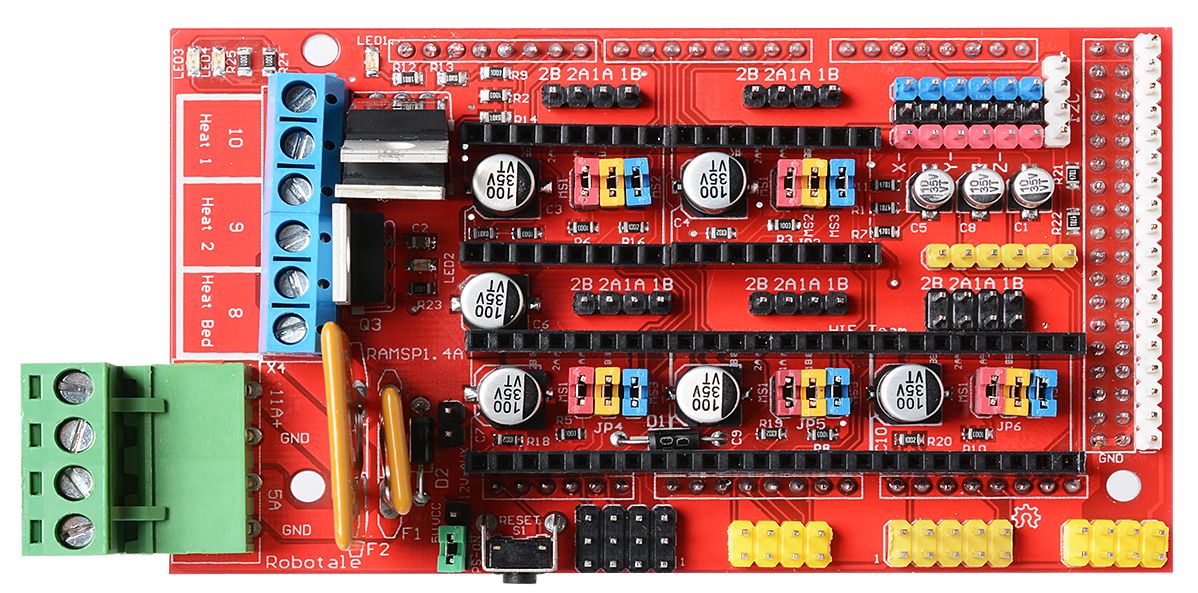
Using Marlin, we switched up the configuration a bit as the sheild used is called a RAMPS Sheild. This sheild has 2 motors attached to one driver on the z-axis and our machine has 2 motors on the y-axis and only one on the z-axis. So in order to have everything work, we had 2 options, which are:
We chose to use the latter because we're not that familiar with g-code.
To use this sheild, we used an Arduino Mega, flashed the firmware on it using Arduino IDE and then used a software called Printrun (Pronterface) To make sure the motors were moving correctly.

With this software, we connected to the machine using the same baudrate that was in the configuration of the firmware and controlled the motors one by one.
While we were troubleshooting the movement of the y-axis and syncing it togeter, we burnt the Arduino Mega :(
We figured that it must have happened when we manually moved the motor which caused current to generate and somehow damage the board.
To make up for our mistake, we switched everything to an Arduino Uno!
To do that we found a CNC Sheild laying around in the lab, we hooked up the stepper driver motors to it and used it instead.

Using this sheild was pretty easy as it has a stepper driver that can imitate the movement of another driver in case you have two motors on one axis. So we didn't have to play with any configuration pins.
Following this tutorial, we managed to connect the motors, specify the stepper driver configuration regarding the microstep resolution and add another motor to the y-axis.
As fas as frimware, we decided to use GRBL, which is an open source, high performance software for controlling the motion of machines that move, that make things, or that make things move, and will run on a straight Arduino.
We flashed the firmware using the Arduino IDE and then used Universal G-Code Sender to test the movement of the machine.

The biggest problem we faced with the movement of the machine, was with the y-axis, since it's the only axis with 2 motors attached to it that need to be synchronized together. There was also a displacement issue with the motors as the movement was the same as the g-code sent. To solve this issue we had to figure out the correct steps for the y-axis.

After editing the steps for the y-axis, we tested the machine again and the movement was pretty smooth.