Version Control Gitlab story

Assignment 2
So as a background I can with gitlab as I was doing it before with github ..
But the idea of using the terminal in this was as a comfort zone for me .. so i decided to dig for more informations about gitlab ..
So after a little bit search I was really shocked with the ability of Git concept ..
Git is realy a powerful tool for documentation .. Before when I wrote codes I was make a lot of different files for a different compiled codes ..
After that I can make with Git some Commits that can save the history of my files ..
And you can do branches to can develop away in a specific part of your code in the branch and test it and then merge it with the master code ..
and you can collorate with other people working with your codes and every one can commit to the files and you can get the difference between the codes ..
after all those abilities :) .. I was happy to go through all of this ..
After that I started to download gitlab as i think that the tool for using gitlab ..
after a while i understand that is the offline server from gitlab for local work ..
then i started thinking about using git .. I watched the Recitation and documetation ..
I didnt help me indeed so i decide to start my own search ..
so I found that great link ..
Before using GIT we need to understand some Definitions :
- Repository is a storage that keep date organized and a community can access this data and contribute changes to it
- Master is the main running content that is stable and reliable
- Branch is the categories in the Repository of the content with being developed and every branch have a lone access and did not conflict with each others and can merge braches together and Master is a branch
- Clone is to get a copy of the repositiory origin to your local Device
- Fetch is to get a branch and save it as a new branch to your device
- Pull is to get a branch and merge it with the running branch right now and now a recommended tool
- Add is a tool to add files that are ready to be commited after you finish your work with them
- Commit / Comment is to submit all changes that you do to your added files to be ready to be pushed to your server
- Push is to send updates to the server after commiting them
- init when you start your first time with git you can add your username with git and email that will be used with push
- Status Show you what are the files that you have change them and which ones have been added and ready to be commited and others that not added and need to be commited
- .gitignore is a file that you use to add files that not uploaded to server and stay in the local side
- rm to remove files from your folder and try to use it because git will be confused if you deleted files from folder without telling him that you deleted files
- Checkout is to move between branches
- Commit amend is to add files to last commit you did without making a new commit with new comment
- Git branch is to get all branches in your repository
- git branch omar is to make a new branch that called omar
First lets install git on my Ubuntu :
sudo apt-get install git
To check if there before any ssh codes or not :
ls -al ~/.ssh
This is the files you may find
- id_dsa.pub
- id_ecdsa.pub
- id_ed25519.pub
- id_rsa.pub
There are two ways to communicate with your repository with HTTP or SSH I find that ssh is the famous one so I decided to use it .
As there are communication that going to happen between two devices so we need to set up the communication between them and make it authorized ..
So we need to generate a RSA code that the protocol that ssh use for Communicating
ssh-keygen -t rsa -b 4096 -C "your_email@example.com"

Enter a file in which to save the key (/home/you/.ssh/id_rsa): [Press enter]

Enter passphrase (empty for no passphrase): [Type a passphrase]
Enter same passphrase again: [Type passphrase again]
This is Optional
the passphrase is like a key for the encryption .. and must be more than 4 letters .
so to add the code to our ssh protocol on our Ubuntu
ssh-add ~/.ssh/id_rsa
to Get a copy from the RSA code to add to my gitlab server side We need to install
sudo apt-get install xclip
to take a copy to your clipboard
xclip -sel clip < ~/.ssh/id_rsa.pub
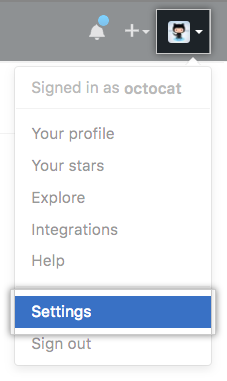
Select Setting
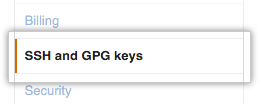
Select SSH Settings
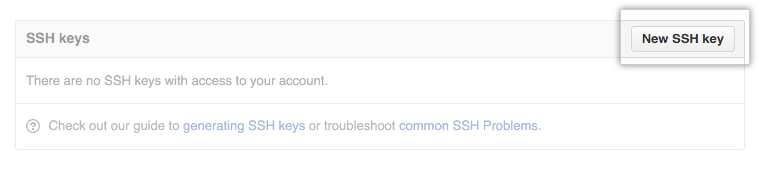
Paste RSA code
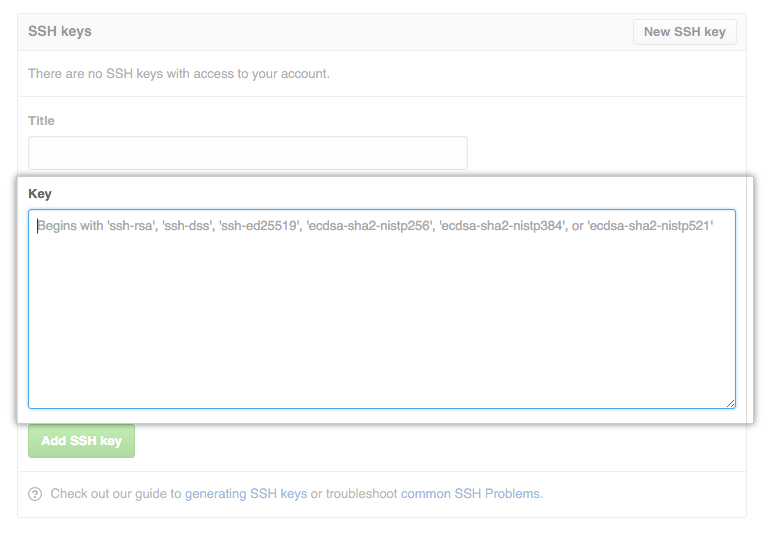
Add SSH
to clone and link the repository to your PC in open a new folder with the terminal and

Take this ssh Code and use it then ..from your gitlab website
Git clone repository ssh link
Now your are connected to your gitlab ..
After doing this you can watch the Recitation and it will be easy to understand ..
Now lets start with my Website ..
I have a background about web design .. As I worked with HTML , CSS , JS , JQ , Dreamweaver and Bootstrap ..
You can search on Tutorialspoints or W3C to learn more about all Programming languages overall .
But this was from long time and as I am a fan of Open Source so I choose to work with Brackets on Ubuntu .
Let's install Brackets on Ubuntu Using Terminal .
sudo add-apt-repository ppa:webupd8team/brackets
    sudo apt-get update
    sudo apt-get install brackets
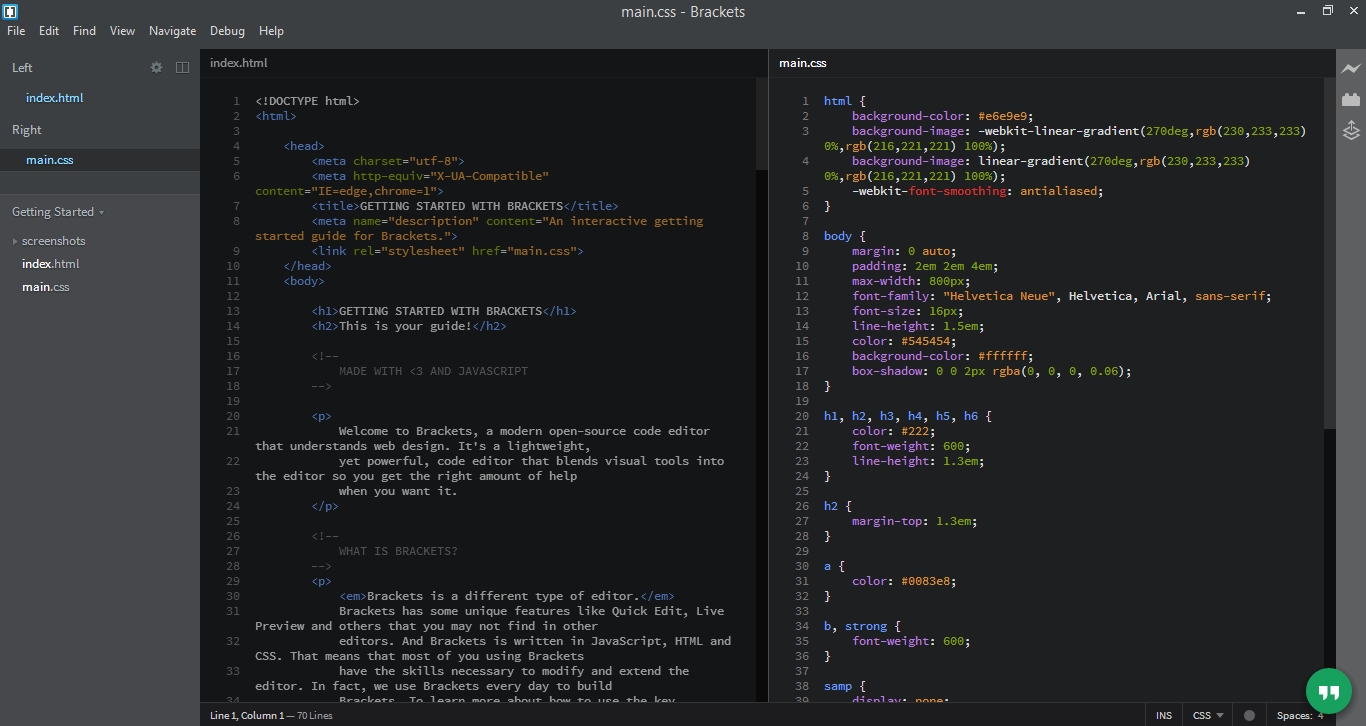
This is Brackets
Then I decided to start using a Template of Bootstarp which is a very good platform to start with ..
I searched and I find one called Modern Business which is very good templates to use ..
This is Modern Business Template

Those are the features of this template :
- 17 HTML pages
- Easy to edit, working PHP contact form (just edit your email address in the included PHP file!) Homepage with full width image slider and captions
- 4 portfolio page options with portfolio items
- Bonus pages - pricing table, sidebar page, FAQ page, 404 page, and a blank full width page
- Various custom styled elments, call to actions
After playing with it a little bit :) and I started to Editing the templates to get
- Welcome page that consists of a brief about me , Navigation Bar to Assignemts ,Final Projects ,Arabic Videos and my Mail to contact .
- About page that consists of a detailed information about me .
- Assignments Page that consists of all Assigments in 1 Page .
- Final Project page that contain all data about the project .
- 1 Assignment Page that is ready to write inside the data directly .
- Edit CSS file to be ready with all pages .
Then I started to understand to deal with Git again :)
First I started with to add all files to commit to be ready to push them so after I finish the first segment in my website ..
I started to add all files and folders ...
**Important Note : You must be in the directory of the git folder to make git can work ..
so I started to add all files
    git add assignment1.html
    git add images
    git add css
then I made a commit .. Commit critiria must have a comment with that refer what is this commit changes
git commit -m "This is my first commit"
then I made my first push
git push
that is it :) now alive on your gitlab account
Finaly now this is my website :)