Week 2
Computer-aided Design

assignment
Individual Assignment1- Model (raster, vector, 2D, 3D, render, animate, simulate) a possible final project and post it on your class page.
Software Used
Google SketchUp, AutoCAD, Rhinoceros, Adobe Illustrator, Google Chrome, Sublime Text, Photoshop, Git


Files used:
Test saltshaker sketchup DownloadFinal Project Sketchup Download
Walkthrough
2D Design
There is a lot of design software available for anyone to download for free such as:
GIMP This is a free cross-platform image editor
Inkscape This is a free and open-source vector graphics editing software.
Illustrator This is a common but paid vector design software that integrates well with other software
If you know the dimensions of the document you want to create, you can start by opening one of the softwares and setting the size of a draw space.
 Create a draw space |
 Place (import) a 2D image |
 Rescale artwork to fit a draw space |
You can draw on top of the 2D image to create vector lines using freehand tools like the Pen. There are also assistive drawing tools like the Line Segment tool, which creates a vector between two points.
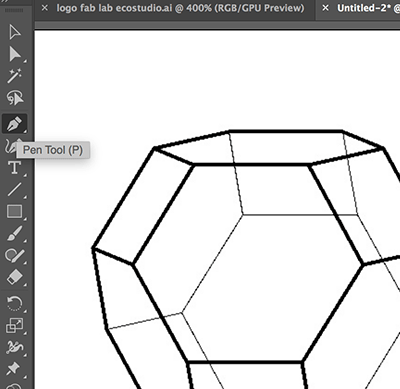 Click the Pen tool to draw vector lines |
 Click Line Segment tool to draw a line between points |
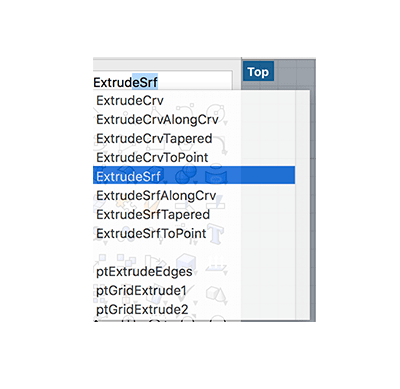
I used the Line Segment tool to create a path on one of the faces of the truncated octahedron drawing.
 Drawing lines creates a layer called a path |
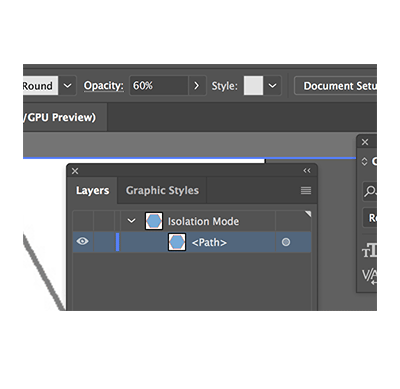 Select the path and an option menu shows information about it |
By clicking on the path I could control the information associated to the vector. I adjusted the size and color of the stroke and created a more visible outline. Next I filled the outline with blue, but it covered a part of the original 2D drawing (which is on a separate layer).
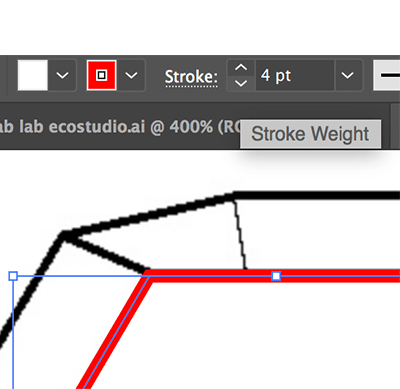 Attribute 4pt red stroke to path |
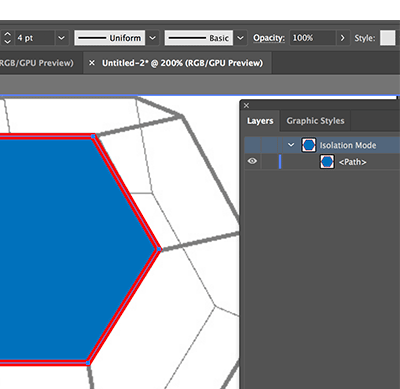 Fill path blue |
By adjusting the opacity of the path, I was able to make the layer behind visible as well.
Working with layers allows you to create and modify customized images to use for presentations or websites. By creating them in vector format you will also be able to export the information to be read by many of the other tools in a Fab Lab. After practicing and learning one or more softwares, you will be able to create physical products from your digital designs.
3D Design
There is a lot of design software available for anyone to download for free such as:
AutoCAD Professional 2D and 3D design software available to students for free.
Sketchup A program for sketching in a 3D plane with mouse and keyboard shortcuts.
You can use any software that is convenient for the work you are doing. Once you understand keyboard and mouse commands and are able to produce a file in 2D and 3D, you can learn more professional software with many more functions.
SketchUp is a program that I use at least once a week to create a quick sketch of an idea. I normally work in meters for units, because in Panama almost everyone asks for measurements in meters so I like to be on the same page when we're quoting materials. In it you can perform tasks like:
 Import a reference image |
 Quickly draw geometric shapes |
In Sketchup, you can use these keyboard shortcuts to create geometry and modify it, much like drawing on paper with the ability to go redo and undo until your design is perfect.
If you are looking to desing 2D files for your laser cutter, I would recommend using a different 2D design program like AutoCAD or Rhinoceros. They are useful for creating files like .DWG and .DXF files that remain consistent when transfering them to your cutter.
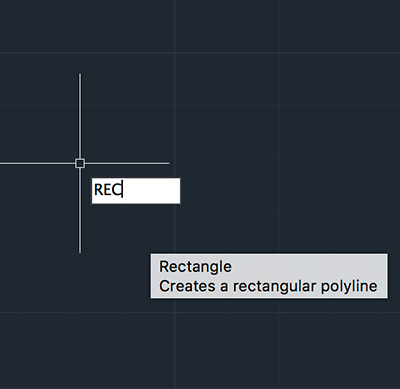
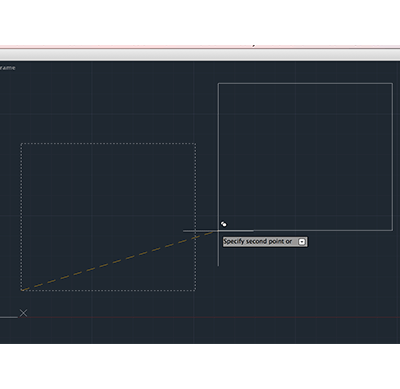
One thing that makes AutoCAD a little more difficult to use is the broad range of commands available. If you don't know the command, you may spend a lot of time drawing something that could have just been calculated for you. For example, you can type in commands like Line, to draw a line, or Rectangle, to make a rectangle with (x,y) dimensions.

|
|

|
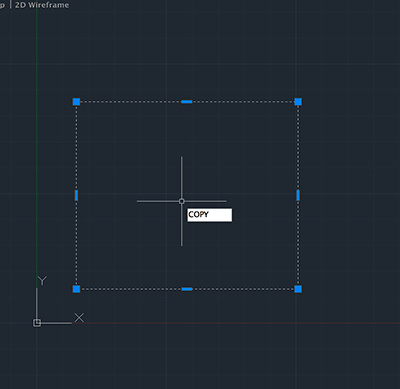
Rather than drawing out a shape over and over, you can type copy and the program asks you to select the geometry you would like to copy. After selecting it, you can place a copy by clicking where you want the duplicate to go.
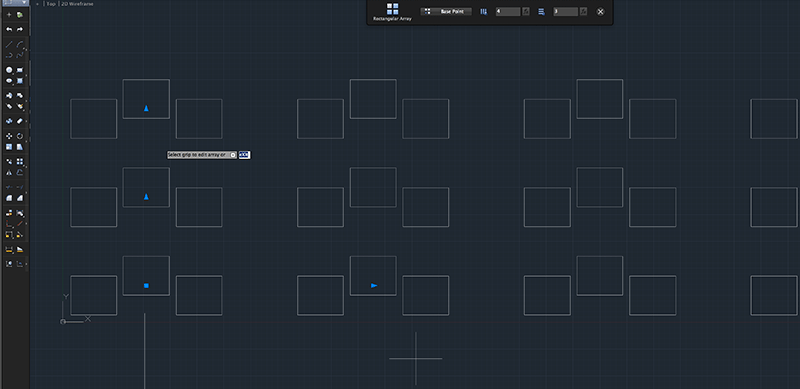
If you want to duplicate something many times along a path a certain distance from your origin, you can type array. This would let you create a pattern based off of a shape you drew.
|

|

|
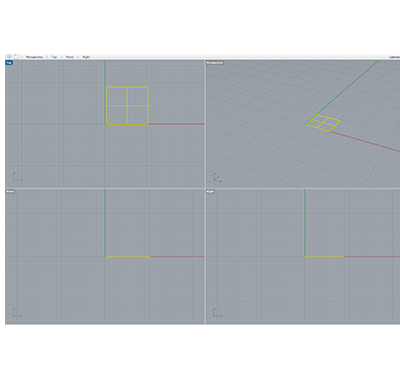
Another software you can use for 2D design is Rhinoceros. This software has 4 viewports open simultaneously, which can come in handy for certain kinds of work. If you need to see the placement on all axes from different views at the same time, this is a good program to use.
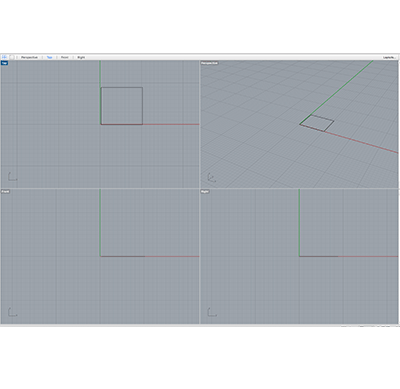
In this program you draw surfaces which you can then extrude to material thicknesses. This turns your 2D drawing into a 3D object with multiple 2D sides.
|
|
|


3D Design
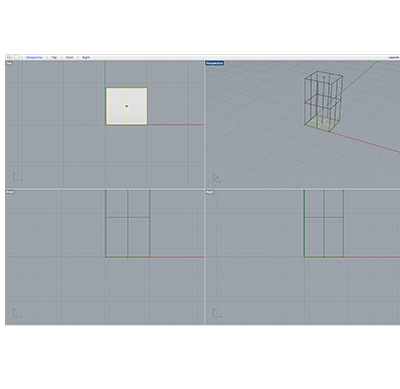
In Sketchup, I first set the camera to parallel projection and use the keyboard shorcut (CMD+1) to switch to overhead view. Here I can draw lines and they will be on an XY plane. Now that I have a 2D version of what I want to build, I can save a screenshot or export a 2D image.
Instead of using Parallel Projection camera mode, I can use Perspective to orbit around the model and have a rendered view of my plane. I click the right mouse button, which lets me switch between pan motion and orbit. By using the extrude command, I am able to quickly shape my model into something that resembles my final project.
If I want to build a more detailed model quickly, another option is to use the follow me command on a circle to create a bell shaped model.
By creating a profile and closing it to make a face, I can select the face and extrude around the perimeter curve to create a solid object. This quickly generated model allows me to text different profiles that can resemble the original shape.
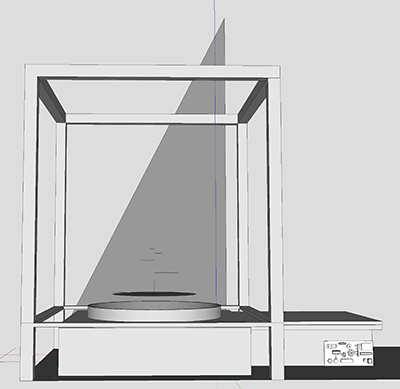
Final Project ideas
For my final project I require a case that can be sealed and insulated with quite specific requirements. I need there to be a window to view inside, but I need it to insulate a different interior temperature. The case must have openings for electronics as well as ducts for air cooling and heating. I would like the form and design to represent the function of the container, so maybe something like an igloo or soccer ball.
|

|
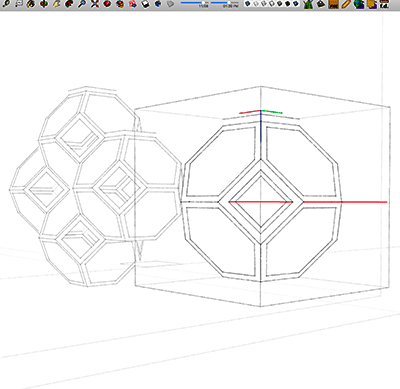
I worked through a full design of the machine but wasn't very impressed with my results. I did a little bit of playing around with some hexagons and arrived at this shape:
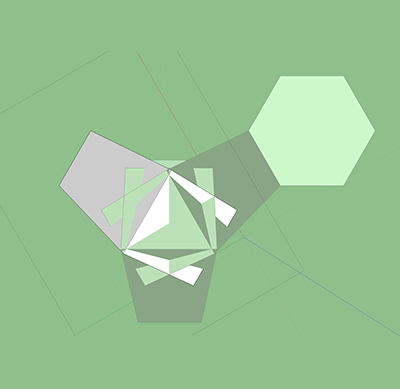
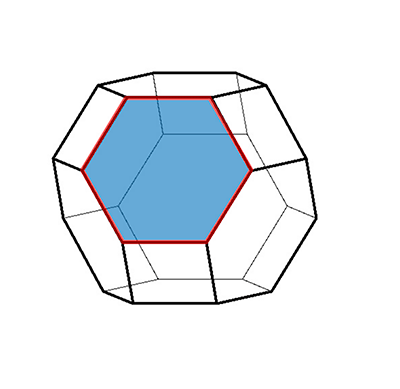
Surely there was some sort of shape that could encapsulate an environment that was made out of hexagons. After spending some time with different keywords in google, I stumbled upon this image:
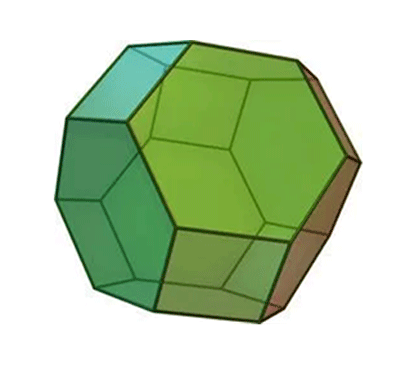
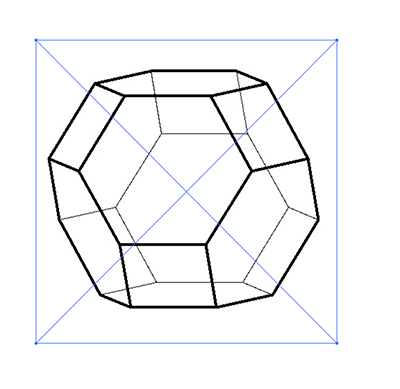
It is called a truncated octahedron. I was pleased to learn about this geometric shape and began exploring using the form as a container. For reference, I imported a shape from the Skethchup Component Library. In the 3D workspace I measured the distances between the two shapes that compose it. I found the inside angle from square to hexagon to be approximately 125.3 degrees. I used the overhead plan view in parallel projection view to enter a 2D workspace. There, I drew a polygon with 6 sides (hexagon) and a rectangle with all sides measuring 100mm. I used this as a reference to work on the individual planes of the 3D shape and modify it.
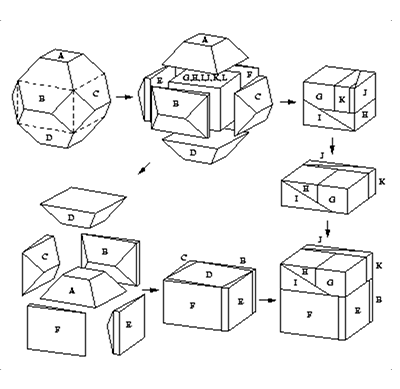
By using Sketchup I was able to begin with a 2D shape and create a 3D model of an idea.