Abstract
This week was about forming a composite and the structure required to mount it
Some of the question raised were:
- Which materials can be combined?
- What final characteristic are we looking for?
- What is the best skeleton?
I mainly used 1 workflow:
Fusion > Slicer > VCarve
My biggest achievement:
My biggest struggle: going 3D
Missing material
| Cardboard |
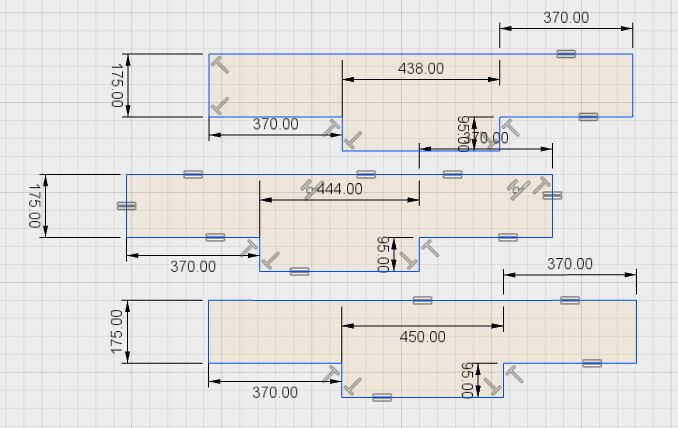
Chronology
| Thursday | Friday | Monday | Tuesday | |
|---|---|---|---|---|
| Demo | Test design | Documentation | Mold design | |
| Inputs catching up | Test skeleton | Final shape modelization | Mold milling | |
| Test production | Final production |
Setup
| Softwares | Fonction |
|---|---|
| Slicer for Fusion | Translate a .stl into intertwinned .dxf sketches |
Skills acquired
Asssesment validation
Test design
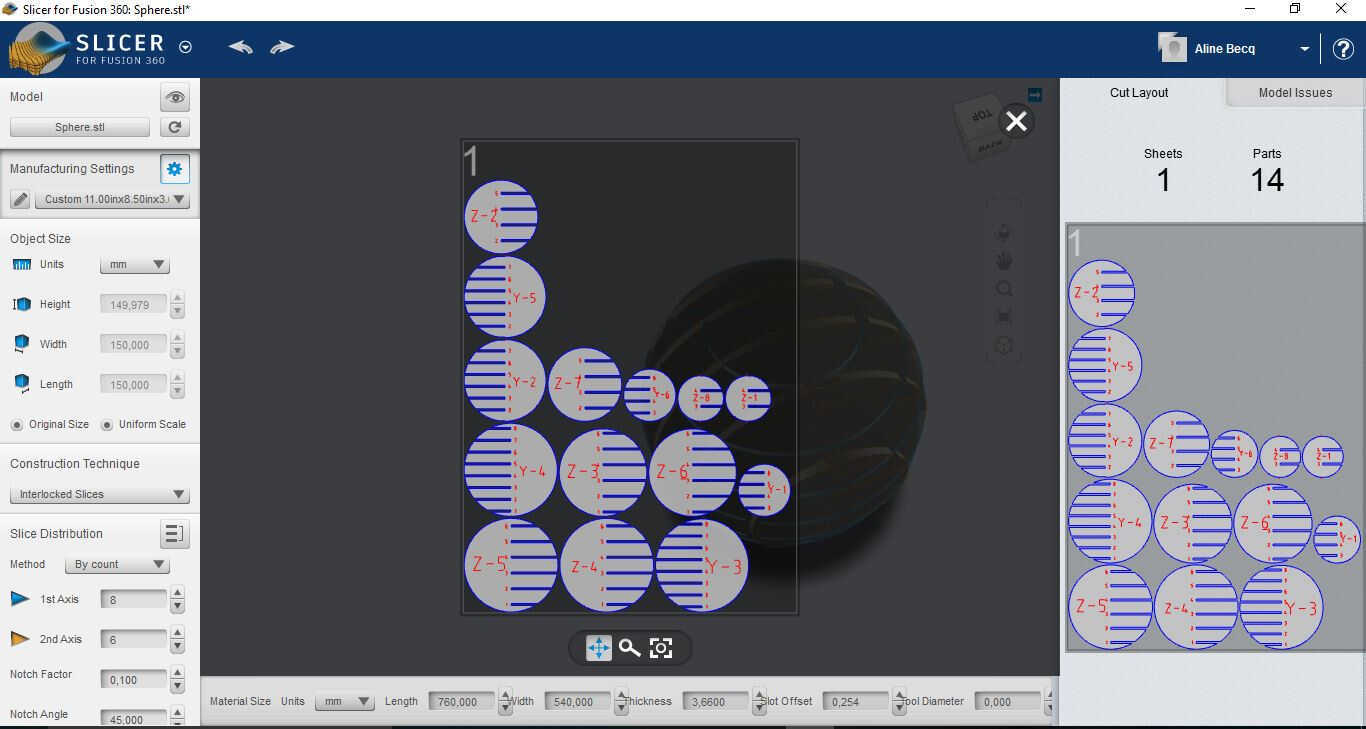
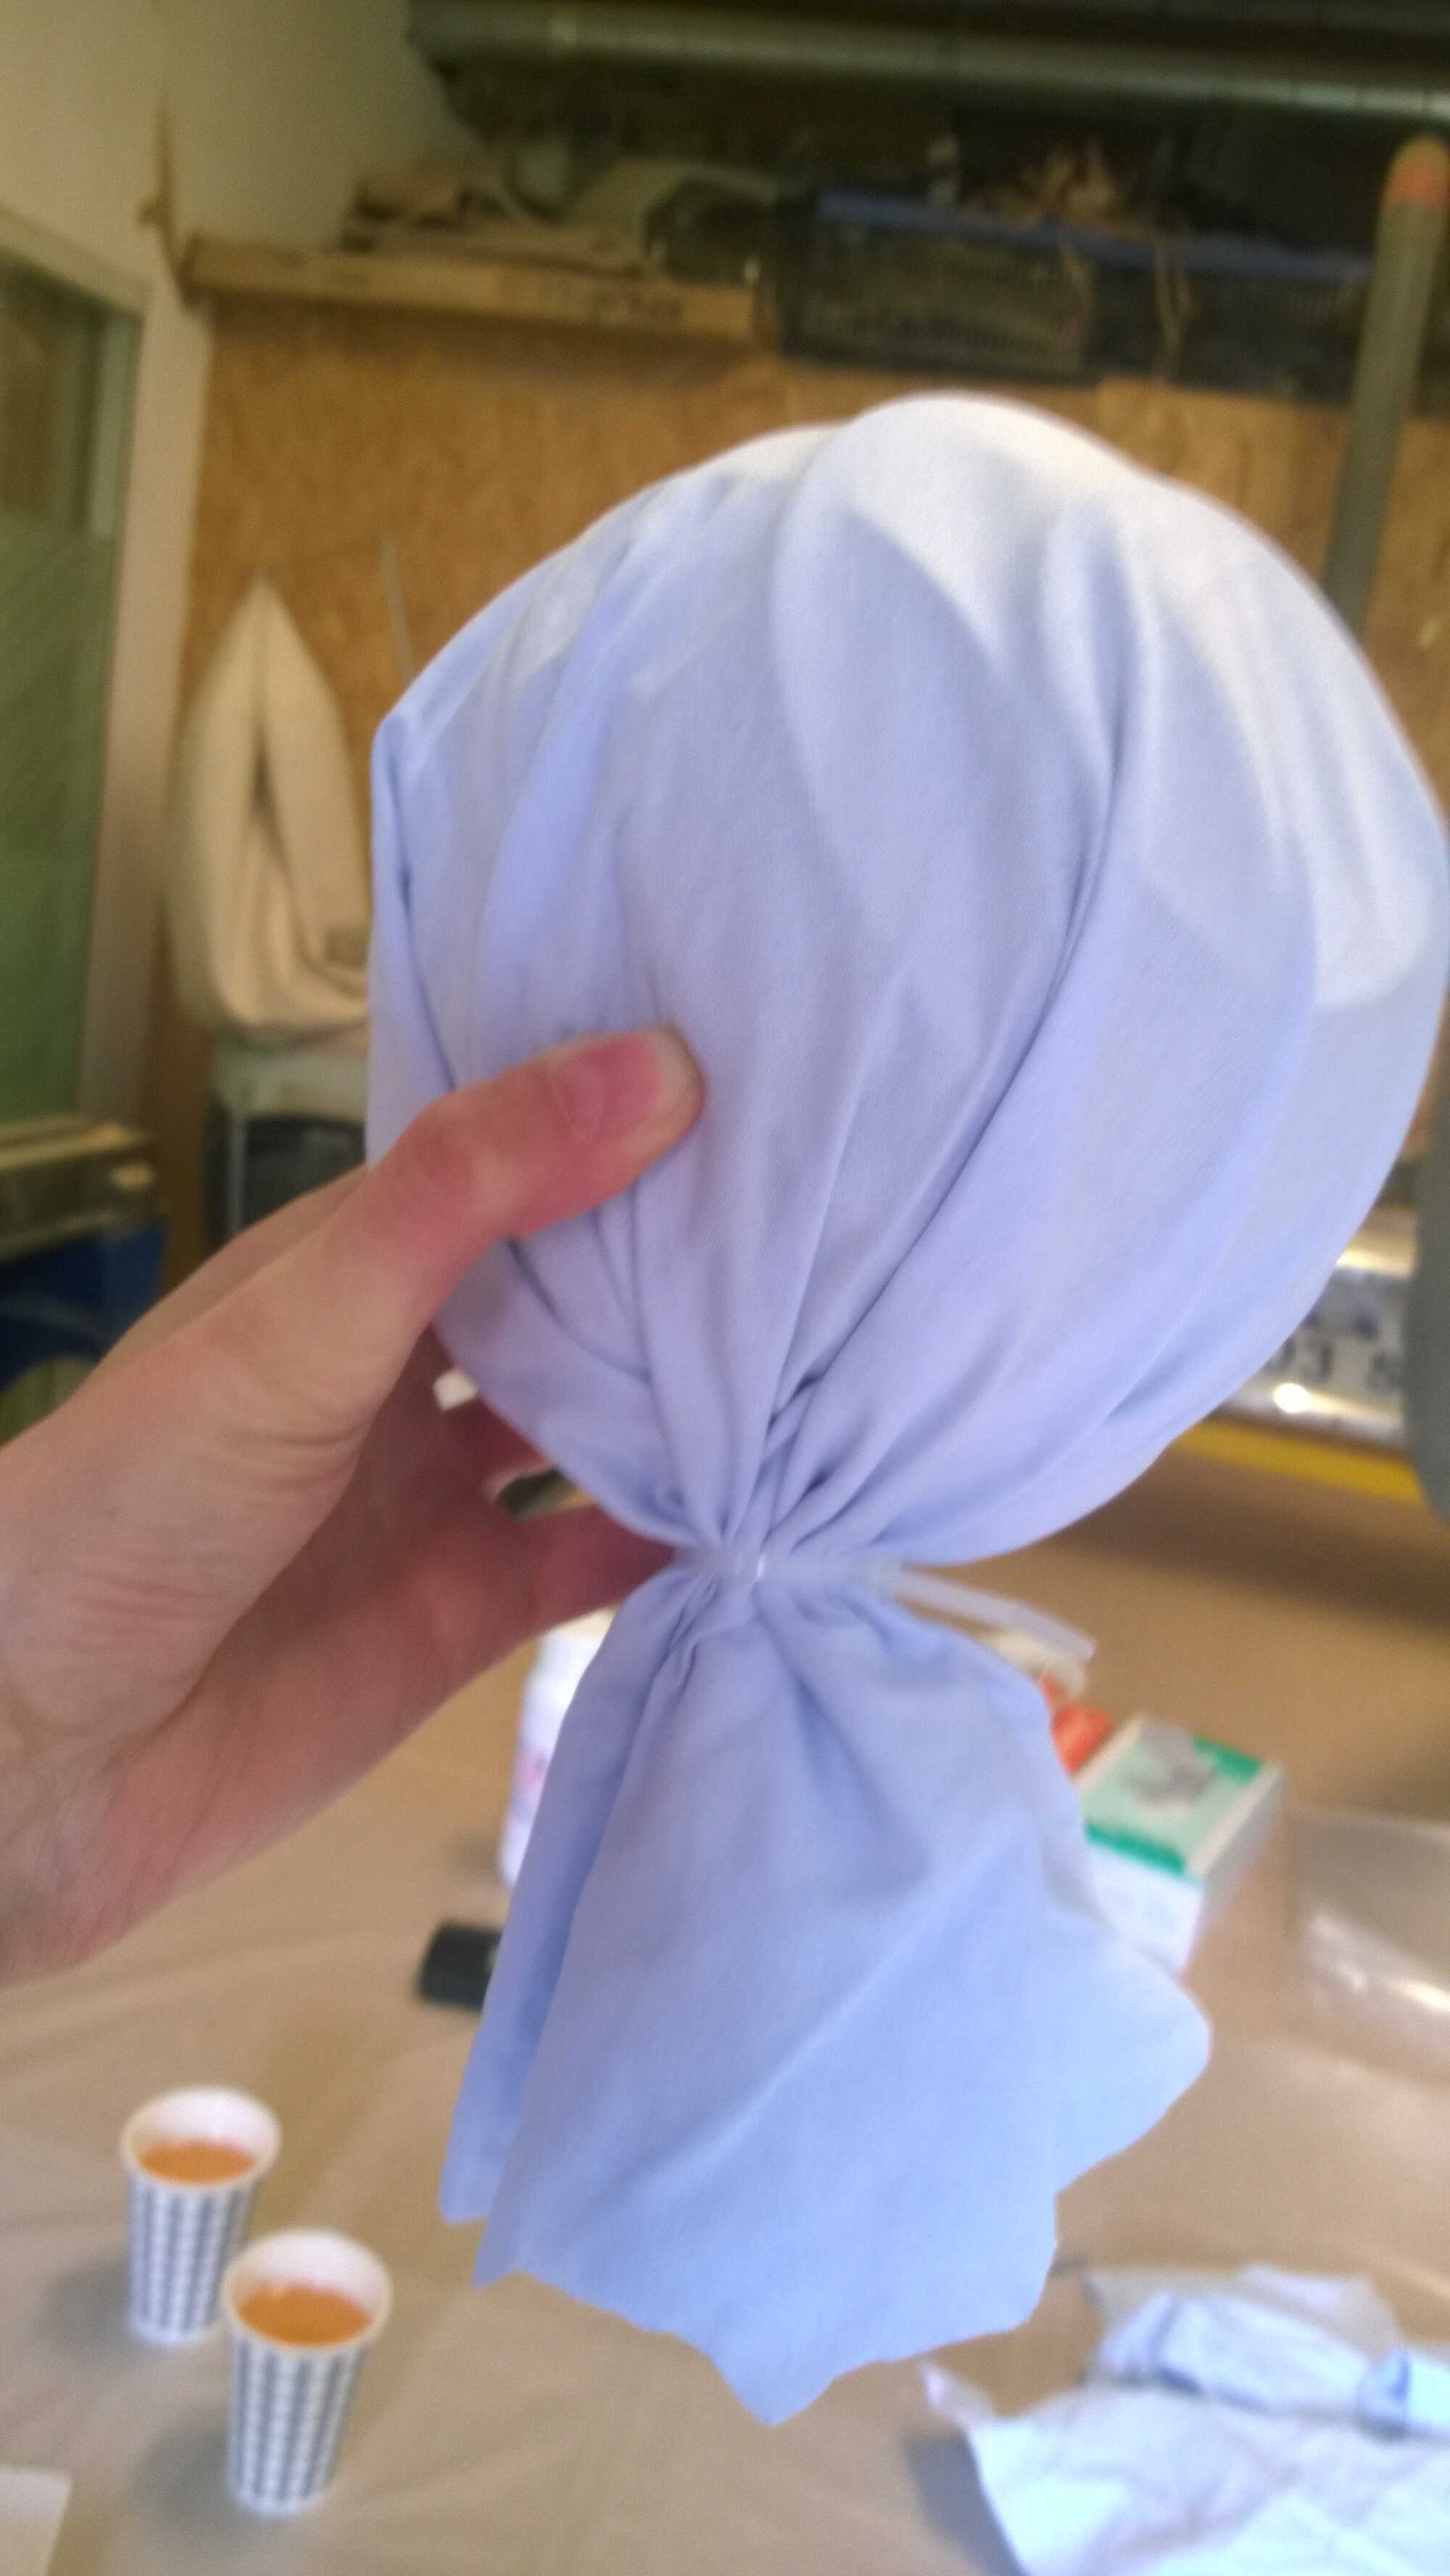
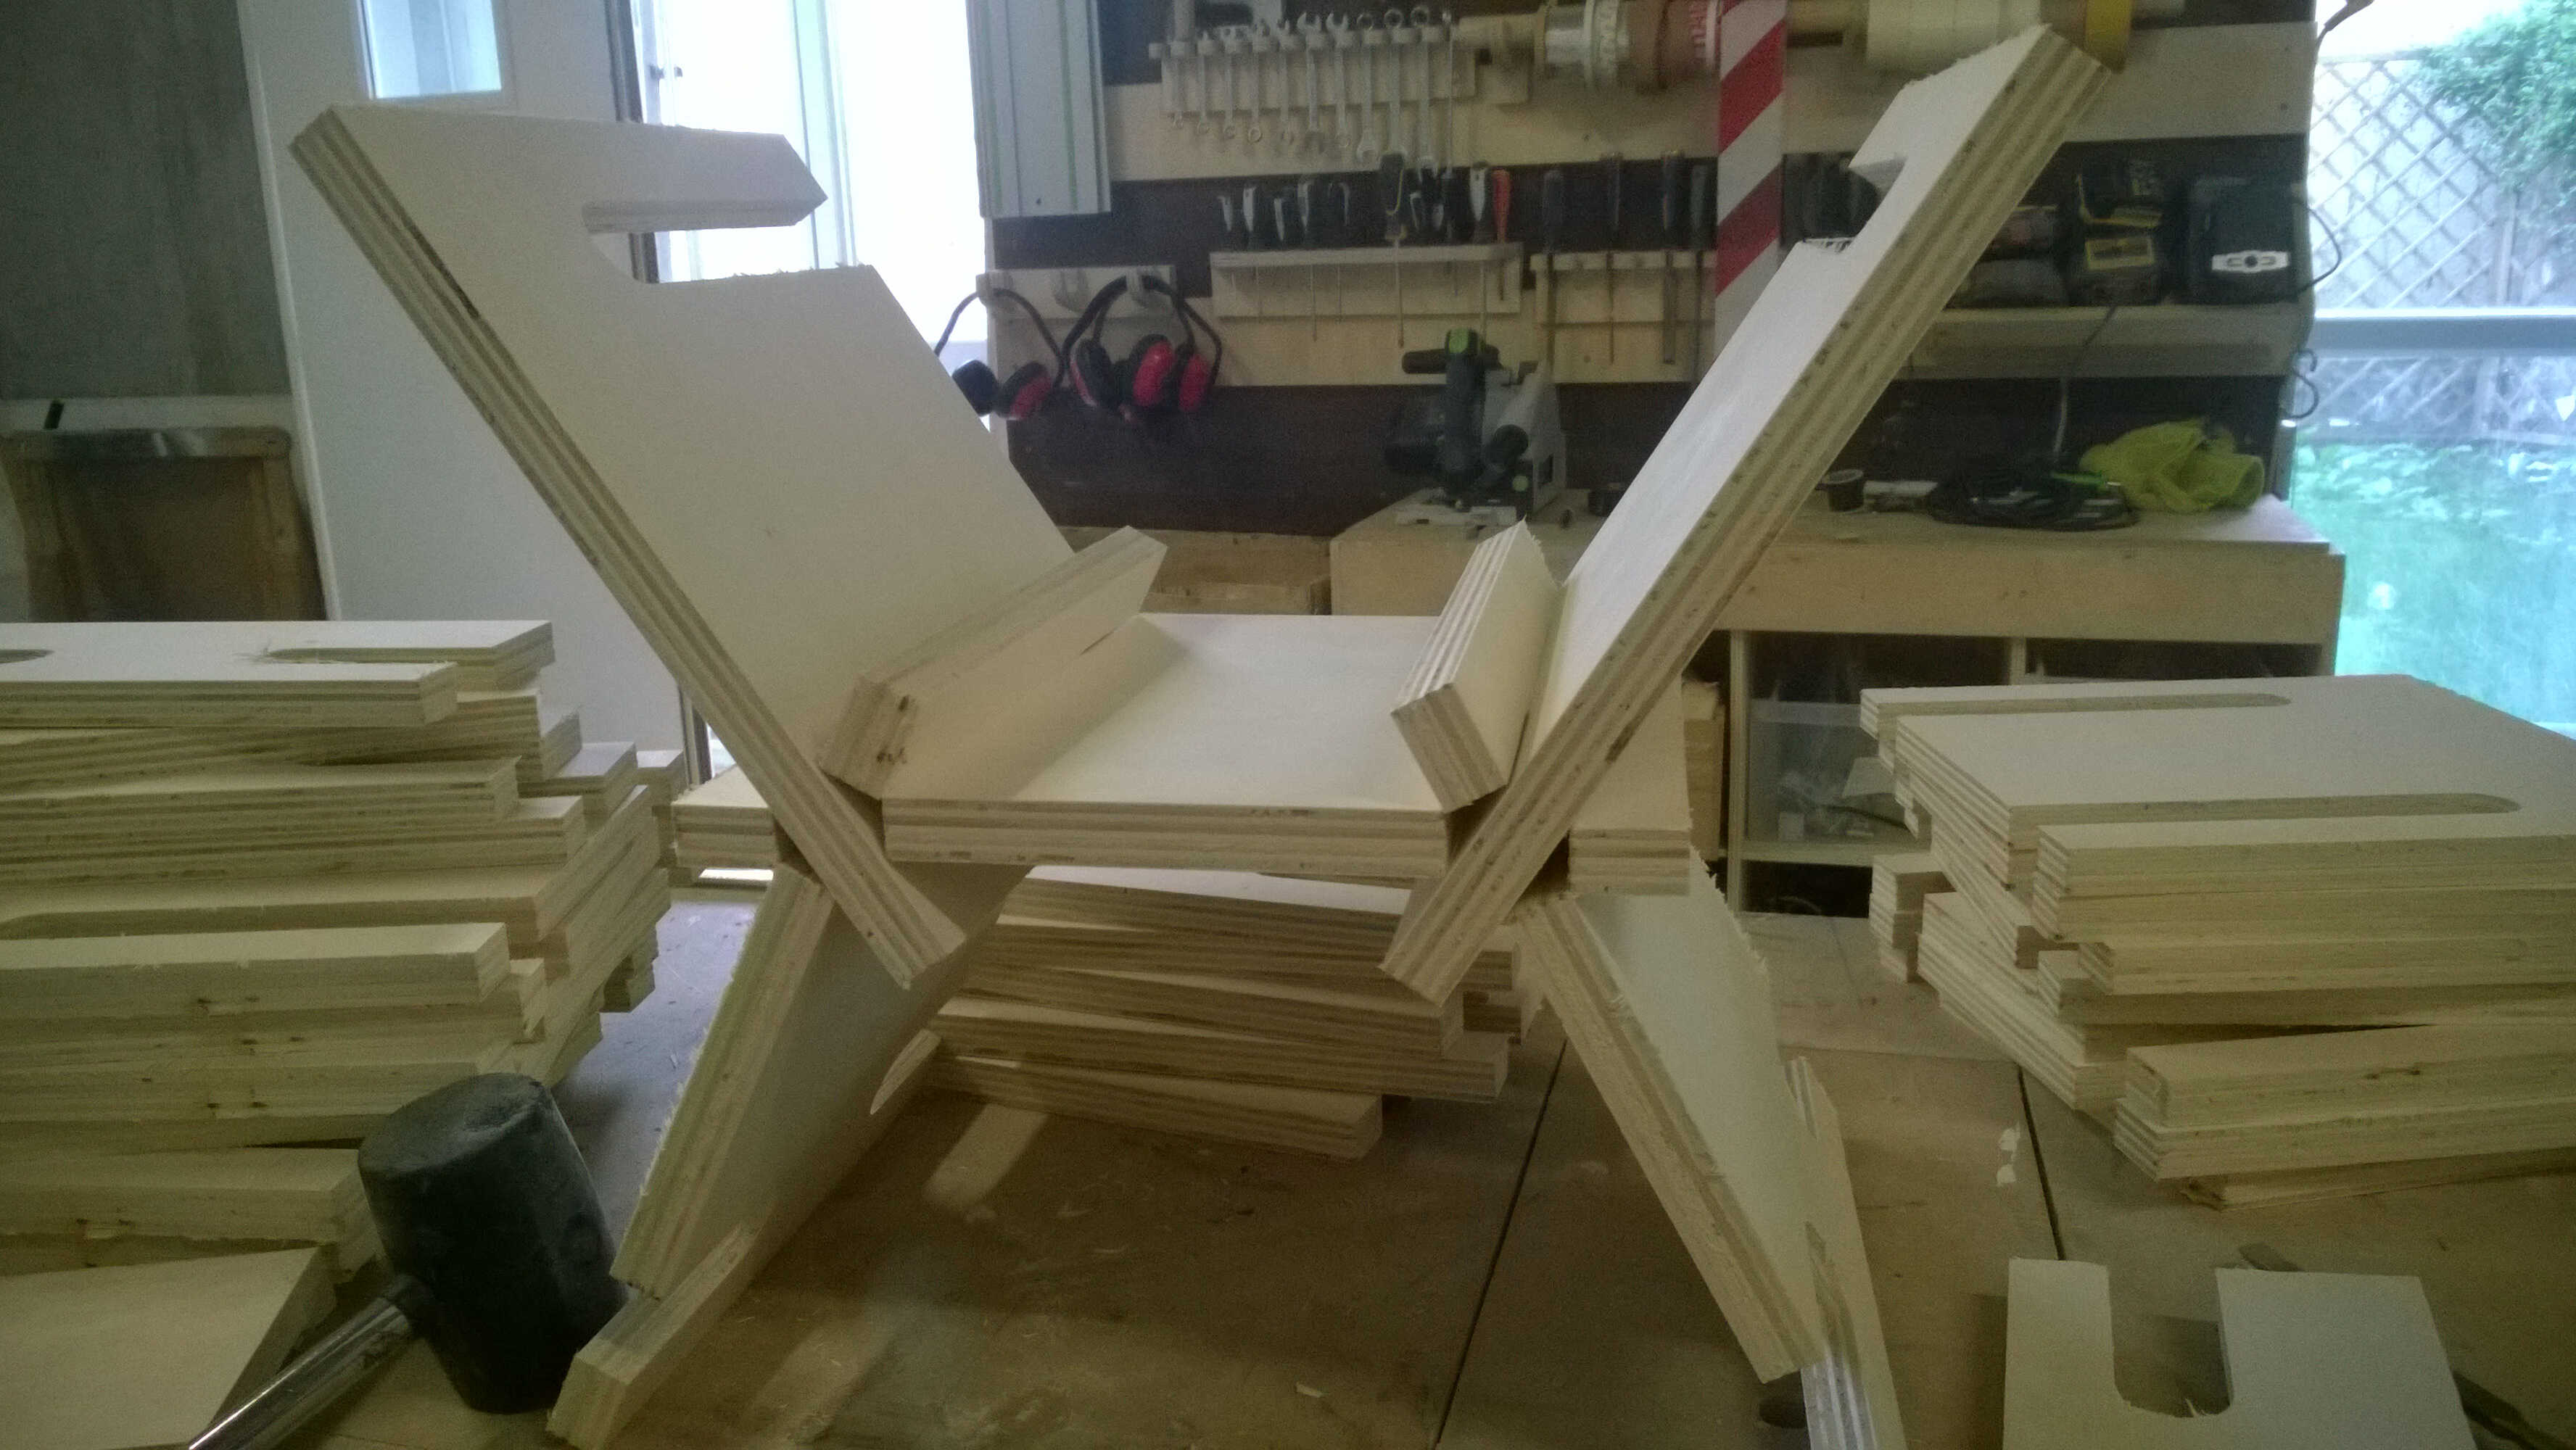
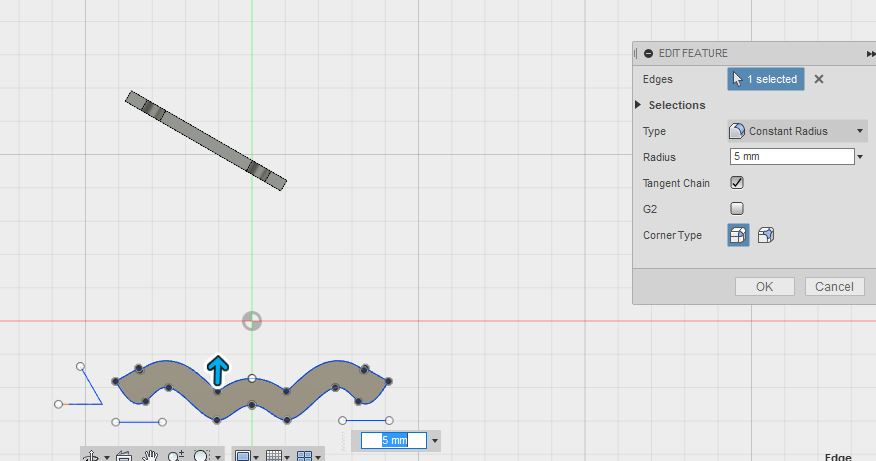
We were supposed to do a coupon. Personnaly I was really intrigued by the cardboard skeleton shown on Westkust page. So I thought about a way to test it with the simpliest design: a simple sphere. I wanted to mimick a balloon. Also another thing I wanted to test was highlighting the different ingredients used in the composites. We had cotton sheets, burlap and wood at disposal. We didn't work with fabric so far, so I chose a combination of whool and resin. I wanted to play with the different touch of cotton (with/without resin) so the idea was to cover a 15 cm diameter cardboard sphere with reinforced cotton and to let a "skirt" of raw cotton protrude .
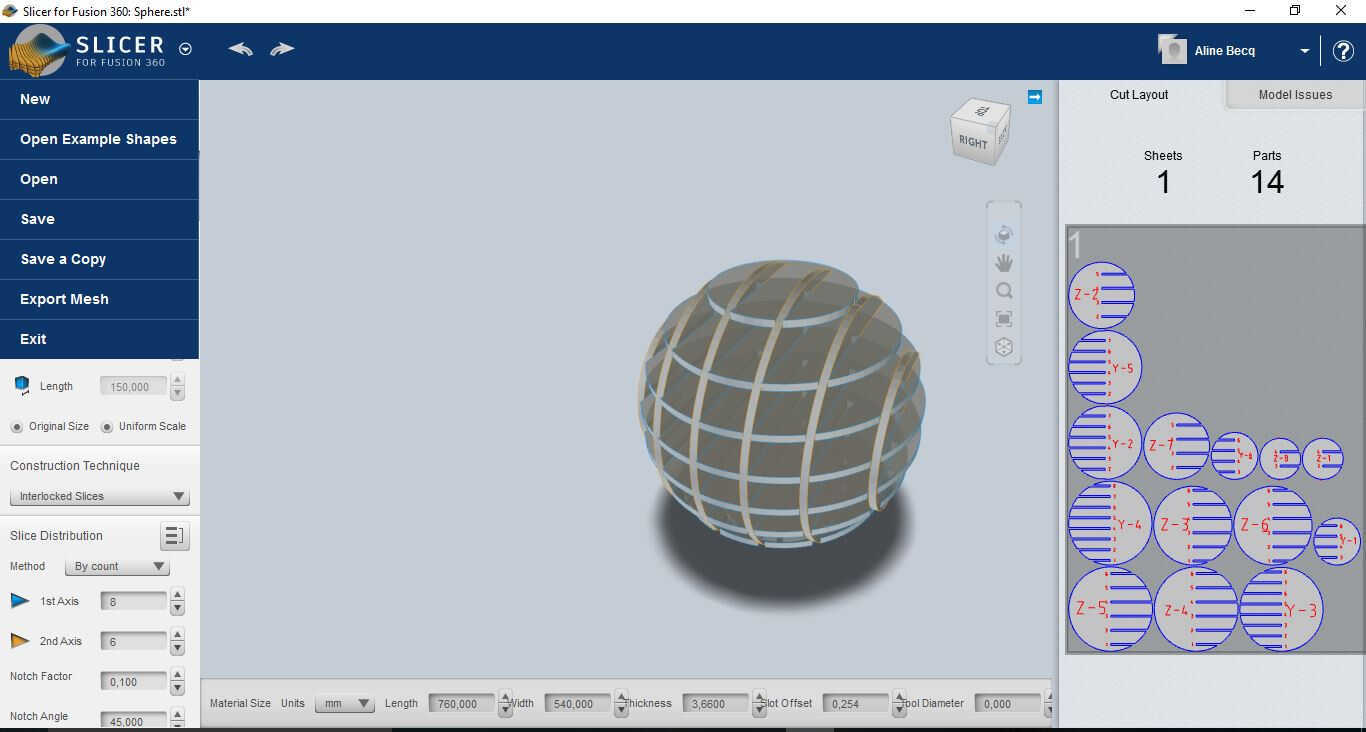
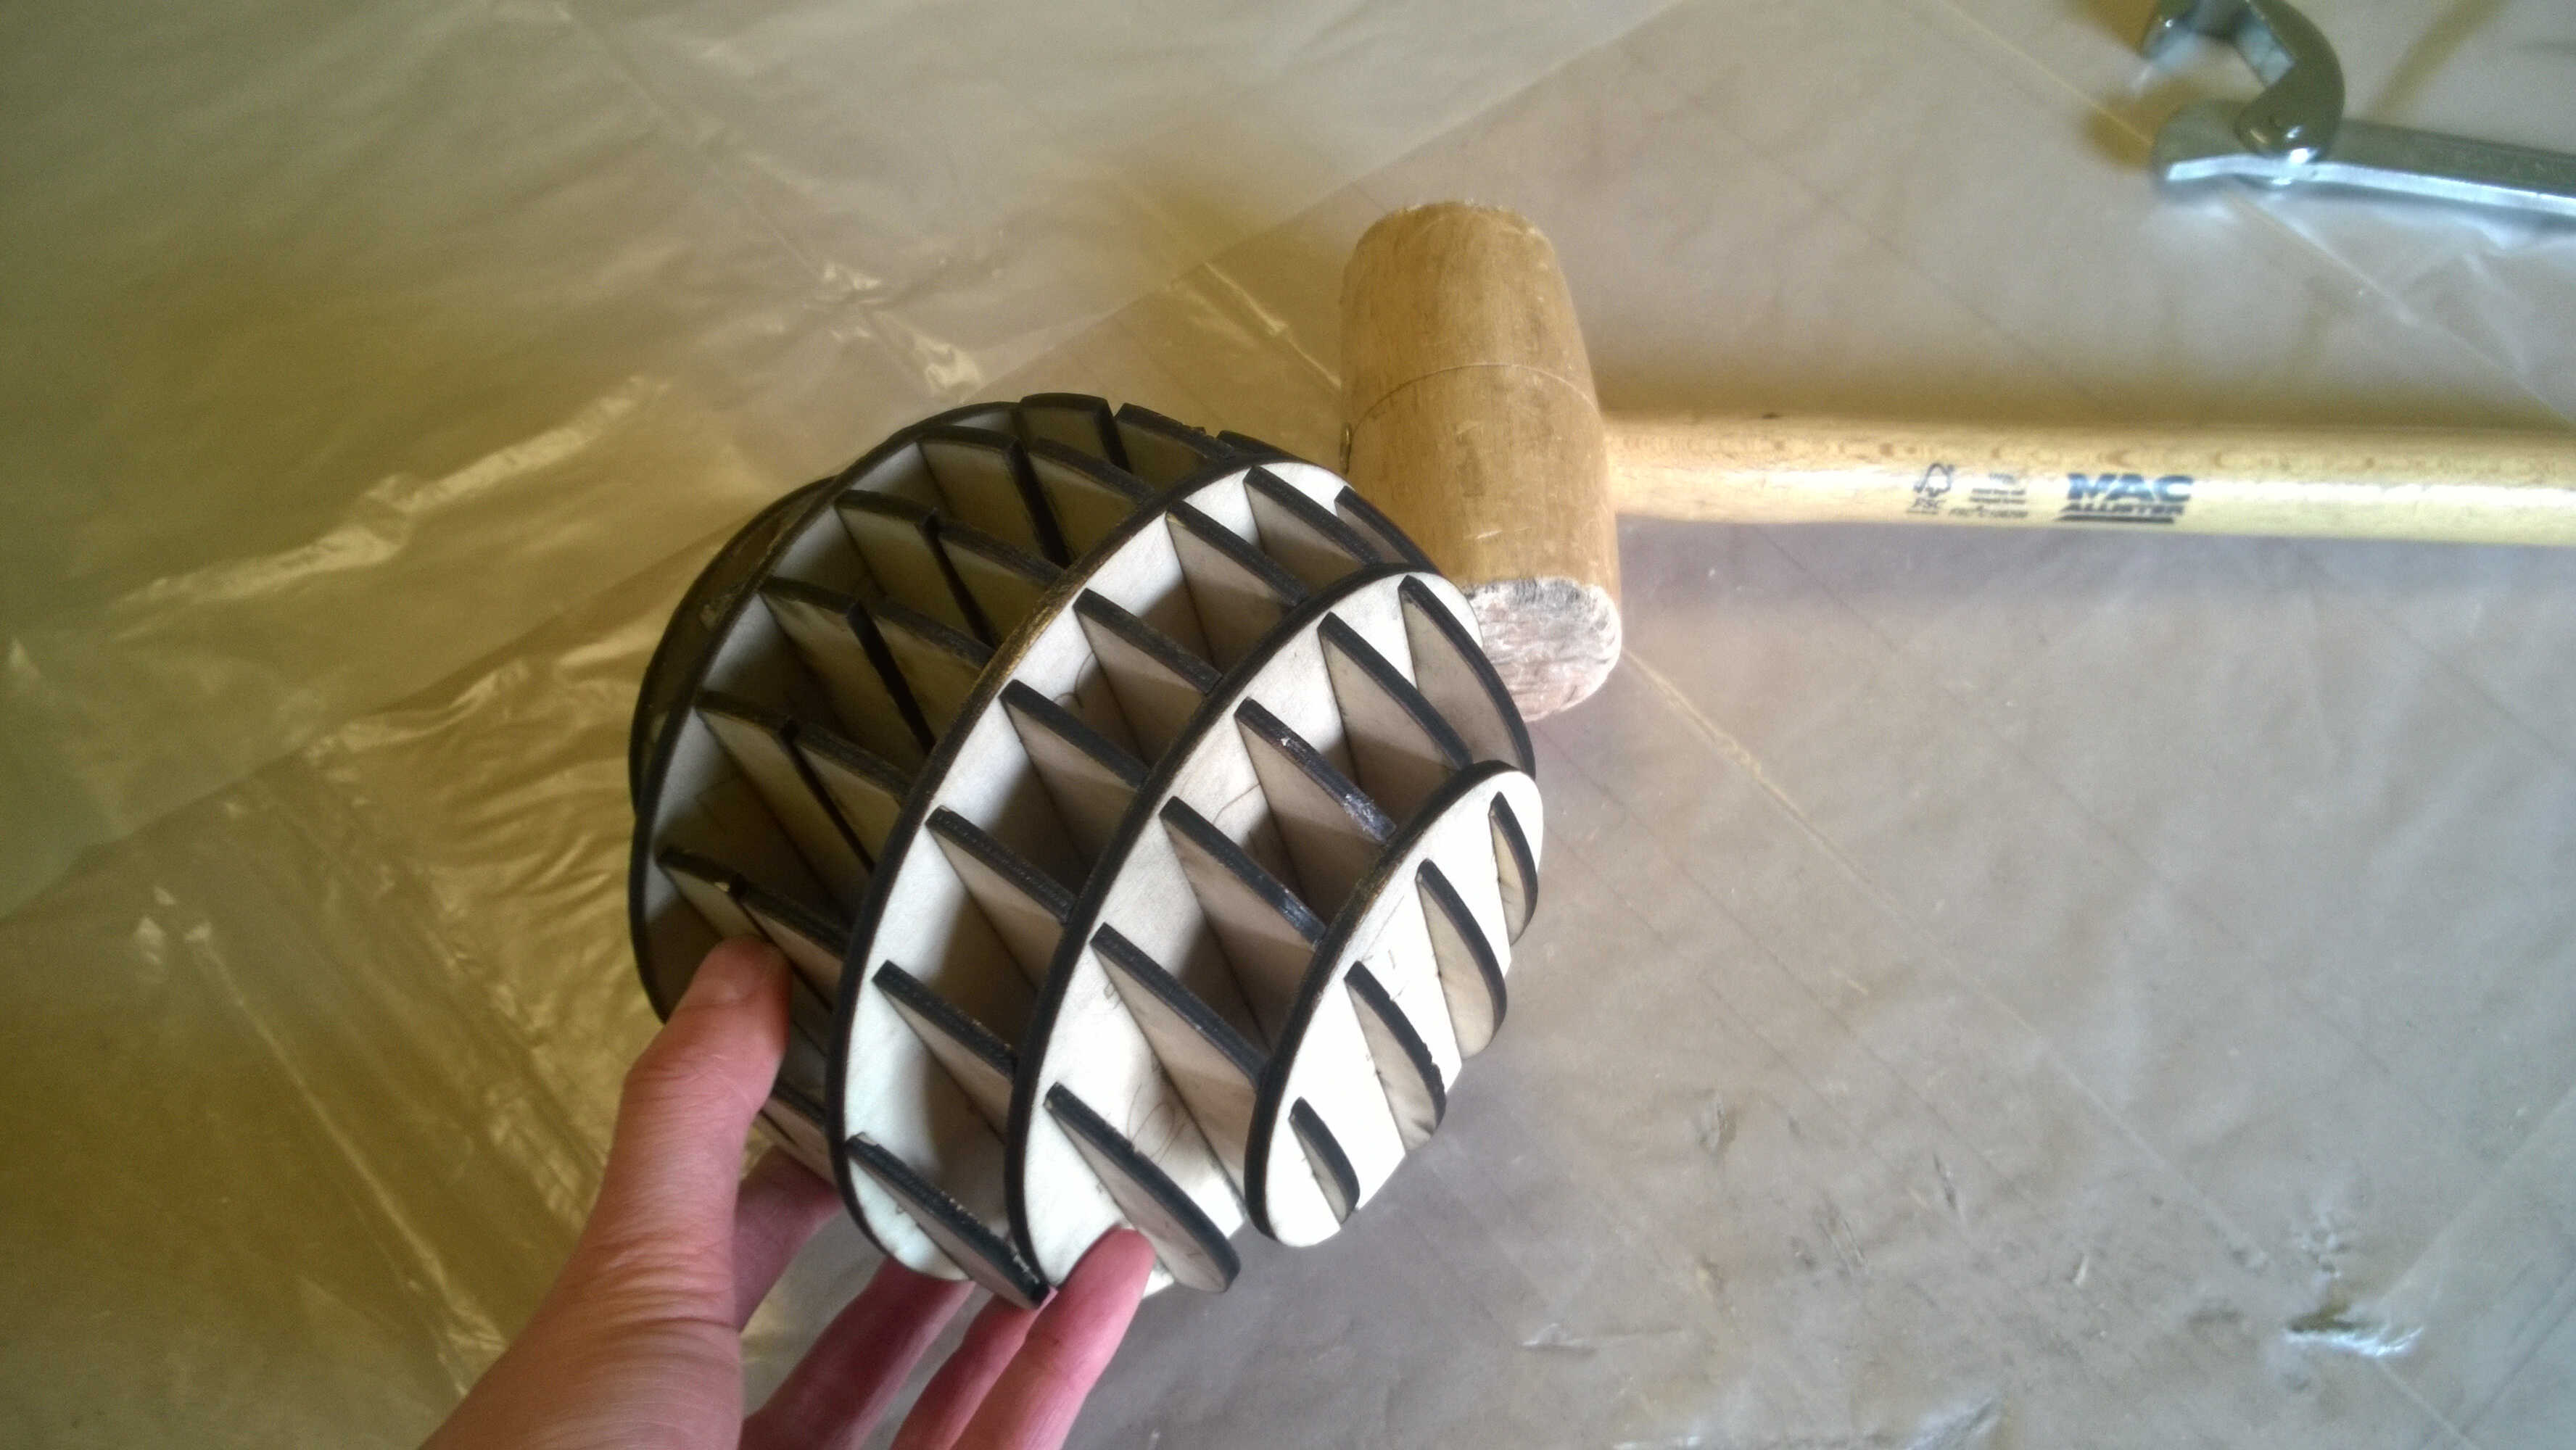
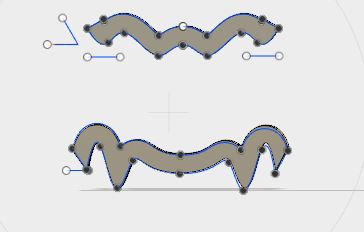
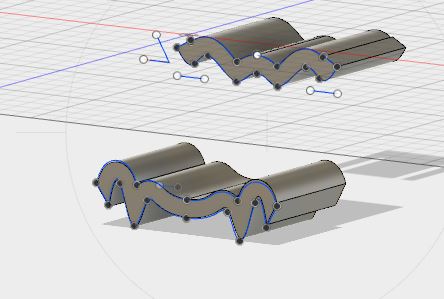
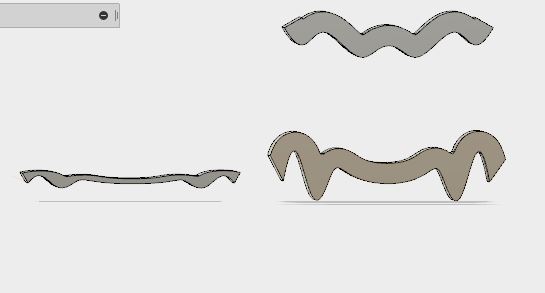
We decided to go for it. I drew a sphere in Fusion, exported it in .stl, opened it in Slicer for Fusion. In Slicer I chose the unit, the type of result I wanted: interlocked slices. I played with the number of slices, went for 8 along Z and 6 along Y. At the bottom of the window I defined the material dimensions and left the slot offset by default. We didn't have such a surface of cardboard so we used 3mm medium instead. This added in stiffness making the assembly challenging (for wood extra offset should be defined).
ready to laser cut
previsualization
in real -with a helper
Resin
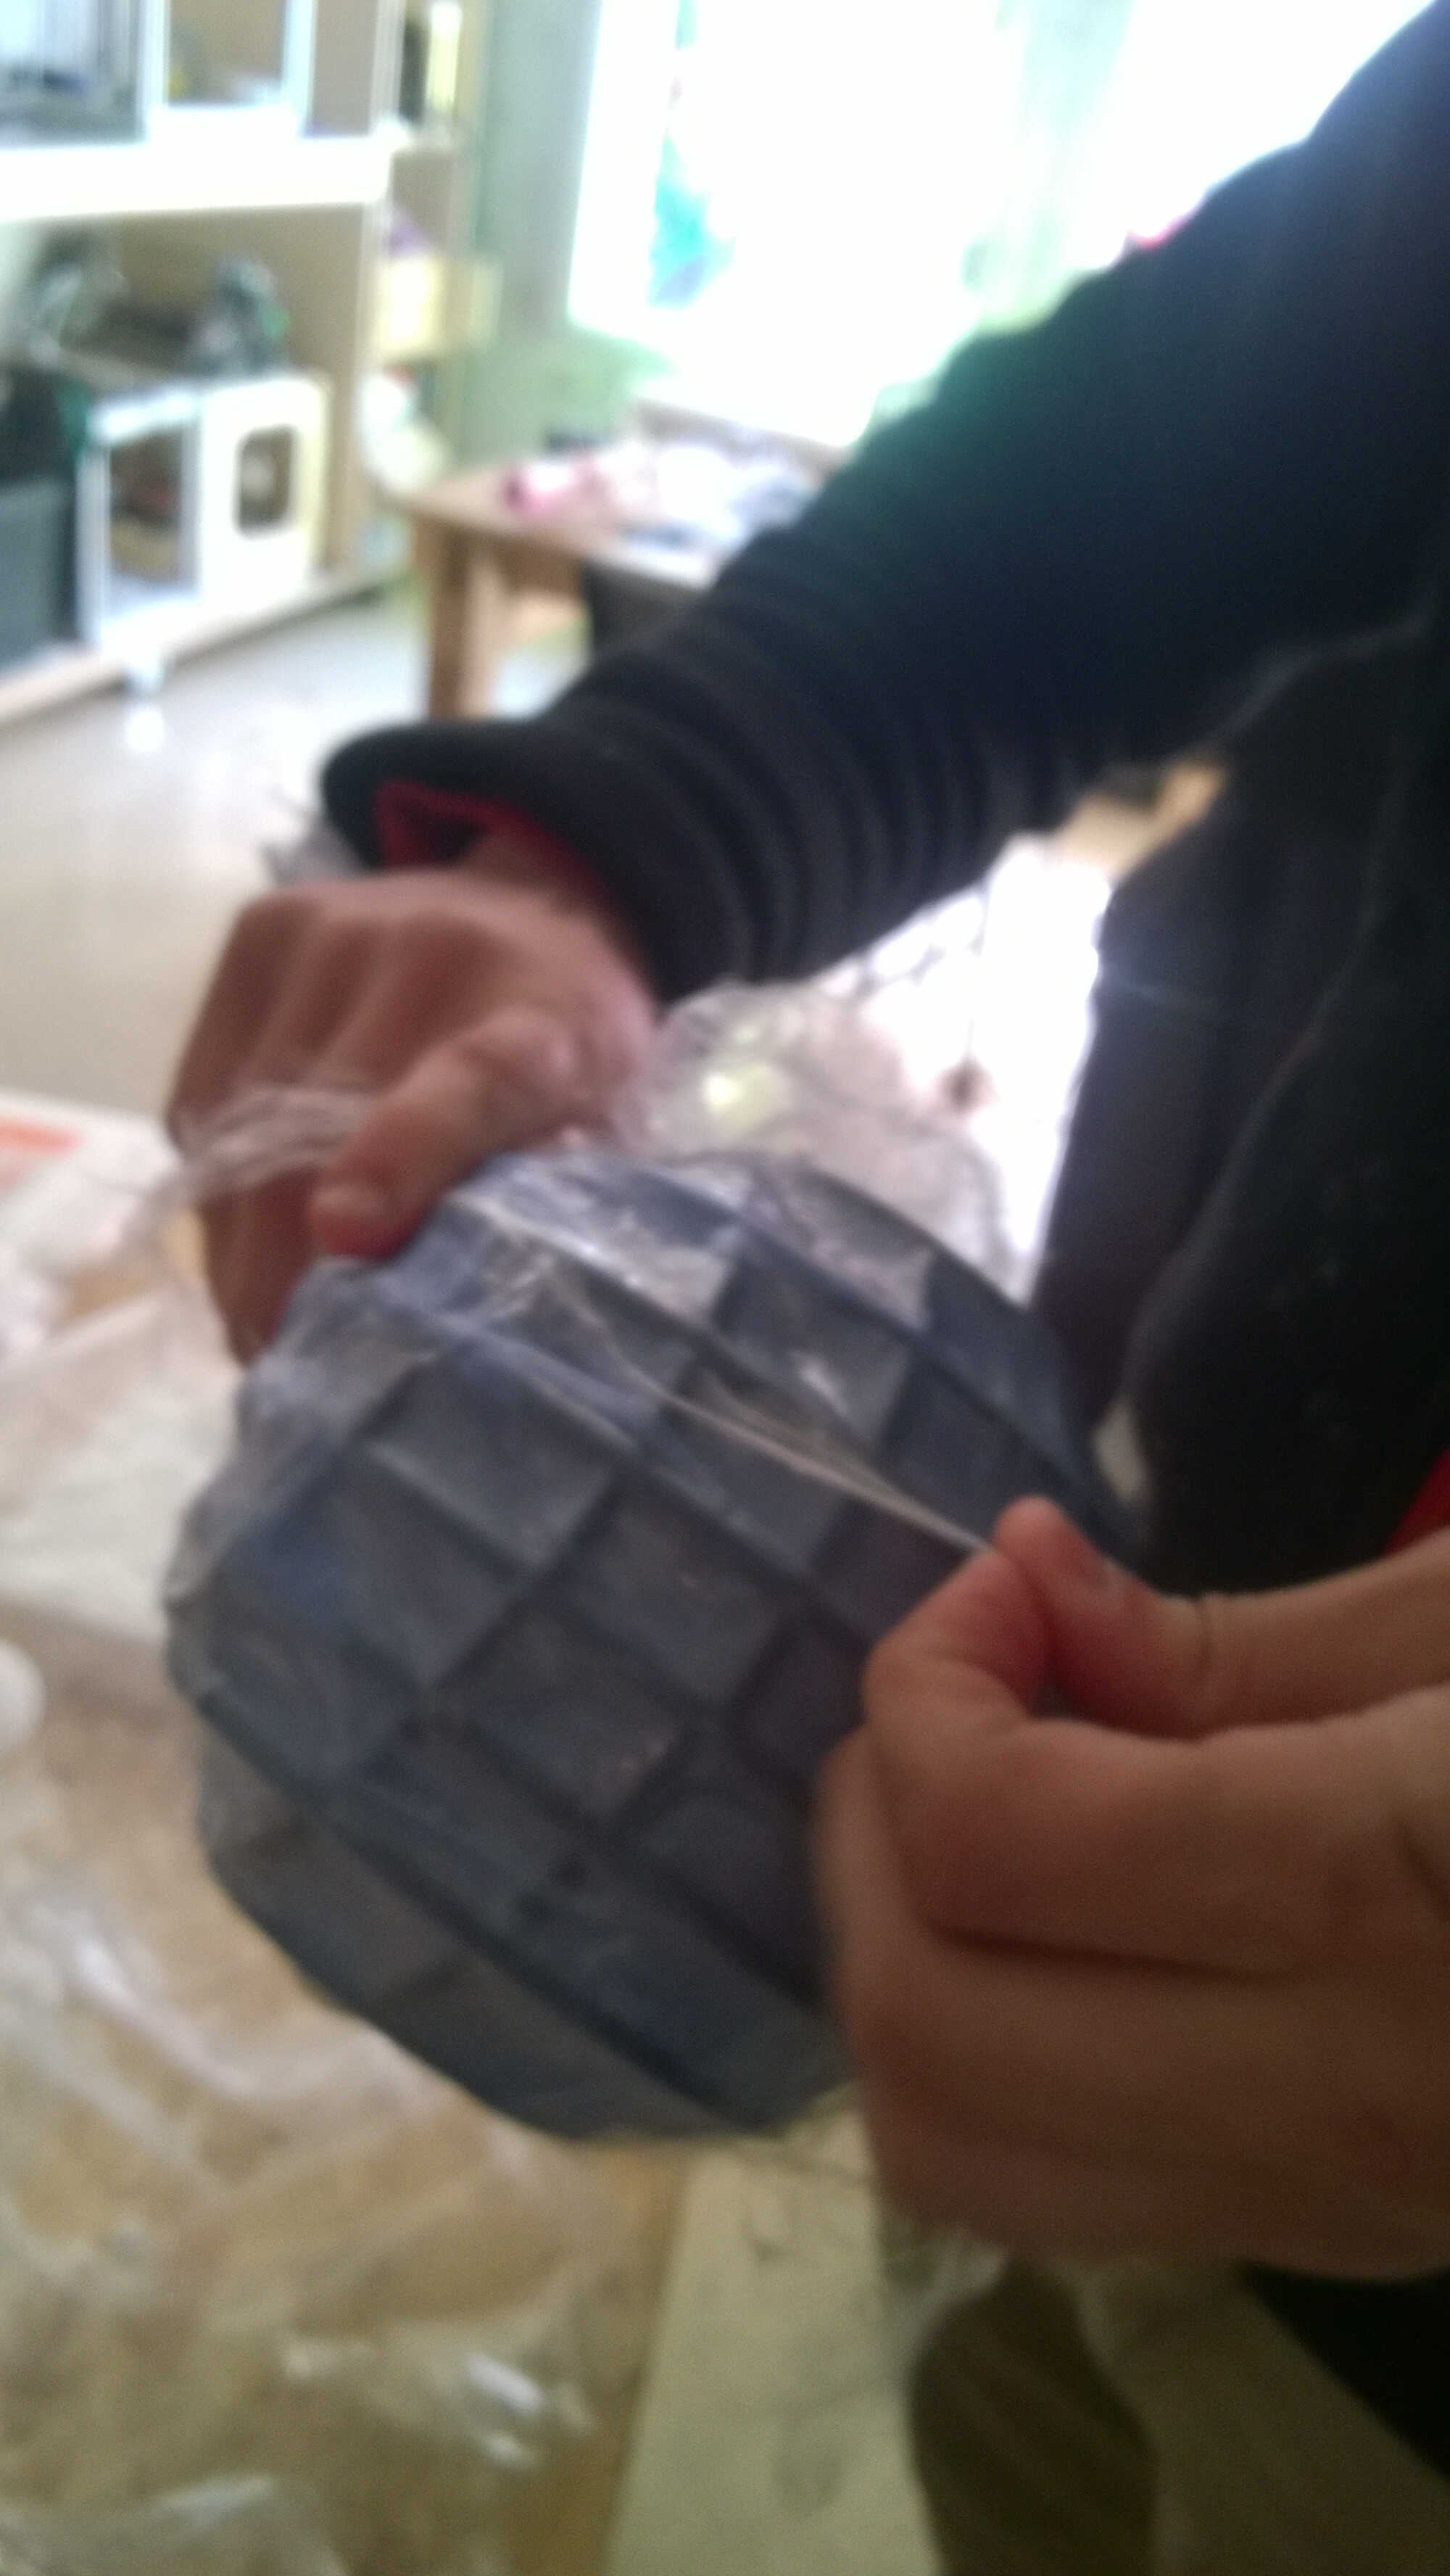
Then we draped the sphere with cotton, trying to protect it from the resin. We weighted the components (120g A/53g B), mixed them with a stick. Once mixed we had 25mn to manipulate before it set.
balooning
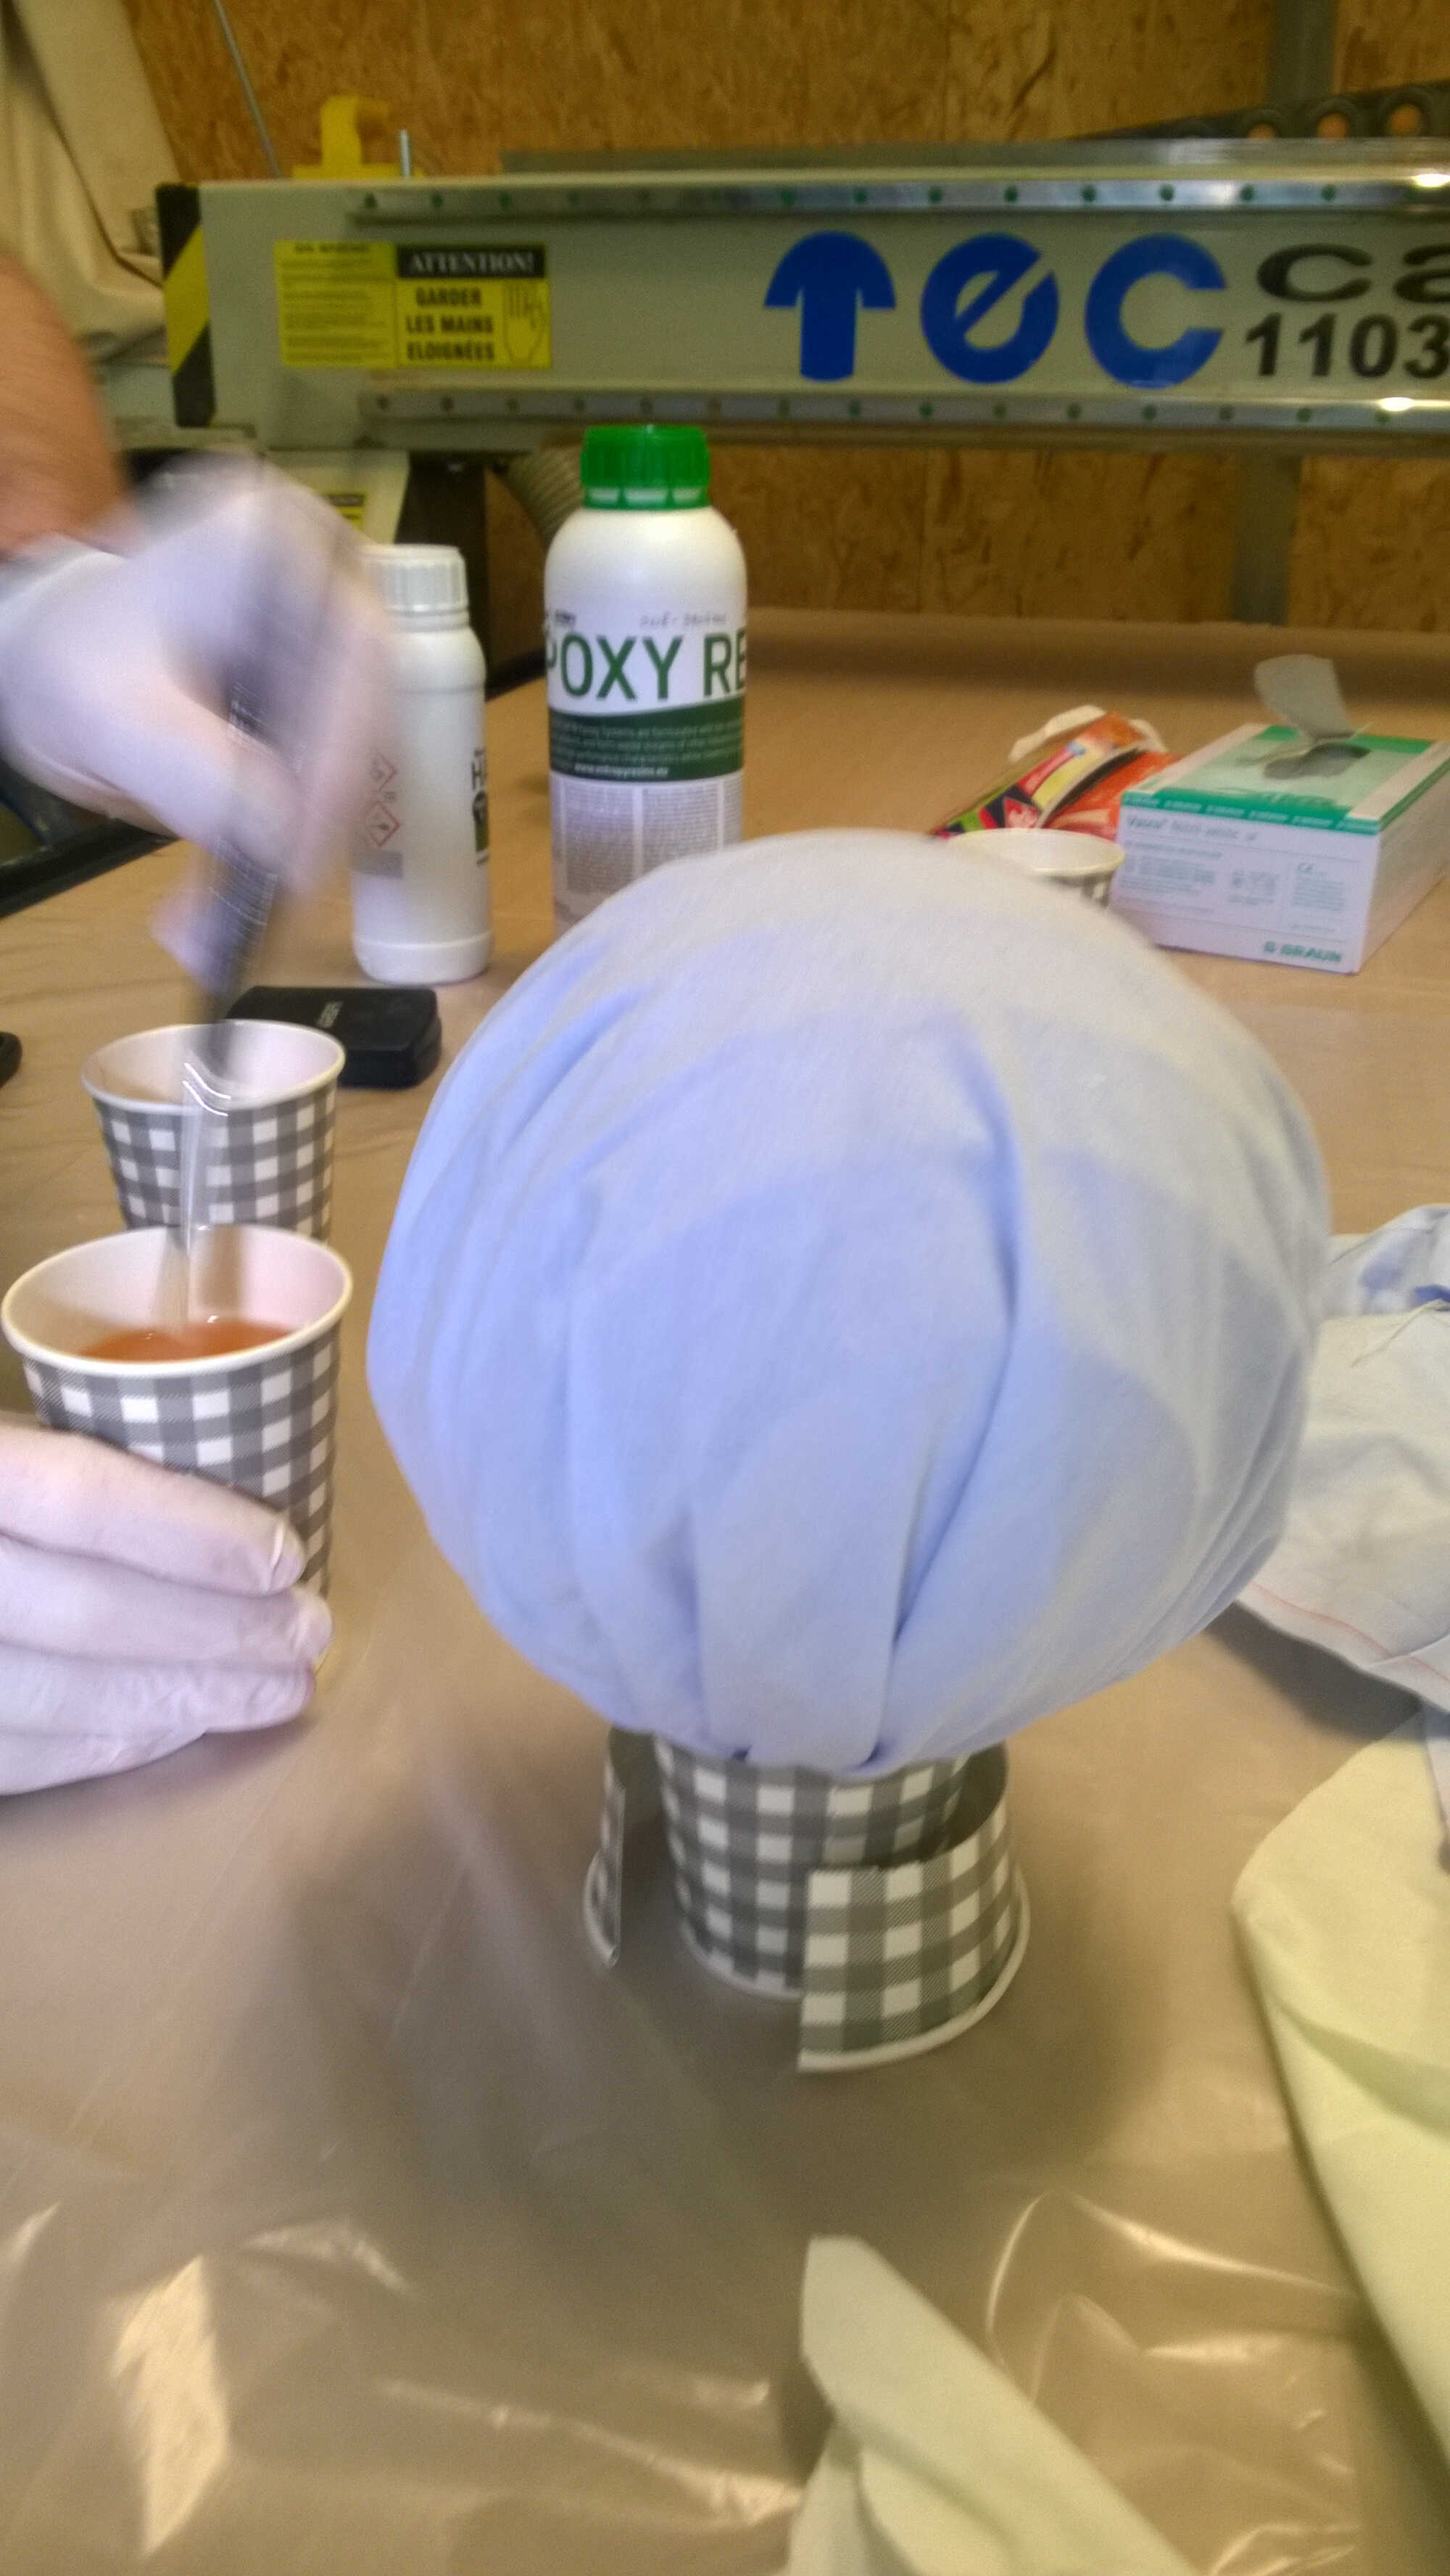
skirt protection

mixing
Yassine and Thomas were manipulating, after the first layer the touch of the heating nitrile gloves began to be unpleasant. They hurried through the second layer, digging it directly into the cup -so the skirt ended up reinforced too. Once a full cup of resin was applied, we drapped the balloon in cling film. The package was then deposited in a vaccum bag and vaccumed.
We noticed that the resin was heating up, the cup of remaining resin was fuming.
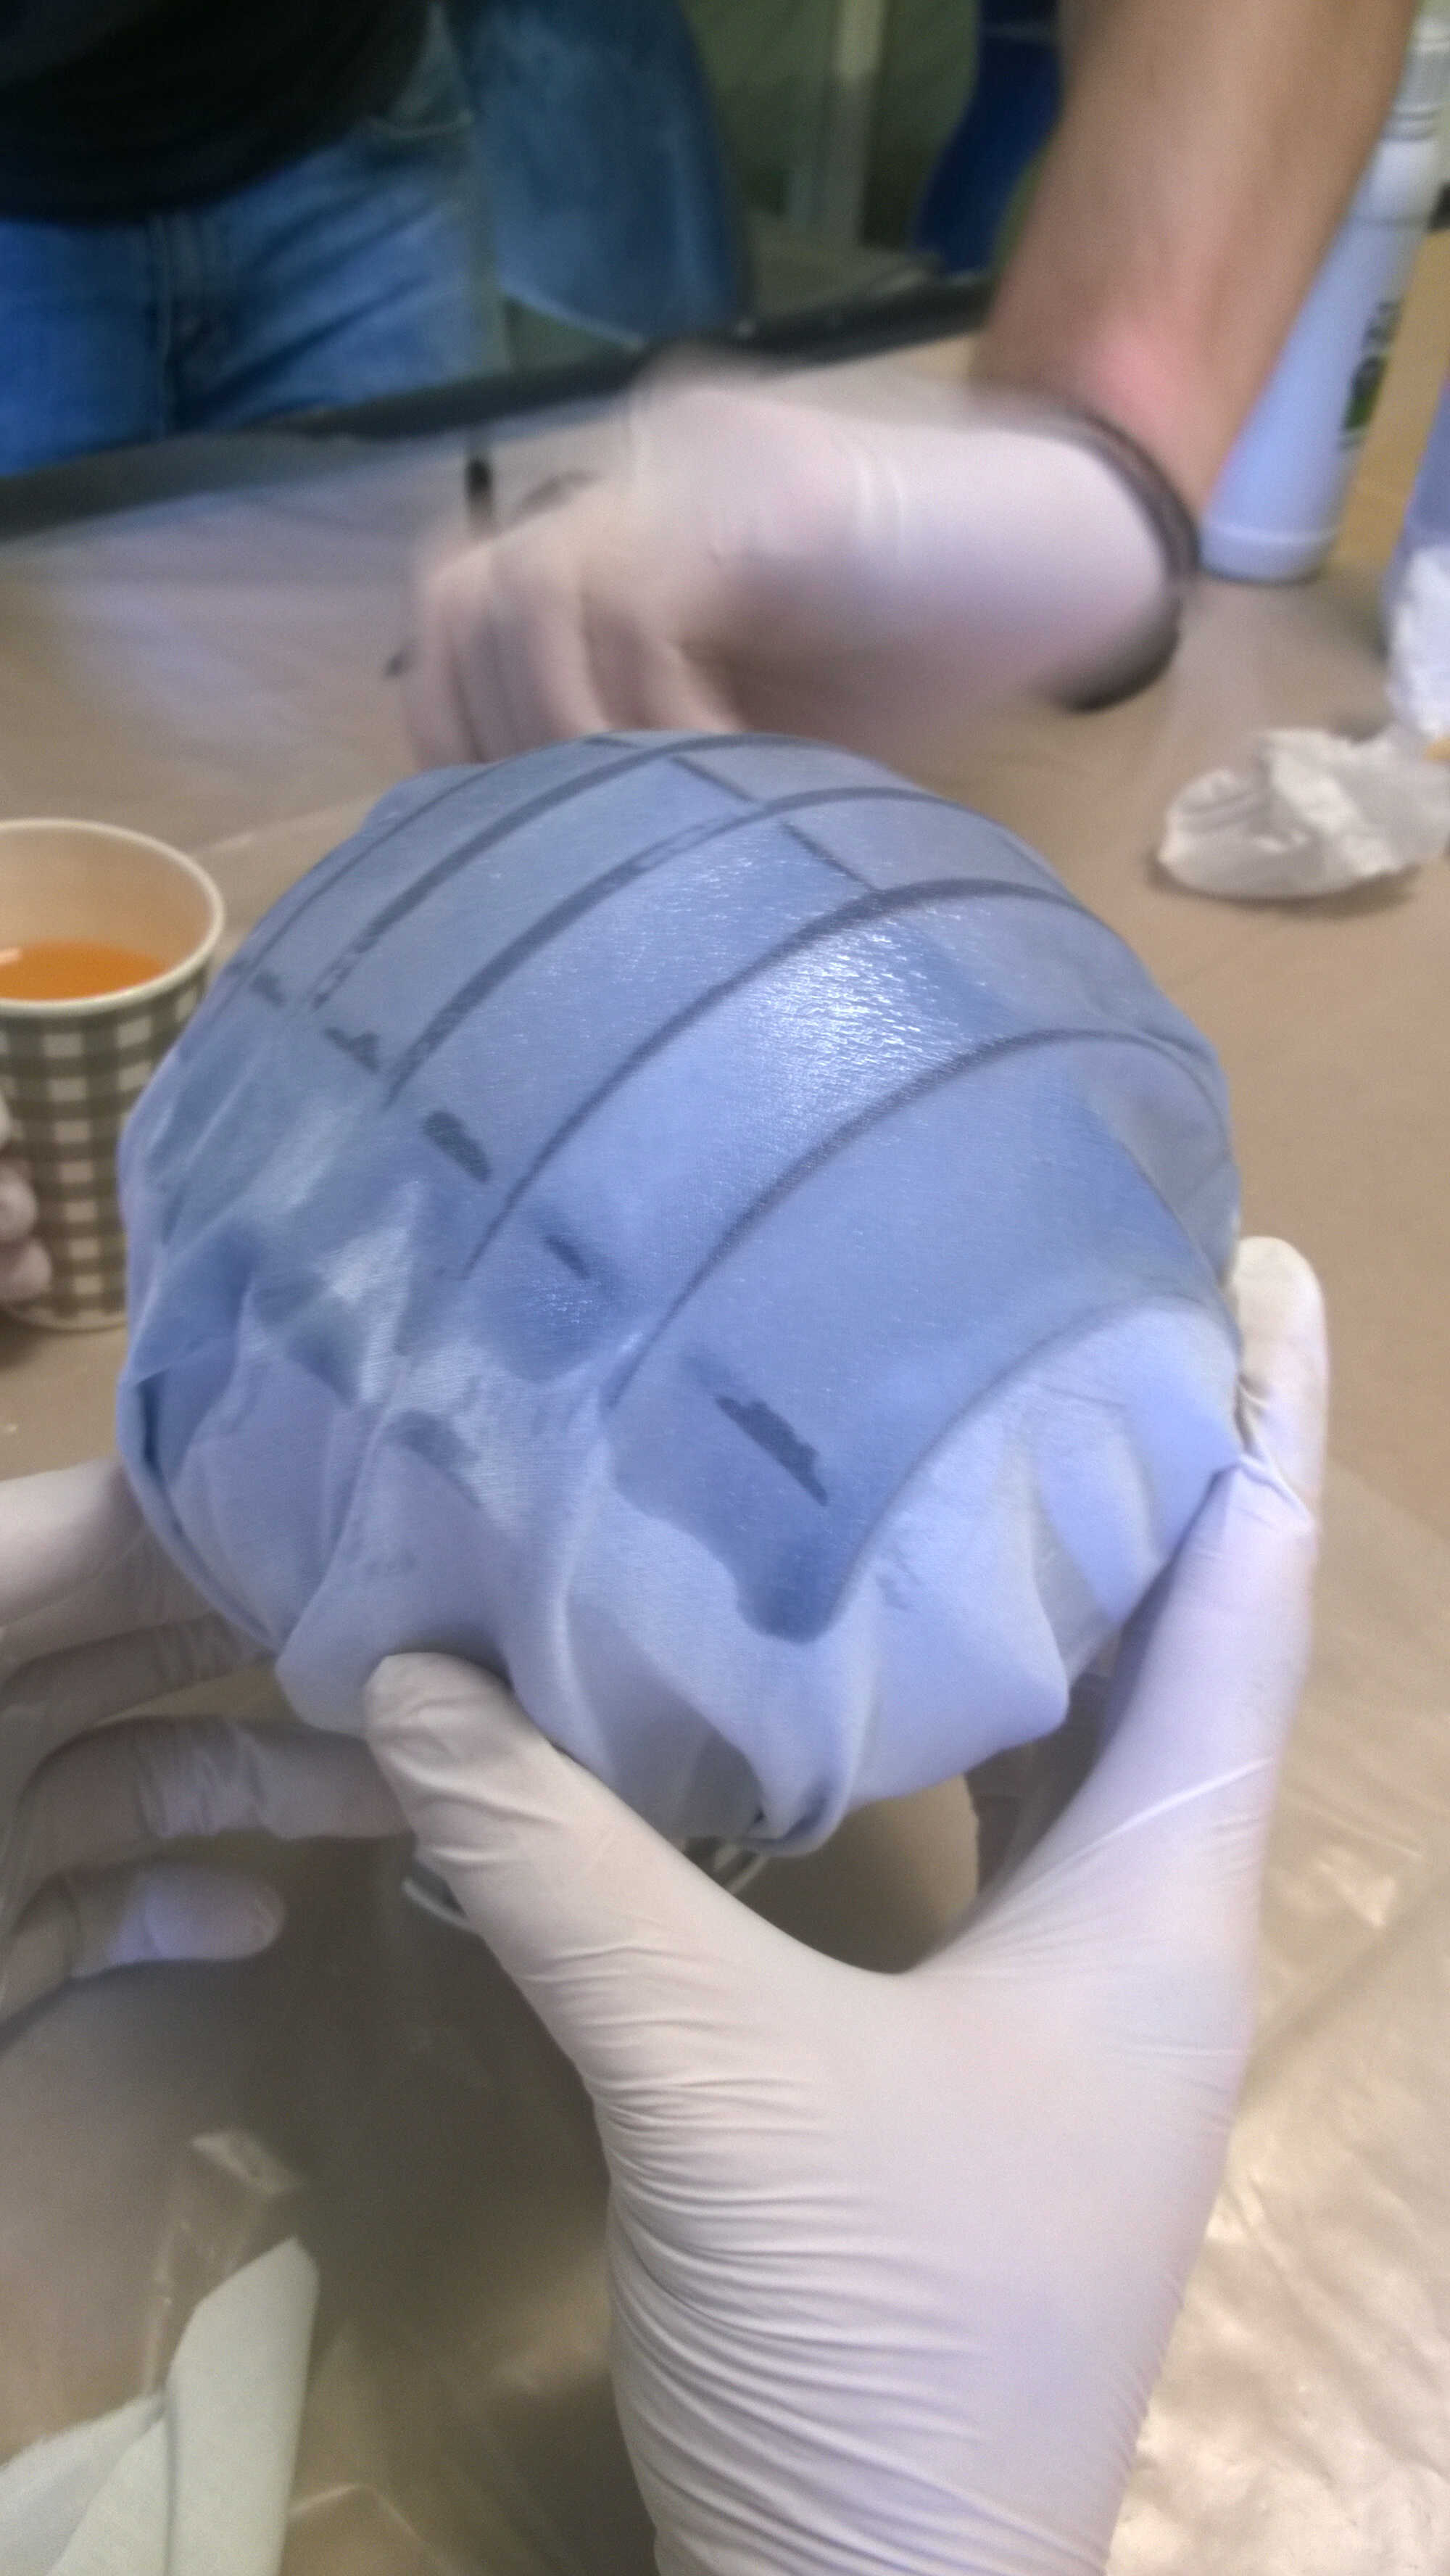
first layer
diggin for resin
second layer
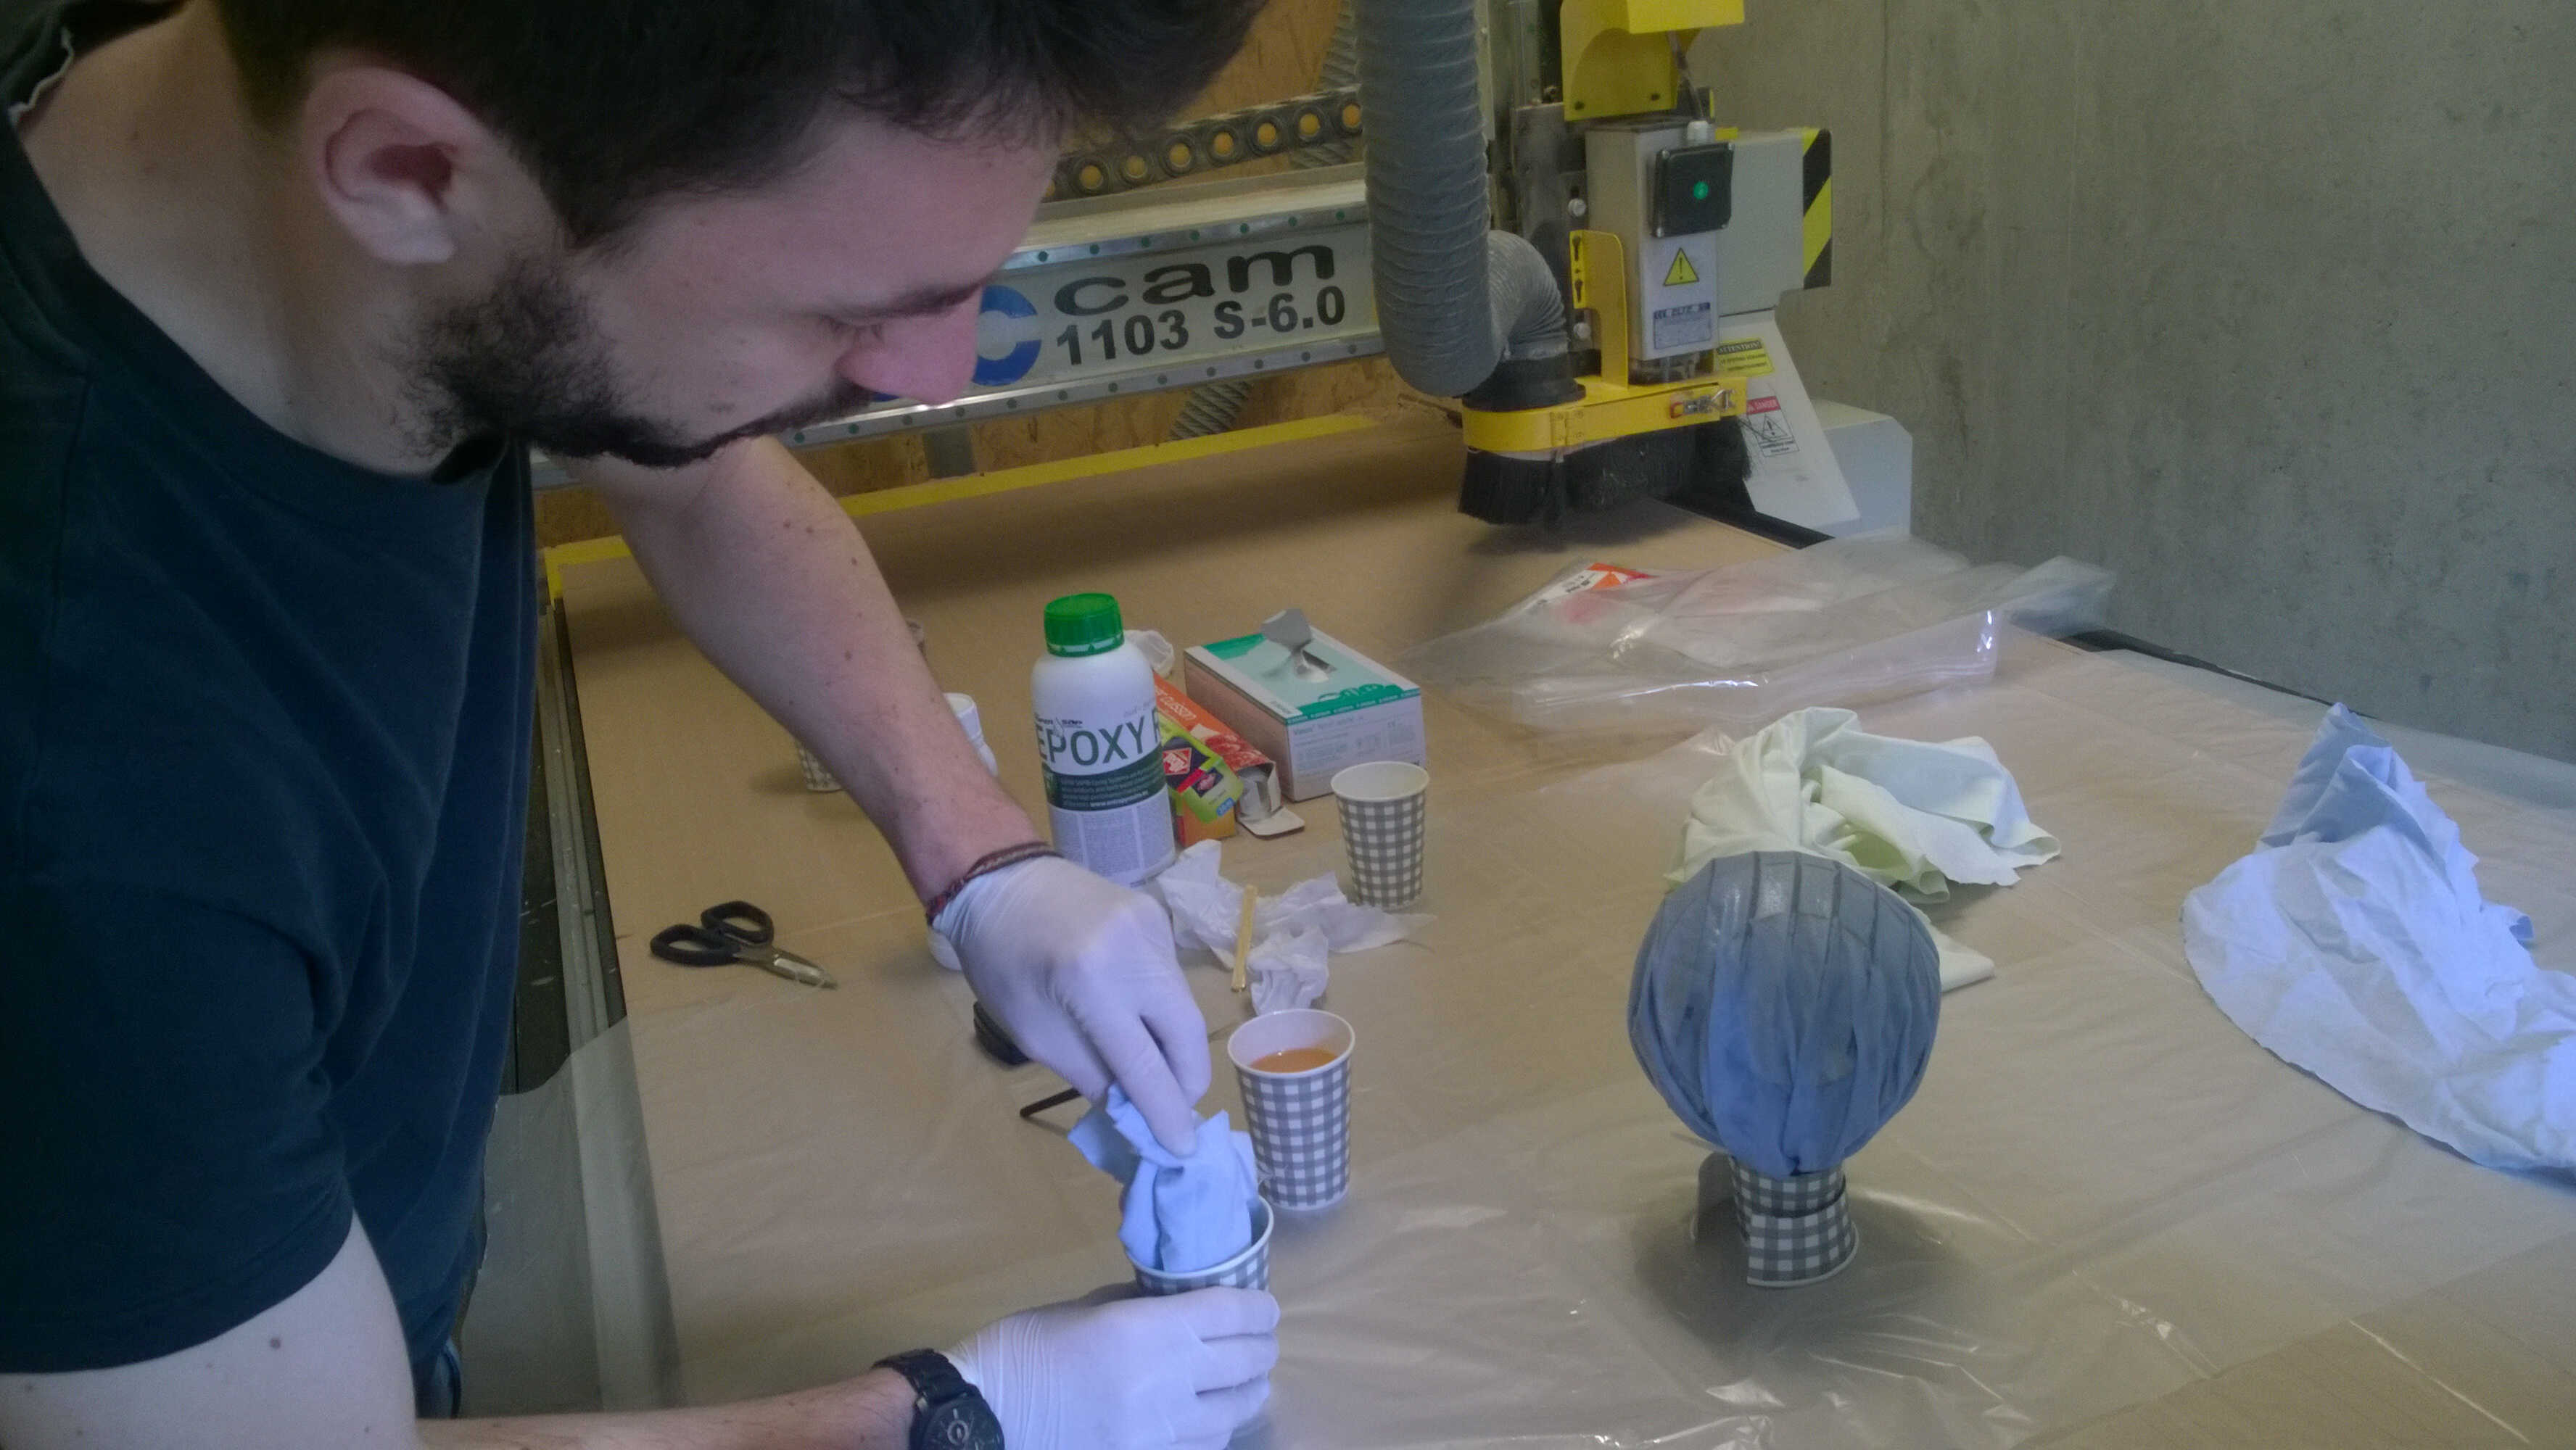
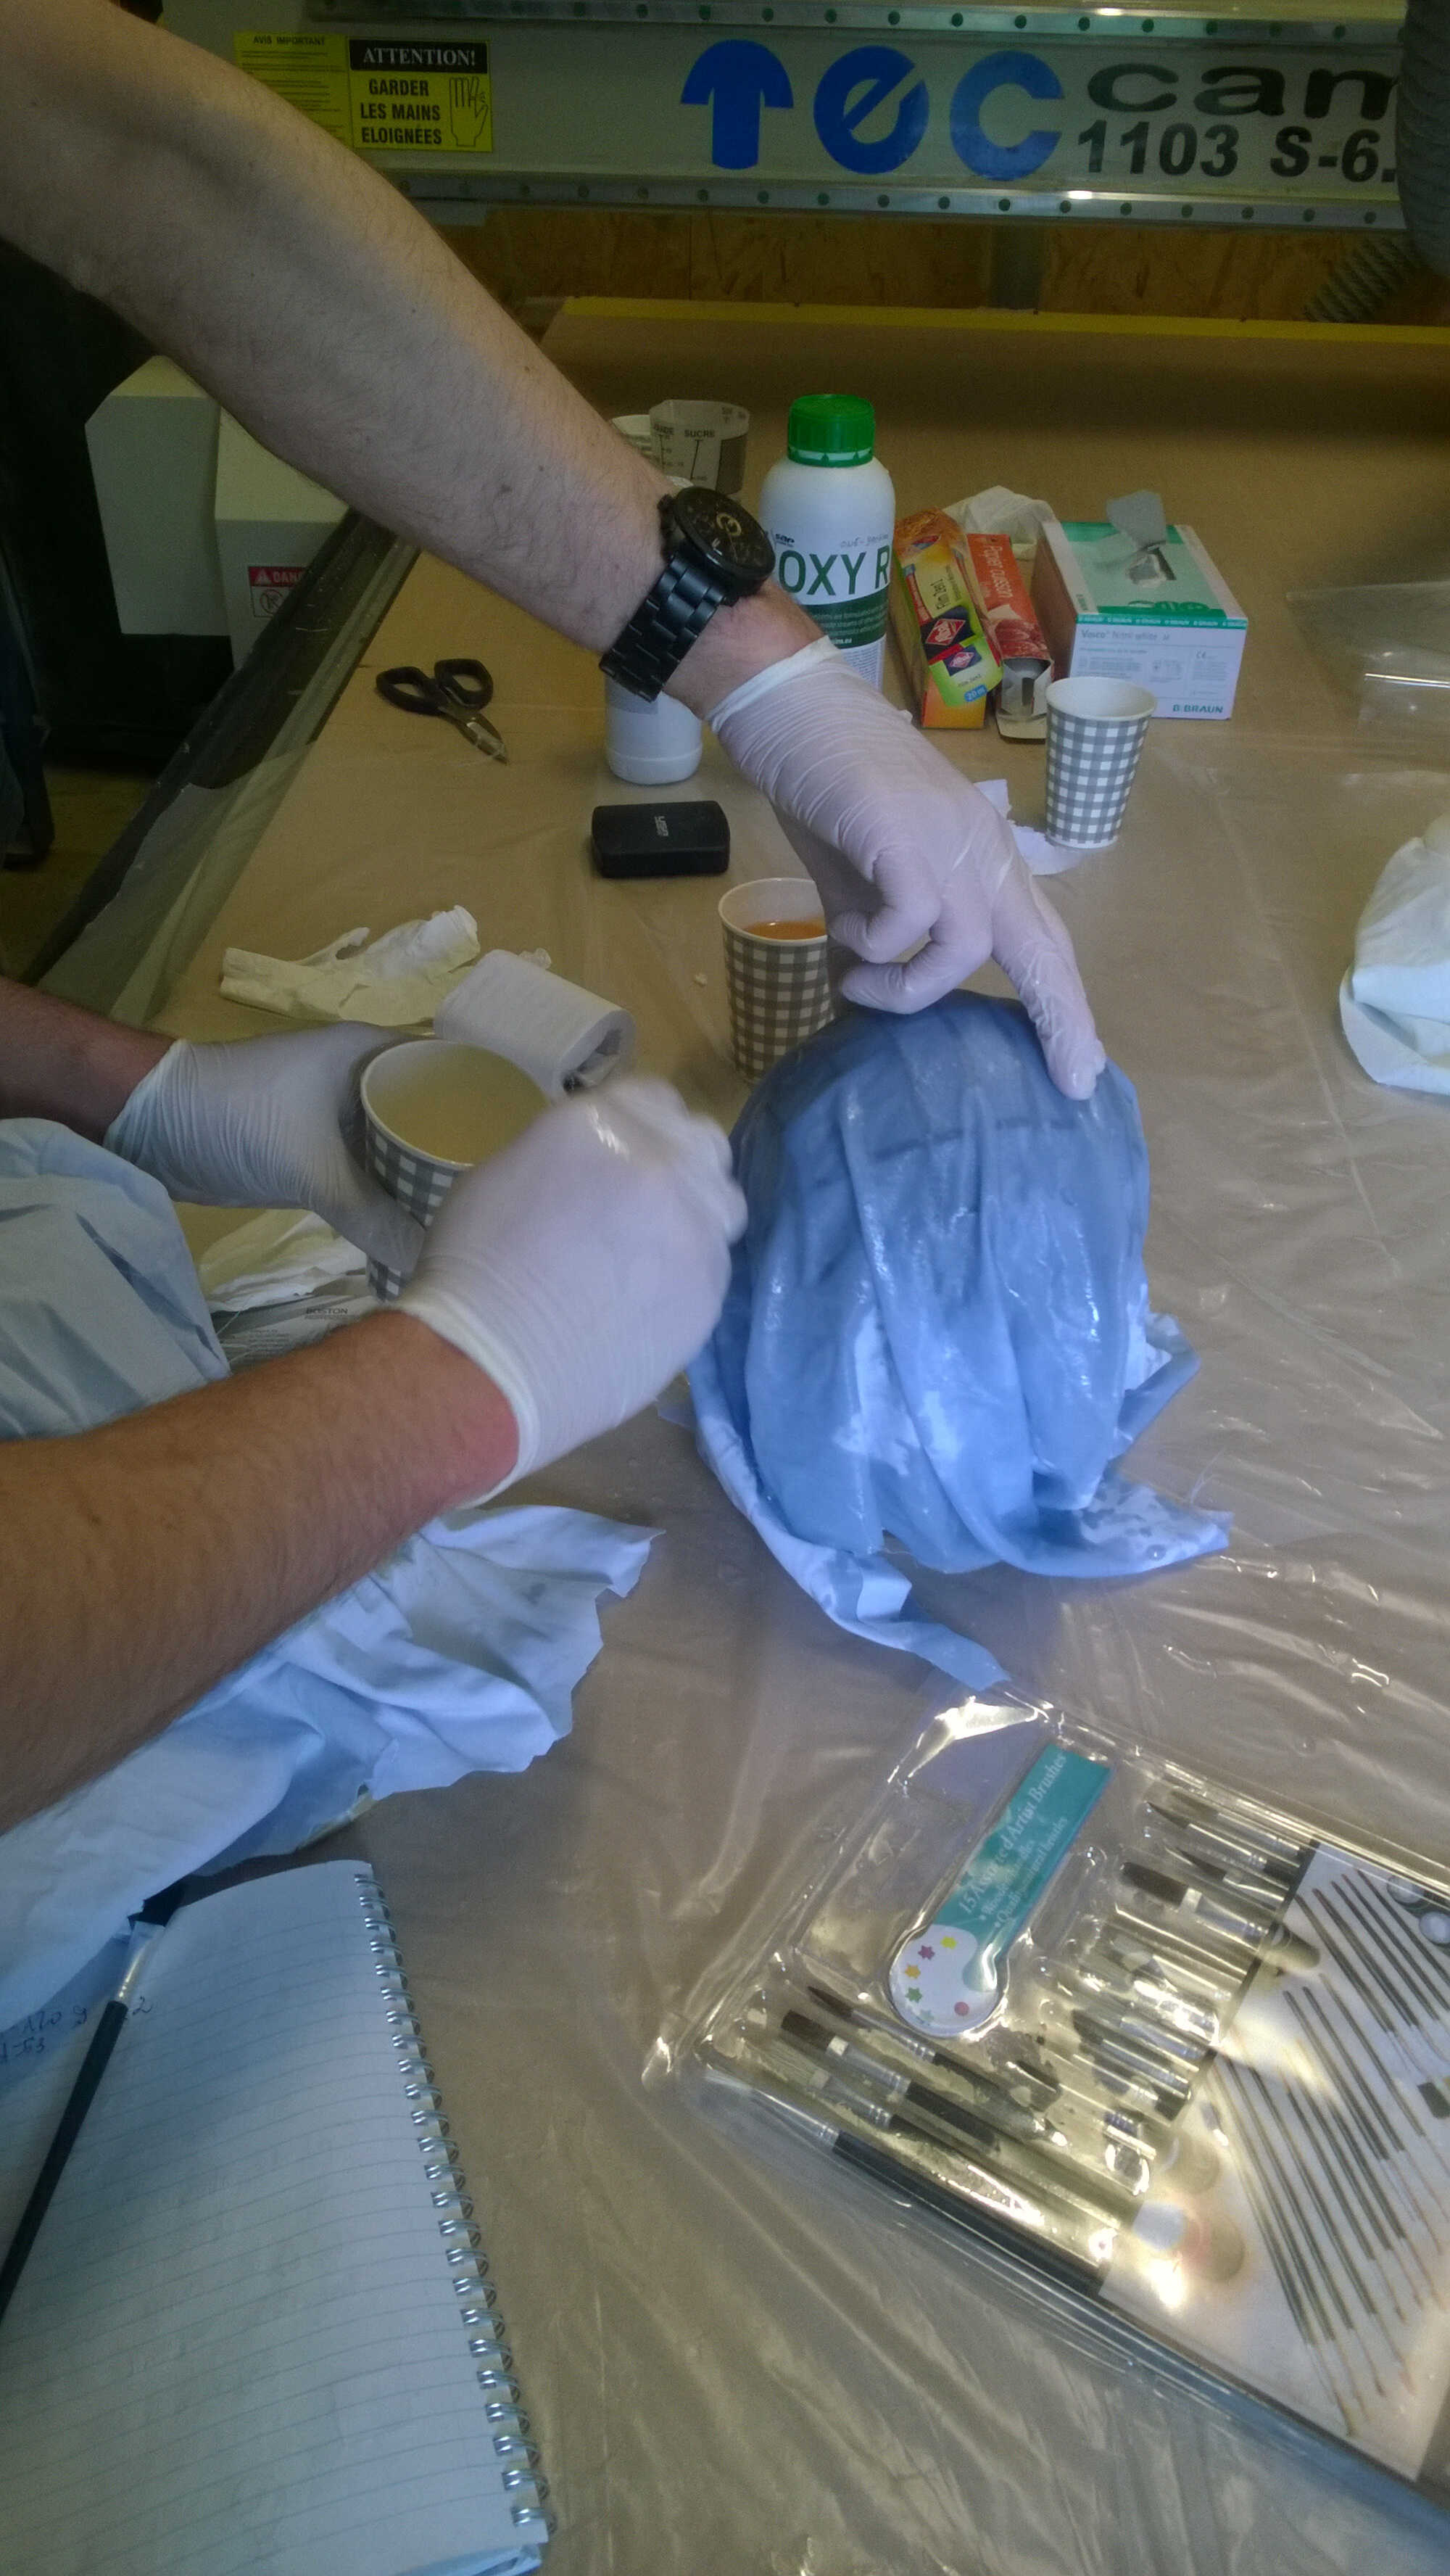
It rested several days, on Tuesday we unpacked it. It was really solid but its aspect didn't change. The underlaying wood structure was really apparent. The cling film was easy to remove where there was no fold. The main body showed no flexibilit -only the tip of the skirt, where only thin layer of resin has been applied- showed some.
unwrapping
This test helped us visualize the effect of resin on fabric. For a second try a smoother skeleton and less resin would be recommanded.
Products
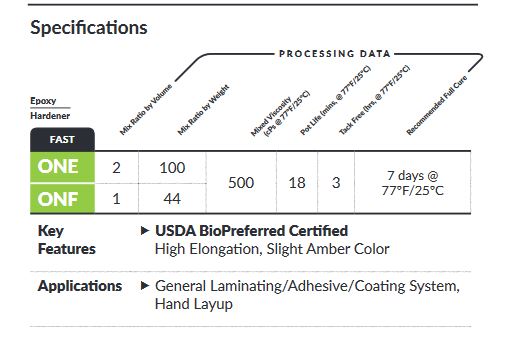
We used Entropy Super Sap CLR CLX extra fast hardening epoxy (2L epoxy and 1L hardener), which cost around 80 euros. 30% is biobased. The pot life is 25mn, the track free time 4h, the full cure time 7 days. The finish is amber. Among others best uses is natural fiber composites.
performances
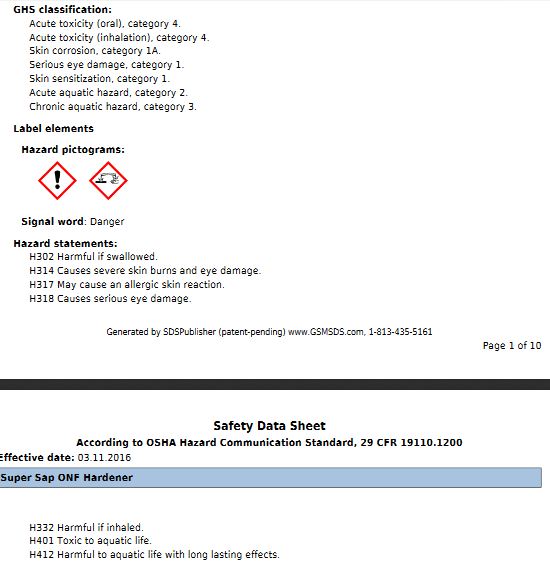
hardener toxicity
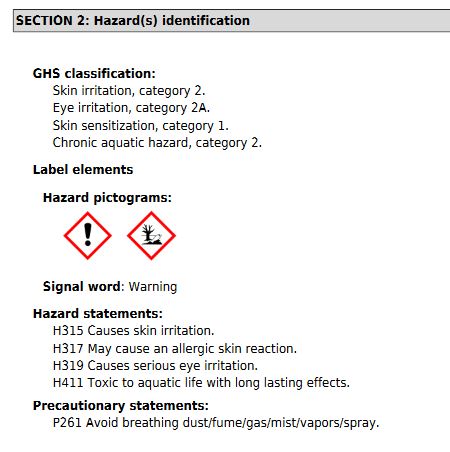
resin toxicity
A question this is raising is: is a coworking/Fablab place abilited for such manipulation? I looked for coworking regulation, I didn't find much. Here is workplace regulation . An Etablissement Recevant du Public is a place hosting public, a coworking space belongs to this category. It would be interesting to look at WoMa rules of procedure.
Protection
As the epoxy was declared as having a low volatility we only used gloves. Safety glass would be a plus. We used the CNC room with open glass window, to prevent impacting people in the coworking space and for good ventilation.
Gloves
We used nitryl(?) gloves. All gloves are not impermeable to all substances. I found this website on glove material. But I wasn't able to decide if we picked the right kind of glove. Thomas had doubts about it as the feeling on the mix on the gloves- when preparing the test balloon- was really uncomfortable and felt as if the mix permeated through it. This made him remove them and wash them. After this we tried to minimize the contact of the mixture with our gloves.
Disposal
They were also several signs indicating the products were harmful to the environment but they are no chemical disposal containers at WoMa. The extra ended in the sink or solidified in the bin.
Ideation
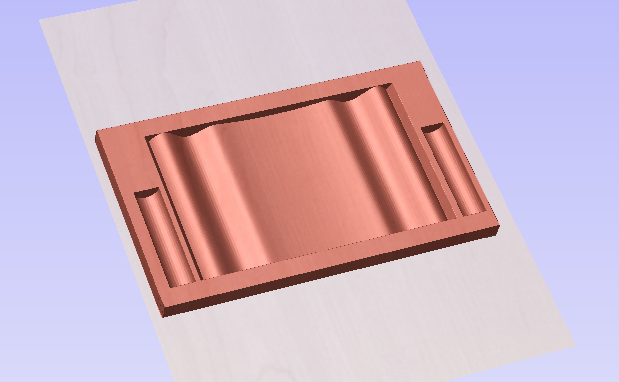
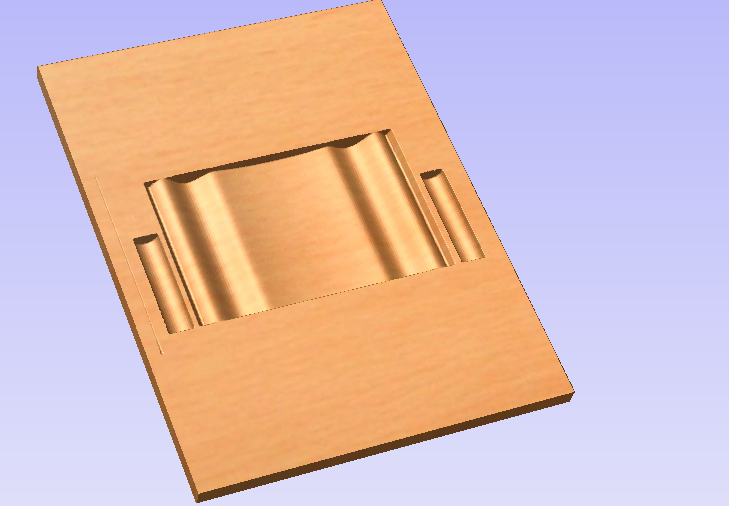
I was not satisfied with the test output so I decided to let go of the skeleton technique. I would design a 3D mold. I thought about the main pros of composites: lightness, elasticity, biosourcing...
leftover seat
idea
Fusion mold
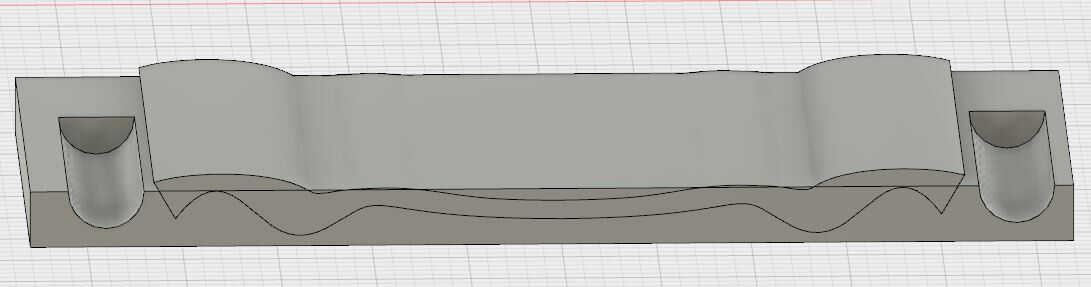
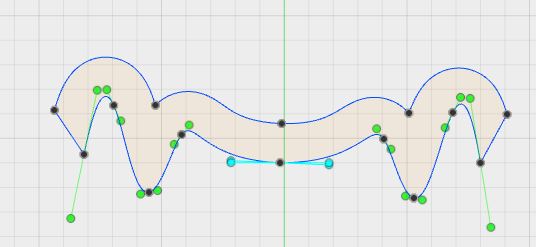
Design
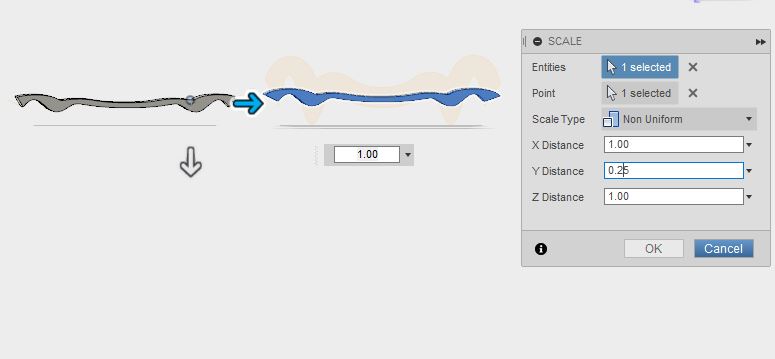
The mold was designed in Fusion 360. I used the Spline tool to design the shape as well as the Mirror one to have a symmetrical seat. I considered my seat would have some elasticity this is why I designed it slightly larger than the structure. I filleted the angles as I knew that sharp angles might trap air when vacuumed. Then I extruded my profiles. At first I had 2 profiles, as I didn't know which one I would pick. I first designed my profiles too thick compared (15cm high!) to the foam thickness (3cm). So I shrank it with the Scale tool along the z axis with a factor of 0.25.
spline design
filet
designs
extrusion
shrink the height
scaling
container
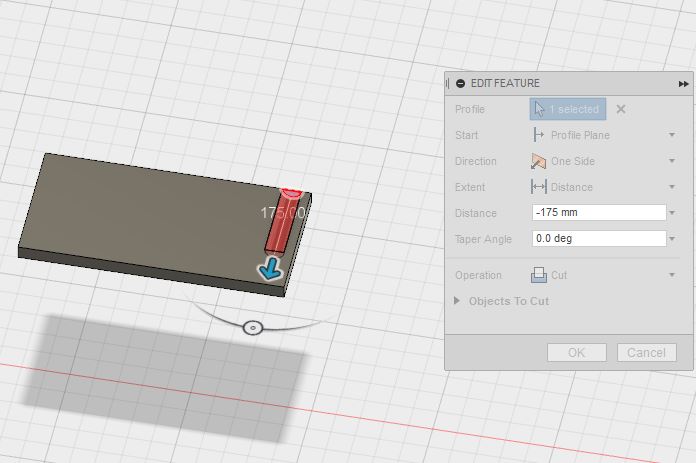
When this was done I designed the negative of the design I wanted to achieve. I designed my foam as a box, cut container for the extra burlap on the sides by extruding cylinders. Then I cut the material with my profile. My profile being slighly above the material as I knew my burlap layer would have a certain thickness.
cutting the foam
profiles and mold
net-shape burlap
mold Fusion
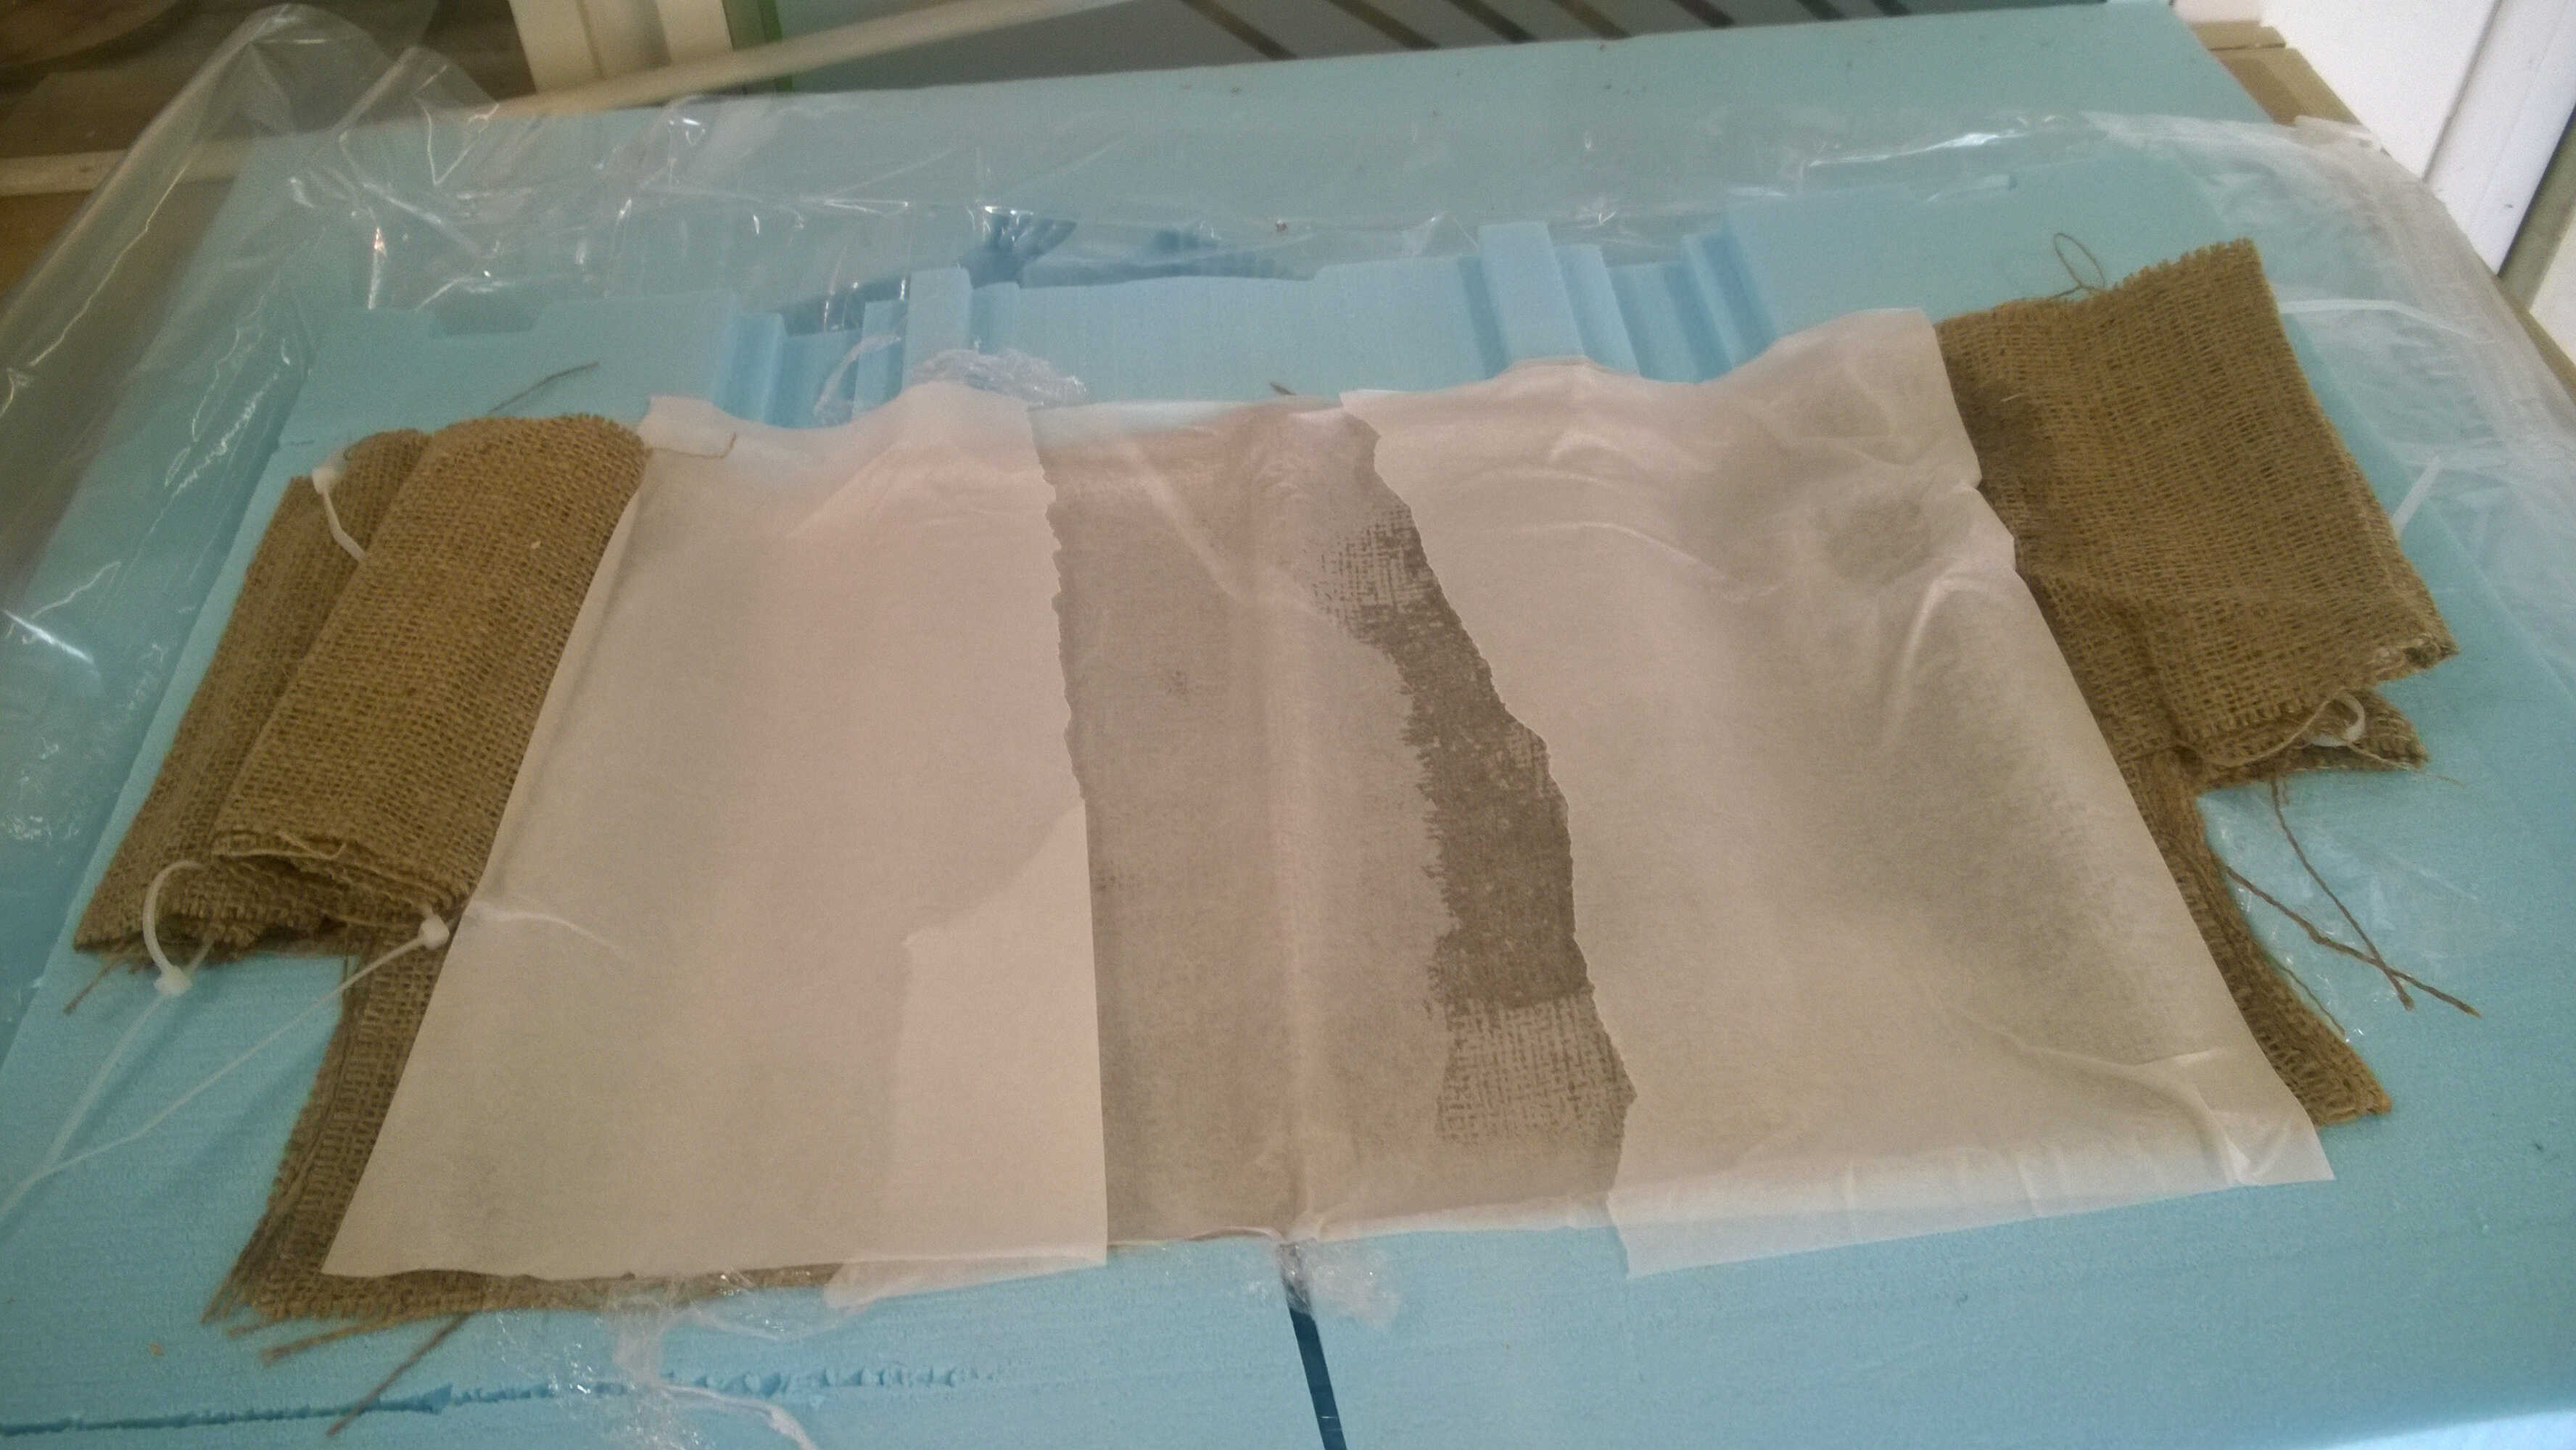
Thanks to my model I could design the net-shape burlaps. I didn't find the Unroll tool existing in Rhino, so I did it semi-manually. I measured the curve length with the Inspect tool from Fusion 360 and designed the shape based on this measurement. I made 3 layers each having a slightly longer central piece.
Source file to load here
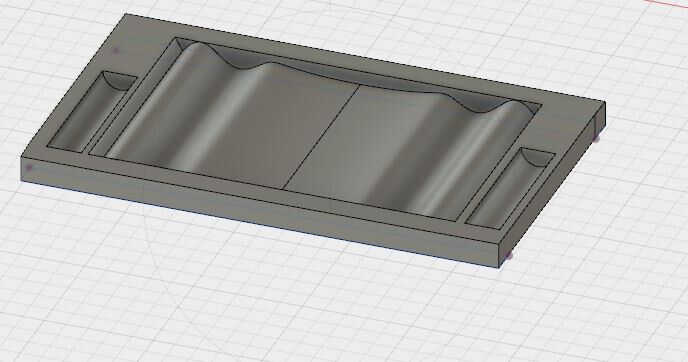
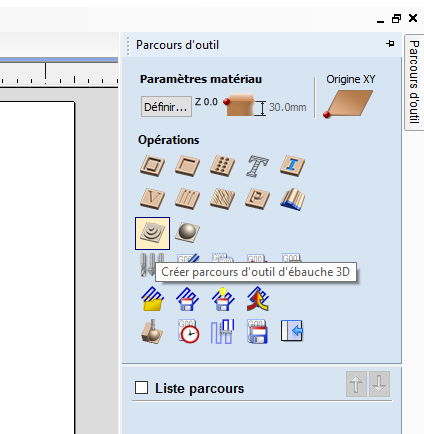
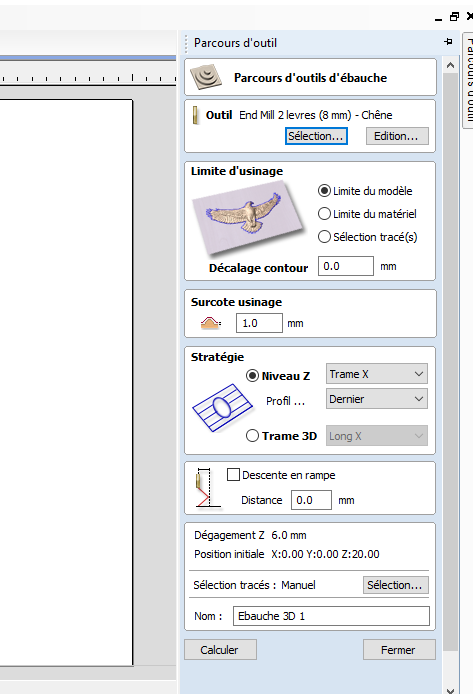
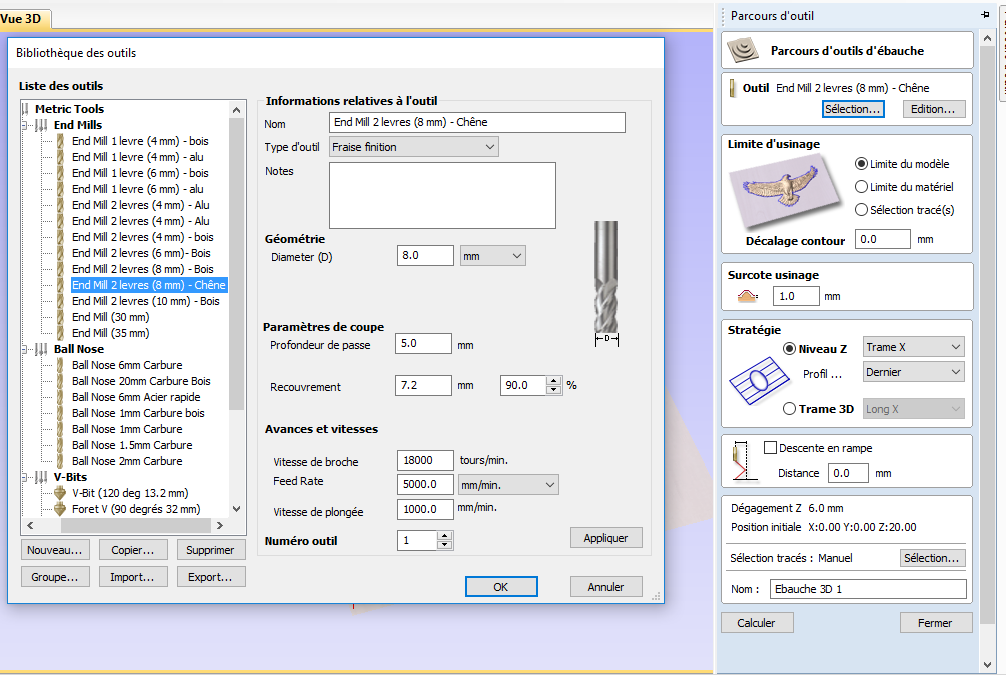
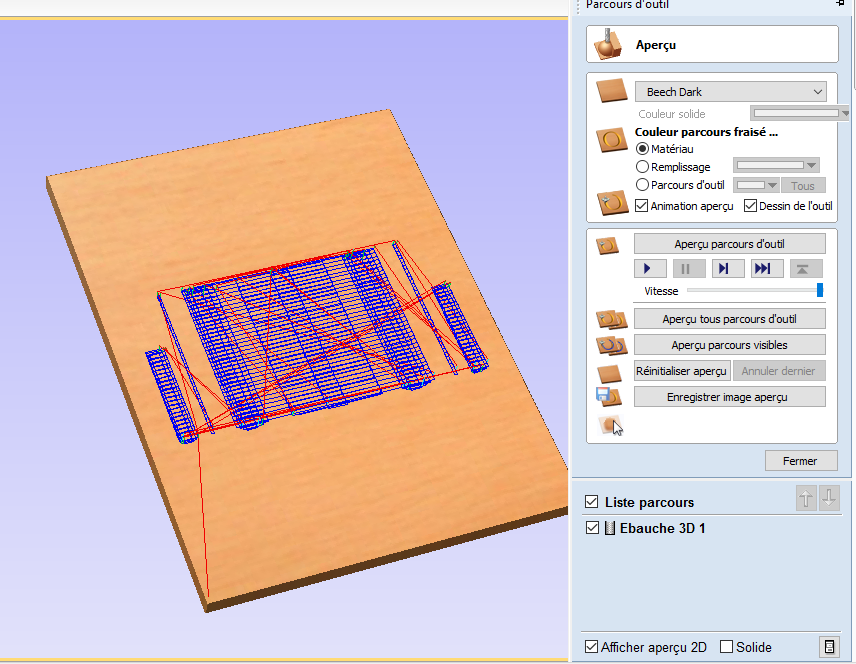
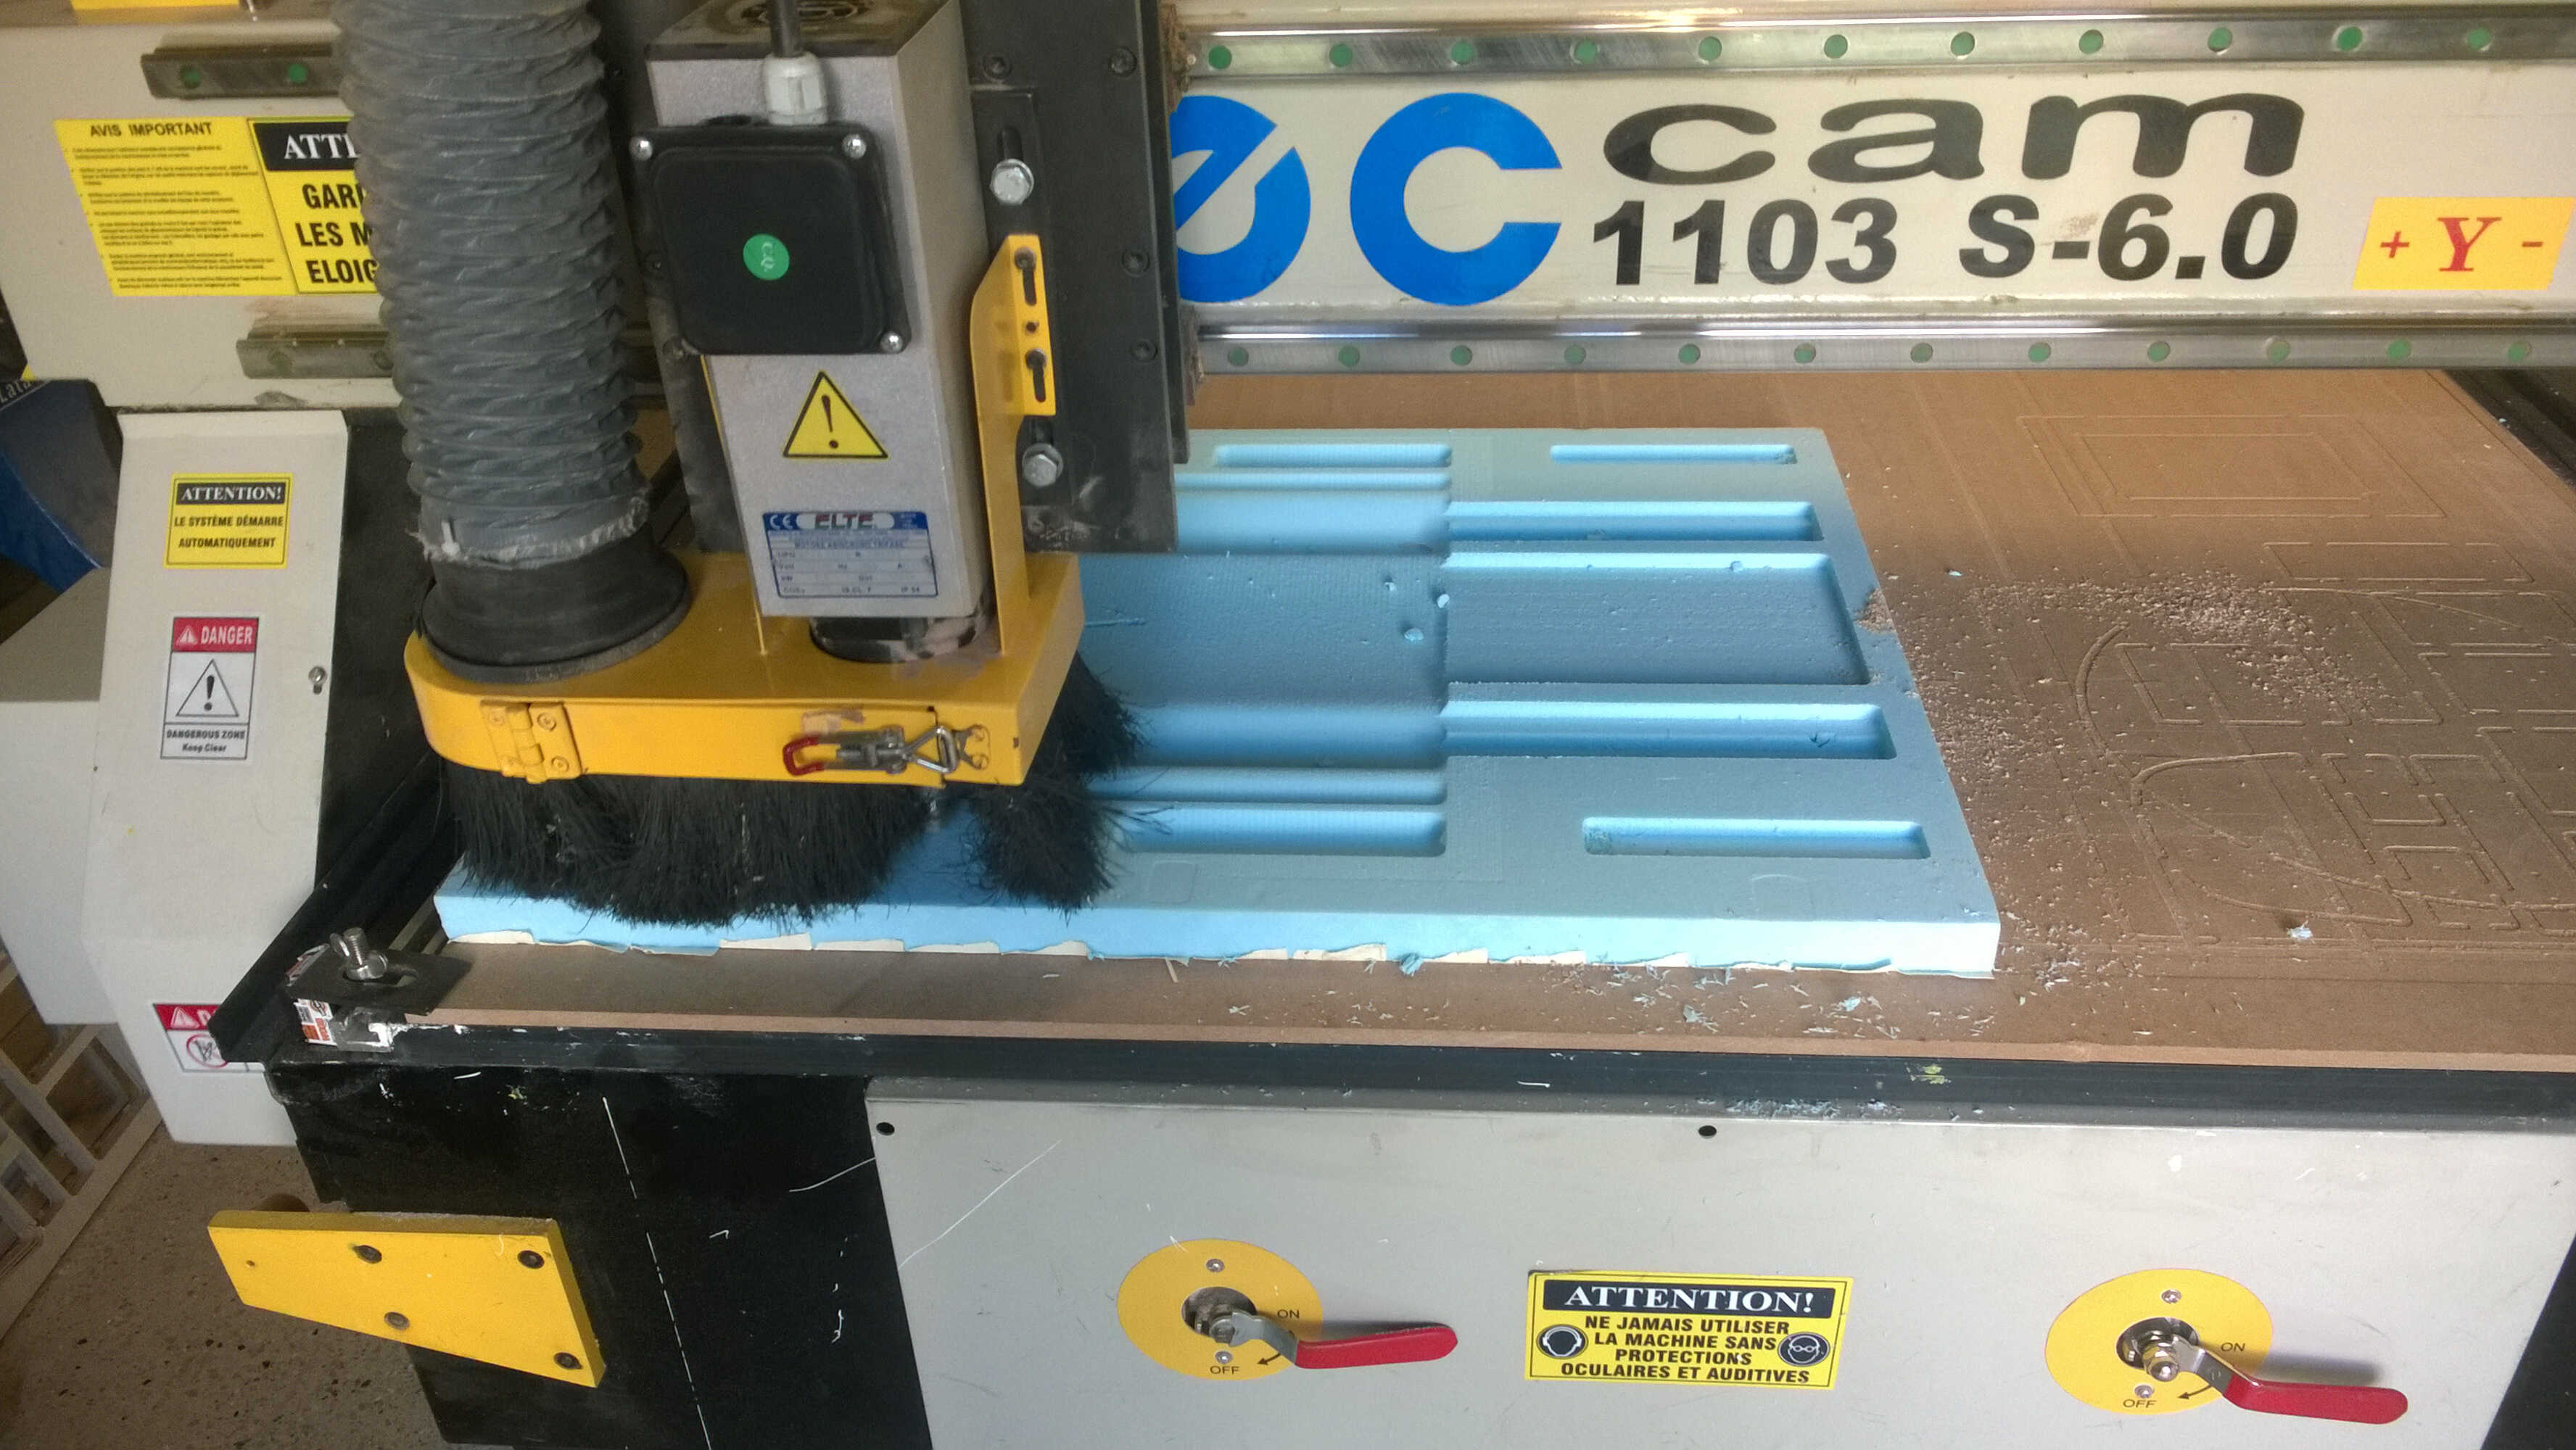
Computer assisted molding
The mold was milled in foam thanks to VCarve The material I had at disposal measured 60x79x3cm. I defined it in Vcarve. Once the material is defined it is possible to import the 3D model in VCarve. I oriented and centered the model with the positioning tool.

material
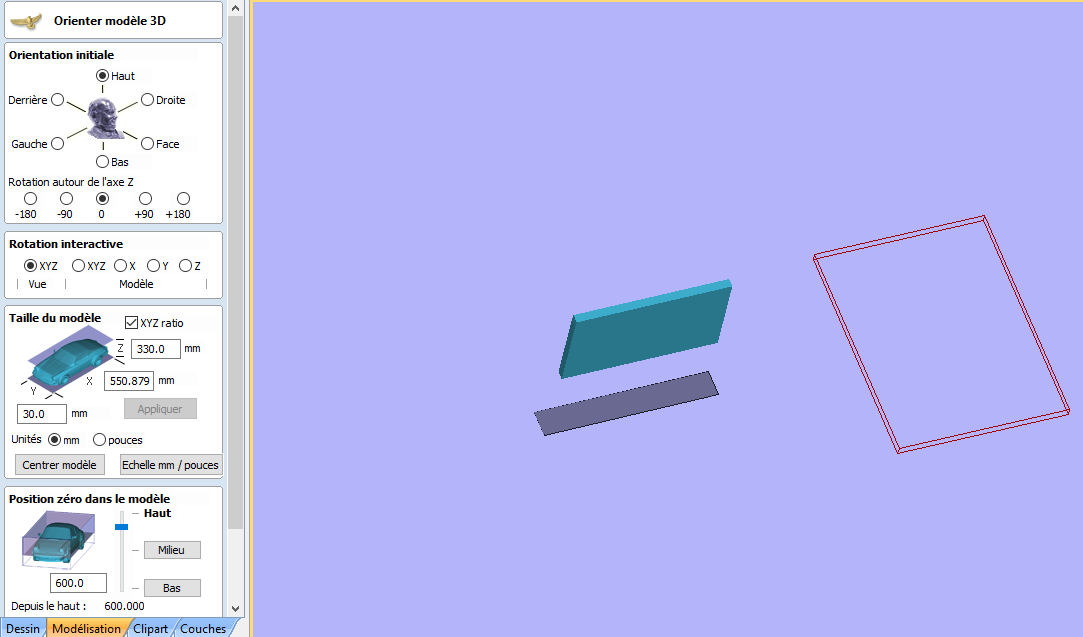
orientation
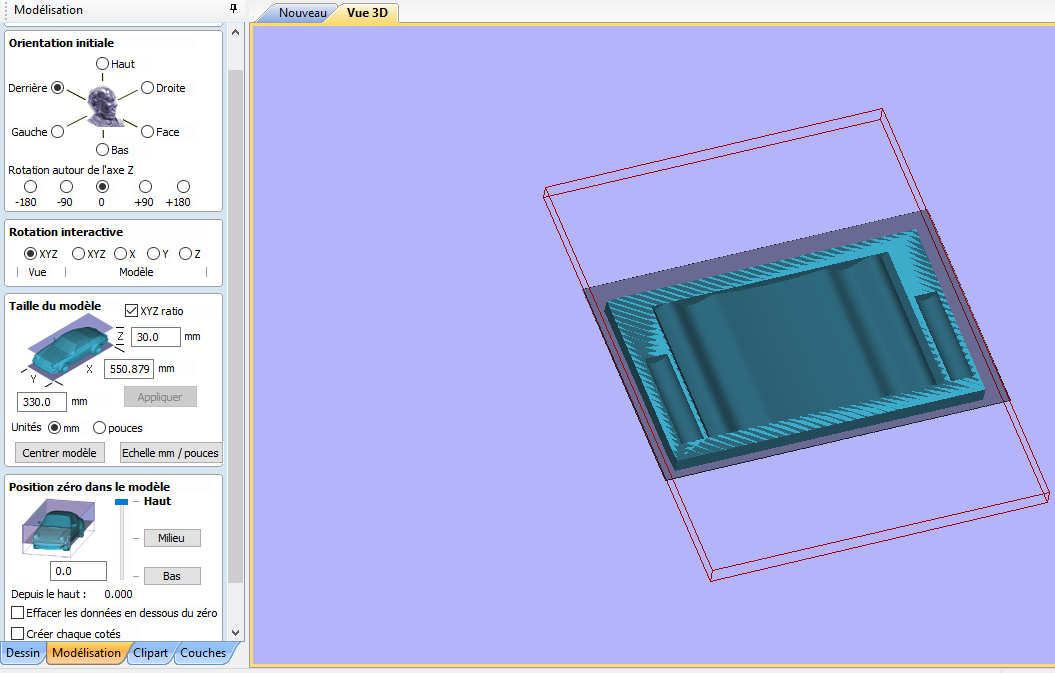
centered
model imported
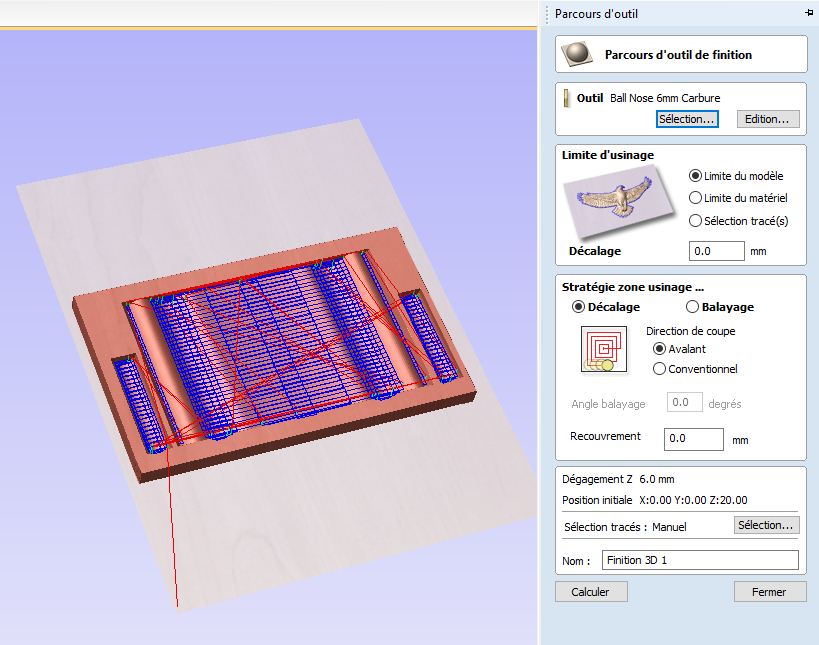
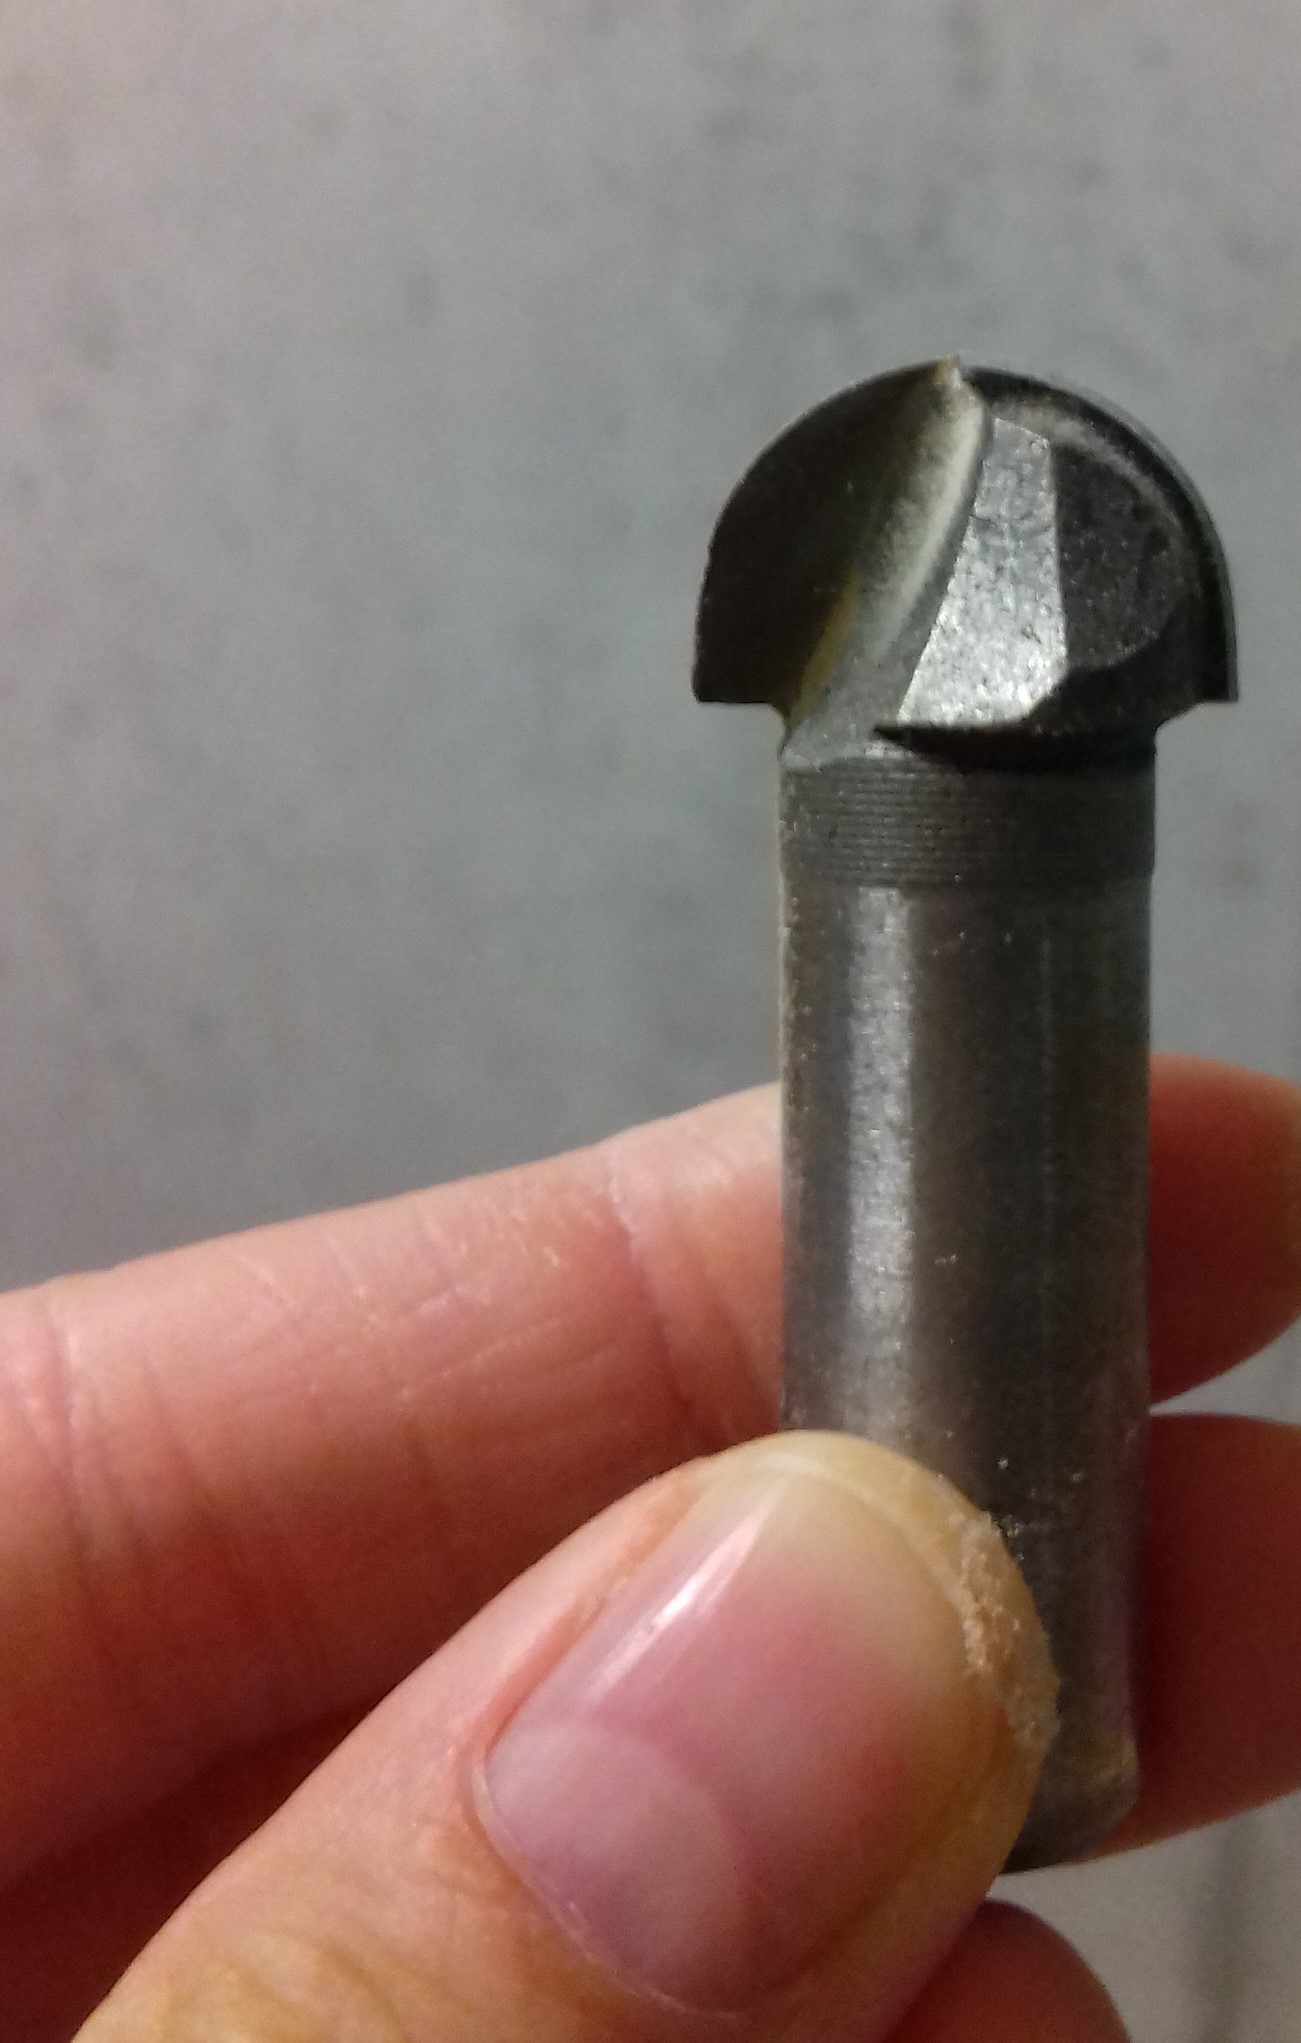
The molding was a 2 steps one: a rough machining with a 8mm mesh, at the speeds 5000/1000 plunge, 90% in overlapping (took 6mn) and a finish one with a 19 mm mesh at the same speeds (took half an hour). First I wanted to use a 6 mm ball nose for finition but it would have removed parts of the model.
rough path
rough path panel
rough path mesh
computed rough path
finish path
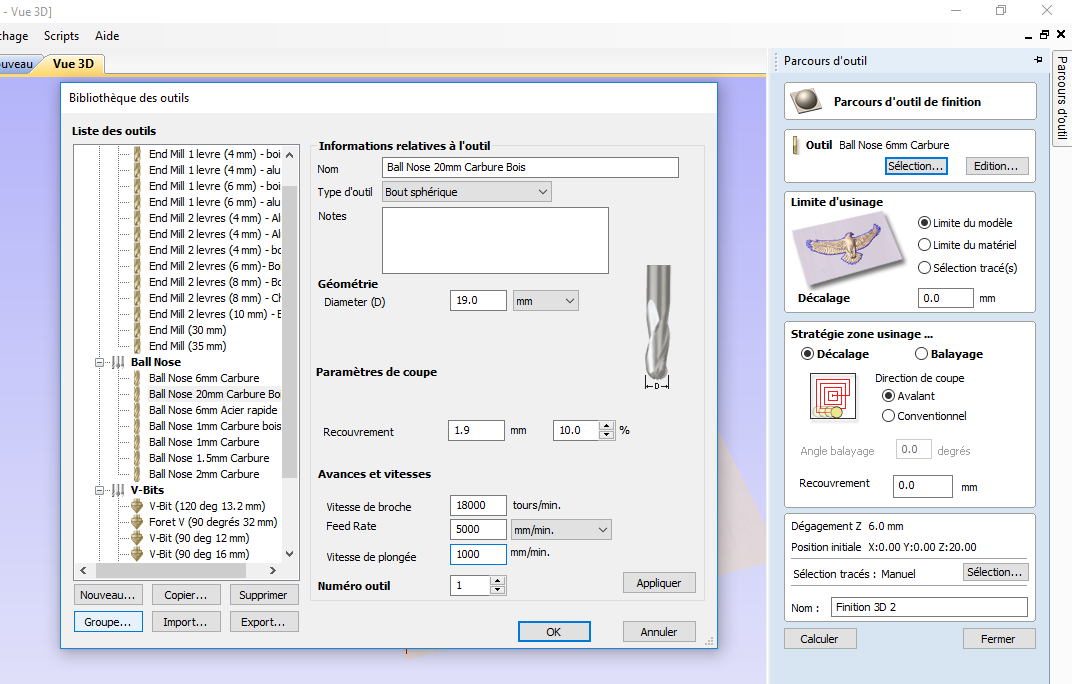
ball nose
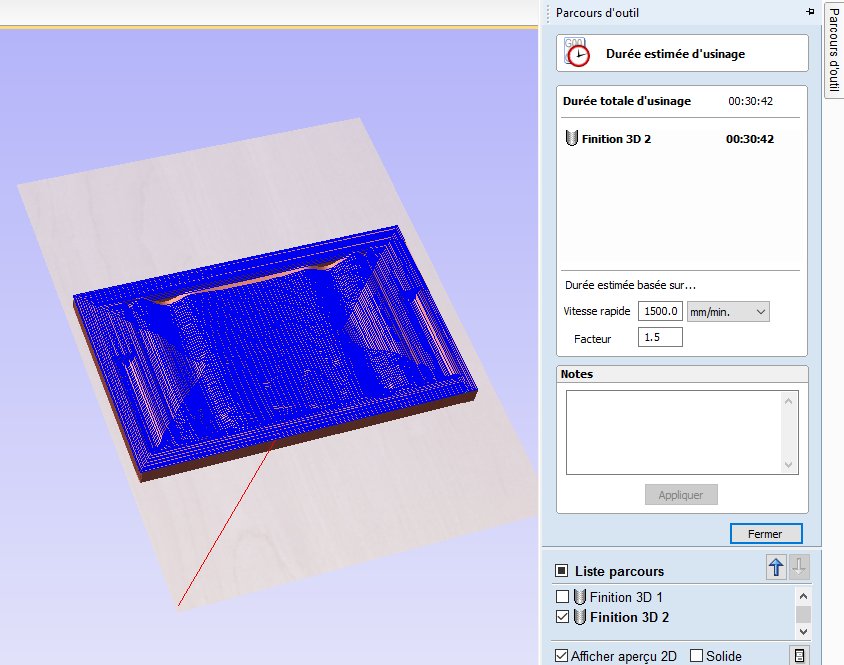
time estimate
result visualization
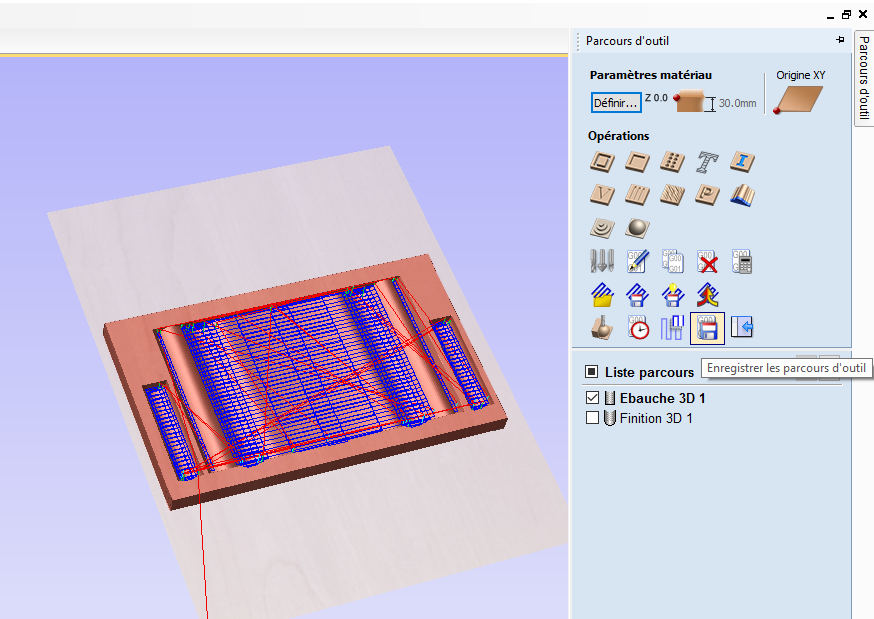
saving the path
It was now time to mill.
19 mm ball nose mesh
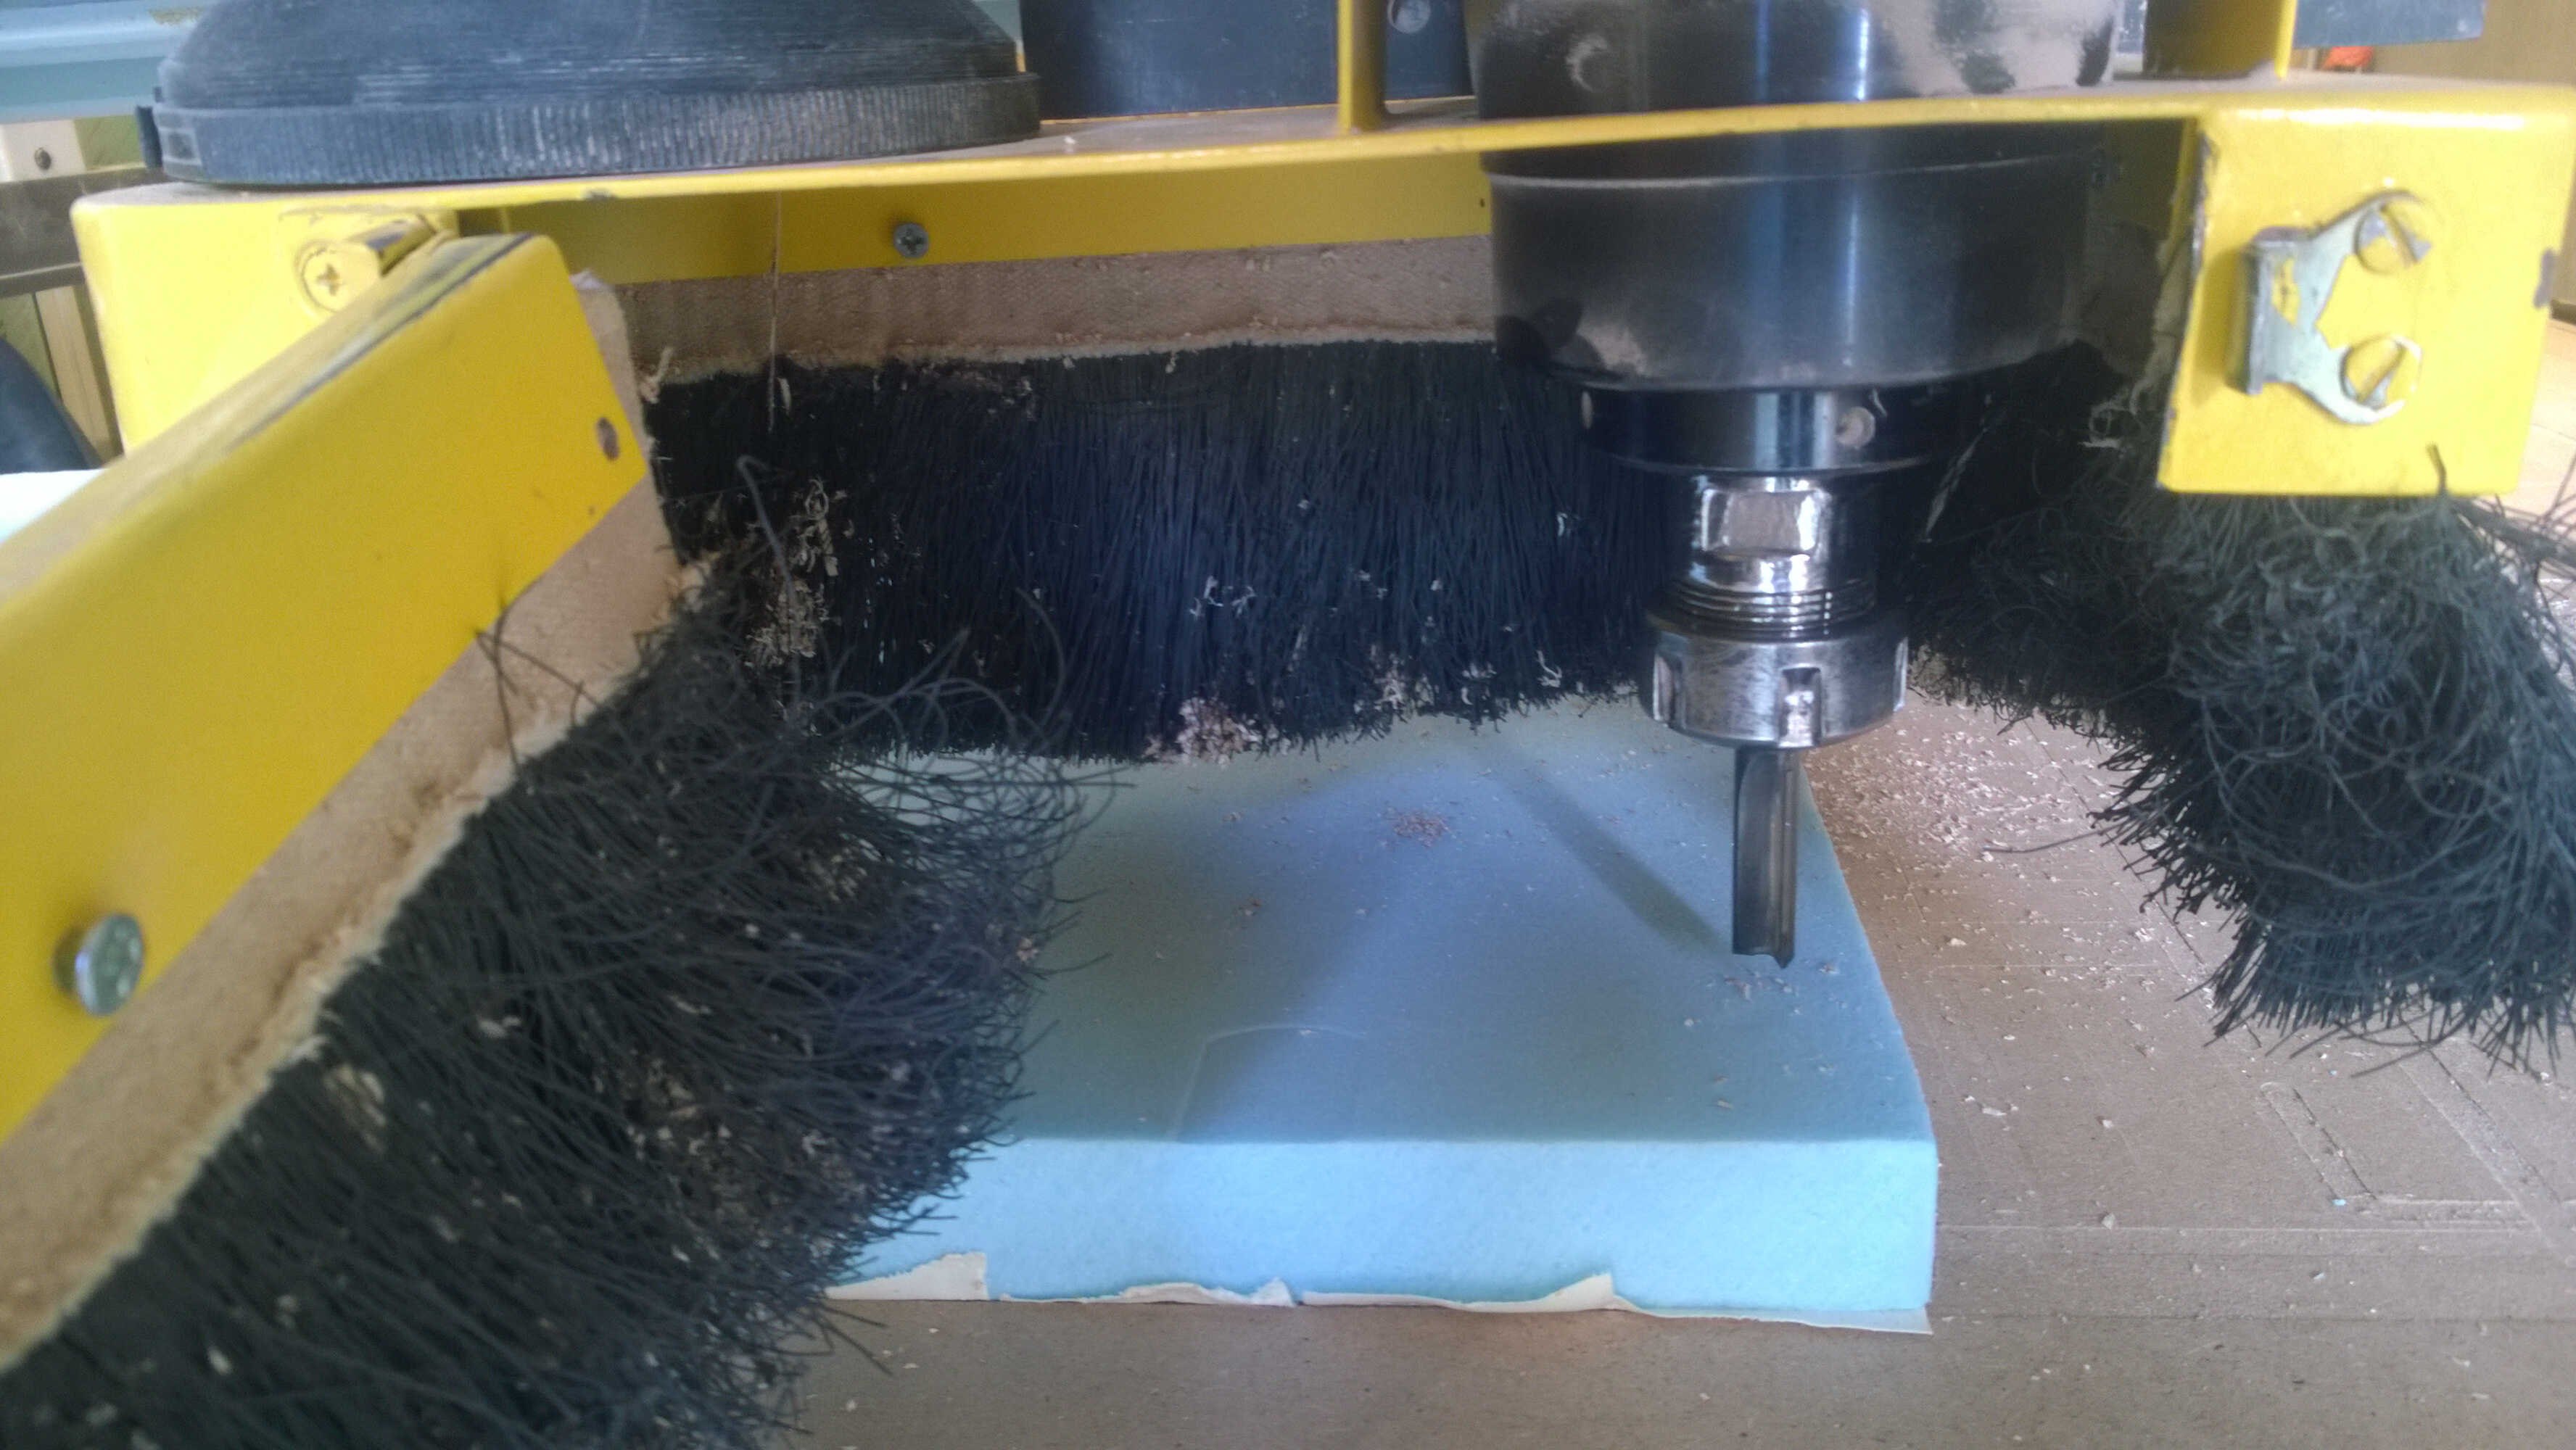
foam
origin shifted
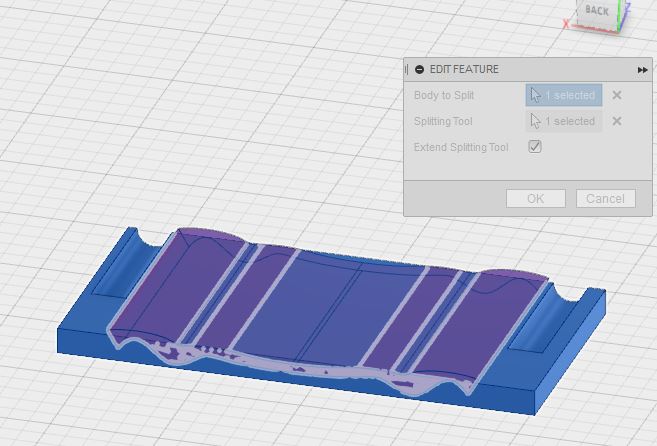
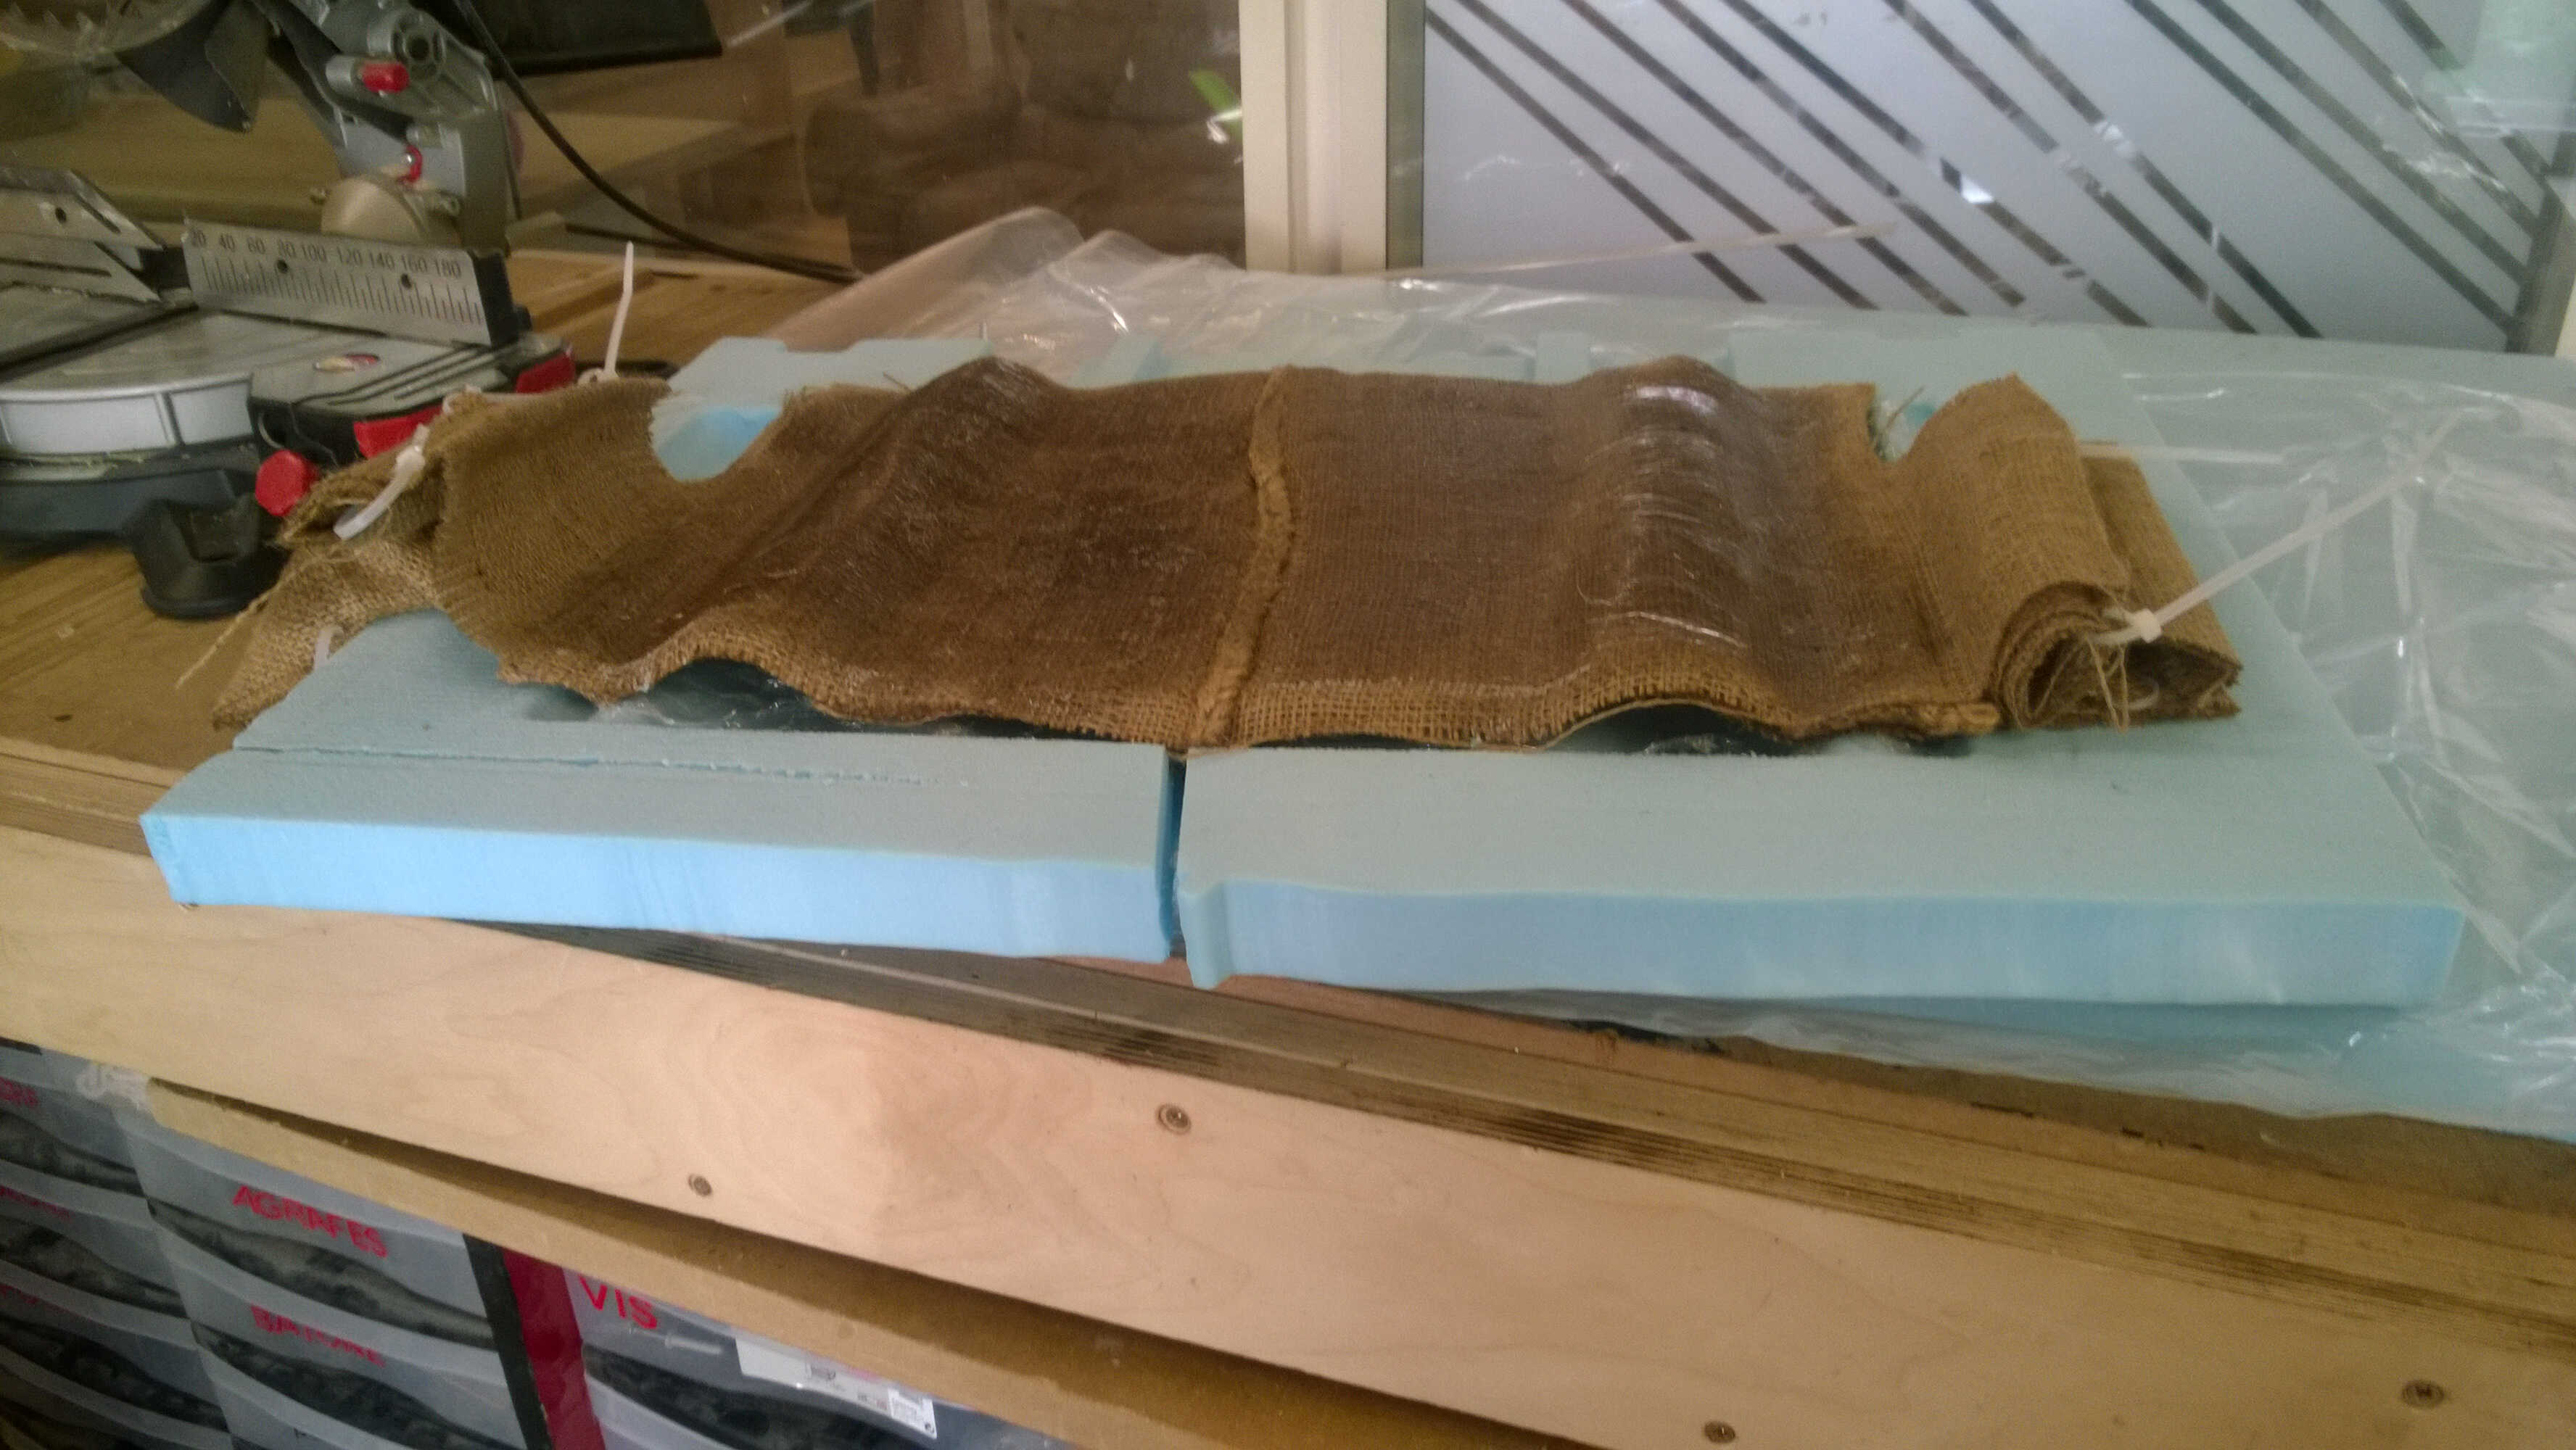
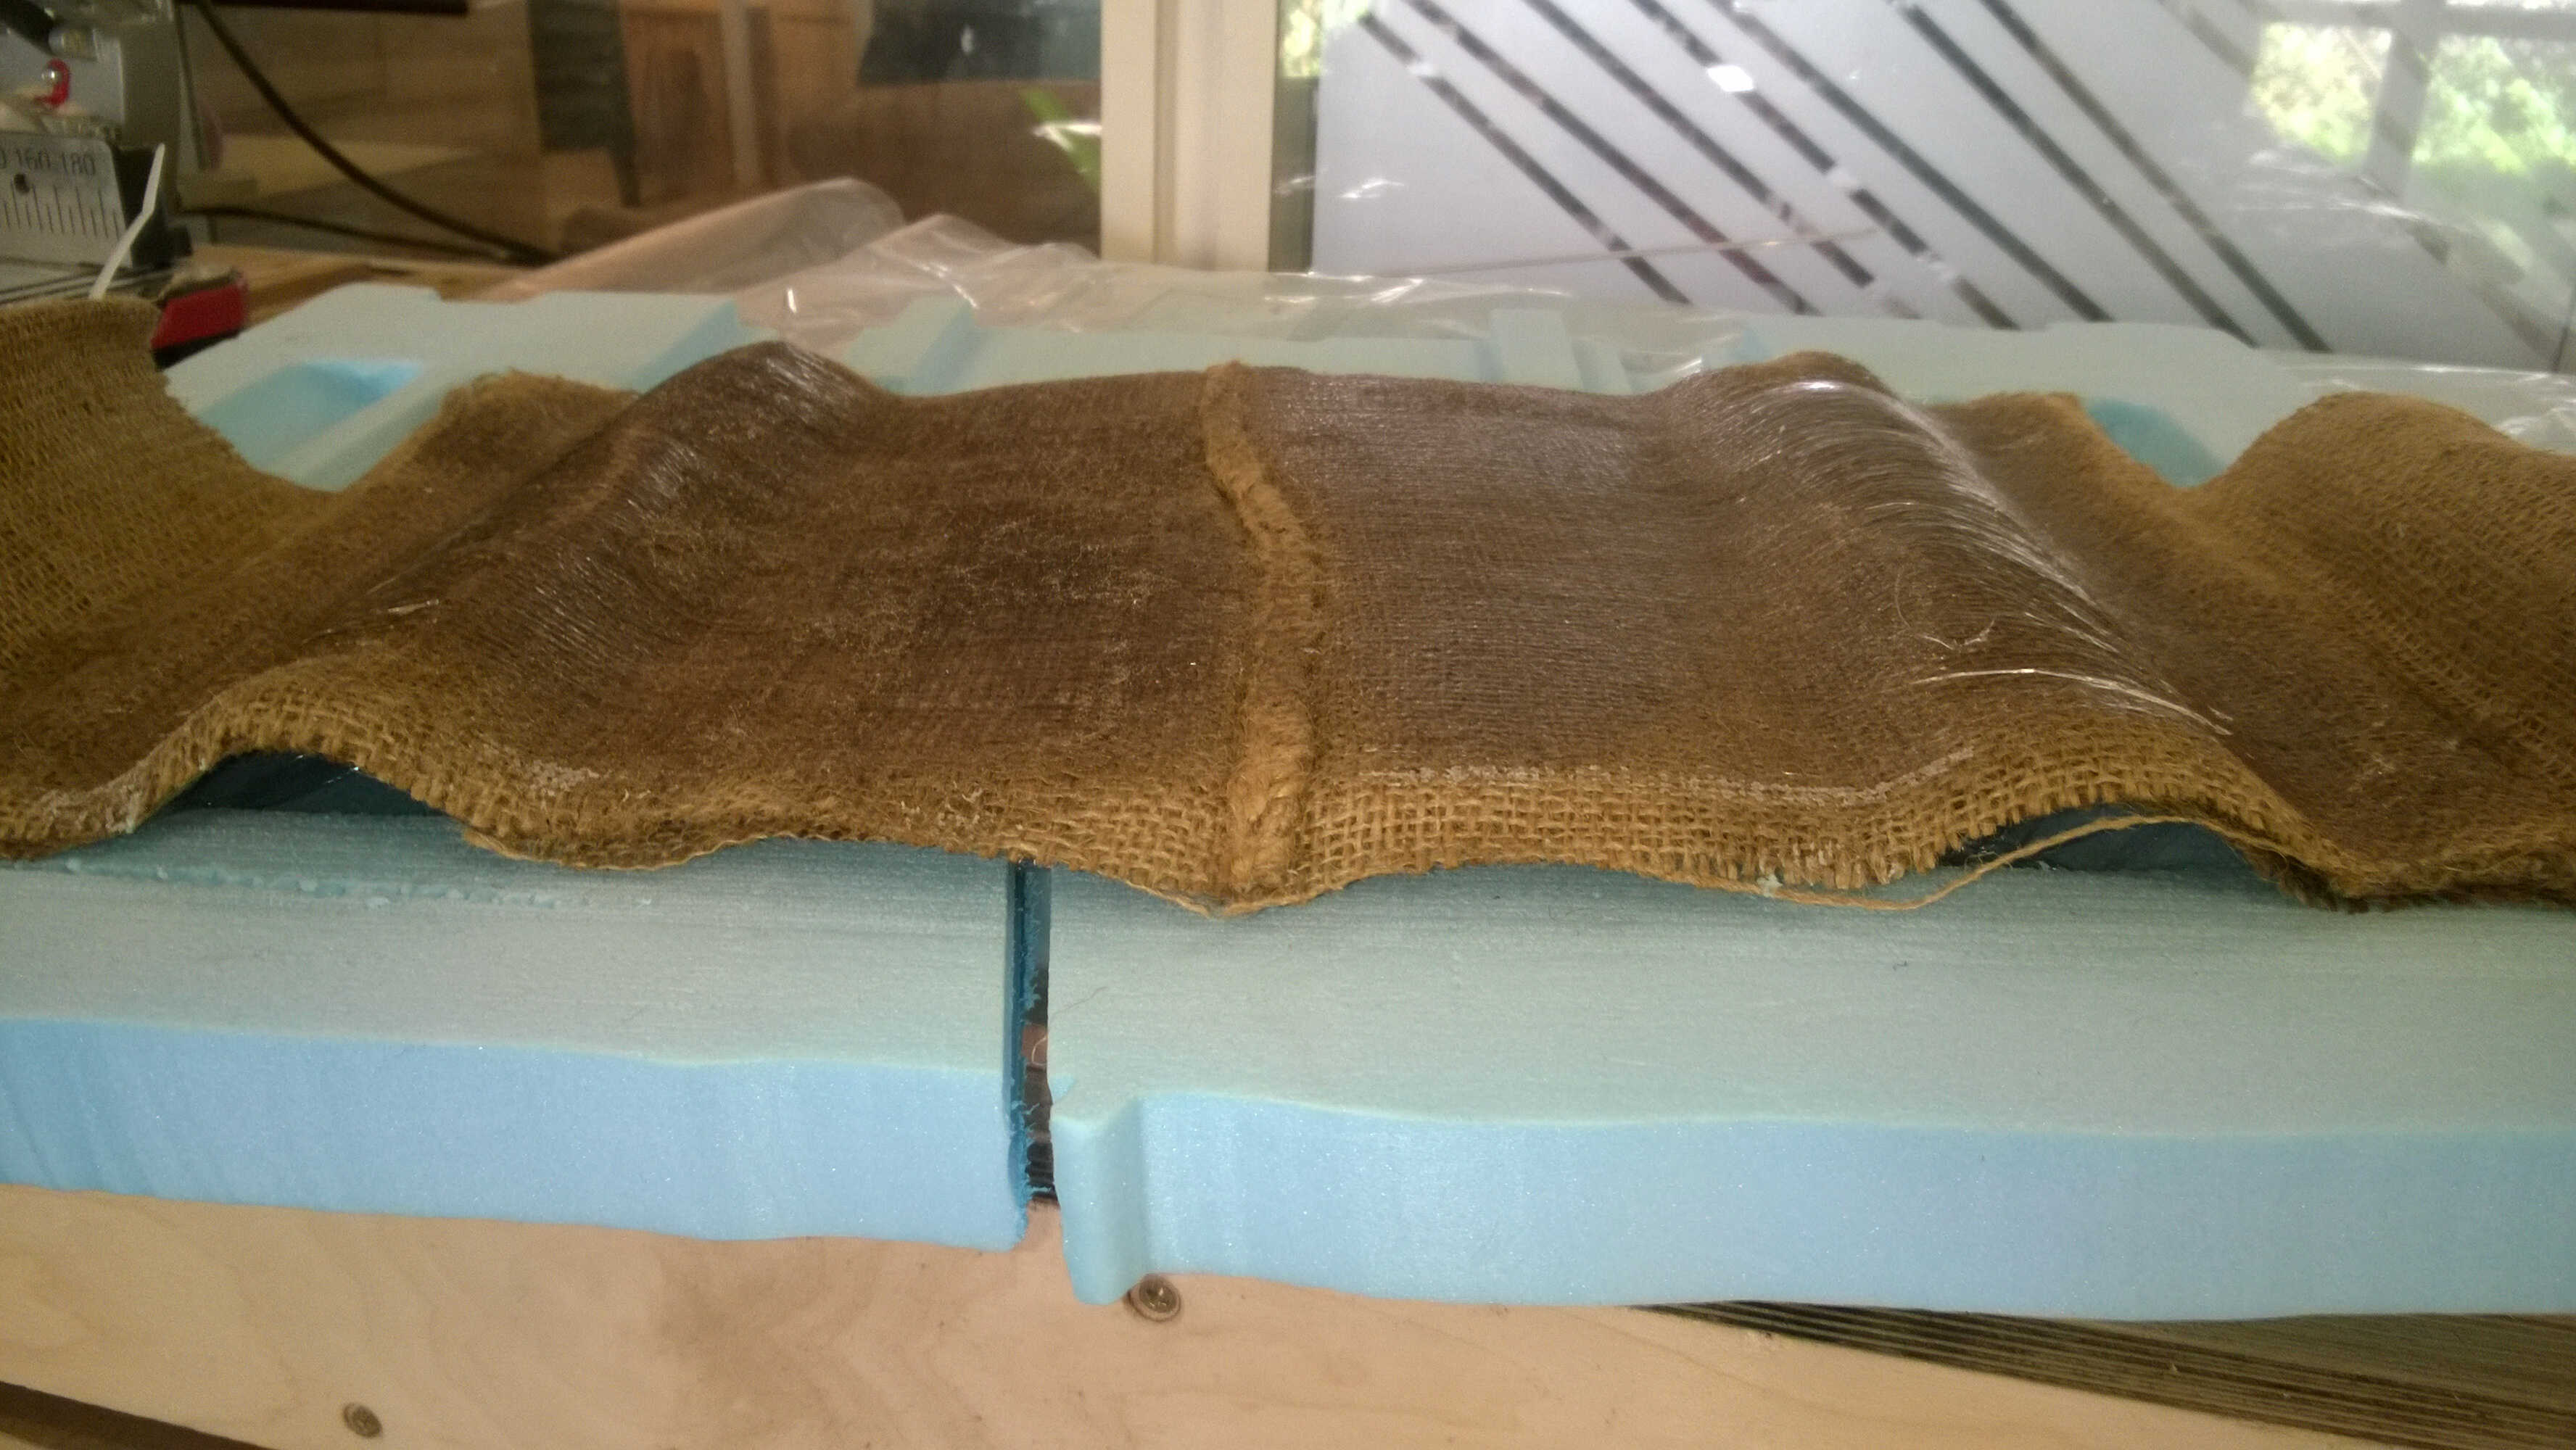
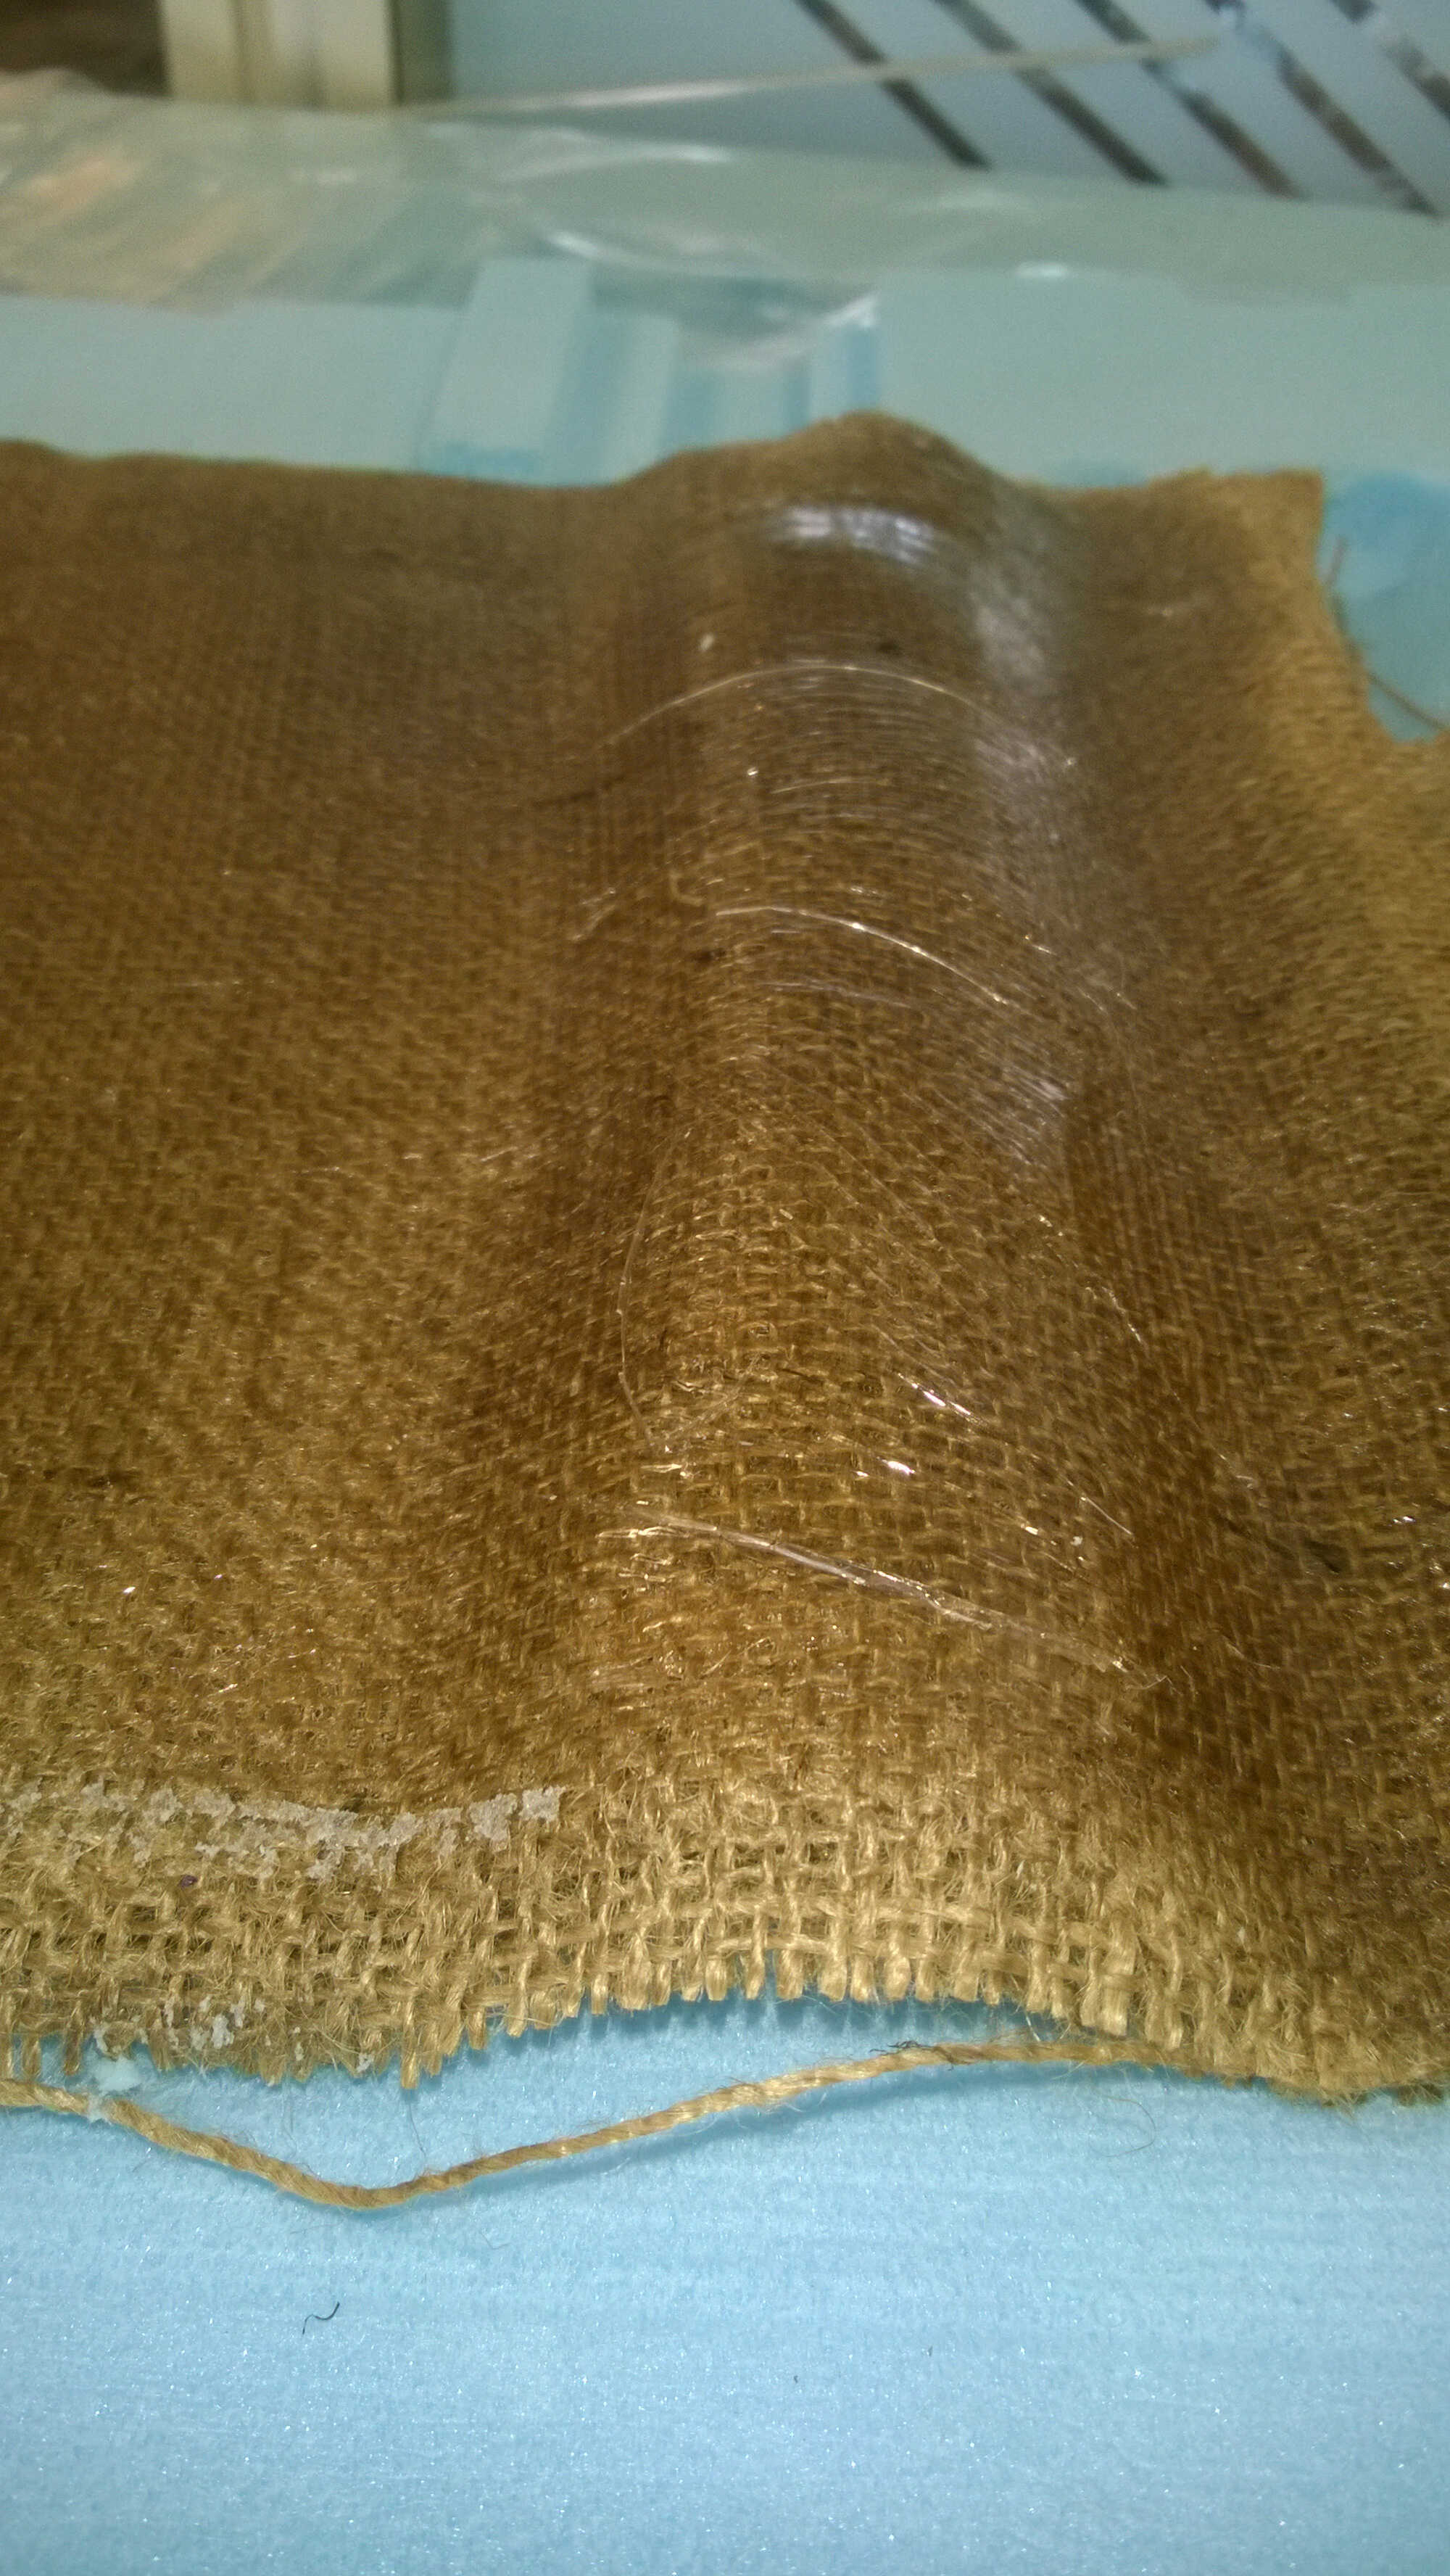
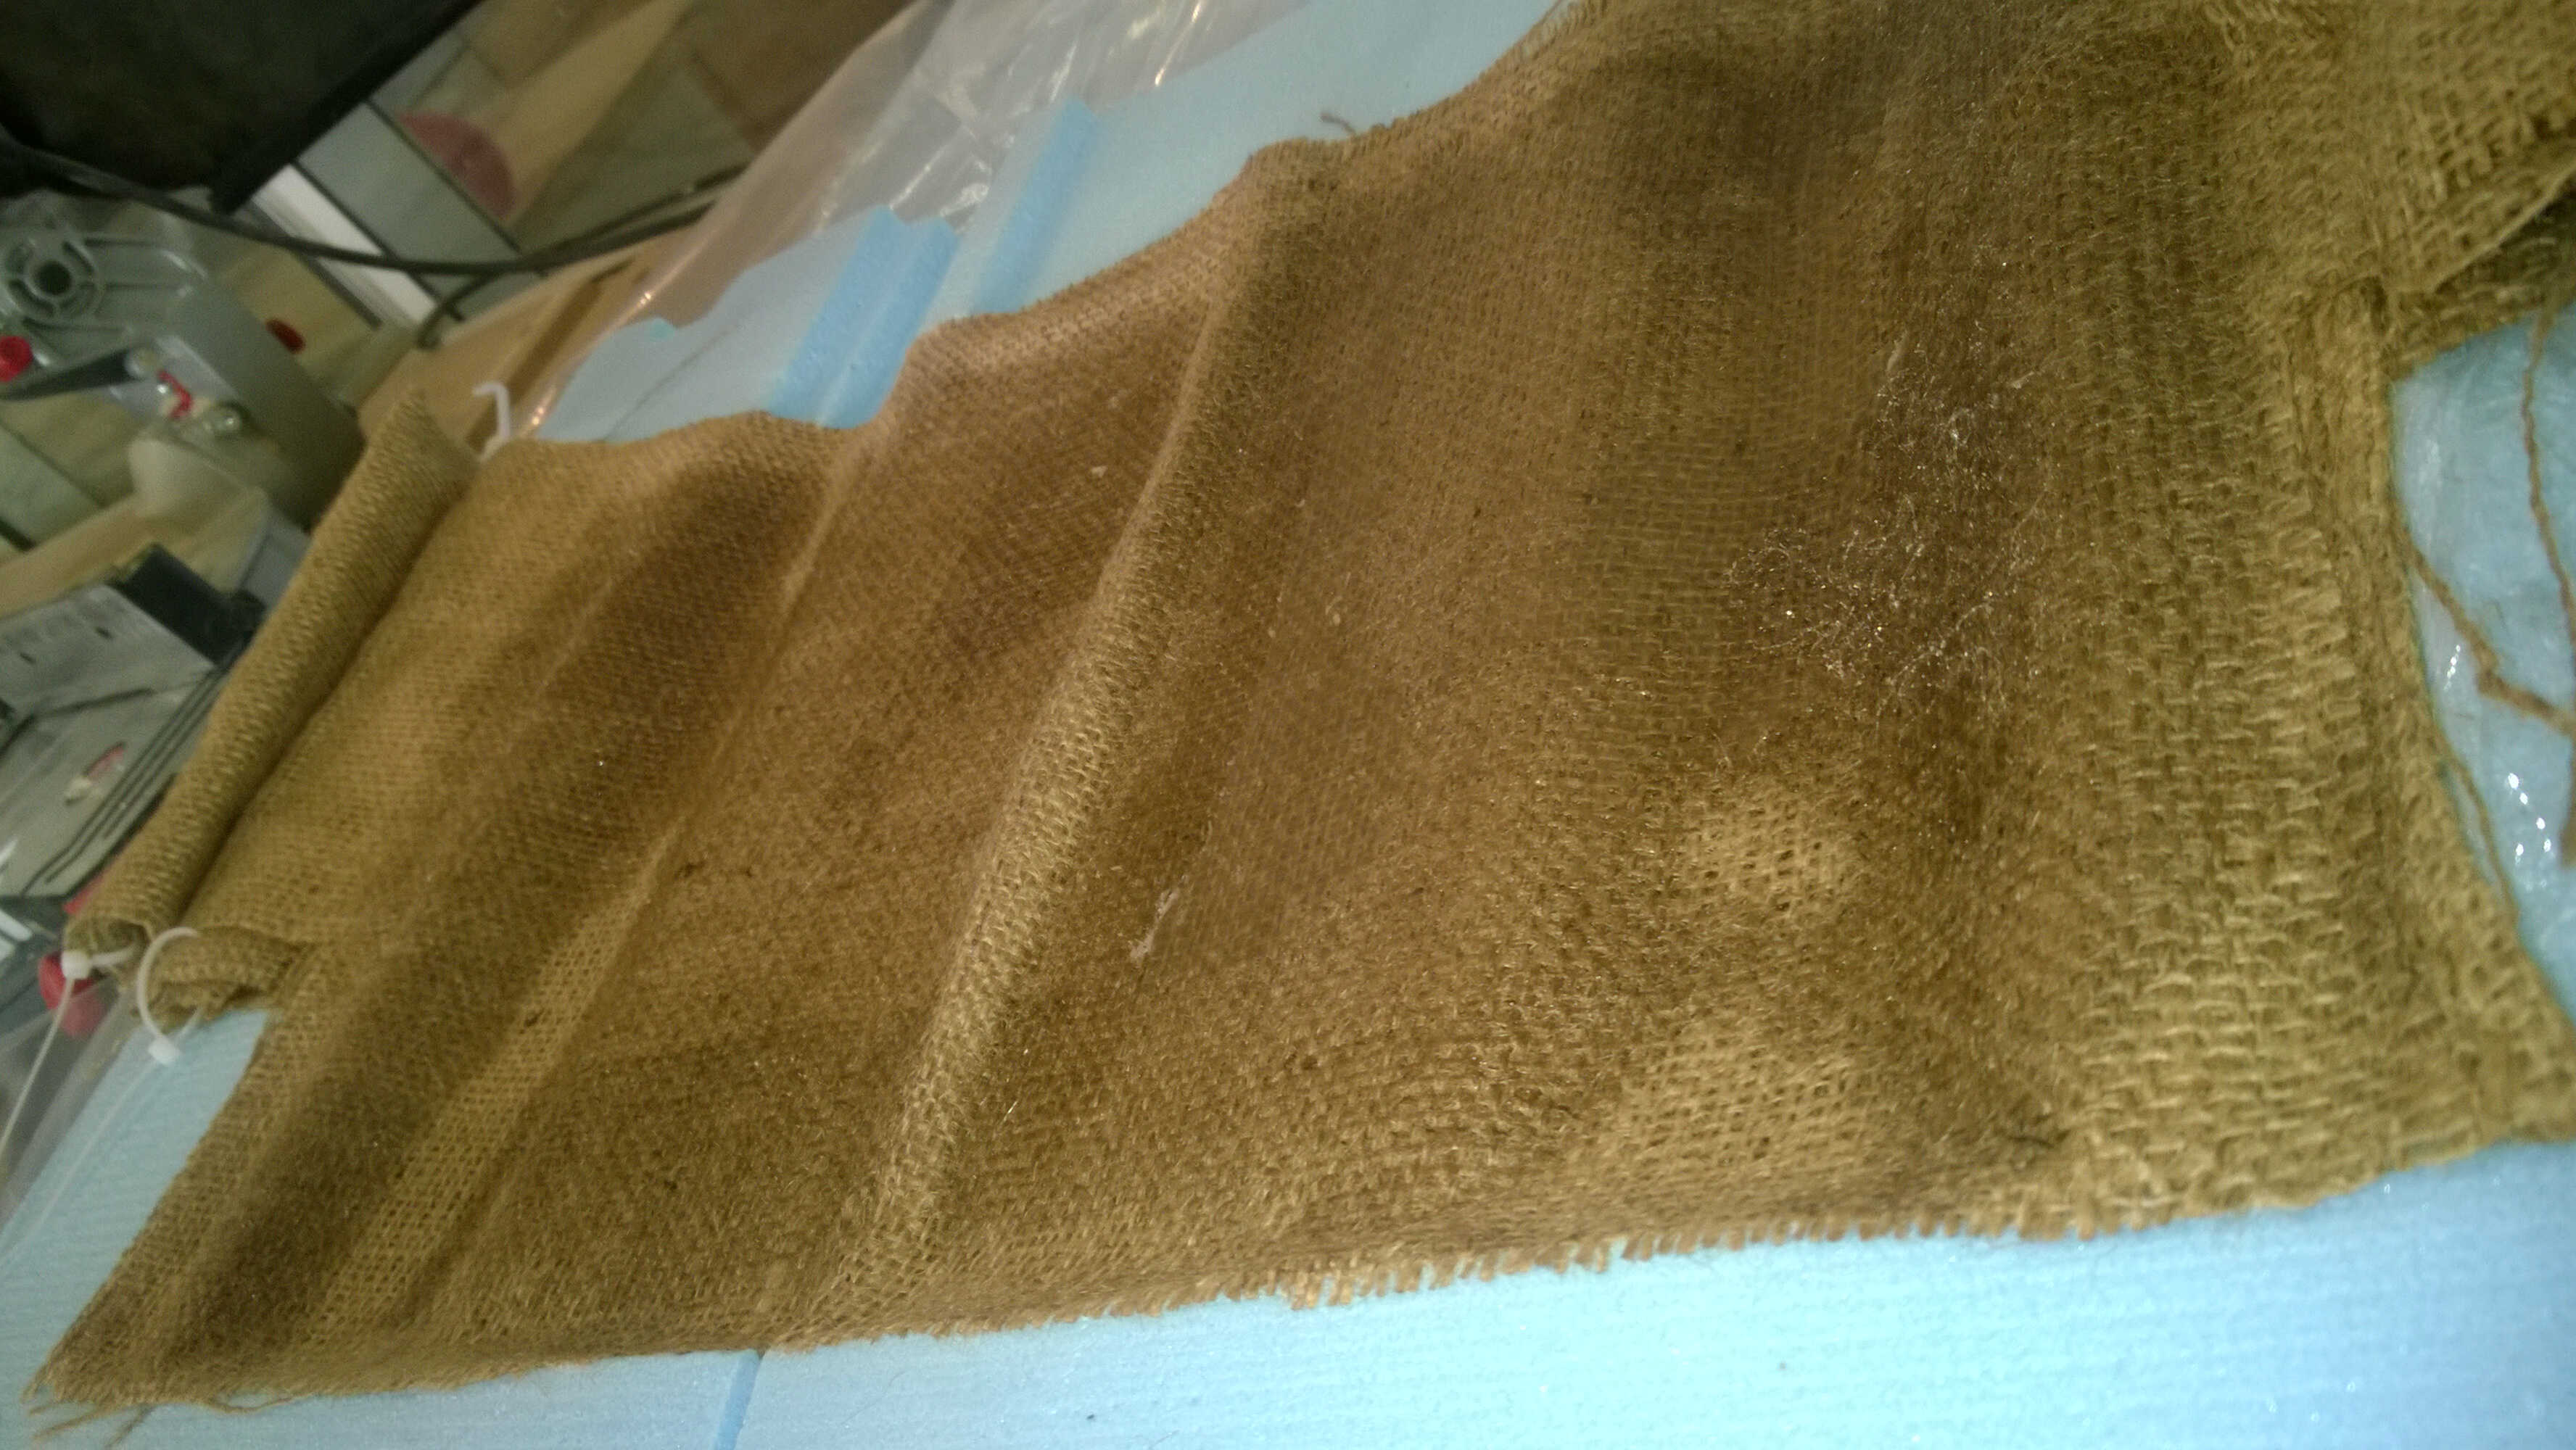
At first I considered laser-cutting the fabric but Yassine was using it for its skeleton. Also the checkered structure of the burlap makes it easy to scissor. I cut the foam of the mold with a hot wire to make it fit in the vaccum bag. This was a good occasion to test this tool. Yassine showed me how to make it safe, cuting always straight with fingers away. To protect the mold, I fixed cling film on it with double sided tape; this allowed me to tense it. Once everything was set I prepared a cup of resin the exact same way we did for the test. We bought large pencils to make the resin coating quicker. I filled the mold in a couple of steps:
- protecting the mold with cling film
- protecting the side burlap with plastic fasteners
- setting the bottom layer of burlap
- coating it with resin
- setting the second layer of resin
- setting the upper layer of burlap I didn't coat thee last layer as I wanted to keep the touch of the burlap and supposed some resin would raise due to compression.
- protecting the upper layer from the vaccum bag with cling film and baking paper. The left part was covered with cling film but we ran short of it. The right part was covered with baking paper.
- fitting in the vacccum bag + vaccumed. The vaccum was really effective, it made the mold bend a little.
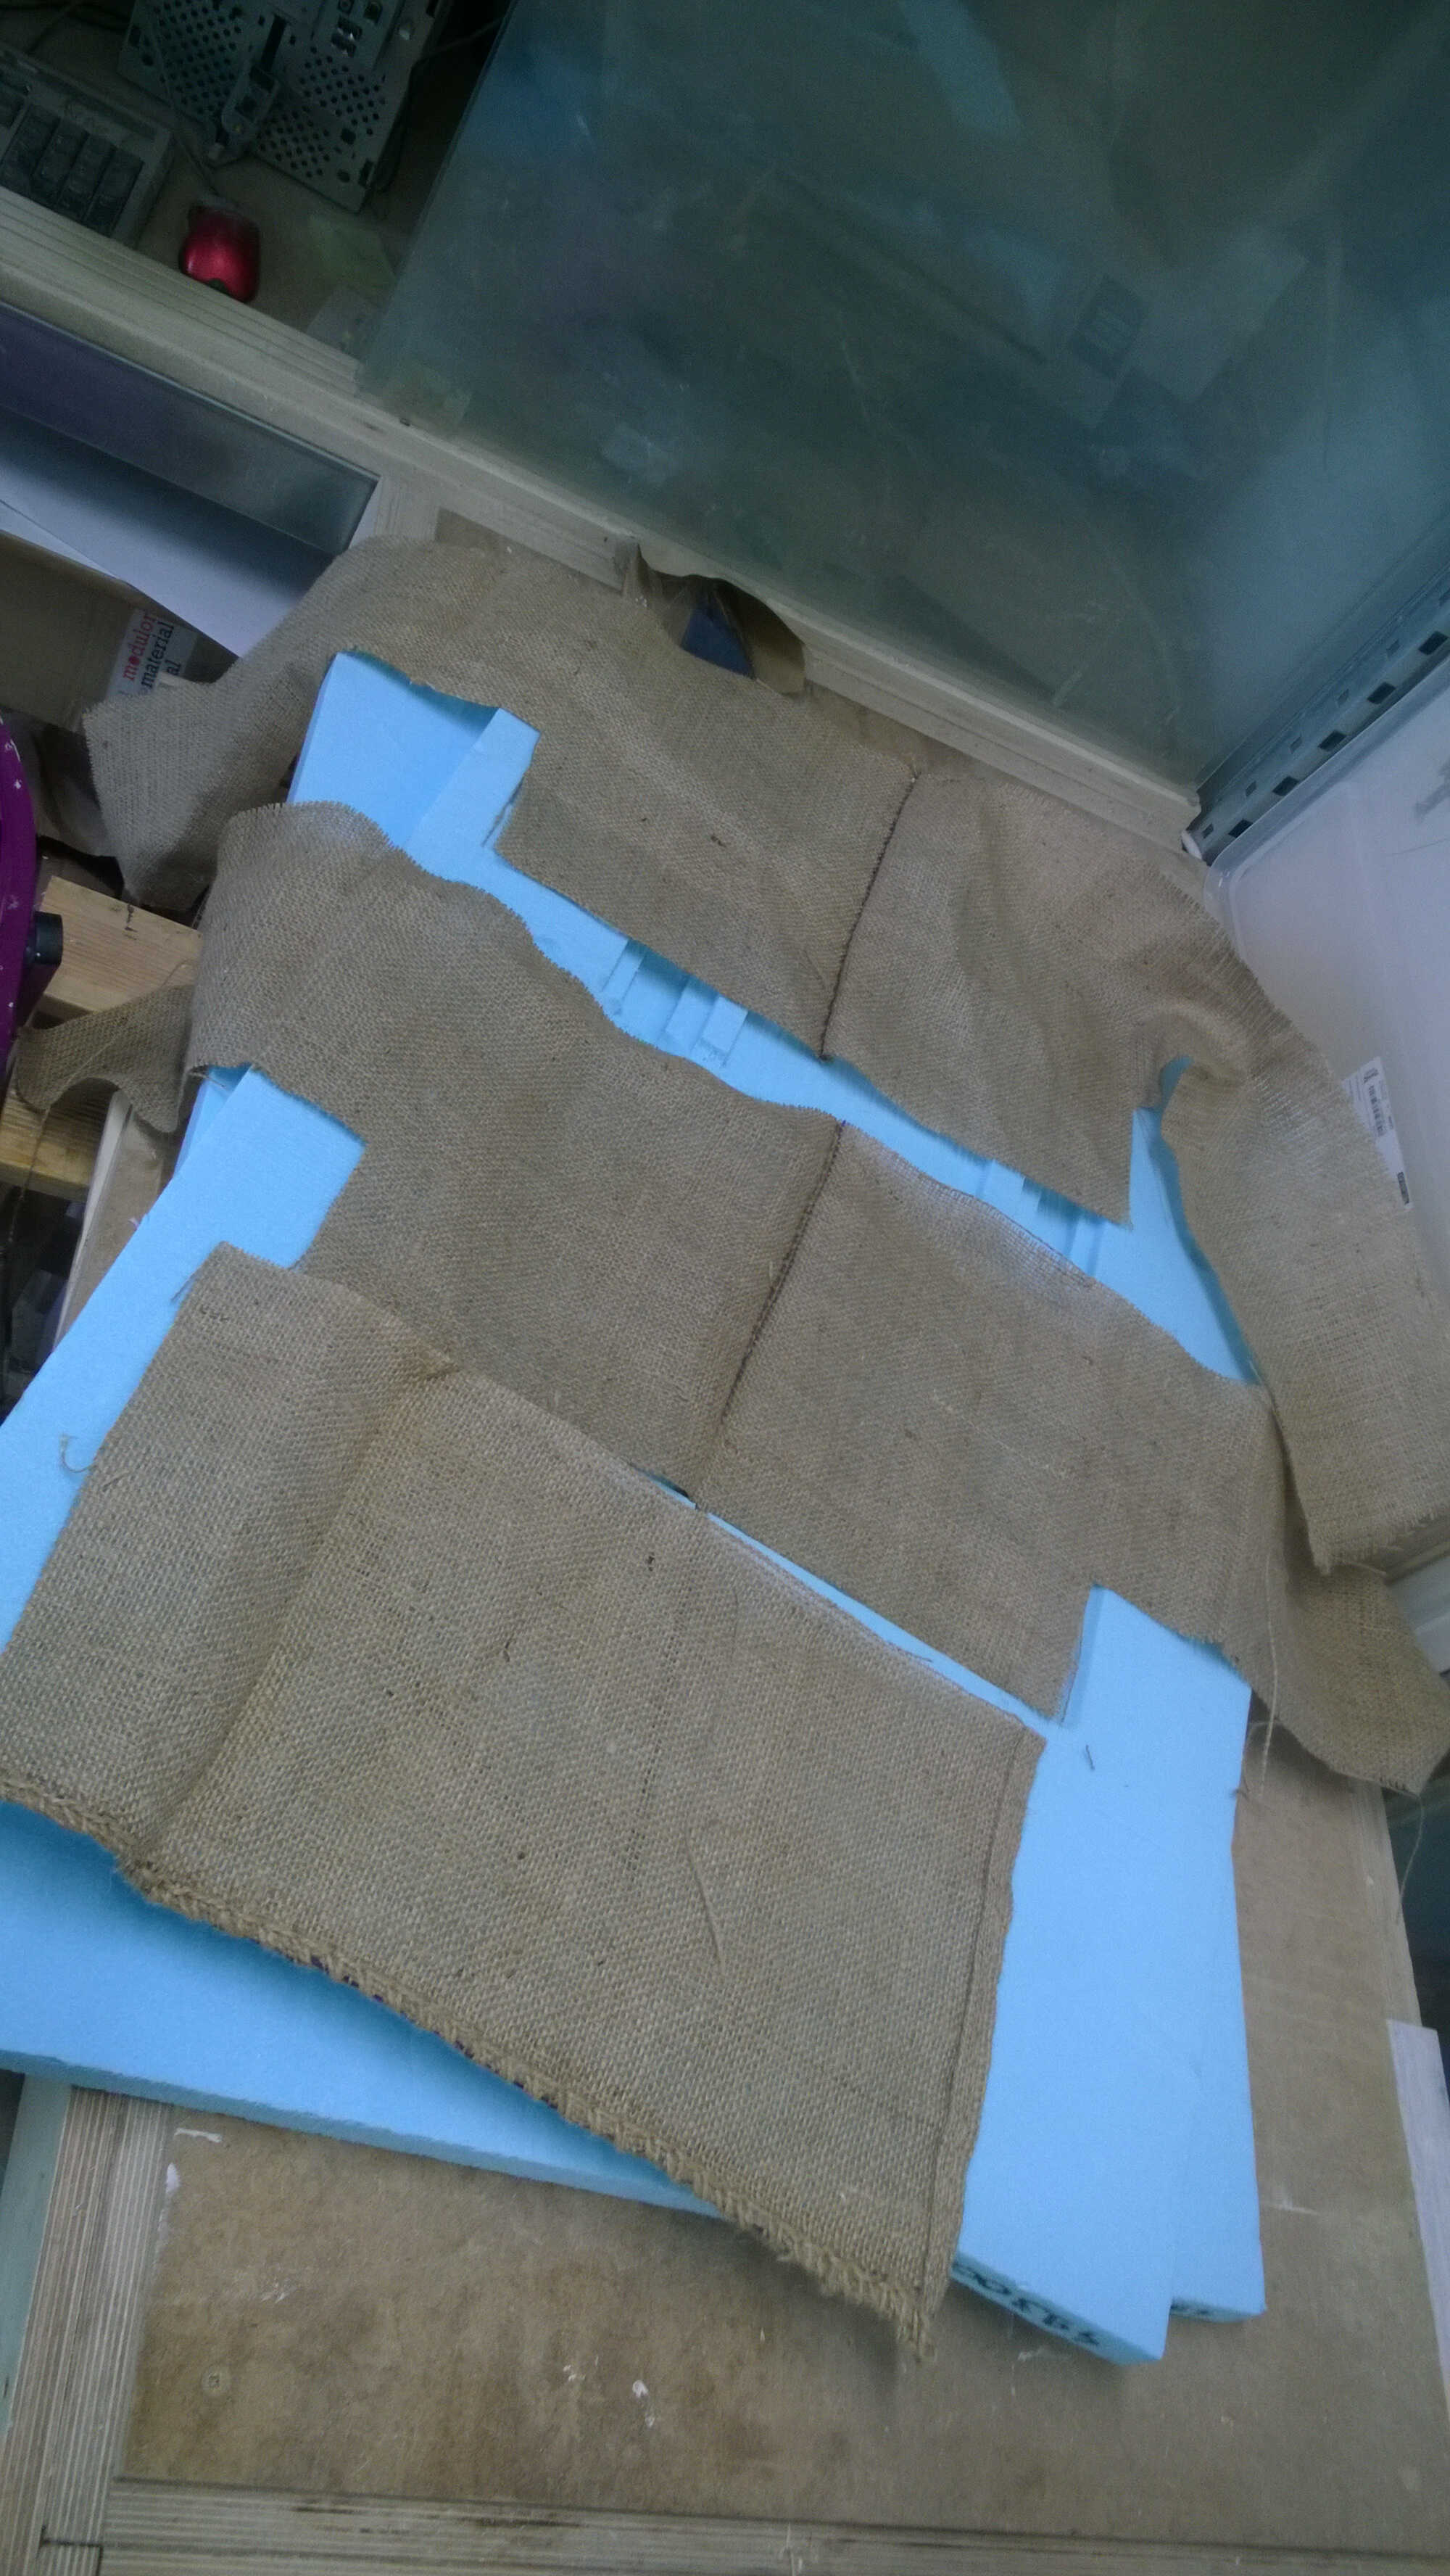
fabric preparation
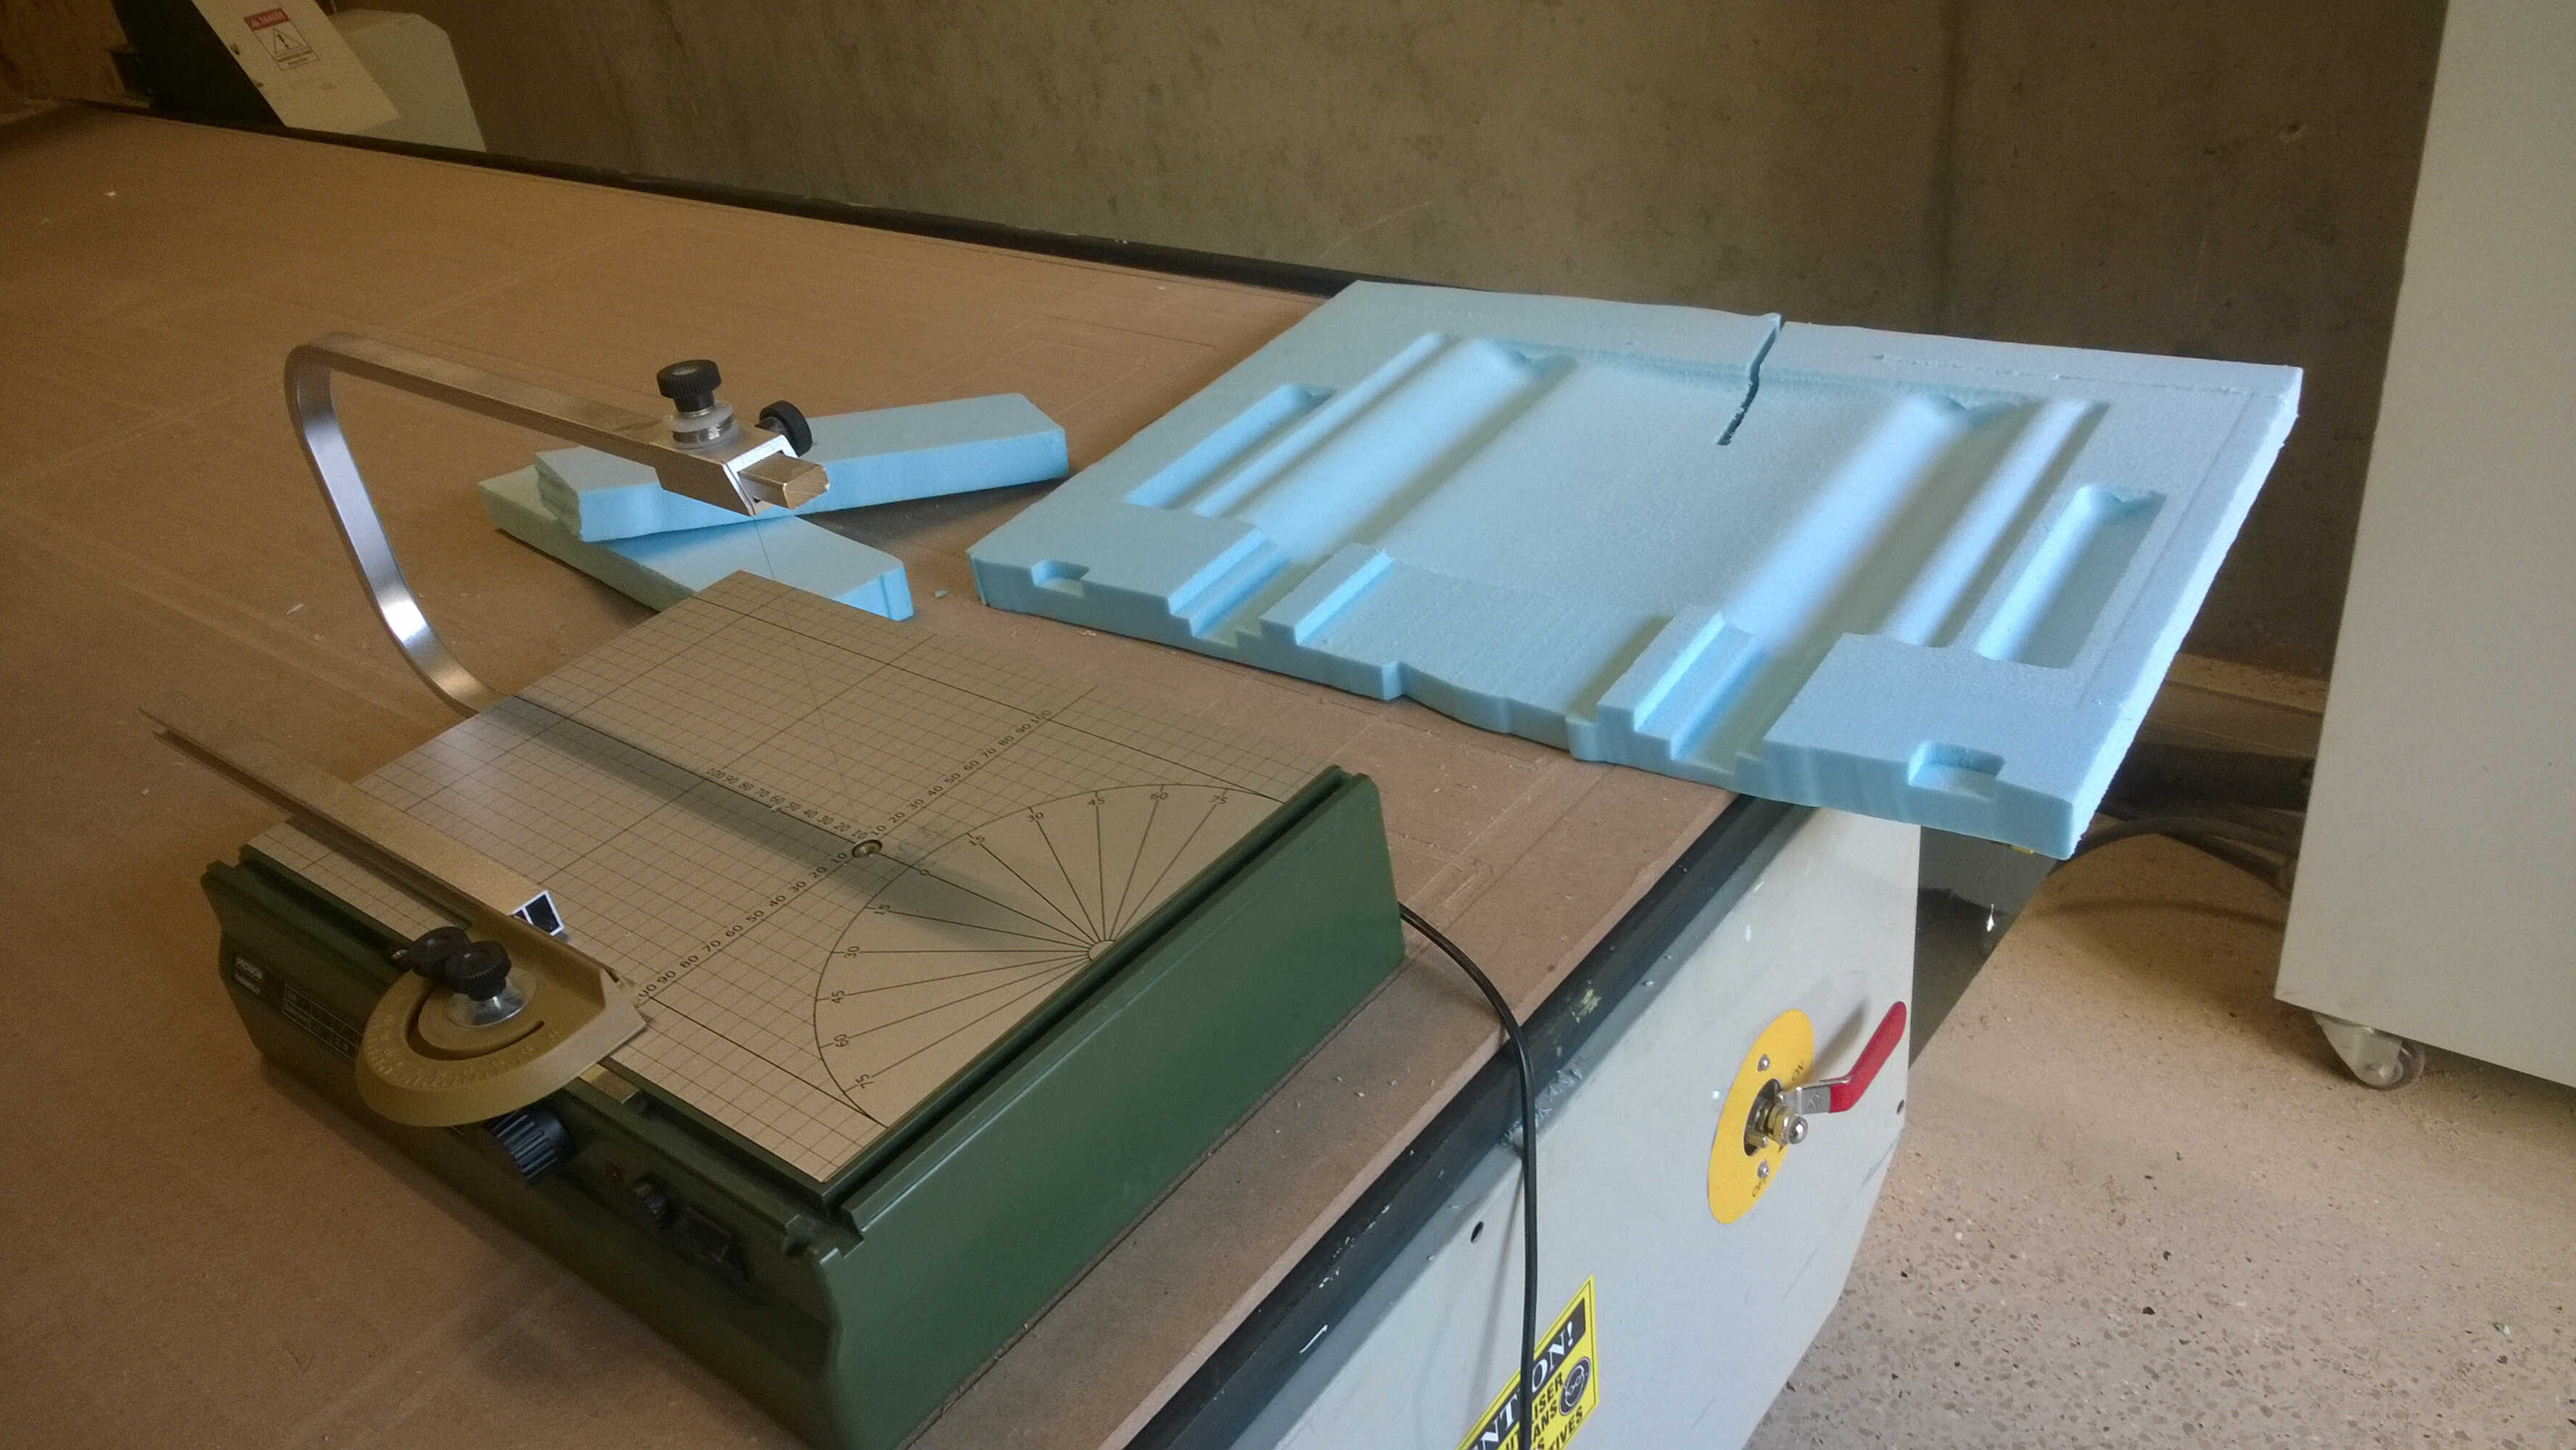
cutting foam

cling film streching
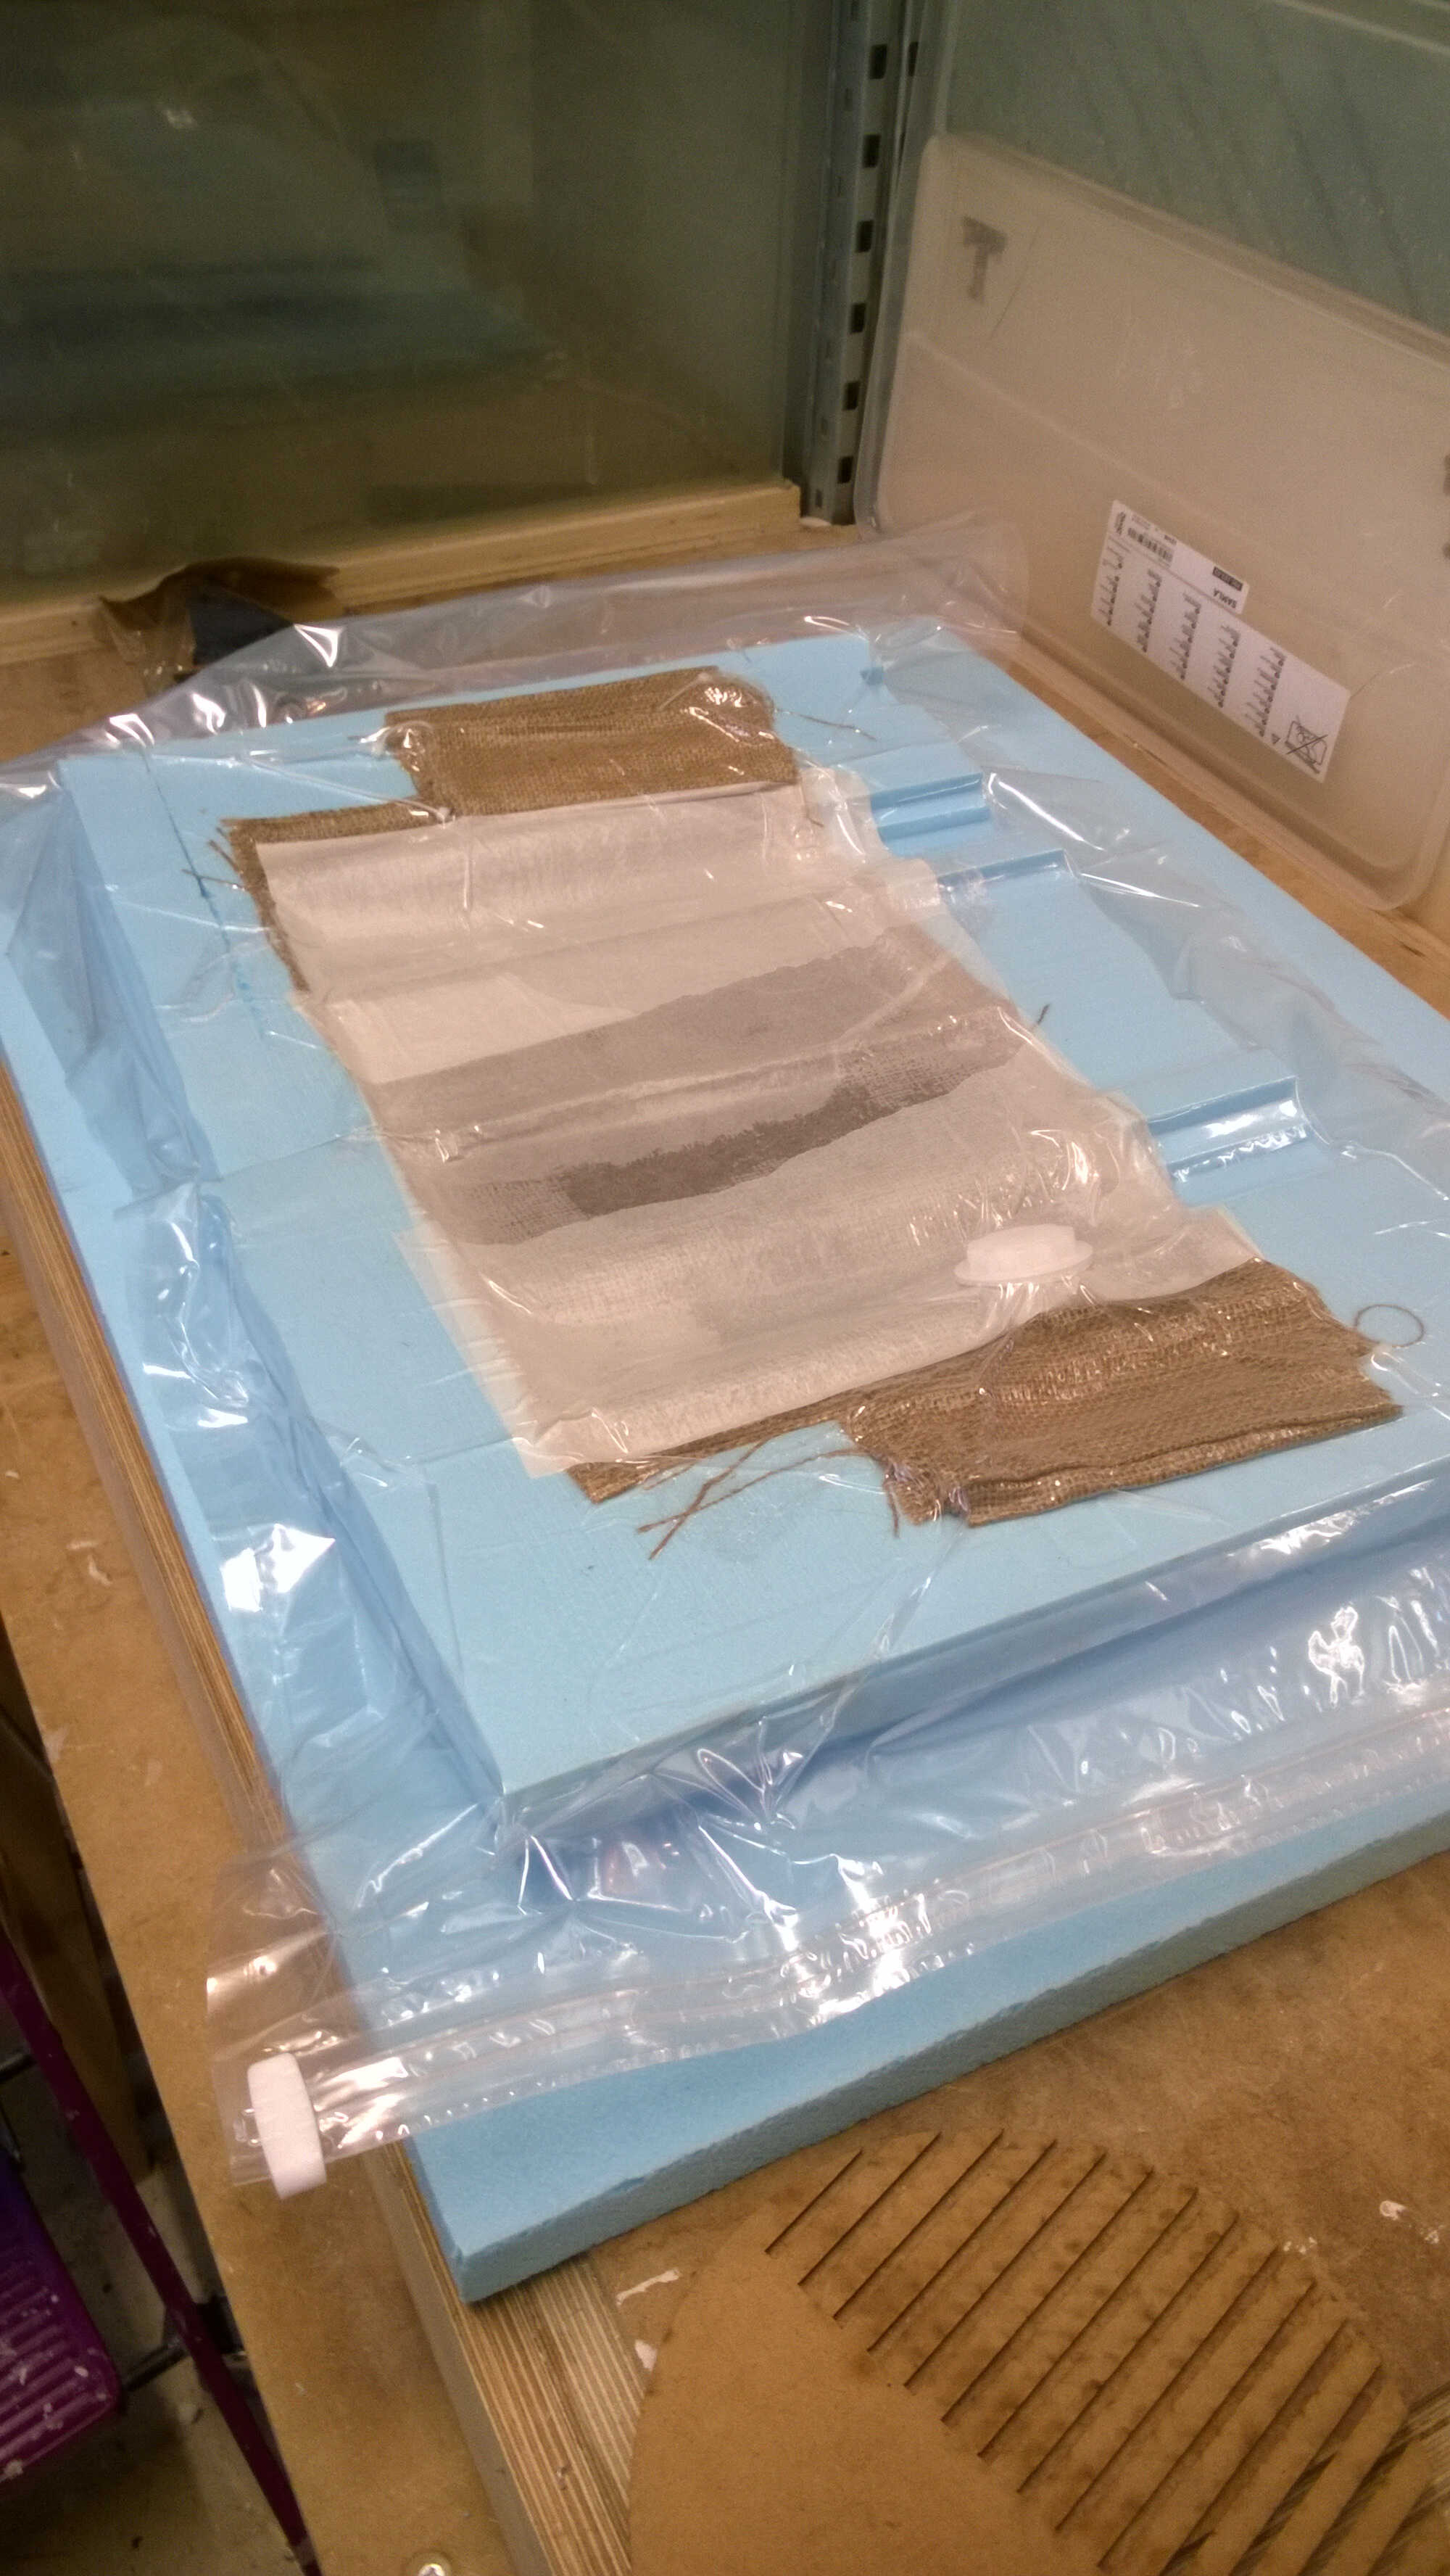
vaccuumed seat
I unwrapped 5 days later. Difference between the left and the right side were noticeable. I relate that to the difference in covering -and maybe to resin application. Even if both coverings were removed easly the cling film side (left) was better looking that the backing paper one. The right side was still a little sticky, I first though it will dry once in direct contact with air but it didn't. This might be due to poor mixing. I think this could be fixed by adding a layer of resin. As none is left this finishing is postponed. Otherwise the structure is very flexible, a little too much actually. Burlap doesn't react at all as coton.
unwrapping
curvature
close-up
cling film negative
sticky part
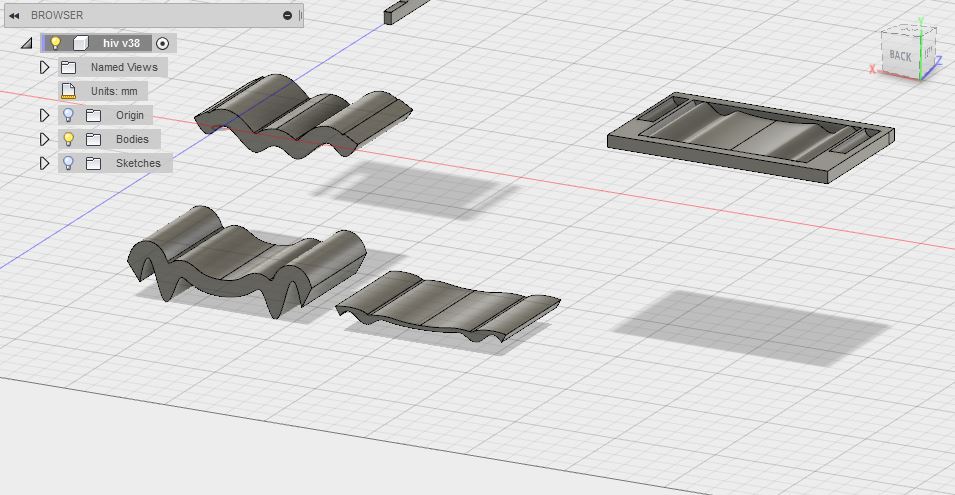
Last I fixed it on my chair. For a v1 it is fine. I imagined an easy wrapping around the armrests but it requires a rotating piece. Also as it was more flexible that I imagined it bend. This could be fixed but sawing the lateral burlap below the seat.
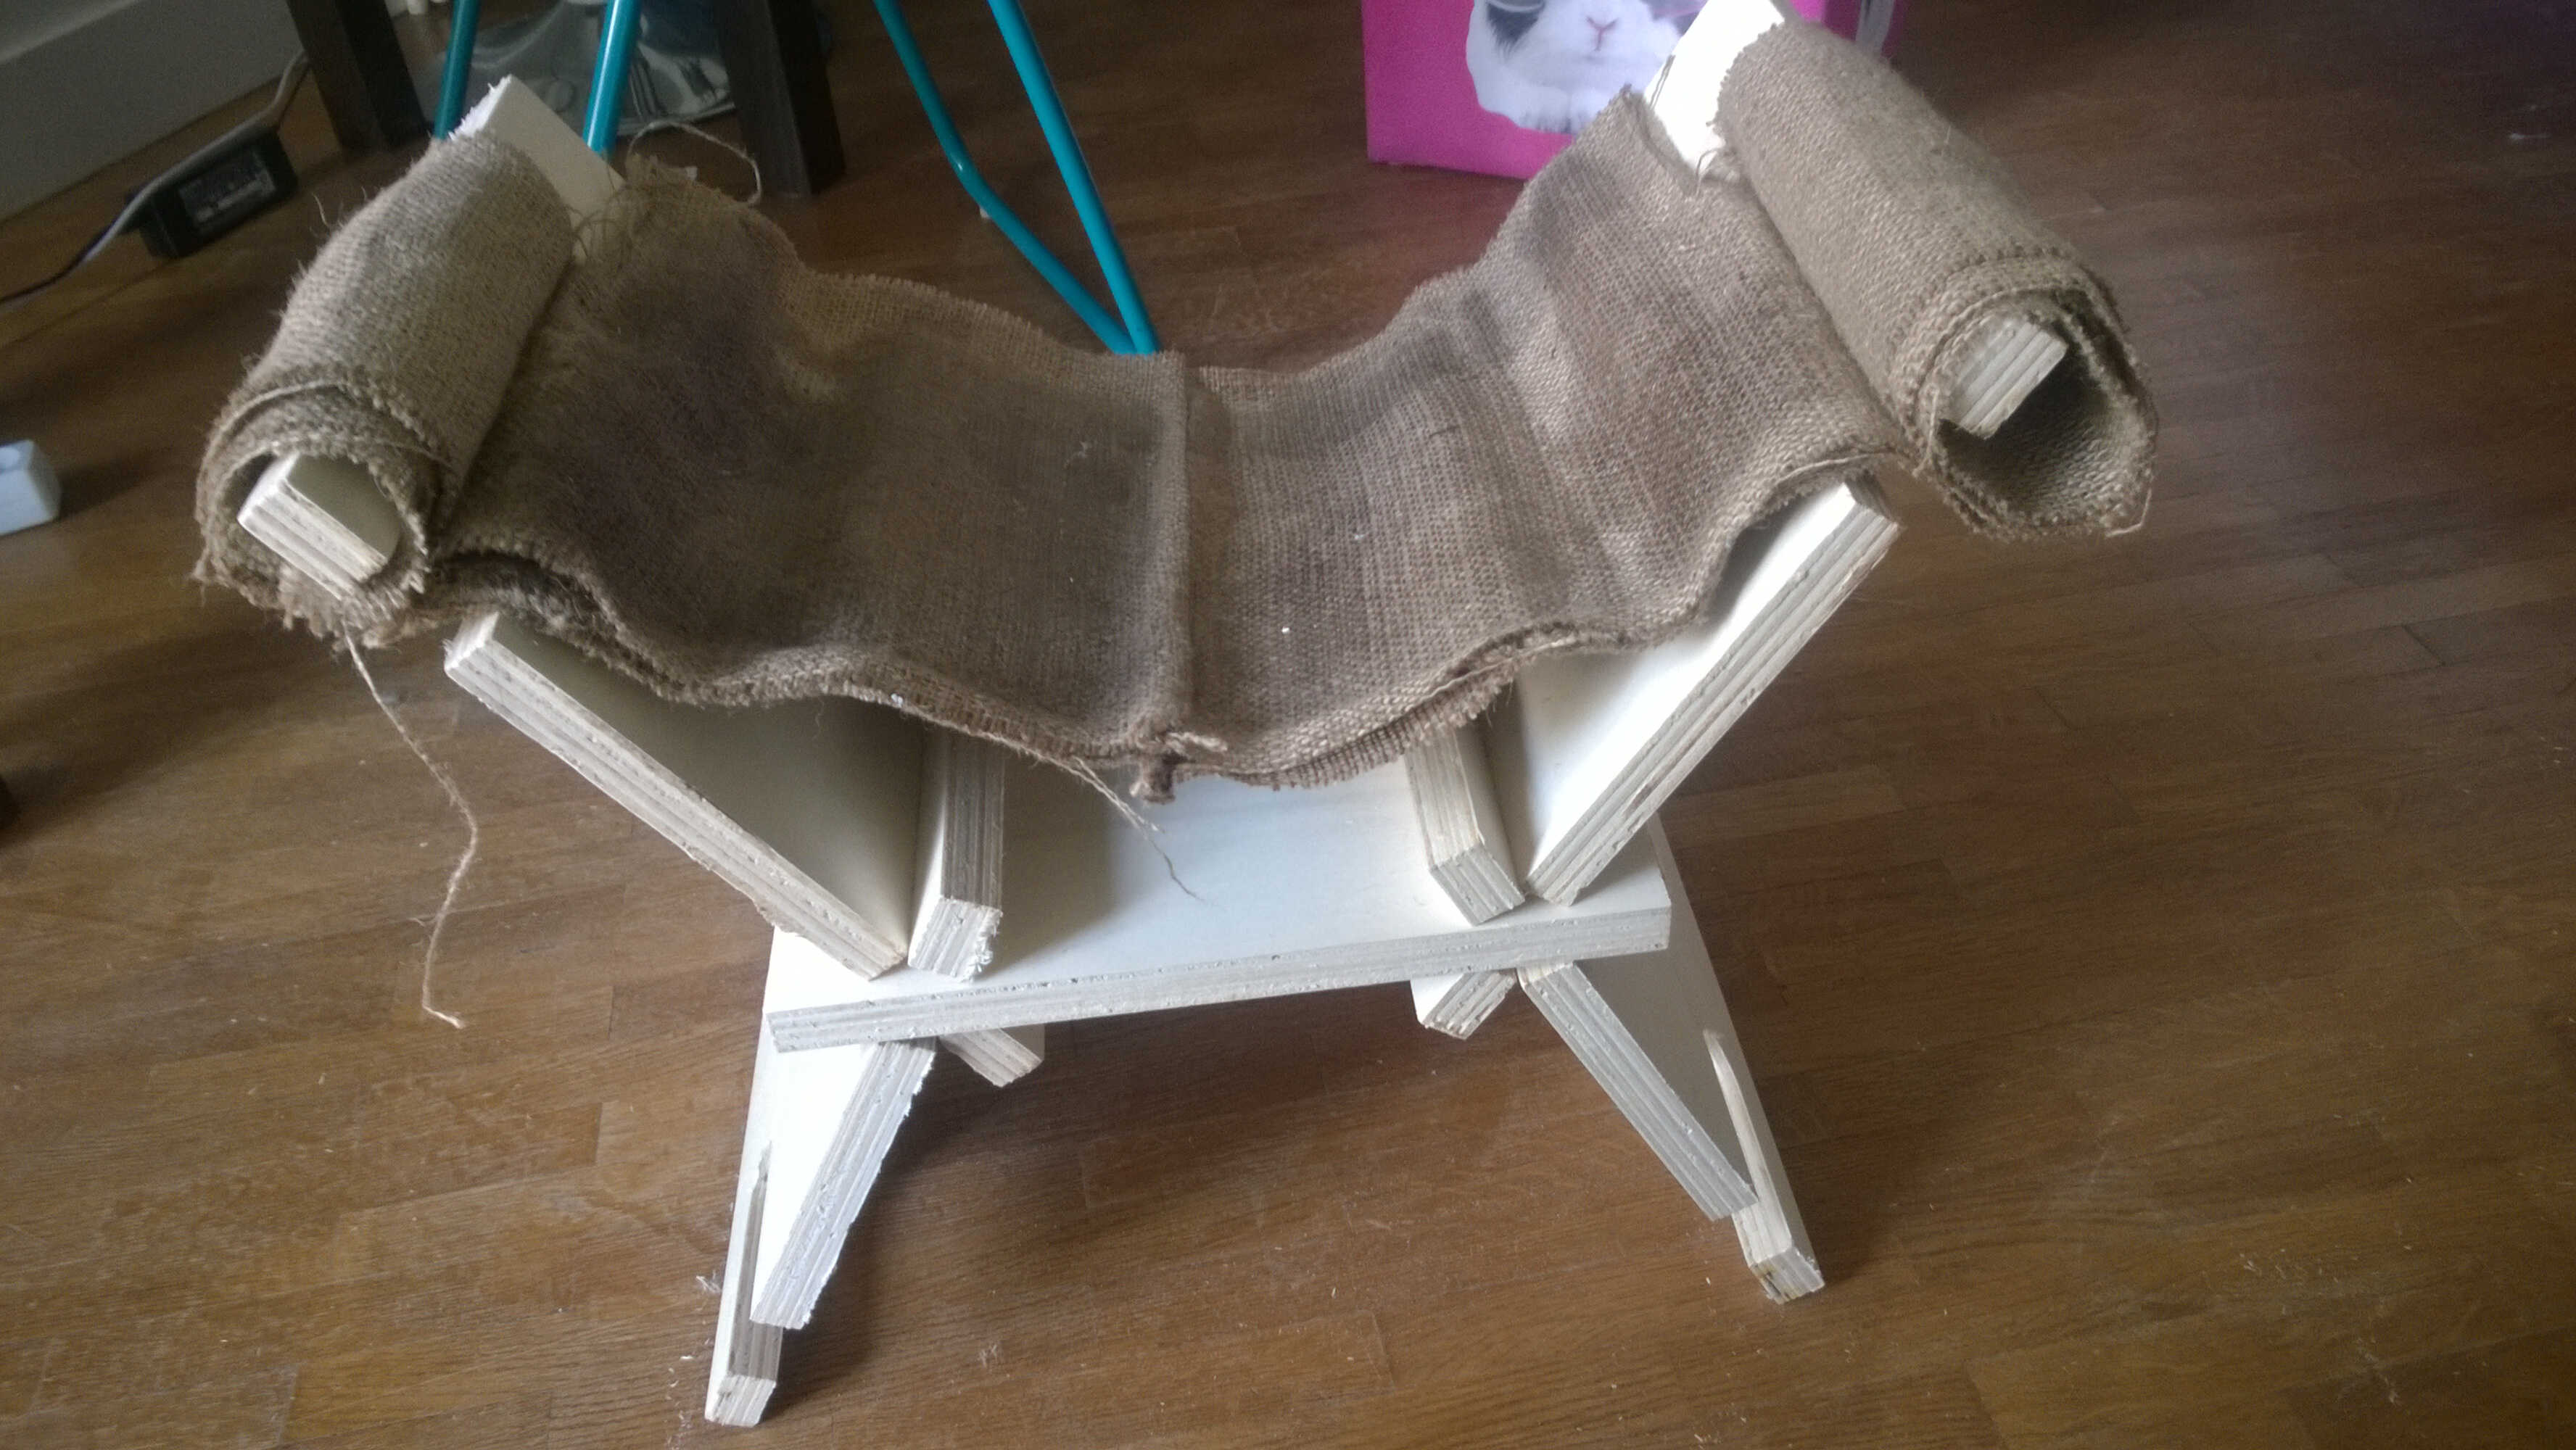
mounted on chair
In order to understand what went wrong I read Westsystem document on vacuum bagging. It helped me clarify some things.
First the vacuum bagging definition: "Vacuum bagging (or vacuum bag laminating) is a clamping method that uses atmospheric pressure to hold the adhesive or resin-coated components of a lamination in place until the adhesive cures. "
The range of pressure differential reached 6-12.5 psi and it is evenly distributed.
The multilayer system that should be involved, that should include a release fabric, an optional perforated fabric and a breather fabric
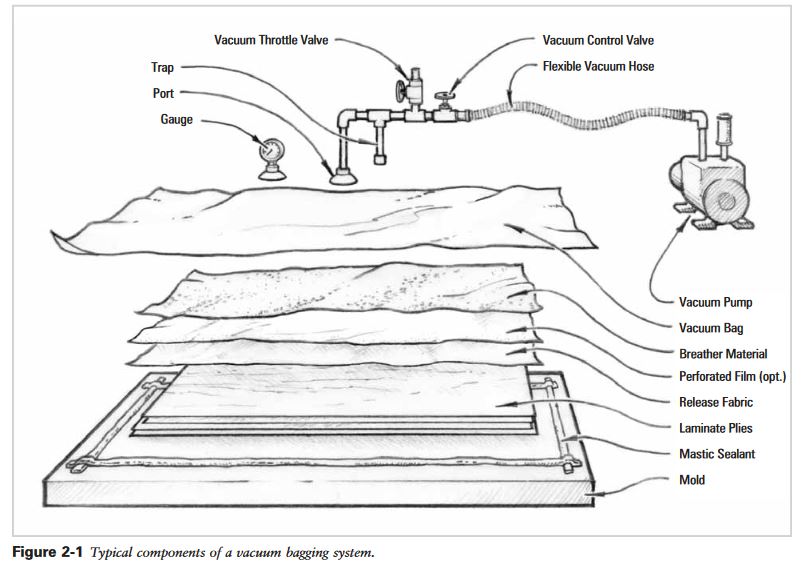
layer system
The release fabric is a smooth woven fabric, polyester for example, that won't bond to epoxy but help to remove excess of epoxy. We used backing paper, I am not sure this is equivalent.
The breather material, bubble-type for example, that prevents excess epoxy to go to vaccumer. We didn't use such a layer.
The optional perforated film that restricts the flow of resin
The vacuumer power has its importance, we used a Festool vacuumer I don't know what pressure differential it can reach.
The sealant should be mastic, we used zips
I should have used a mold release agent, but didn't get trouble to remove my piece
What I did is called a "basic laminating in a female mold"
To apply resin I should have used a squeegee and done it on a plastic cover
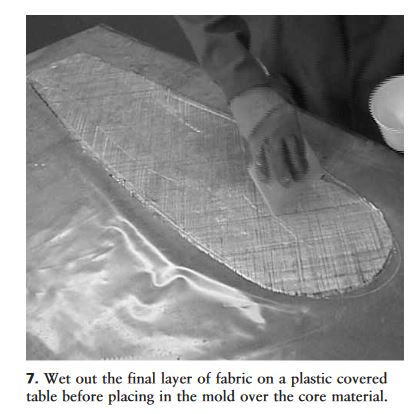
squeegee
The fiber/resin ratio is 50/50 without vacuum and 65/35 with. I think I was below that. It is not said if it is in weight or in volume. I suppose it is in weight. I should have weighted my burlap. It is also said that the ratio is function of the vacuum pressure the resin viscosity and the resin cure time.
There is also a section on uncured epoxy, which is what happened to me. My seat is sticky. They say to scrap with a wire brush, to warm, to use alcohol. The cause probably being unsufficient mixing.
There is also a section on uncured epoxy, which is what happened to me. My seat is sticky. They say to scrap with a wire brush, to warm, to use alcohol. The cause probably being unsufficient mixing.
Regional
This was a really small review -in term of participant- we were only 3.
Alexis designed the bottom of the shower of his final project.
Denis build a wind turbine foil he found online with a cardboard core. He also nicely documented composite use in nature (turtle shell, pine cone...). He did 3 coupons with 3 different fabrics (burlap, hemp and cotton) and looked at how they react when wet. He finally chose cotton as it enables better detail resolution.
As for myself I was told it was nice to recycle previous weeks leftovers. I didn't demold at the time so we couldn't discuss the result. I was reminded to add a safety section.
General
351 did a project similar to mine (a portable swing seat with 3 layers of burlap).
121 thought of a foldable object with papyrus (which led to environmental concerns)
31 build a fantastic dragon mask. Neil mentionned that burlap should be fully saturated with resin...too bad.