Exercise 14 - Composites
Design and make a 3D mould (~ft2 /30x30cm), and produce a fibre composite part in it
Test day, materials and healty risks
During the first day of the week we did a test. I would follow these steps also during my exercise.
It is a good idea to make composites outside the lab in order to breath less toxic vapours as possible. More information about the healthy risks of the epoxy resins could be find here.
First we should cover the wood table with plastic film.
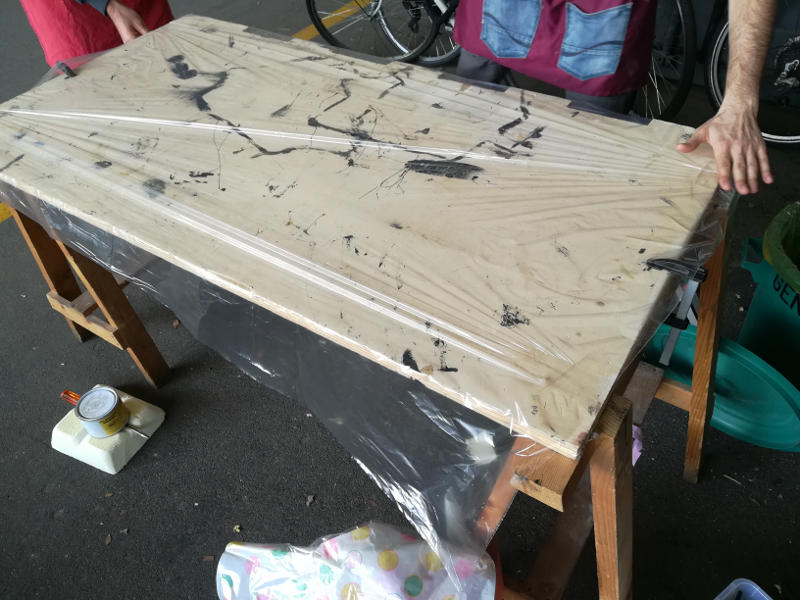
We put wax over the mold as release agent.

With a balance we calculate the amount of bi-component epoxy resins at the ratio of 1:4.
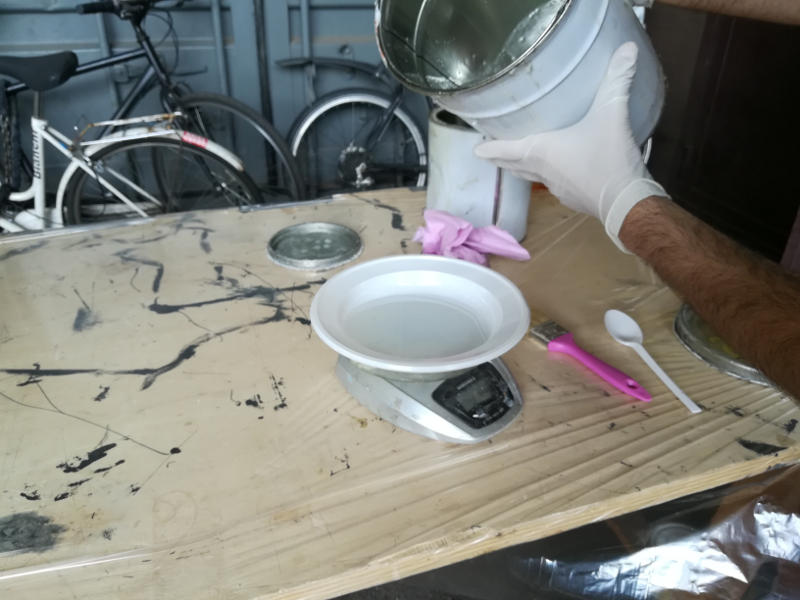
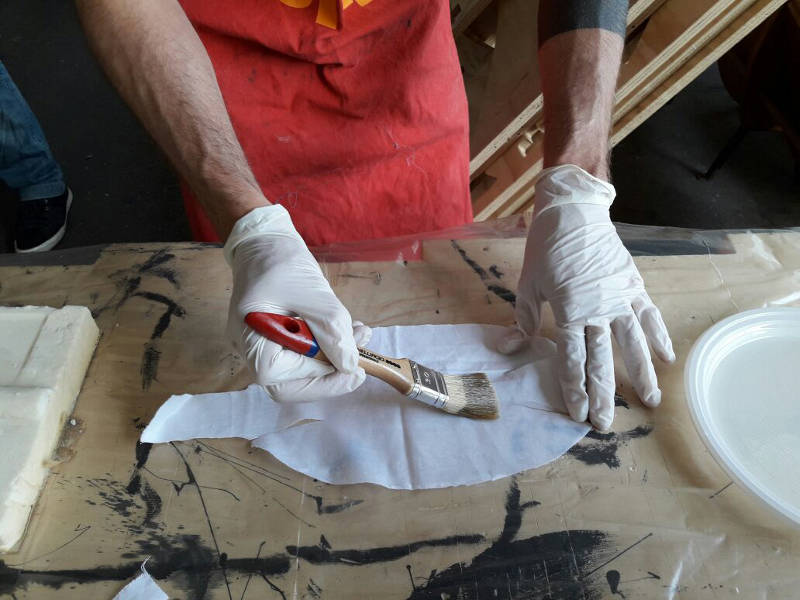
With a brush we mix the resins and we spread it on the tails of organic textil.
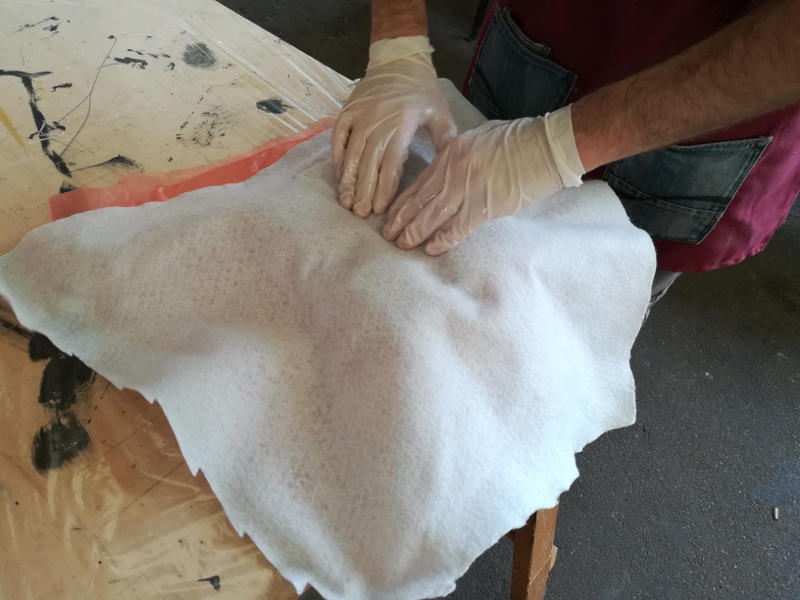
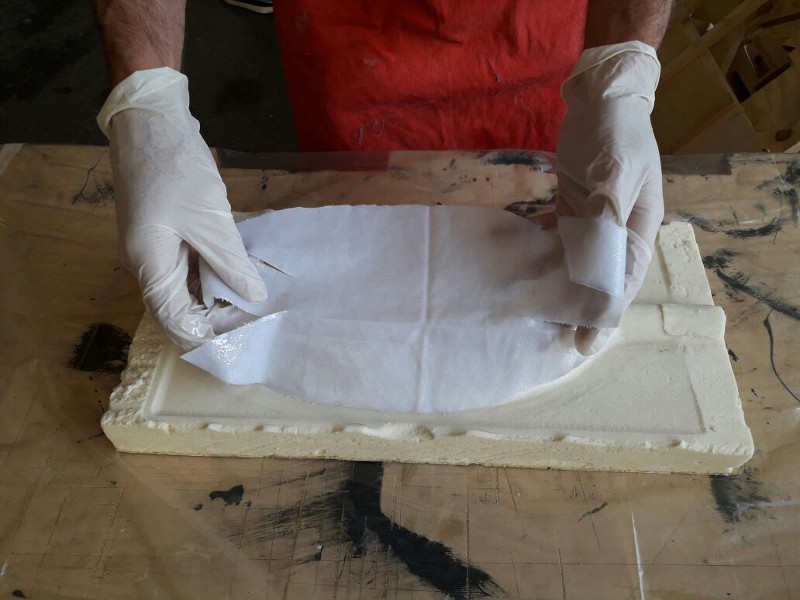
With the brush we also squash the fibers over the mold. We put from 3 to 5 layers of fibers at least.
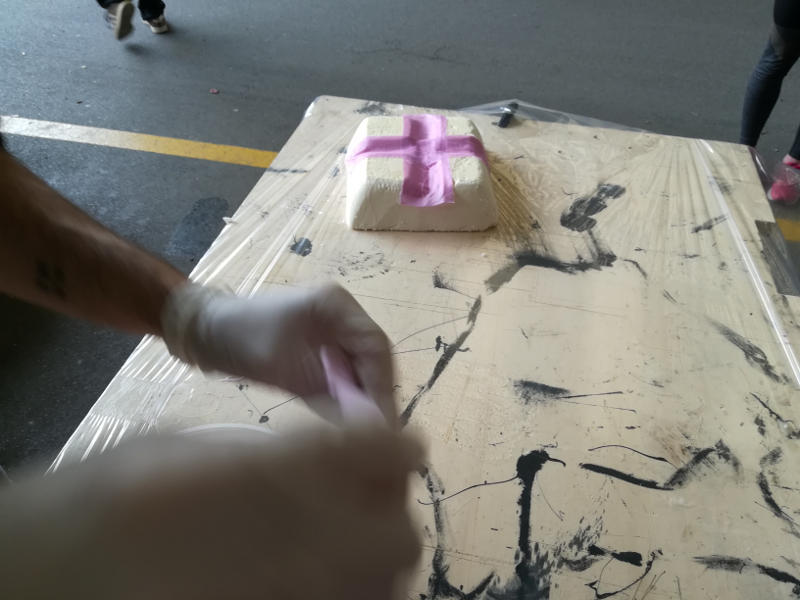
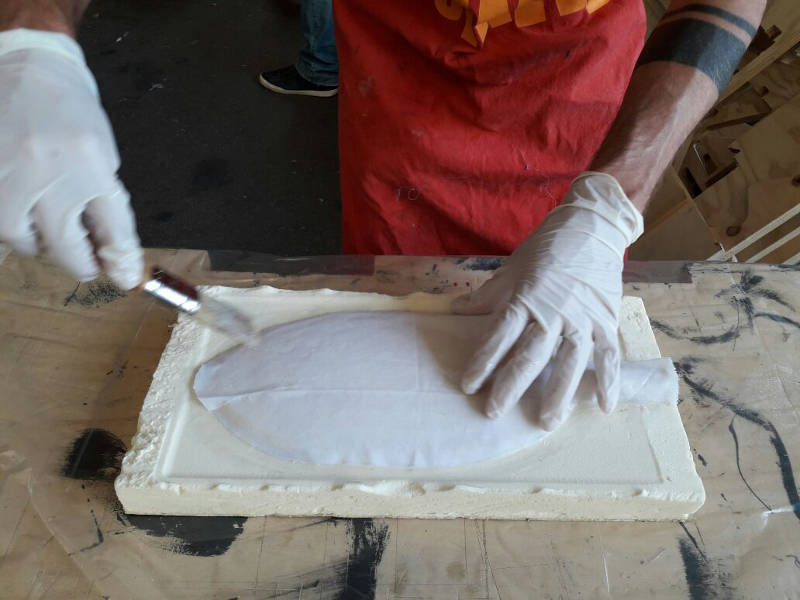
We cover the fibers with a plastic film with small holes to allow the resins to go out.
We cover the plastic film with a absorbent fabric which will take the resin.
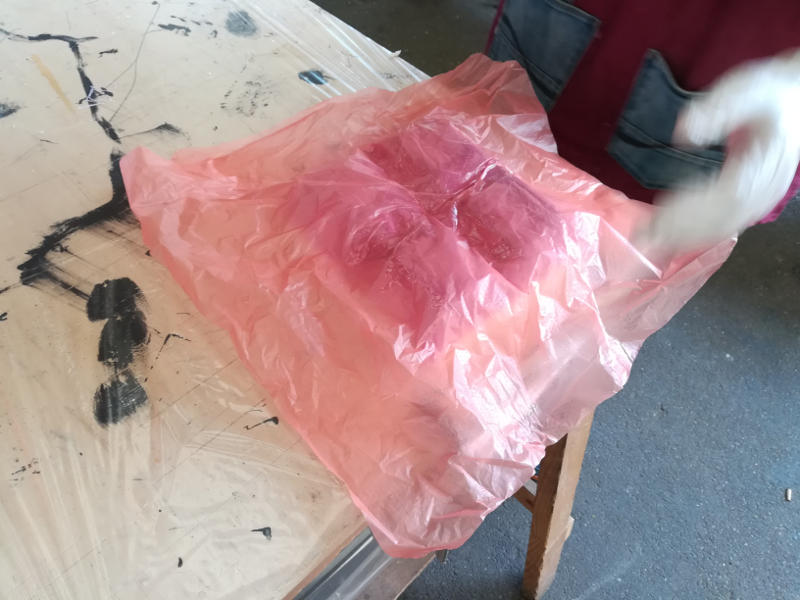
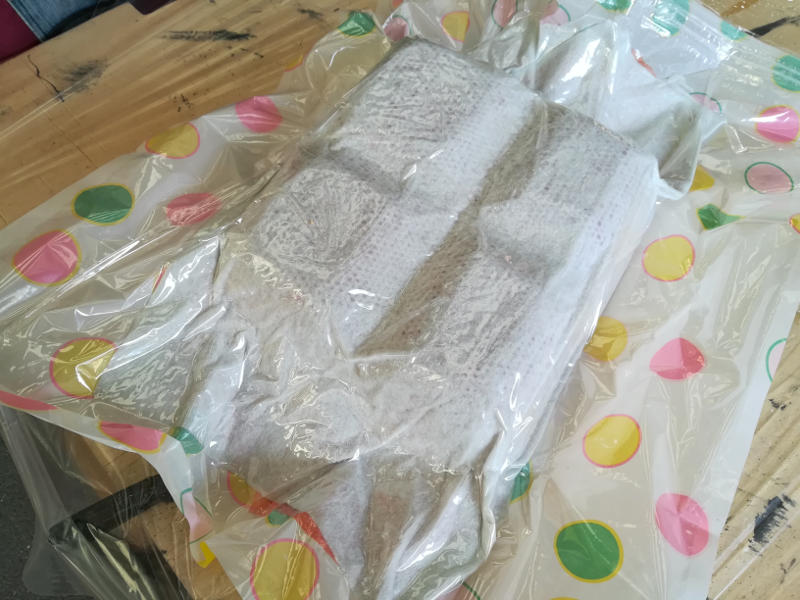
We put everything inside a bag and we close it.
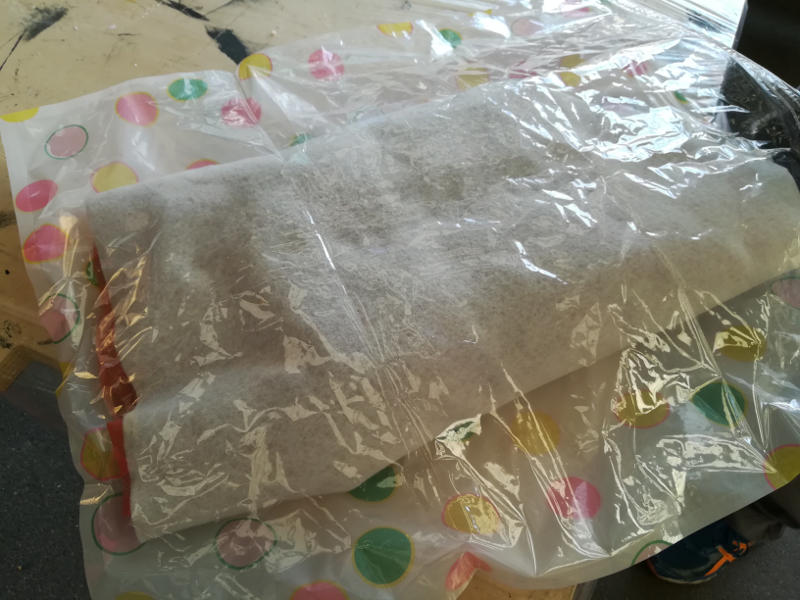
We make a vacuum with a vacuum cleaner. We wait for at least 24 hours.
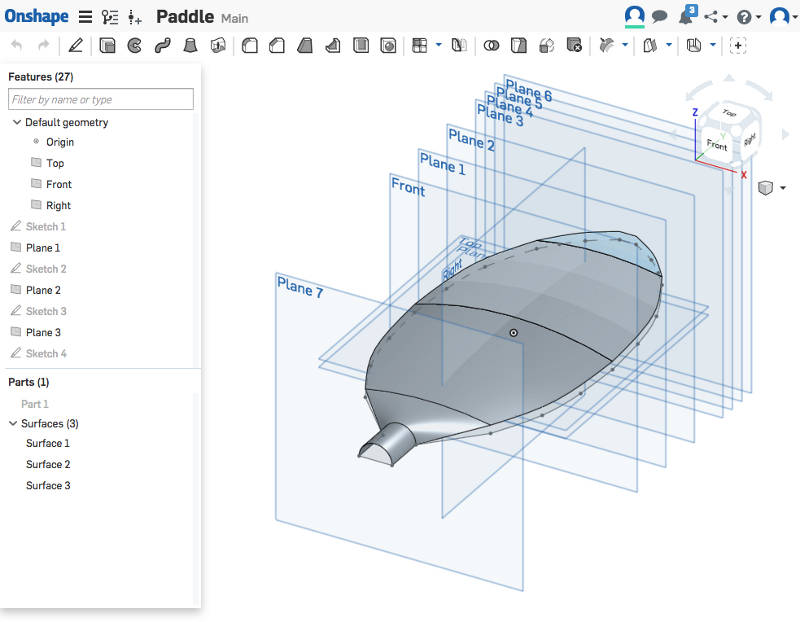
A paddle in natural fibers and epoxy
Because one of my hobbies is to do kayak, I thought to design a paddle with natural fibers and epoxy syntetic resin.
Designing the mould
First I watched some tutorial, and in particular this one, about surface modelling with Onshape. It was my first time modelling these kind of objects, but I very soon started designing feeling quite confortable with the tool.
From 3D model to CAM file
Then I watched some tutorials about 3D moulds milled with our Shopbot machine and others about Vectirc software to create the tool path readable by the Shopbot machine.
Tutorial 01: ShopBot basics - introduction to machine's function, settings, software and introduction to Vcarve
Tutorial 02: Wiki basics: how to use the Shopbot
Tutorial 03: Importing STL to Vectric
Partworks
Before importing in Partworks I had to fix some problems on my 3D file with Rhinocheros software.
Then I imported the fixed .stl file in Partworks and I followed these simple steps below.
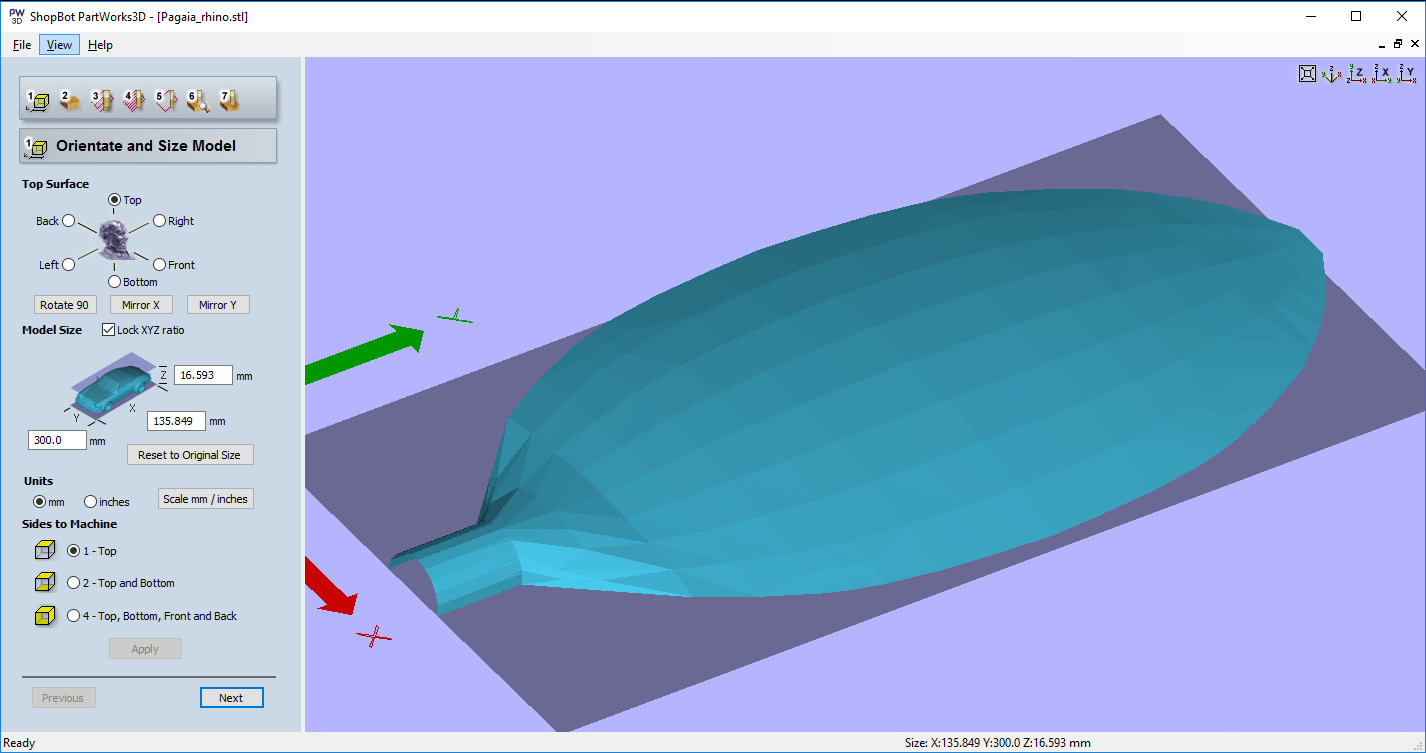
Orient and size the stl file:
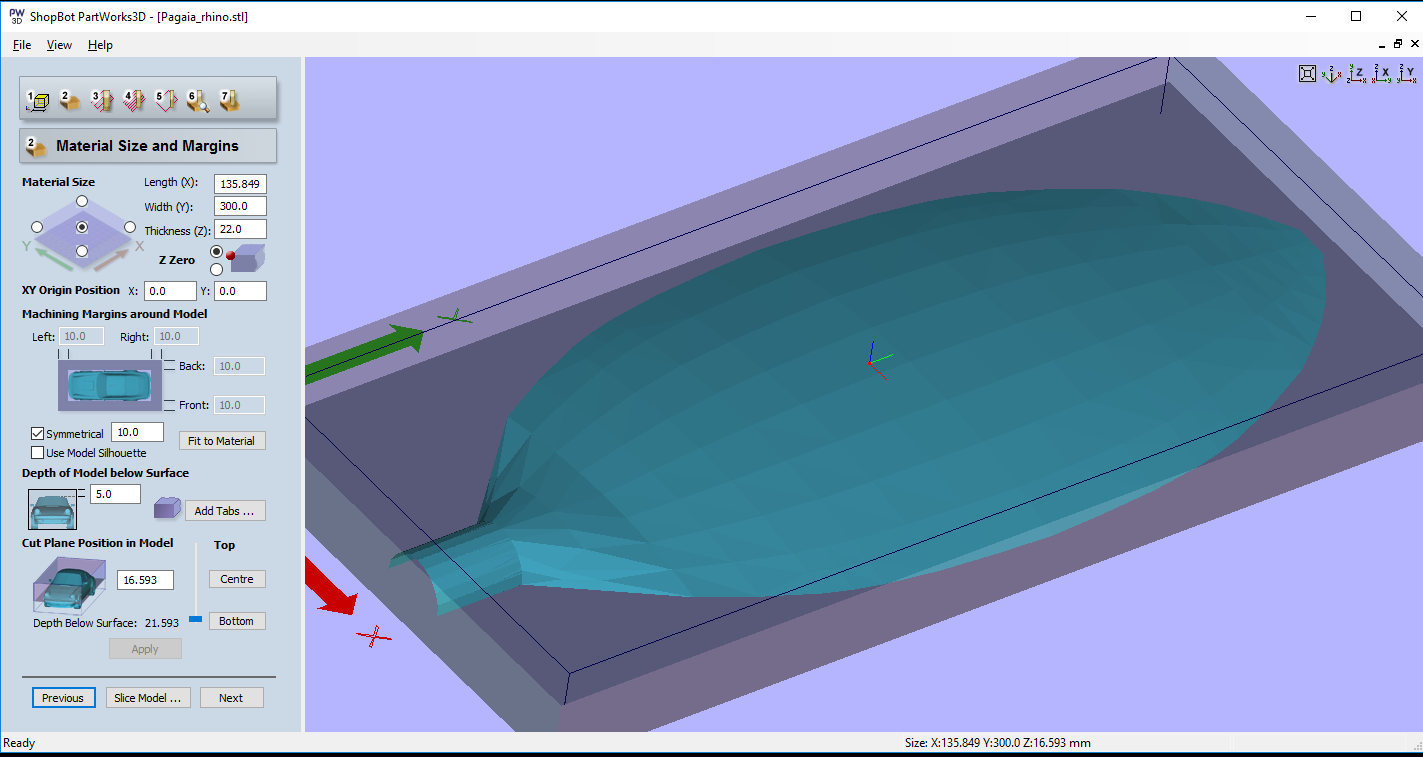
Material size and margins:
Roughing toolpath:
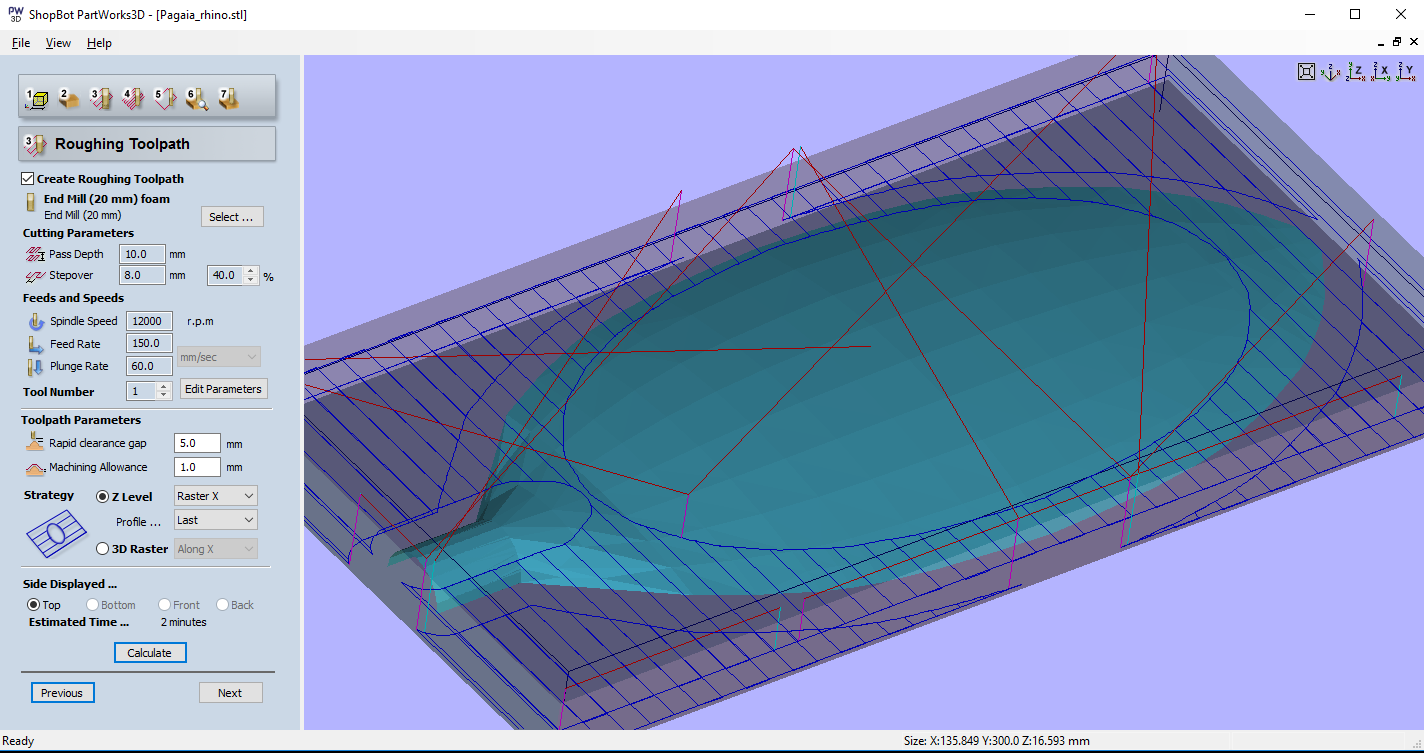
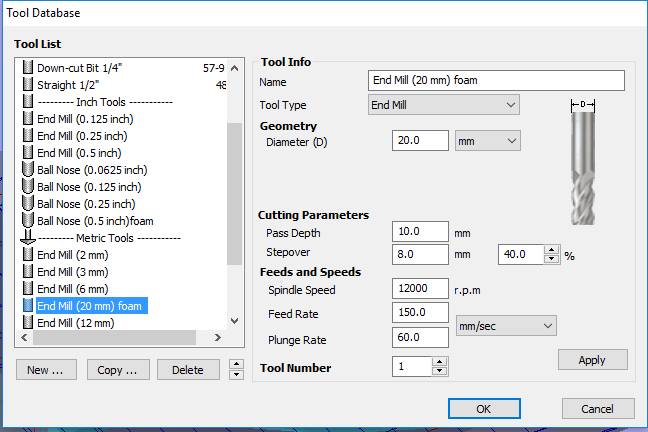
The mill for the roughing toolpath:
Finishing toolpath:
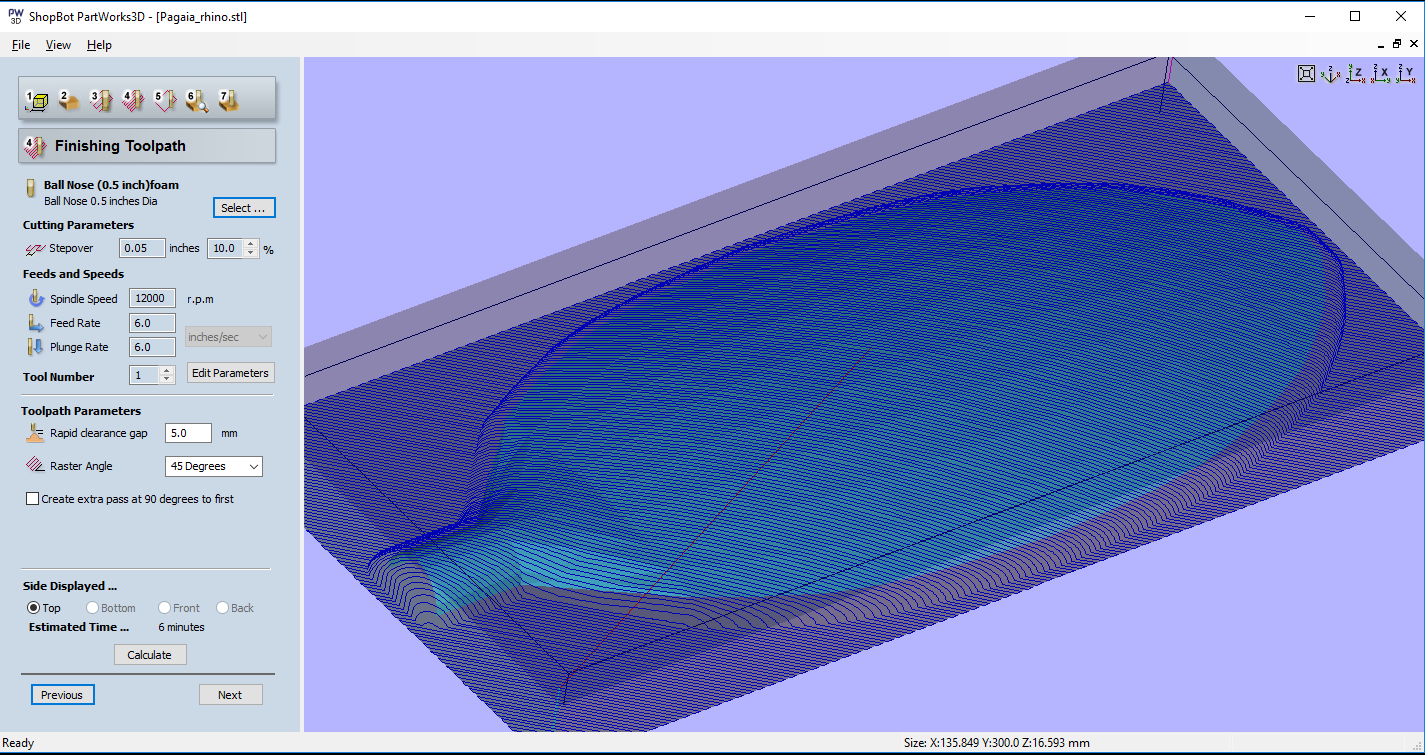
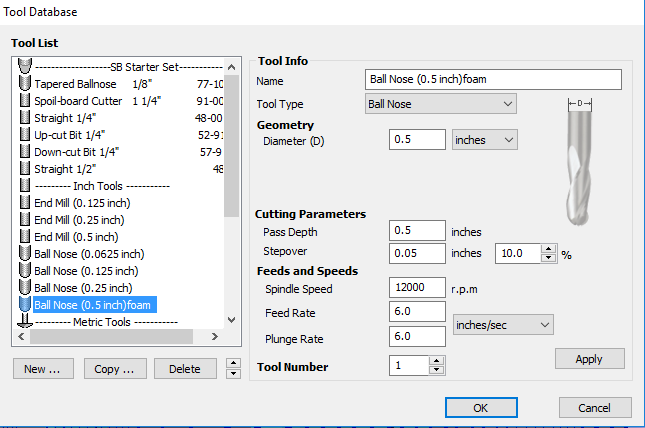
The mill for the finishing toolpath:
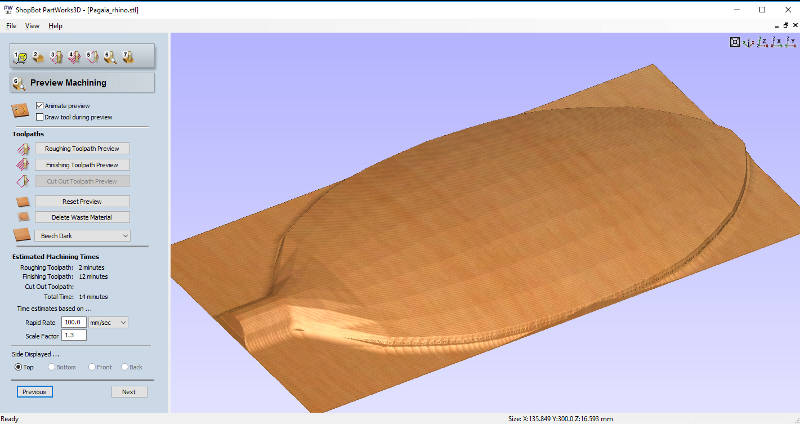
The preview:
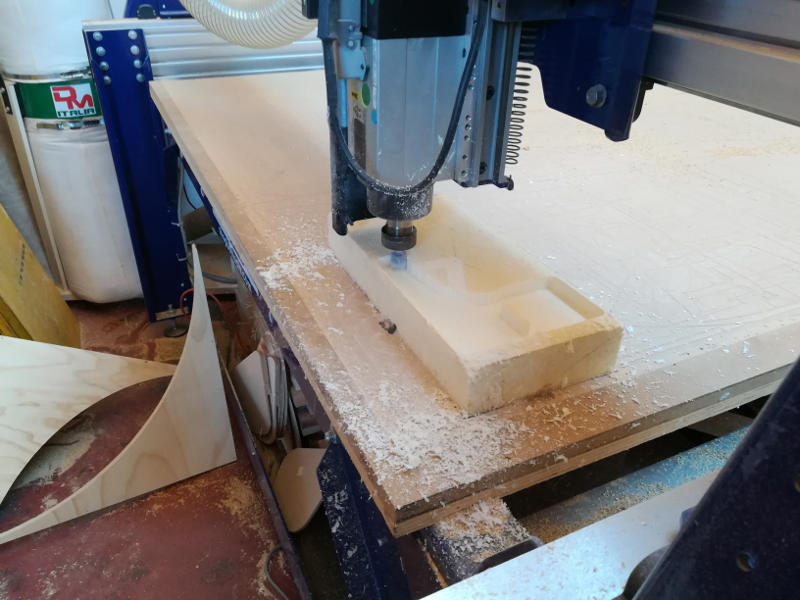
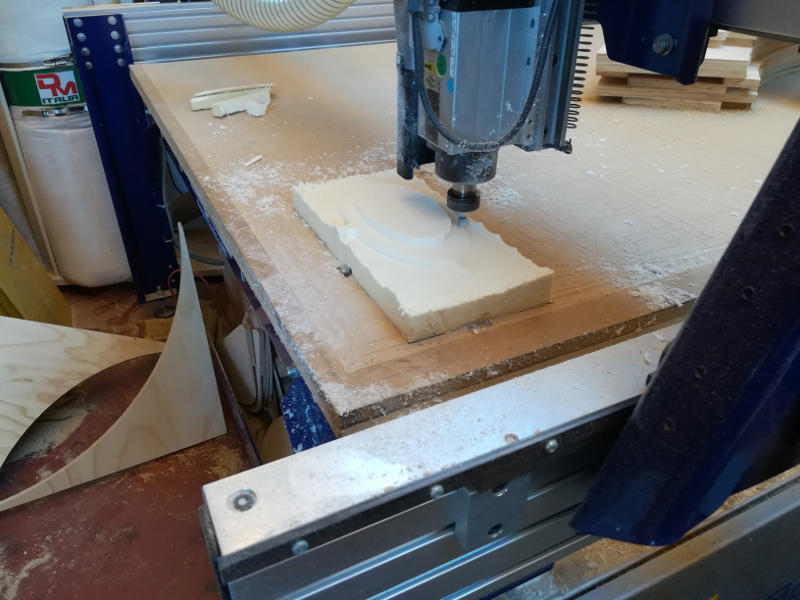
Milling
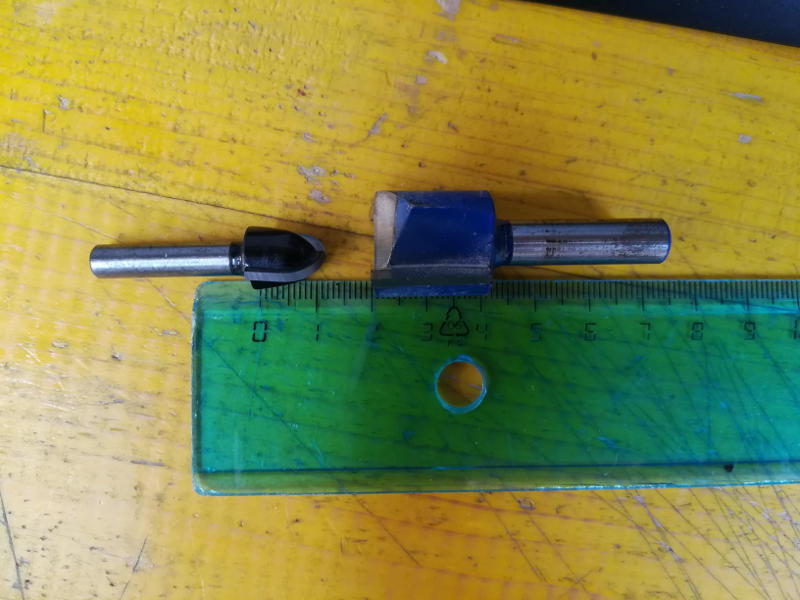
I took the endmills that I needed: end mill 20mm and ball nose 0,5 inch and the foam material.
I followed the video tutorial we did during week 07 for the start up of the machine.
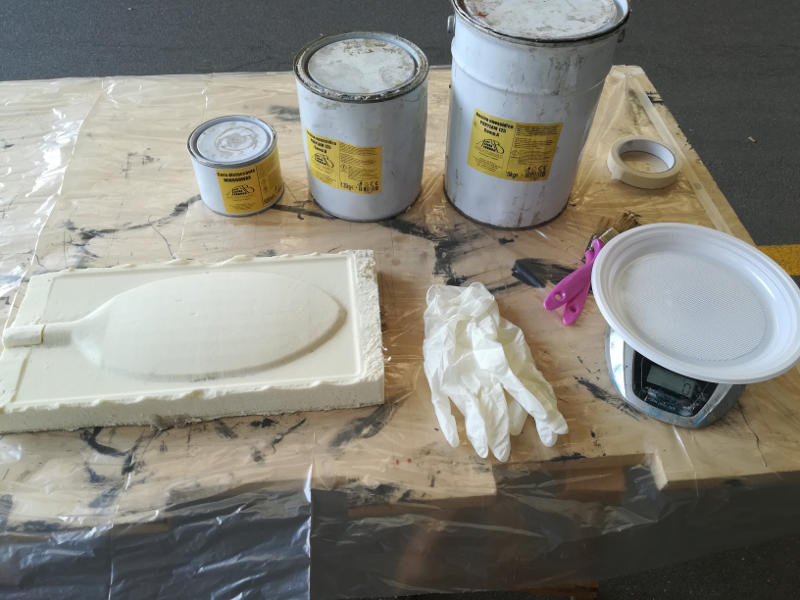
Composites production
I moved outside of the lab for healthy reasons -epoxy resins could be dangerous if they are inhaled- and I prepared all the material to finalize my work.
List of materials needed:
- Glows to protect my skin
- Wax as realase agent. Here the data sheet.
- Bi-component epoxy resin. Here the data sheet.
- Brush
- Balance
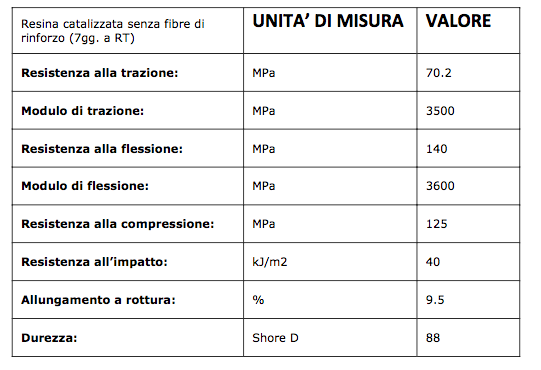
From the data sheet of the epoxy resin I can see the mixing ratio, processing time and hardening time.
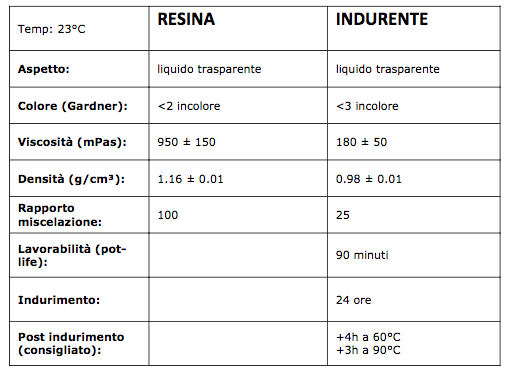
The mechanical specifications:
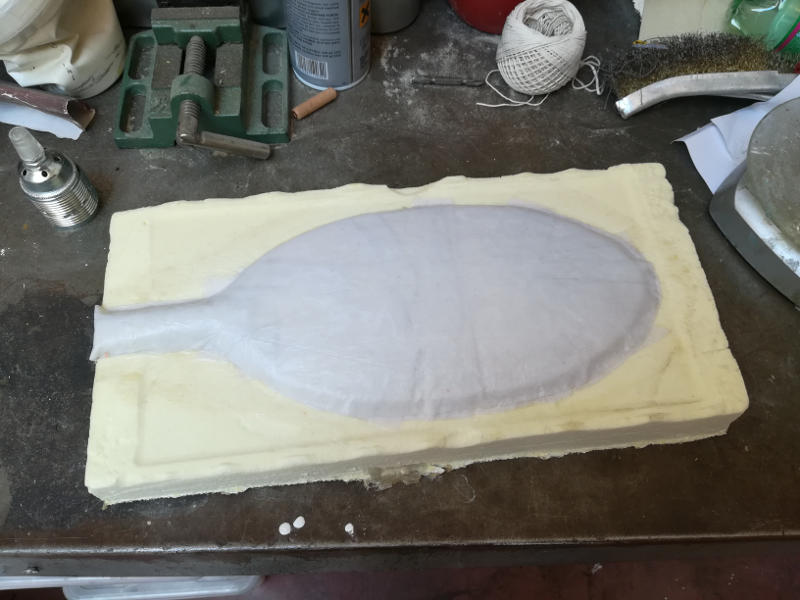
I used a fabric in cotton for the fiber of the final composite material.
So I followed the same steps I followed during the test, that you can find at the beginning of this page.
I made some cuts to allow the textiles to match better the curved surface.
I changed the orientation and place of these cuts on the different layers, this way I didn't weaken the final material.

After more than 24 hours the result was good and the material looked strong enough.
Even with the wax as realase agent it was impossible to take off the paddle without breaking the mold.
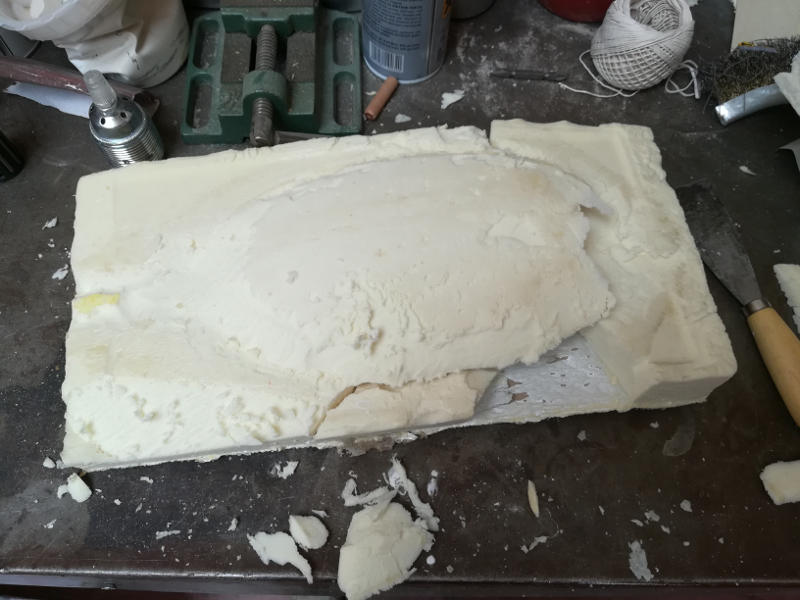
Finally I smoothed the paddle with a grinding machine. The result was nice!
