1st Part- Basic Webdesigning
Learning to develop a website
I have something called as Logizomechanophobia, this means that I have fear of coding, according to wiki. I felt Fabacademy is the right place to over come this fear
I have a Civil Engineering background thus I never had any exposure to programming, electronics and website designing. I took it as a challenge and started learning Website making from scratch.This means no downloading easily available website templates on the internet and no copy pasting the code
I find watching videos is the best way to learn any software thus I started by watching video tutorials on youtube, I liked "Envato tutorials on HTML and CSS
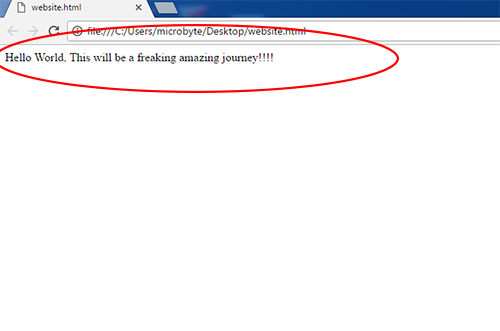
I started the basic hello world program, editing the code in Notepad on windows and saving it as a HTML.
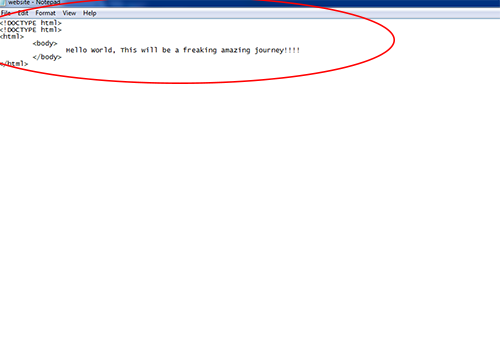
 Code in notepad and its result in Chrome
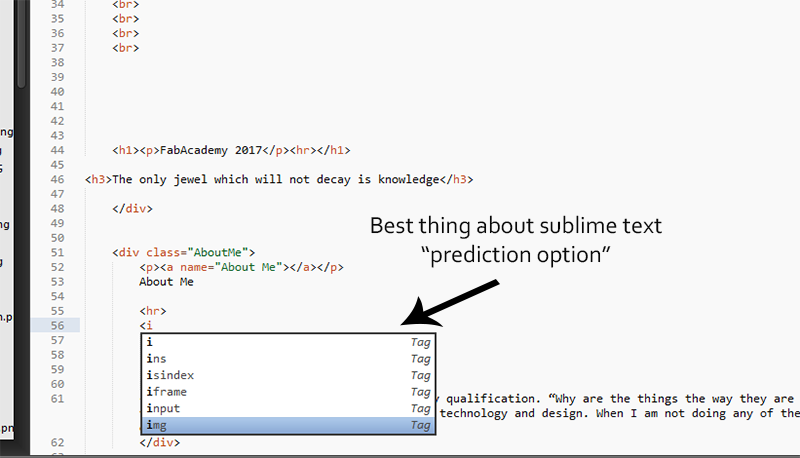
I went through most of the code editors in given in our syllabus but then I came across this amazing free code editor named Sublime text
The great fact about this code editor is that it has an auto prediction option which lets you select a command from the list, this is really helpful to code fast and you dont have to remeber the syntax great thing for a person like me.
Still whenever I faced problems I refered to this w3school This is an amazing website to learn basic web developement
I wanted to keep the layout of my website as simple and clean as possible so that the evaluator or anyone who is refering the website understands it
I started with the division of the page into sections such as inroduction, assignmentsm, project and coloured them differently so that I know the position of sections relative to the page
 Basic divisions of the sections using div attribute
After coding a editing HTML and CSS files I reached this stage.

The Website will be continuously improved for better experince
I am using Linux based Ubuntu operating system on my computer. I was guided by my instructor to install the same, I did the following.
all the screenshots are from another PC that my collegue is using but the procedure is the same for all
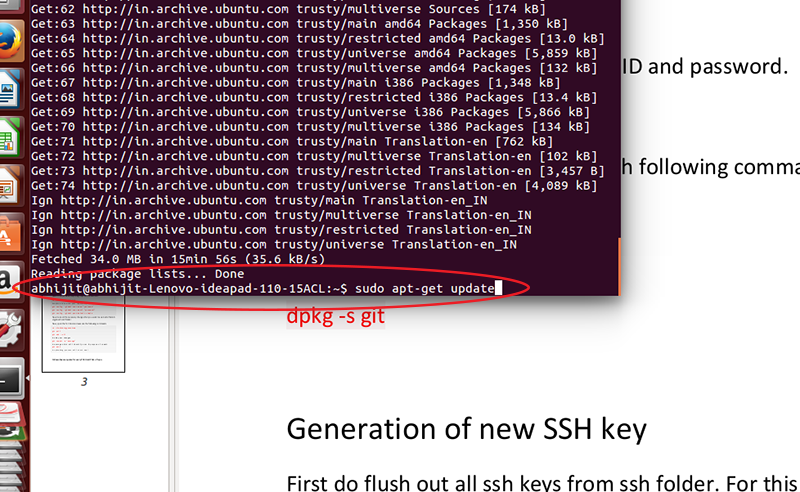
If one has installed Ubuntu recently and downloaded the updates while installing the operating system you might not want to install the updates again but I recommend updating Ubuntu before installing and configuring GIT to do this open the terminal and type
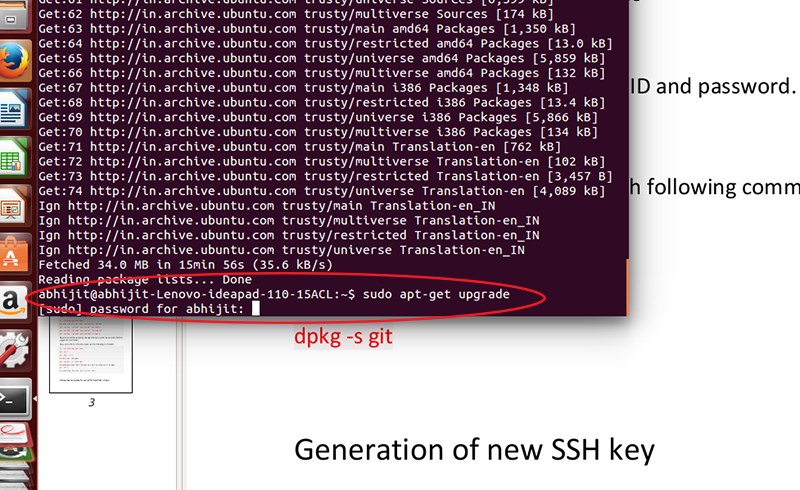
sudo apt-get update after this is done use sudo apt-get upgrade these two commands will install the latest updates for Ubuntu, this migh take a while depending upon the speed of the internet.
1 After this I installed GIT in my Linux system with following commands
sudo apt-get install git –y
#This will install Git in your laptop
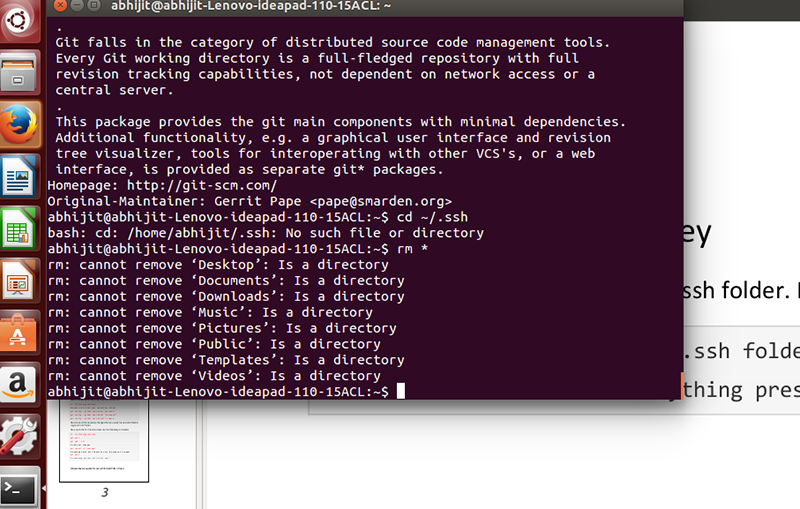
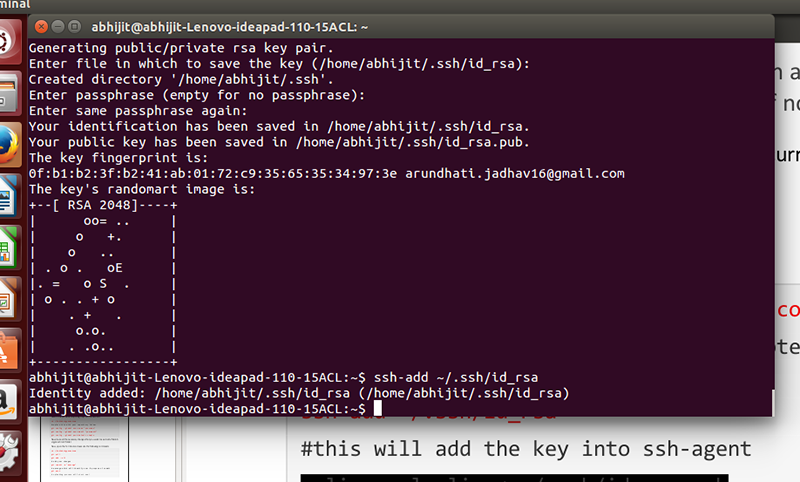
2 Generation of new SSH key, these key are unique for every installation, before generation of new keys we have to remove the older keys, for this navigate to the ssh folder by
cd ~/.ssh and then
rm *
Now generate new keys by
ssh-keygen -t rsa -C "MY EMAIL ID.com"
#Replace the email id with your id
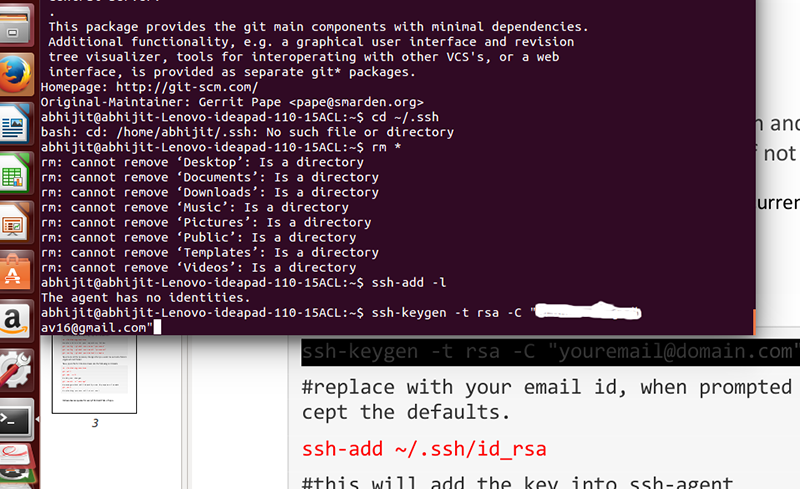
ssh-add ~/.ssh/id_rsa
#this will add key to the ssh -agent
#by-default it creates id_rsa file. At this stage the terminal will ask for the location to store the keys,
just press enter to save the keys to the default folders this saves us a lot of trouble.
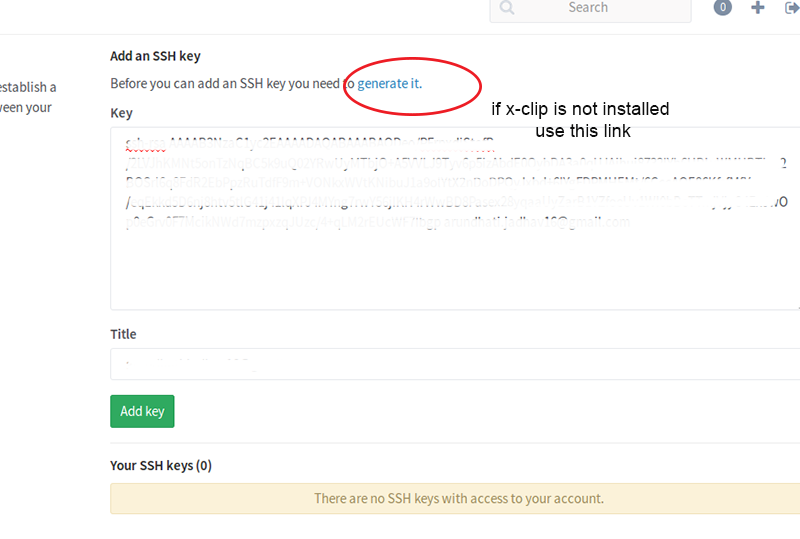
3 Went to git.fabacademy.org -> sign in with FABLAB. Log in with fablab.io user credential and added the keys by just pressingctrl+v to paste the keys in the key section.
If some has not installed x-clip ctrl+v will not result into anything, thus we have to install x-clip or press the generate key option on the top and follow the commands
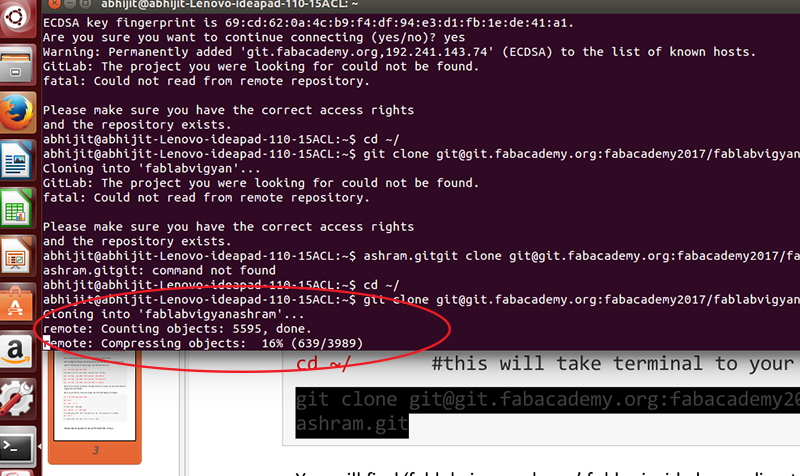
To clone the folder in our computer typed the following in the system navigate to the folder by
cd ~/
git clone git@git.fabacademy.org:fabacademy2017/MY FOLDER .git
#this will download/clone the folder that where you have to update your content to your PC, this will take few minutes to download depending on the size of the folder. Checked weather a folder named "fablabvigyanashram is in my home directory"
How do I go I go about using GIT henceforth
I just have to use four commands from now on
First- I pull the content of the repository in my directory on my computer, This is as good as downloading the latest content of the repository and saving it in a specified location all the time, everytime I pull only the updated content gets downloaded and not the entire folder all over again.
For this I go to the local directory in my computer, cd/Desktop then fabacademy
git pull
Then I make all the changes in my folder i.e I delete all the existing folders and added all the updated folders in the repository
Then I type git add --all, this adds only the content to the folder
Then I type git commit -m "message", in the message I can type whatever message I want to, this step is just a confirmation of adding all the content.
Then the final step git push , this will upload all the updated files to the repository, the files which were the same will not be updated again. This is the best feature of git as it saves a lot of uploading data
This is a great .pdf file which has compiled all the steps from Git installation to psuhing the content in the repository
Video Conferencing
We at Vigyan Ashram are using MCU to attend Neil's lecture, Neil share his screen at vnc.fabacademy.org while in the lecture.
We can attend Neil's lecture from our computers by downloading bluestacks, this is an android emulator basically makes available all the apps available on playstore on your windows or mac.
After installing bluestacks we have to install an app called cisco sparks and call on 18.85.8.48 address, the password for this link is 1379 you will be connected to the conference.
For android phones it is as easy as installing the same app and using the above adress and password.
3rd part-Project Brief
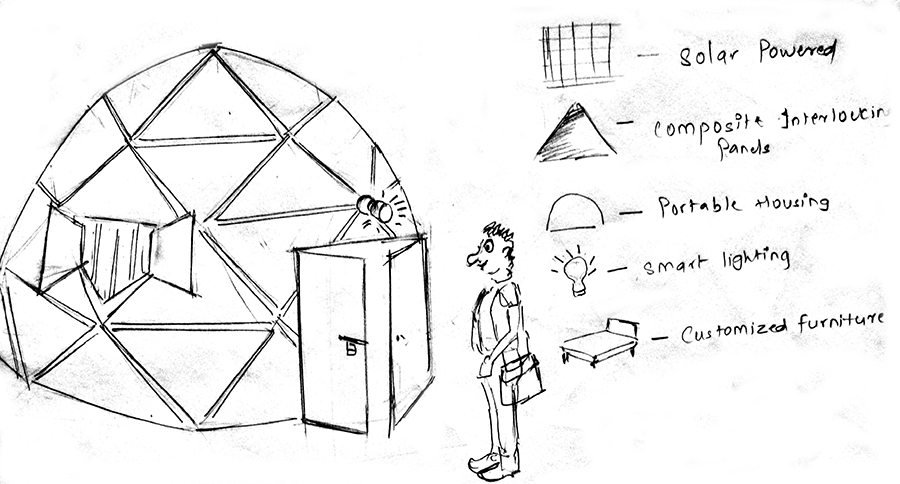
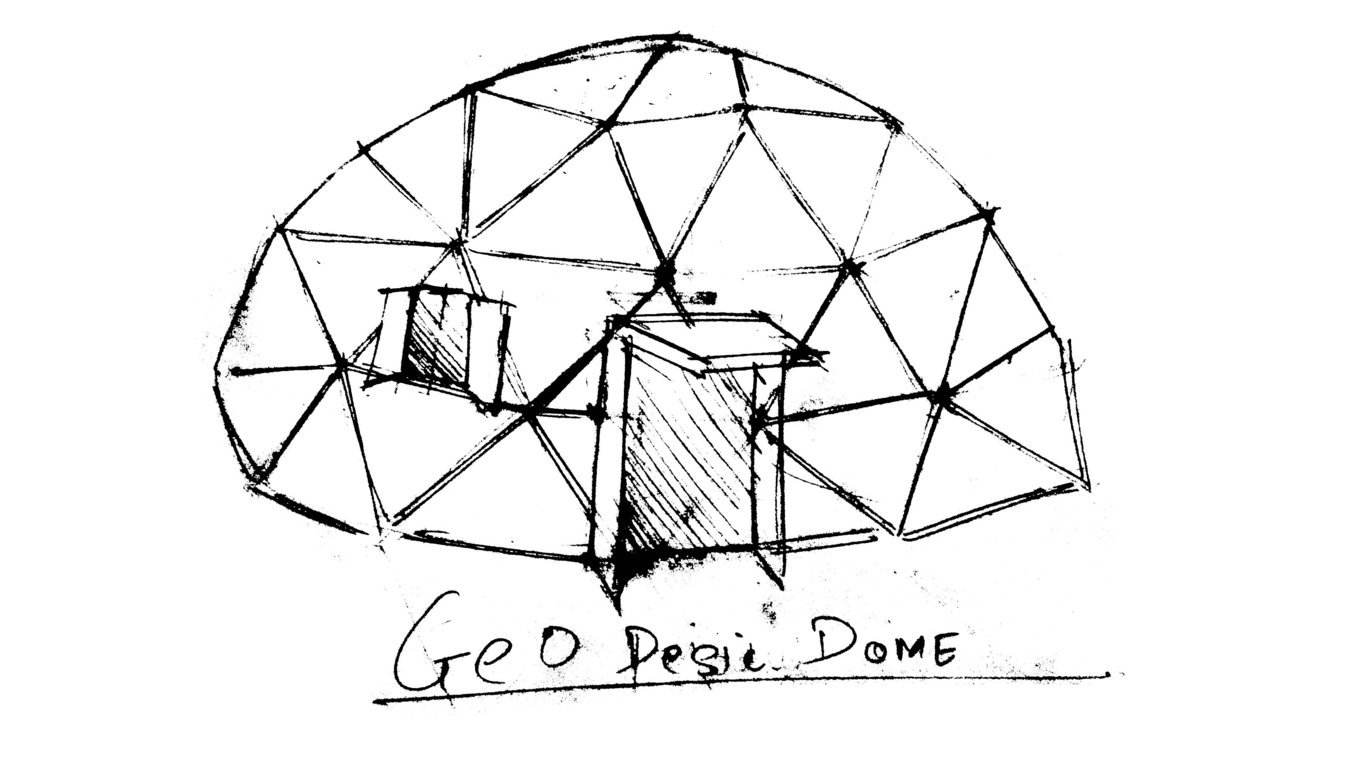
SMART STUPA
Stupa is a dome shaped structure erected as a Buddhist Shrine. "Sanchi Stupa" is a fine example of it, built in the Maurya Empire this UNESCO Heritage site stands proud in the town of Sanchi.
We at Vigyan Ashram pride ourselves on sustainable way of living. We are planning to build a place of residence for our Director, a place worthy enough for a Director.
I took it as a challenge to build a house wich will be,
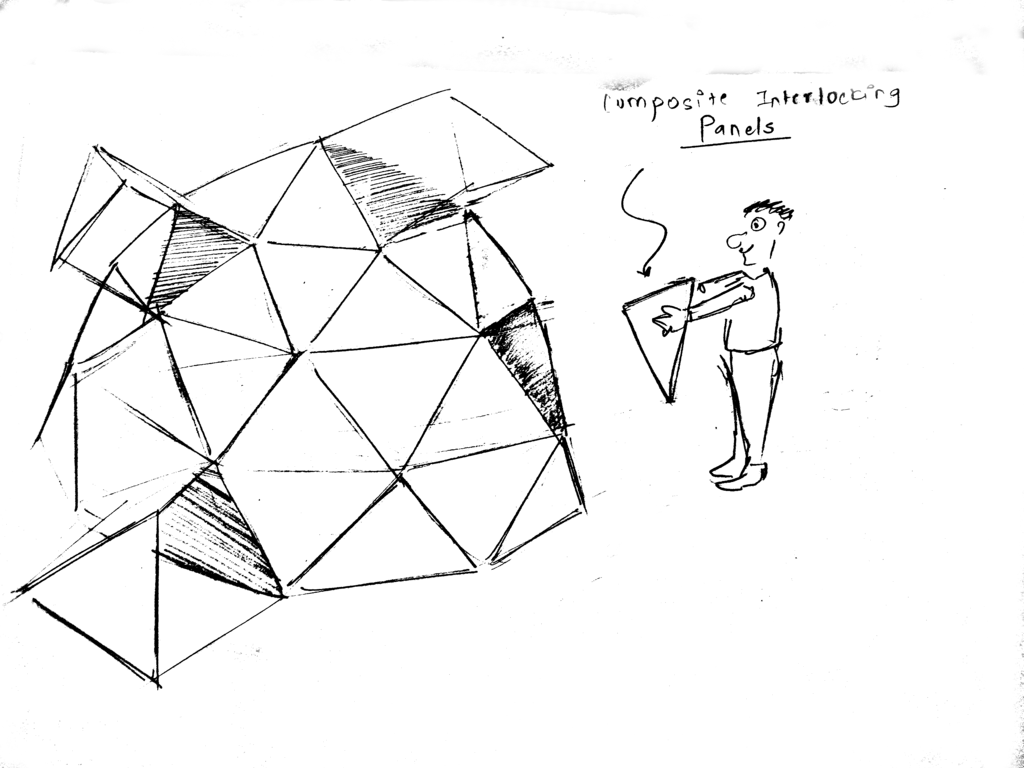
1) Portable- Easily assemblemed and dismantled
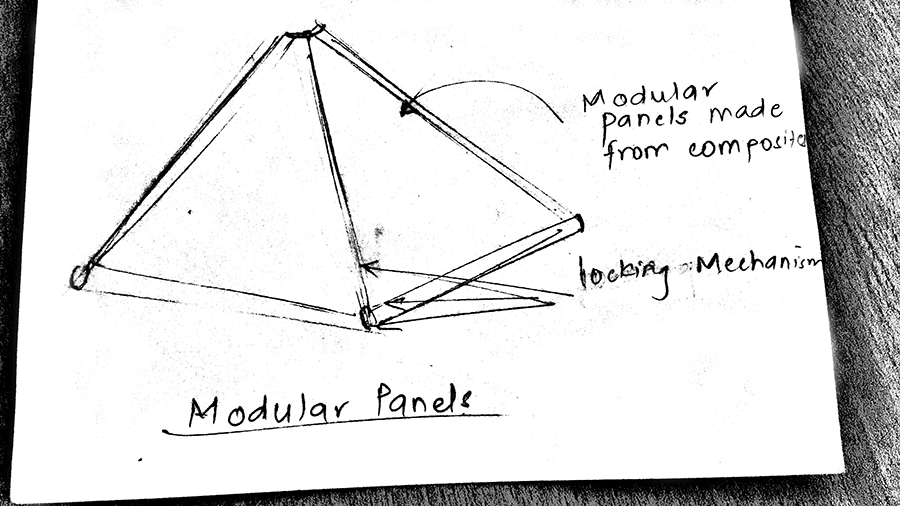
2)Made out of Natural composites- Vigyan Ashram is located in a unique location,it has a variety of building material in and around it. A variety of composites can be made as a trail with clay, cowdung, rice husk, hay, fibreglass, FRP etc.
3)Unique designed furniture- Furniture which will blend with the dome shaped structure of the house
4) Solar powered
5)Using smart lightings
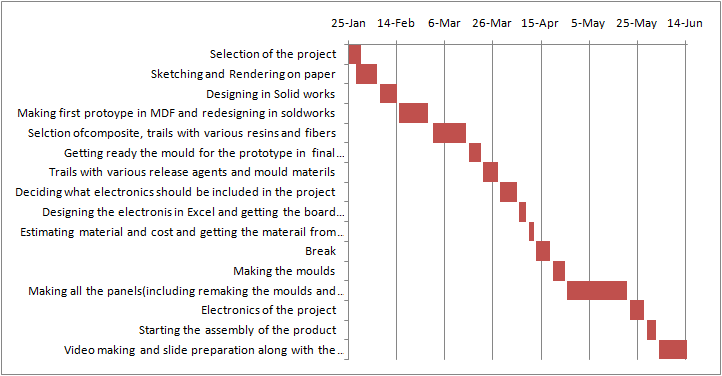
I made Gantt Chart for my project, As the course progressed I soon realised that it is really difficult to keep uo with the dates in the gantt chart
I followed this tutorial for making the gantt chart in Microsoft Excel, this is a really helpful tutorial and I recommend everyone to use it