GROUP PROJECT
TEST THE DESIGN 3D
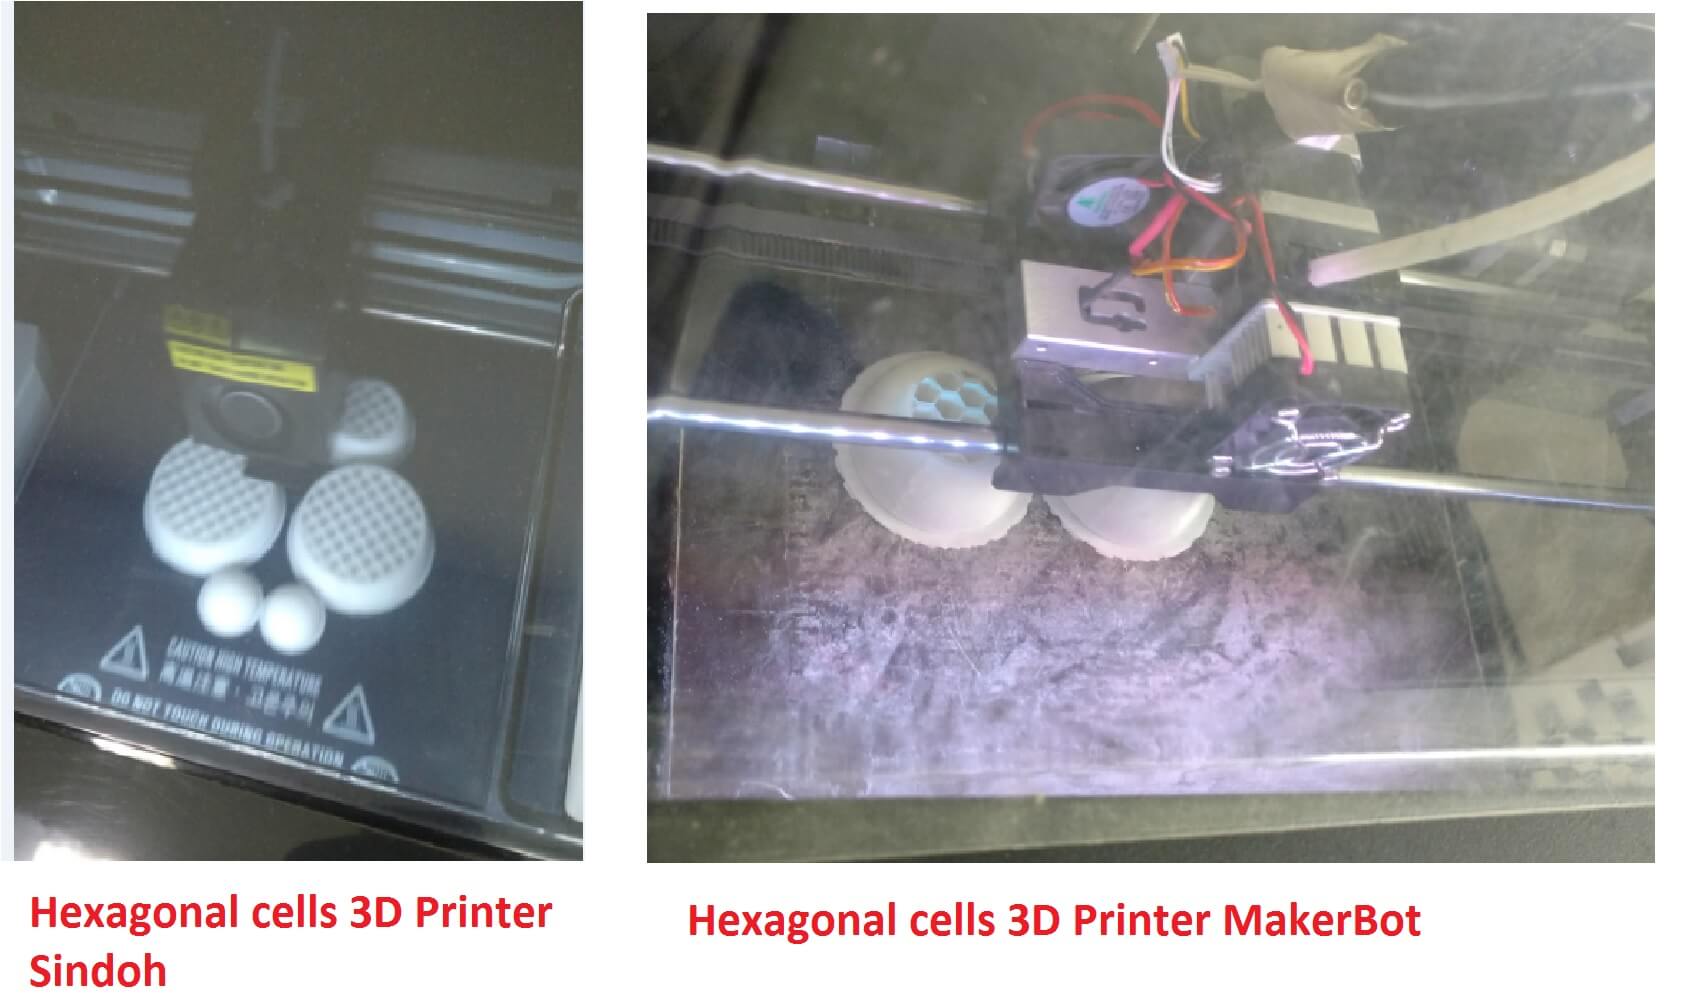
The group project consists of printing spheres on three different machines, such as: MakerBot, Object Stratasys and Sindoh:
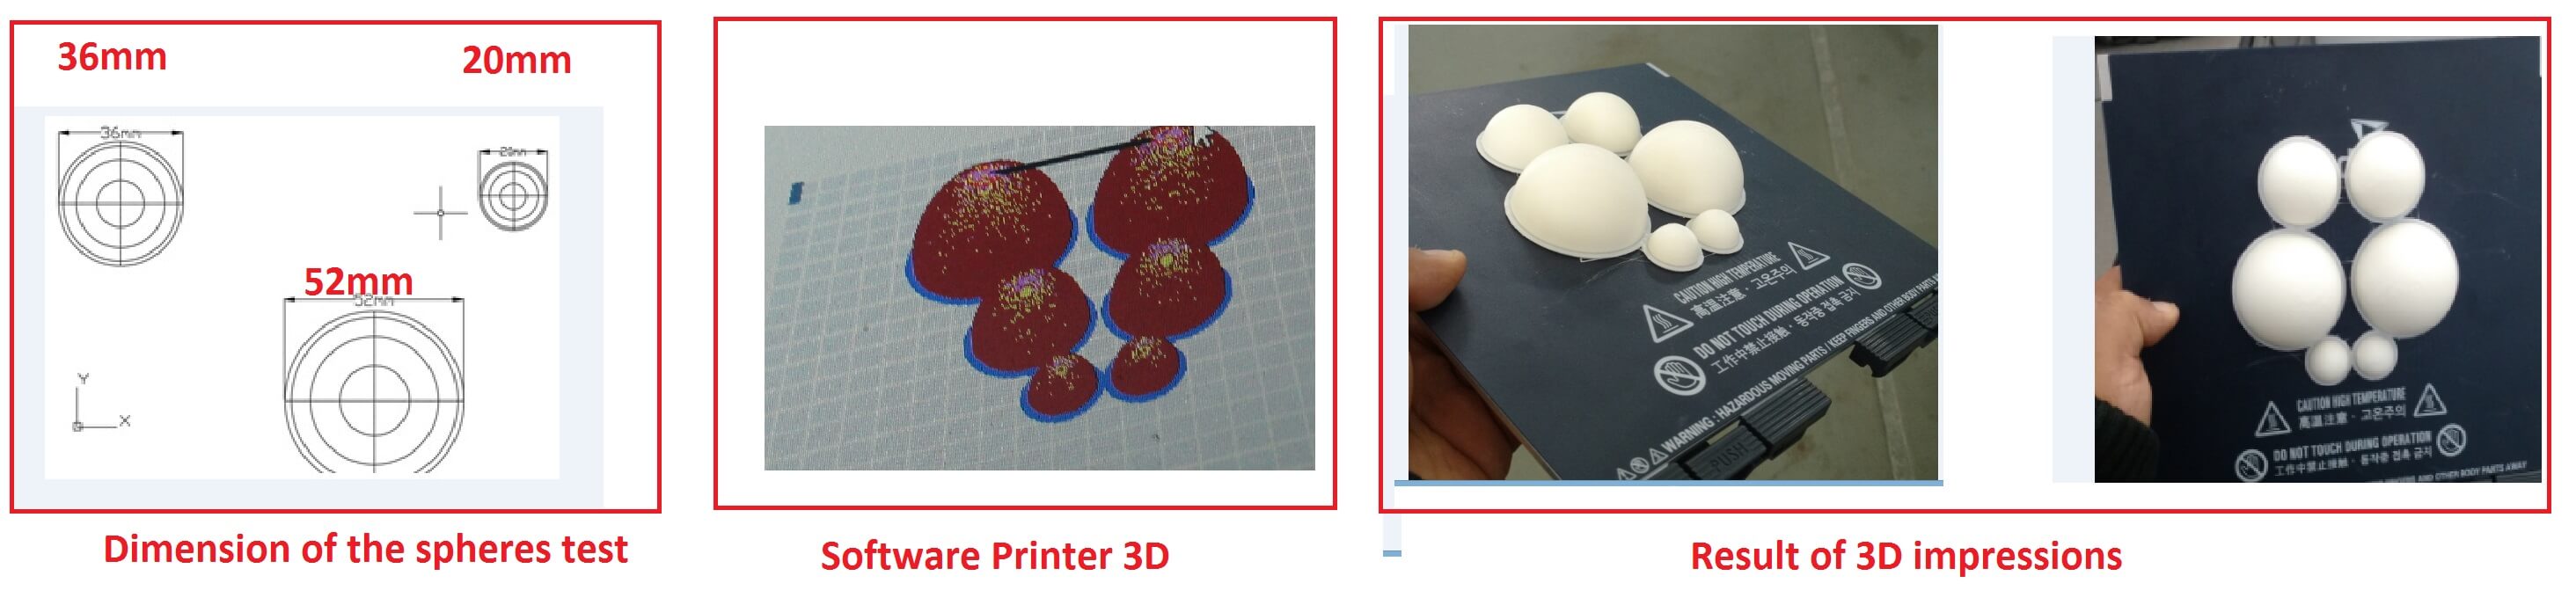
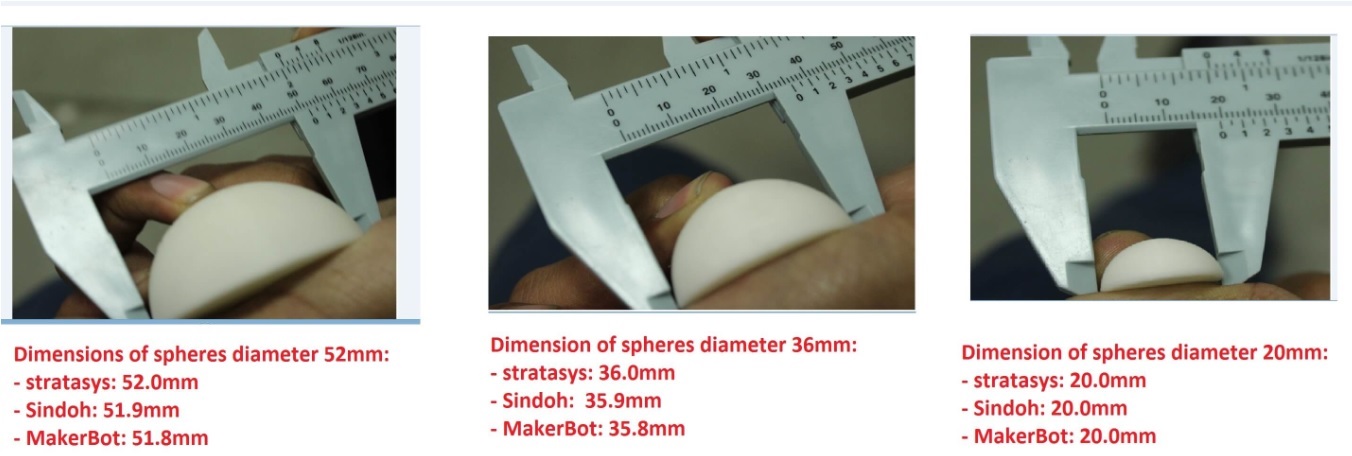
The measurements for the makerBot have a measurement of 51.8mm - 35.9 - 20mm. The smaller the piece, the better the accuracy.
The measurements for the Sindoh have a measurement of 51.9mm - 36mm - 20mm. The smaller the piece, the better the accuracy.
The measurements for the Stratasys have a measurement of 52mm - 36mm - 20mm. The smaller the piece, the better the accuracy.
The machine that proved to have better precision in the finishes was the stratasys, followed by sindoh and then the makerBot.
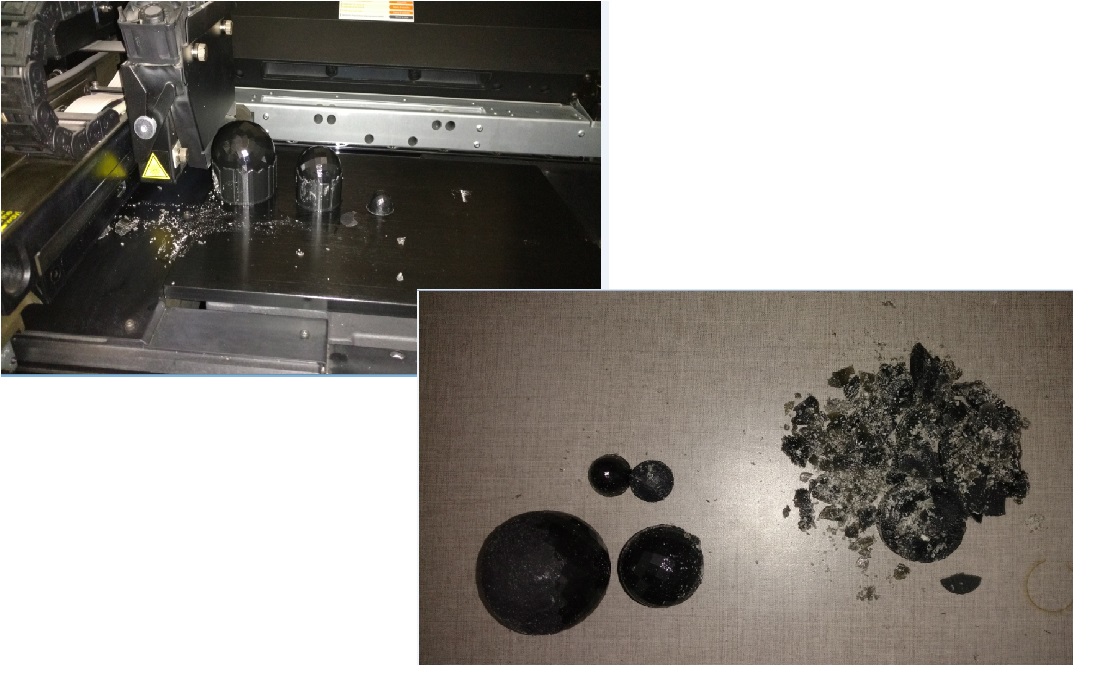
The spheres present volume and the impression MakerBot and La Sindoh perform on the inside of the spheres are hexagonal patterns. These offer firmness and resistance to the sphere and saving of material.
When choosing the high print quality the hexagonal patterns are smaller and offer greater strength than normal quality printing.
3D SCANNING AND PRINTING
3D SCANNING
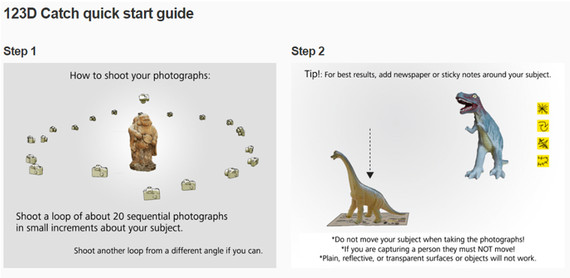
This time use the 123D Catch application for the activity scanning the image you want to scan in three dimensions, to do this follow these steps:
- Download the application of internet, in my case I preferred to use the application running on the PC.
- Review the steps recommended the tutorial website.
- Take pictures of a commercial 12 Megapixel camera , take a total of 25 pictures.
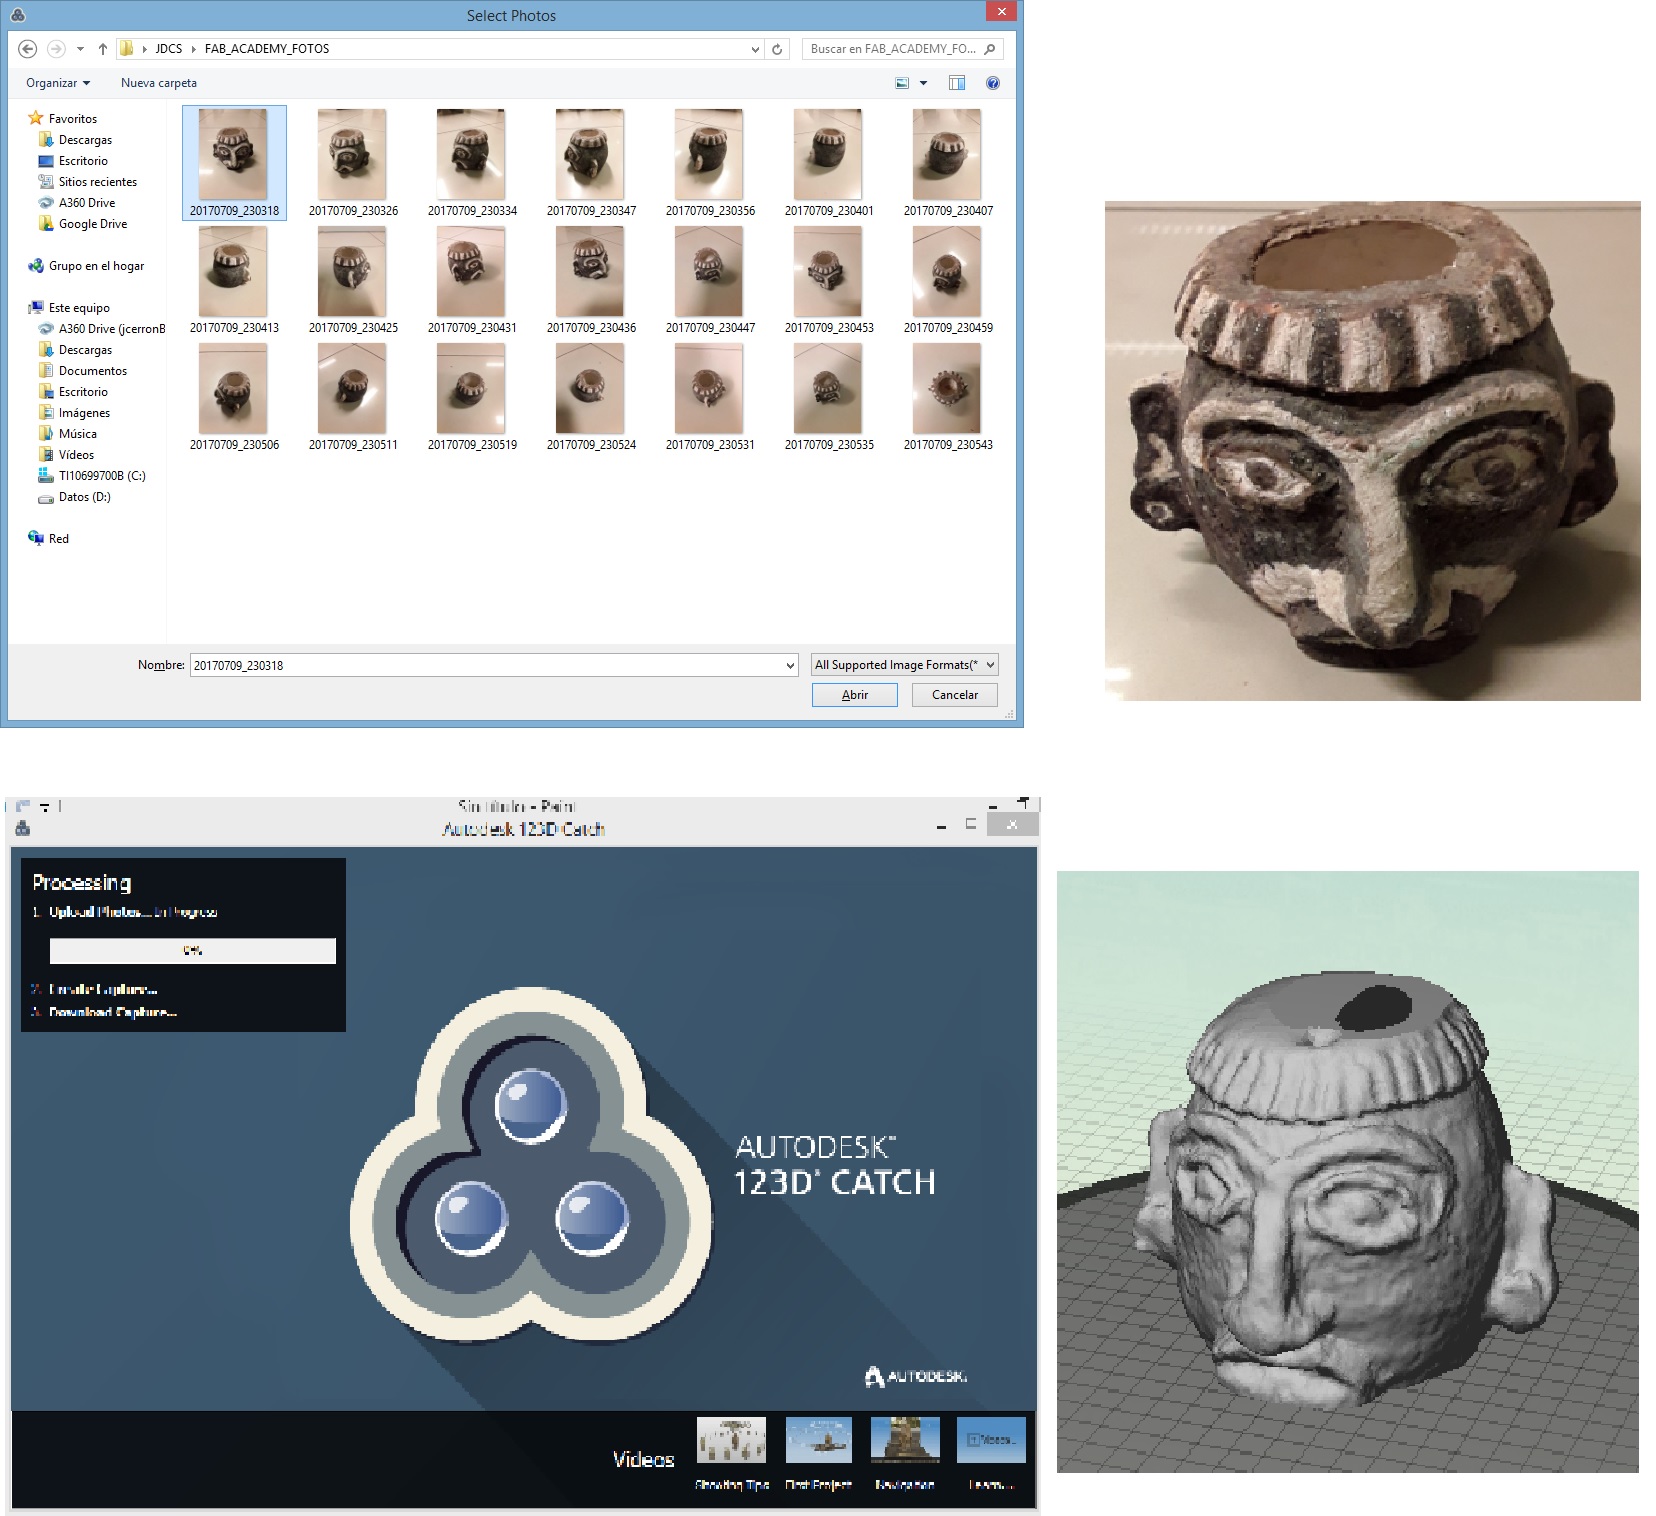
- Run the "Autodesk 123D Catch " application and upload photos of the object that was scanned in a virtual 3D model. It is noteworthy that for the application to proceed, you need to have an internet connection.
- After waiting a few minutes, the application displays the solid generated .

The digitized model presents some unrecognized areas, called blind spots. For improvements in these blanks, you need to take more pictures. But this leads to a longer processing the images for the scanned solid. As you may notice , on the website of the application, tutorials how to use the application appear . For the image to be scanned chooses catch a doll that had at hand . I also decided to set up a base of newspaper as recommended by the page.
With a commercial 14-megapixel digital camera , take about 21 photos, then upload the " 123D Catch" software, for it was necessary to have an active internet connection . The process I took to scan the hard image at least about 8 minutes. After this time last already had the digitized sound. I have to mention that when taking pictures , because working at night , I had the problem that direct light fixtures , would not let me have some good photos , so , go for tapas lights and create an environment with a more uniform illumination , but not very intense.
3D PRINT
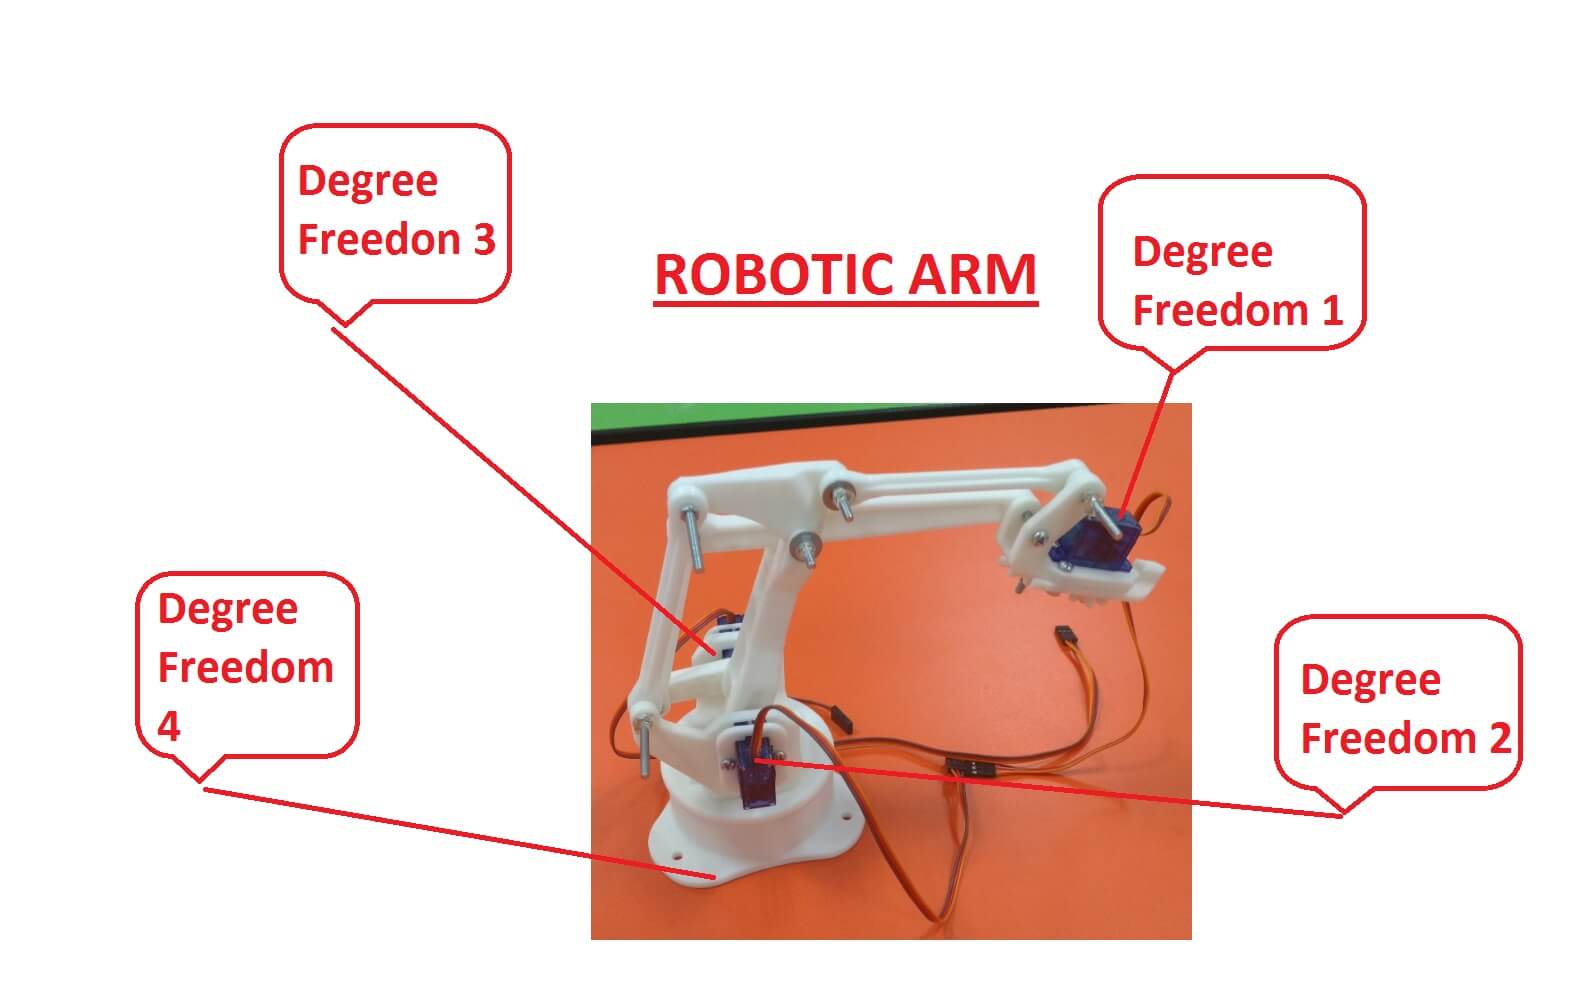
It made the impression of robotic arm designed in SolidWork where I exported the file in STL format. Robotic arm printing was done on the Sindoh printer. The print of the arm lasted about 15 hours.
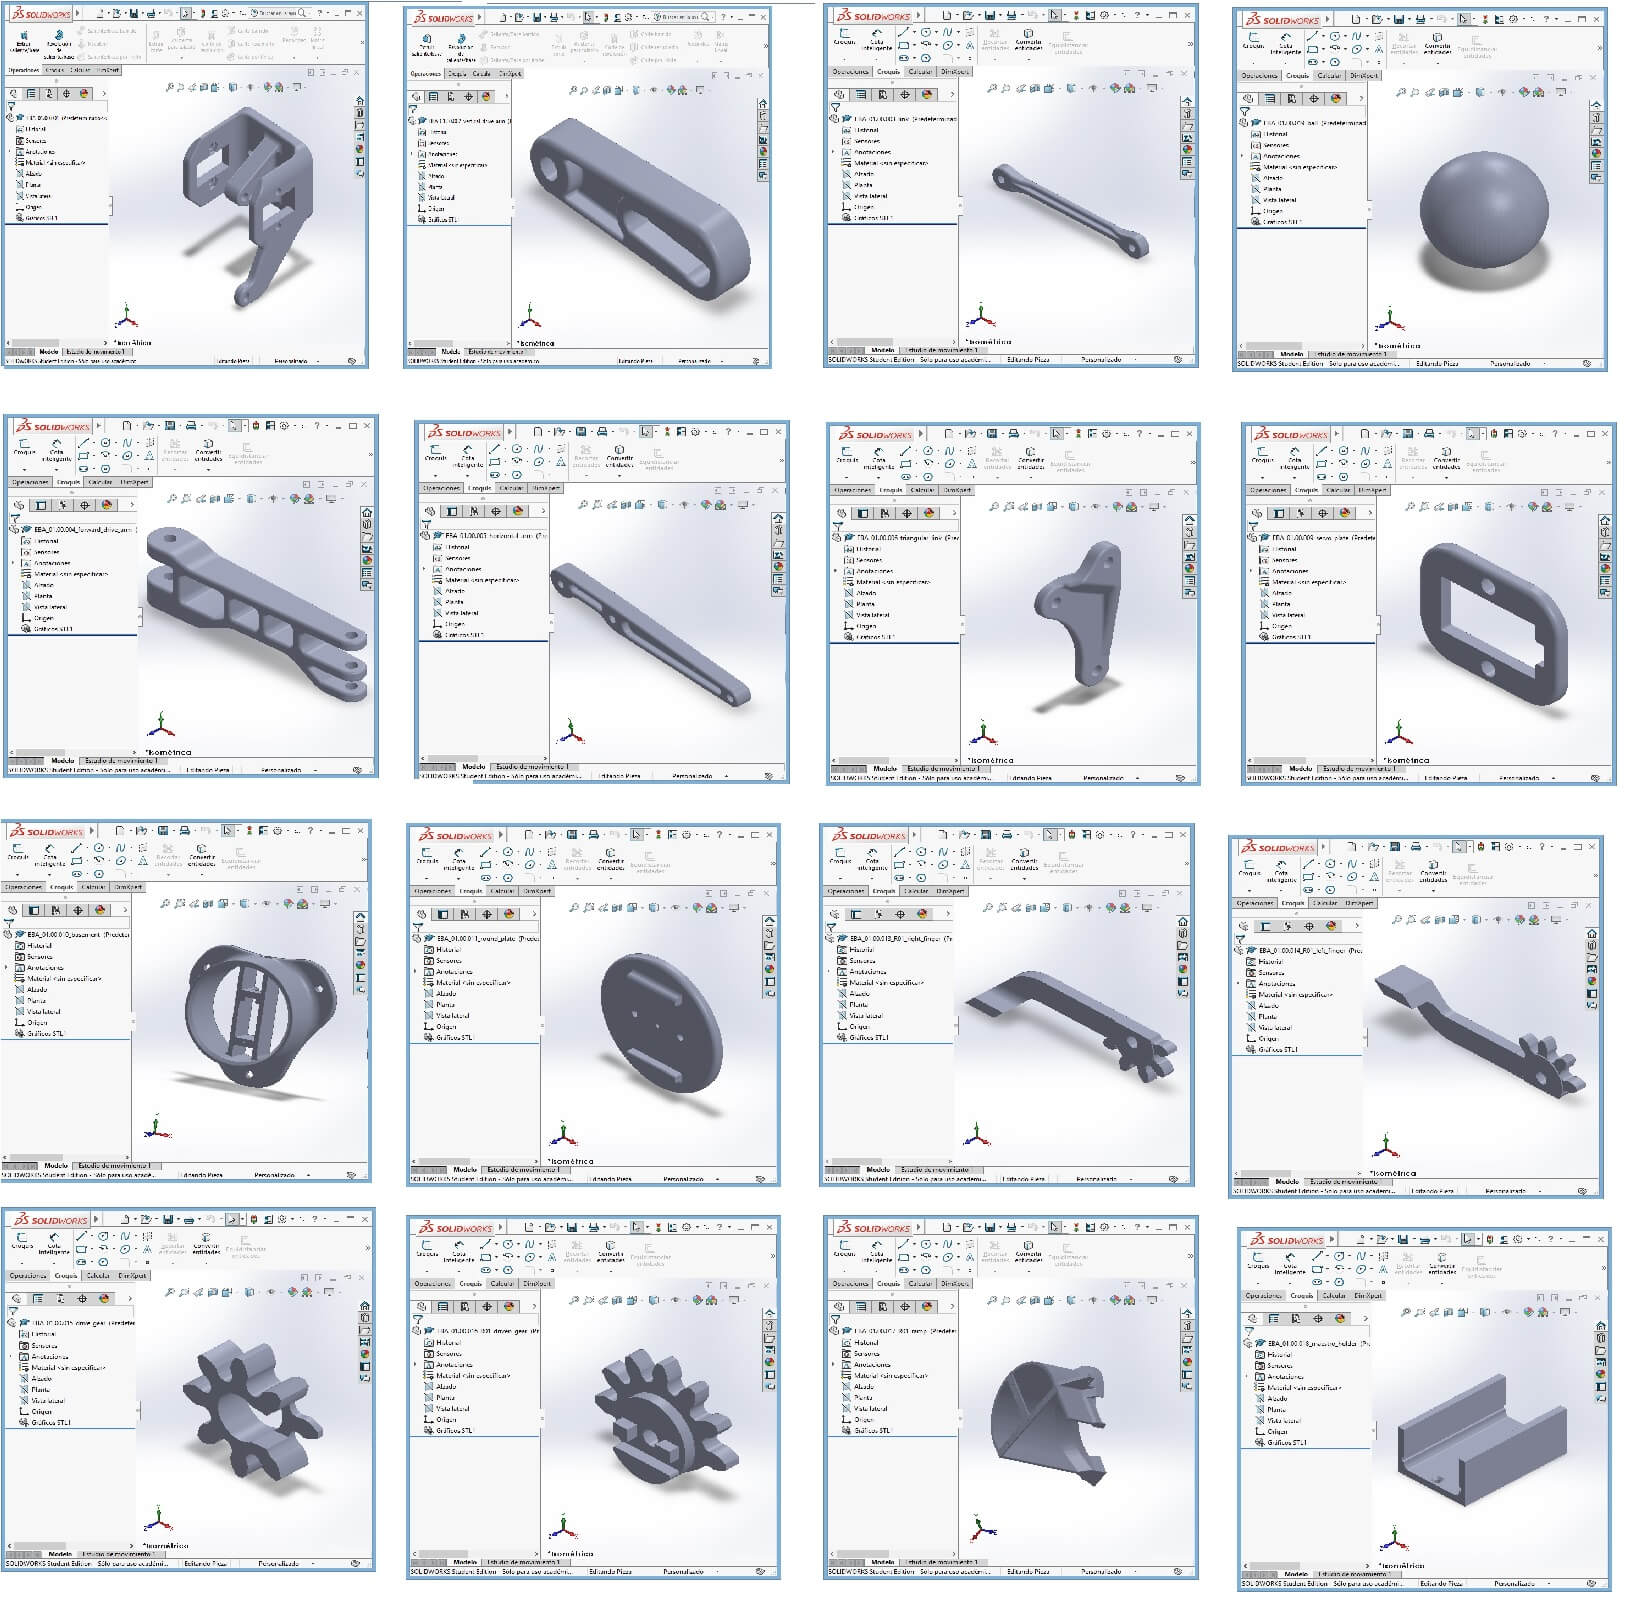
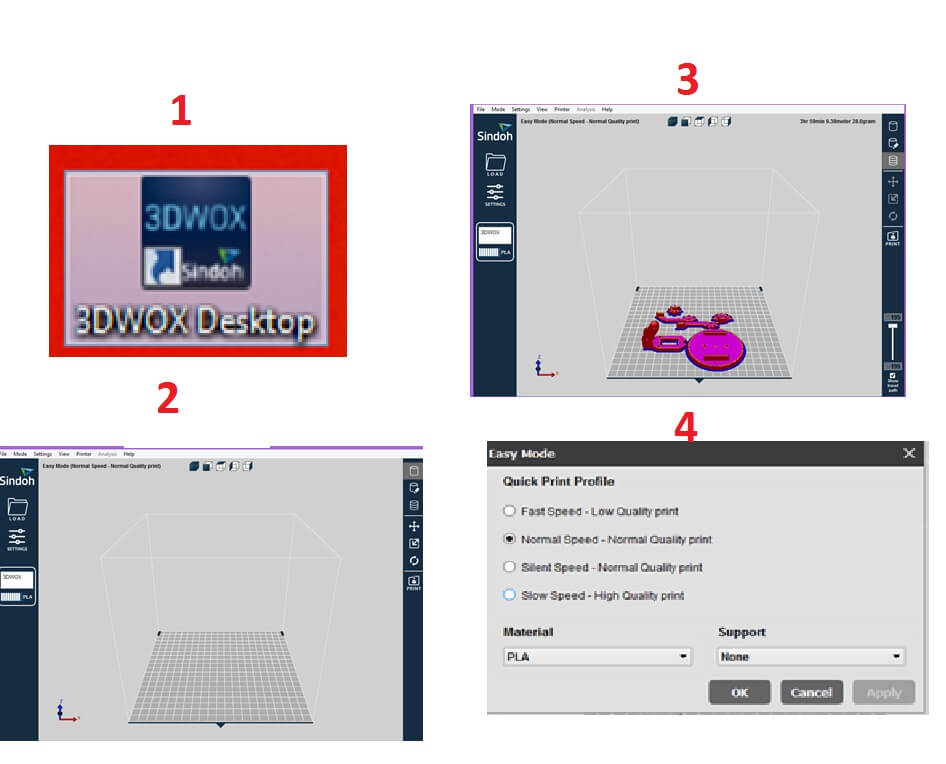
To print the solid it is exported in .STL format as follows:
- Make sure you have enough material to print in this case PLA.
- Set the printer: the temperature of the heads, the quality (in this case normal) and the support.
- Open the file saved in STL format in the software of the 3DWOX printer.
The parts of the robotic arm terminate on a support and this will have to be removed once the impression is finished.
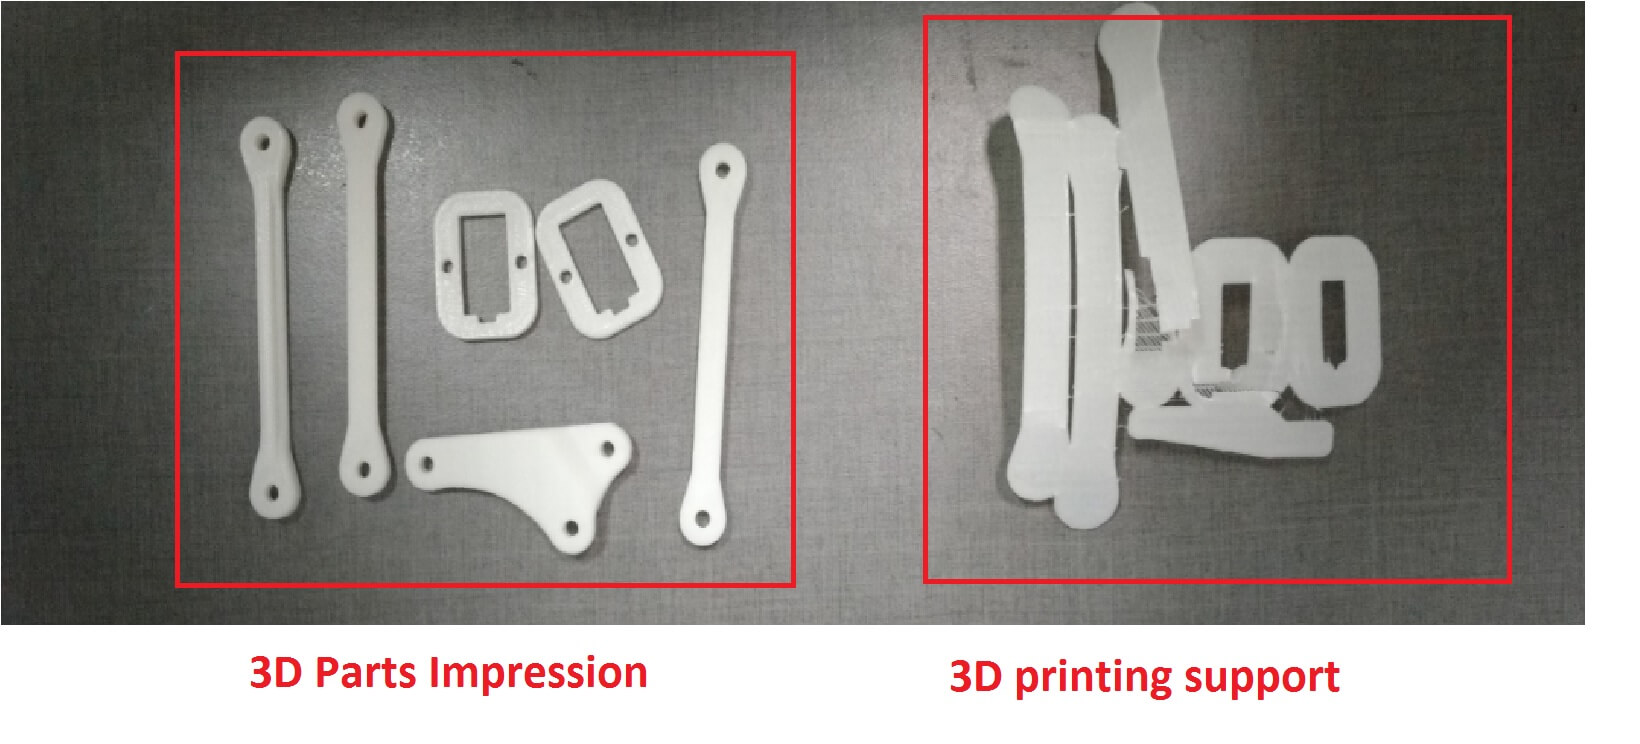
Material PLA is very resistant because it uses hexagonal cells as supports when the material has more volume.
The robotic arm of 4 degrees of freedom was assembled and servomotors were placed for each degree of freedom.
ADVANTAGES 3D
- It facilitates the replication of any spare parts.
- It can be printed in any quality: High-Medium-Low.
- You can replicate with mold techniques to reproduce it in a massive way.
-It can be used to create components, which are not in the market.
LIMITATIONS 3D
- The printing time is very long.
- Pieces smaller than 2 mm do not print details.
- The maximum print size is limited to its 20 x 20 x 20cm platform.
- Printing material: PLA and ABS are not very resistant.
- Horizontal printed materials are less resistant than vertically printed materials.
ADVANTAGES SCANNING
- Can be scanned using only one camera.
- The scan size is relatively large.
- You can scan shapes that can be difficult to perform in a design software.
- Scanning is fast and does not take much time.
LIMITATIONS SCANNING
- You have to take the scan at several points preferably at the same distance.
- You have to take the photos in place with no objects around, because it would take a long time to filter them.
- The base of the surface must be opaque.
- It is necessary to use a medium if you want to scan large objects.
- The camera for the scanner has to be professional, to get a good image quality.
It is necessary to use design programs to improve the scanning.
- Archive 1: Arm 3D Design
Download here
- Archive 2: Inca Head 3D Scan
Download here
