Exercise 5 - 3D Scanning and Printing
Assignment for this week
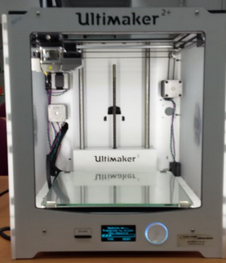
Test on the 3D Printer
The 3D printer in Fablab SP is Utlimaker 2 plus and the software used is Cura. We downloaded the test files for 3D Printers from Thingiverse for 14-in-1 Test feature and Overhang Test.
 |
 |
 |
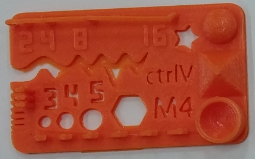
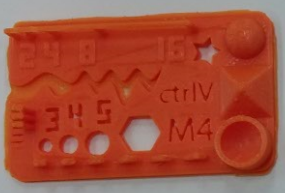
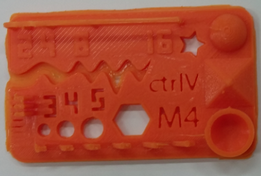
14-in-1 Test feature
The 14-in-1 features was printed using the 3 different print options: Fast Print/Normal Quality/High Quality
 |
 |
 |
| Layer High: 0.15 mm | Layer High: 0.1 mm | Layer High: 0.06 mm |
| In fill: 18% | In fill: 20% | In fill: 22% |
| Speed: 60mm/s | Speed: 50mm/s | Speed: 50mm/s |
| Travel Speed: 150 mm/s | Travel Speed: 120 mm/s | Travel Speed: 120 mm/s |
| Print Time: 33 mins | Print Time: 57 mins | Print Time: 1 hr 34 mins |
| Baseplate Length: 49.7 mm | Baseplate Length: 37 mm | Baseplate Length: 37 mm |
| Baseplate Width: 29.9 mm | Baseplate Width: 17.7 mm | Baseplate Width: 17 mm |
| Baseplate Thickness: 1.48 mm | Baseplate Thickness: 1.44 mm | Baseplate Thickness: 1.3 mm |
The 3 printout show that there is a shrink for the length, Width, thickness and holes sizes respectively. The minimum distance and walls also failed to print for 0.5 mm and below. Table below is a comparsion of the test result using the Fast Print option with the Test Parameters
| Size | 2 x 50 x 30mm (baseplate) | 1.48 x 49.7 x 29.9 mm |
| Hole Size | 3/4/5 mm | 2.2/3.3/4.3 mm |
| Nut Size | M4 Nut should fit perfectly | Did not have M4 Nut to test |
| Fine Details | Pyramid, Cone, All numbers | Able to print and pass |
| Rounded Print | Wave and half sphere | Able to print and pass |
| Minimum Distance and Walls | 0.1/0.2/0.3/0.4/0.5/0.6/0.7 mm | Failed to print walls less than 0.5mm. |
| Overhang | 25°/30°/35°/40°/45° | Able to print and pass |
| Bridge Print | 2/4/8/16 mm | All pass except 16mm bridge |
| Surface | All the flat parts | Able to print and pass |
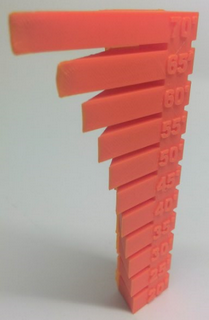
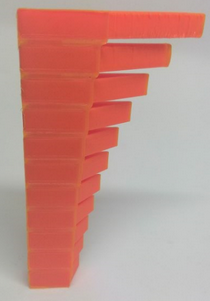
Overhang Test
The overhang test show that the printer is capable to print model with overhang without support up to 70 degrees, however the surface for 60 degrees or above is uneven and not smooth.
 |
 |
My other classmate, Louis and Kenny did a similar test on Cubicon 3DP-110F and Flashforge. You can browse here for their website for more information.
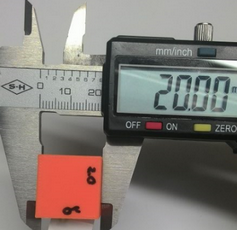
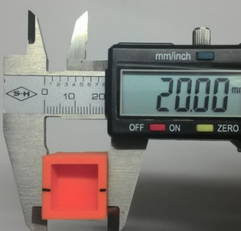
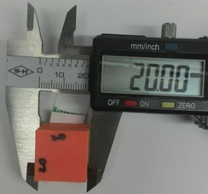
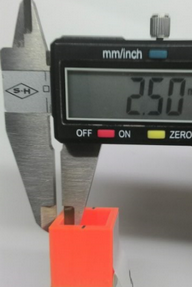
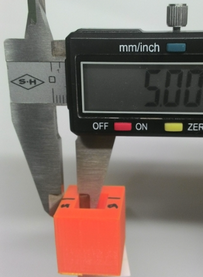
Cube Test
Next is to test the print accuracy for a square of 20mm with a thickness of 2.5mm and 5mm. It can be seen that the printer is quite accurate.
|
|
From the various test, it can be seen that very much depends on what is the method, materials, size and complexity of the model being printed.
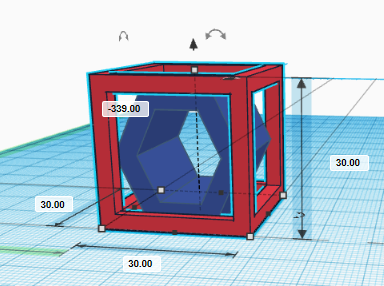
Design and 3D print a Small Object
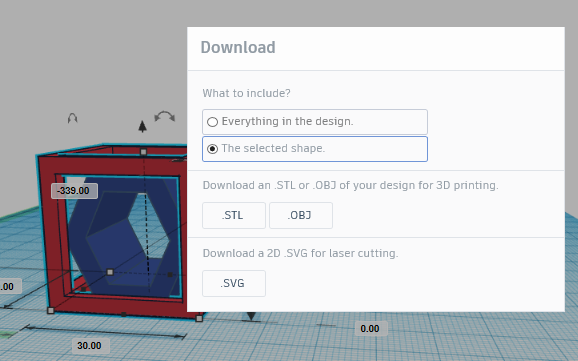
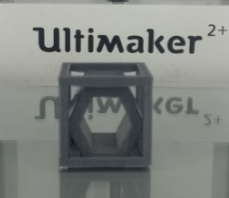
Using tinkercad, I draw a simple box with 30mm, make six 24mm holes on each side. Then I added a polygon in it. Since the objective was to design something that could not be made subtractively, I thought I would design some structure that is trapped inside a larger structure, I got this idea when I browse the class archive in 2016.
After that I have to export the file in stl format so that I can 3D print using the Cura software that come with the 3D printer Utlimaker 2 plus.
 |
 |
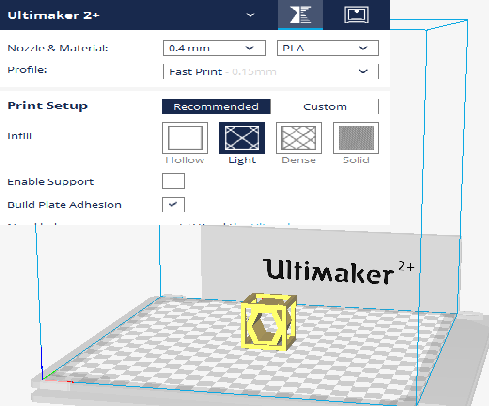
With reference to How to use Cura Software. I then proceed to open the exported stl file in Cura, an auto slicing process will be done which basically converts the model into a series of thin layers and produces a G-code file containing instructions to be printed during the 3D printing process. I will be using the Fast print - 0.15mm for my model as other option will take a longer time to print the object. I export it to a SD card and send to printer to print. The filament use is PLA.
Construction of a model can take from several hours to several days, depending on the method, the size and complexity of the model. Additive systems can reduce the time to a few hours but again it still depend on the type of machine, the size and number of models being produced simultaneously. All in all it is faster, flexible and less expensive when produce small quantities of parts.
|
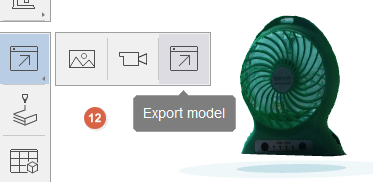
The 3D Model can be rotated and zoomed with the mouse
The above file can be downloaded here.
3D Scanning
There are a few steps and things to note before you digitize an object in 3D. Steps like looping sequential photographs on your objects, do not move objects when taking photographs, reflective and tranparent surfaces do not work. Do refer to the tips and tutorials on How to use 123D Catch, 123D Catch web app Tutorials and Autodesk Meshmixer 101 Tutorials.
If you are using 123D Catch, you have to download the 123D Catch App onto your Smartphone. However, the 123D Catch App is no longer available in App Store. You have to search for 123D Catch 1.2.1 apk file for Android 4.0.3 and above. Smartphone will then act as a 3D scanner, capture the snap pictures and process to generate the model when complete. The model wil appeared in the autodesk 123D cloud for download. You can clean up the unwanted images using Meshmixer. I manage to get the model process online only on the second attempt. The first attempt did not went through because I did not shot at the correct angle and not enough lighting.
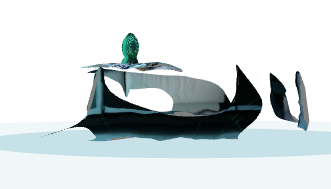
Another way of capturing is through Autodesk Remake. I snap 20-30 pictures based on the first two steps for 123D Catch, and then following the Autodesk Remake Guide and Photos to 3D Print Workflow.
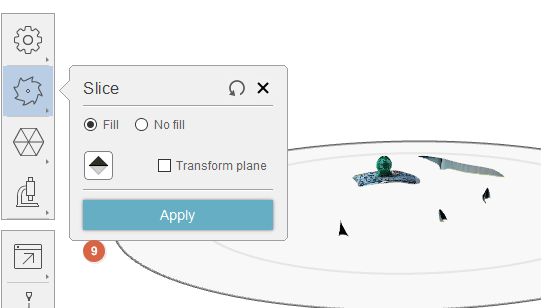
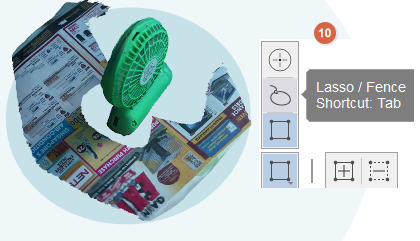
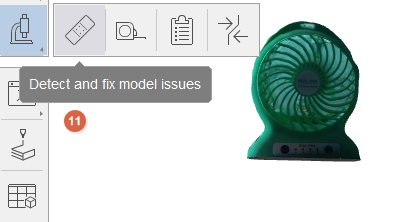
Next, Create 3D in Remake based on the files you have captured. Removing unwanted surfaces or images using tools like slicer/lasso and then run the analyze test to repair the 3D scan object. Once done, export the file as stl format for 3D printing.
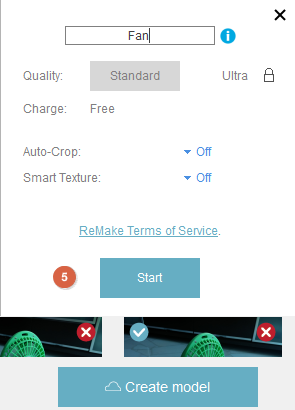
The following are the steps in using Remake after you have downloaded the capture pictures in the local drive.
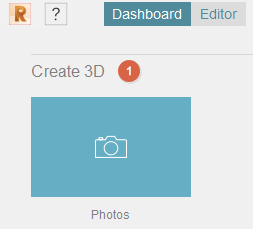
- Open Remake > under Dashboard > Create 3D
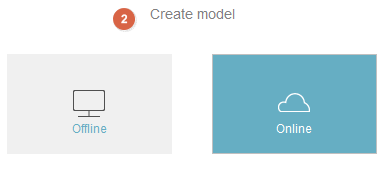
- Under Create Model > Click "Online"
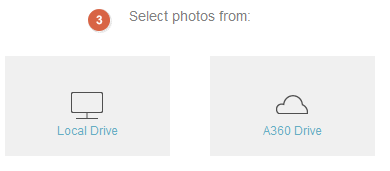
- Select Photo > Local Drive or A360 Drive (Cloud)
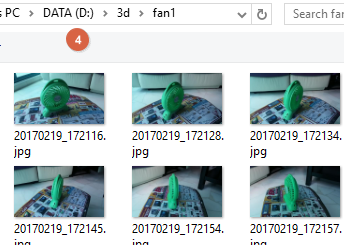
- Select the pictures that you have captured
- Create Model > Enter Model Name > Start
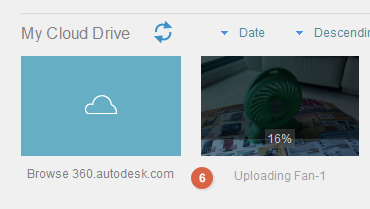
- Creating and Processing the Model
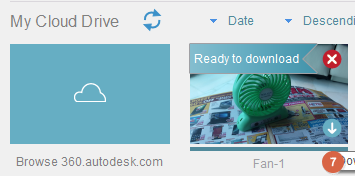
- Ready for Download
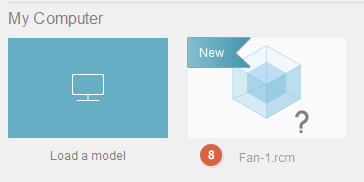
- Double Click to open the Model Created
- Using slicer to remove unwanted surfaces
- Using Windows/Lasso tools to clean up unwanted images
- Once clean up is done, use Analyze to detect and fix model issues
- If detect no more issues, model ready to export
- Additive Manufacturing vs Subtractive Manufacturing
- Types of 3D printers or 3D printing technologies overview
- Test your 3D printer! v2
- 3D Printing Tips and Tricks – How to 3D Model A Great 3D Print
- How to Design and 3D Print Chainmail Patterns and Interlocking Parts
- 5 Mistakes to Avoid When Designing a 3D Model for 3D Printing
- PLA vs ABS | What's the Difference for 3D Printing?
|
|
|
|
|
|
The above file can be downloaded here.
References
My Thought
Didn't know that 3D printing can be that complex. The various test will varies with differemt models of printers, the print options selected, what is the materials, size and complexity of the model being printed. But is good to explore and test the capabilites and limitation of the 3D printer.
For 3D scanning, is fun and exciting to witness how captured images can be transformed into 3D models via Smartphone as a Scanner. I did not manage to capture it right at the first time using 123D Catch, perhaps due to wrong angles and lightings. Manage to do it second time round. But I prefer to use Remake as it can process your model based on your snap pictures, once the model is ready, you can edit and make good your 3D object before sending it for 3D print.
I enjoyed this week assignment as compared to previous week of Electronics Production and Laser Cut. For someone who know nothing about 3D printing or scanning, there are many online tutorial and guide given for some basic scanning and 3D printing, is quite easy to follow as long as you are not making something very complex.