Exercise 5 - 3D Scanning and Printing
Requirement
- Test the design rules for your printers (group project).
- Design and 3D print an object (small, few cm) that could not be made subtractively.
- 3D scan an object (and optionally print it)
What is 3D printing?
3D printing, also known as additive manufacturing (AM), refers to processes used to synthesize a three-dimensional object in which successive layers of material are formed under computer control to create an object. Objects can be of almost any shape or geometry and are produced using digital model data from a 3D model.
Advantages of 3D printing
- Ability to personalize products according to individual needs and requirements.
- Able to produce product simply could not be produced physically in any other way.
- Can be used to produce highly accurate patterns for casting.
- Manufactured really model parts can be combined with real parts to produce a fully functioning product that can then be tested and evaluated.
Disadvantages/limitations of 3D printing
- Limited Materials: Currently, 3D printers only manufacture products out of plastic, resin, certain metals, and ceramics.
- Copyright: With 3D printing becoming more common, the printing of copyrighted products to create counterfeit items will become more common and nearly impossible to determine.
- Dangerous Items: 3D printers can create dangerous items, such as guns and knives, with very little or no oversight
- Size: Currently, 3D printers are limited with the size of the products that they can create on the build platform.
Stress-testing the 3D Printer
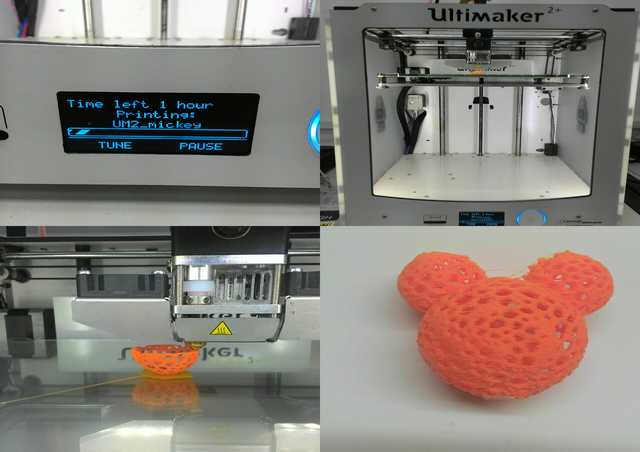
Our FABLab had a few different kind of 3D printer, ranging from Makerbot Replicator 2, Cubicon, and Ultimaker 2+. I will be using Ultimaker 2+ to test it printing quality and where is it's limitation. There are lots of 3D printer test kit out in the web, the kit we are using can be found in thingiverse (free community where everyone can contribute and share their ideas). This very comprehensive kit for testing print out 14 in 1 and a Hang-over test model.
|
|
|


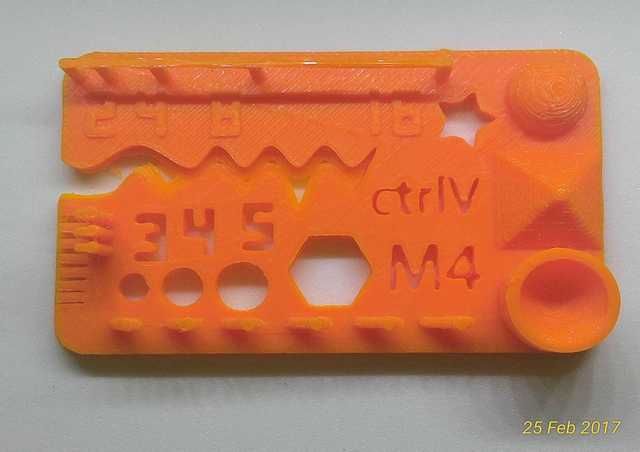
By printing this model kit, we are able to test the following in this very tiny model:
- size: the object is 2x50x30mm (baseplate)
- hole size: 3 holes (3/4/5mm)
- Nut size: M4 Nut should fit perfectly
- fine details: pyramid, cone, all numbers
- rounded print: wave, half sphere
- minimum distance & walls: 0.1/0.2/0.3/0.4/0.5/0.6/0.7mm
- overhang: 25°/30°/35°/40°/45°
- bridge print: 2/4/8/16/mm
- surface: all the flat parts
Here are some observations and findings after printing with predefine default setting: Fast Print, Normal Quality and High Quality.
|
|
|
|
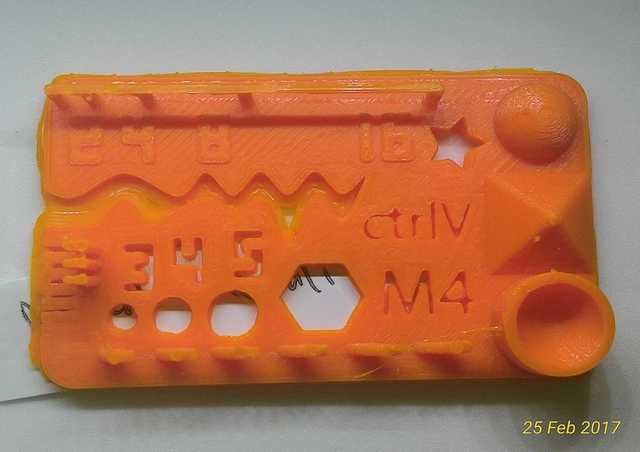
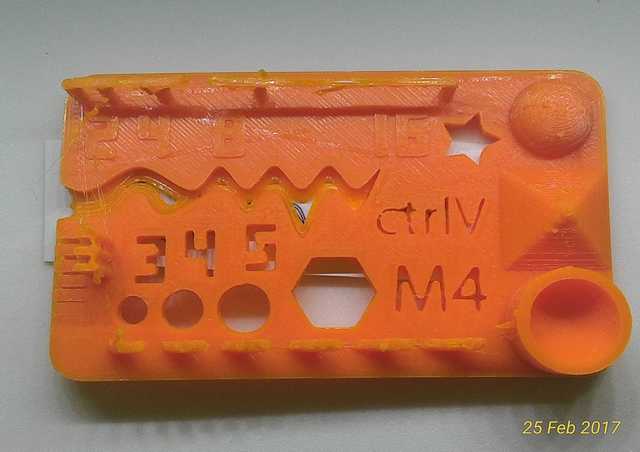
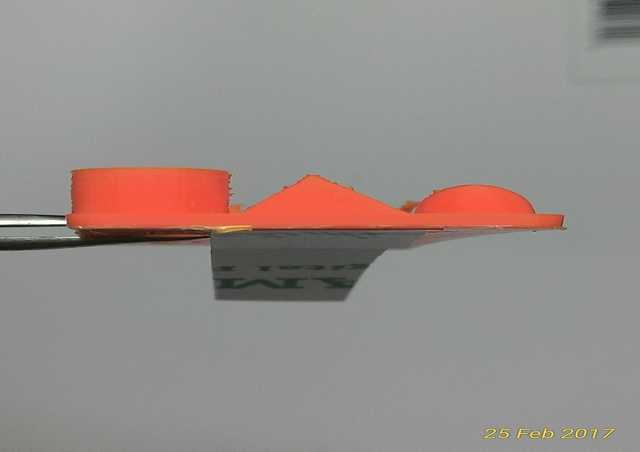
For all the 3 print out, we can evaluate that Ultimaker 2+ pass most of the test, but with some shrinkage for thickness and the different hole sizes. Ultimaker 2+ was unable to print minimum distance & walls for 0.1/0.2/0.3 to 0.4.
And with the different in Layer Height, the print out gets more compact from Fast to high, and the pyramid and half sphere are more well form using high quality. But the down side of using high quality is that it take about 3 times longer as compared to fast print.
And by looking at the 3 print out, the differences are not very obvious to inexperience user/ new user like me.
|
|
|
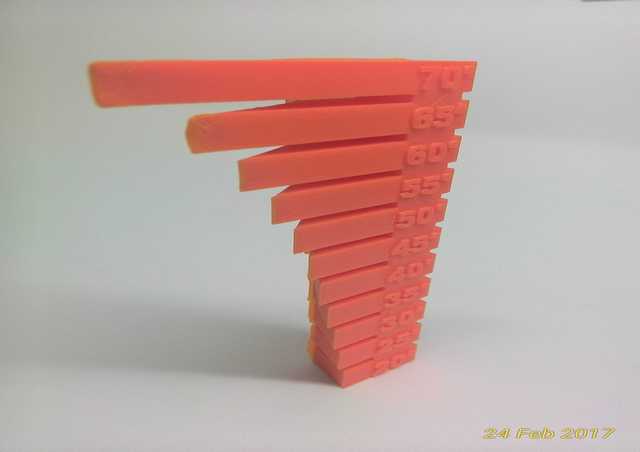
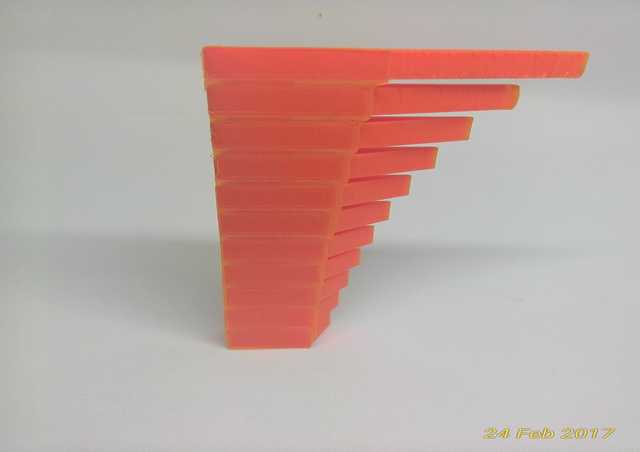
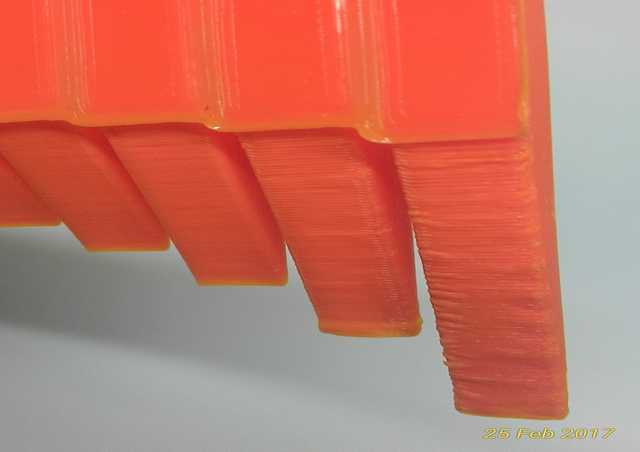
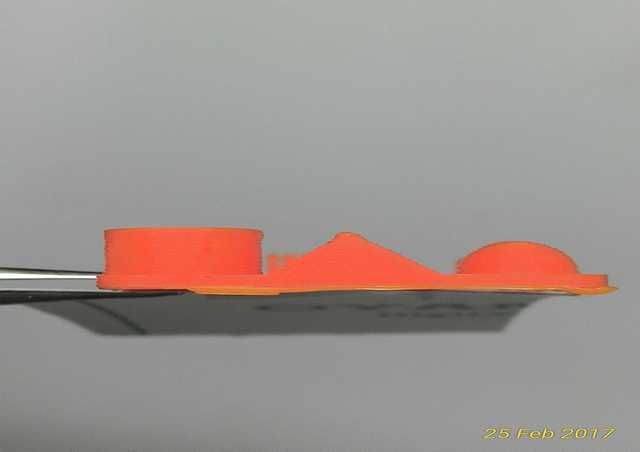
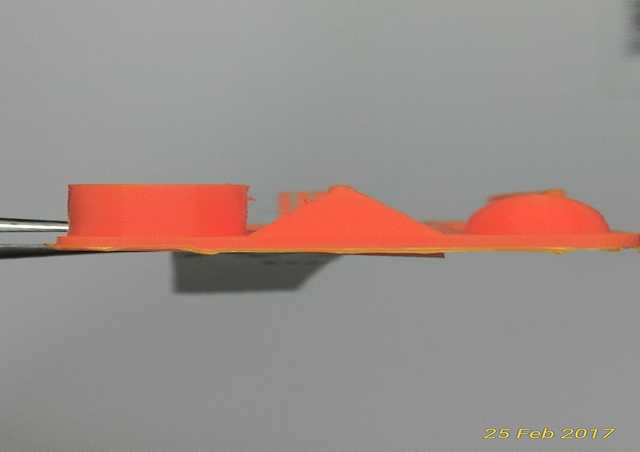
From the hang-over test, the maximum hang-over for Ultimaker 2+ is at 60 degree, surface is nice, end of tip is smooth and without extra support. At 65 degree even without extra support, starts to show slight uneven surface and end of tip slightly deformed. And at 70 degree also without extra support, can clearly see uneven surface and end of tip deformed.
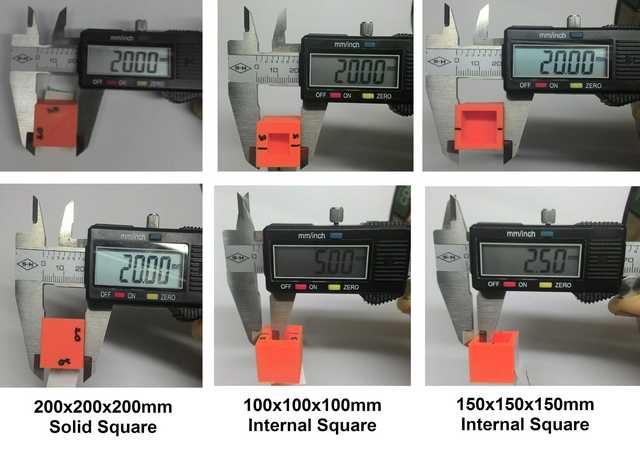
Printed out a few 200x200x200mm cube to test if the printer can print accurately. After measuring with a caliper, can said that there is not much string in size for Ultimaker 2+.
For other 3D printer test like Cubicon and Flashforge, please refer to our fellow classmates website for more information.
3D printing basic
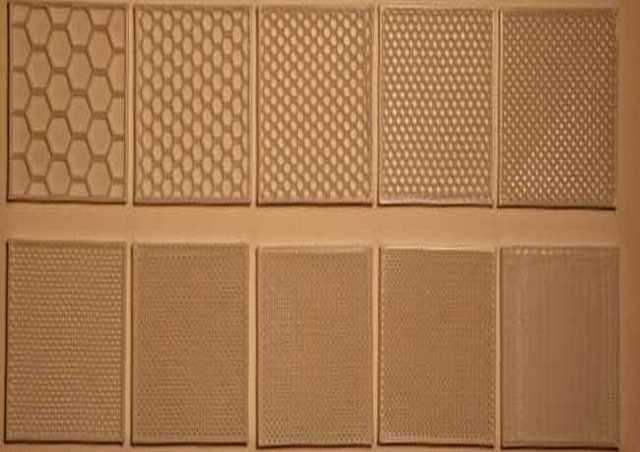
With different infill density percentage, the 3D printed model will get more dense and stronger but print time and material usage will increase accordingly.
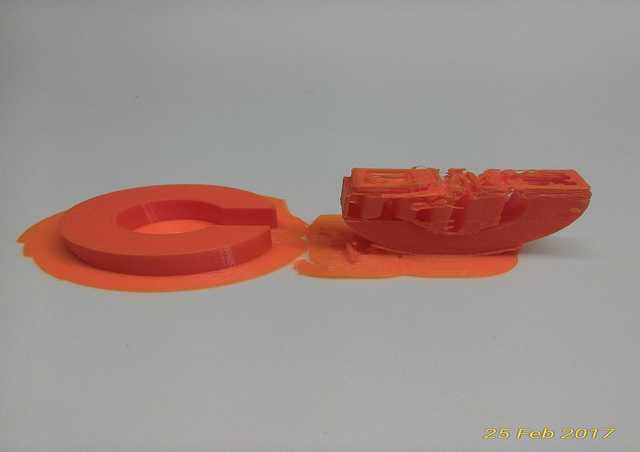
To print out a nice and clear 3D model most of the time is about how the model is orientated on the build platform. For the example above a "C" can be printed laying flat without support or printed standing with break away support.
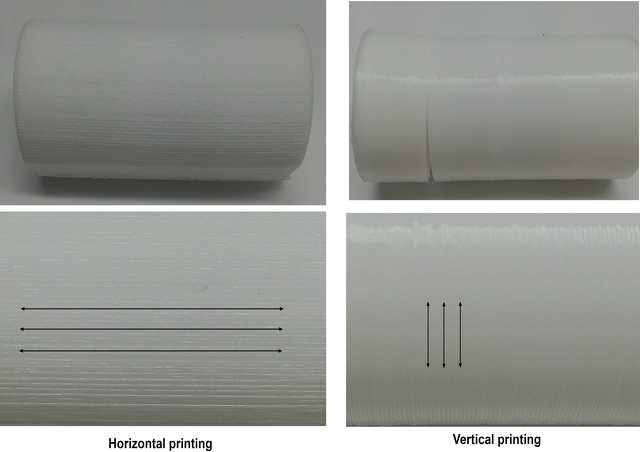
The print direction also can affect the strength of a model, depending on where the force is coming from during usage. If the force coming from top, horizontal printing can withstand more before giving way as compare to Vertical printing and vice versa.
3D print an object that cannot be machine out (CNC)
CNC is subtractive manufacturing process by which 3D objects are constructed by successively removal of material away from a solid material with the use of multiple tools to make the desired cuts (e.g. different sized drill bits) and multi axis.
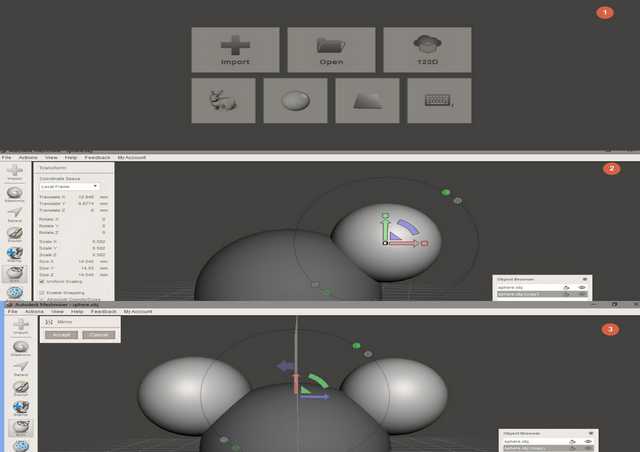
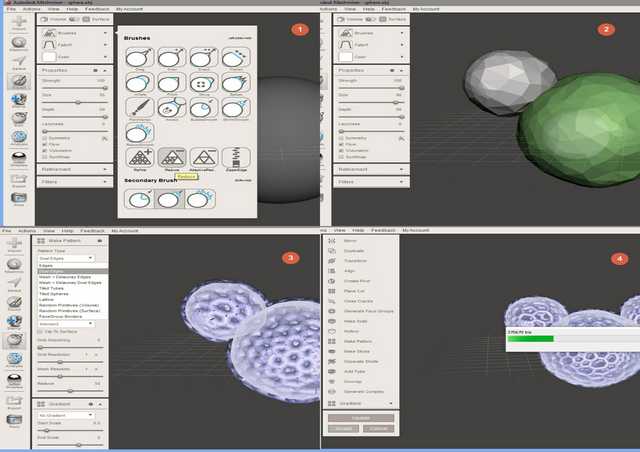
So in order for a model to be 3D printed and not CNC, the model must be either interconnected or hollow. Inspired by Voronoi Patterns, using Autodesk MeshMixer.
Autodesk MeshMixer can be use for in lots of ways, for example: re-mesh surface, cut, fill and etc. I decided to design a Voronoi Mickey Head using MeshMixer. The process is simple and easy to follow.
3D scanning
A 3D scanner is a device that analyses a real-world object or environment to collect data on its shape and possibly its appearance (e.g. colour). The collected data can then be used to construct digital 3D models.
Advantages of 3D scanning
- Save time in design work.
- Quickly capture all of the physical measurements of any physical object.
- Easy to use
Disadvantages/limitations of 3D scanning
- Objects surfaces to be digitized must be within "line of sight" of the instrument.
- Copyright: With 3D scanning becoming more common, the printing of copyrighted products to create counterfeit items will become more common and nearly impossible to determine.
- Complex internal geometries, such as hole features, threads internal or external features of size, trapped or enveloped volumes or any part which has internal features could not be scan properly.
- The price of a good quality 3D scanner is expensive.
Trying out phone apps 123D catch. The app is not available in android play store yet but available in other platform, so do a search in Google for 123D catch.apk. Just download and install into an android phone.
Autodesk also provide so useful information on how to use the app to catch your pictures and how to clean up the scanned model using MeshMixer.
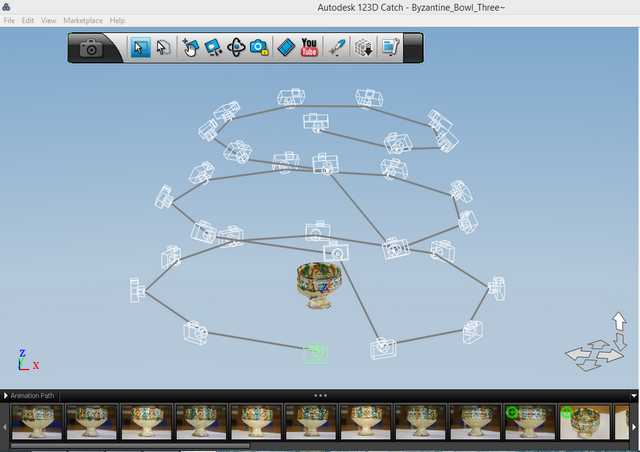
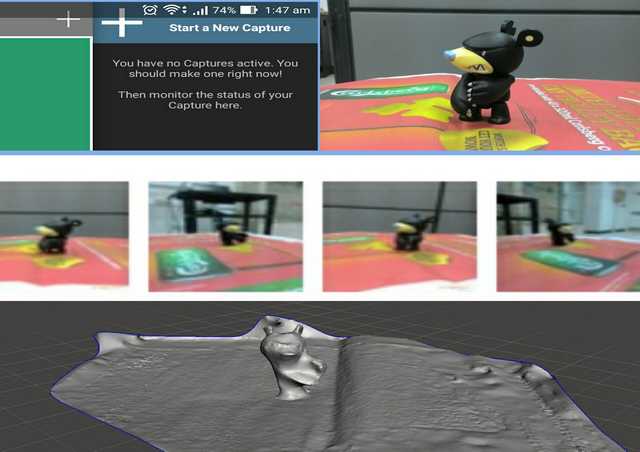
Using the smart phone to take a series of images around the object in different angles from front, top and bottom (roughly around 20 to 32 images), Autodesk cloud base program will analyze and merge the images to form a 3D model. Then using MeshMixer -> Edit -> Plane Cut (to remove unwanted part) and Make Solid (to fill up the hole). When done Export model as STL extension for 3D printing if desire.
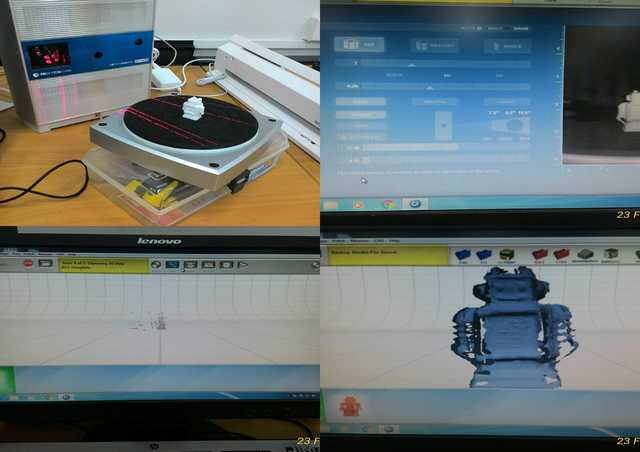
The scan quality for Next Engine give you high quality mesh but a lot of holes, cos depending on how the model is place and scan. Extra clean up of surfaces and mesh need to be done through 3D software.
Links for the above file.
- 3D printing - Mickey.stl.
- 3D scanning - bear.mix.
My thoughts
For what I think there is no optimum setting for PLA material, but more importantly is to know the capability of the 3D printer. Cos material itself will depend on a few conditions for it to print properly too, for example; environment, machine condition, is there any impurities within and etc.
3D printing and scanning had evolved and improved so much over the years, and prices are getting more affordable. This technologies seem easy to use at sight but deep down, a lot of knowledge on setting and understanding the machine capability is require. Cos through my findings and usage with the 3D printer this week, I can't really tell much different between the different print out that I got.
Return to top