WEEK05-3D SCANNING AND PRINTING
Part 1 3D printer test
- 1. Dimensional accuracy test
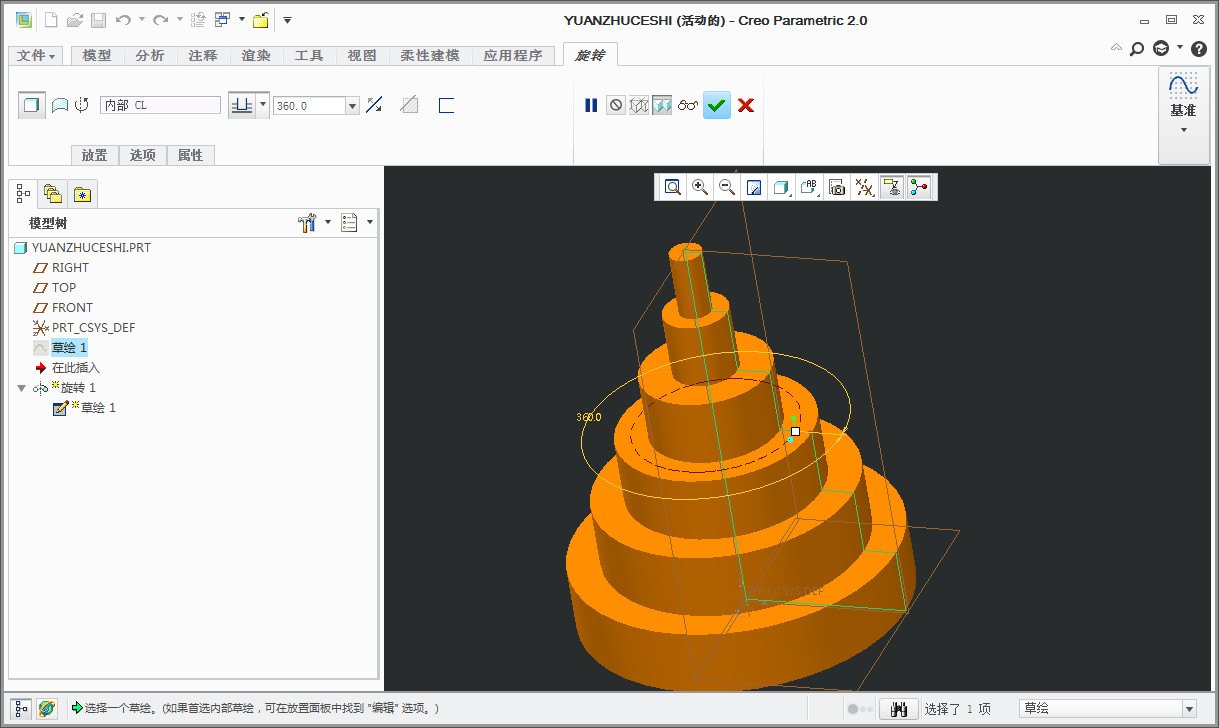
- There are many 3D printers nowdays, desktop industrial-grade face differernt users. Makerbot is an famous company in desktop 3D printer, we have replicator 2 and replicator 5th in the lab. We test the replicator2. Design a cylinder in 3D modeling software.Six disc, the diameter are 25 mm, 20mm, 15mm, 10mm, 5mm, 2.5mm and the height is 5 mm.

- Model was build by revolve.
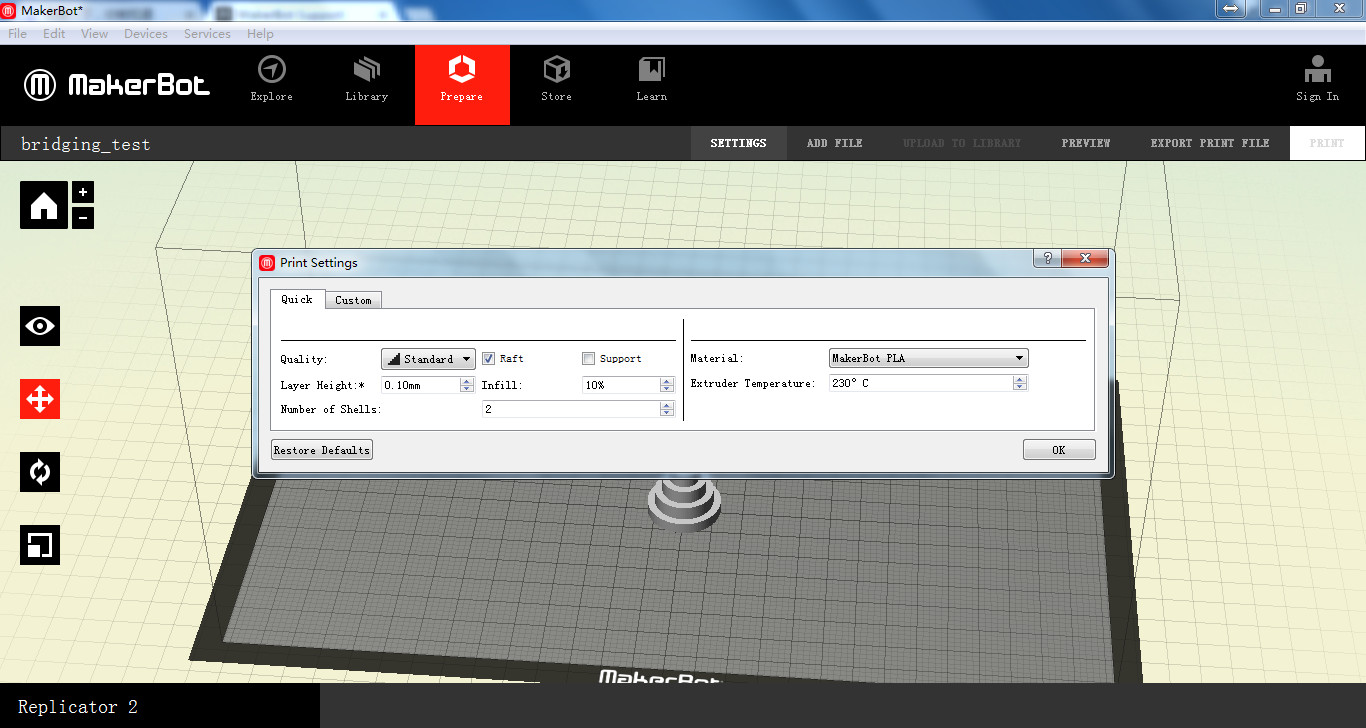
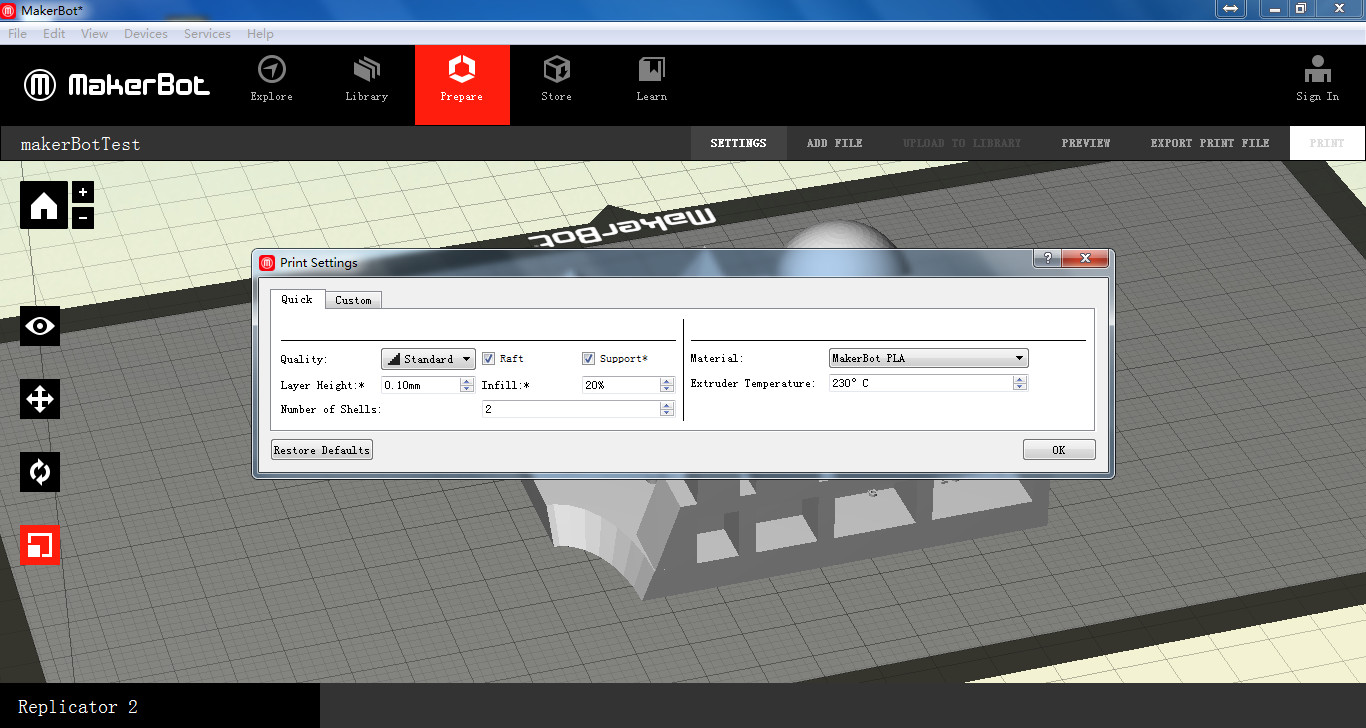
- Open makebot desktop and add the .stl file.

- Othen setting print parameters. Layer height setting is 0.1mm, infill is setting 10%.
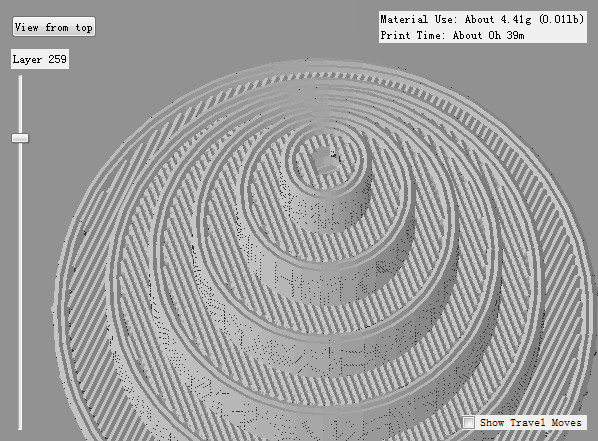
- Priview the layers the model is slicing by 259 layers.
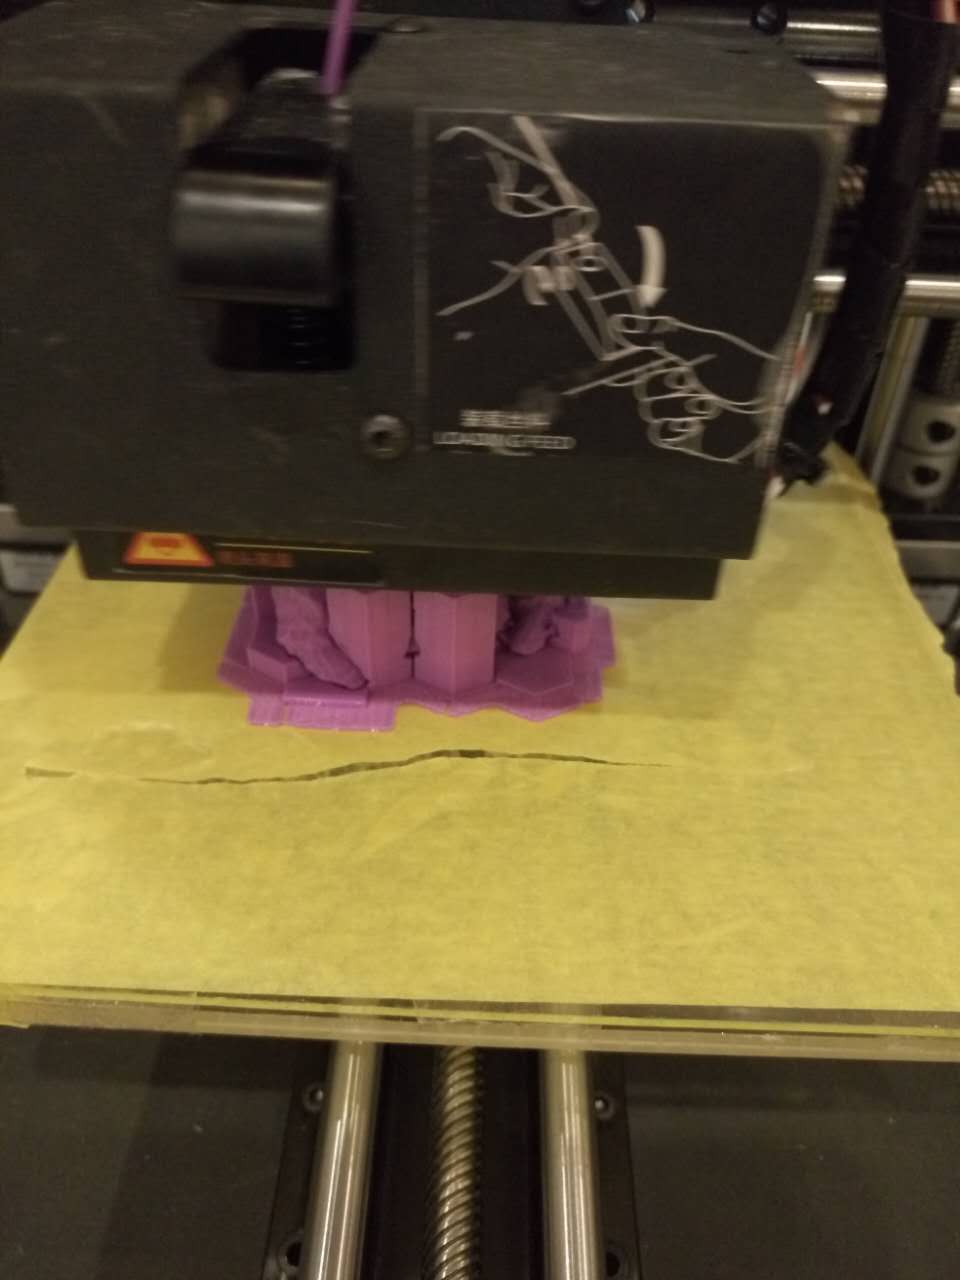
- 2. Print it.
- Copy the code .x3g to SD card after save, then choose build from sd card find the file push OK, then it will take about 3 mins to heat, don't leave until the print work normally.

- It takes almost 40 mins.

- It's not a good model, for the 5mm and 2.5mm disc haven't printed. Not enough time for cooling. And I change the infill it becomes worse. That's beacuse the printer extrude more fialment per time. So setting a slow print speed it will be work. For I have done before by Ultimaker 2+.
- 3. Measure.
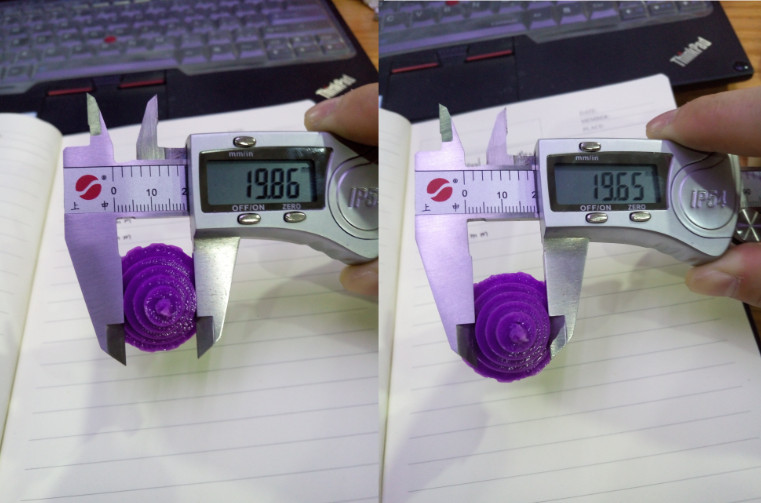
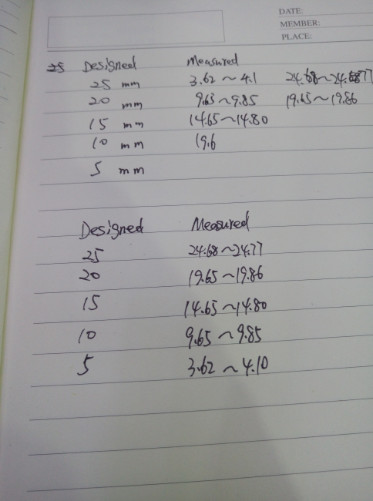
- The measuring show that the disc is not round. The design dimension is 25mm and the max is 24.92 and min is 24.68. The accuracy range from 0.32% to 1.28%.

- The design dimension is 20mm and the max is 19.86 and min is 19.65. The accuracy range from 0.7% to 1.75%.
- The design dimension is 15mm and the max is 14.80 and min is 14.65. The accuracy range from 1.33% to 2.33%.

- The design dimension is 20mm and the max is 9.85 and min is 9.65. The accuracy range from 1.5% to 3.5%.

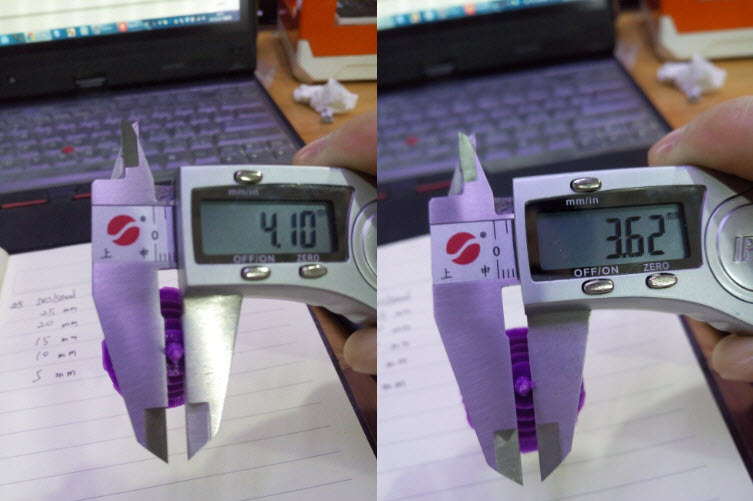
- Although the 5mm cylinder didn't print well, I measure its size.The design dimension is 5mm and the max is 4.1 and min is 3.62. The accuracy range from 1.8% to 27.6%.
- The measurement lists on notebook. It showed that the model can't be too small when printing, as size decreasing the accuracy decreasing obviously.
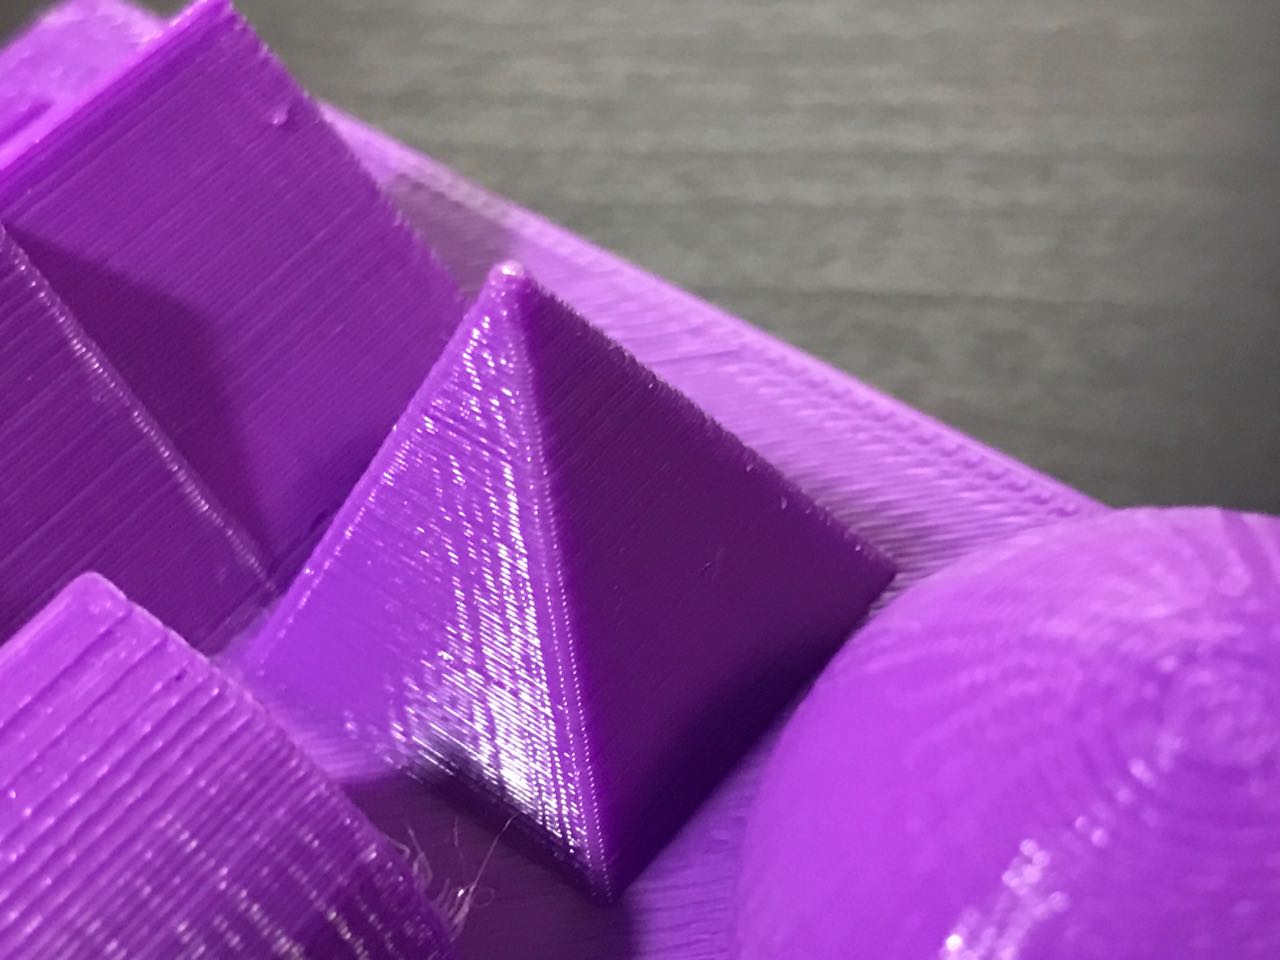
- 4. My group partner design another model.
- The model can test accuracy, bending, bridging, spire.

- The spire maybe can't be printed well but it maybe better than the last 2.5mm cylinder for it have more time for cooling.

- Setting the same parameters with the first test.
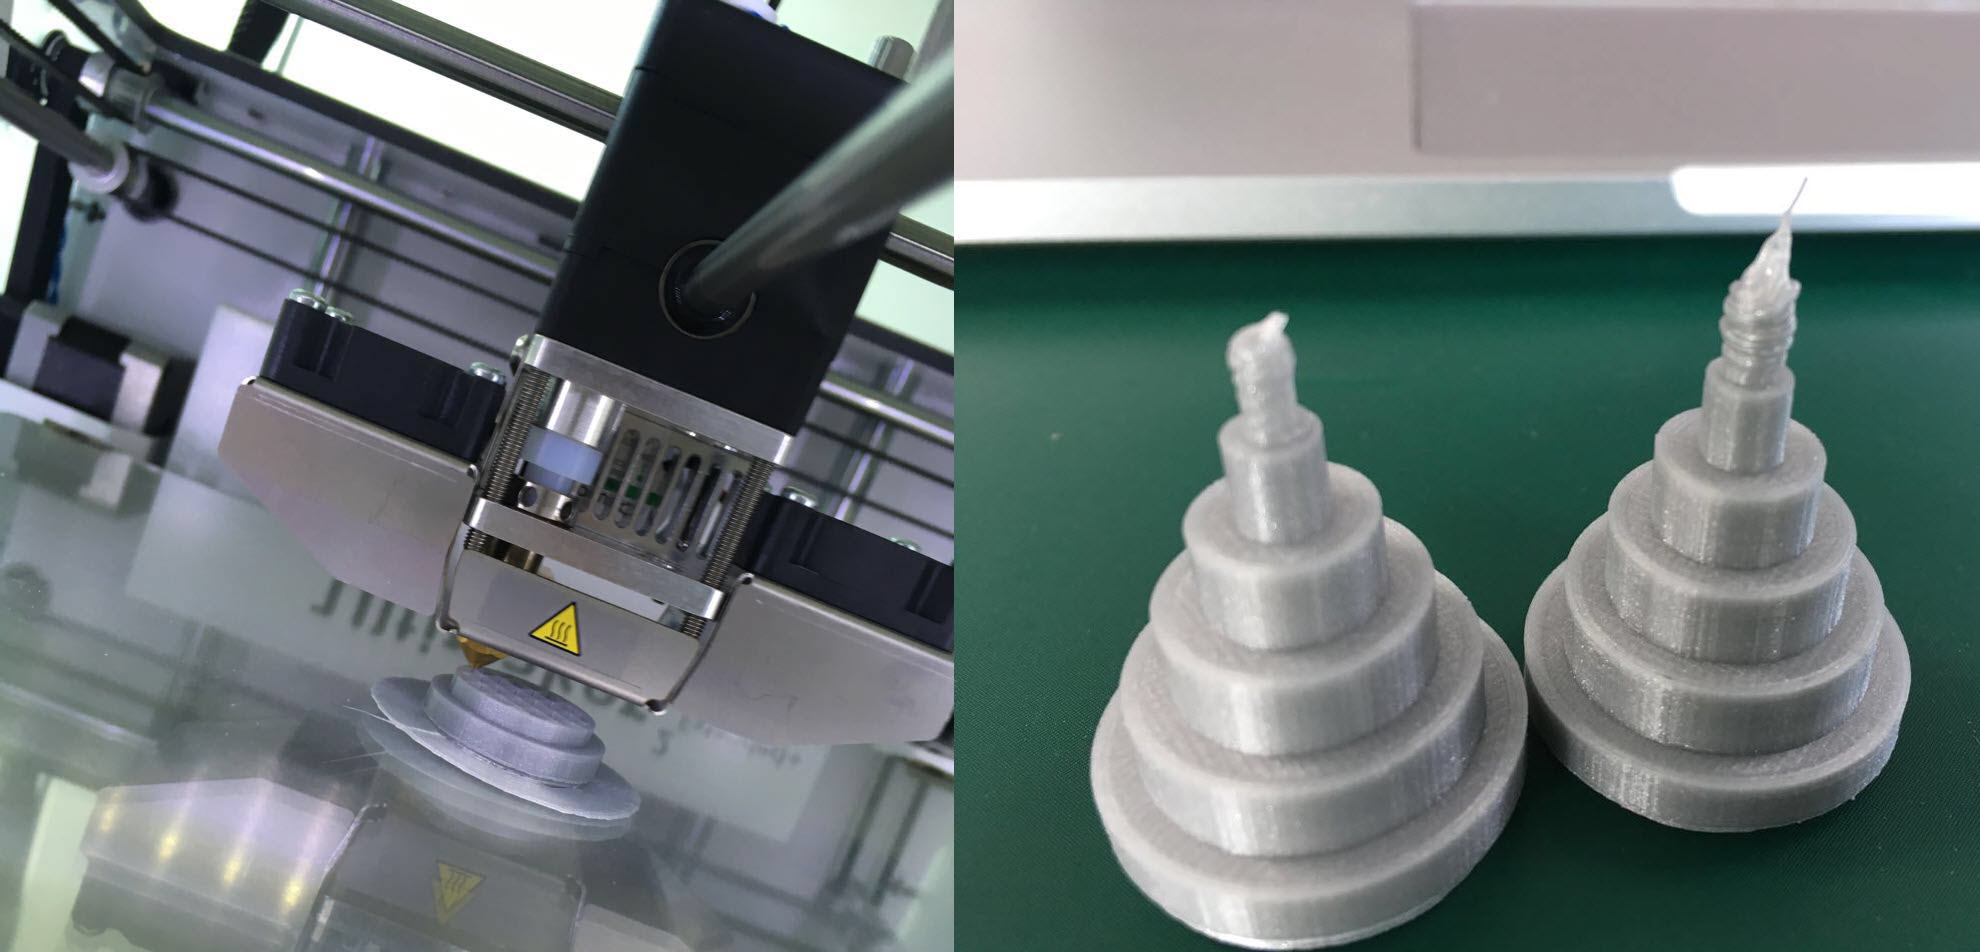
- 5. Printed model.
- It's a good model but also have some problems.

- Obvious suspension was observed.
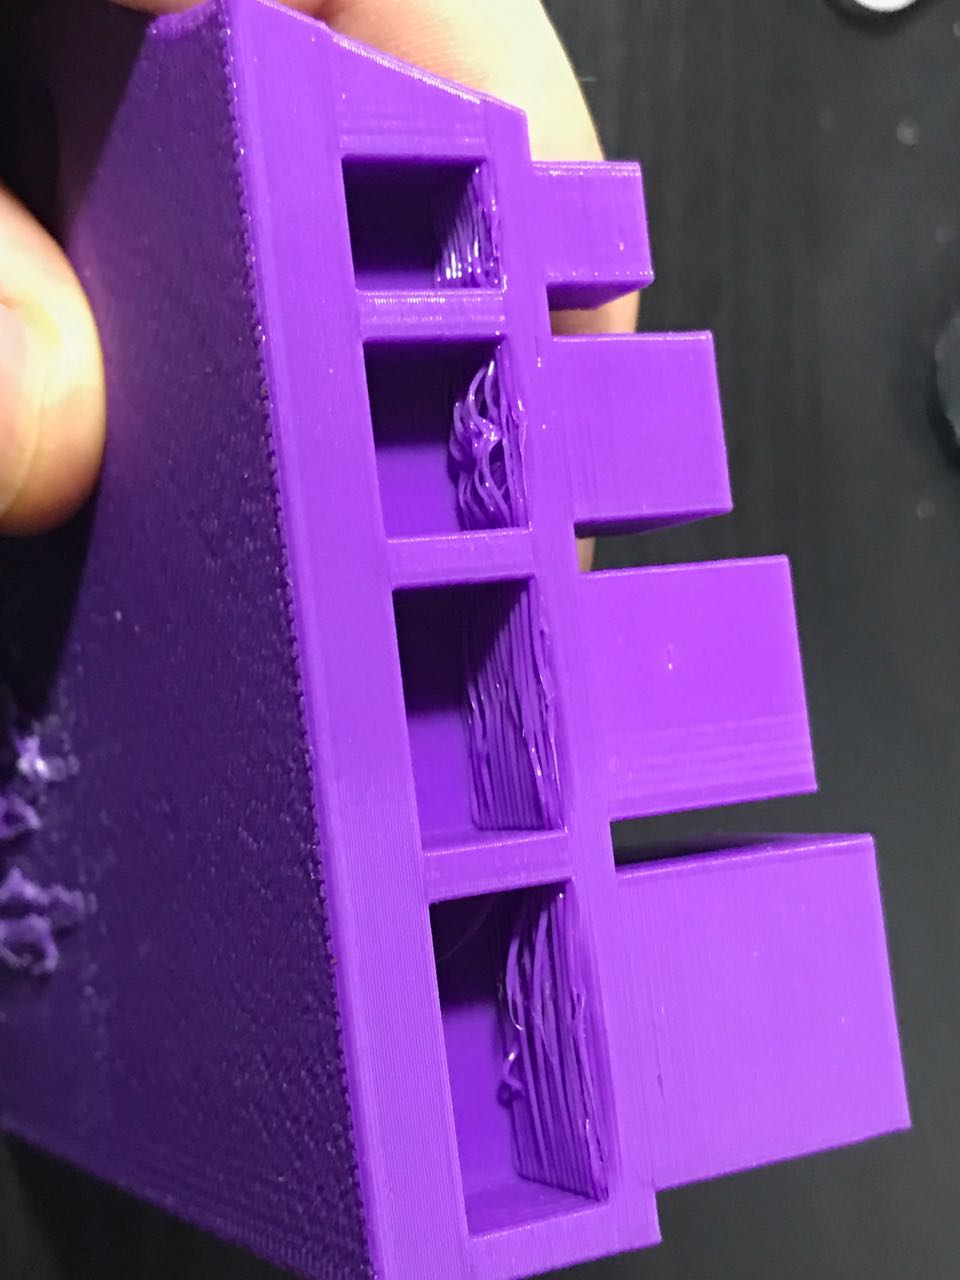
- The quality of spire is better than cylinder.
 So the test showing the replicator 2 is not a very good printer. Actually I used replicator 2, mini, replicator 2X, replicator 5th, ultimaker 2+ and two China brand panowin F1, panowin F2, panowin F3 and up plus 2. Ultimaker is the best, high accuracy silence convenient, and panowin F3 is also good but too noisy. Replicator 5th often jamed, so there are too many complain on the internet and it's new technical extruder can't solve the problem. Replicator 2 is the most stable in makerbot. Replicator 2X has two extruder so it can print two color, but the model always can't stick to the build plate, and the model often warped.
Part 2 Printing a desing model
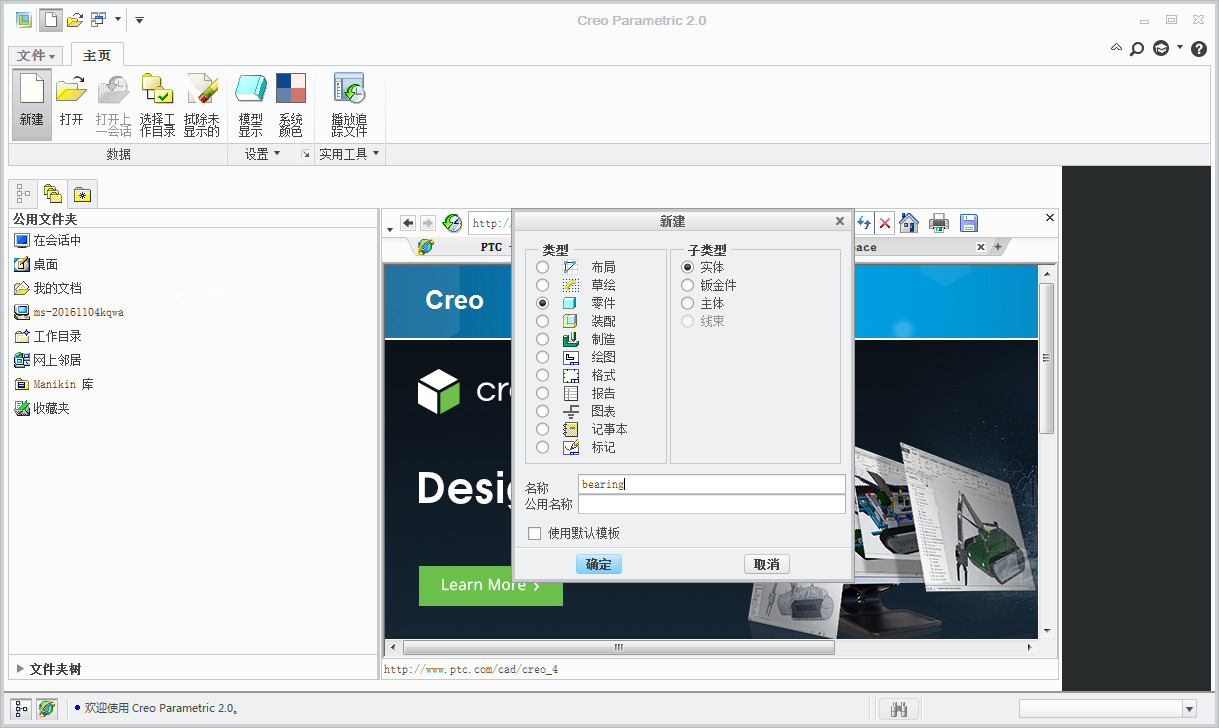
- 1. Design model.
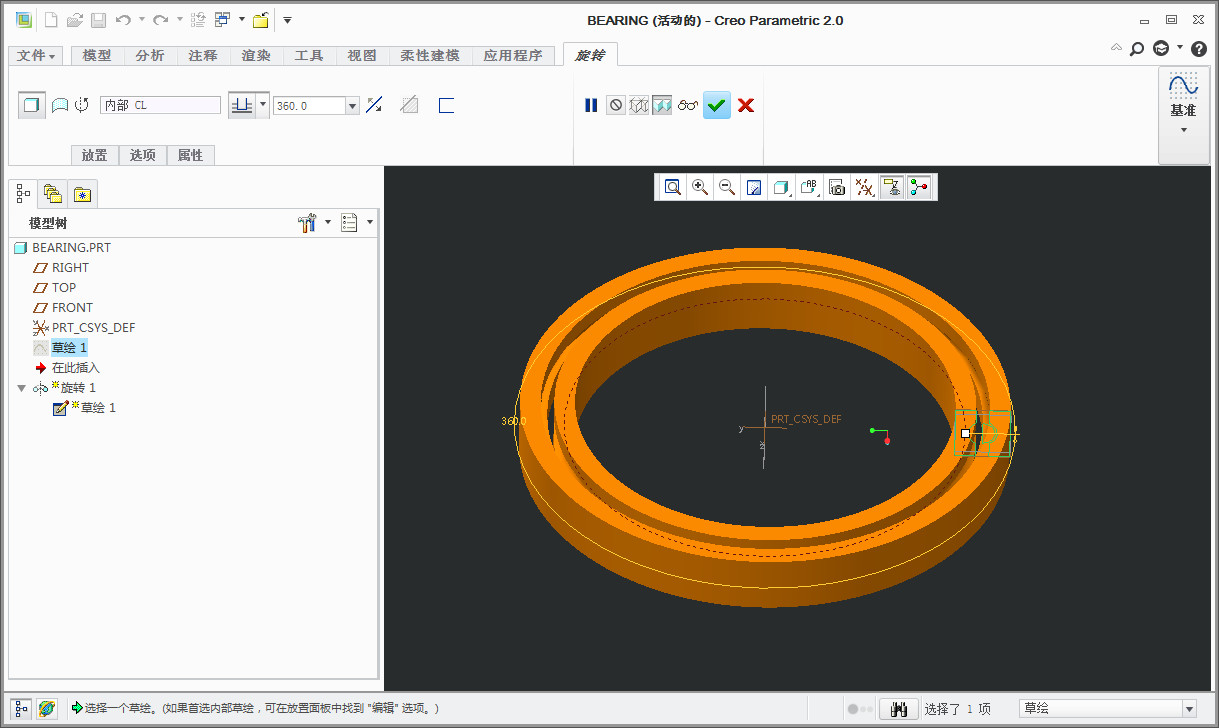
- I will design a bearing. Open Creo parametic 2.0, bulding a new model.
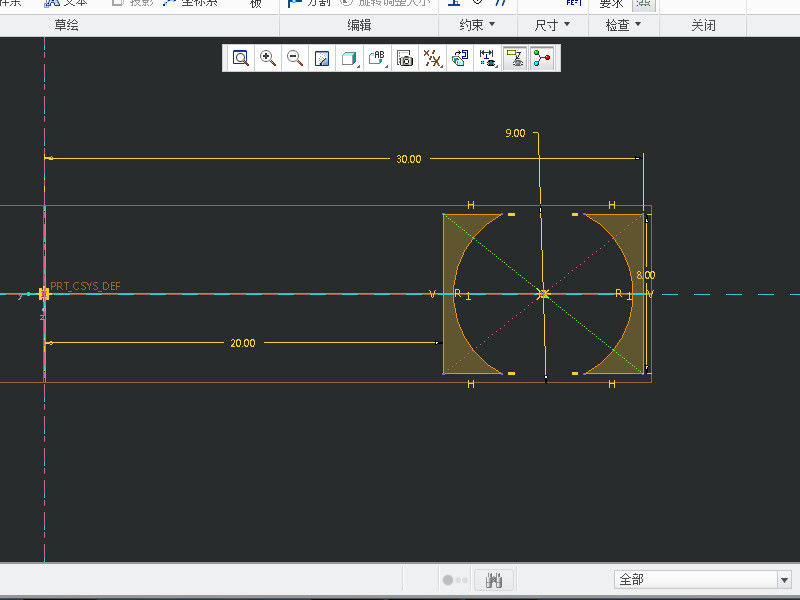
- First choose a plane for sketch.
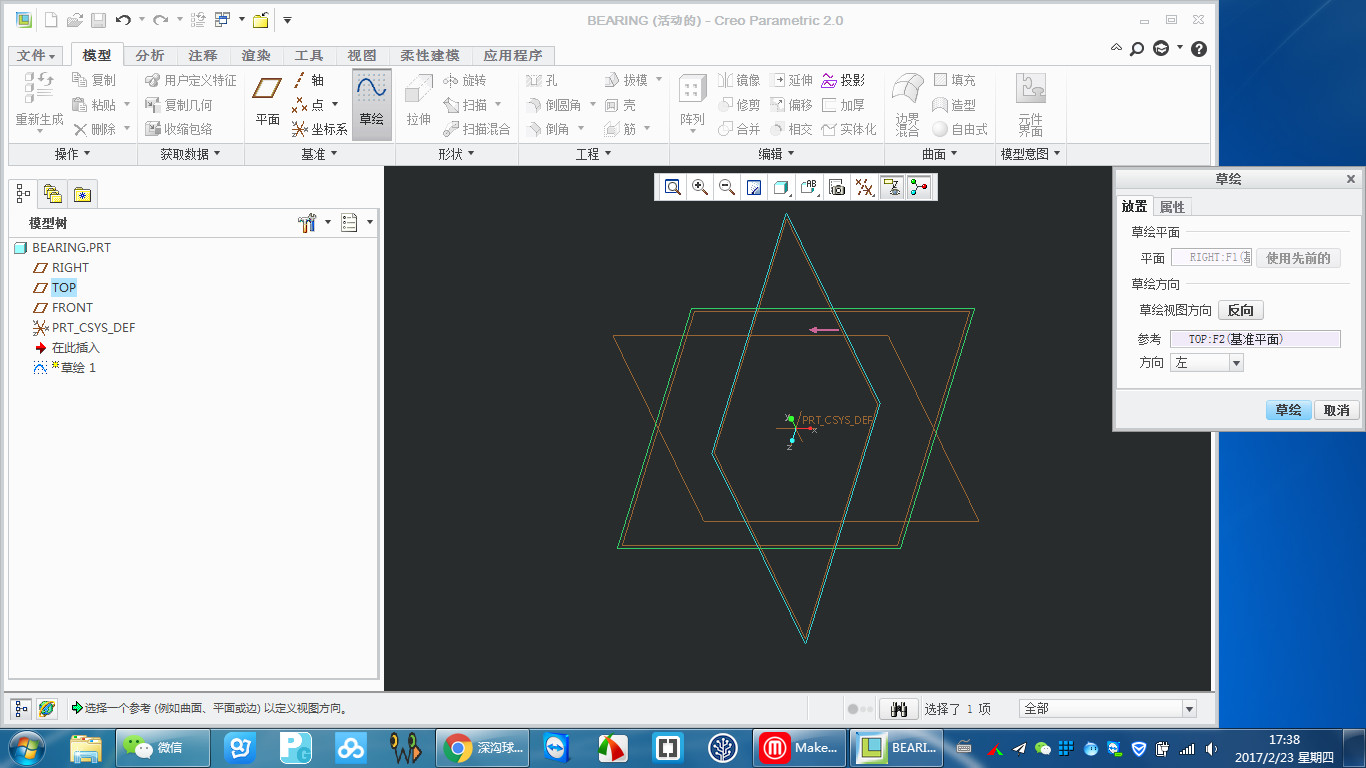
- Sketch the cross of bearing.

- Click on revolve the inner ring and outer ring of bearing were bulid.
- Sketch the cross of ball.

- Setting the size of the ball.

- Revolve the sketch then the ball was build.

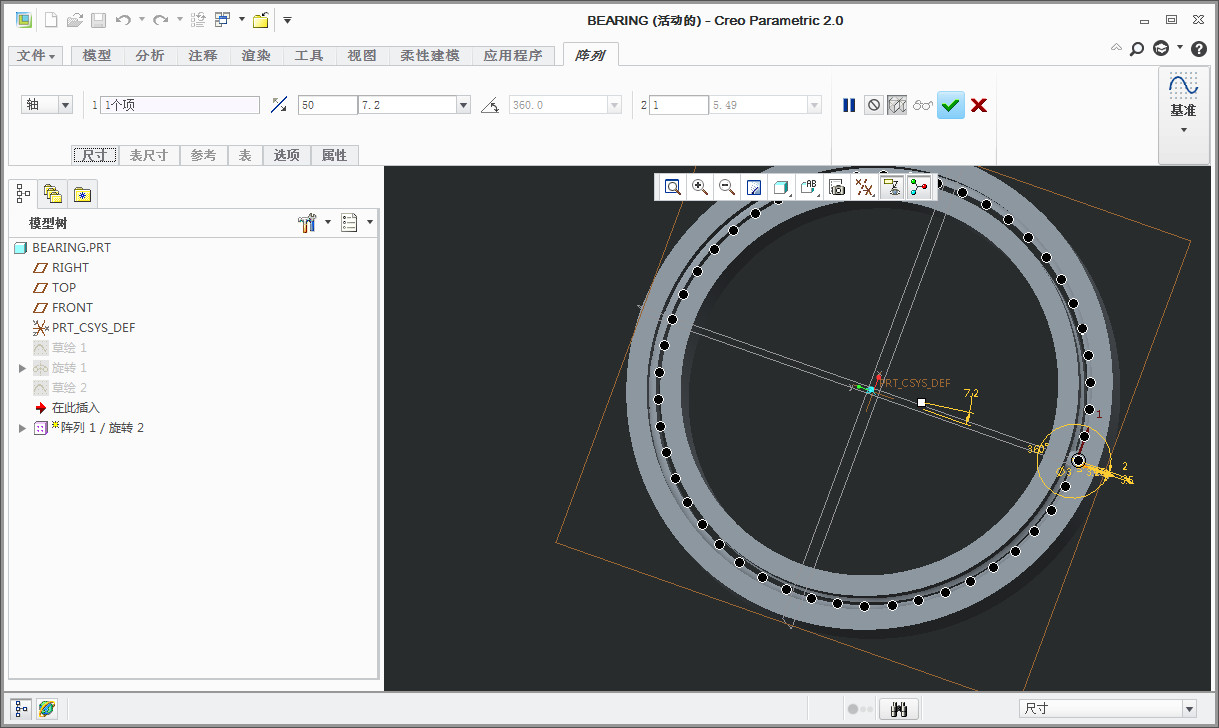
- Pattern the solid ball, setting the number as 50.
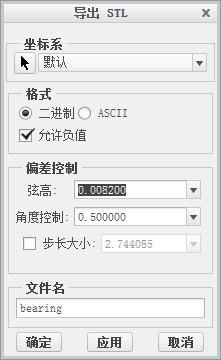
- Save and save as a stl file, setting the height of chord as the minimum.
- 2. Print the model.
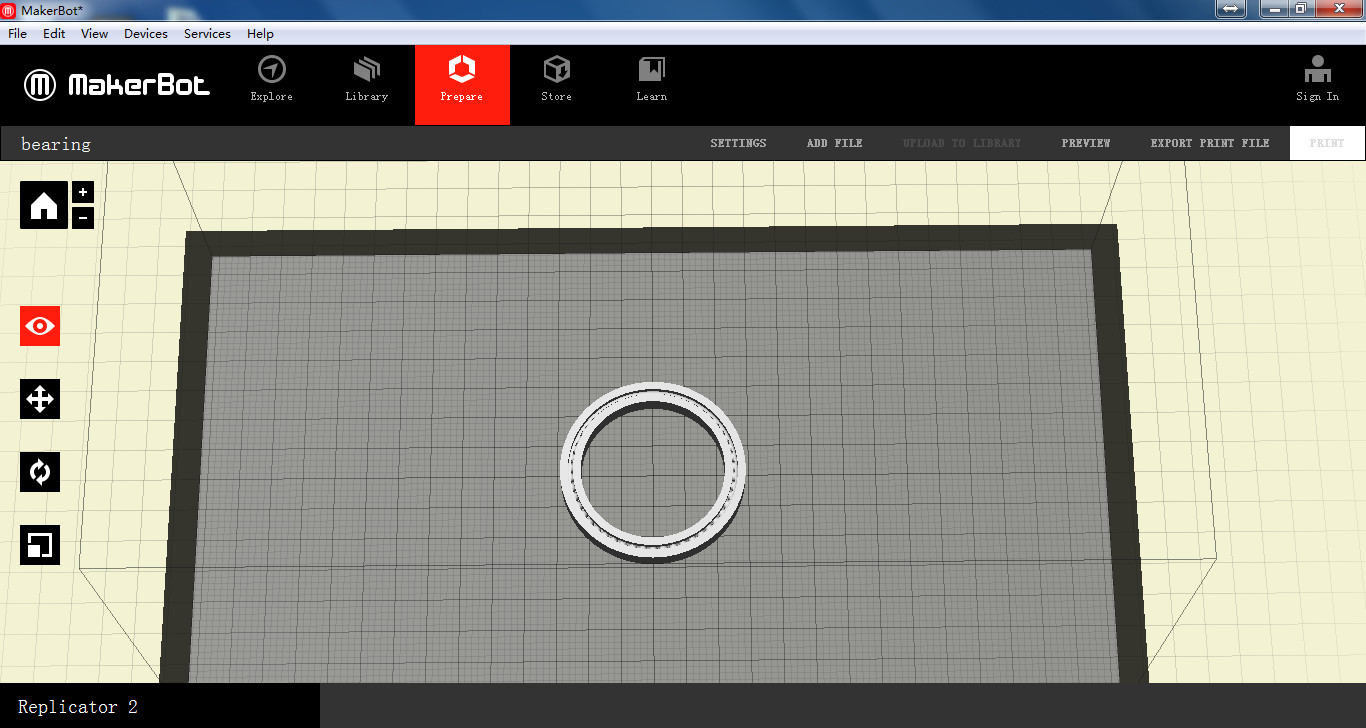
- Open Makerbot Desktop and add bearing.stl, setting layer height and infill.
- I found the ball stick to outer ring maybe the ball is too small, so the first print is unsuccessful. Actually, ball is not easy to print. Make some change of model like increasing the size and the gap between ring and ball.

- 3. Change the model.
- Increase the ring and the gap.
- Increase the size of ball.

- Pattern the ball and set the number as 18.
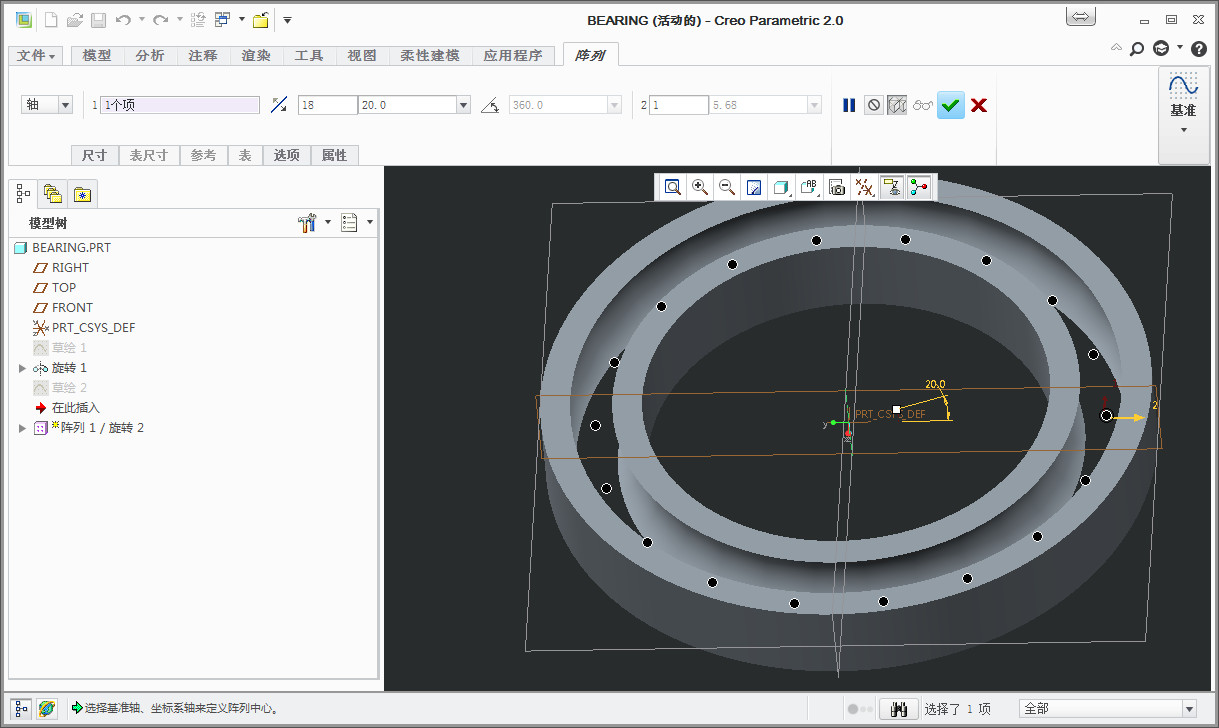
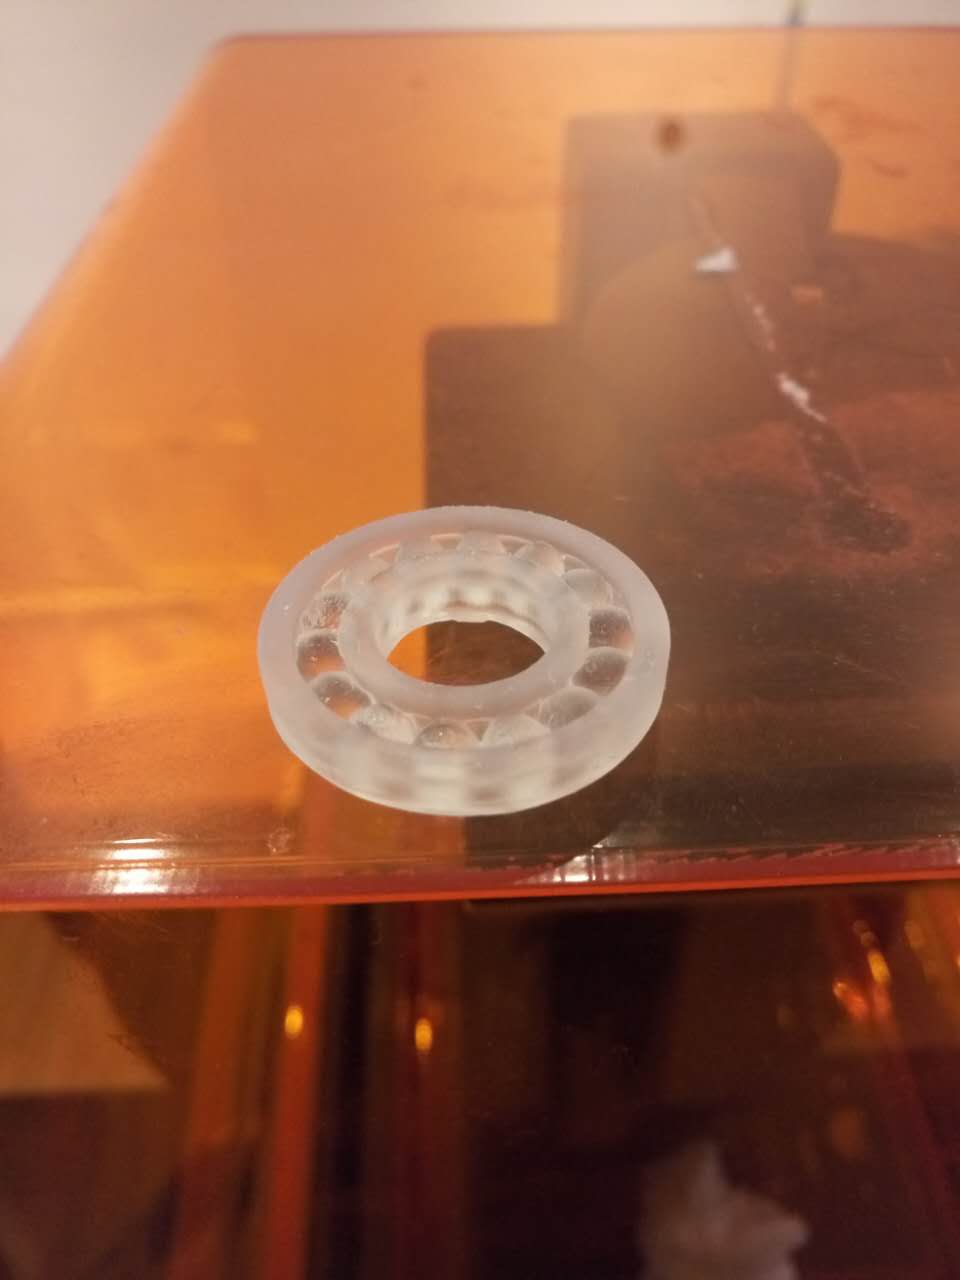
- A nice bearing model was build.

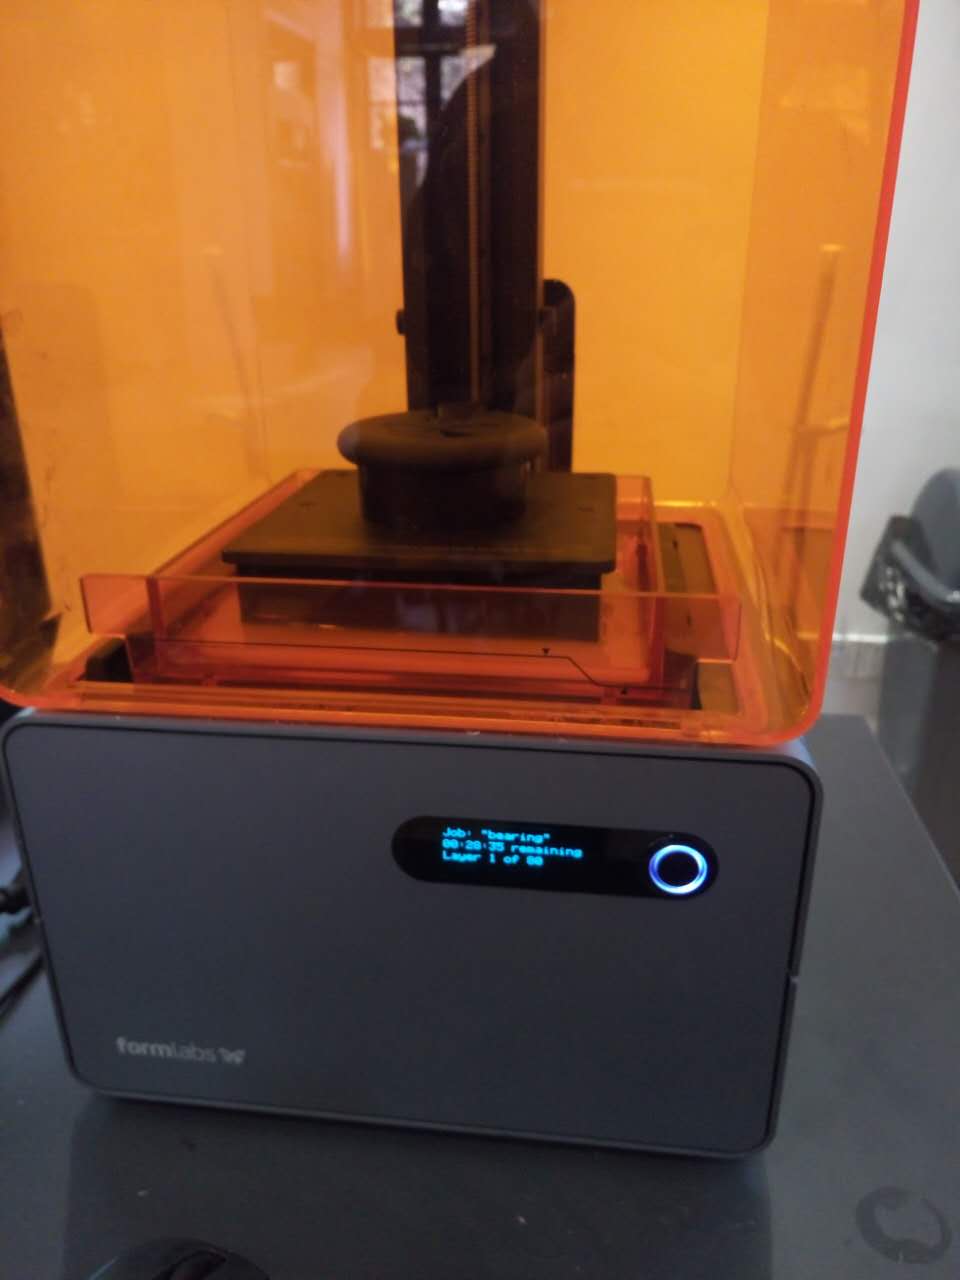
- 4. Print it with a SLA printer.
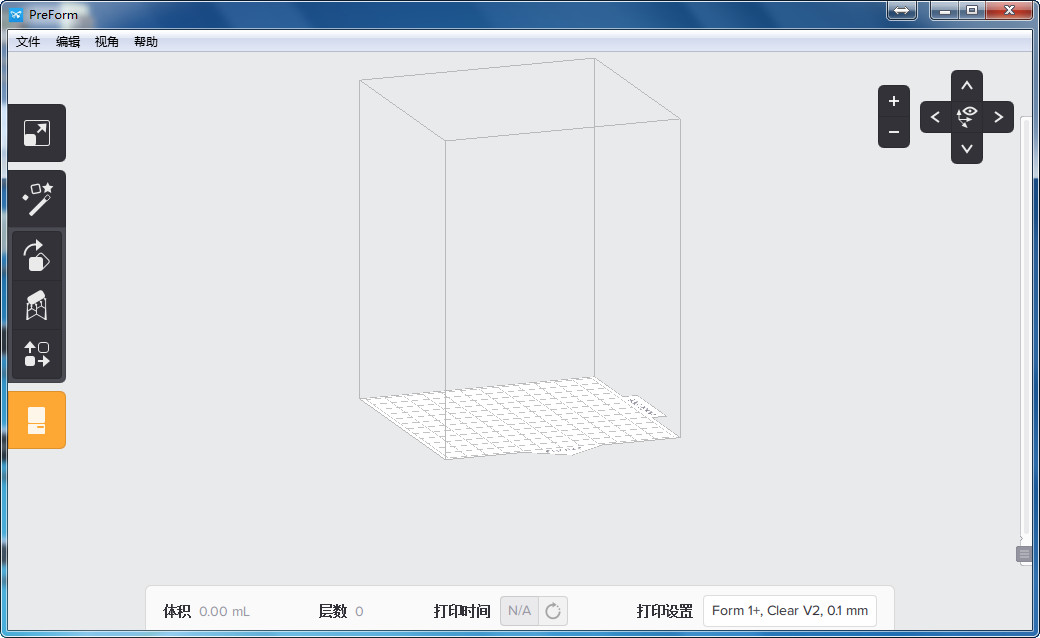
- Formlab 1+ is a desktop SLA 3D printer. Open PreForm, choose printer and material.
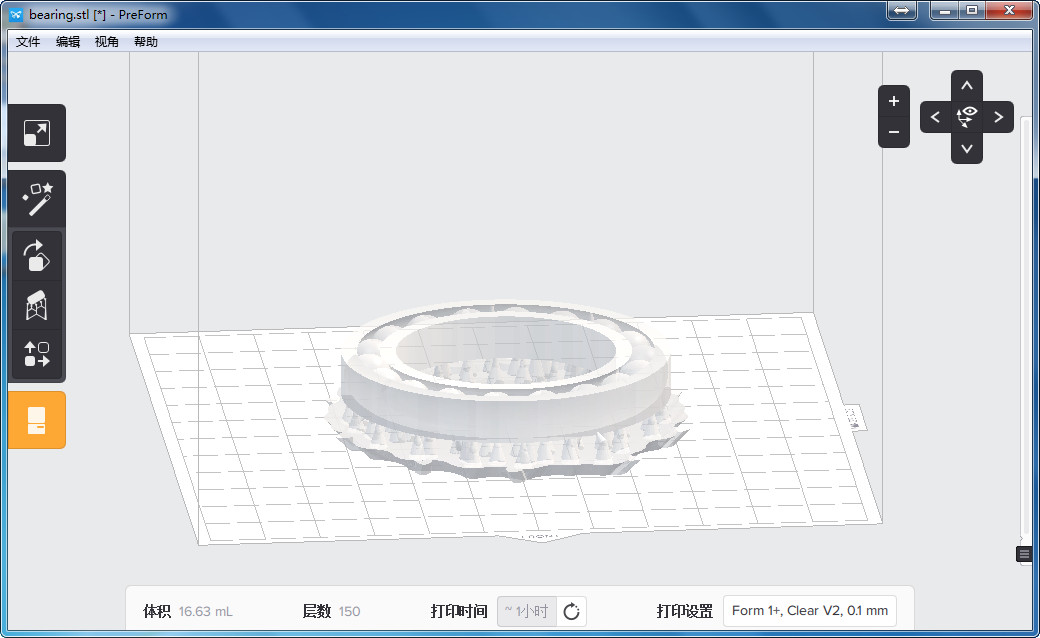
- Add file, and increase supports, setting layer with 0.1mm and the model was slice by 150 layers. It will take about 1 hour to print. Click on "print", the file will upload to machine.
- Push the button on machine and it will work.
- The printing work has finished.
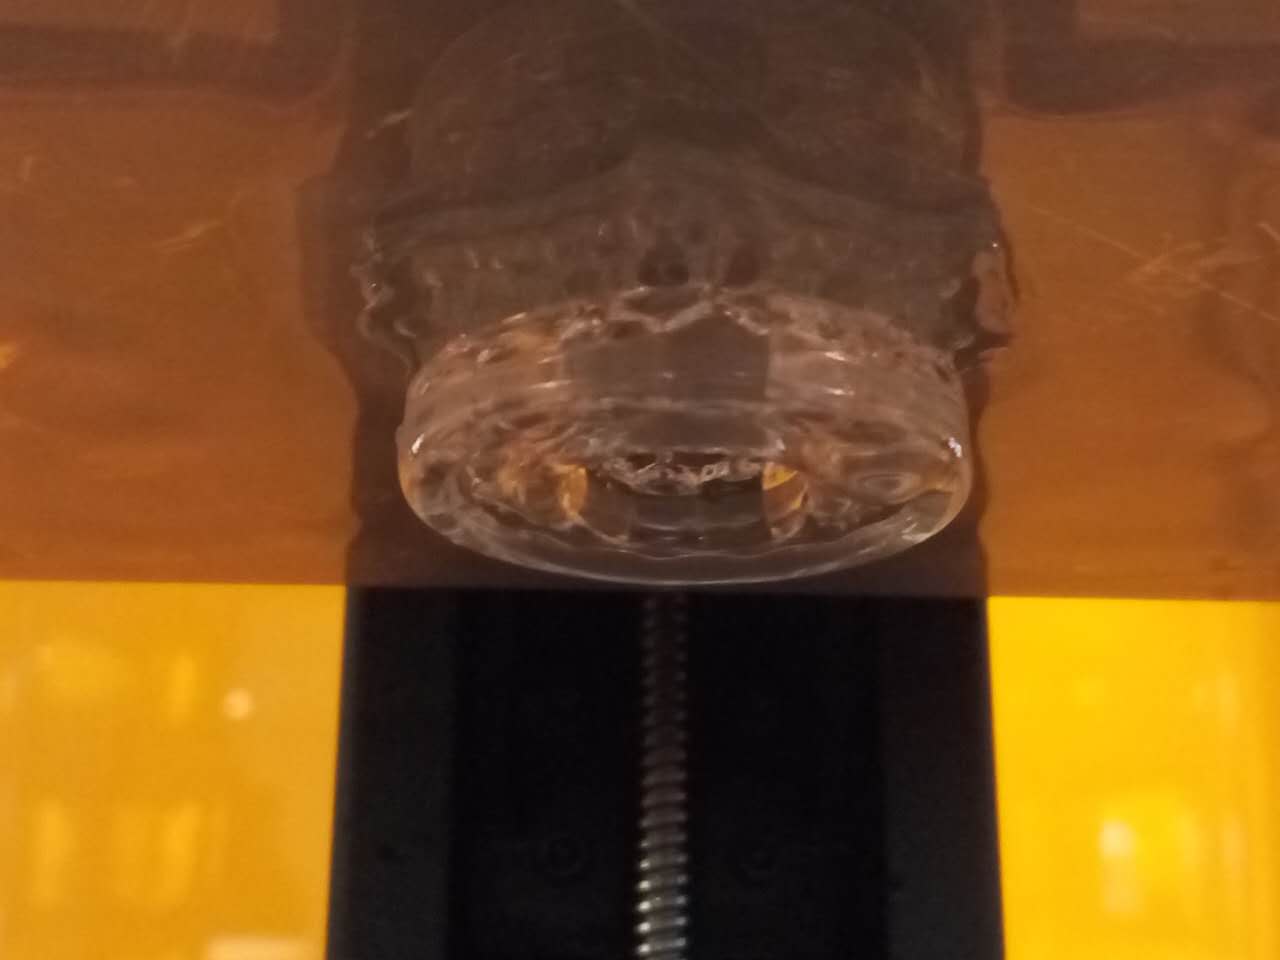
- Take it off from the build plate.

- Put it into 90% alcohol by volume.

- Washing it and wait until dry.
Part 3 Scanning and printing
- 1. 3D scanning is amazing.
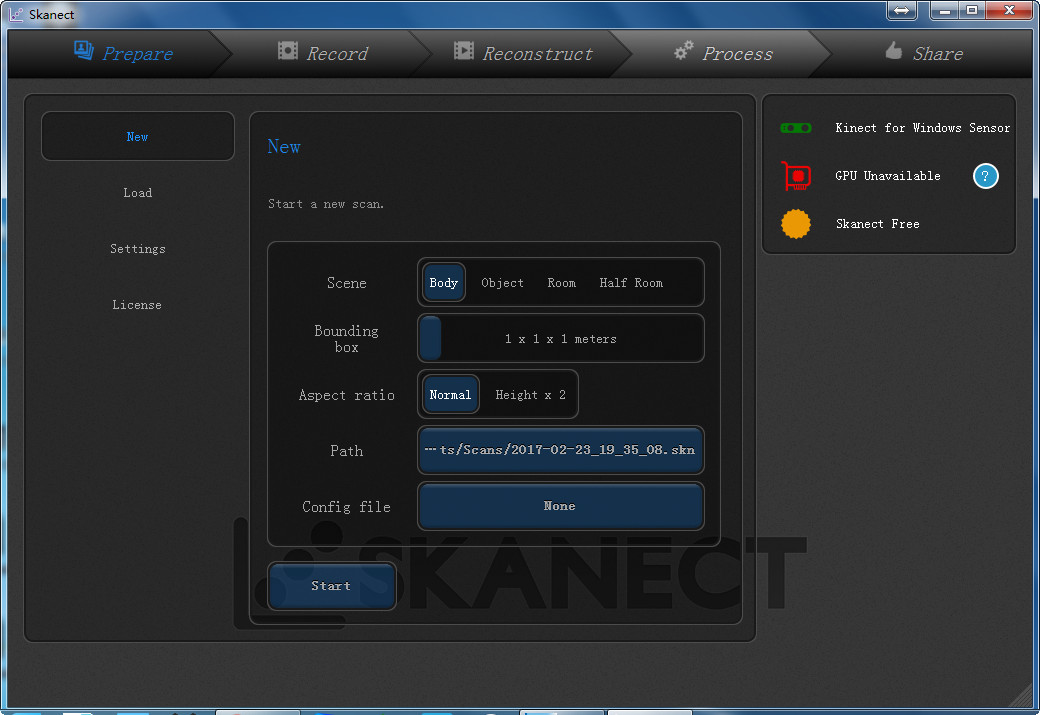
- The industiral scanner is very expensive. Kinect is suitable for home. It can build model quickly. But not very precise.

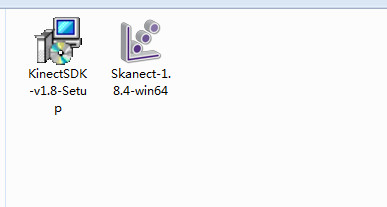
- Install the driver and control software.
- Connect the kinect to computer and open control software, choose scene as body for I will scan myself.
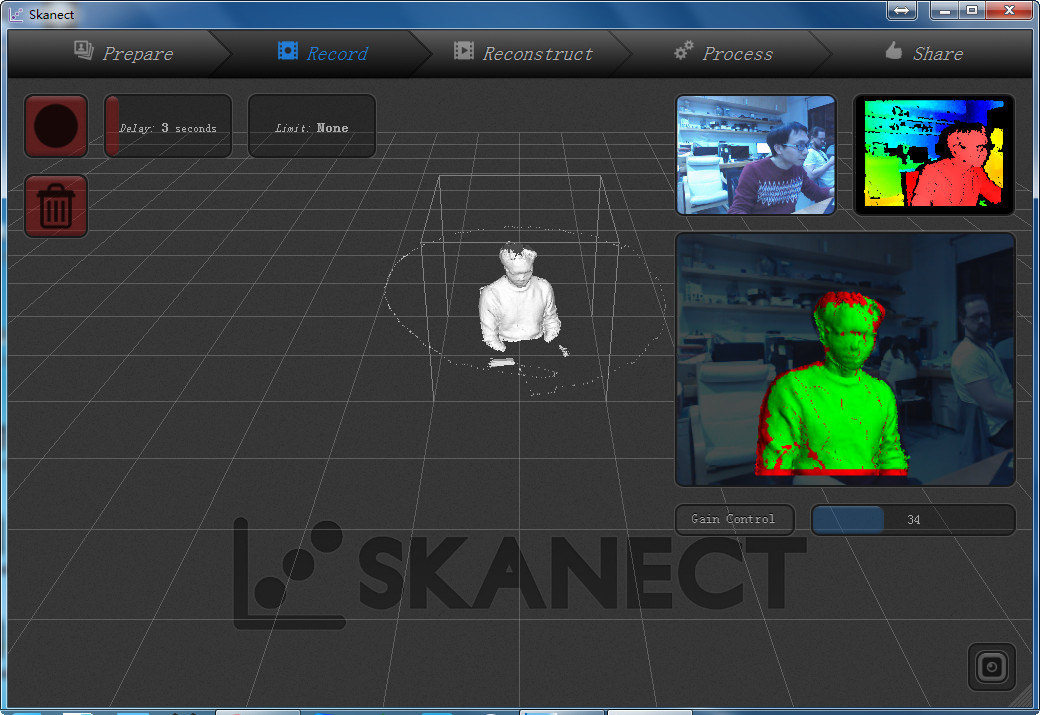
- Click on record and it will start in 3 seconds, then turn round slow.
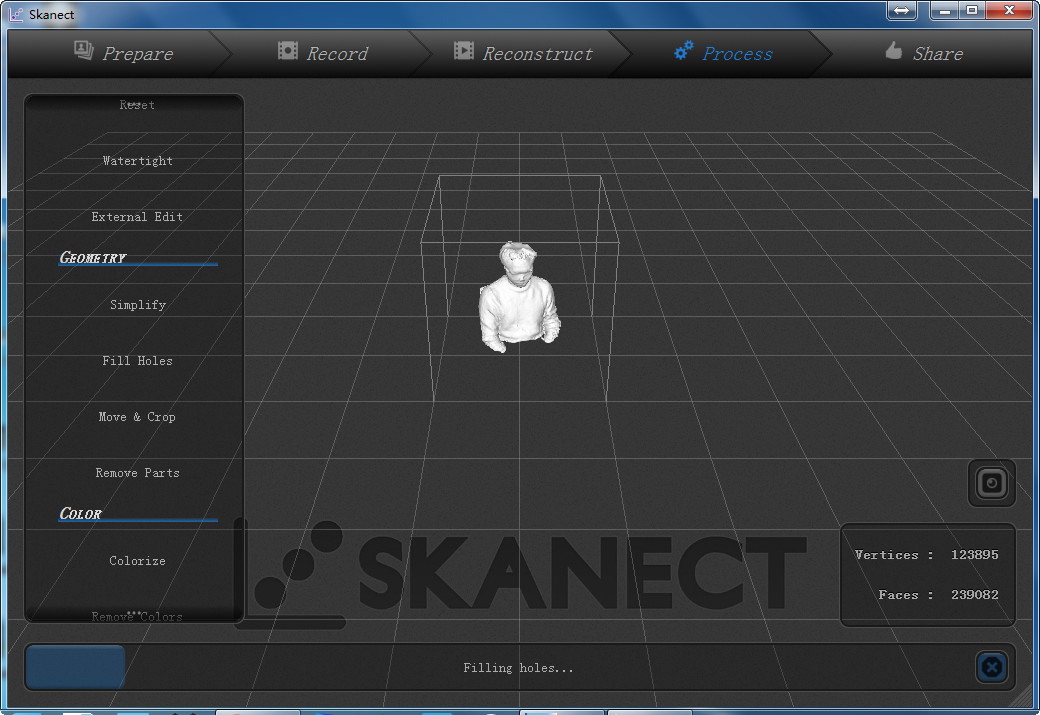
- Click on reconstruct, the model will reconstruct.

- Do some edit like filling the hole of model.
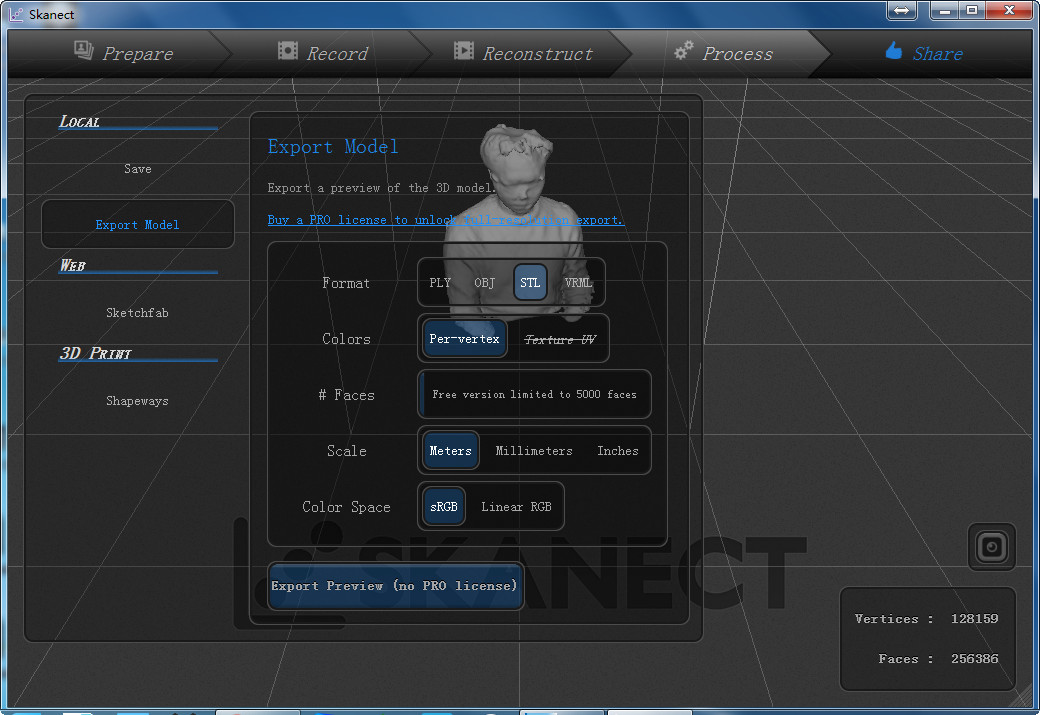
- Click on process, and click on export choose stl format.
- 2. Print
- Open an slice sofware, I use pango, add the file.

- Setting print parameters, and send the code to SD card.

- Print it.
- The model is not very precise. So who is the guy?
