Assignment 8

embedded programming
This week assignment was study ATtiny45 datasheet and programming earlier made PCB board with earlier made programmer.
I found out from datasheet that ATtiny45 is 8-bit low power AVR microcontroller and it have advanced RISC architecture. It is very robust with 100 000 write/erase cycles and it also have 4K bytes programmable internal flash memory. There is internal temperature sensor and internal calibrated oscillator. ATtiny have also on-chip debug system and its operating voltage is 1.8-5.5V. I learned from datasheet pin configurations, different modes of operations, counters and timers, electrical and performance characteristics, programming and couple code examples.
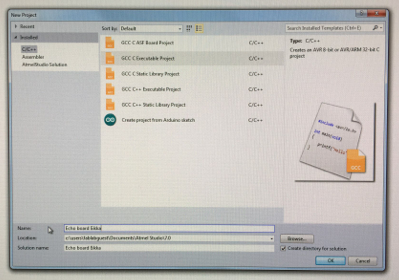
Then starting programing by learning to use Atmel Studio 7 which was installed to our lab computers. First task with it is program my hello world board with ready hello.ftdi.44.echo.c program which I loaded from this week schedule files. I need to use also FTDI cable so I get power to my hello world board because my programmer won´t offer power to board. Creating new project - New ->Project -> Executable project -> ATtiny 44A -> OK. I defined Chrystal frequency from Project - Project properties - Toolchain - Symbols and add F_CPU=2000000UL (2 MHz)
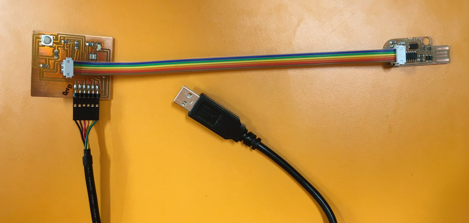
Programmer, Hello world board and cables
Next step was make my hello world board to do something. I decided to put its led light flashing and also control led by pressing boards button.
- First program make led light flashing
- Second one gets input from button and when button is pressed led turn on.
I have made couple programs earlier to arduino but lets say that I´m little bit rust in this area so It takes a while before I can say I´m comfortable with programming.
First program flashing led in two sequences, first is 0,02s and second 0,5s
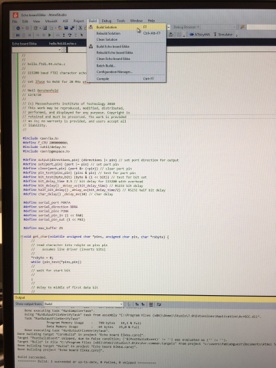
Code in Atmel Studio.
Creating new project in Atmel Studio
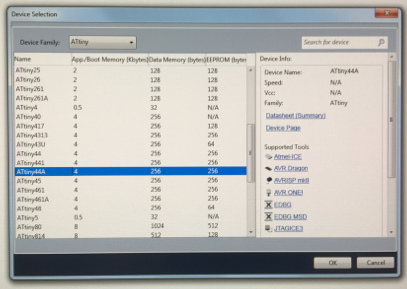
Selecting device in Atmel Studio
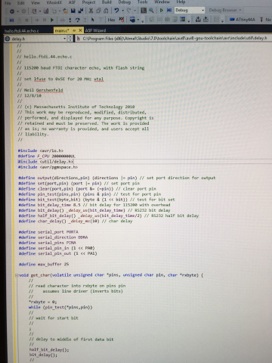
hello.ftdi.44.echo.c code
I opened hello.ftdi.44.echo.c code and defined crystal frequency in it after that I saved it. Next step was making a .hex code by using Atmel Studio Build -> Build solution tool.
Making code by Build solution tool.
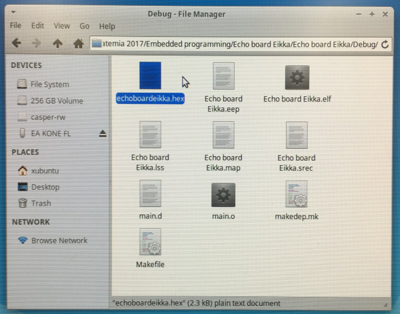
I saved builded code in a folder to my usb stick and then restarted computer with OS Xubuntu linux. In Xubuntu I opened terminal just like electronics production week and run next commands after connecting my helloworld board, programmer and FTDI cable to computer.
Command avrdude -p t44 -P usb -c usbtiny -U flash:w:echoboardeikka.hex will write .hex file to helloworld board memory. I renamed .hex file for easier to remind.
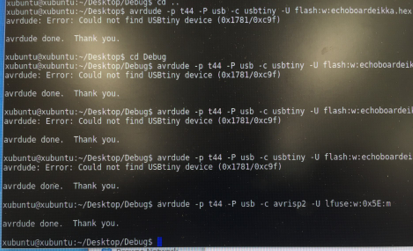
I renamed my .hex file to echoboardeikka.hex
Again I get error - could not find USBtiny device
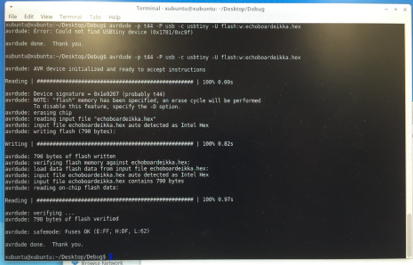
Again for some reason my programmer didn´t work so I changed it to Jani Ylioja´s programmer just make sure that my helloworld board is fine and then programming went well. Ok, there has been so many problems with my programmer that I leave it for waiting better time to find out what is wrong with it and continued with Jani´s programmer. I also set fuses with command avrdude -p t44 -P usb -c usbtiny -U lfuse:w:0x5E:m.
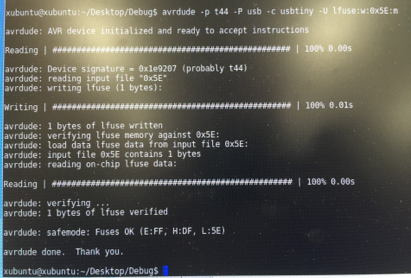
Programming done with Jani´s programmer
Checking fuses
Now programming is done and next I need to test my board and is it working so I changed to Windows OS and connected my board to computer with FTDI cable. Then I opened windows device controls and checked which port FTDI cable and my board is connected. I find out that correct port is COM4. Then I opened Putty terminal and connected to COM4 serial port. First I tried using default speed 9600 but it didn´t work so I change speed to 115200 and then it worked. I typed fablaboulu2017 and result is seen below.
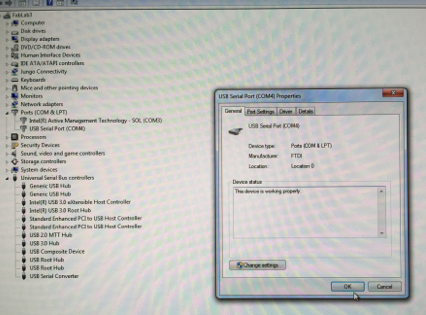
Finding connection port
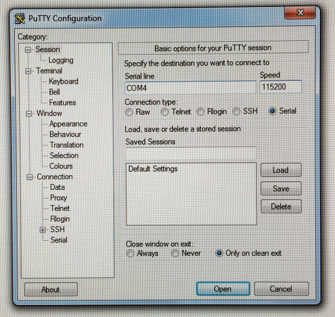
Connecting in Putty
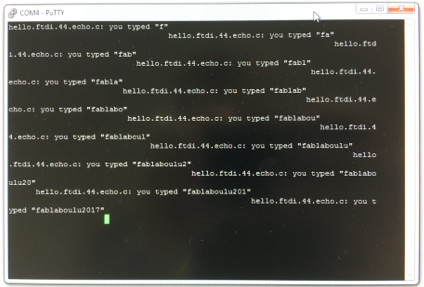
Testing my board and it worked.
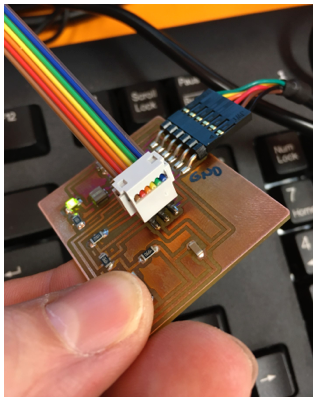
My board with green led and button under thumb
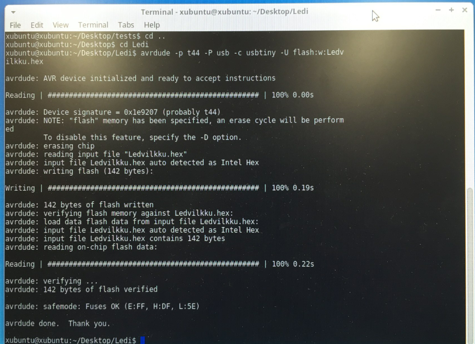
Installing ledvilkku program to board with Linux terminal.

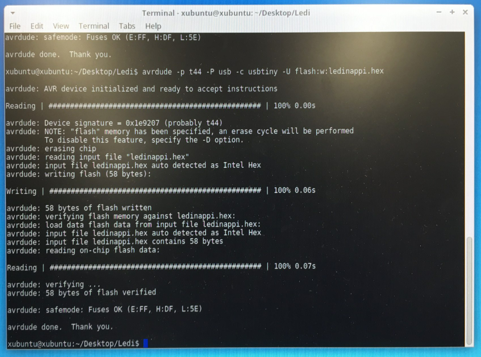
Installing lednappi program to board with Linux terminal.
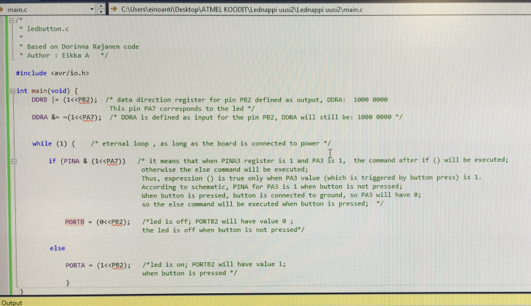
Program which reacts to button pressing and turn led on.
First I opened again Atmel Studio. My codes based on our lab staff Dorinna Rajanen codes. So I asked also Dorinna to help with code. I need just edit codes to be suitable to my board. There are couple thing I need to remember ATtiny44A have 8 pin port A (PORTA) and 4 pin port B (PORTB) then Pins are named PAX and PBX (X stands for pin number). For flashing led I need to define also my board crystal frequency and delay library. Then I just define in while loop which port is read and what happened and in which port depends on read value of input port. I checked ports in my board schematic and find out that input pin from button is PA7 and output pin for led is PB2. Then I just wrote codes which are shown below. Then I builded code just like with hello.ftdi.44.echo.c and get .hex file which I programmed to my board. Program changes also other PBX port values but this program works because there is no other PBX pins connected.
Conclusion:
There is no questions about this assignment or coding but I want to learn later more about designing and making more complex codes.
Files: LEDVILKKU.c, LEDNAPPI.c