MTM machine design
Group members
Eamon (Nim) Durey
Liam Maskey

Introduction
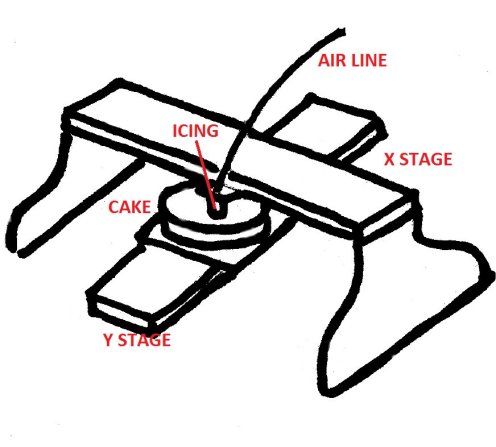
Our design for the MTM project is a machine that will ice a message onto a cake - any cake and any message. The machine is designed so that the cake owner can simply a type a message into a computer terminal, hit 'ice' and the expressed sentiments will be transferred from screen to cake. The image below gives an idea of what the final design will look like. There will be two axes of freedom, X and Y, and a pnuematic syringe will operate as the icing dispenser.
The work tasks were divided as follows
- Initial design, manufacture and assembly of axes : Nim and Liam
- Construction of final unit and testing : Nim
- Electronics and firmware : Liam
- Documentation: Nim and Liam
Initial build
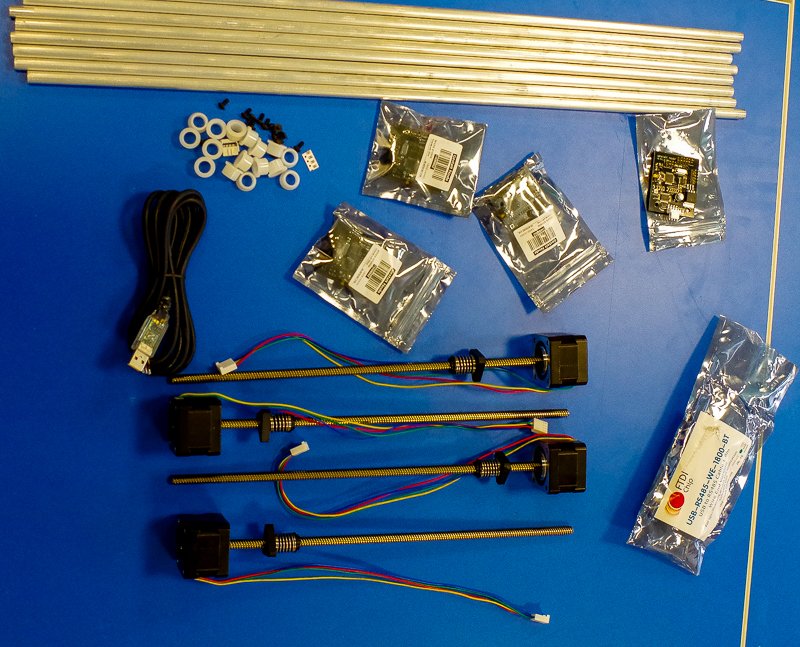
The kit of parts for the MTM assignment was opened and the parts check against the required inventory.
Next we downloaded the drawings for the cardboard drive stages from here. The drawings were viewed in LibreCAD to check they looked ok before being imported into Inkscape prior to laser cutting. Once loaded into Inkscape it was obvious the drawing scale wasn't correct. The original drawing dimensions were in inches while Inkscape imports dxf's in mm. There were also cut lines (blue) missing from the dxf.

Various Cad tools were tried in order to import the dxf and save it as an svg with no success until we tried QCAD. QCAD opened the dxf and allowed us to save it as an svg file which was then opened in Inkscape.

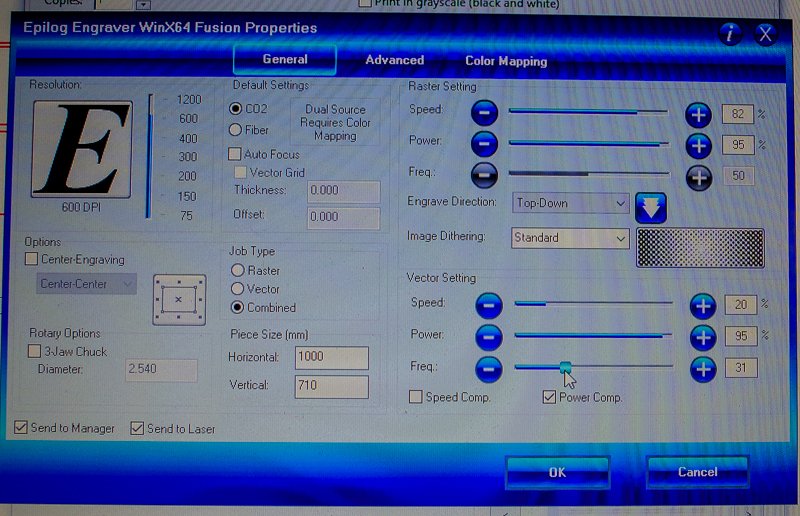
The Inkscape drawing was prepared for Laser cutting/engraving by changing the colour of the blue cut lines to black (000000ff) and their width to 0.01mm. The red drawing lines, indicating the folds, were left as is with the idea the laser cutter would engrave them making it easier to fold. The Inkscape file was saved as a pdf and loaded to the laser cutter where it was cut out.
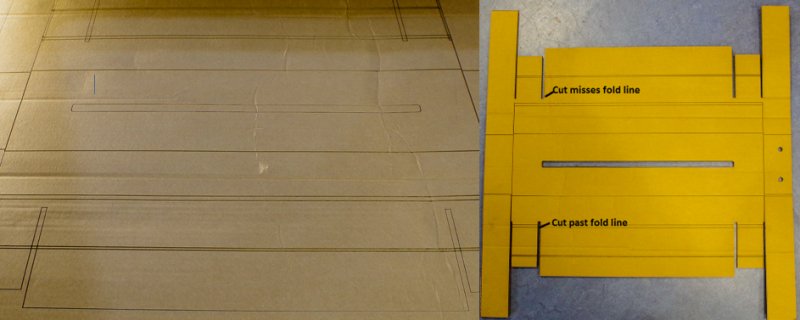
After laser cutting it was noticed that some of the cut lines were misplaced with respect to the fold lines. We discovered that within Inkscape the cut vectors had been offset a little and this caused the cut and fold lines not to match up. This was easily fixed by manually cutting the lines.
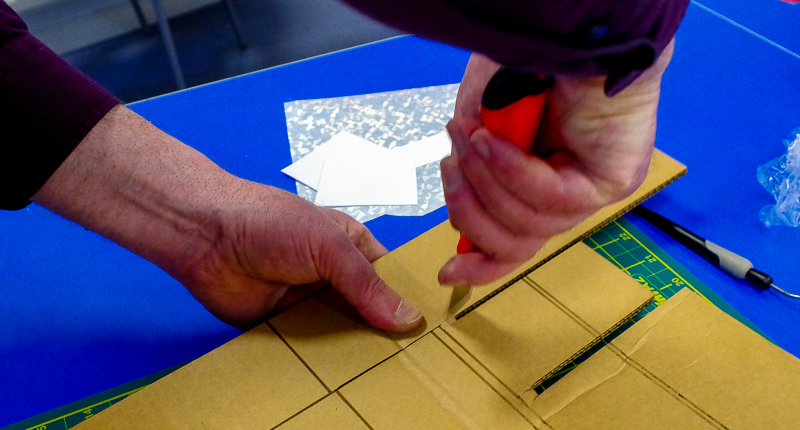
Once the parts were cut we began folding them into shape. This became difficult as the carboard used was a lot thicker than that specified, closer to 5.5mm than 3.75mm. We decided to move to a lighter cardboard but the only type available was 2.5mm and intial cuts of this indicated it would be too light weight.
Machine design
Nim designed a new stage and support frame in Freecad. This was cut from 3mm MDF on the laser cutter.
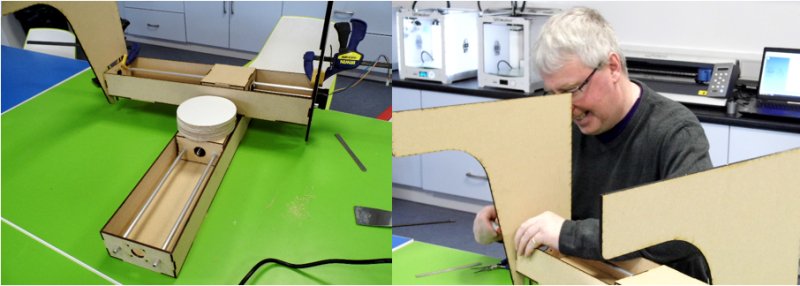
Once everything was assembled we tested that the stages moved freely before trying to control the machine with the stepper motors. For the end effector we decided to use a pnuematic syringe which would be powered by compressed air. This was connected to the X axis stage and its height in the Z direction could be adjusted with a clamping screw.
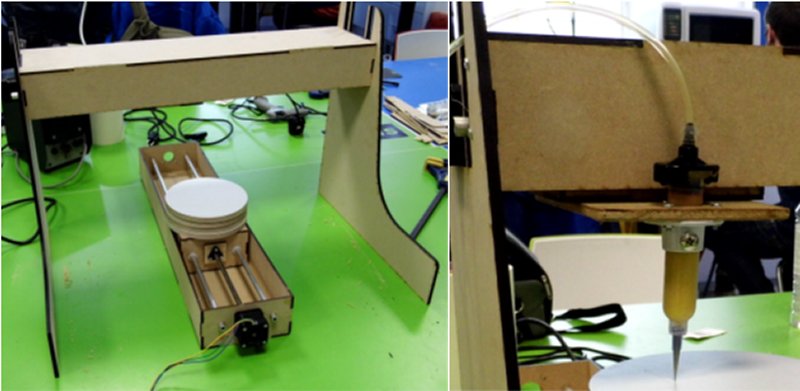
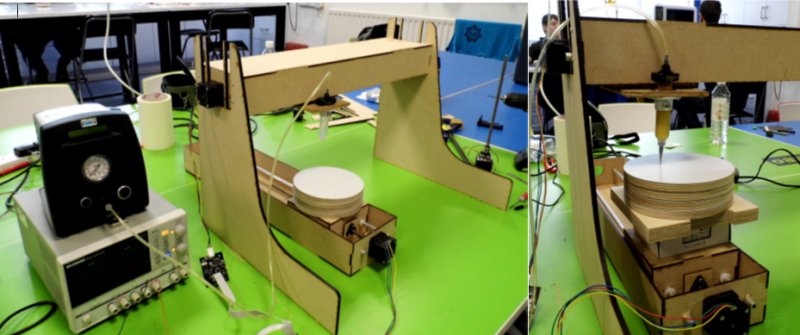
After checking the stages moved correctly the stepper motors were connected to the X and Y nodes, the syringe filled with yellow icing and the power supply and air supply turned on.
Python code
Liam took an existing Python script that controlled 2 stages - X and Y - and modified it to read in X and Y coordinates from a csv file. The input file causes the X and Y stages to drive to a set of cartesian coordinates and in the process draws a square on the target material. We weren't able to use a Gestalt node to control the dispensing of the icing from the syringe as this would have required the node firmware source code to be modified and there wasn't the time to do this. Instead the dispensing controller- OKI DX-200 - was manually operated from a switch that when pressed caused the syringe to dispense icing.
Future development
- The pneumatic syringe that dispensed the icing was controlled manually, by pressing a switch. For a future project this switch could be replace by a relay contact which would then be operated automatically under software control.
- In our original design the syringe was held in its vertical positon above the cake by a locking bolt. To adjust the vertical position, the bolt was loosened and the syringe then moved to a vertical position before locking it in place by tightening the bolt. A better arrangement would be to have the Z stage controlled by a stepper motor allowing the user to adjust the icing syringe height without having to unscrew anything.
- The pattern that was iced on the cake was contained in a csv file which was edited in a text editor to produce the correct positioning coordinates. In the future it would be good if the icing pattern could be drawn in Inkscape or some other graphics software and the positioning csv file created from this by software.