Interface & Application Programming
This weeks assignment was to write an application that interfaces with an input &/or output device earlier made.
There are many programming languages that can be used to accomplish this. I chose to learn and work with Processing.
Processing is an interesting java based open source computer programming language and IDE built to promote software literacy within the visual arts, and visual literacy within technology-related fields.
A Processing program is called a 'sketch' and sketches are stored in a 'sketchbook'. A sketchbook is a folder that is used as the default location for saving all the done projects.
So I read through some tutorials and watched some videos too and within no time I was ready for start.
Interestingly, in Processing environment you can bundle your sketch into an application with just one click. File → Export Application.This saves your current sketch as an application for Windows, Mac OS X, or Linux depending on which operating system you're exporting from.
I used the arduino for serial communication with my processing interface. The first programs I wrote were to enable commands from Arduino to processing.
.PNG)
After this I wrote another code to enable communication from processing to the arduino.
.PNG)
Download files
Processing sketch_a
Arduino sketch_a
Processing sketch_b
Arduino sketch_b
ControlP5
I got to learn about the ControlP5. This is a GUI library written by Andreas Schlegel for Processing programming environment.
I installed the library from the Processing IDE, using the Library Manager from the menu. Sketch → Import Library → Add Library. Then I searched for ControlP5 and installed it.
The library is simpler to learn as it examples located inside the examples/controllers folder. This example can form a good basis to start familiarizing with the platform.
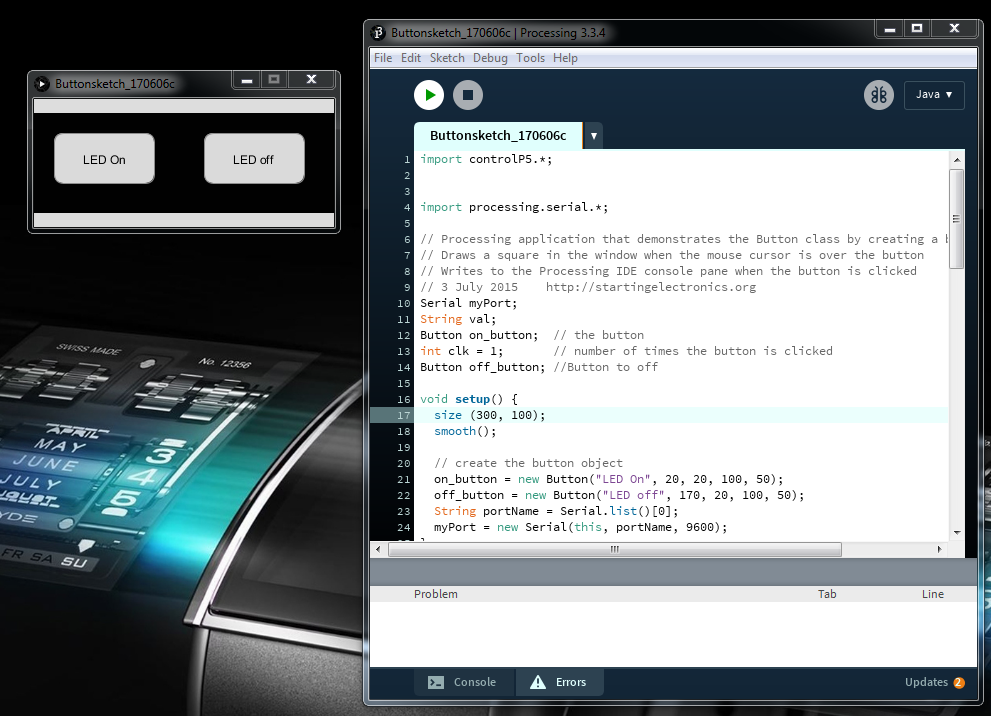
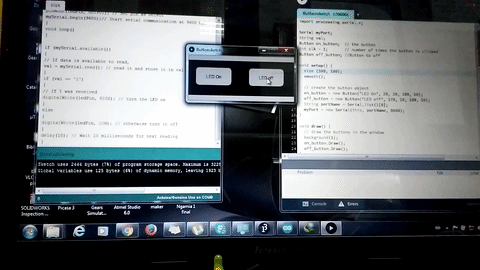
So I moved on to create an app that can turn an LED On and Off using processing
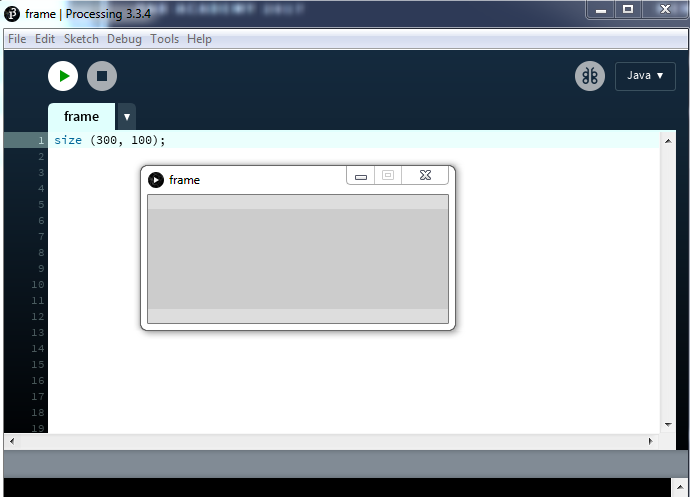
To design a simple frame, I wrote the following code:
                                    void setup() {
                                    size(400, 400);
                                    }
I used the following simple code to create the buttons, lebel them and specify their positions
                                    on_button = new Button("LED On", 20, 20, 100, 50);
                                    off_button = new Button("LED off", 170, 20, 100, 50);
I used the mousePressed variable on the button functions to determine when my signal is sent to put the LED ON and OFF. This way, i can once I click on the button the LED's state will be changed.
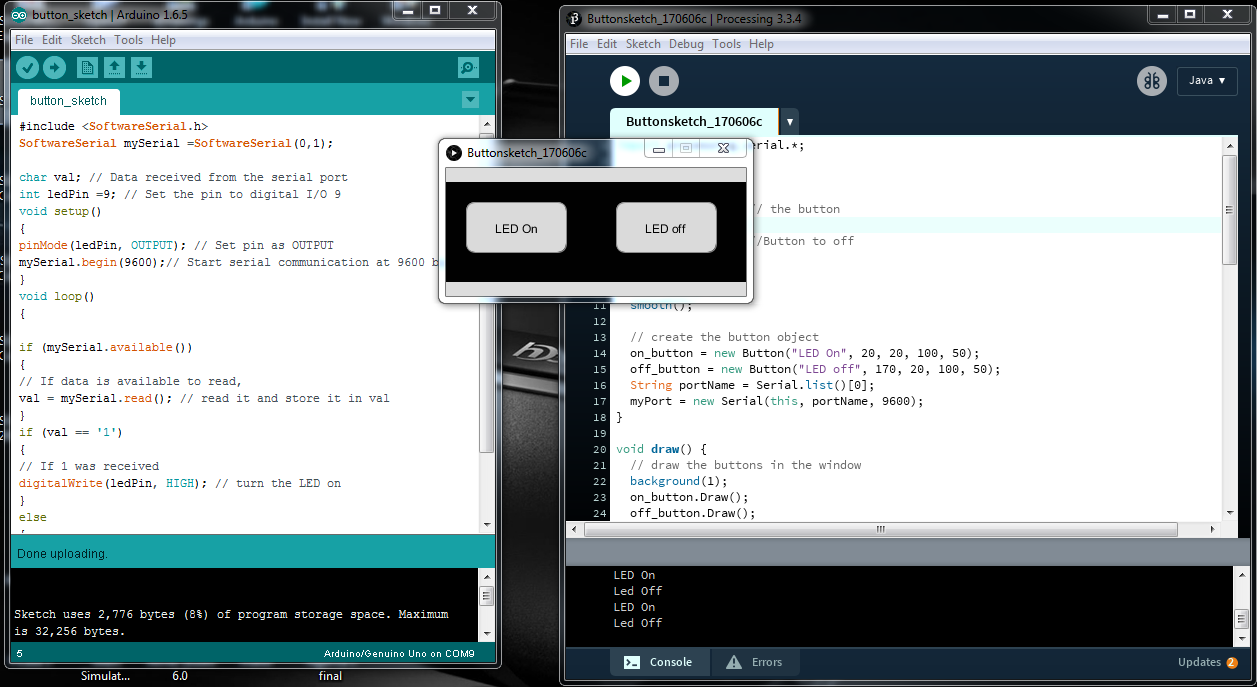
The code on Arduino IDE was mostly to facilitate serial communication with the Procesing IDE at 9600 baud rate
Download files
Processing button_sketch
Arduino button_sketch
After a successful process, i sort to find a way of loading the arduino program to my echo hello world board. I learnt that arduino IDE did not have a support for the ATtiny. So I followed this tutorial on 42 Bots in order to understand the basics of the process. Teo Cher Kok also did an indepth explanation of the same concept during his week 6 assignment and these were very handy in accomplishing the task.
Part of that process was to install additional support for ATtiny MCU in the arduino IDE. This support does not readily come with the Arduino IDE, but thanks to the works of David Mellis the support can be downloaded at High-Low Tech group of MIT.
After downloading the file, I realised that it couldnt work on my IDE. I checked through the file and found out that it had been designed for arduino version 1.6.x. My IDE was 1.8.5 so I downloaded 1.6.5 and that worked very well.
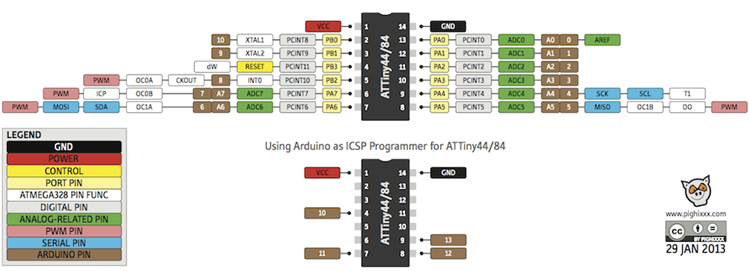
Here is the pinout map i used