13 COMPOSITES
Index
- WEEK TASK : For the week´s assignment the goal is : to learn about Composites.
- DataSheet Time : Learning How to read Data Technical and Safety Detail Sheets.
- Design Moulds I. How to Design a Mould following an OpenScad Turorial.
- Design Moulds II. How to use Fusion 360º.
- Mould Fabrication: Learning How to use Aspire for prepare files.
- Mould fabrication II : Learning How to use the CNC machine.
- BOM: Learning How to buy materials needed.
- Prototype Coupons.
- The Real Process.
- Results.
- Files
- My Week Problems Solved
- Things I Learned
- My Week Conclusions
- My Final Project
| HAVE YOU | TASK COMPLETED |
|---|---|
| Read the Technical Datasheet for Materials Used | YES |
| Read the medical Safety DataSheet for Materials Used | YES |
| Design a mould and | YES |
| Included your design files and ‘hero shot’ photos of the mould and the final object | YES |
WEEK TASK
This week the goal is learn about composites, i haven´t experience so all is new for me. Always when don´t know nothing about the class view the class recorded at the weekend, but for this practice, we have a lot things new my instructor suggested me to see the Neil´s class again on friday morning for clear things and to add new words to my FabAcademy Glossary.
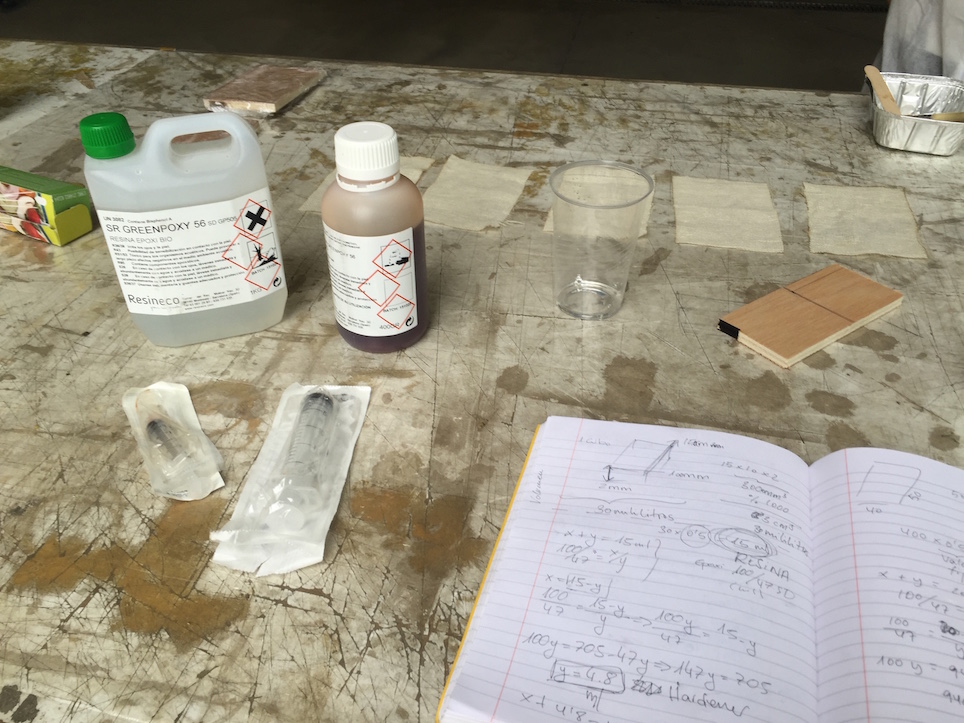
After this i was studing the Technical and medical Datasheet for Materials will be use later in our case SR GreenPoxy 56:
1. Technical Data Sheet
Things learned :
2.Safety Data Sheet
Things learned : As all Safety Datasheets this begin with the chemical components, show hazard pictograms, international rules for classificated this information and as i studied at my first degree CDU and other precoordinated and postcoordinated languages I love read and identify abstraction for define things, in our case such as skin irritation or allergic...may be when finished the first part of the process i had a bit of H317 or H315 hahahaha so here are some things i learned.
For Design my mould i decided use OpenScad for continue practice with open softwares and following a tutorial from Kit Wallace about computed surface construction i made my model step by step. Here you can see the project Kit described : http://kitwallace.tumblr.com/tagged/openscad and there you will to find some usefull tutorial for quick knowledges about the tool.
1. I wrote a pair of main functions, "plane" for remmove level of brackets and "inverse function" for reverse the elements of an array, for my values:

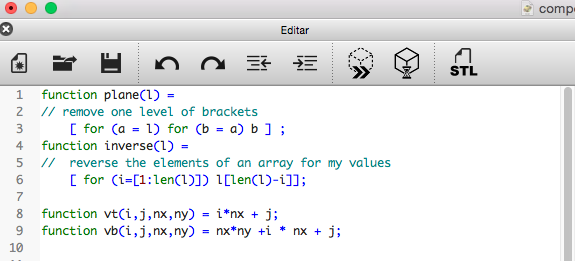
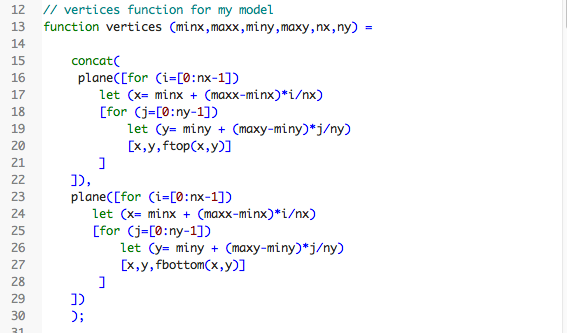
2. Later, i must to write a function for the "vertices with a bucle, as many code tools we use "for" sending the minimum and maximun values of them based in ftop and ftbotton functions that will to draw my final model.
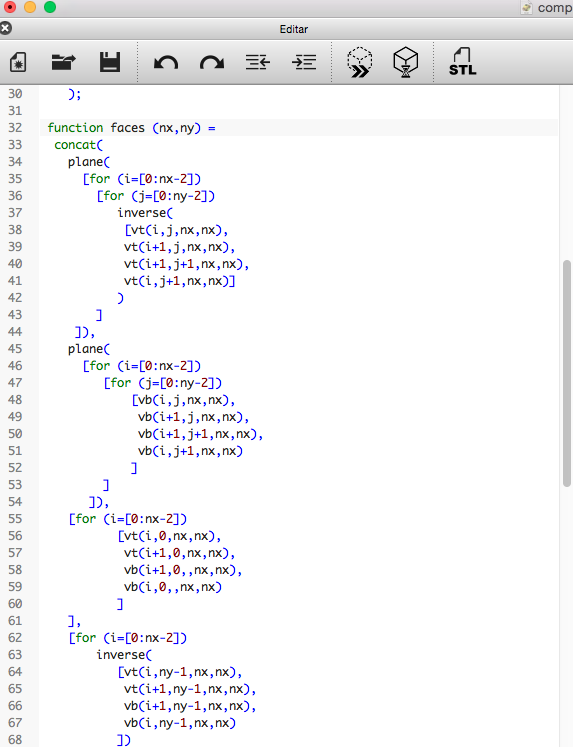
3. Another important "function faces" in relation with firts function plane and inverse.
4. For finished i made 3 modules. First "polySurface" where applied the geometry choosed, in my case a polyedrhon.

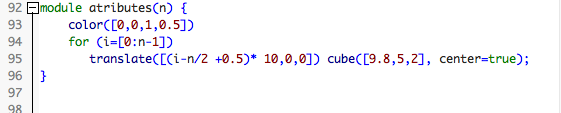
6. Other for attributes such as color and position at the plane:


7. For Finished i added my real function

8. Fo export my design i made a Previsualization first for debug things and rendered it for export as binary .stl :

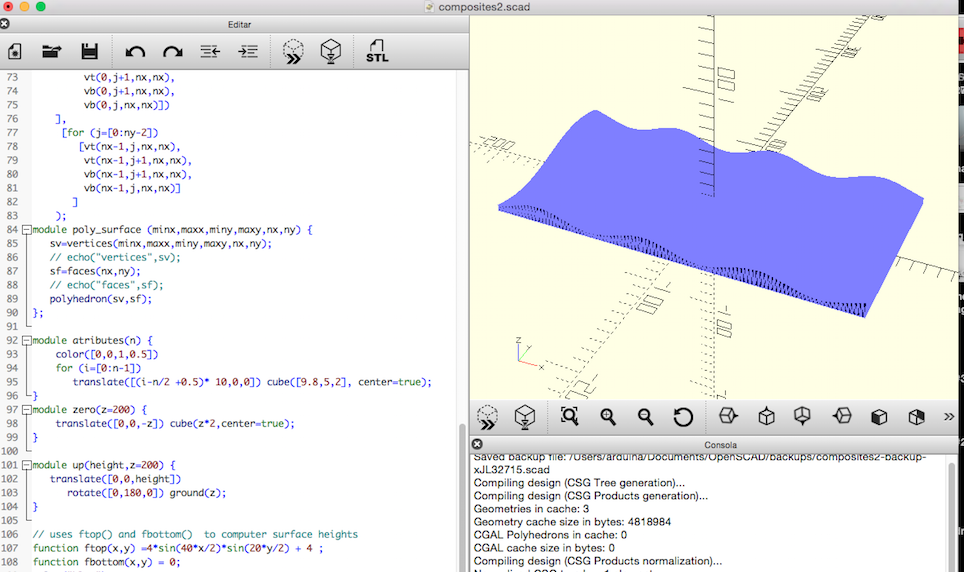
9. An the render for export the model :
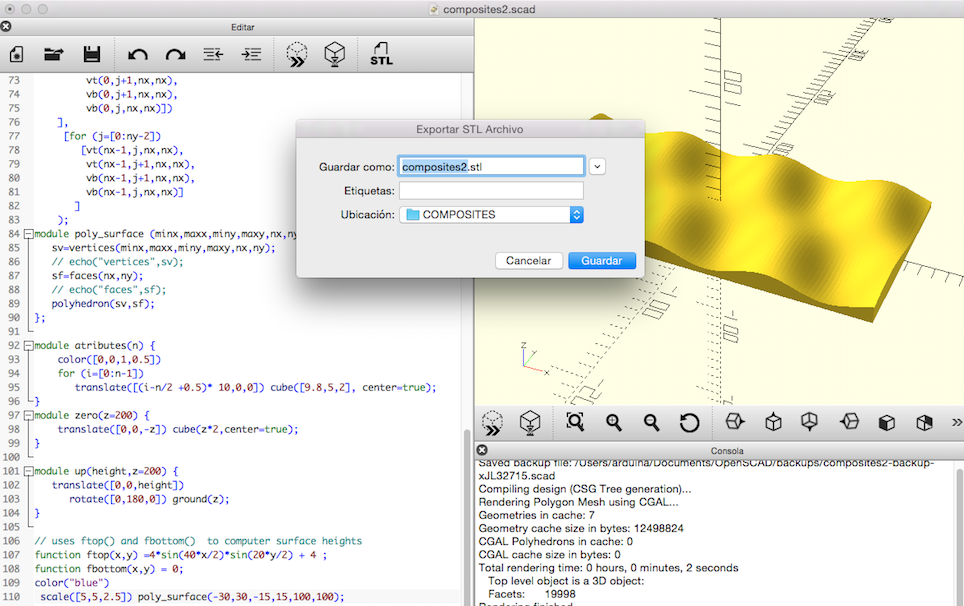
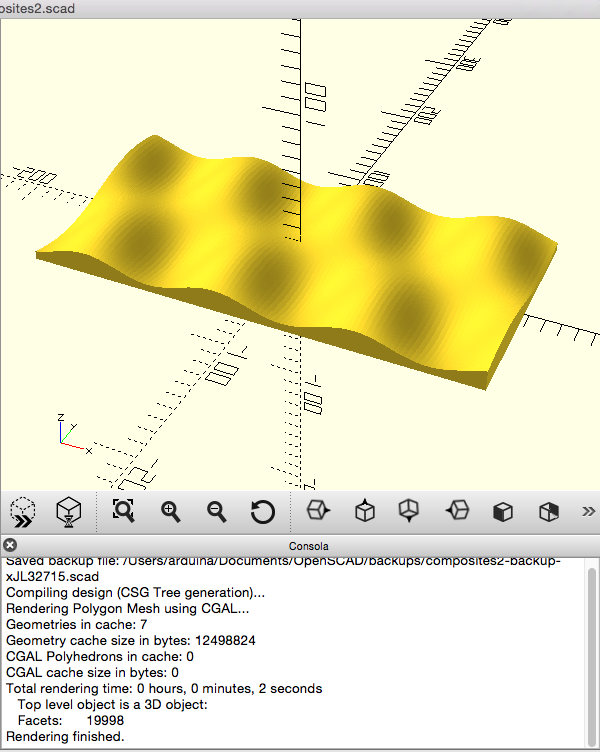
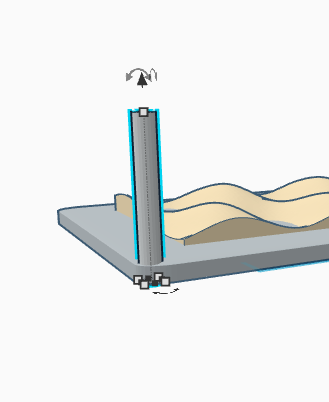
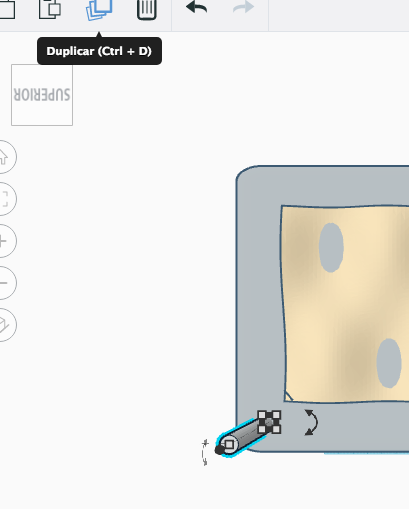
Finally i decided added a the base with holes for test how works the mill at CNC making them in this material.
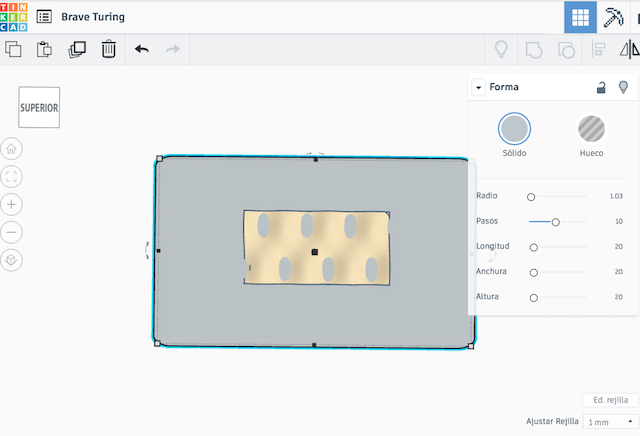
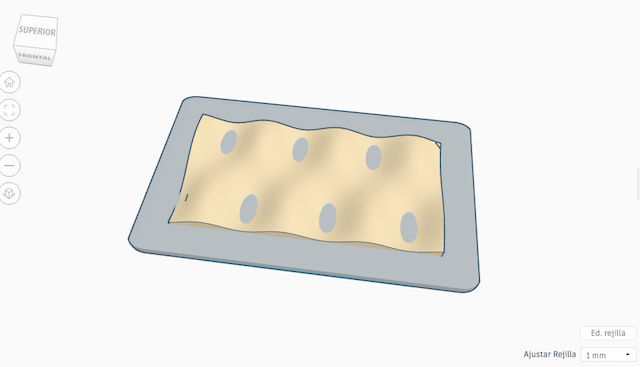
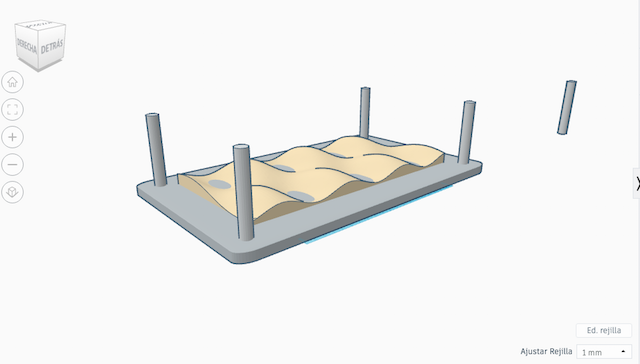
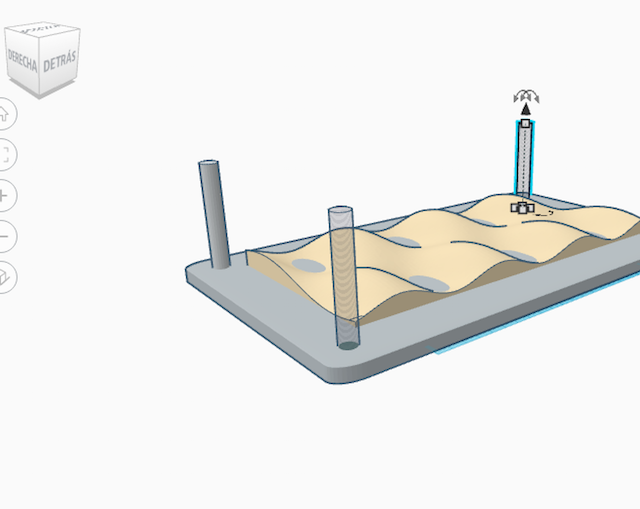
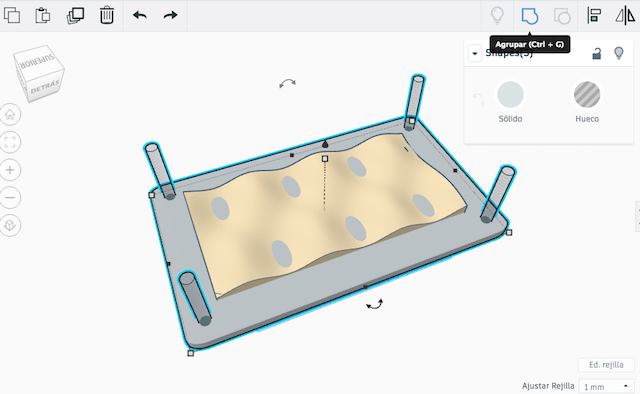
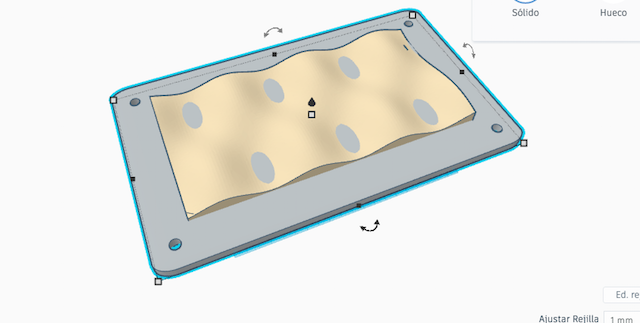
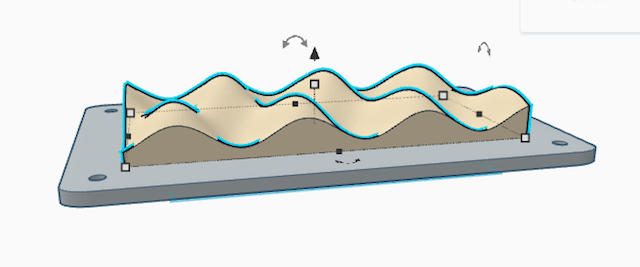
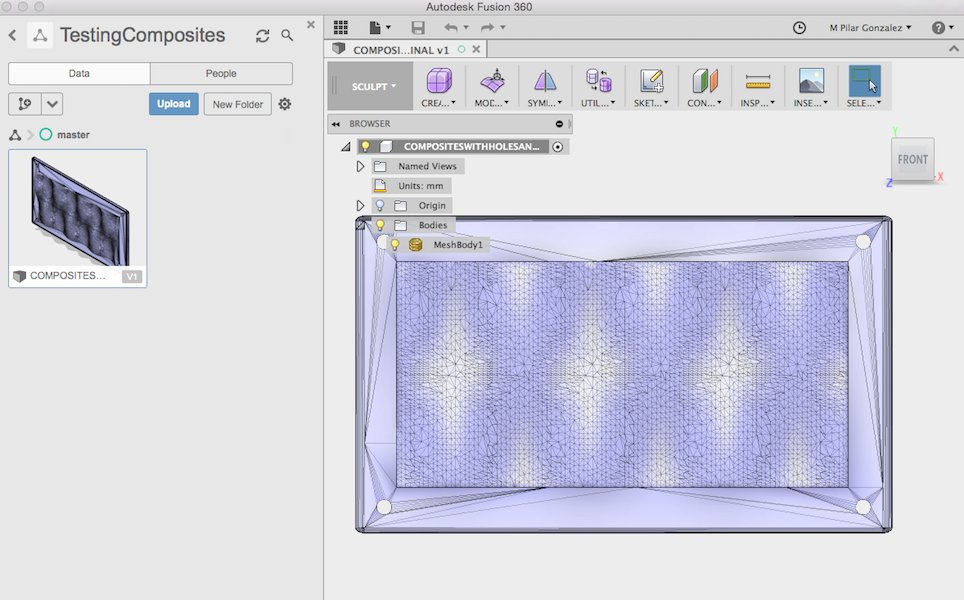
For finnish i test the work at Fusion 360 where i learned one thing new, convert a mesh into a solid surface for work with it :
As last week i posted my model at SketchFab, here are the links, take a look :
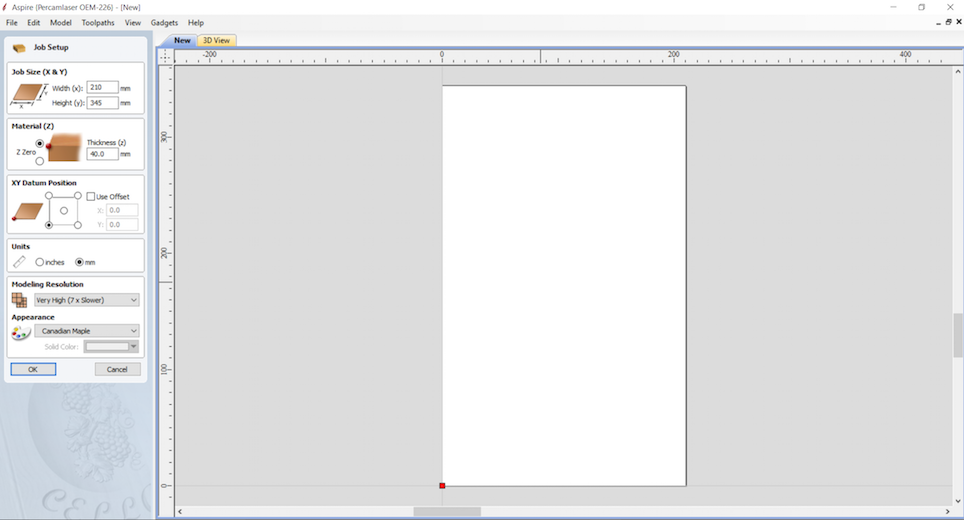
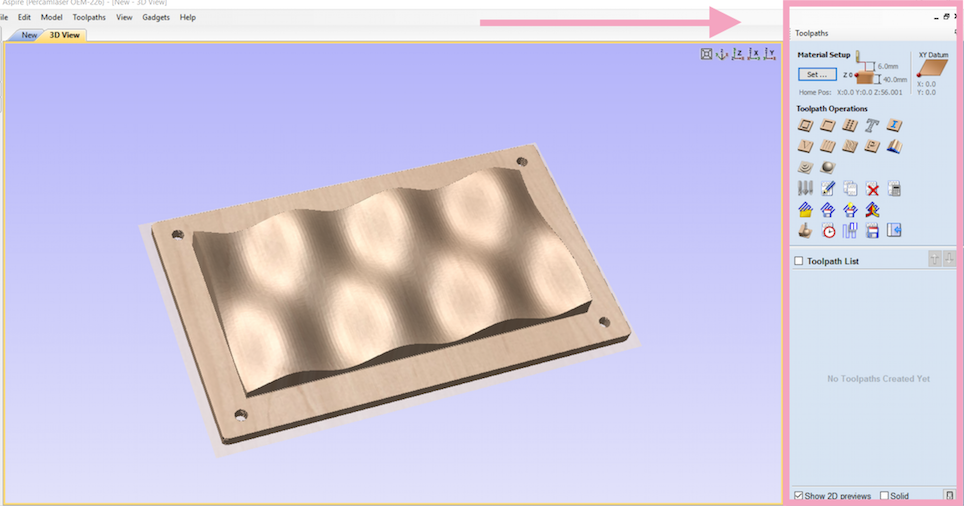
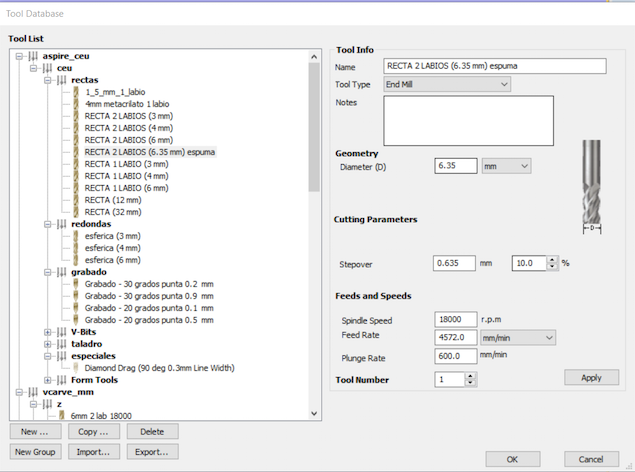
The Process for milled the mould was easy and without problems. We have at CEU Fablab the ShopBot and the TECCAM so i use the last one with Aspire Software for prepare my Foam Mould, using 2 lips mill with 6.35mm.
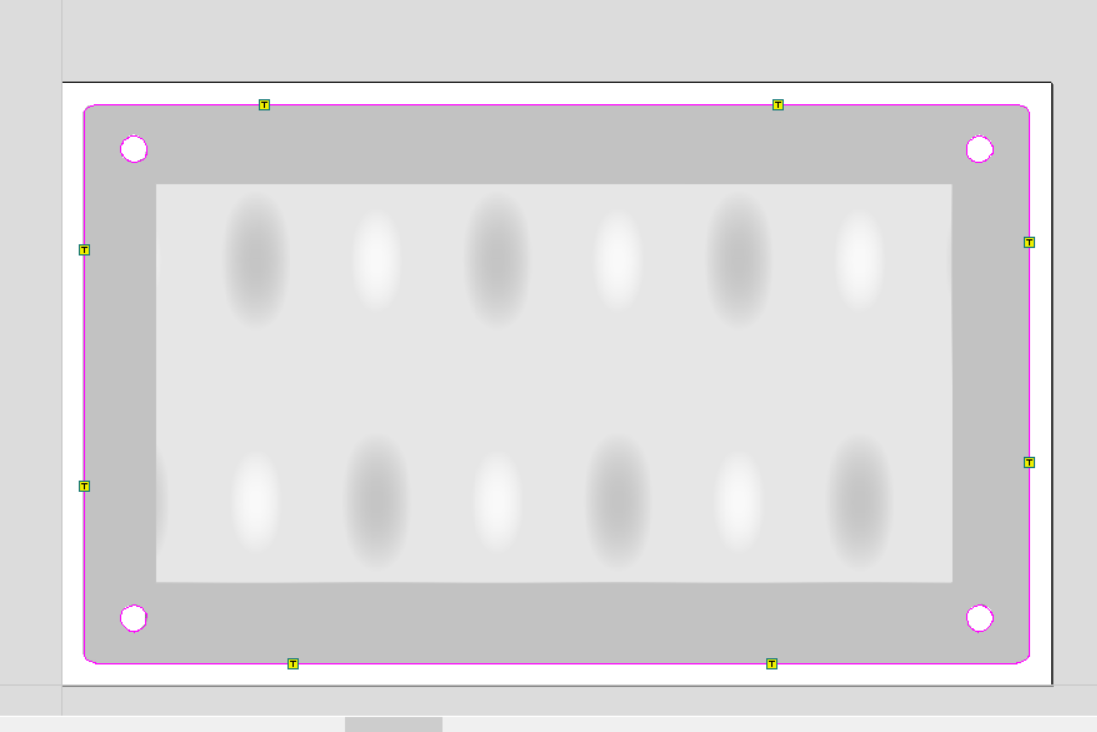
1. Prepared the attributes for work with my model adjusting the size and thickness about my material :
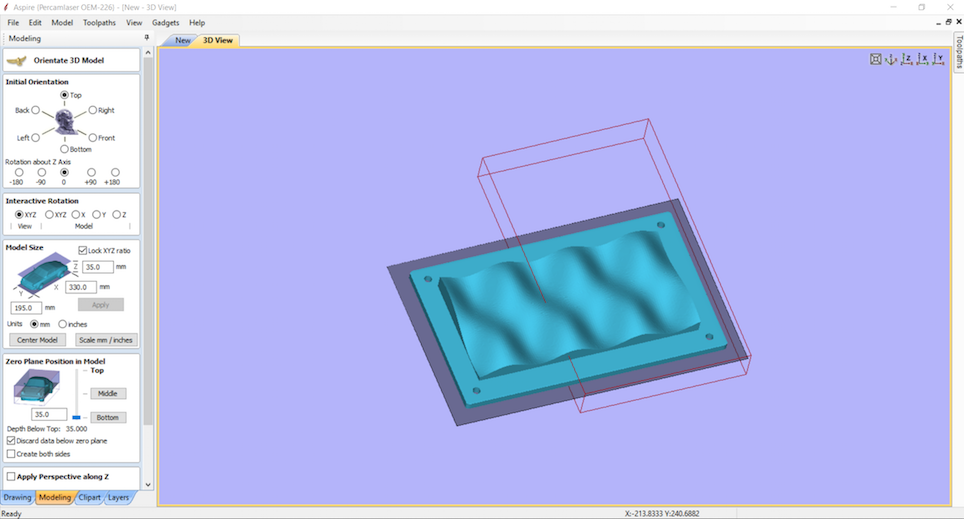
2. Imported my model and center it at the piece of my material putting at the botton and the ZAxis to 0:

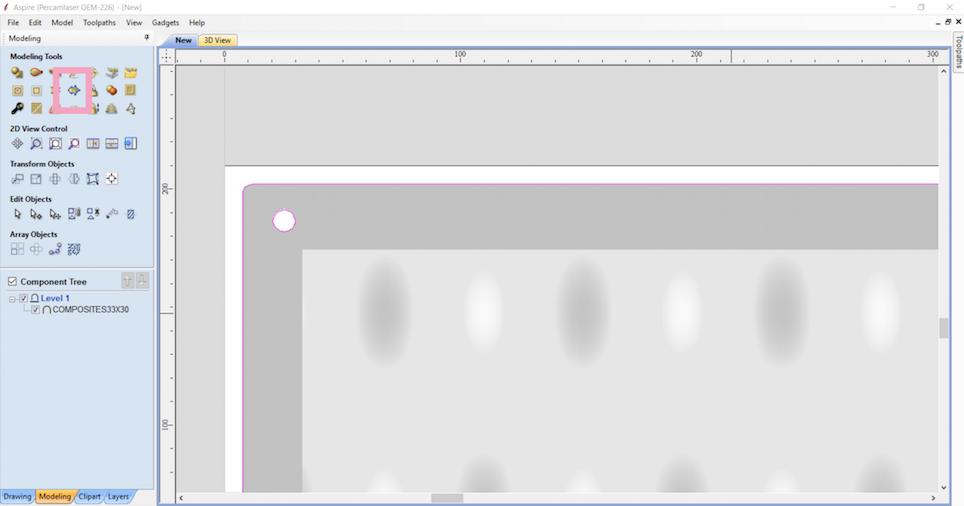
3. Another important thing is make the boundary tool :

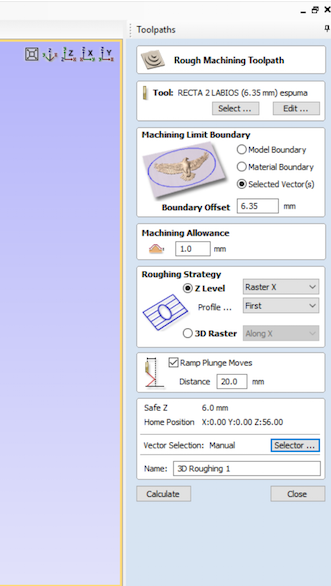
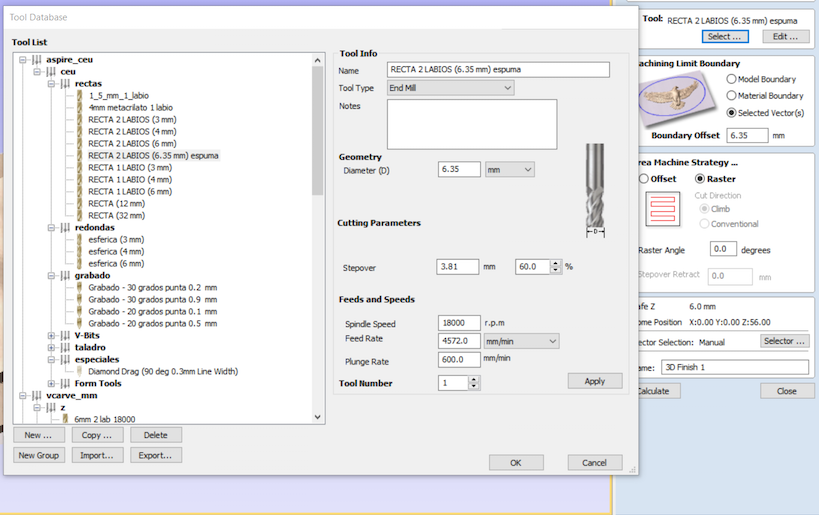
6. Ready for make the ToolPaths, for begin i made the 1st "Rough Machining Toolpath" :
Selecting the appropiated Mill for my Material, Vector´s selected with a boundary offset with the same diameter of our mill, 6.35mm, a 1.0 mm of machining allowance, Z level for roughing strategy and a distance for ramp pluges moves about 20.0 mm. For finish i renamed the toolpath with the name CUT1.
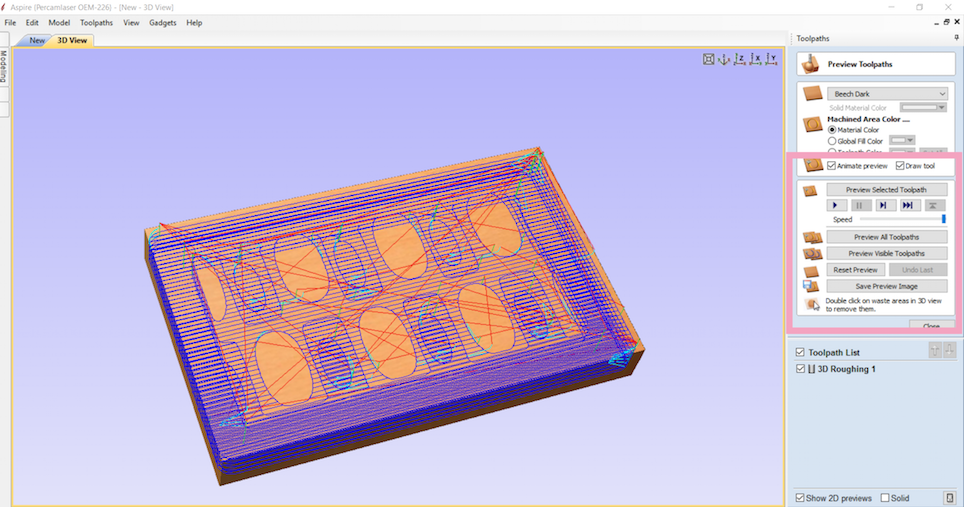
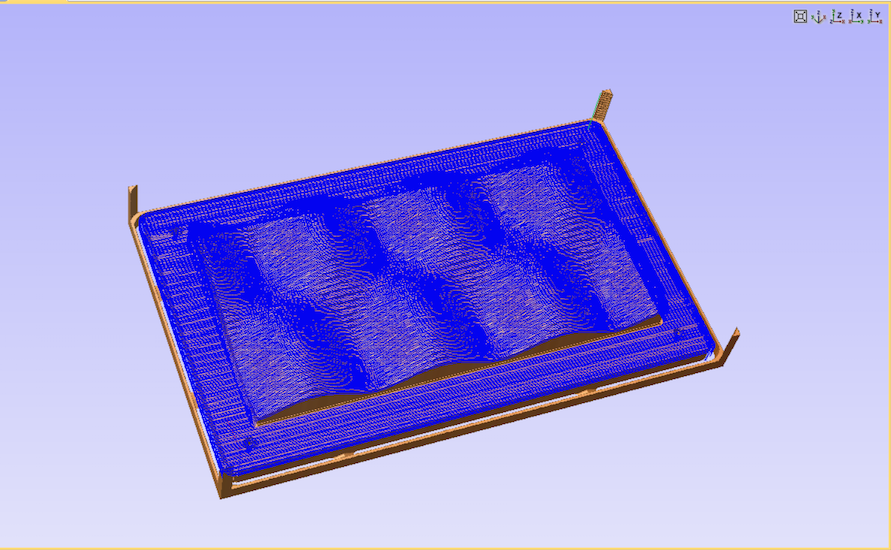
7.For finish i previsualized the Routes tha machine will do for check things
8. 2nd toolPath was "2D Profile so i selected again the mill at Machine Vectors > i selected outlines and climb and change things at Tabs adding some for my design :
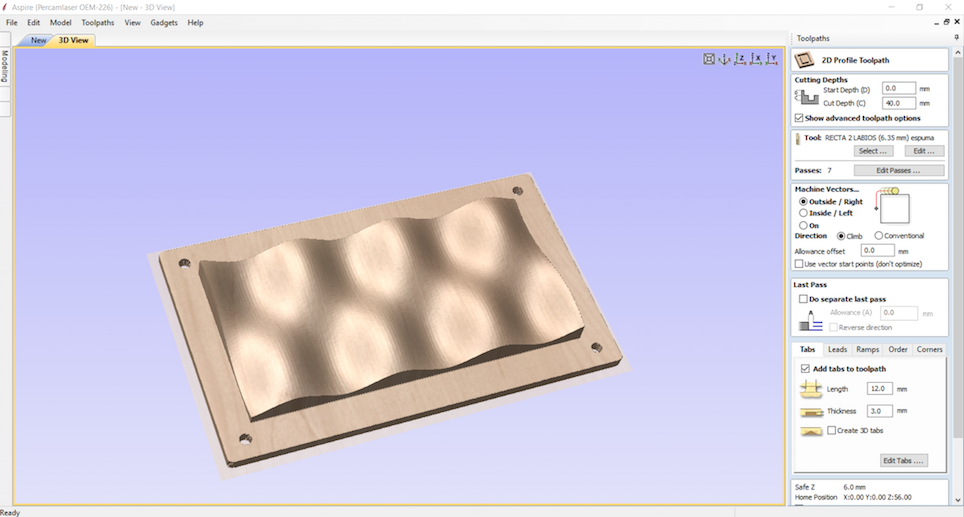
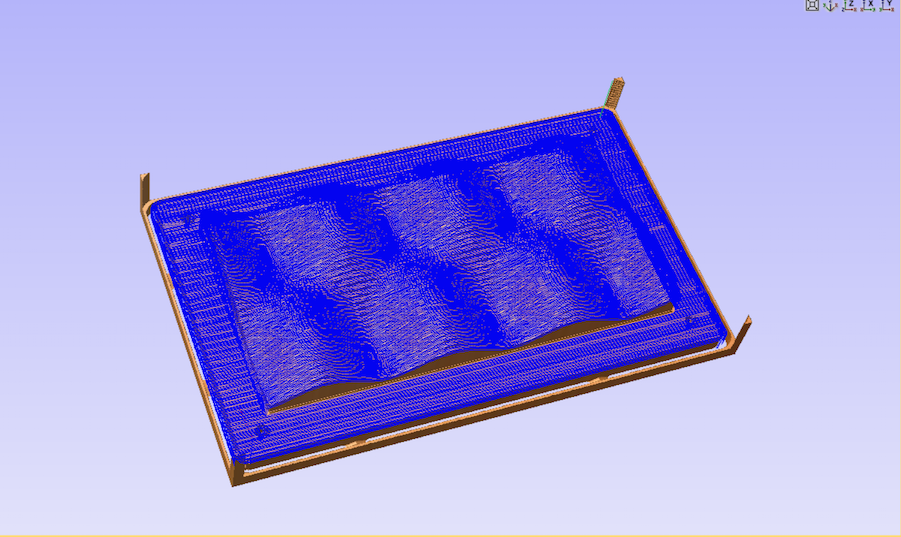
9.For Finished i made the 3rd Toolpath
When renamed the last one i made a preview about all toolpaths and observe that my model present strange things, i had a mistake with the stepOver for mill.
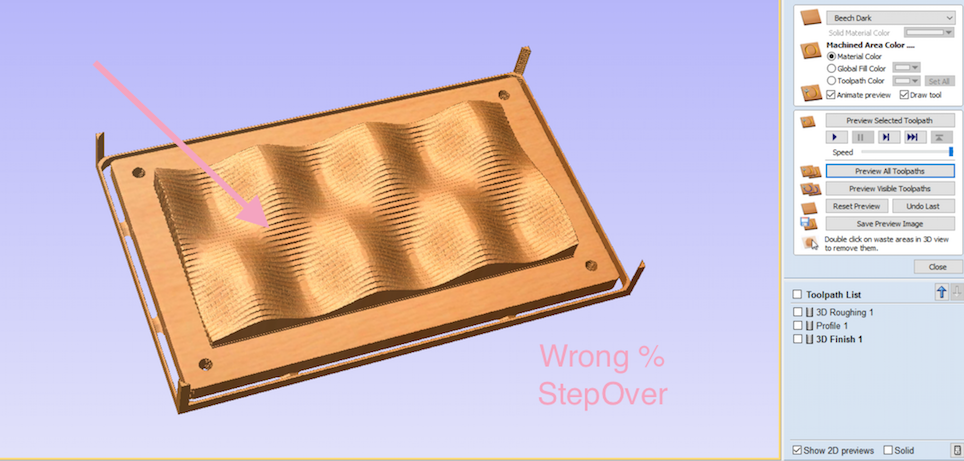
The StepOver value was at 70% so i changed it to 10% and repeat the previsualization so after this i had the 3 toolpaths for send to the CNC.
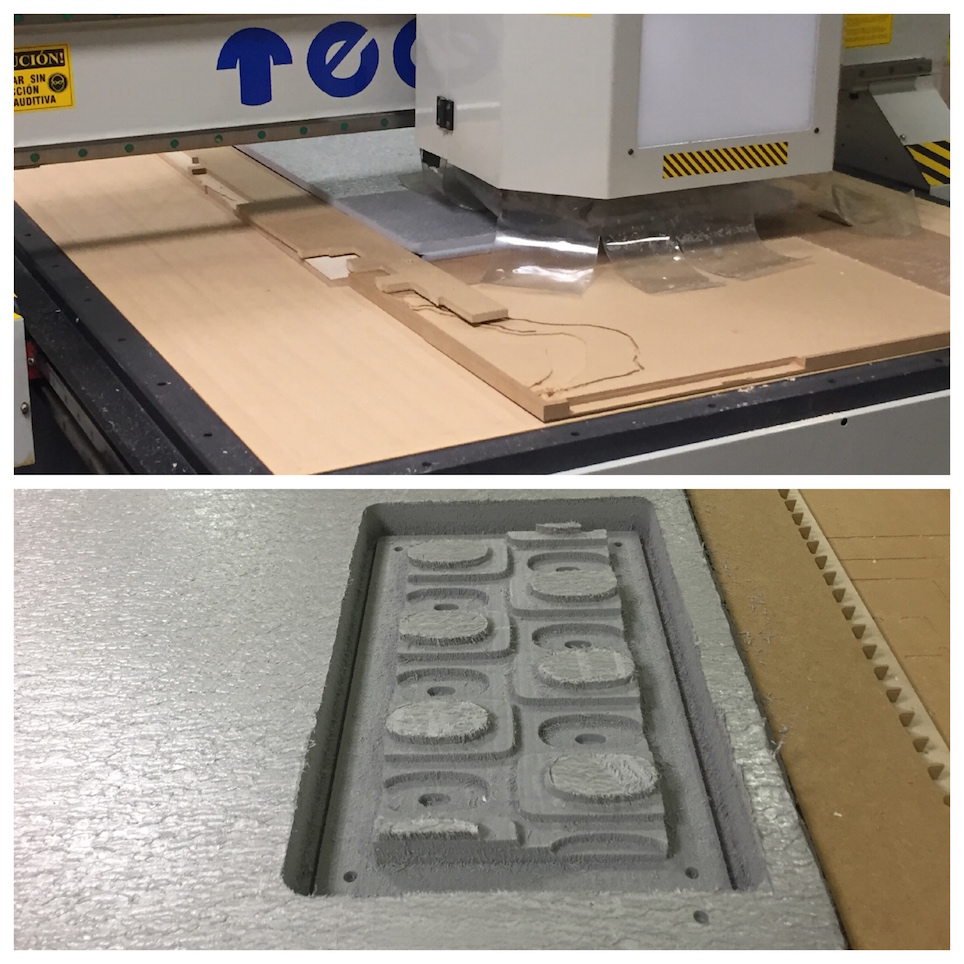
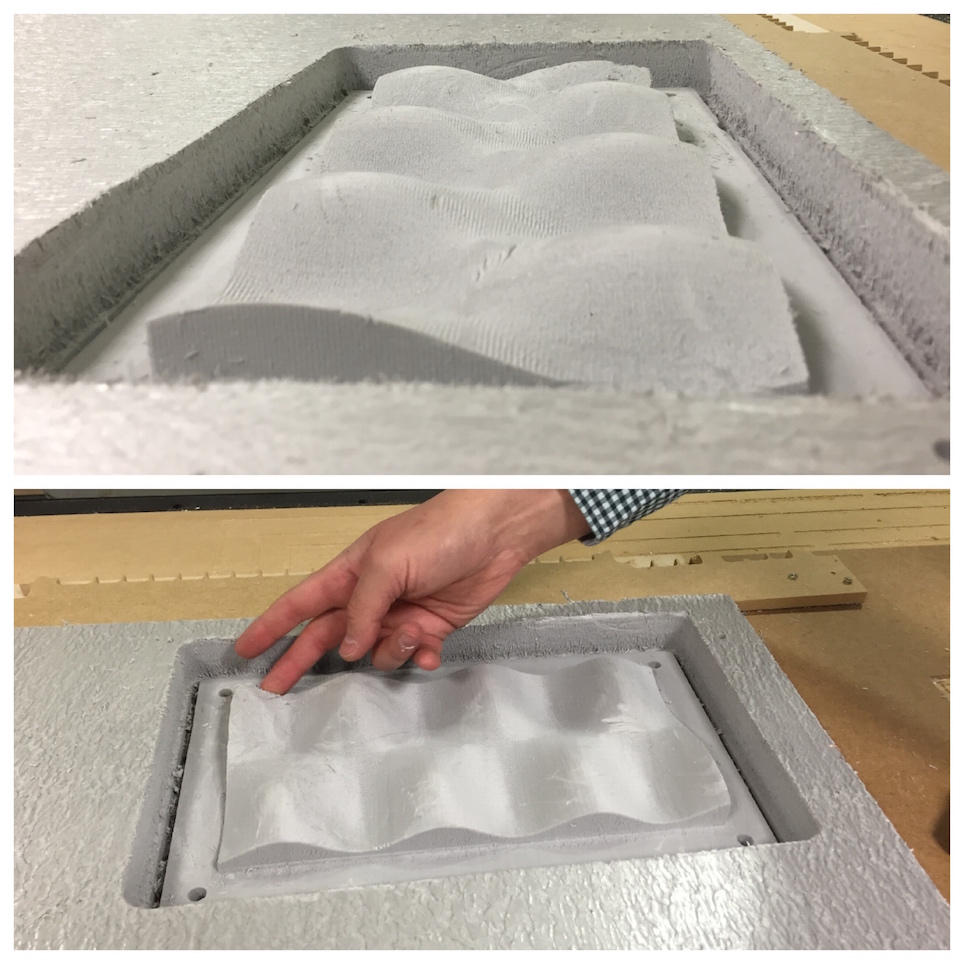
Duration Time for all process was about 2 hours and half, as you can see at pic and video was without big problems, but at the finish toolpath, the mill made extrange thing nothing important, so this process was a success for me.
Composites from Pilu Caballero on Vimeo.
Composites II from Pilu Caballero on Vimeo.
Composites III from Pilu Caballero on Vimeo.
After this i was ready for buy the rest of materials to the "Fablab´s store" , here is the BOM for make the prototype coupons and all things for later make my design.
COUPONS
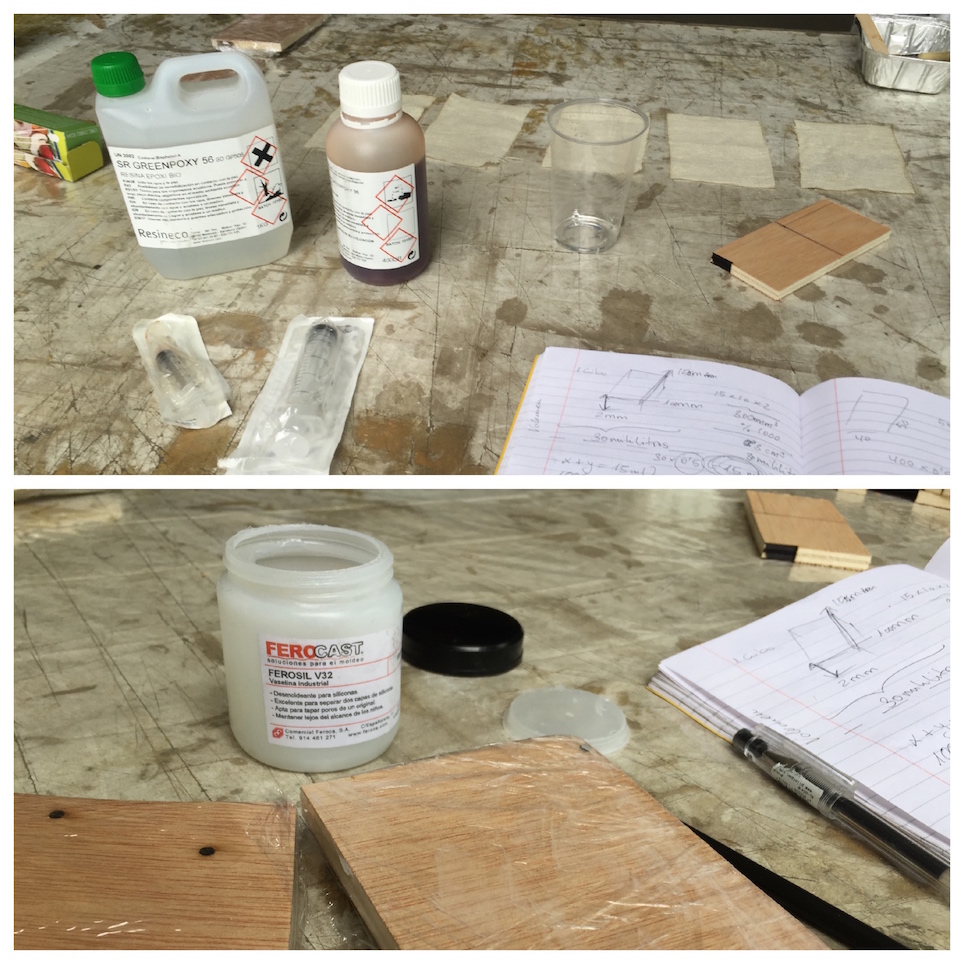
5 Fabric Layers 10x15 mm + Safe Equipment + Resins + Vaseline + Paint Roll + Plastic Glasses + Aluminium Molds + Wood Layers 20x15
MY DESIGN :
I decide use a Vacuum Bag for curated my mould so the reference posted at the class webpage is another weekly essential :
There was where i found all things necessary for make one, this graphical resource clear a lot the things:
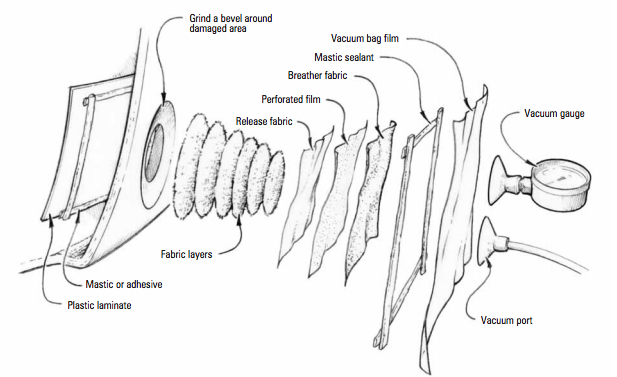
My BOM was :
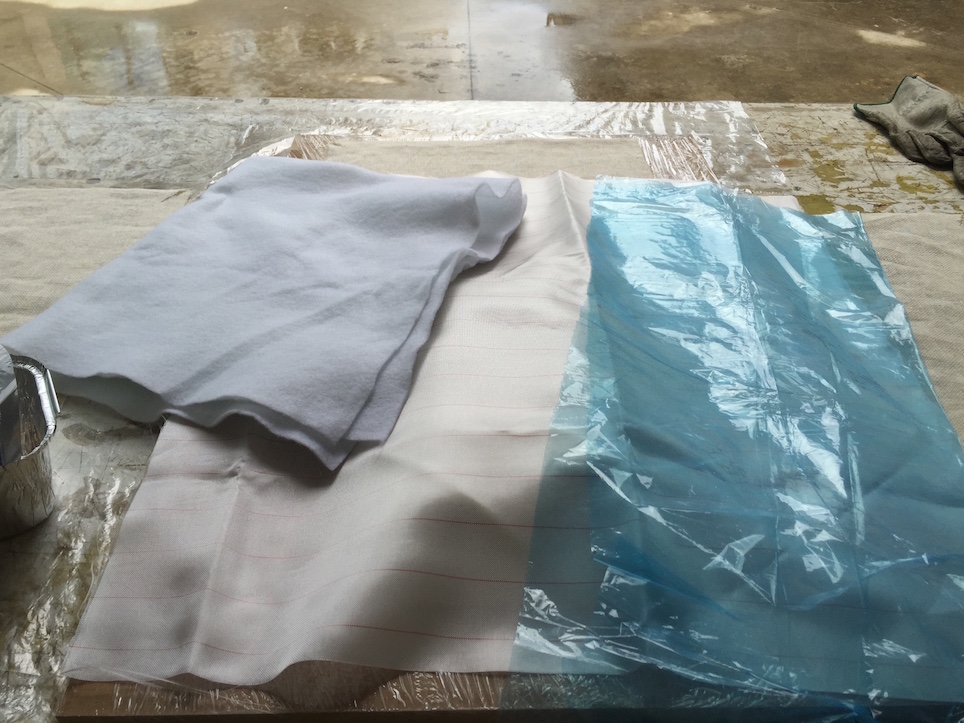
4 Fabric Layers 25x40 + Safe Equipment + Resins + Vaseline + Realease Fabric + Perforated Film + Breather Fabric + Mastic Sealant + Vacuum Bag + Paint Roll + Plastic Glasses + Aluminium Molds
For learn and practice on friday arrived to the fablab and made my own coupons with my clock active during all process for clear and calculate things, the workflow was as a follow :
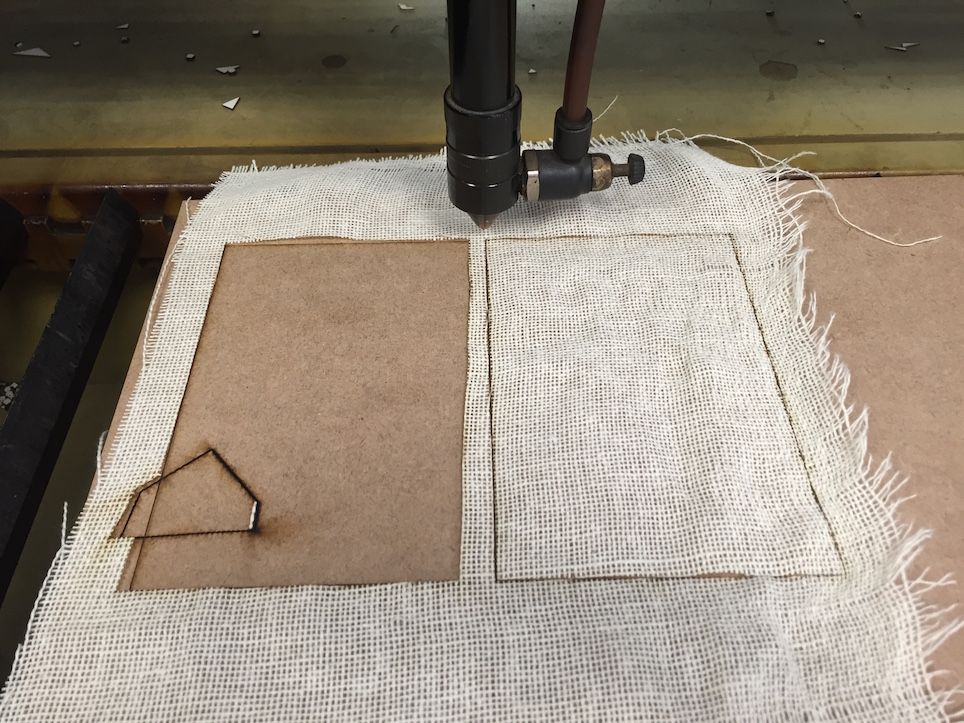
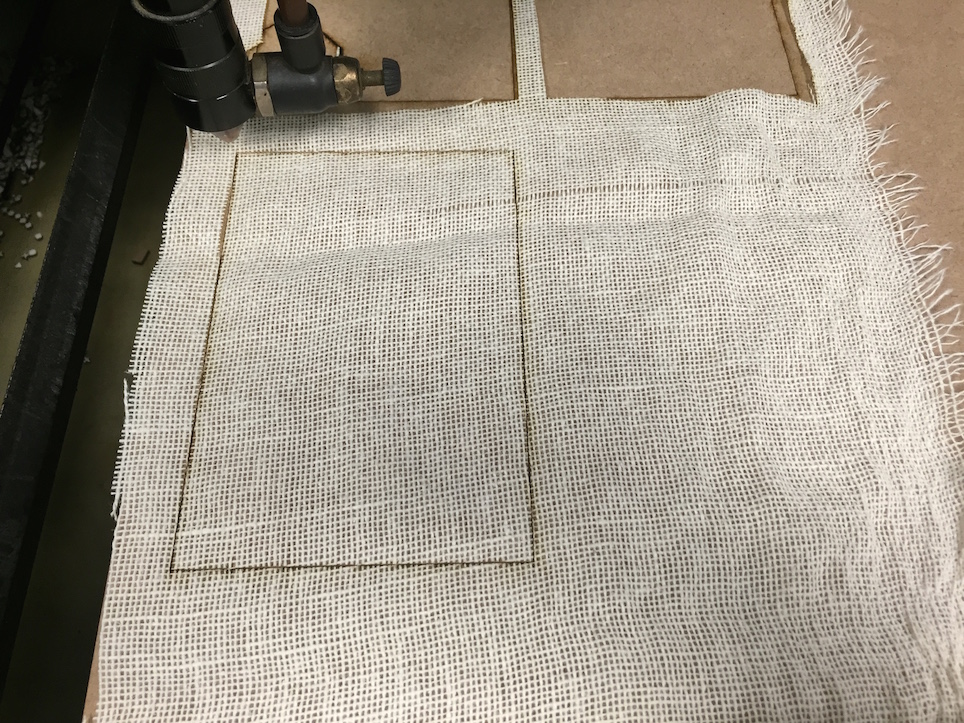
1. I designed the coupons with Inkscape quicky simply drawing a rectangle with the proportions desired, in my case 100x150 mm, i was working with vector map bits for save as .svg . Later, exported my design as a .dxf file for send to the Laser machine properly.
2. As i never had used the laser machine for cut fabrics, i decided make some test first, getting some settings and new things learned thinking in my final project. The experience was great. I began with small values with speed and power for finally increase both to adjust things. Here some process pics and my settings.
Laser Machine Parameters Used
| SPEED | POWER | CORNER POWER | OVERLAP |
|---|---|---|---|
| 60.00 | 25.00 | 20.00 | 0.12000 |
The experience inspire me to begin with my fabrics testers for my final project.
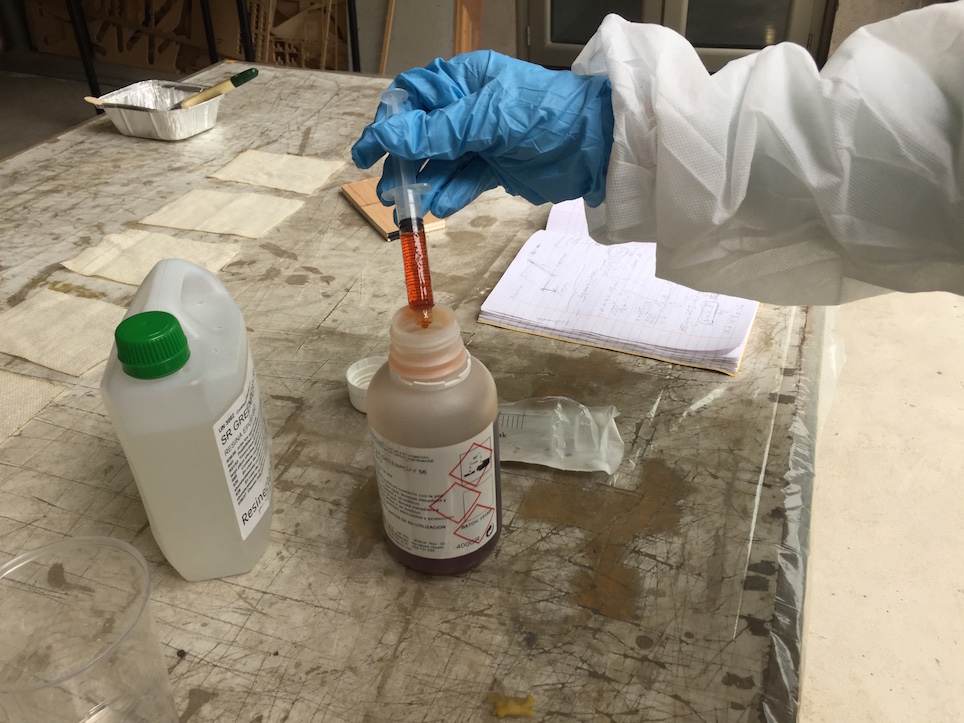
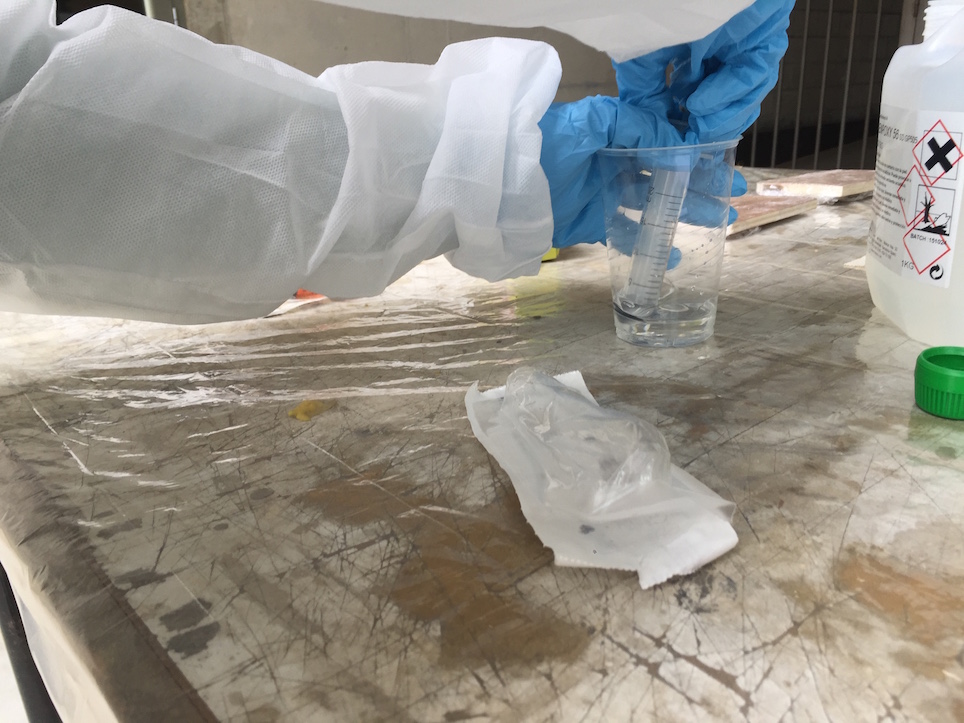
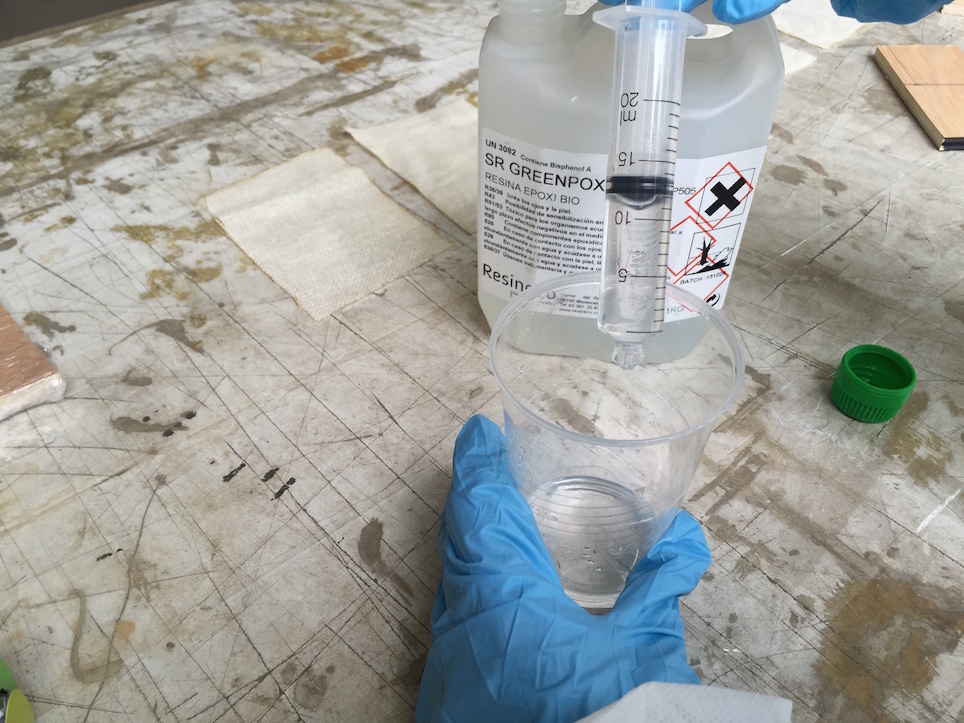
3. Calculate the quantity of each material from Epoxy and mixing later : I learned a lot with this process refreshing some mathematical equations for the exact amount. For calculate this its necessary extract the information about proportion from technical Data Sheet readed previously. In my case the proportion is 100/47, when read the first values at DataSheet i didn´t understand and showing the Neil´s lecture again and asking to my instructor, which proportion is for each material. so this i will to need if my model have 4 laminates about 100 x 15 x "the thickness" of the material:
First with the calliper was this :
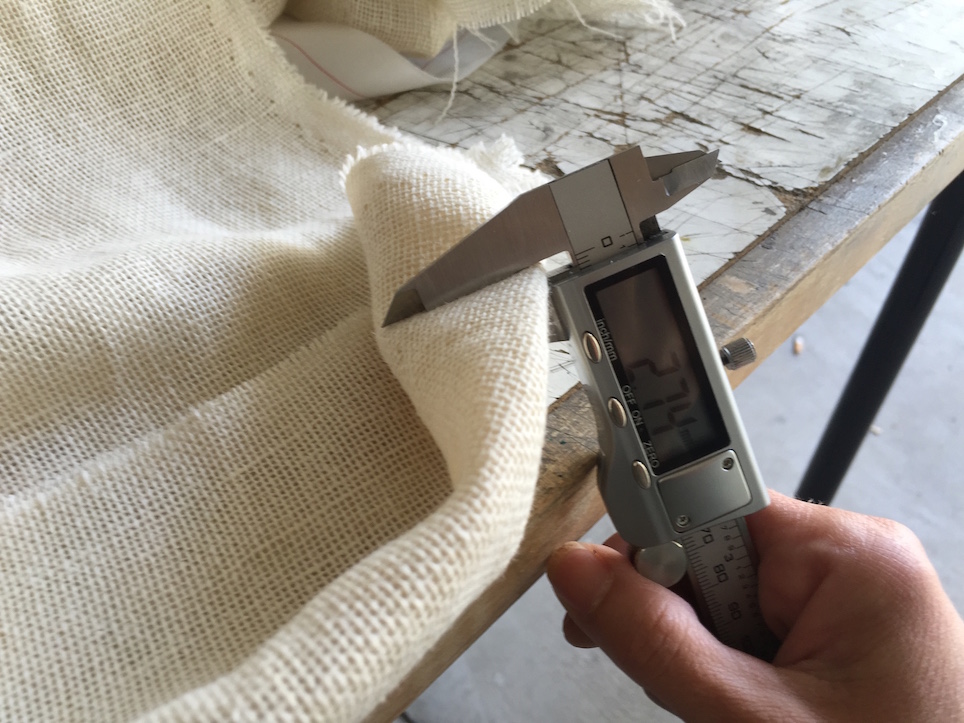
But after i cut them at the laser they have 2.00mm
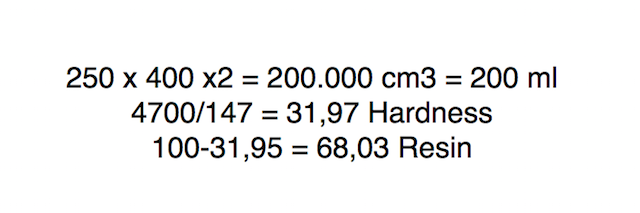
MY EQUATIONS
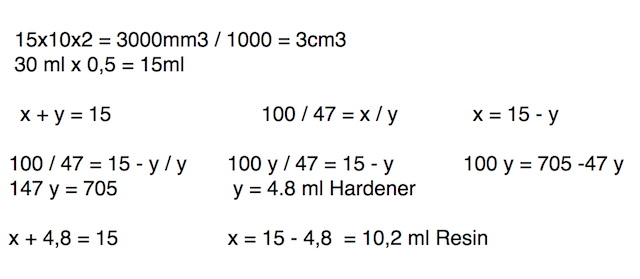
The Process was fun and learned me a lot: I spent 10 12minutes for all, 2 minutes for mixing Resins and 10 minutes for make the process.
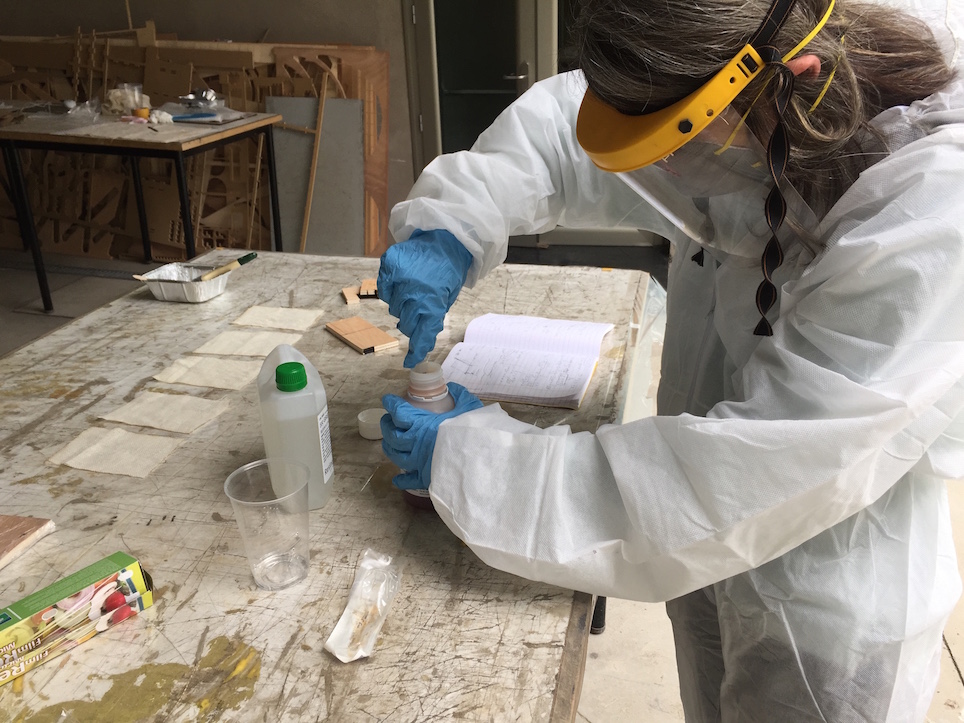
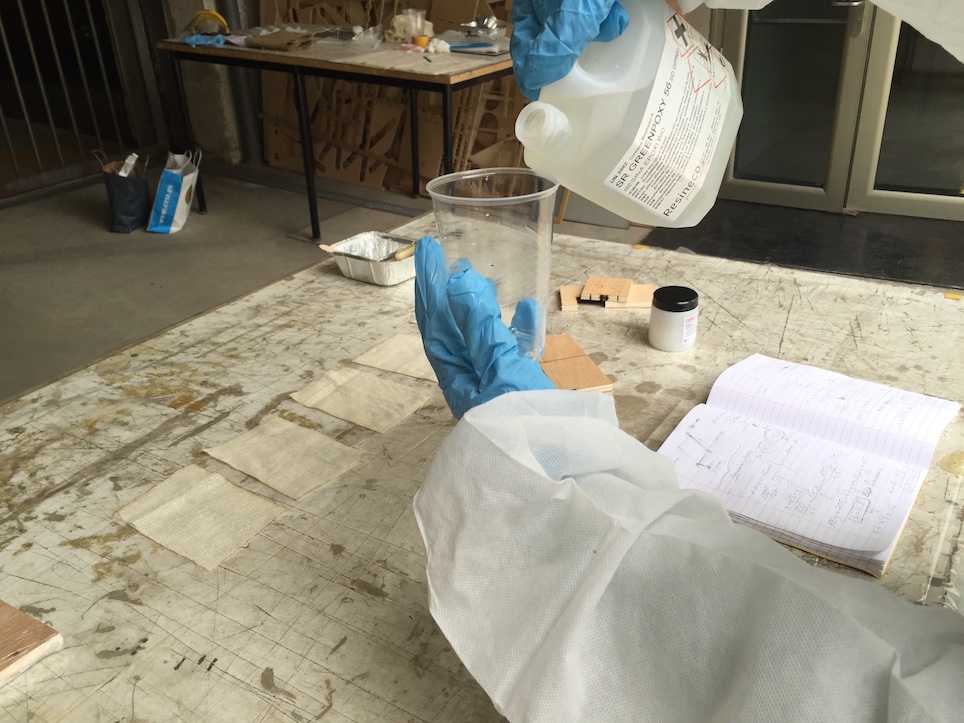

With the new knowledges this was my process for make my composite:
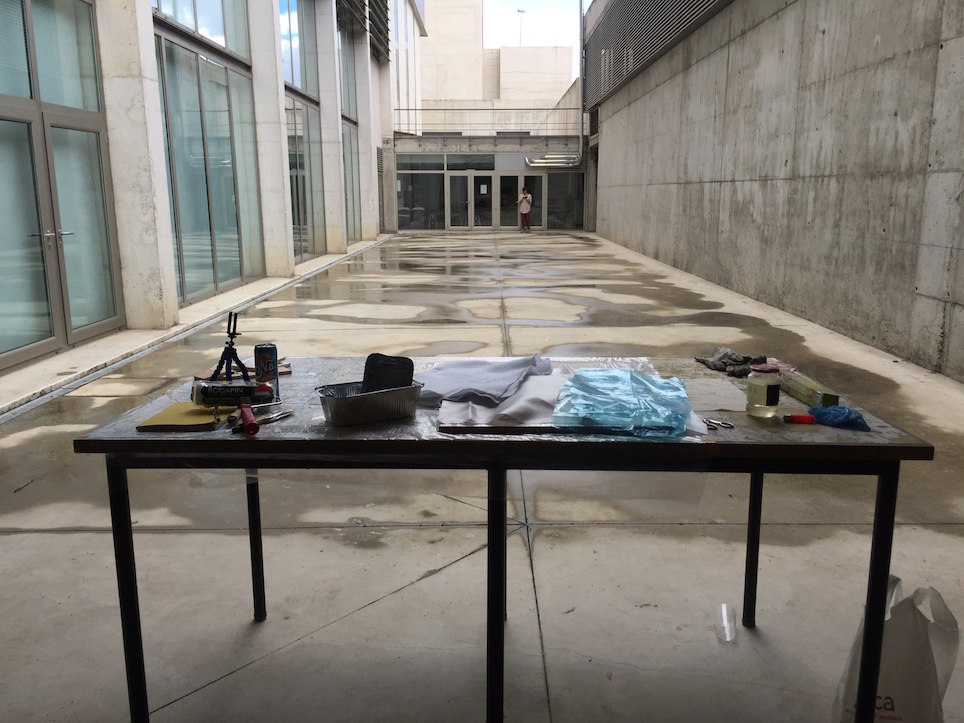
Choose a ventilated are for work : The Ceu Fablab have a perfect place for this kind of works and the weather not was an inconvenient.
1. Calcules for my design :
2. Preparing all things first:
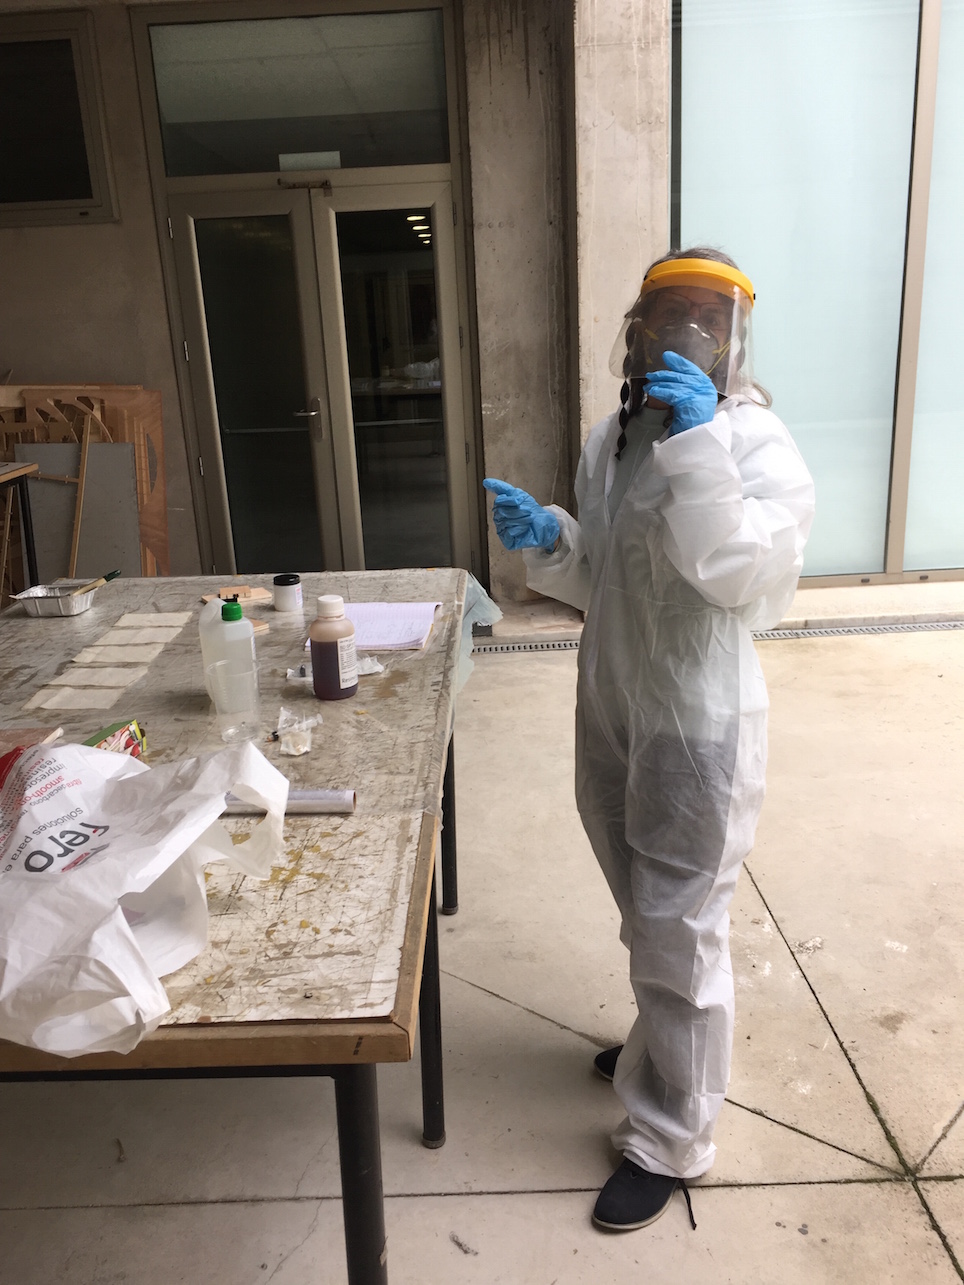
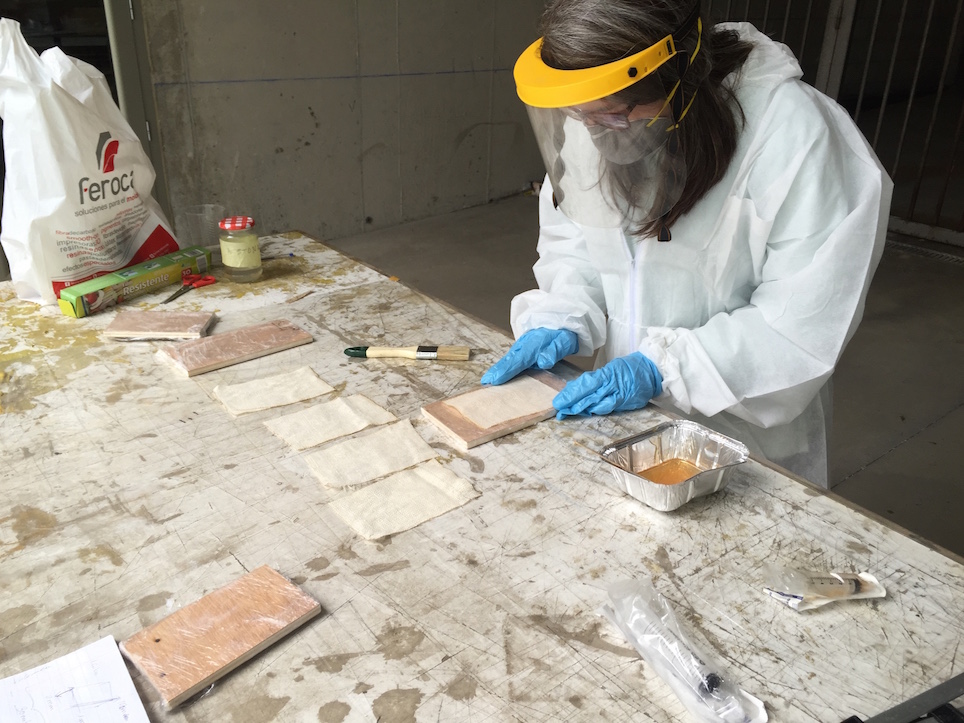
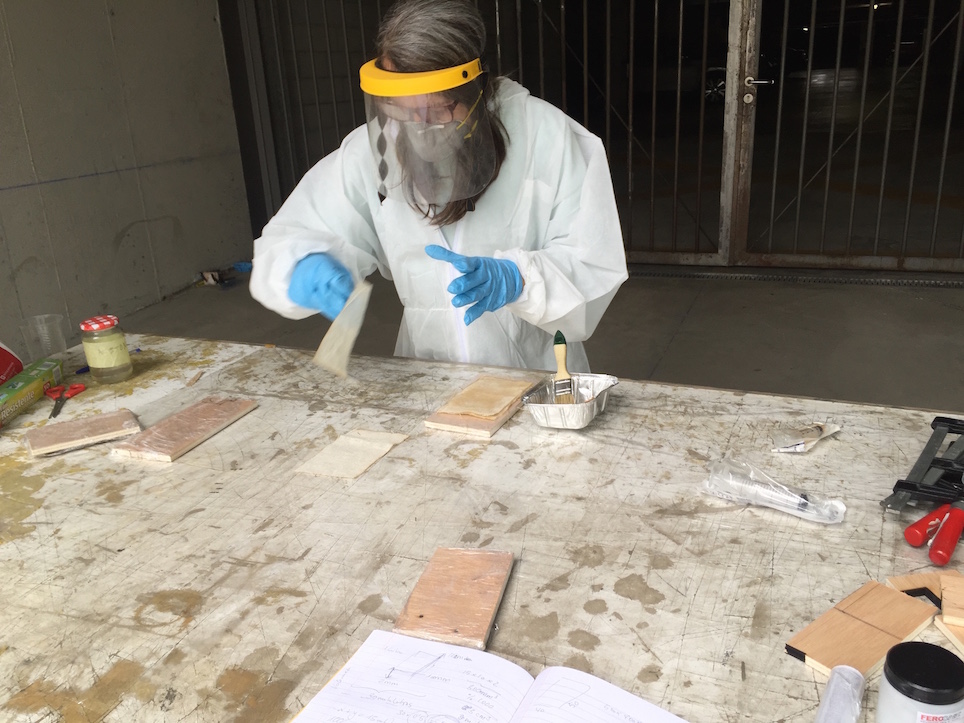
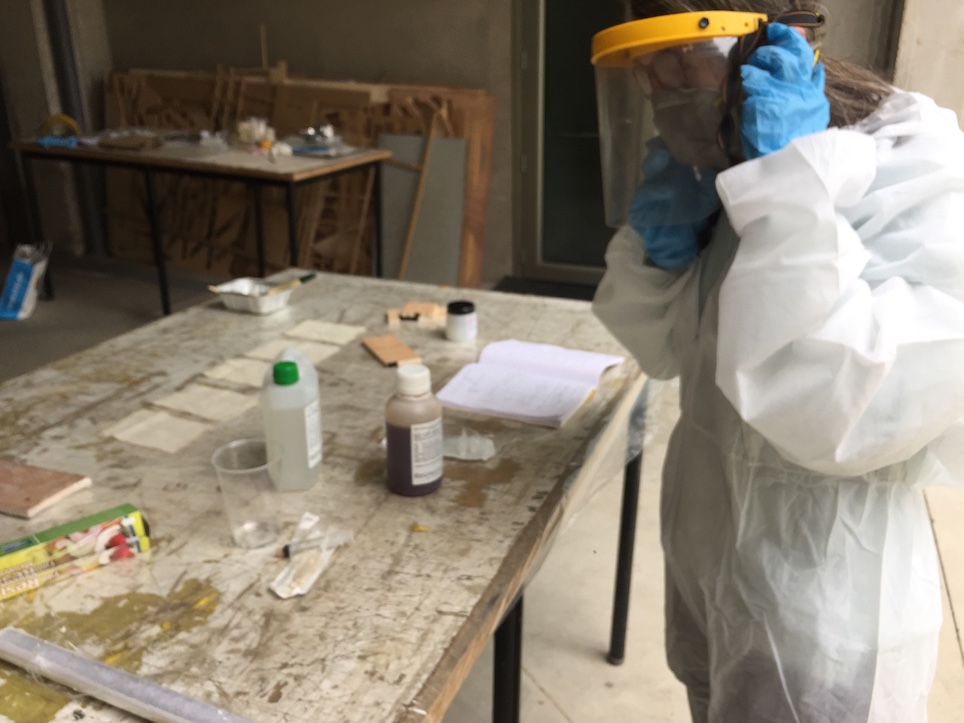
3. The Safe Equipment:
4. The Cuts at Laser Machine : First Attend I cuted each laminate at 500x400mm but finally i reduce to half for adjust to my design.

5. Making my things with my classmate Alvaro´s help
1. PROBLEMS WITH QUANTITIES AT MIX
First problems was the quantity of material after the mix. Probably my calculates miss something so i should to apply better at the corners, probably i lost some material during mixed.
2. PROBLEMS WITH VACUM BAG PROCESS
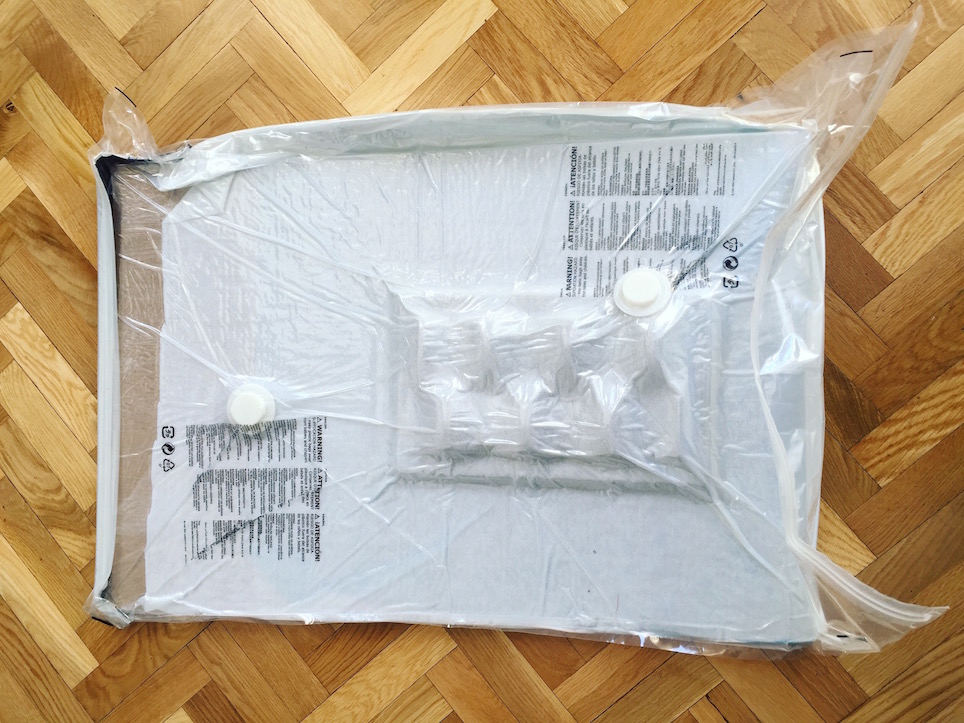
Probably, my vacuum bag bought from IKEA to my instructor have a mini hole so after just 5 minutes it lost the vacuum so we decide to put another one outside by my instructor advice.
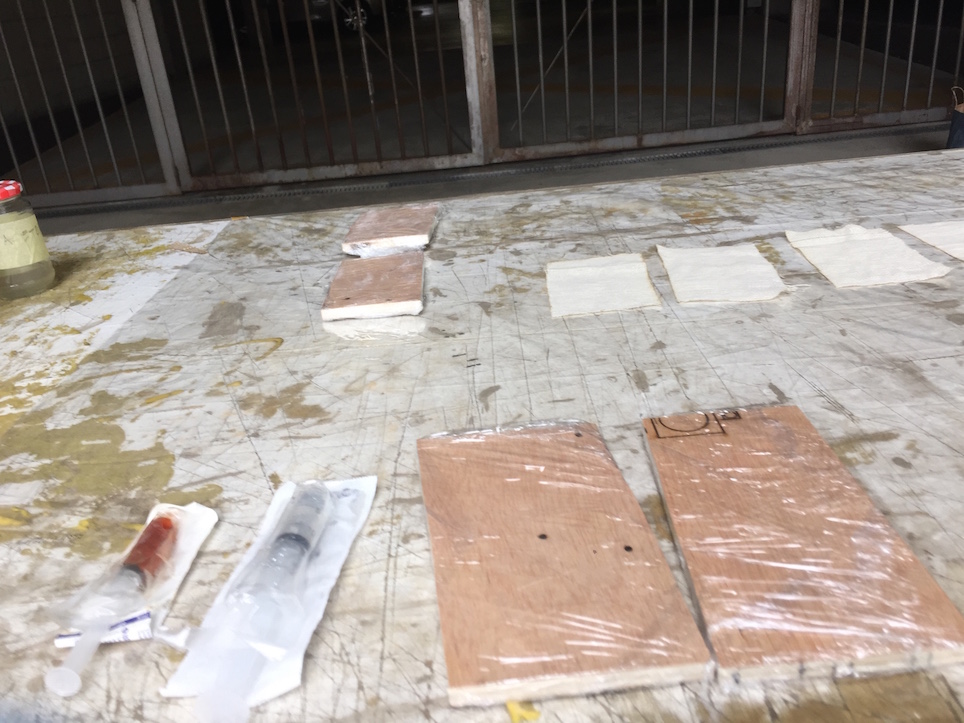
Here is my hero pic with the results, now it´s time to wait to Sunday morning and see what happens with all and continue with the practice.
After 24h i opened the vacuum bag i have a lot curiosity with the result so i think is better than i thought for my first composites :
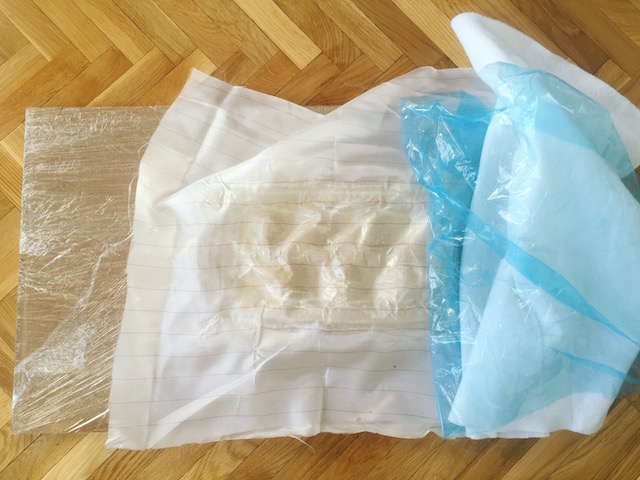
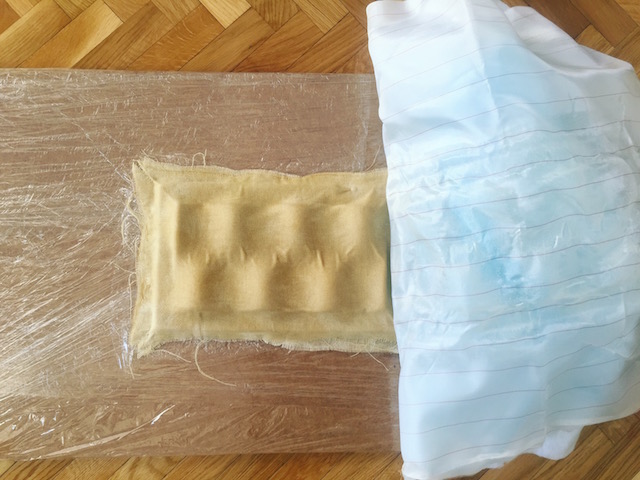
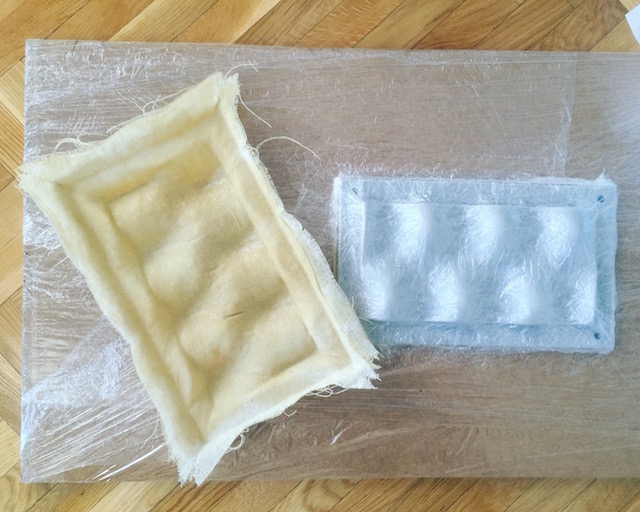
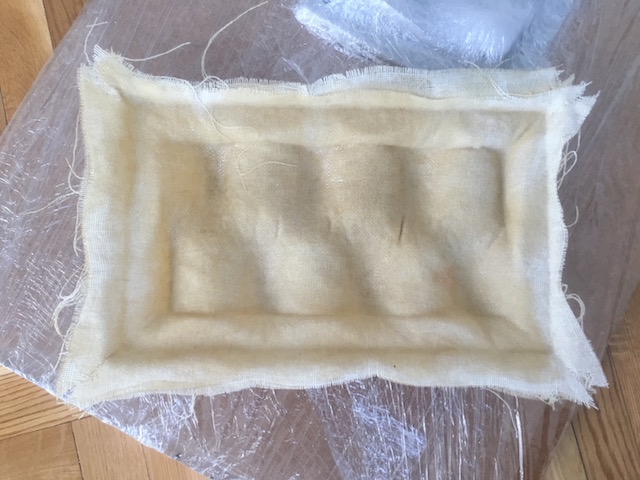
As you can see at the firts pics, i should to apply better the resins and also i think something about resins is lost when mix at plastic glass.
Now it´s time to wait 7 days crating for continue with the process.
WEEK FILES
THINGS LEARNED
For this week as i wont to learn more about open source softwares for design i learn new useful functions at for made interestic models
Of course i learned about the Technical Use of Epoxi Resins, Technics of Mix, new processes, Vacuum Bags or Curated Time the knowledges of the week was totally fun. All processes described learned me something.
WEEK CONCLUSIONS
This week was my turn at Neil´s Correction so was fantastic talk with him about the assignment his words gave me the force of Bits and Atoms.
Under my week goal i made the assignment with bit problems so for this time i have all in the week.