This week's assignment is to read a microcontroller datasheet, program my board to do something.
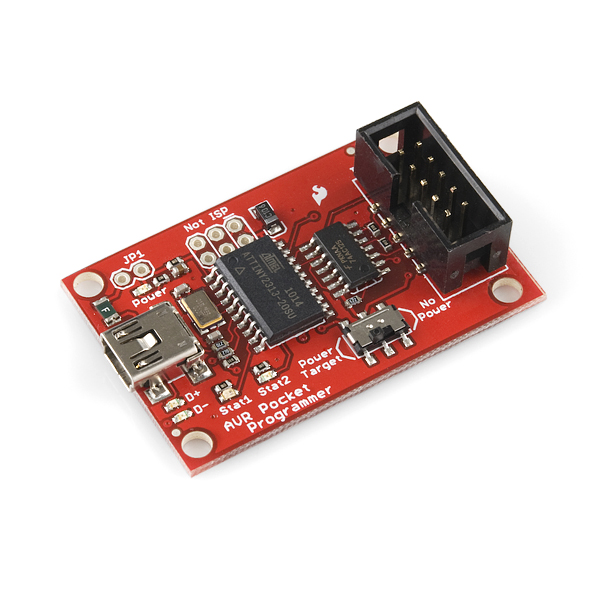
I decided to use both the hello-echo board developed in week6 for embedded programming. This board was based on the ATTiny44 chip. I decided to abandon the ISP I fabbed earlier during Fabacademy because it damaged my laptop. I purchased a Sparkfun Pocket AVR Programmer to program the hello-world board from earlier. The Pocket AVR programmer can be purchased from DigiKey or directly from Sparkfun's website for $14.95. It looks like this:
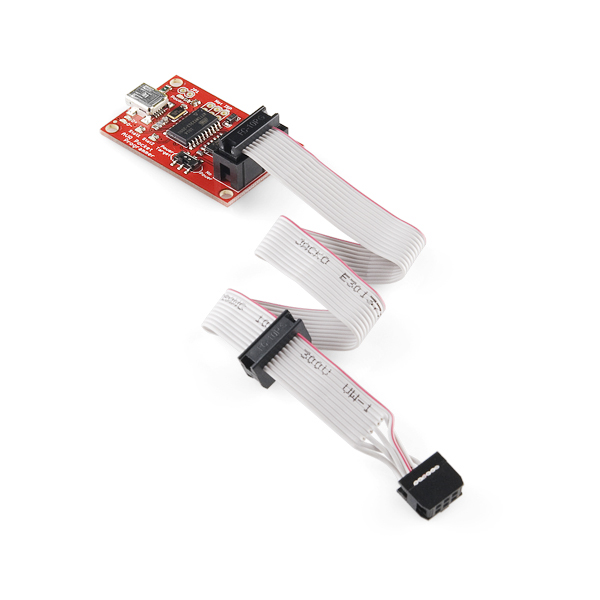
It has a slide switch on it, so you can use it to power, or not power, the target board. It also comes with a nice header cable. Yopu plug this programmer into your laptop or desktop with a micro-USB. It is also buffered, so if anything goes awry, the pocklet programmer will take the blow and not your laptop, supposedly.
The ATTiny datasheet can be found from the manufacturer's website here: http://www.atmel.com/images/doc8006.pdf. From the datasheet, you can get the pin configurations for the ATTiny44.
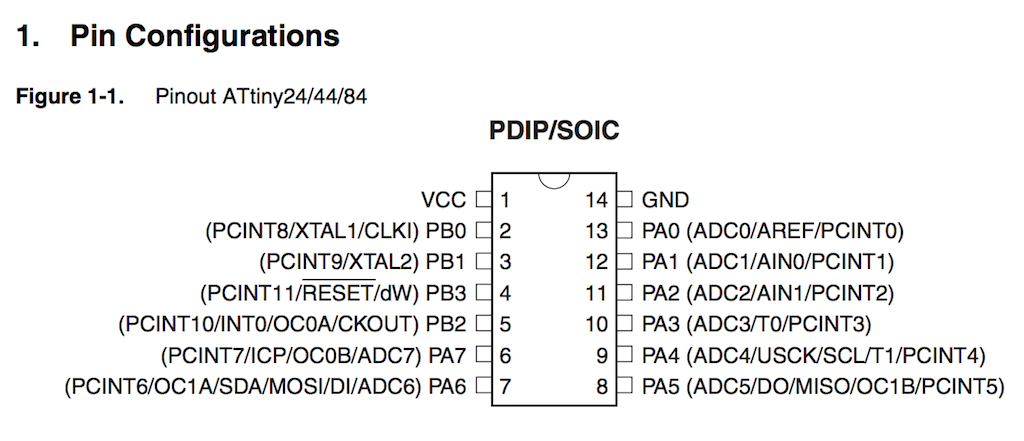
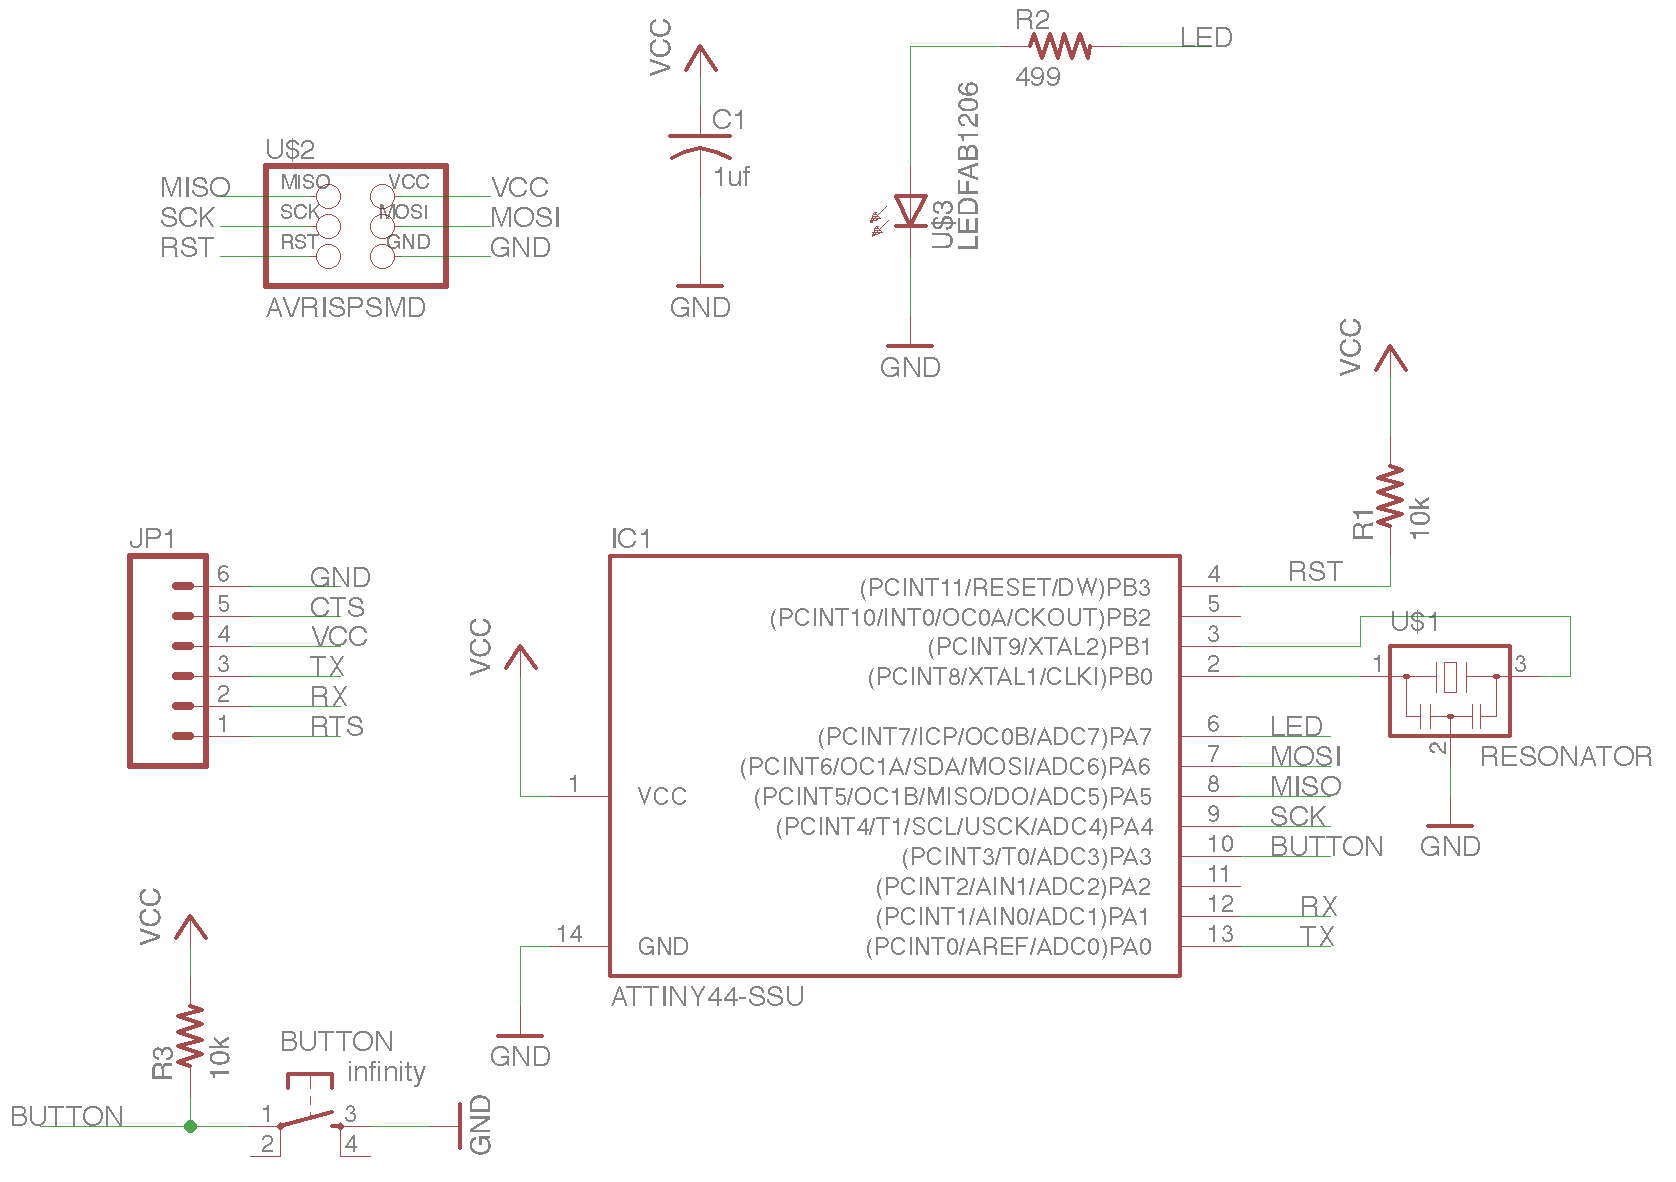
On the hello-world board, I made the following connections:
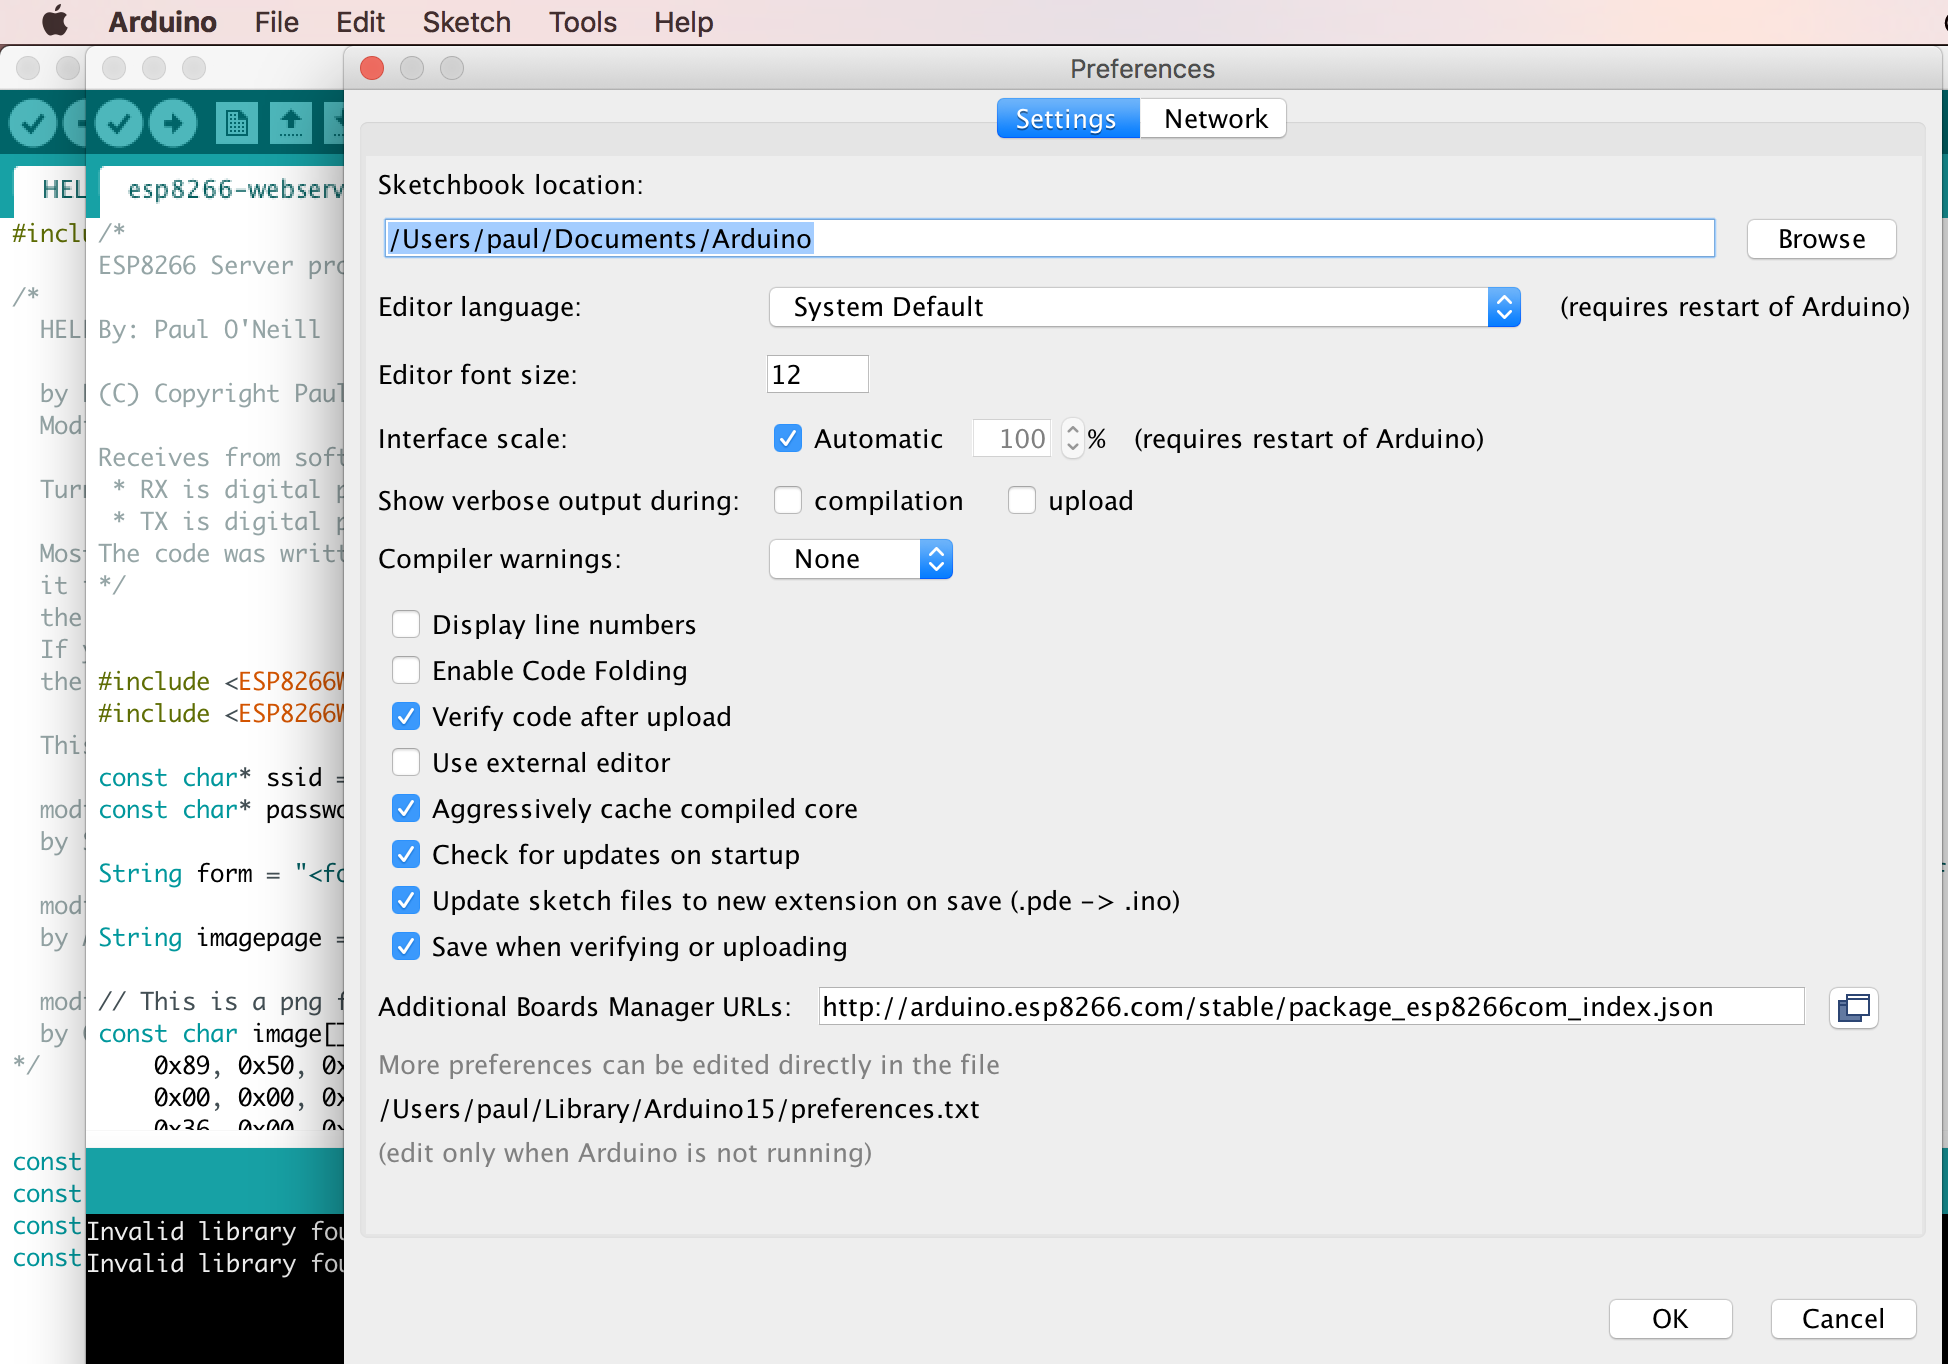
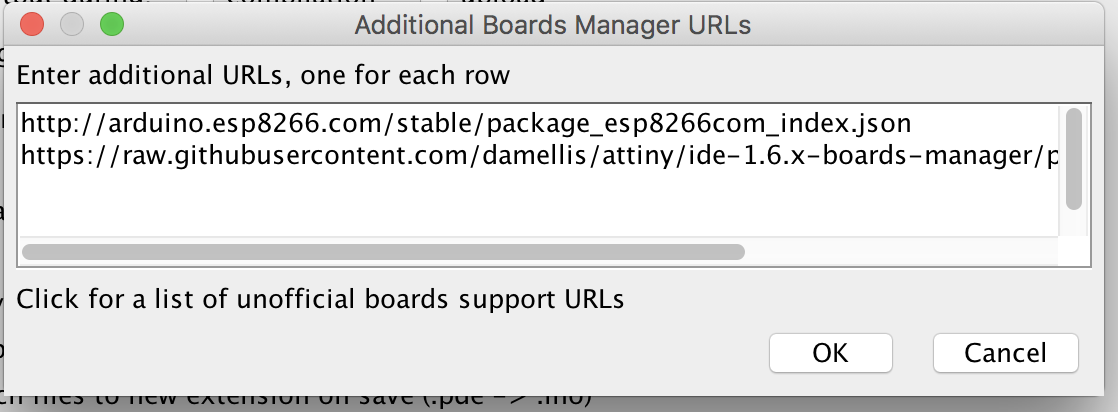
My instructor, Chris Rohal happened to be familiar with the Sparkfun programmer and directed me to a very useful website called "high-low tech". The link to this website is: http://highlowtech.org/?p=1695. This website explains how to set up the Arduino programming environment to work with a ATTTiny44 target. The Arduino environment comes with a standard list of targets. However, this list can be extended through the additional boards manager. Select "Preferences" and then find the "Additional Boards Manager URL's" data entry box.
You can enter more than one programmer in here, if you seperate the URL's with commas. In the above case, I would follow the existing entry with a comma, and then type: https://raw.githubusercontent.com/damellis/attiny/ide-1.6.x-boards-manager/package_damellis_attiny_index.json
Click OK and it is saved.
You can press the small icon at the end of the URL entry box. It will display a list of all the URL's that have been entered into the Arduino environment. In this case, the ESP8266 AND the ATTiny are both listed.
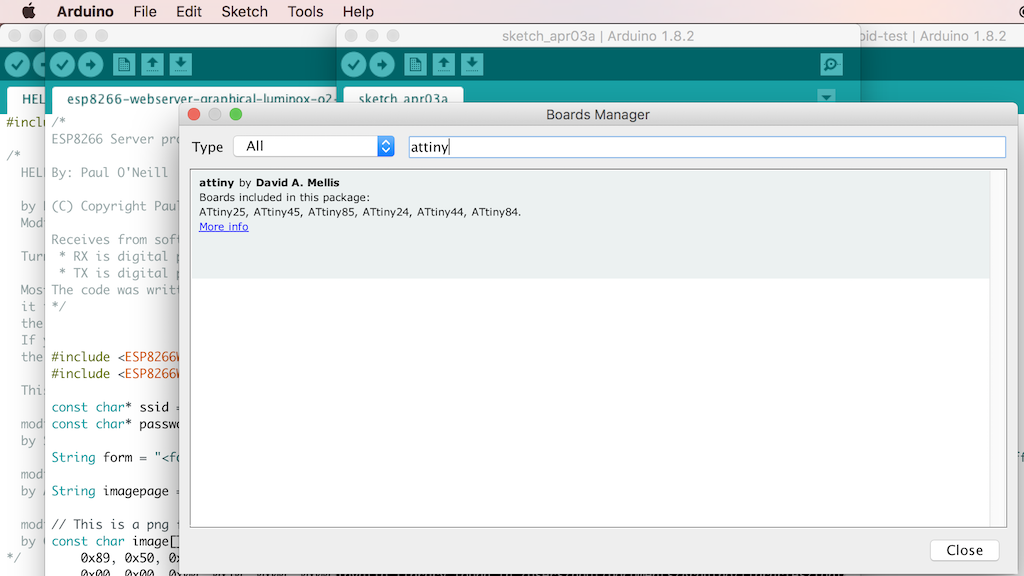
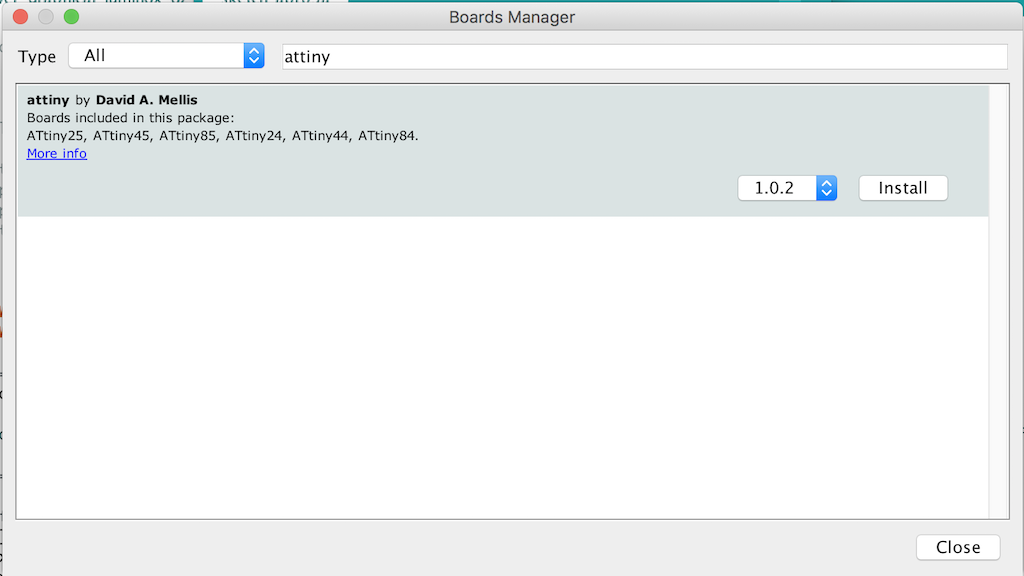
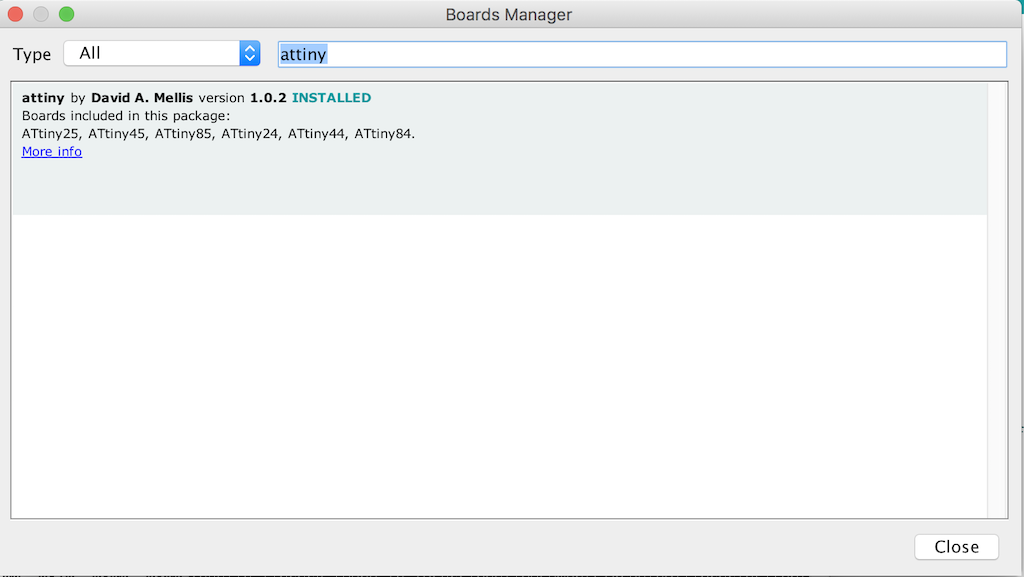
The next thing you have to do is select the ATTiny from the modified list of targets and install it.
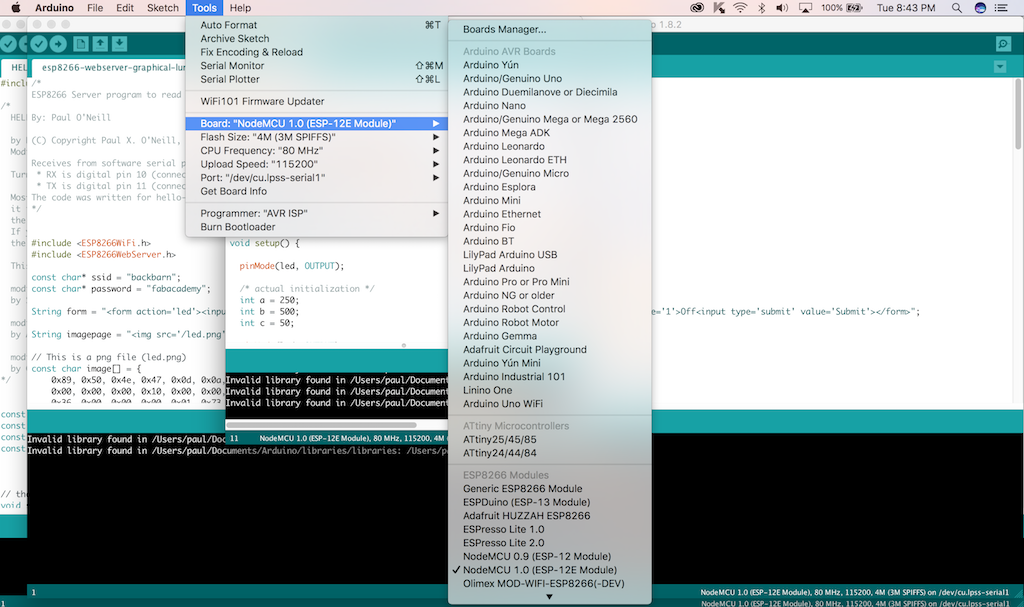
You do this by navigating Tools > Boards and scroll down until you see attiny

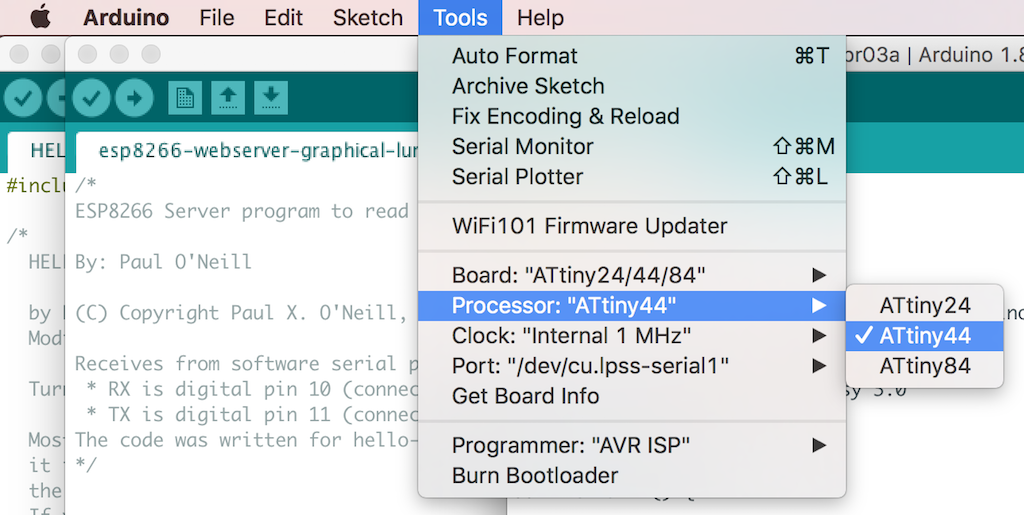
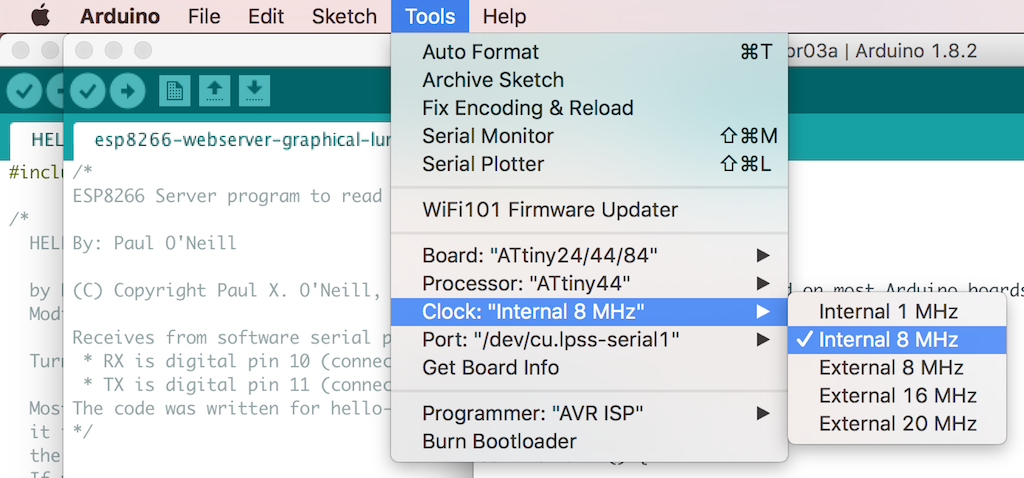
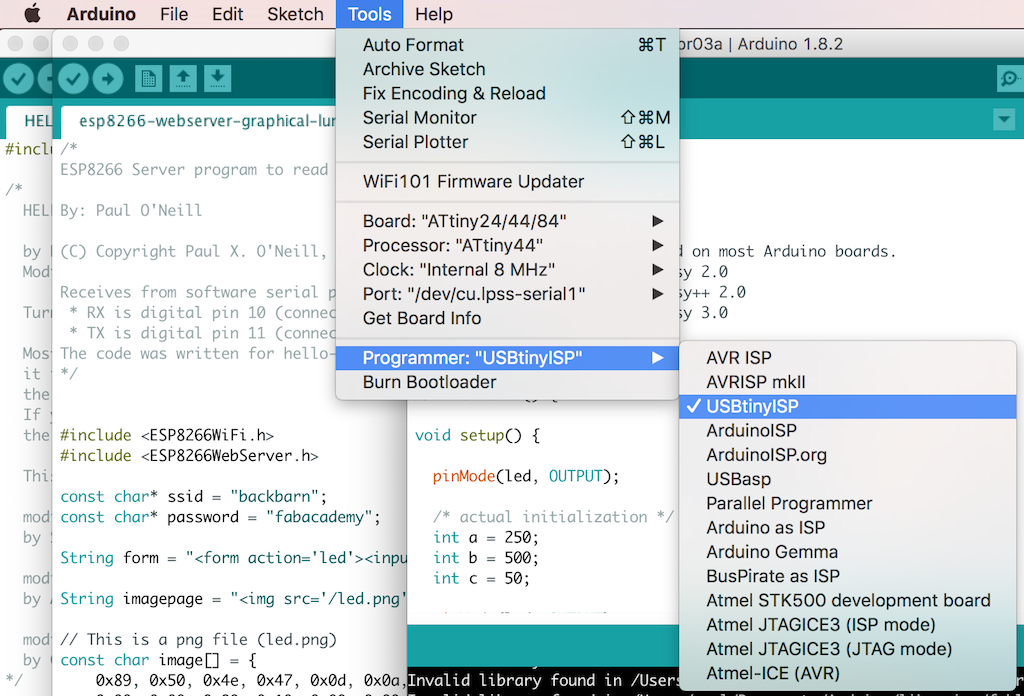
Next, we have to select the correct settings for the board. We will be selecting Board = ATTINY44, 8MHZ internal clock, and Programmer = USBtinyISP.
Tools > Board > ATtiny24/44/84
Tools > Processor > ATTiny44
Tools > Clock > Internal 8 MHz
Tools > Programmer > USBtinyISP
Arduino programming environment is all set. You will have to assign the serial port detected by your computer.
Switch the slide switch on the programmer to provide power to the hello-world board.
The next thing that needs to be done is translating ATTiny pins to their corollary Arduino pins. The following is a map from the High-Low Tech website:
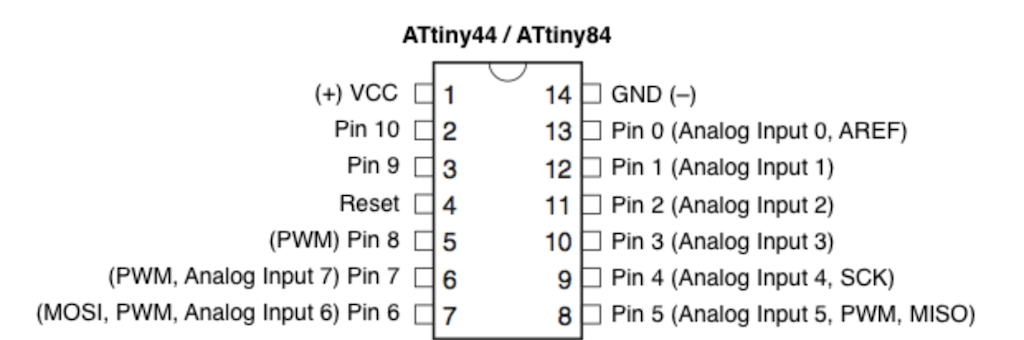
So, I expand the mapping of the pins until I identify how I should program them in the Arduino environment.
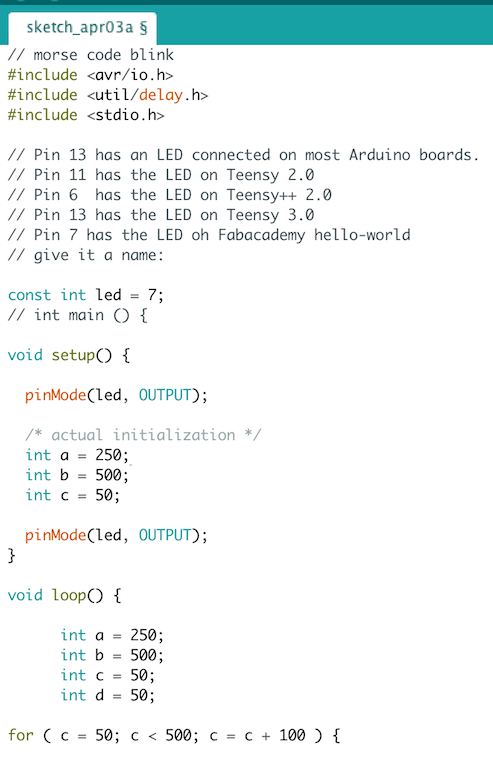
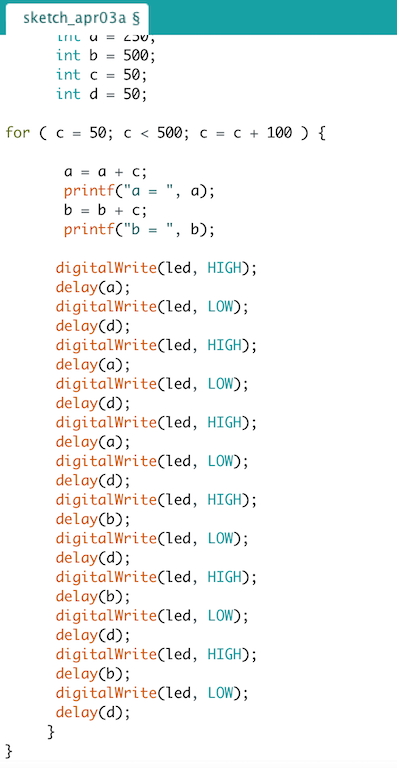
Blink Program, modified for hello-world board. Two screen shots of a long program. Splice them together at the "for" loop.