Are you having hard time finding your jewelries and valuables ? No more missing Jewellery’s from now on .. with the Smart Jewellery’s Box (SJB) your staff are safe from your sister, husband, house made, friend, kids or any other person and protected by complex or simple passcode that nobody know it except you and it is activated through your bluetooth connection to your smart phone or tablet.
Wooden sheet to cut out my final press fit designed jewelery box.
- Board copper sheet
- Bluetooth module
- Attiny45 and electrical components
- Servo
- Acrylic sheet for partitions
- Vinyl paper for stickers
Cost :
The jewelery box approximately cost 40 USD.
* Note : defiantly it will cost less if it will be produced in mass quantities with automated production.
Design process :
Ideas :
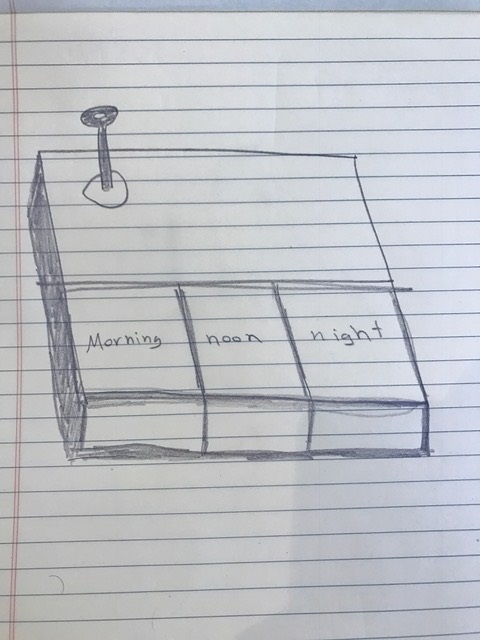
Smart pills box: simple smart pill box for elderly people that opens certain compartments in specific medication times for example “Morning” “Noon” and “Night” to help them have the right medication on time. The box has a key for the person who arranges the pills which allow him to open the box in anytime. This is just a potential idea for the final project which might be improved or changed during the program
The bill box idea sketch :
AFTER the FabLab Video conference I discovered that there was a very similar previous project so I decided to come up with a different idea and changed my final project to “Fingerprint Activated Jewelery Box” for ladies to keep their small valuable belongings and keep it safe out of the reach of kids, house made or even their husbands and I name it FaBox which takes the initial litters of Fingerprint Activated and com pined the word FAB with the word Box.
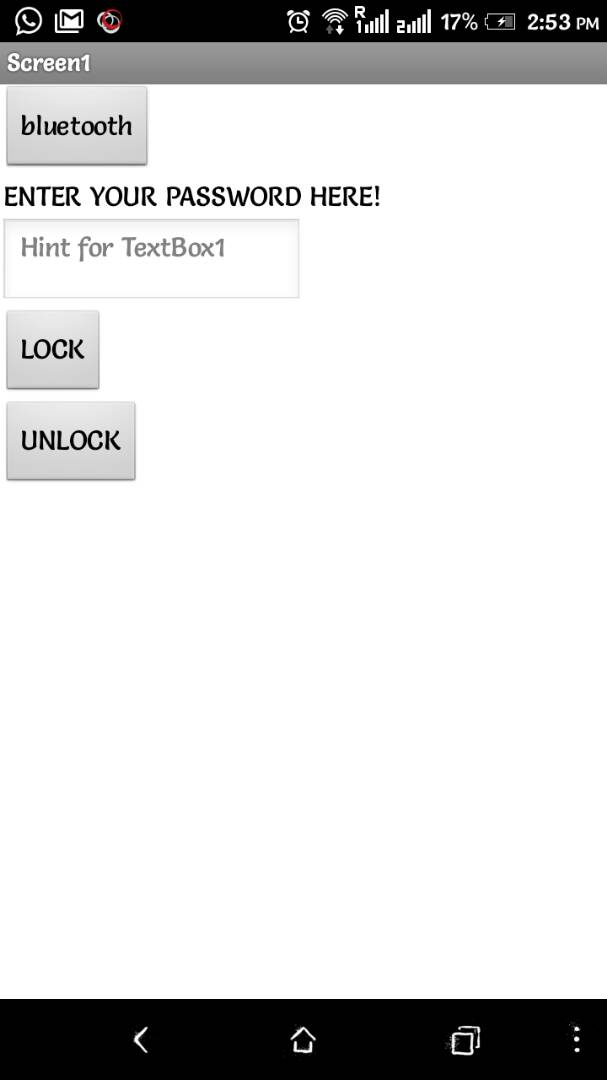
Since we are in the smart phone era and our mobiles are with us almost all the time I came up with the idea of interfacing the Jewelery Box with the mobile through bluetooth then lock it and unlock it using a mobile application with a password and called it Smart Jewelery Box (SJB).
Future Development :
This project Idea can be improved to safety-box which will be used in hotels rooms, and now days many hotel provide a complementary smart phone for their customers where the mobile application will be installed and the customer will choose his passcode and use the safety-box.
Since many mobile phones comes with finger print reader the mobile application of the Smart Jewelery Box can be improved to include the option of unlocking the box with the user finger print instead of the passcode
also so many accessories can be added like LED light than turns on when the user open the box to provide better vision for the staff inside it or a sound speaker that play a song when the box is opened or just say the words ( locked – unlocked ) to let the user know the situation of the box
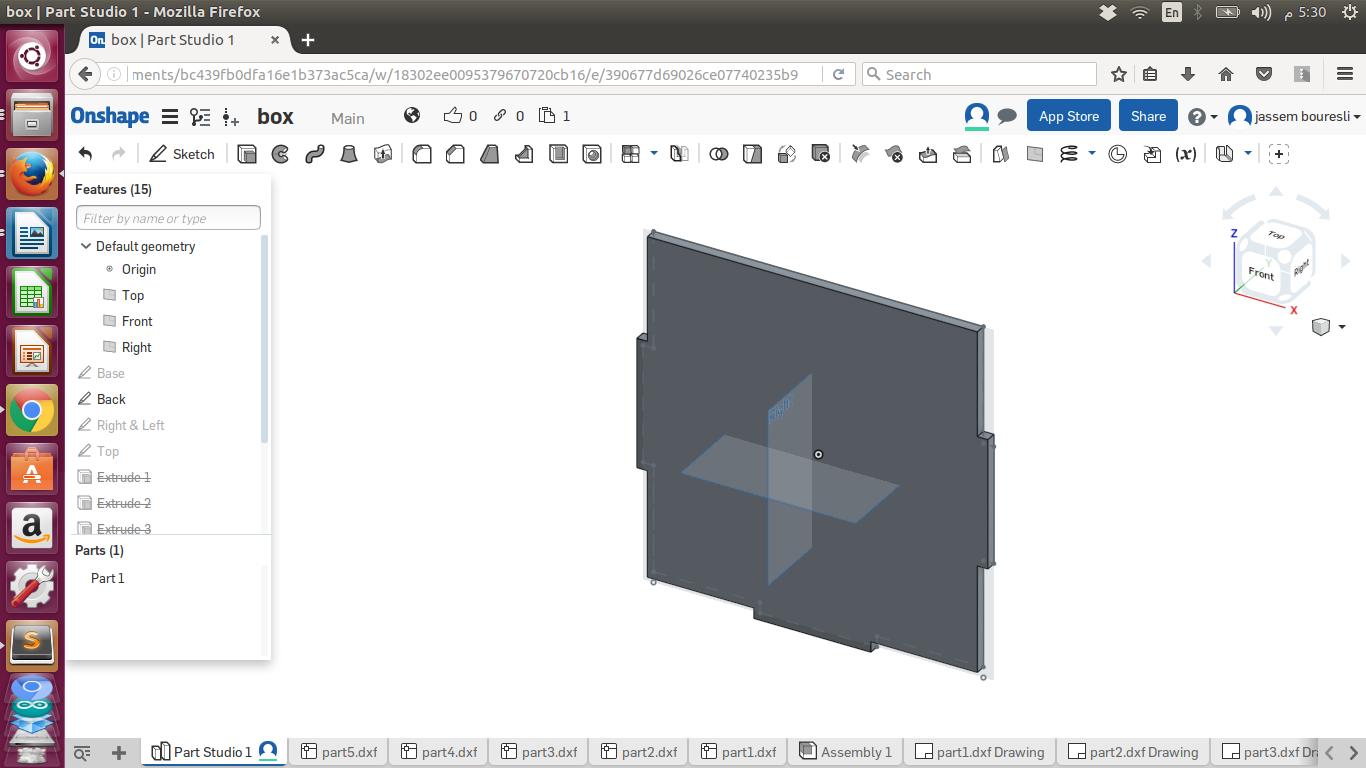
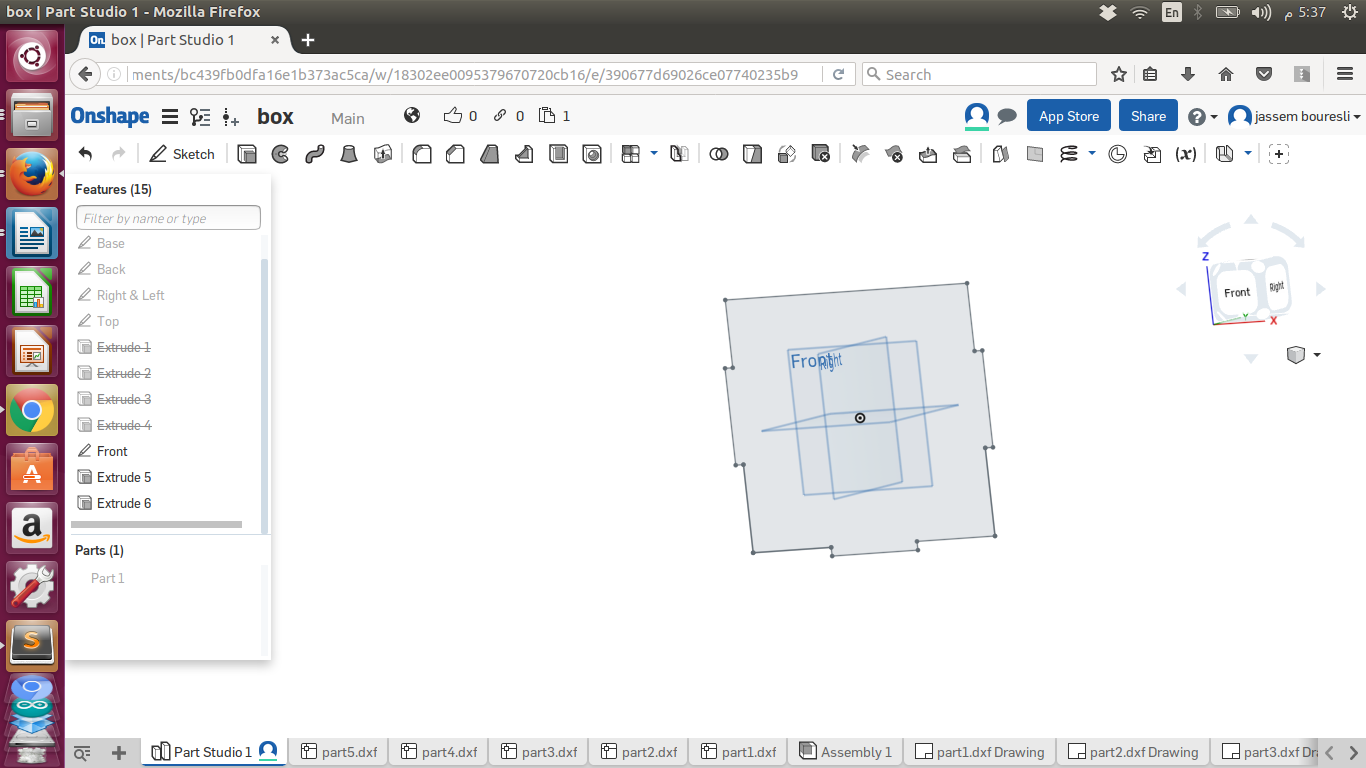
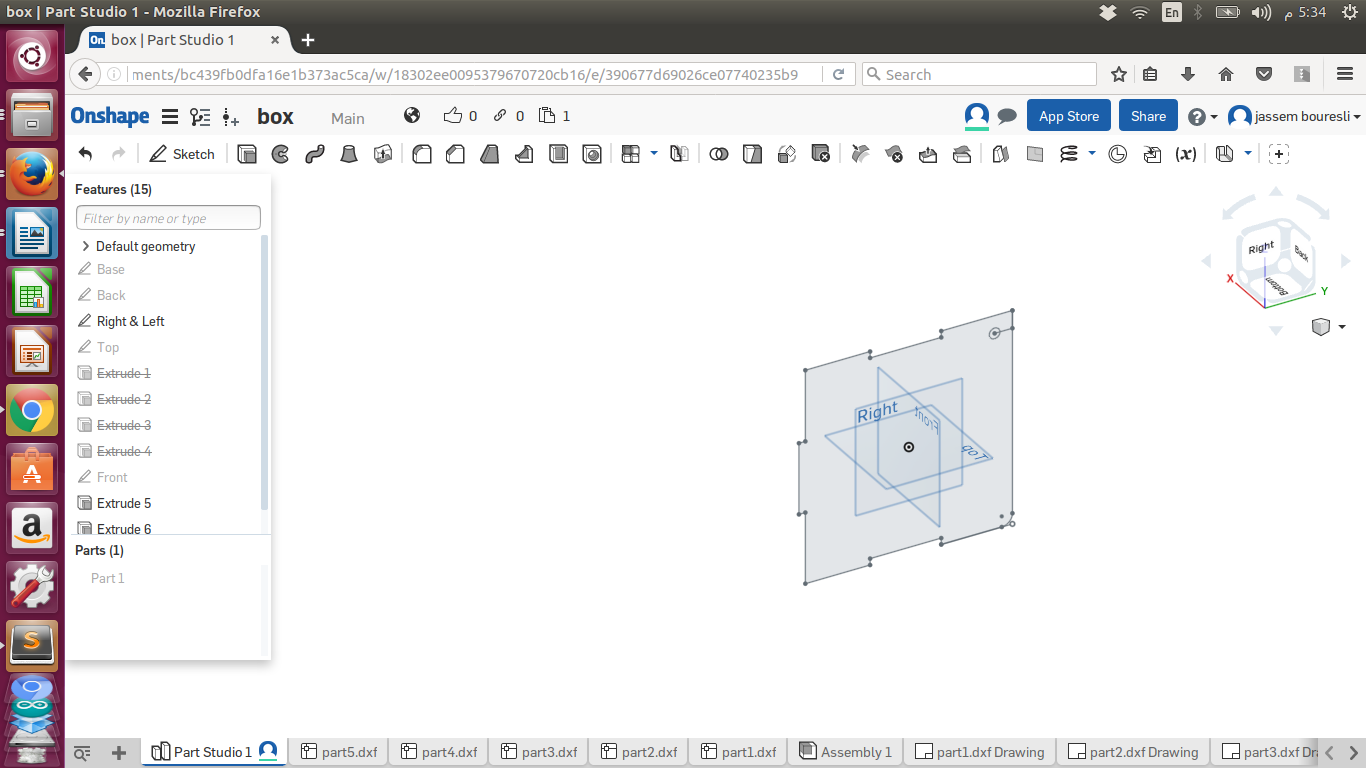
Onshape Design :
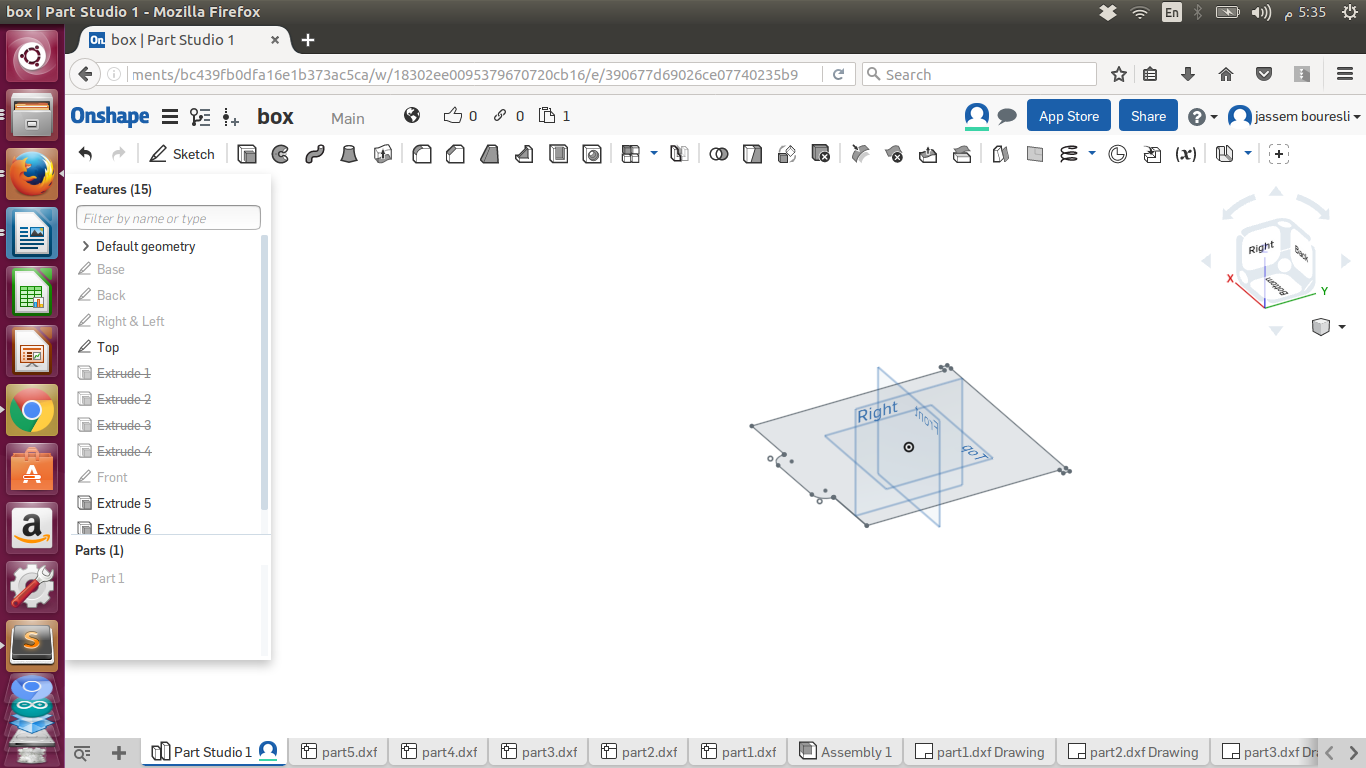
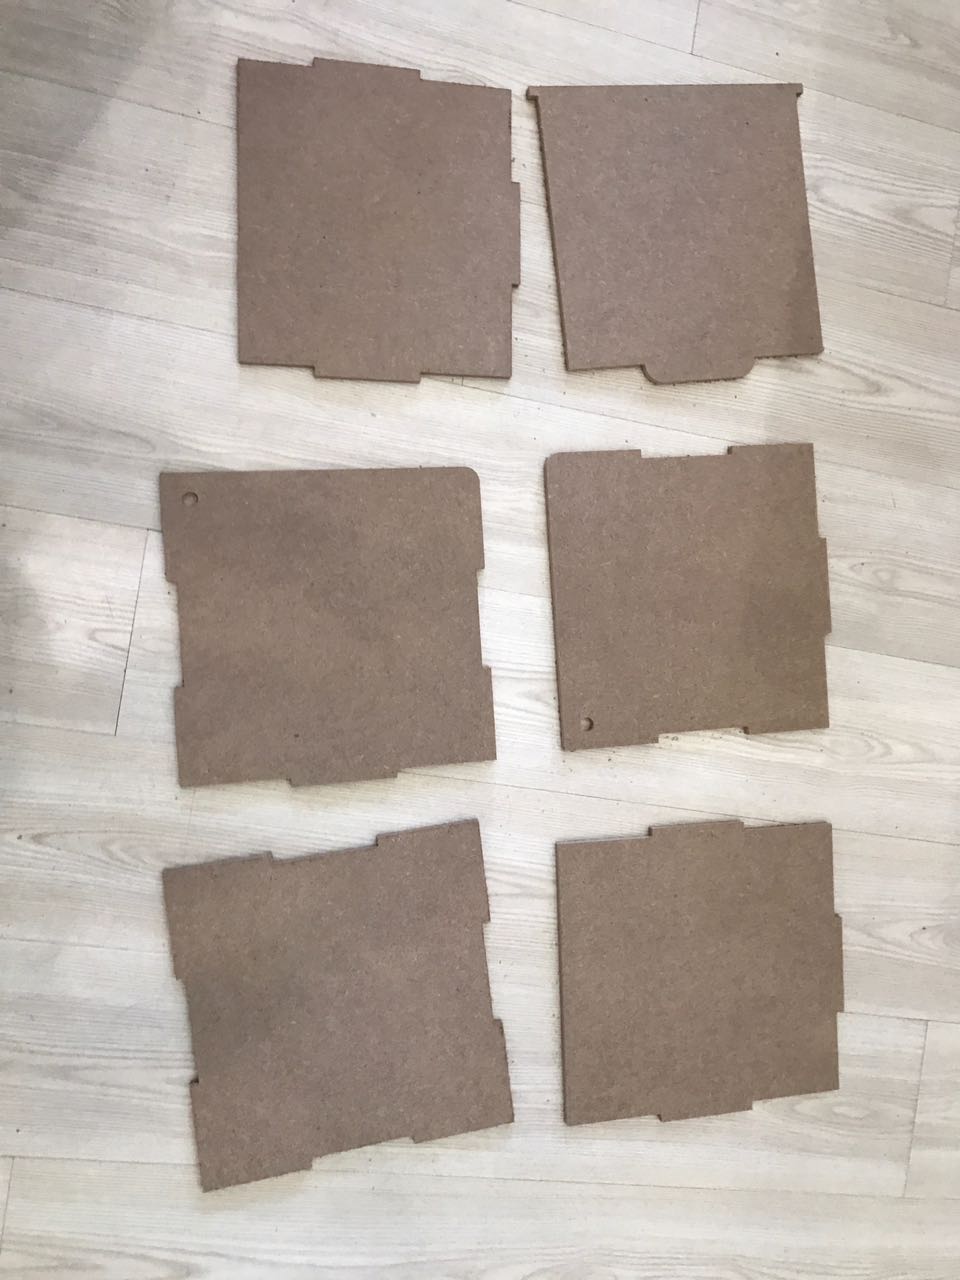
The Box consist of six pieces : base, front, back, lift, right and top. I designed all of them in onshape and it was really interesting and challenging to to calculate and design the press fit of interlocking six pieces considering the thickness of the wooden sheet which is 9mm then I exported the files in dxf format to cut them in the cnc machine.
Then I designed internal acrylic partitions for the staff inside the box and to provide a specific place for the electric circuit board
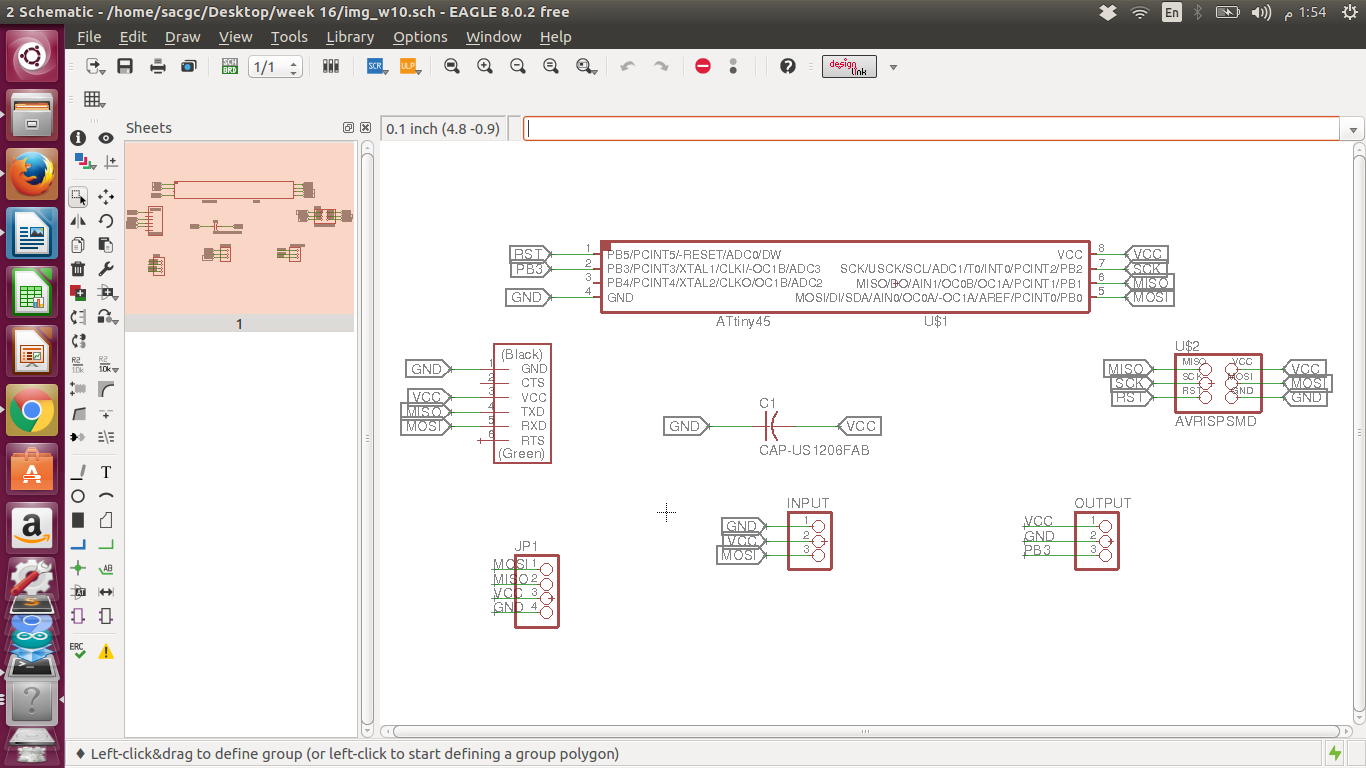
Then I designed the electric circuit board using eagle for a servo motor and a bluetooth module with Atitiny 45 micro-controller and here is my schematic
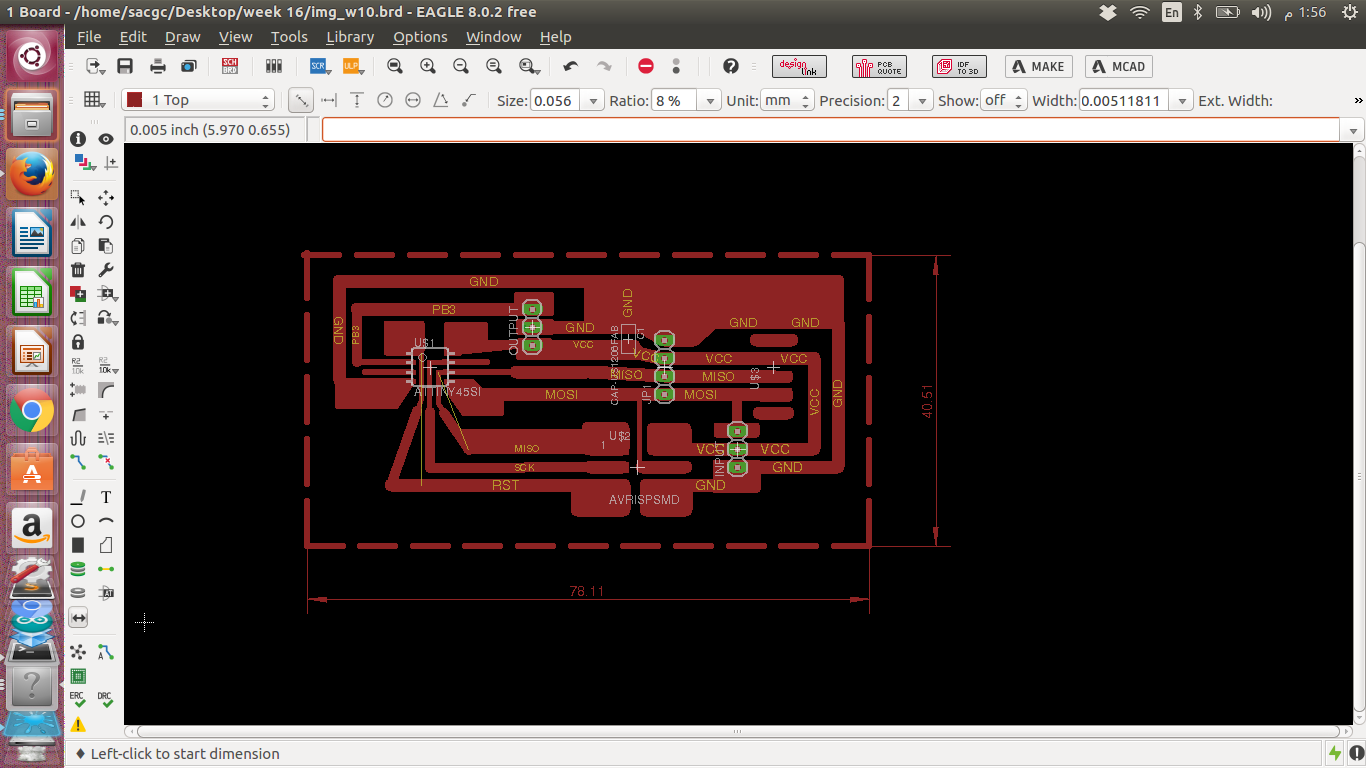
And this is my board and you can notice that I draw my routs manually to enlarge the soldering area and making it easy to solder and enlarge the routs and separated them as much as possible so I will avoid any rout loss in the milling process and I can easily mill deeper to avoid shorts and it worked very will for me.
Production :
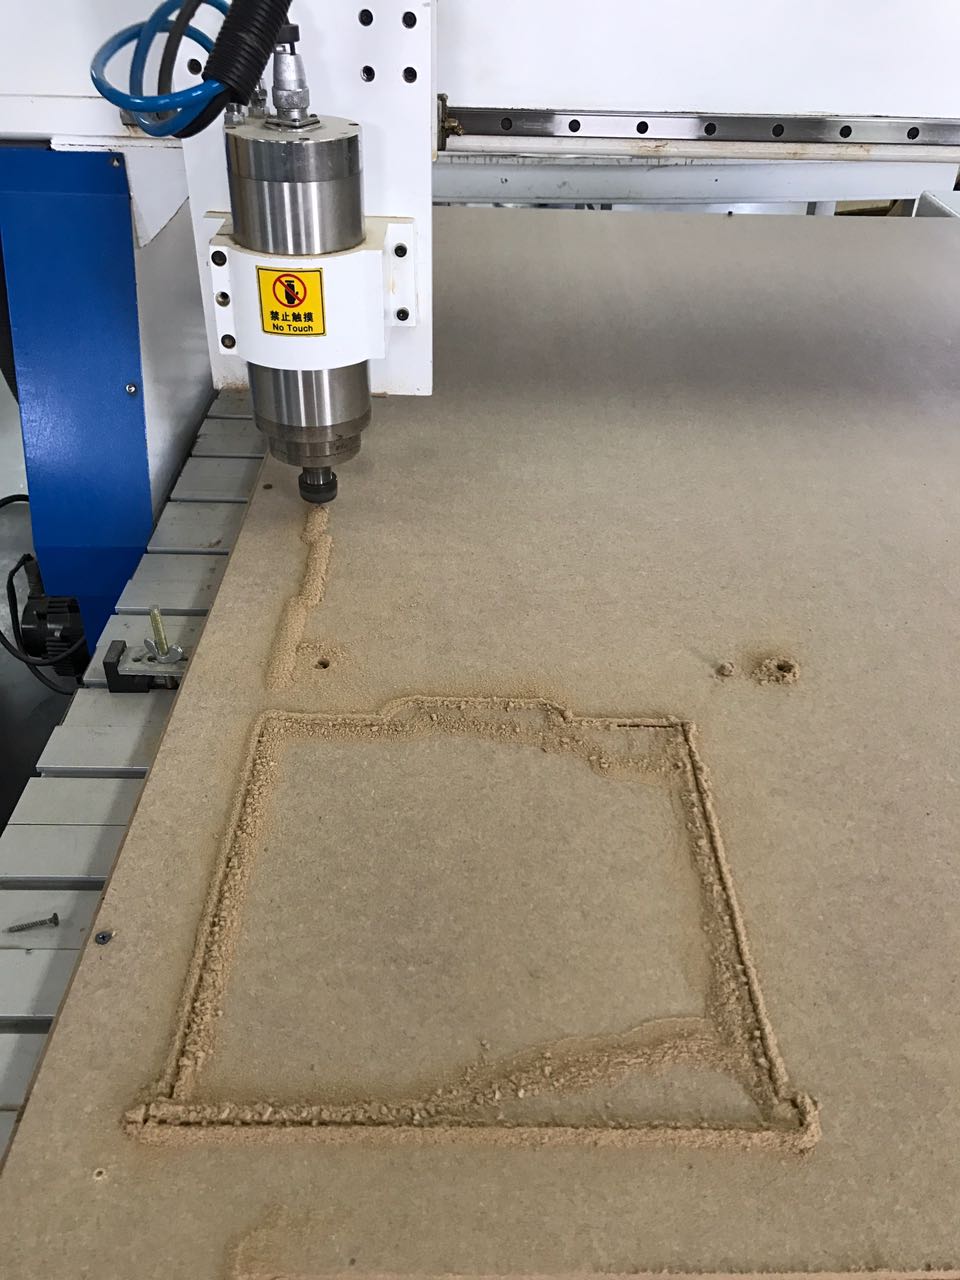
CNC Cutting : Using ArtCam software I imported the .dxf files to align the objects I wanted to cut on the wooden sheet placed on the Controlled Cutting Machine to cut, since the CNC machine is operating by .plt file type I fixed -0.3 mm as tolerance of the press fit opining in my box to make sure that the parts will fit each others.
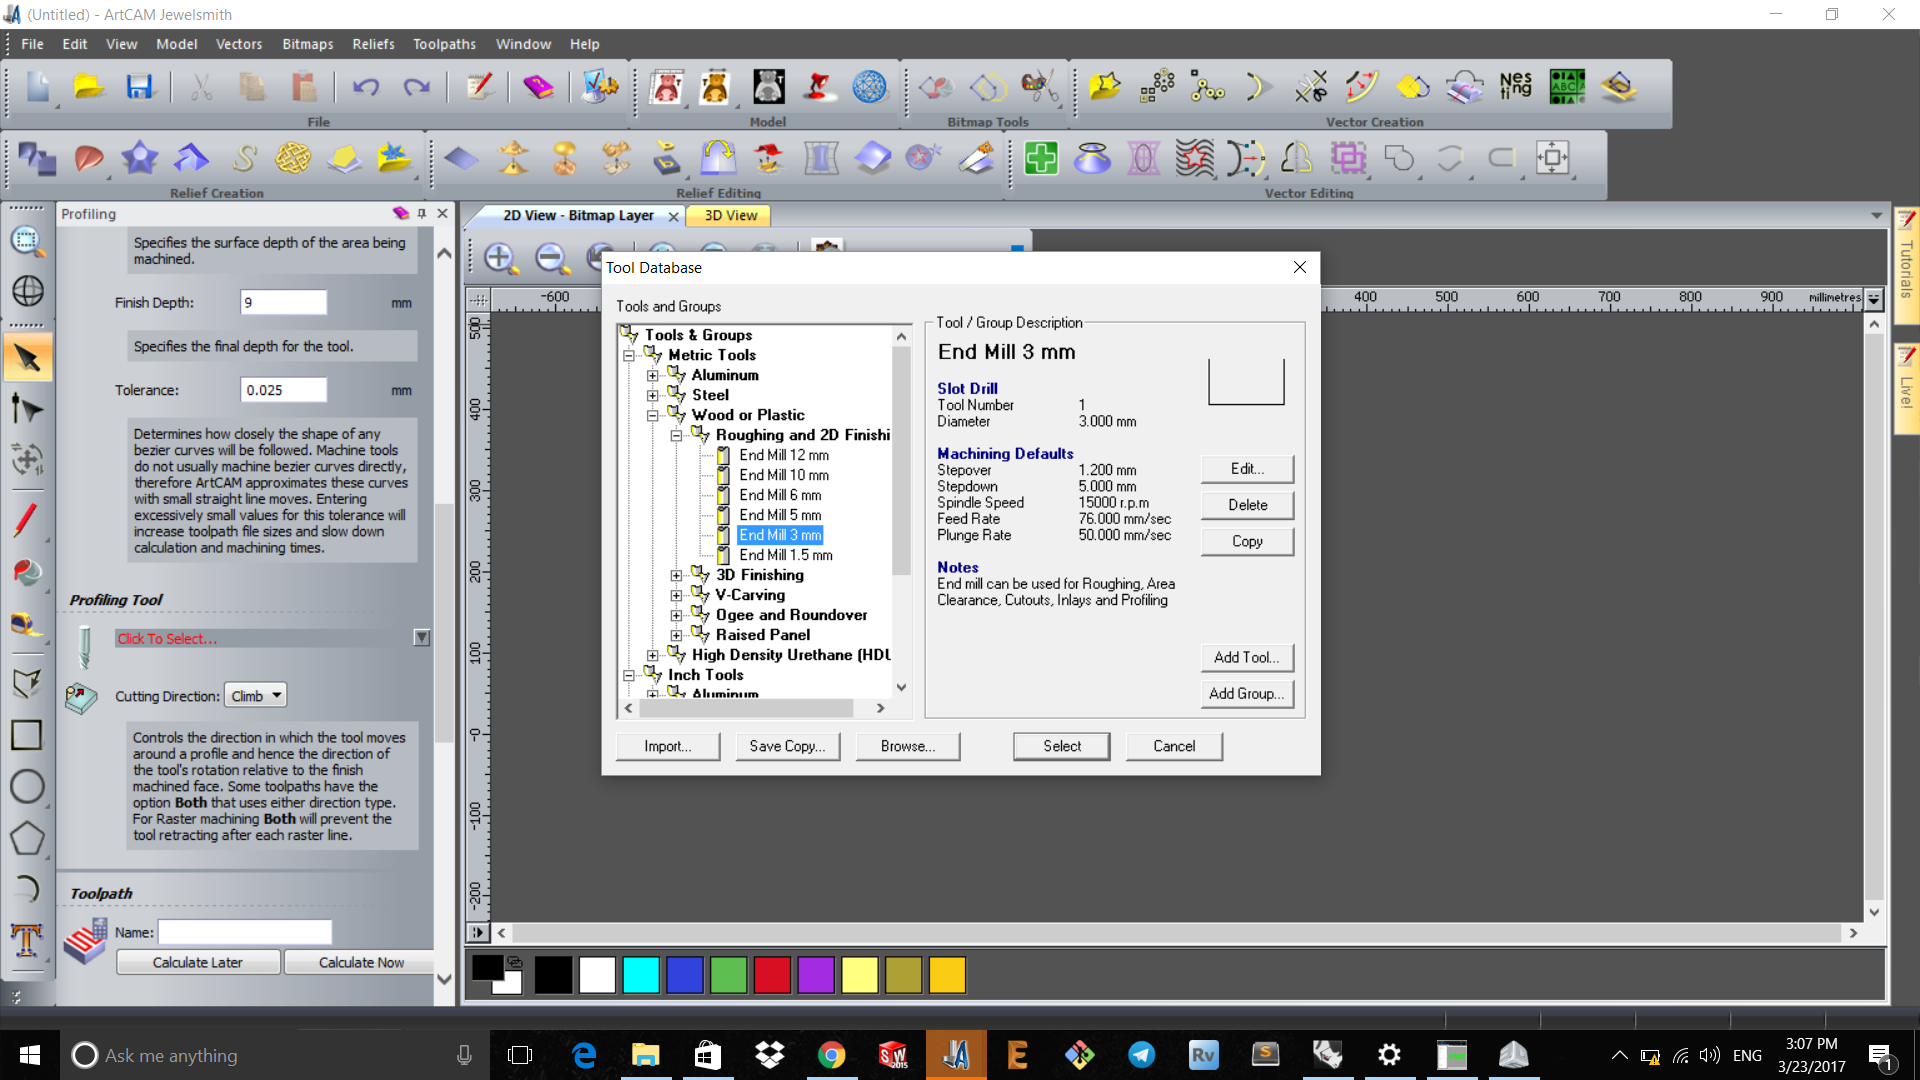
after that choose tool-path by Toolpaths then New 2D toolpath . Then I fixed the cutting (finish) depth to be 0.9 CM since the wooden sheet is 0.9 CM and I put another old used wooden sheet below the one I am cutting for safety, clicked select tool and choose 3 mm as a bit, calculated the tool path to cut my box parts and I saved tool paths, Then I exported the files as .plt
The settings as shown in the following screenshot are:
1-Stepover 1.2 mm
2-Stepdown 5 mm
3-Spindle Speed 15000 r.p.m
4-Feed Rate 76 mm/sec
5-Plunge Rate 50 mm/sec
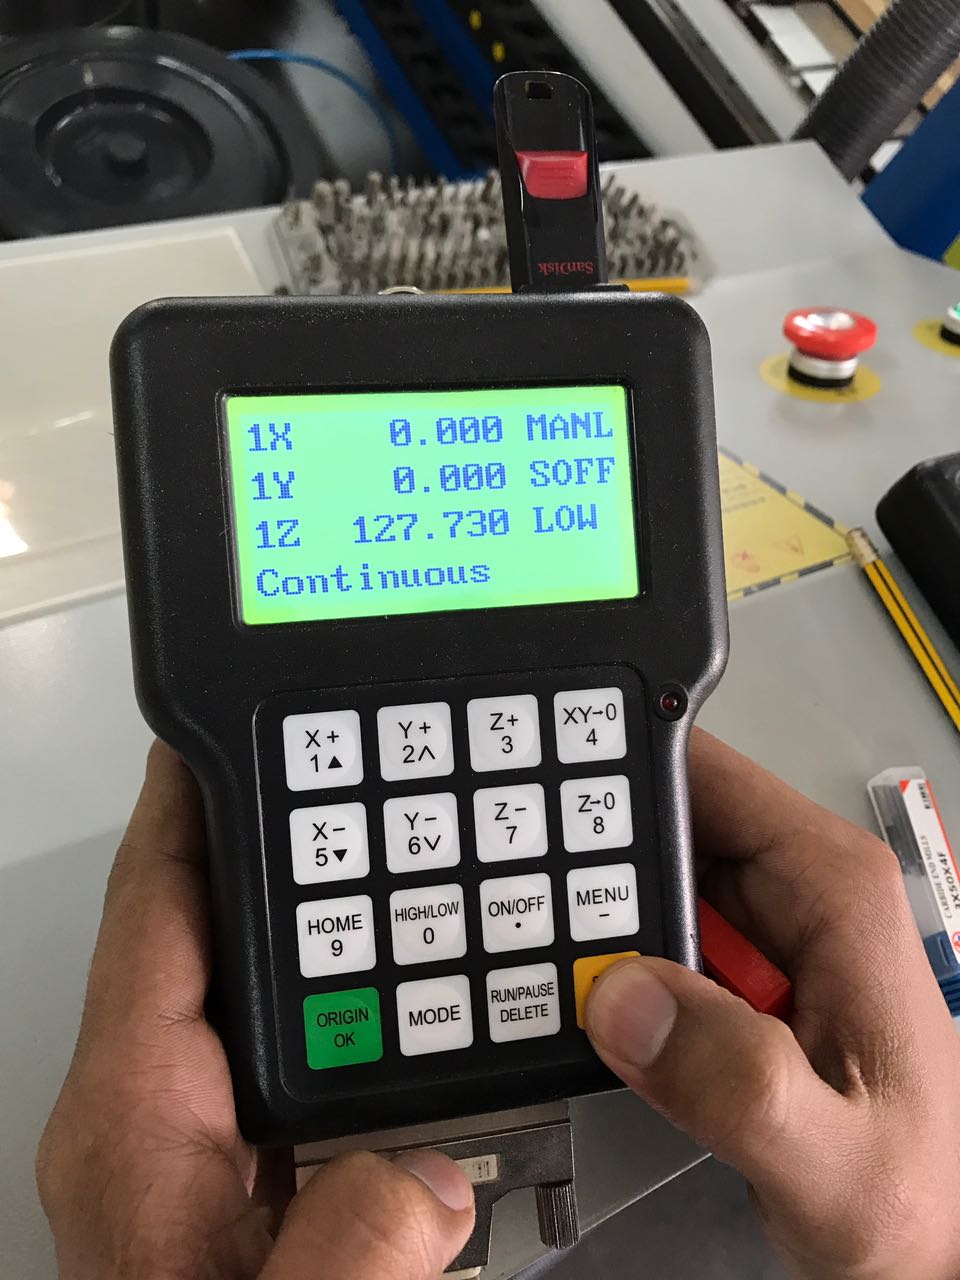
Using the machine controller I loaded the .plt file and set the 3 axis X,Y & Z and started cutting
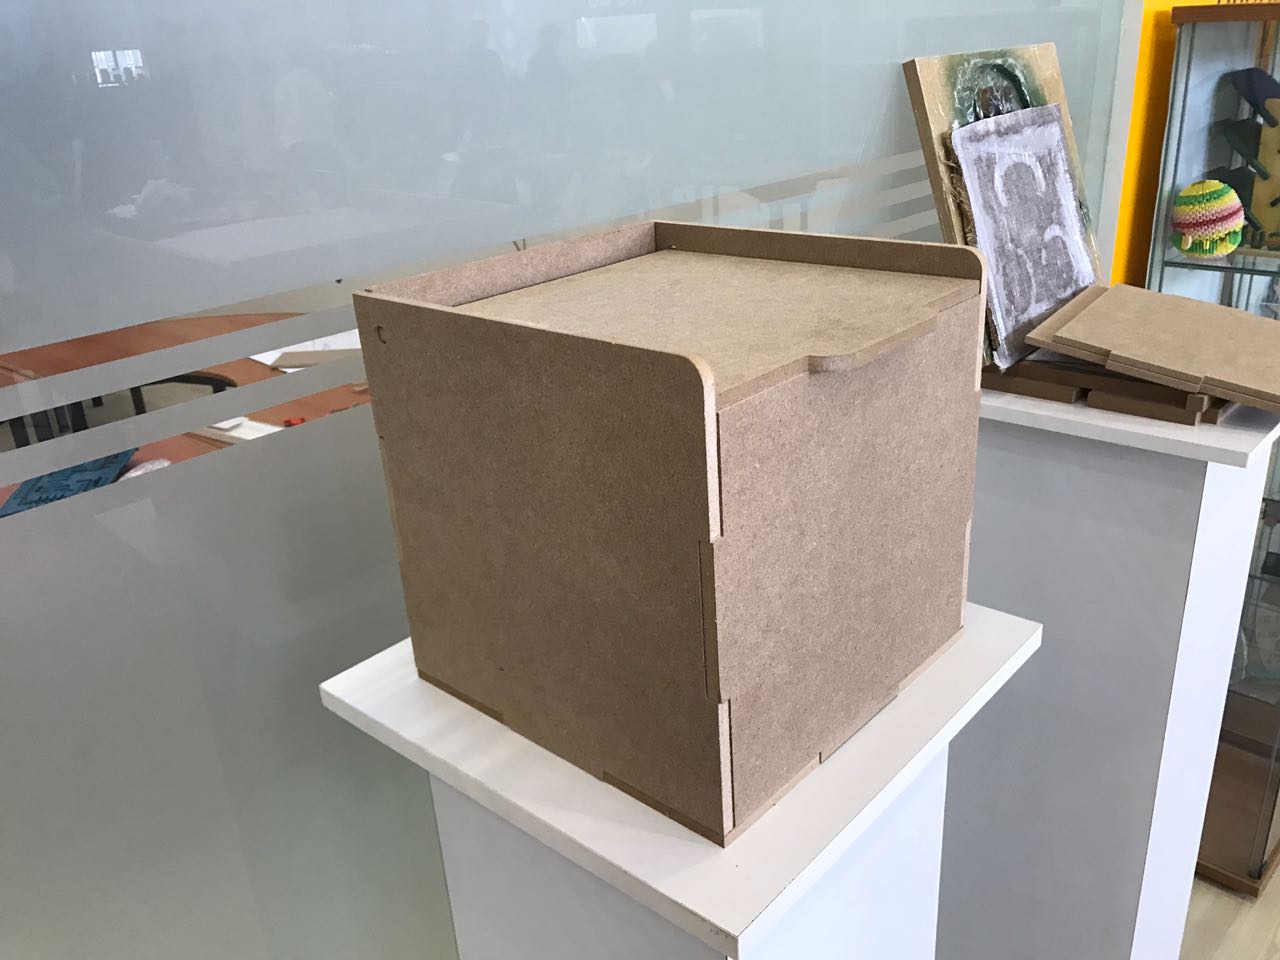
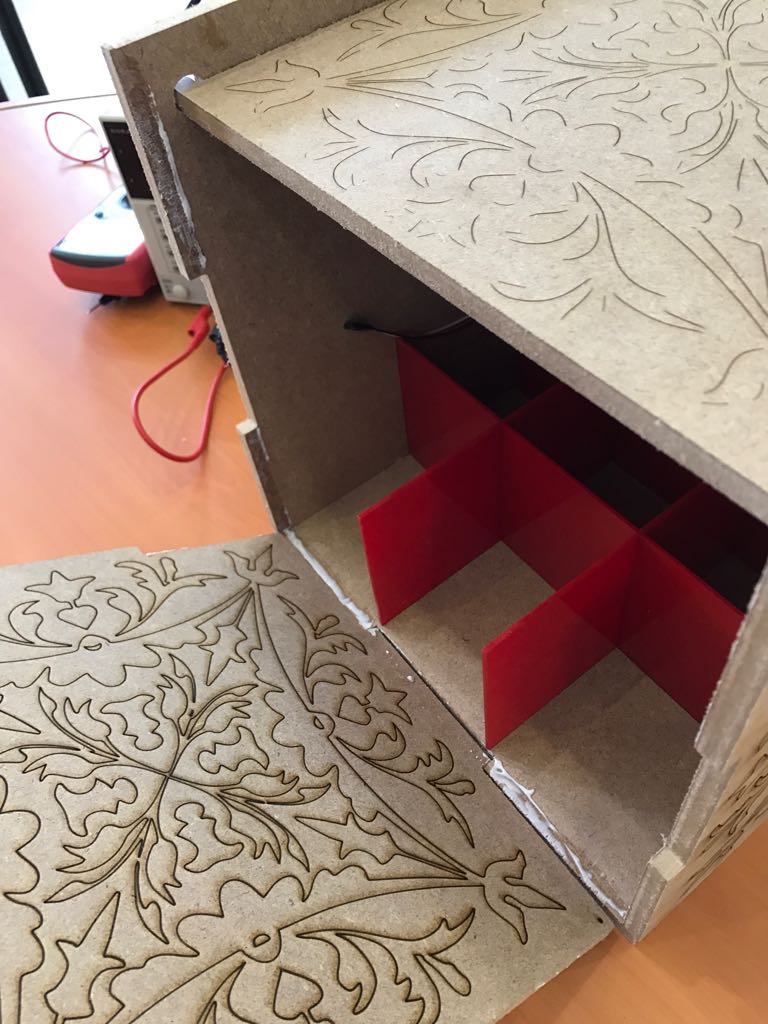
These are the box parts
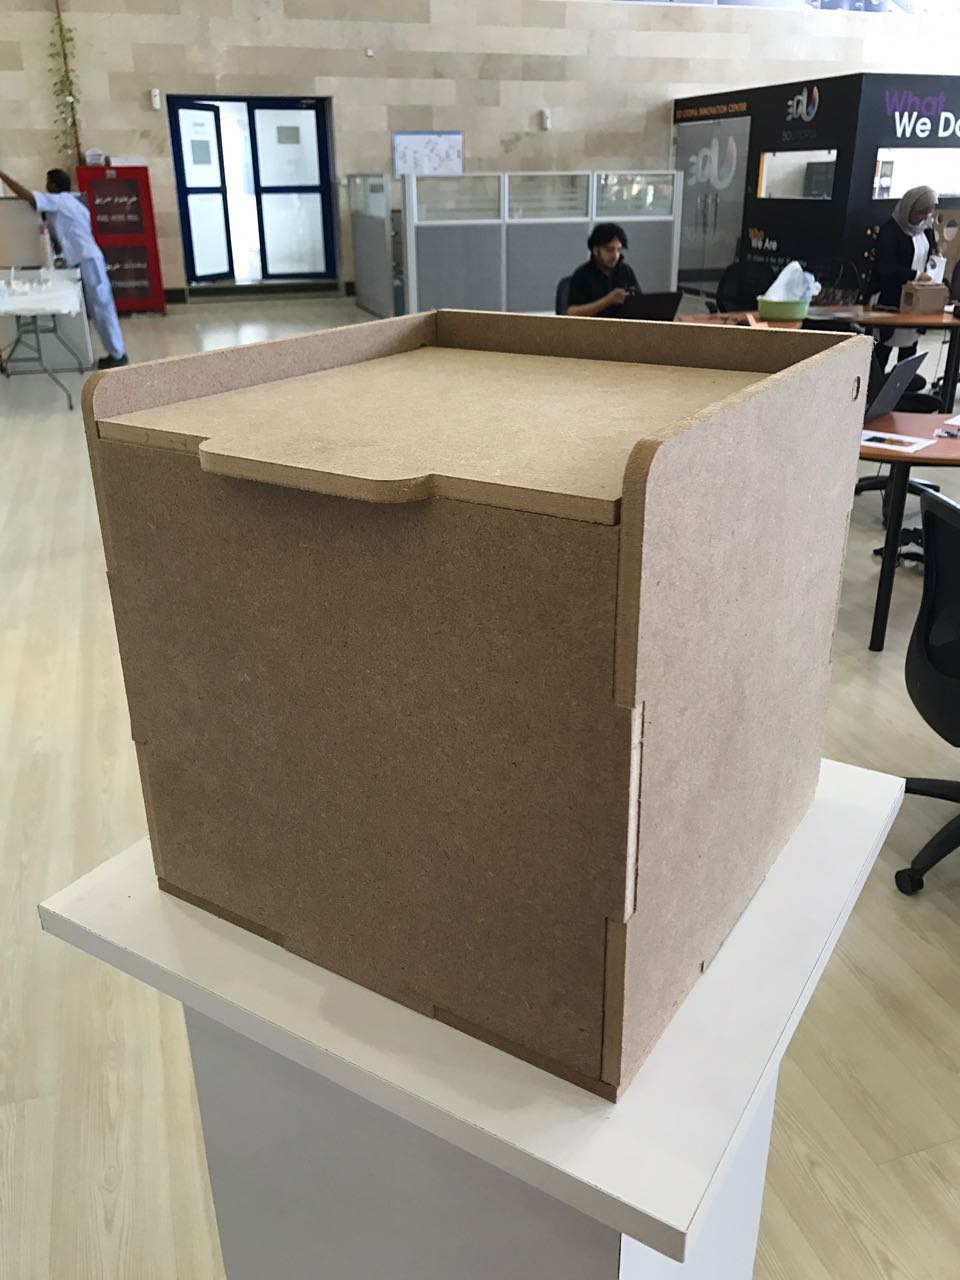
Then I assembled the parts
and fixed the the servo and the lock metal using glue gun .. because the wood thickness is just 9mm and the screw might damage it or go through it
after that I tested the lock mechanism and it worked perfectly
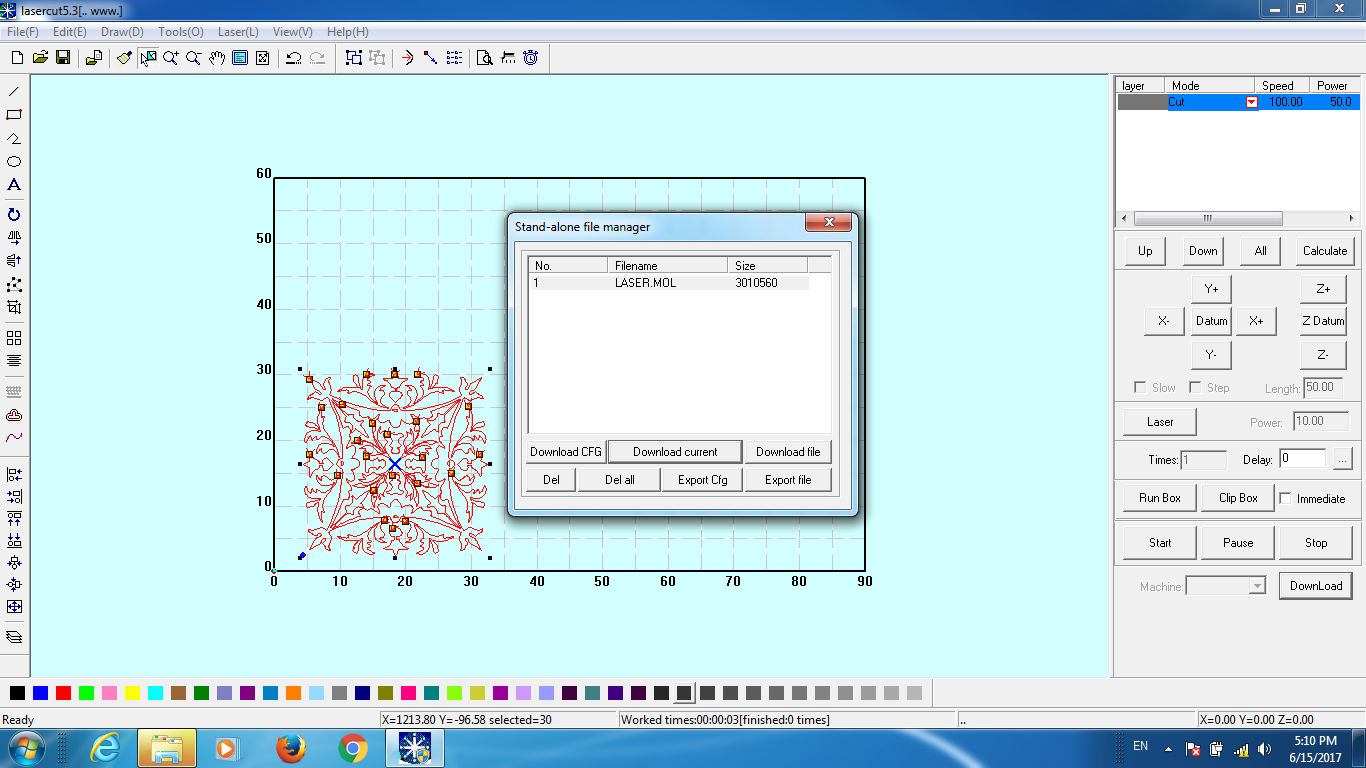
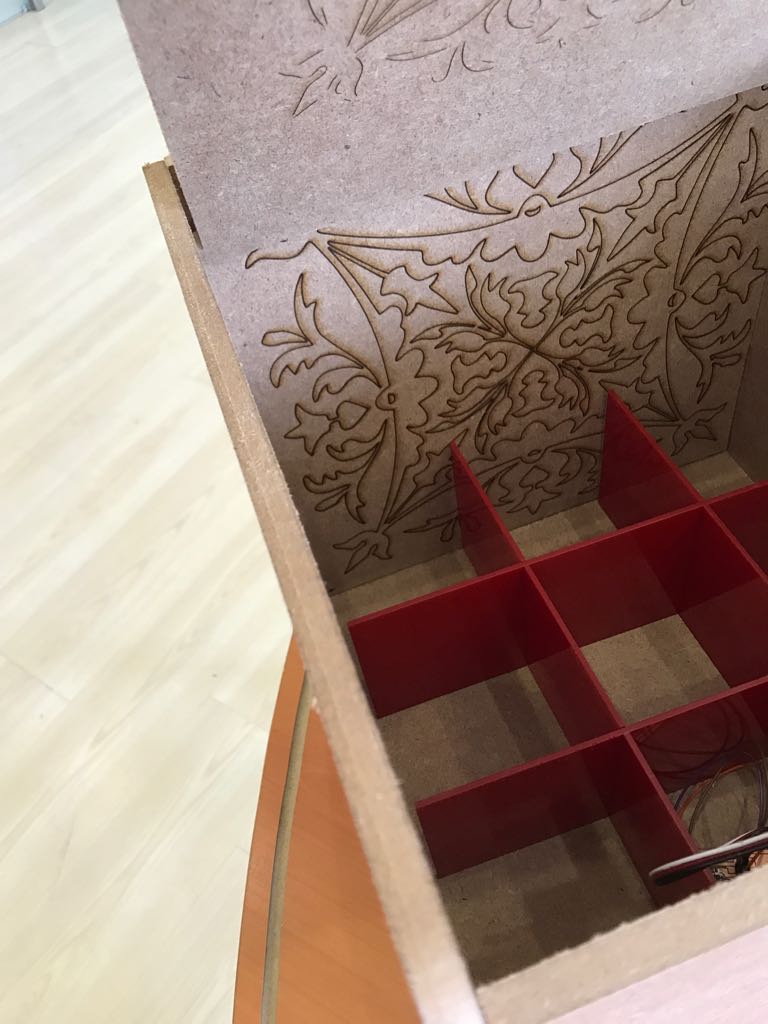
Then I decided to decorate the box and make it look nice so I used the laser cutting machine to engrave the wood by downloading this picture
and converting it from jpg to dxf file using online website
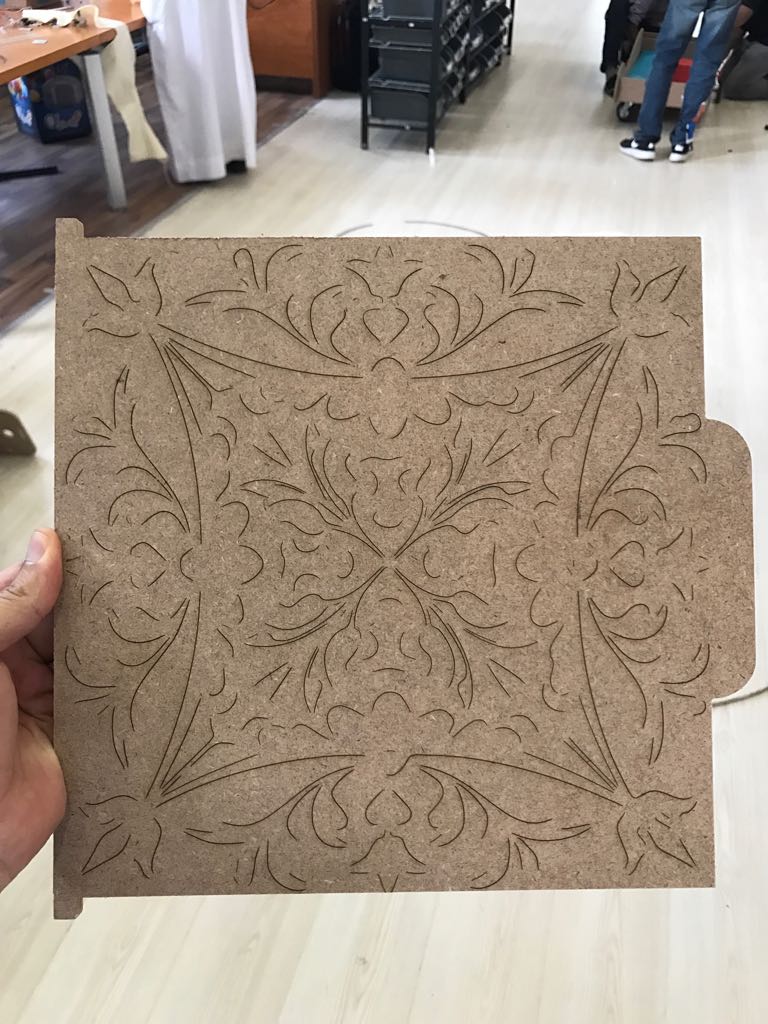
Then engrave it on the wood using the laser cutting machine
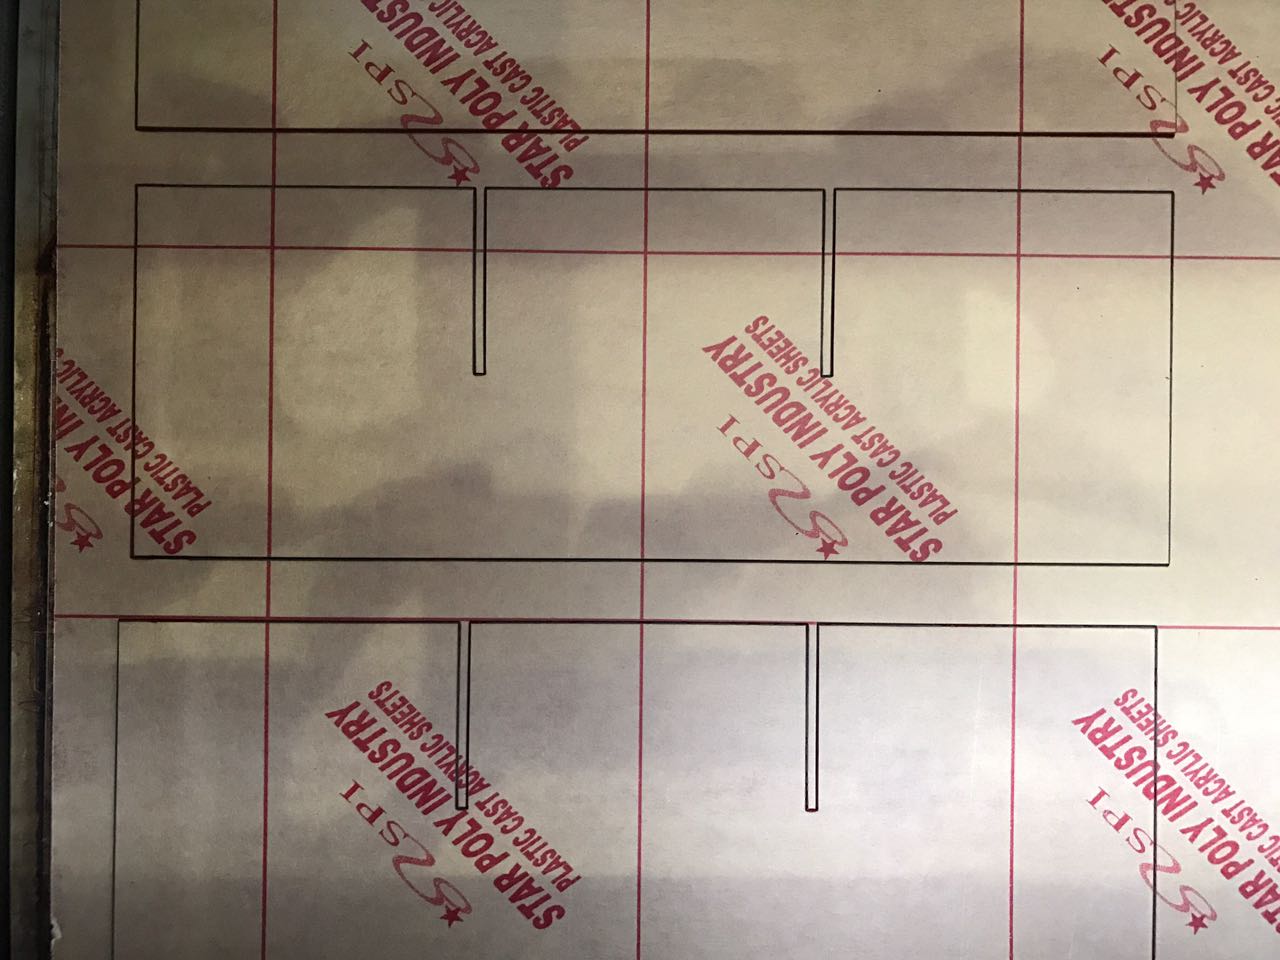
And I cut the acrylic partition I designed earlier on onshape in the laser cutting machine, removed the protection paper and assembled them the placed them in the box
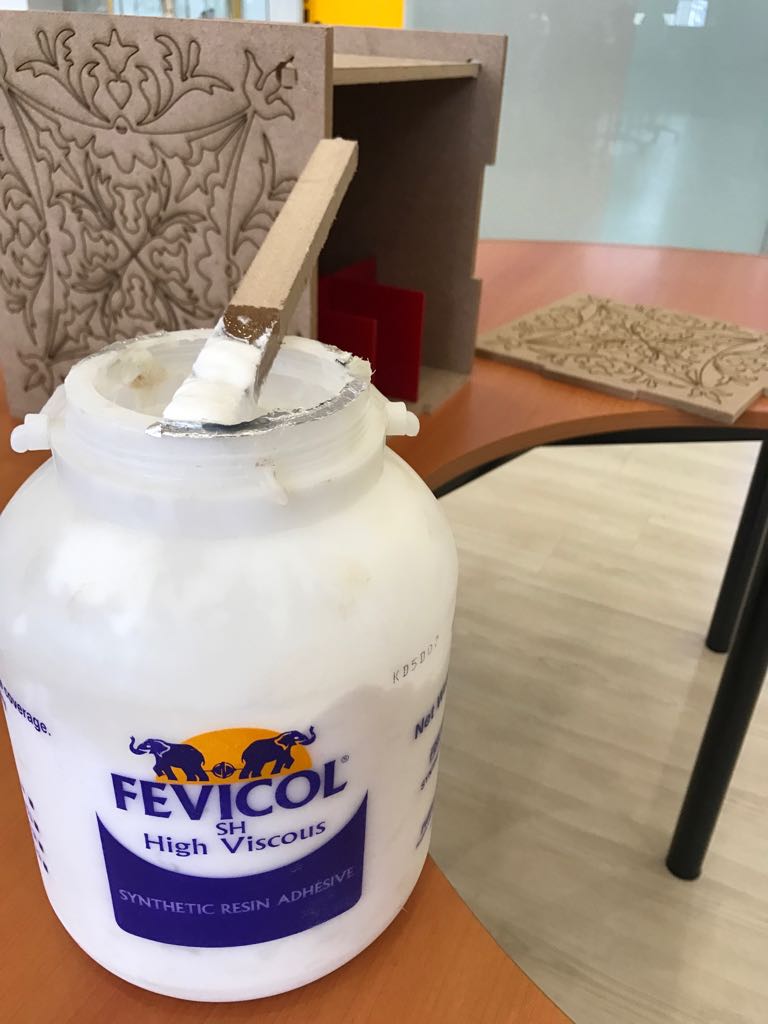
Finally I used the synthetic raisin adhesive shown below
To glue the wooden pieces together in the press-fit places to make it stronger and prevent the dismantling of the parts an lock the box
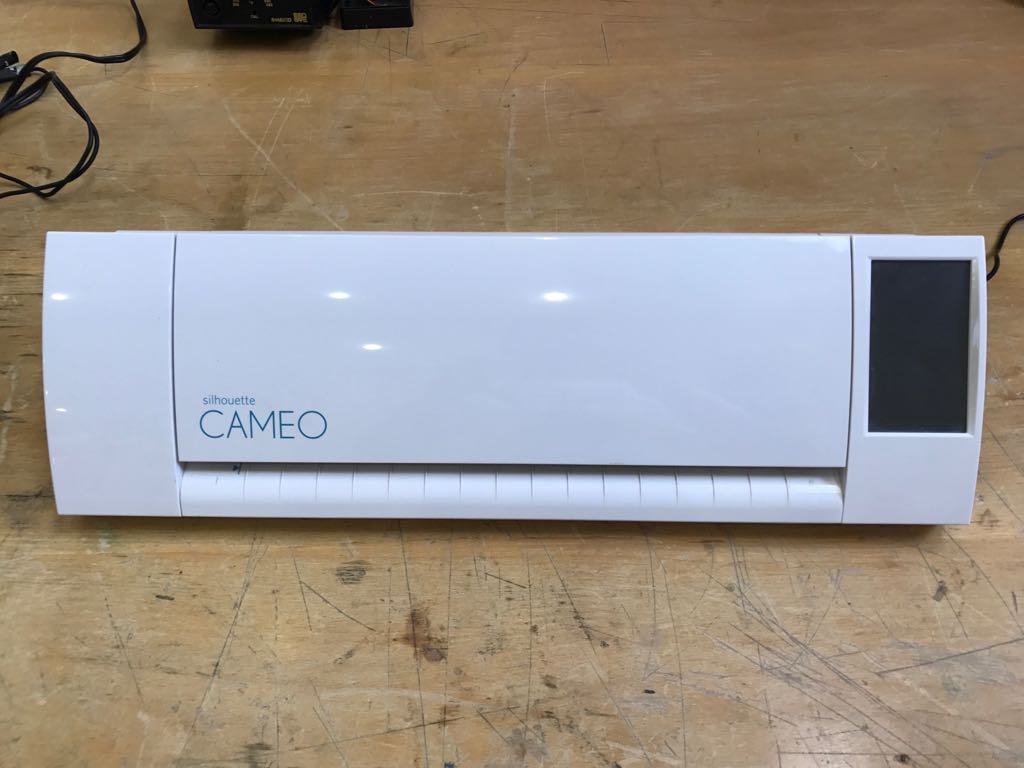
And the cherry on the top is the logo sicker cut sing CAMEO machain
The Previous Weeks Used
1) Principles and Practices, Project Management Week: designing and creating the project webpage and managing the project and activities in tight time window
2) Computer-Aided Design Week: used Onshape online software to design the box parts and the partitions
3) Computer Controlled Cutting Week: using the laser cutting machine for the internal partitions and the vinyl cutting to make the logo sticker
4) Computer-Controlled Machining Week : using the CNC to cut the wooden box parts
5) Embedded programming Week to program the micro-controller circuit board
6) Output Devices : using a servo motor controlled by the micro-controller circuit board for the lock
7) Interface and Application Programming : using a bloetooth module connected through a mobile to control the lock servo motor.
8)Electronics Production Week : to mill the electric circuit board in the PCB and solder the components.
9) Invention, Intellectual Property and Business Models Week:Choosin one license type to secure the copyrights for my project which is the creative common.
10) Project Development Week: how to mange my time and work withing limited and tight time window and which activities can be done in parallel simultaneously and which activity must be accelerated
I will defiantly choose Creative Common Licens non commercial no derivatives. So that my rights are protected and I can guarantee that any commercial benefits of my Project will be for me.
Code :
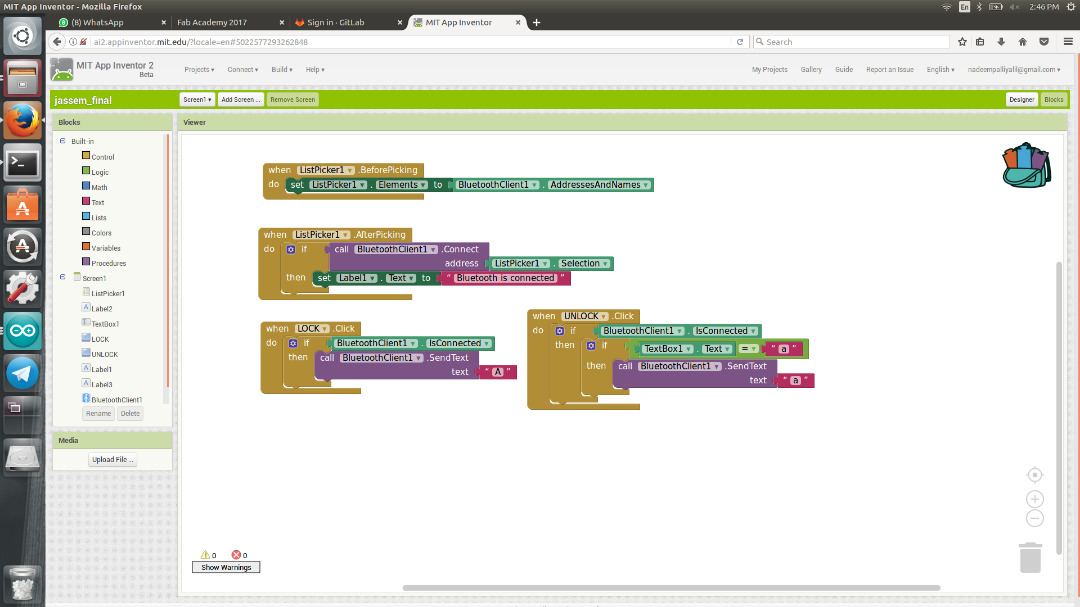
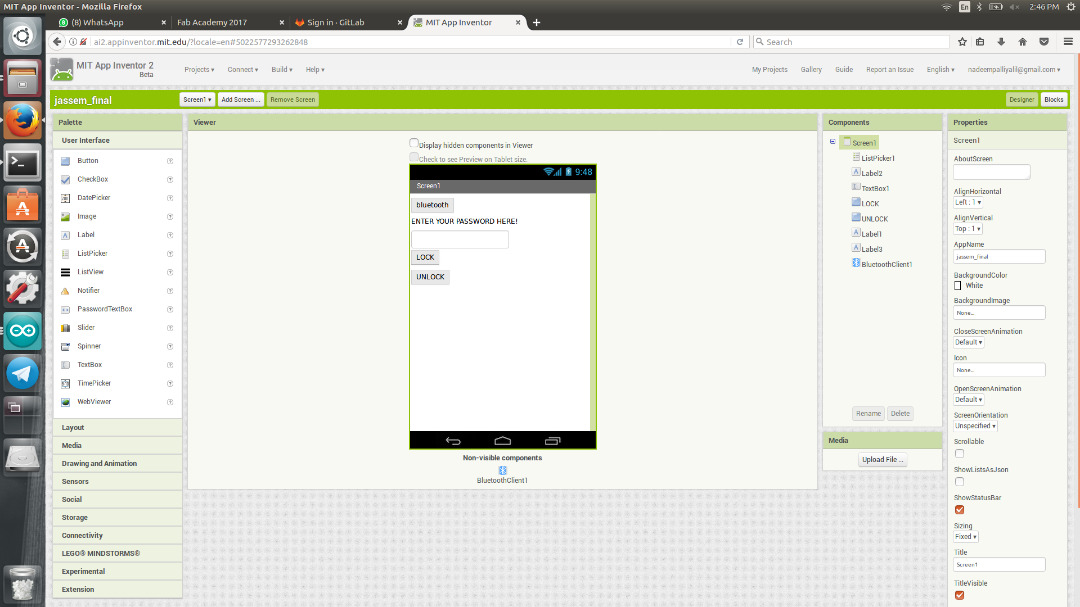
I used MIT web based Application interfaces for programming since it is easy with drag and drop to use and doesn’t need any installations.
After authentication go to Projects -> Start new project and its done ,ready to go! Its very easy to use ,just drag an drop all the functions we need simultaneously we can see the screen and once dragged everything needed. just switch to Block view
.
.
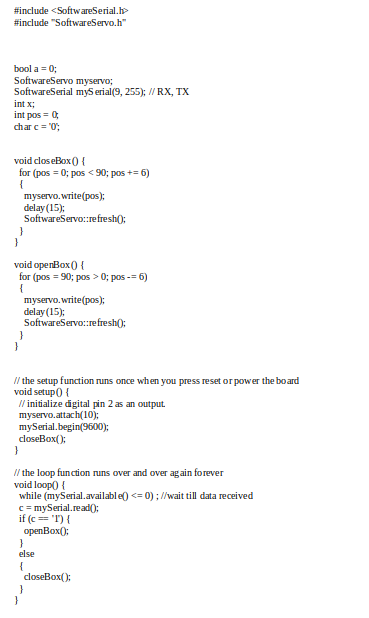
Here is the code to program the micro controller board :