Week 12: Molding and Casting
Assignment: Design a 3D mold, machine it, and use it to cast parts.
What I have done:
Molding is the process of manufacturing by shaping liquid or pliable raw materials using mold or matrix, which have been using pattern or model of final project. Casting is a manufacturing process on which a molten metal is injected or poured into a mold to form an object of the desired shapeDesign
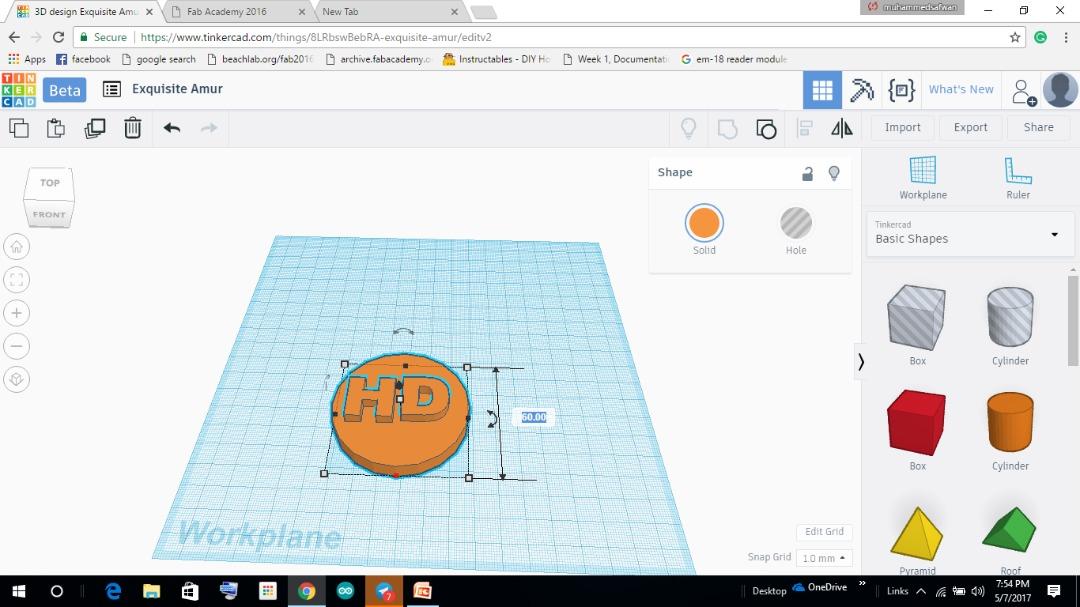
I started the design in tinkercad and luckily it happened to be easier than what I thought especially that I am a beginner with no background. The make up of the drawing is effortless and smooth. In my design I had to make the XY measurement 60 by 60 and the Z measurement is 13mm, the wax size I am using is 2mm.
Design step in tinkercad
step 1
Firstly i click tinkercad menu then i choose Basic Shapes.unde the basic shape i select the cylinder shape then i scaled 60 * 60 ,x and y

Step 2
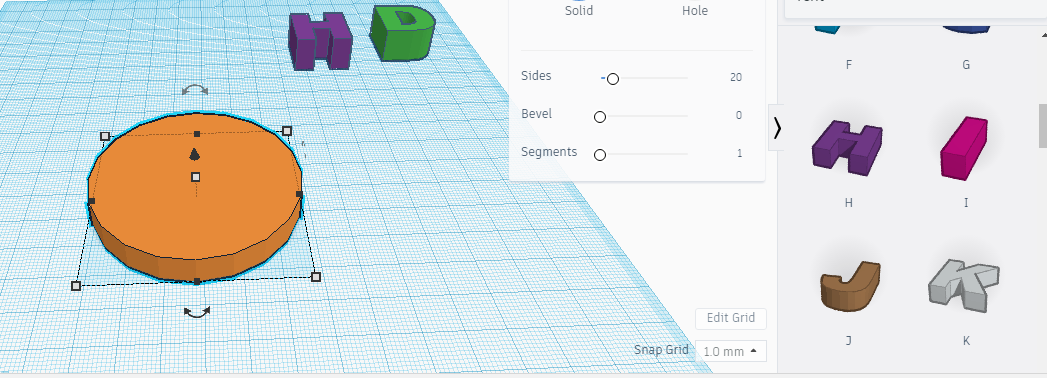
Then I select Text under the tinkercad menu.moreover i choose the text and i drag it in to the workplane.
Step 3
The next stage i select the text then i substract the text in to the cylinder shape then there is an option for grouping is called "group".i select all the design then i grouped.
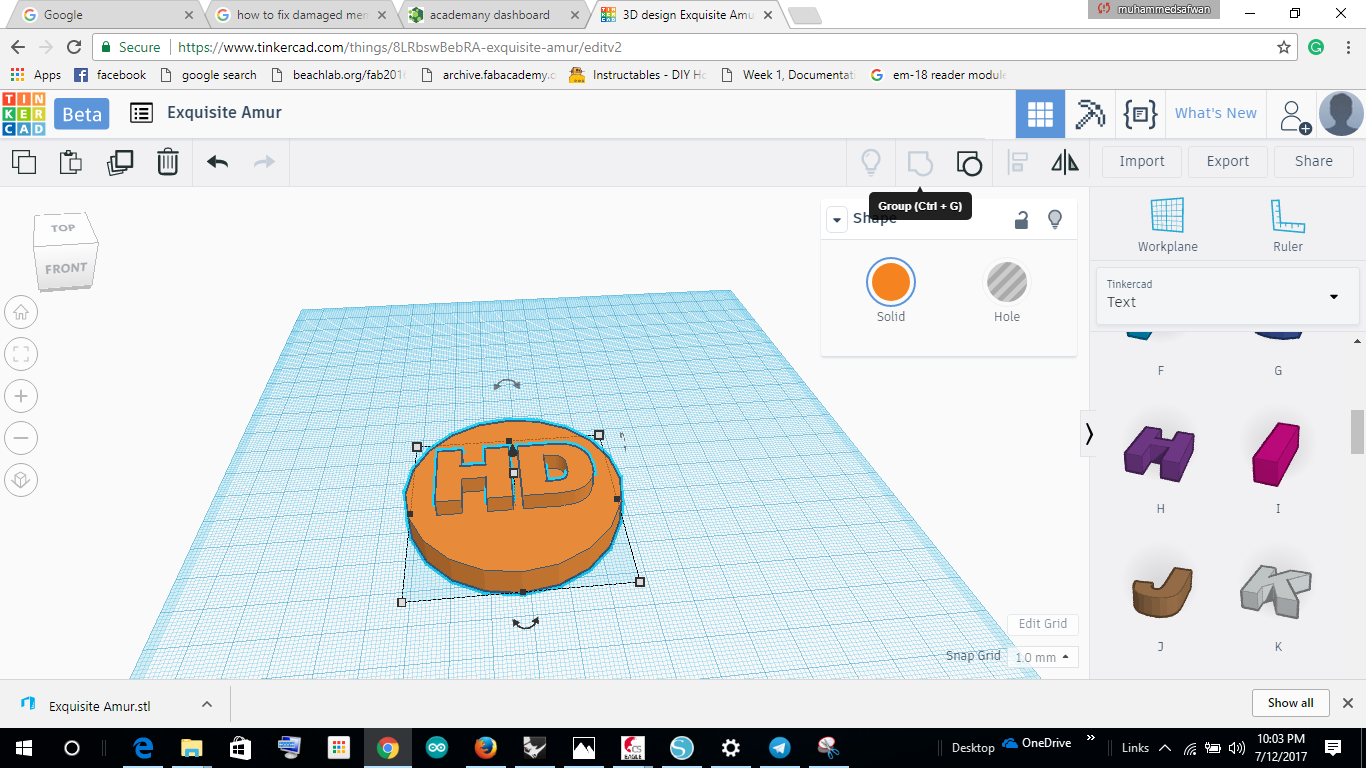
have exported the design as .stl file.
How to upload a 3D design in ArtCAM
Open a new page in Art cam then give the XY measurement, the deasign file is X= 60 mm, Y=60 mm.
How to import 3D file in artcam
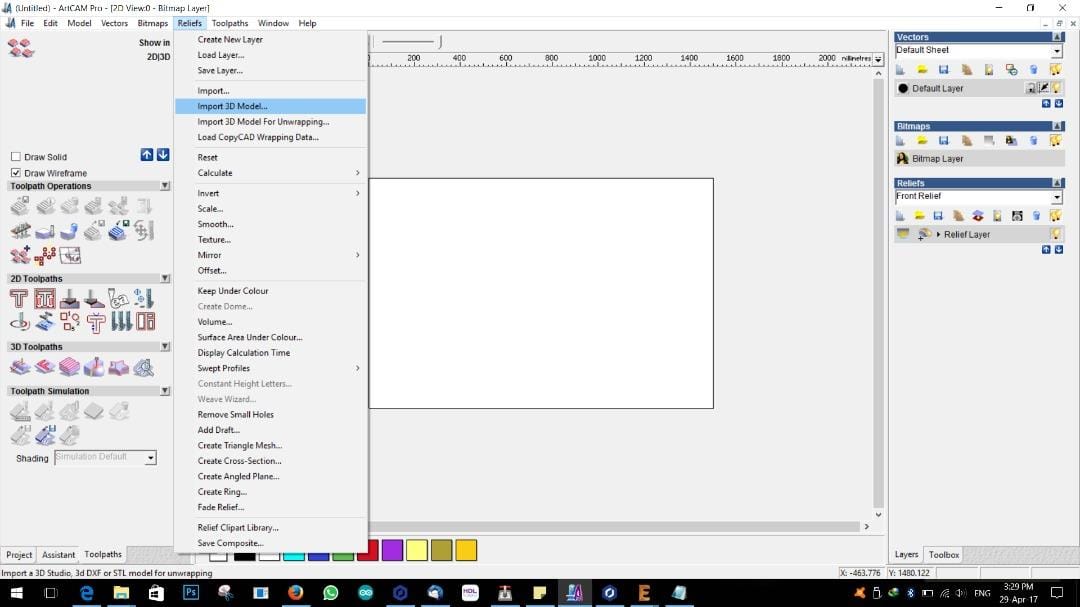
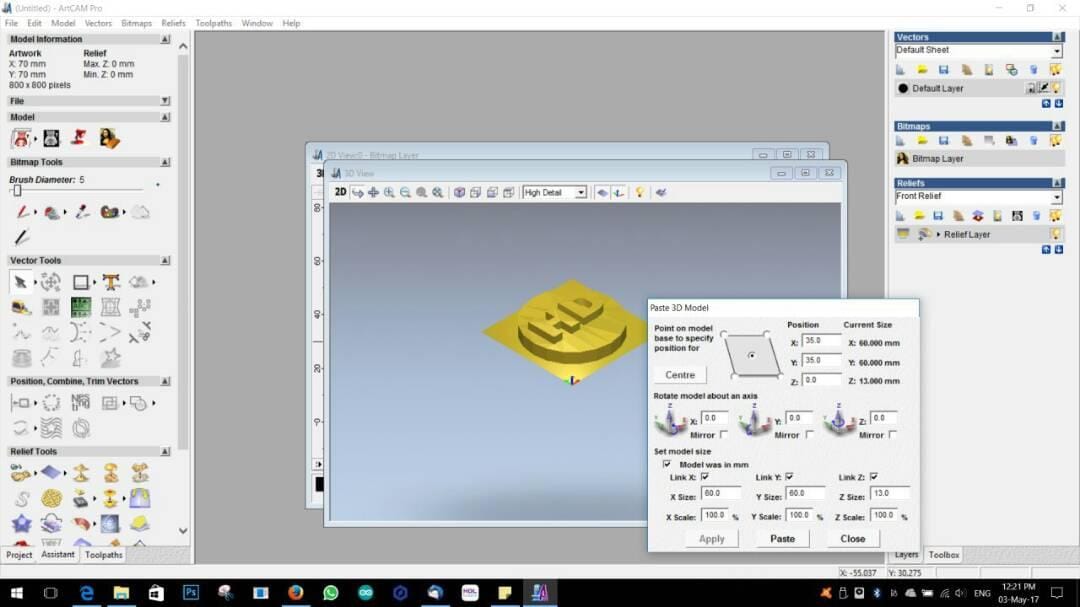
Relief → Import 3D Model → select the file → open. The following window will be open

Click Center → check the XY dimension –> apply → paste → close
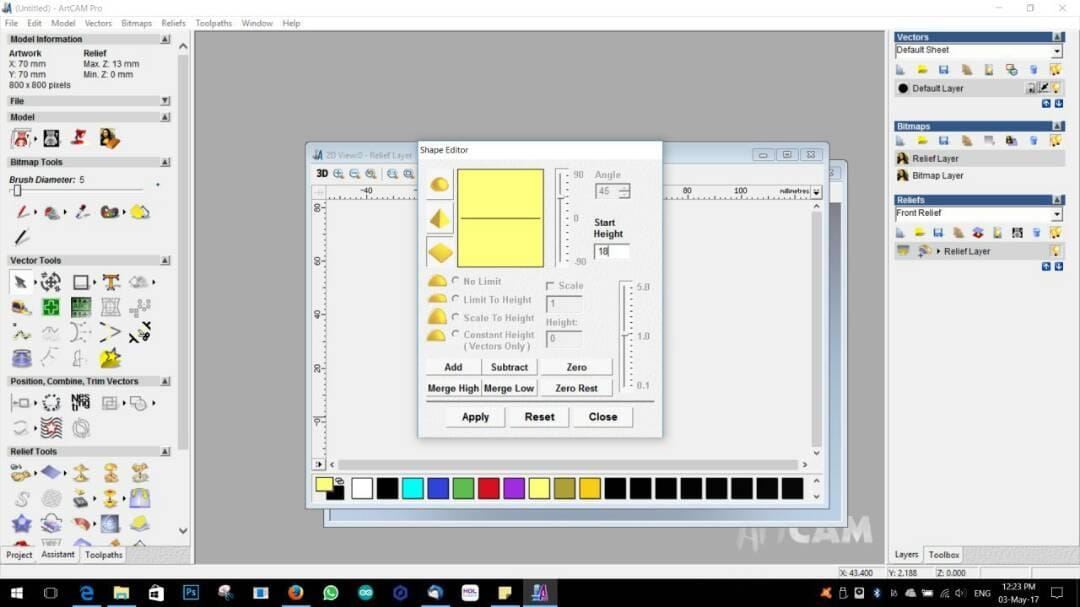
starting from down. We have to change that; therefore, click 2D → create grey scale bitmap then create a square of the 2D picture and double click. In that time we can see the picture below that I gave 18 mm start height ( depth of the design from the material) –> Subtract → Zero Rest → Apply → close-→ 3D.
My design structure is ready, the next step is making the tool path.
How to make a tool path?
I am using two types of bits for the milling:
1) Rough Cut
2) Finish Cut
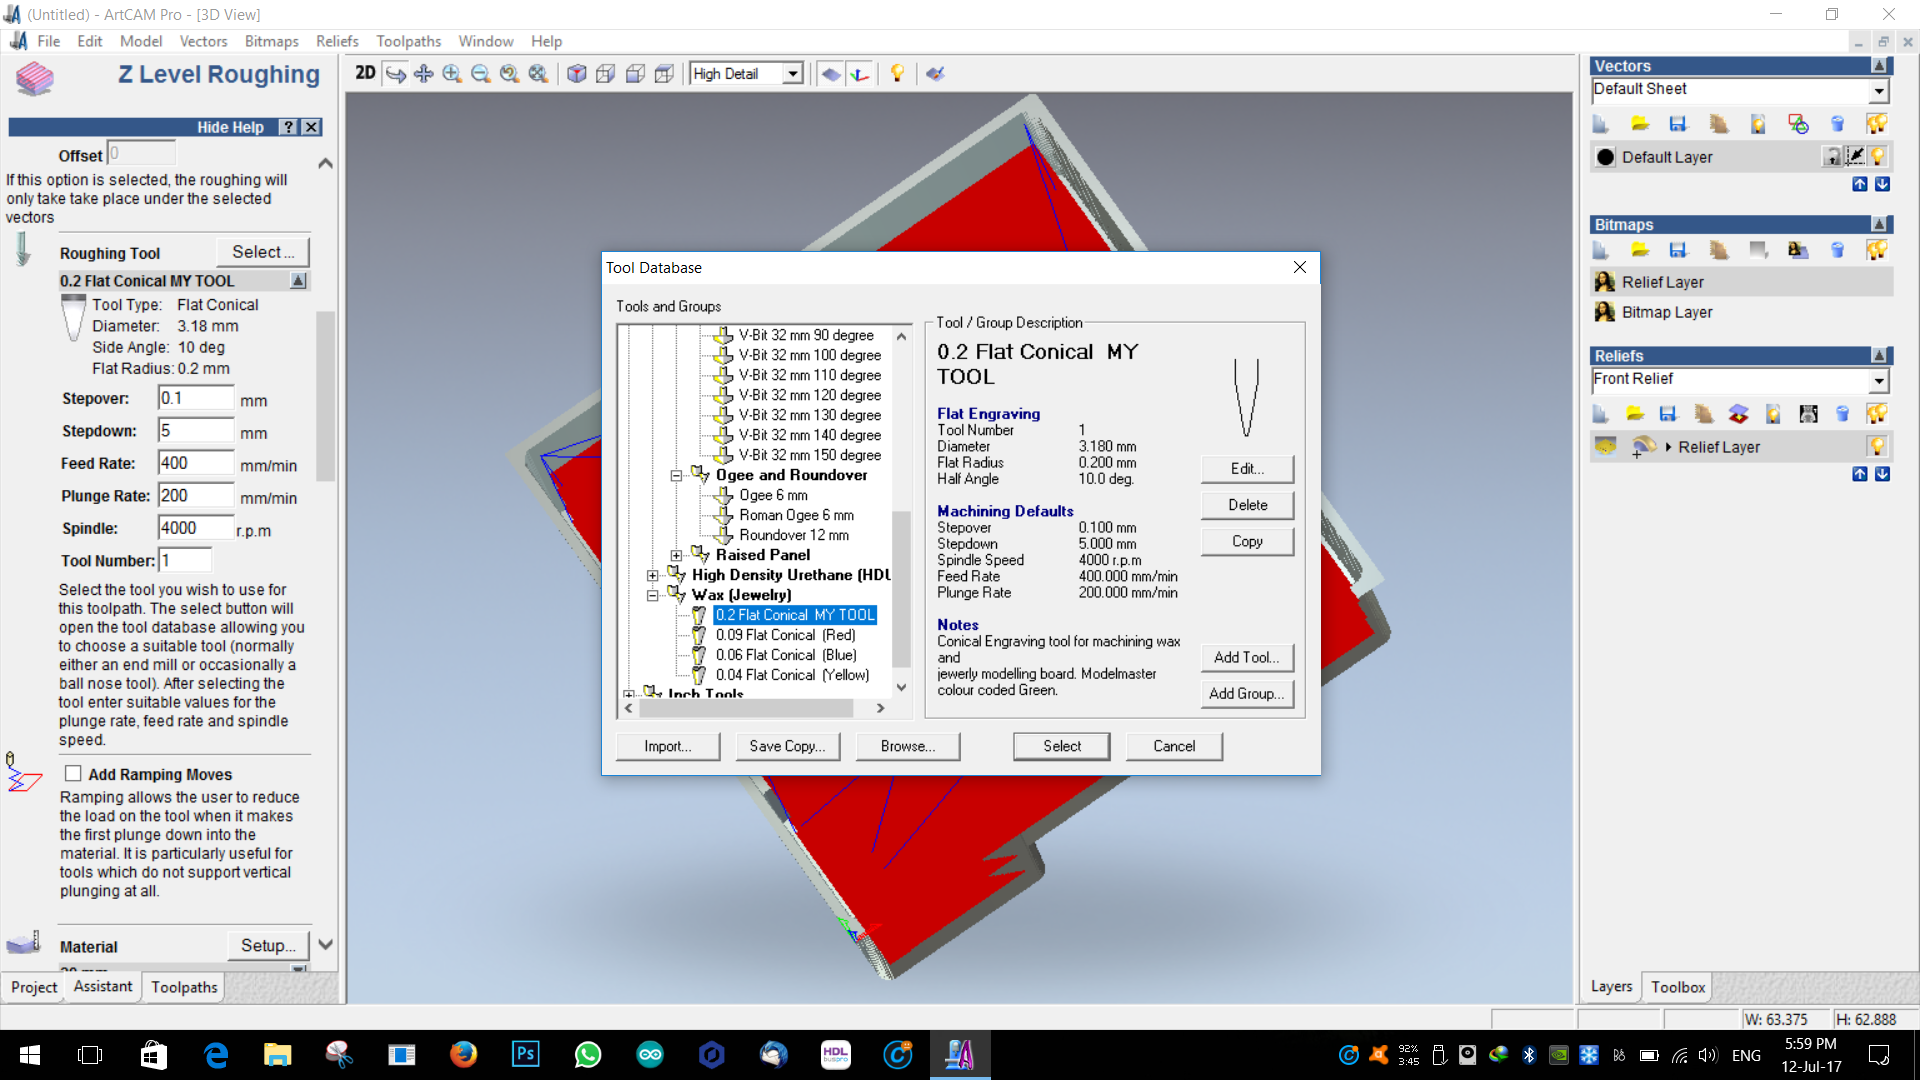
Click tool path → Select Z level Roughing → Roughing Tool → Select the bit from the list → Select Material ( before measure the wax thickness) –> gave the machine Z value → gave the name and click now.
For the rouhgf cut we are using 3mm bit
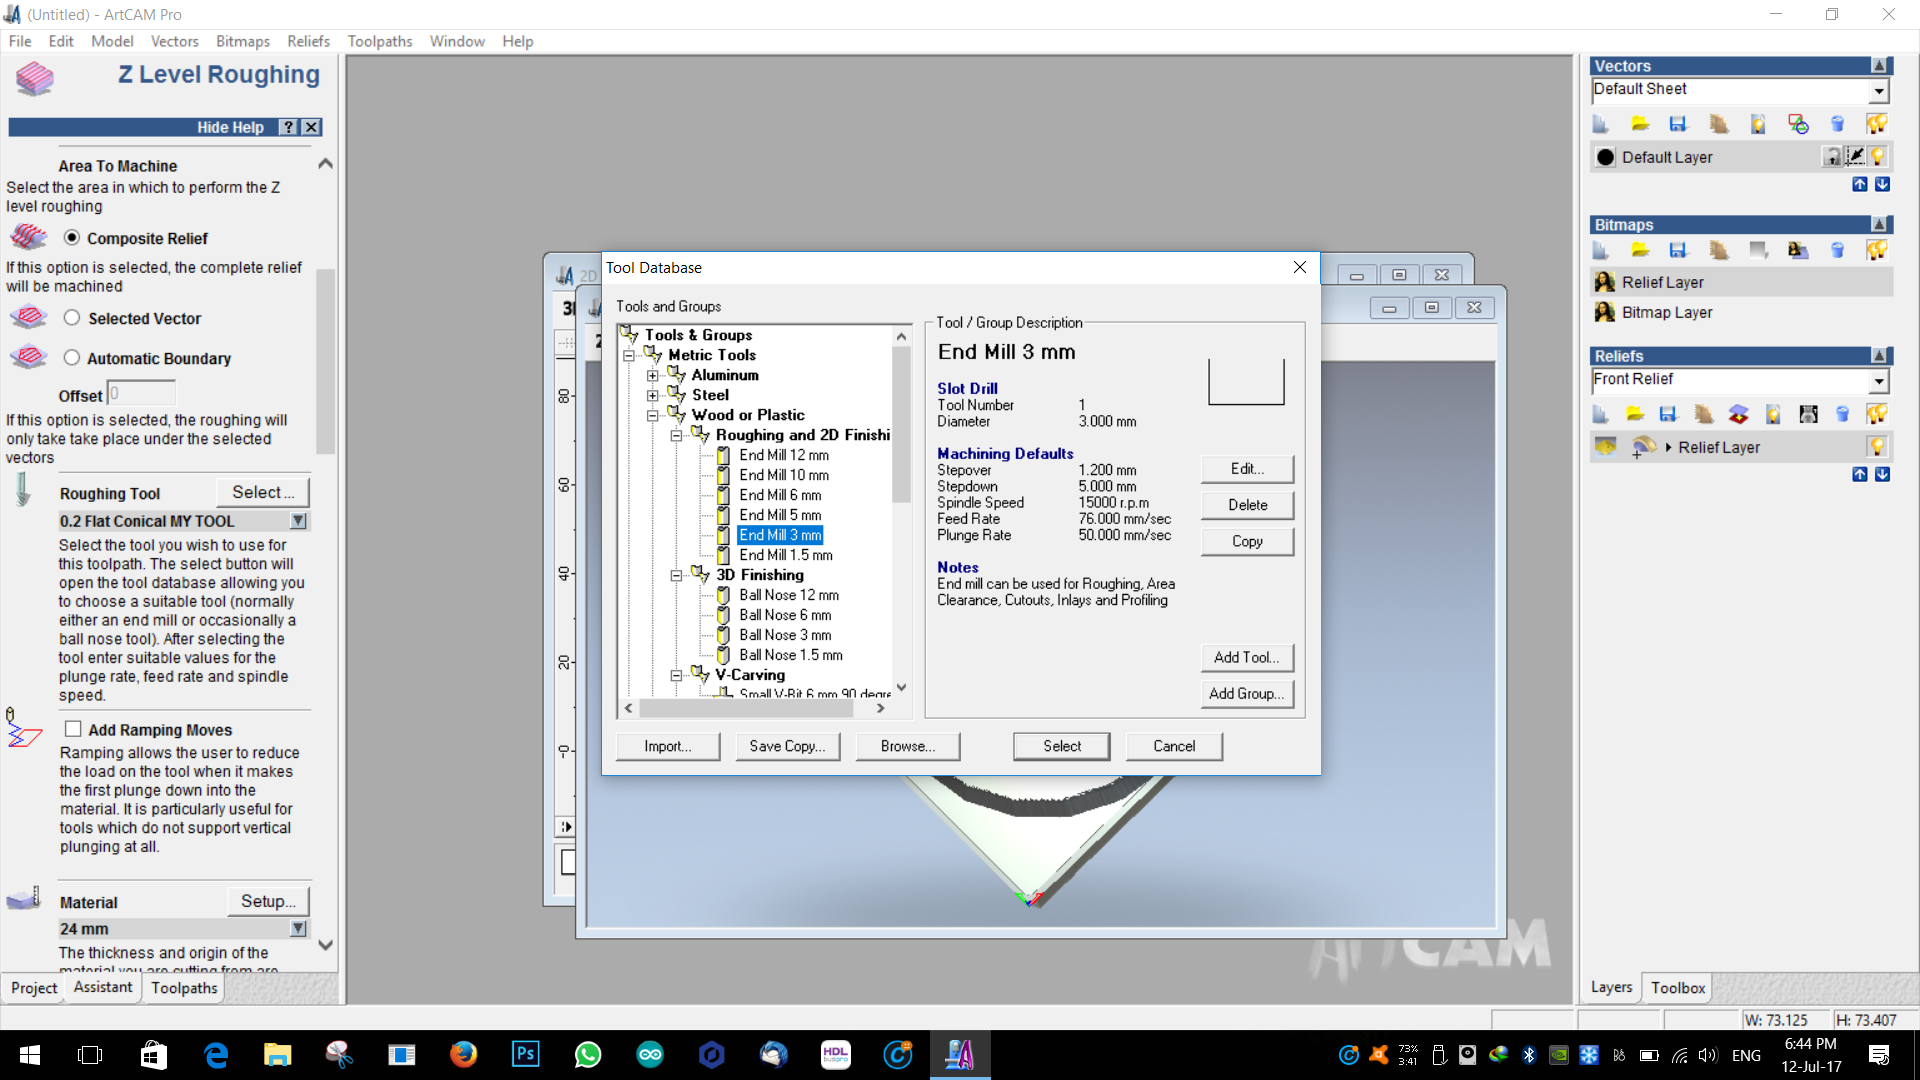
For the finishing we are using 0.2 flat conical tool
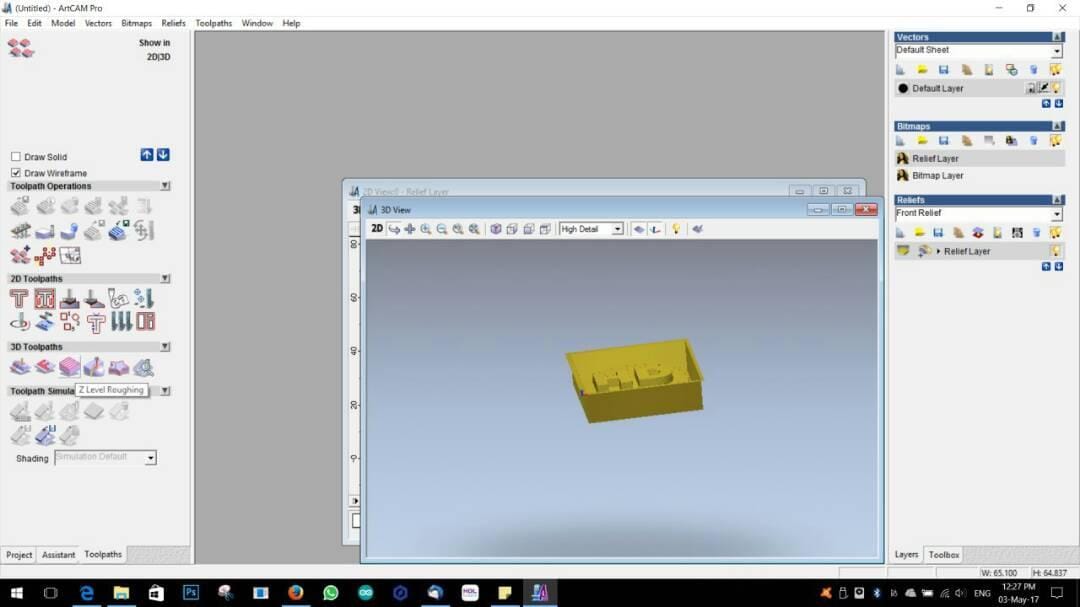
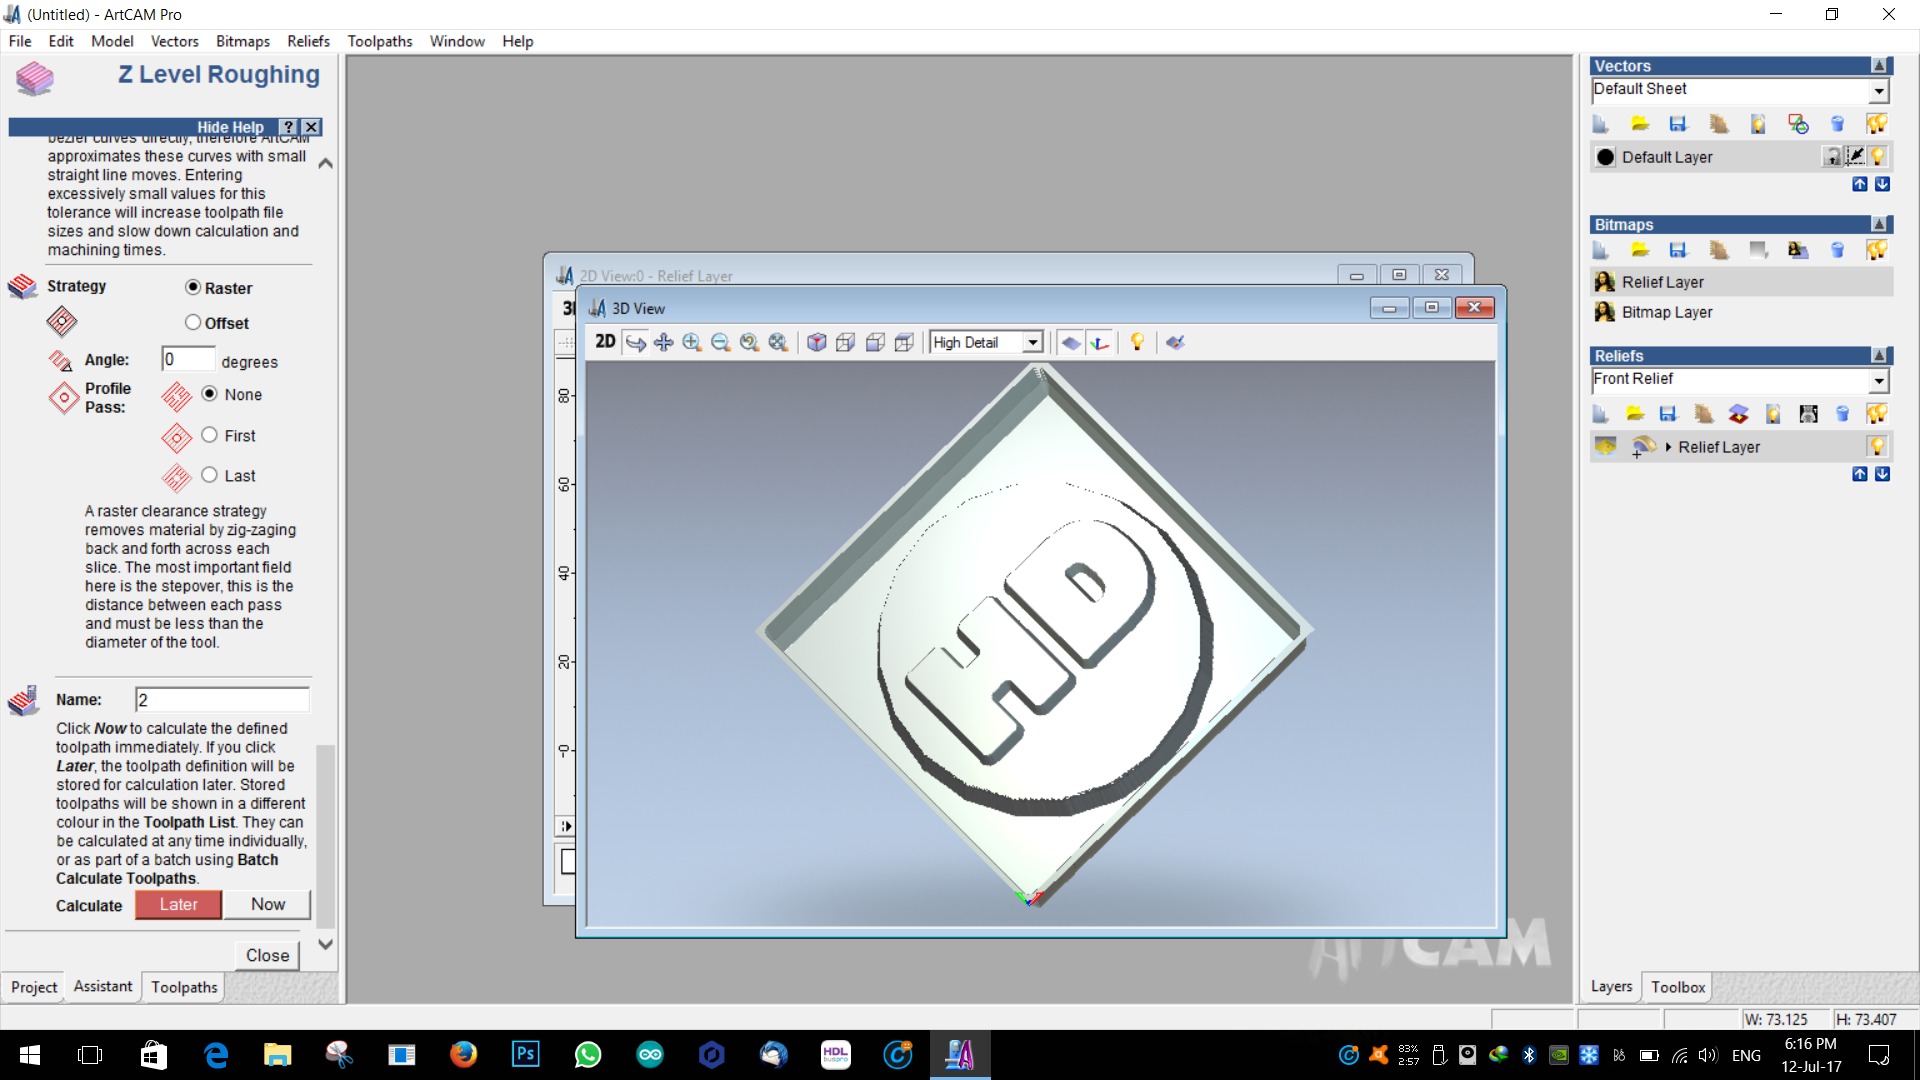
Then i simulate the tool path .it is working fine
Then I saved my tool path as .nc for the CNC.
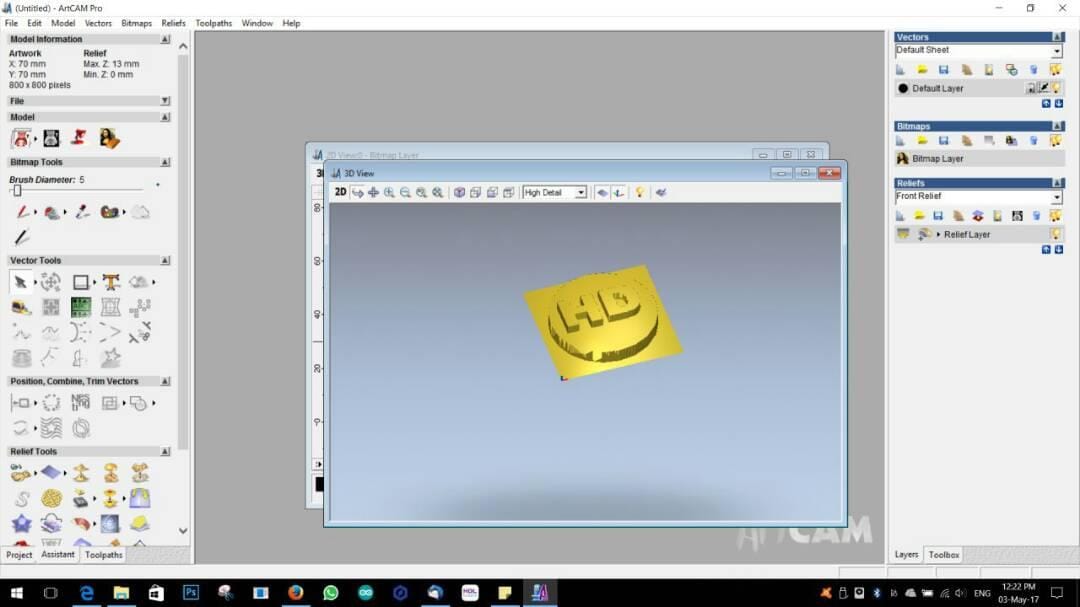
Milling Result:
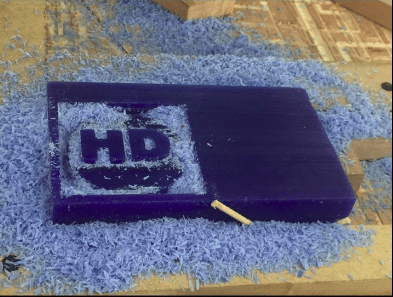
Molding:
We are using silicon for making the mold then mixing ratio of silicon is 1:1. We should use all the safety equipment to avoid any hazard or incidents; like,, gloves, glasses, mixing spatula and spoon, foil.Step 1:
I have measured how much liquid I need to to use for the measuring cup. I have poured water into the design wax then I have poured it into a measuring cup; then after knowing the exact amount.
Step 2:
I have measured silicon A&B 1:1 composition then I have poured both of them into an empty glass. Then I have mixed them for two minutes. After that I have poured into the wax (while I was pouring I have to center the place and keep some distance in order to avoid the bubbles.
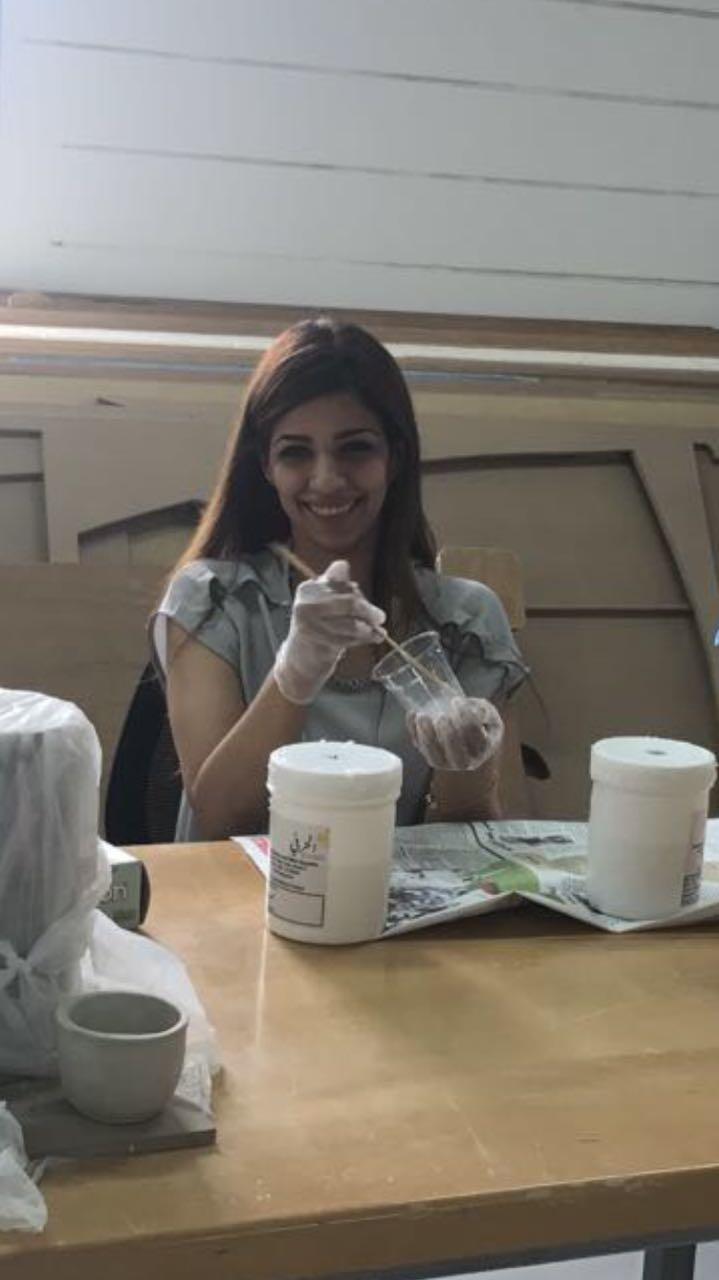
For the setting of the mold we have to wait for four hours in order to have the following result:
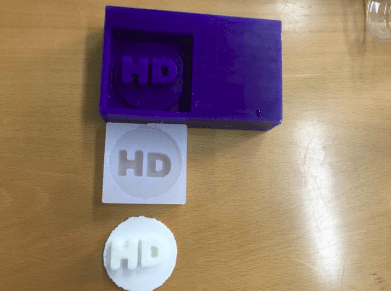
Molding Result:
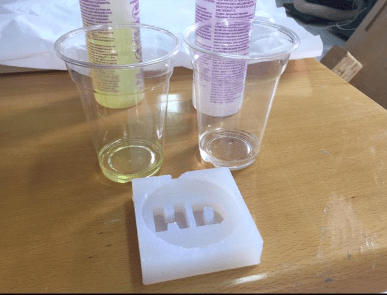
Casting:
For the casting we are using amazing casting resin. For this resin the mixing ratio is 1:1 as well. We should give it time for 30 minutes in order for it to settle easily.Casting Result:
GO to design file
Download the stl file