In this week, i will create a circuit with an output devices which is a speaker. To do the board, i need to know the circuit trace and the components in order to fully achieve the board to function.
Speaker Circuit

This is a sample board of a speakers circuit and how it should be done. The speaker circuit is different than the LED circuit. There are different components that are used for the speaker than any of the others.
Details
For additional information about the speaker, it contains 11 parts shown in the above image. The parts are Surround, Cone, Dust Cover, Suspension, Coil, Cone Neck Fil, Chassis, Suspension Neck Fill, Front Plate, Magnet and Yoke.
DetailsCircuit Process
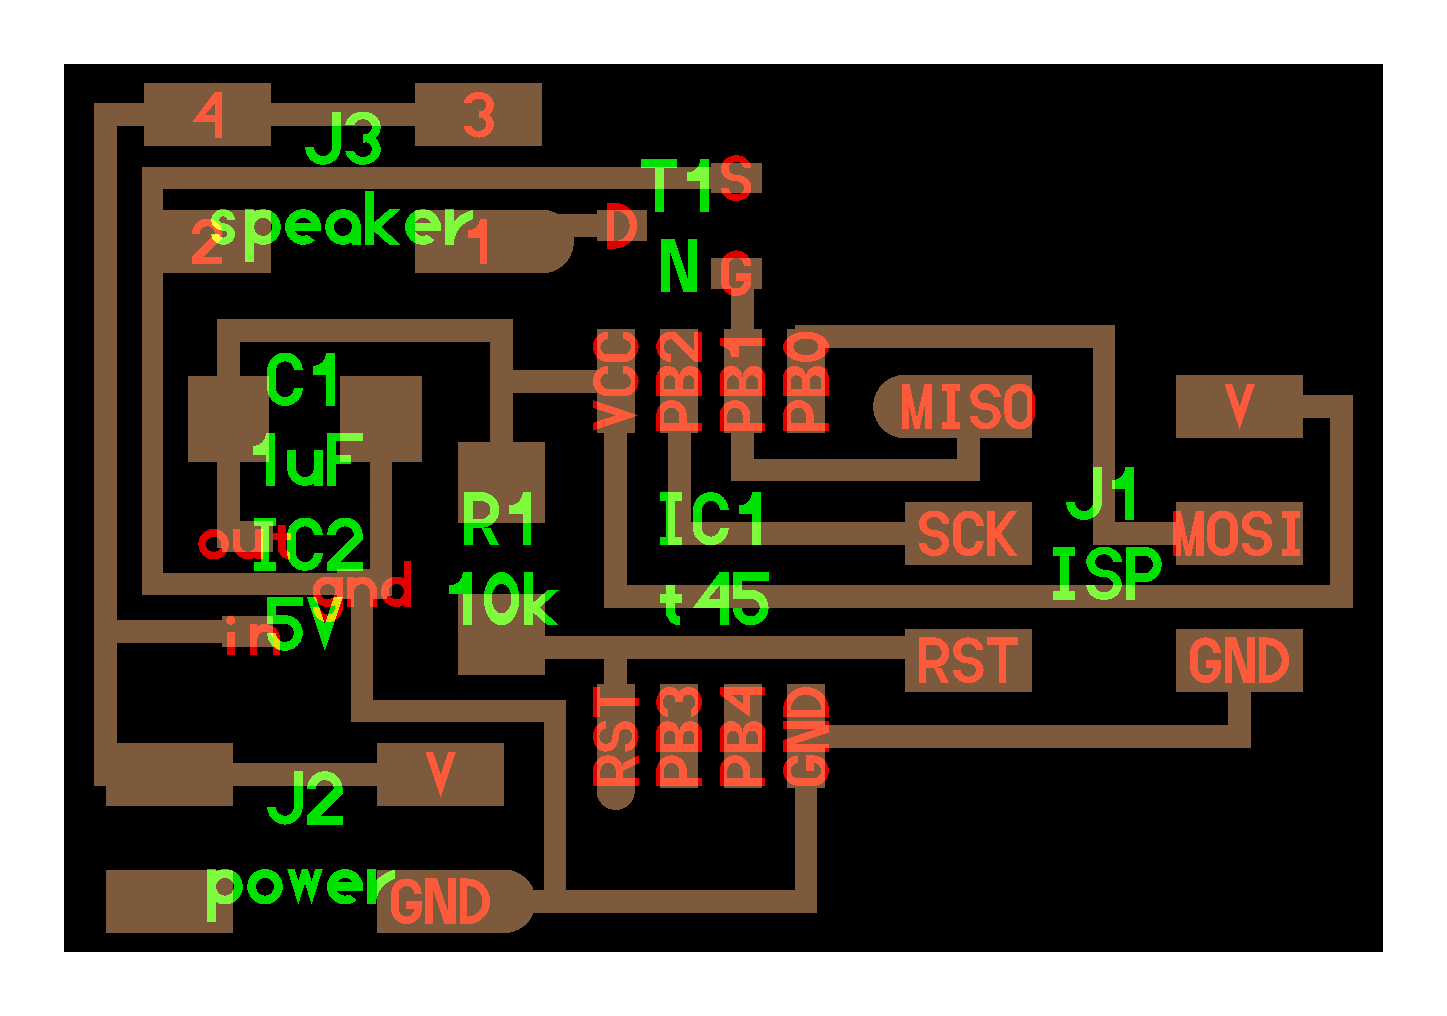
As for choosing the speaker circuit, i need to know all the requirements of it. First of all, this is the trace board map of the speaker circuit. There are some areas which are easy to link, and some other areas which are a little bit confusing. The left side there are so many links related to each other that need to be drawn carefully.
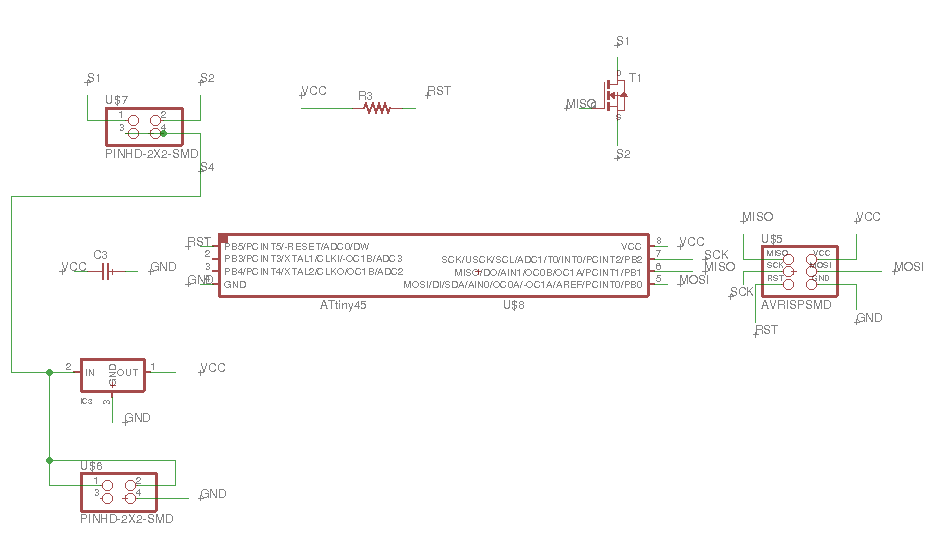
The components of the speaker's circuit boards:-
1. ATTINY45SI
2. AVRISPSMD
3. PINHD-2X2-SMD (2)
4. PMOSFETOT23
5. REGULATORSOT23
6. RES-US1206
7. CAP-US1206
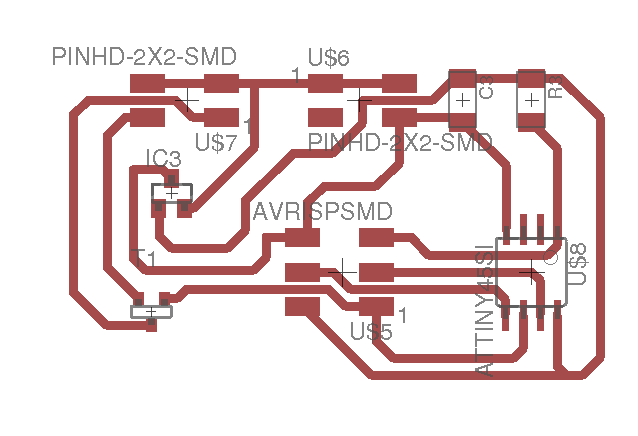
I made the routes more thik and spacious to avoid the shorts and route interfering.
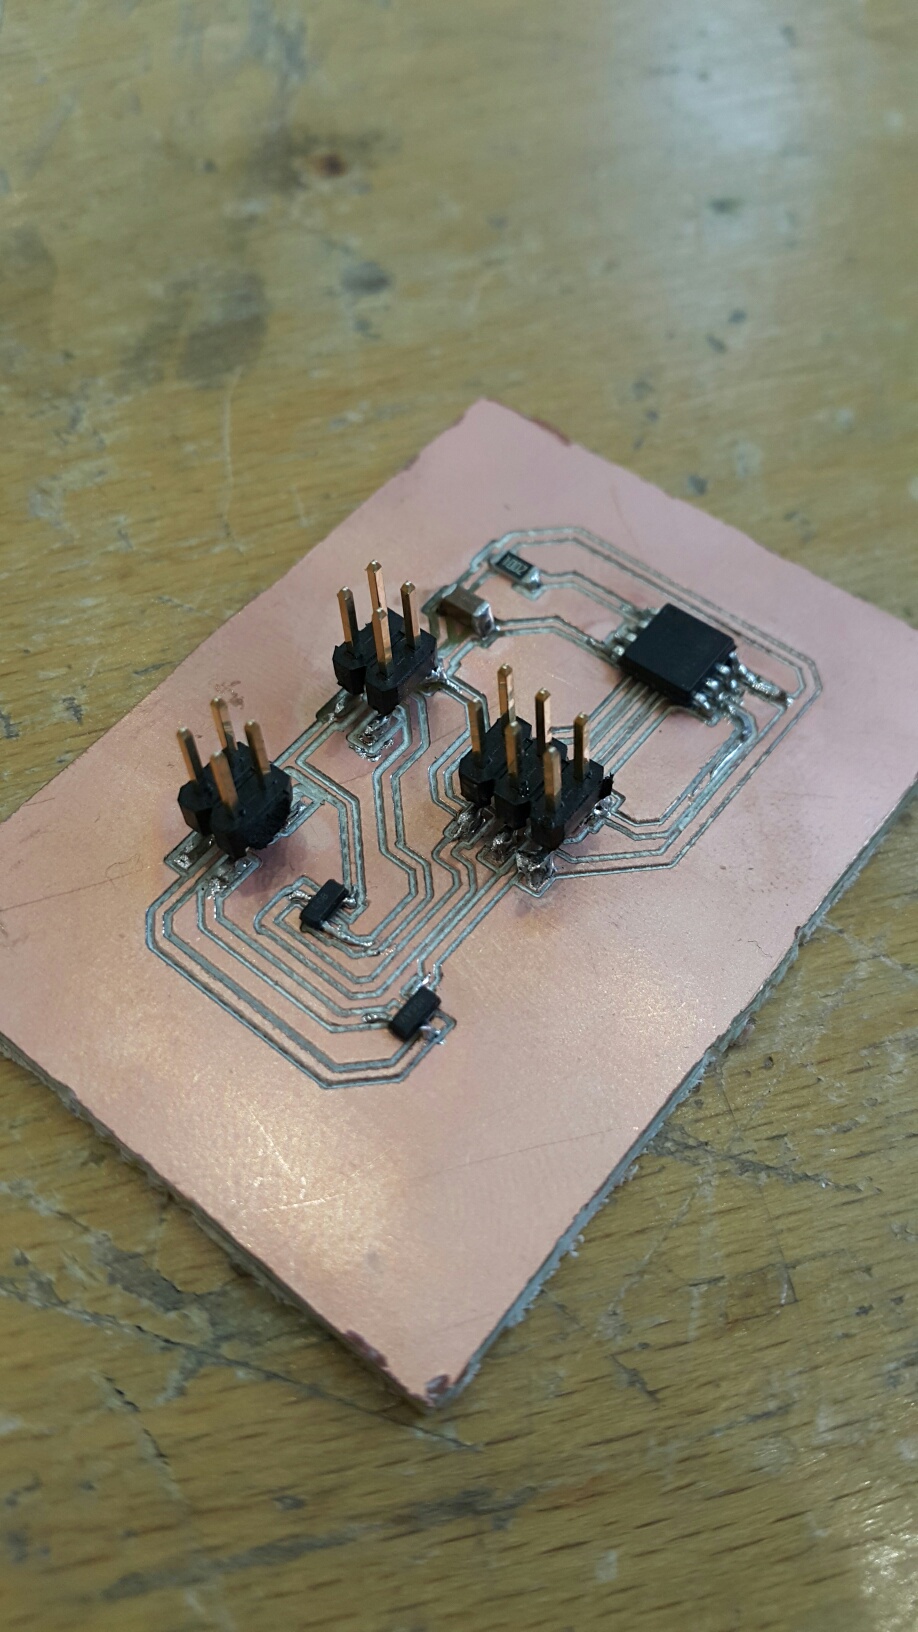
Now ones i did that, the board now looks nice for soldering and easy to attach the components upon it.
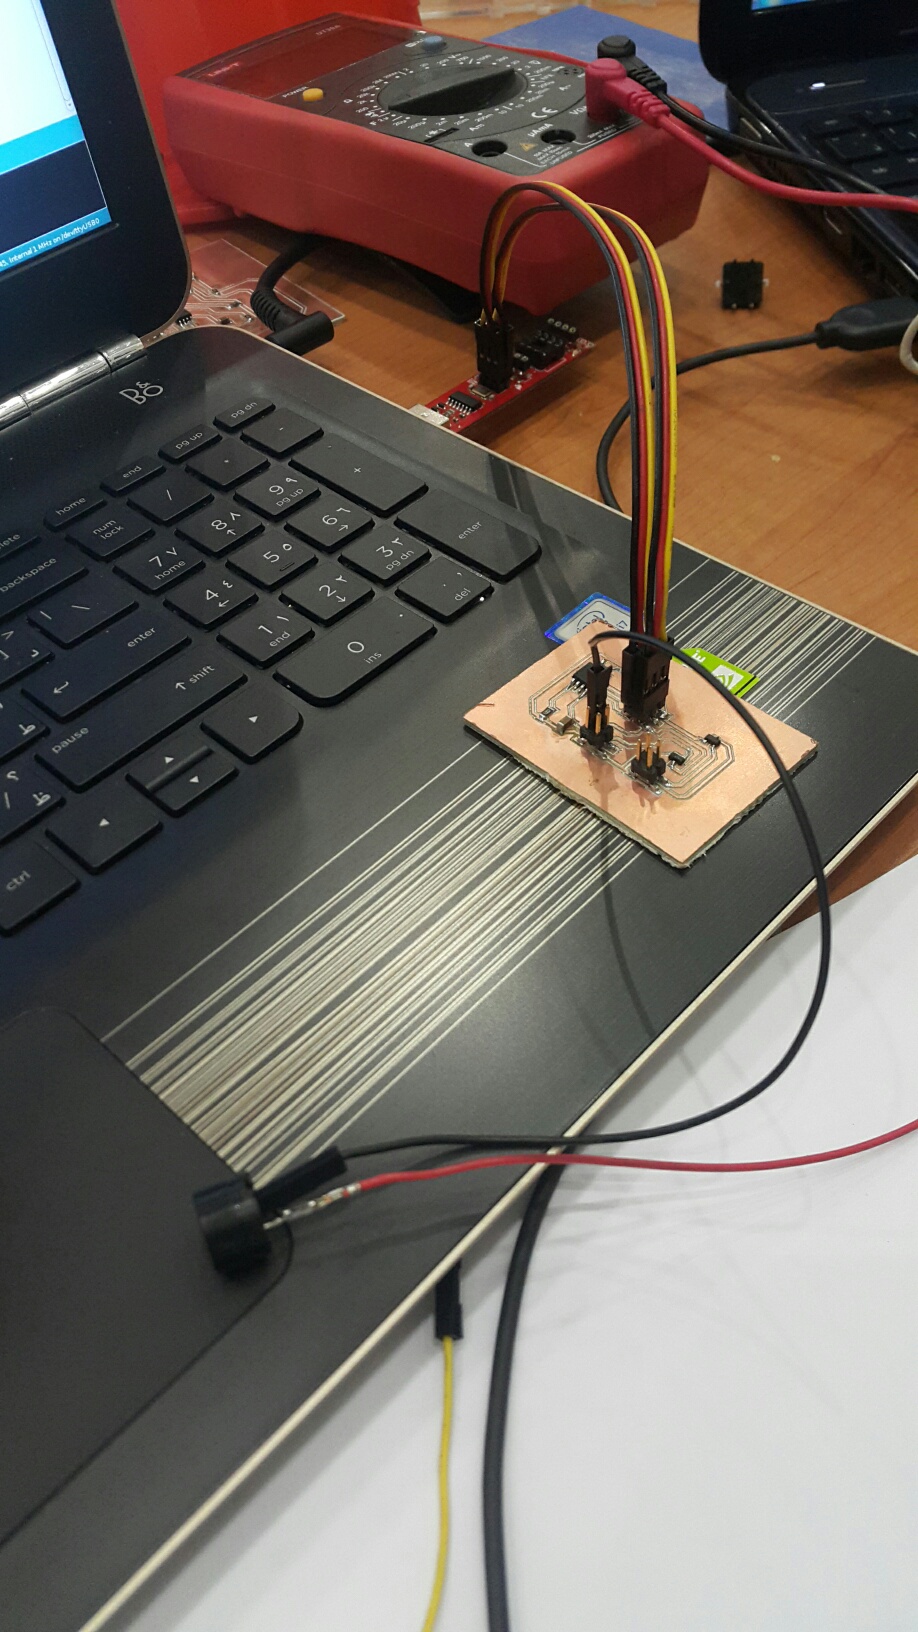
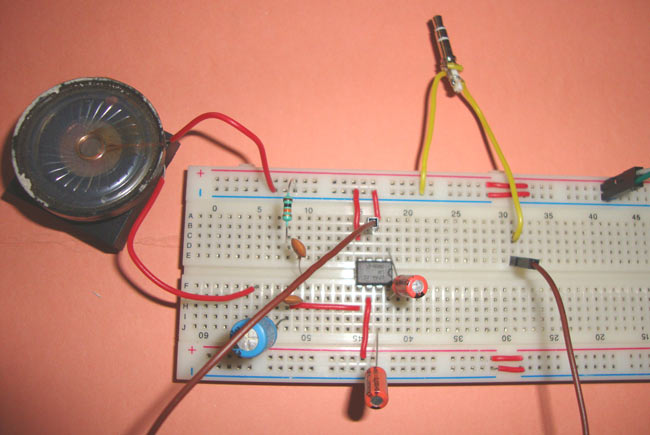
Connected the wires with the speaker. The board is now recieving the power from the laptop.
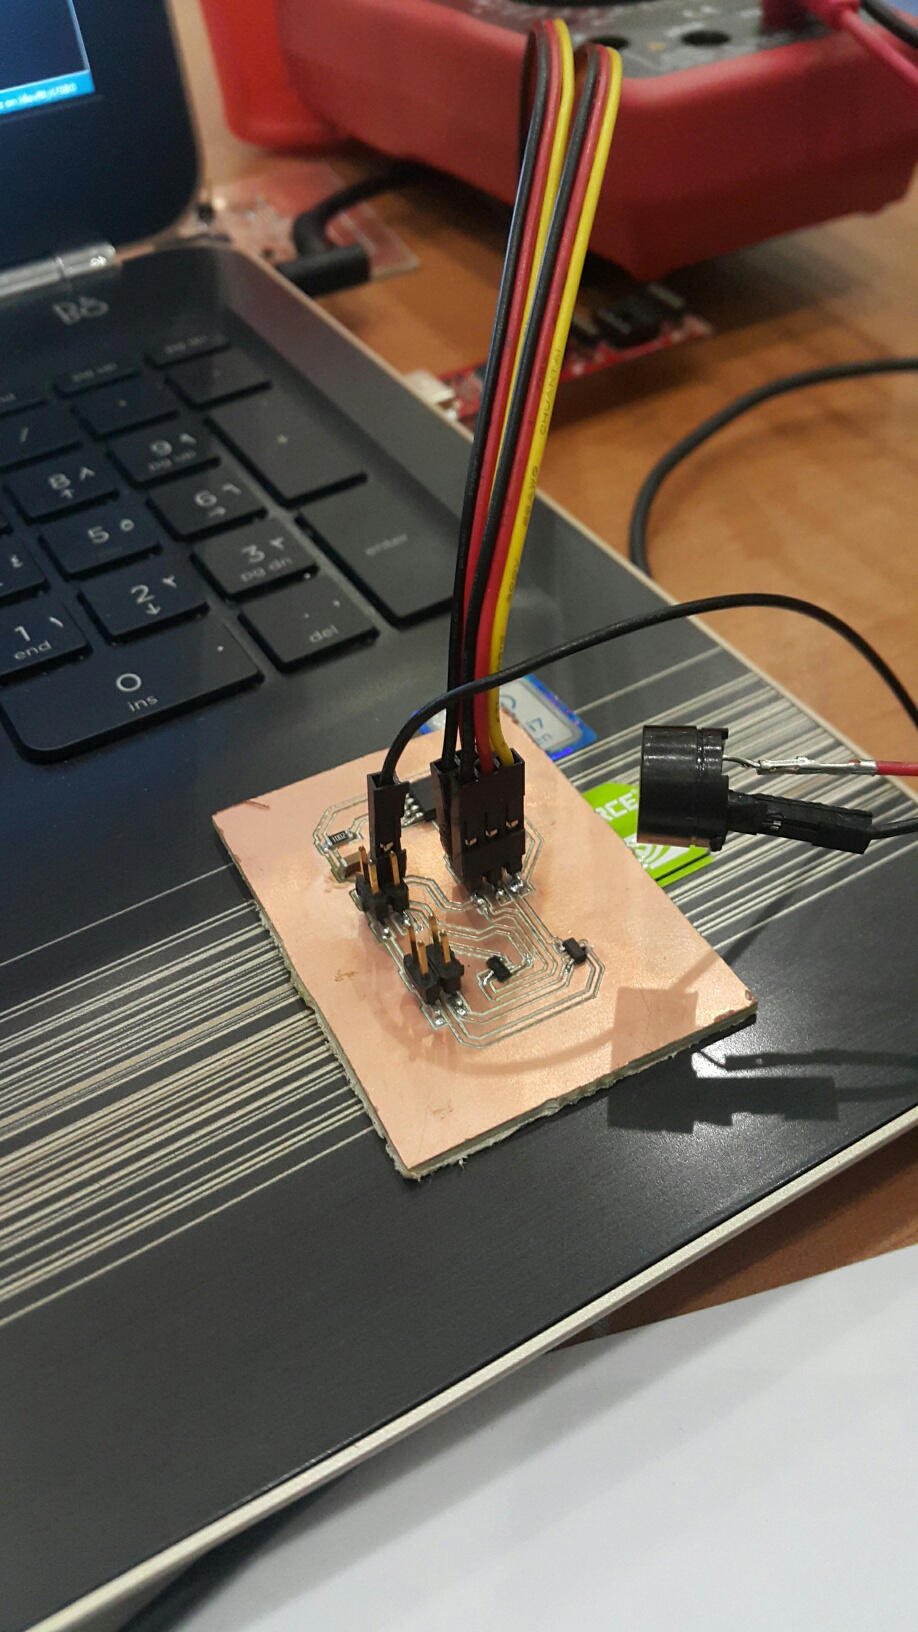
This speaker has low volume sound and it will not show a proper sound to know wither the board is working or not. So, i have replaced it with a better one.
// the setup fuction runs ones when you press reset or power the board.
void setup () {
// initialize digital pin LED_BUILTIN as an output.
pinMode(1,OUTPUT);
}
// the loop function runs over and over again forever.
void loop() {
digitalWrite(1,HIGH); // turn the LED on (HIGH is the voltage level)
delay(1000); // wait for a second
digitalWrite(1,LOW); // turn thr LED off by making the voltage low.
delay(1000); // wait for a second
}
This is the code used for the speaker. The sound will go on and off with couple of seconds in between. To check the demonstration, check below video.
Files Download
Demonstration of the Speaker PCB