Computer-Aided Design
Tasks:
Evaluate and select 2D and 3D software
Demonstrate and describe processes used in modelling with 2D and 3D software
- Model (draw, render, animate, simulate, ...) a possible final project, and post it on your class page with original 2D and 3D files.
Computer-aided design (CAD) is the use of computer systems (or workstations) to aid in the creation, modification, analysis, or optimization of a design
I have very few experience with CAD softwares, the one I used before is  , and to be honest, I really don't like it.
The design tool that I will be using for this assigment is  , I really love this software, and will try to explore and understand it deeper.
To make something useful, I decided to design the first prototype of my final project! It will be very raw, but in order to have a brief idea, its useful to visualize it!
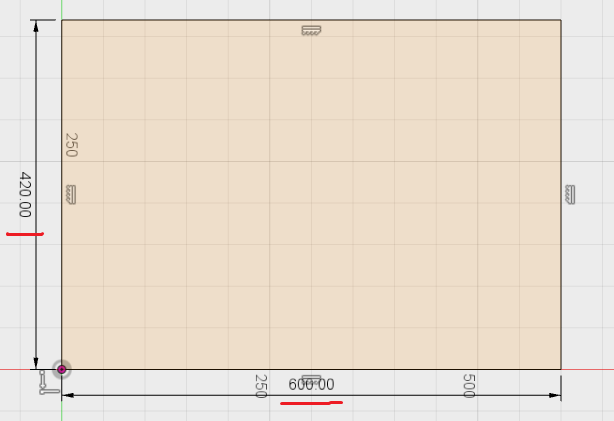
I started designing the box by drawing a rectangle with the following dimensions:
Next step, I want to round the corners a bit. I love aesthetics, and hate 90 degrees corners :D. I use the Fillet command
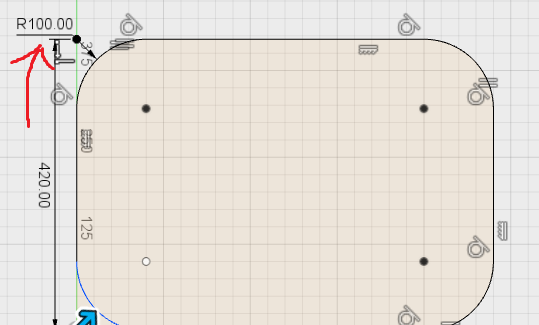
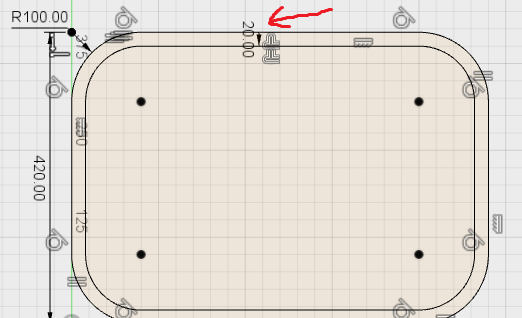
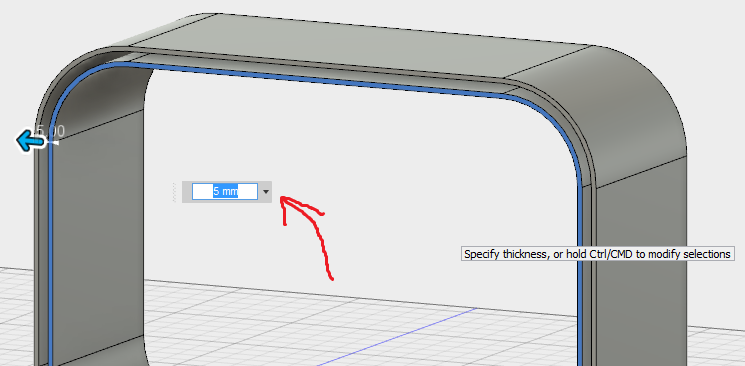
I made a little offset to have a structure thickness
Now let's give my design a dimension. I extrude it by 20cm
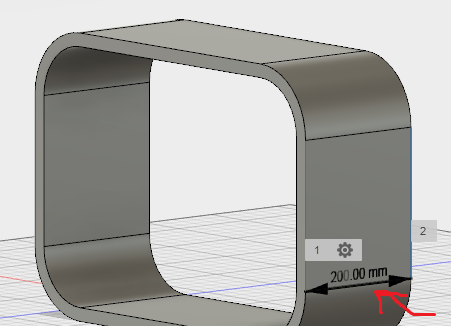
I am not sure why, but I want to give it some design element by leaving it hollow inside. I was planning to hide the cables there. I used the Push / Pull function
The main idea was to have different dimensions on the front side, which should look nice, IMHO
Next, I want to add kind of fixators inside the box, which will be used for the water container. I designed new sketches on top!
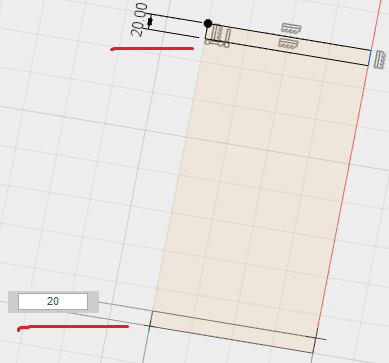
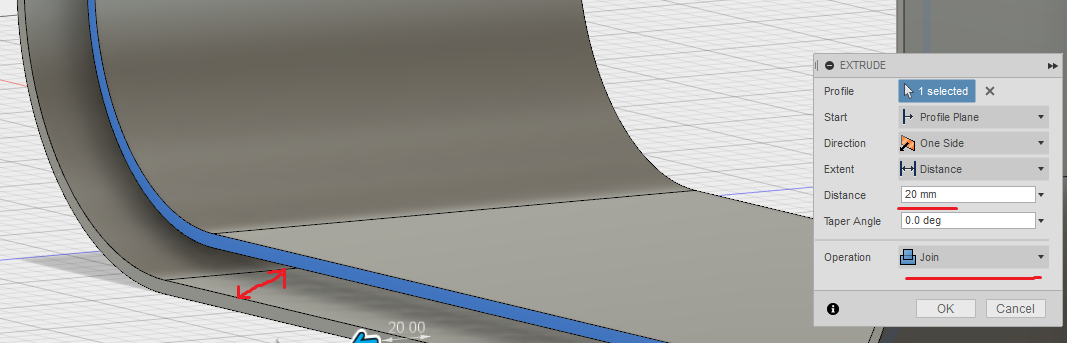
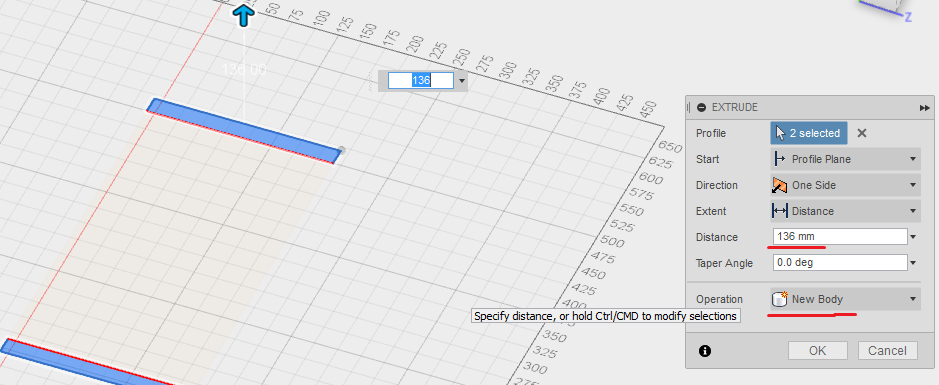
After that I am extruding the sketches
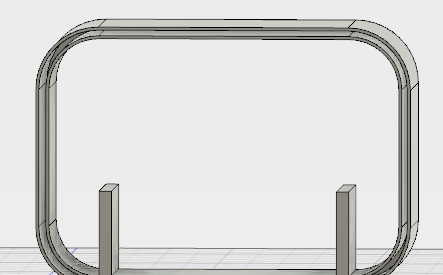
This is how it looks when I am almost done!
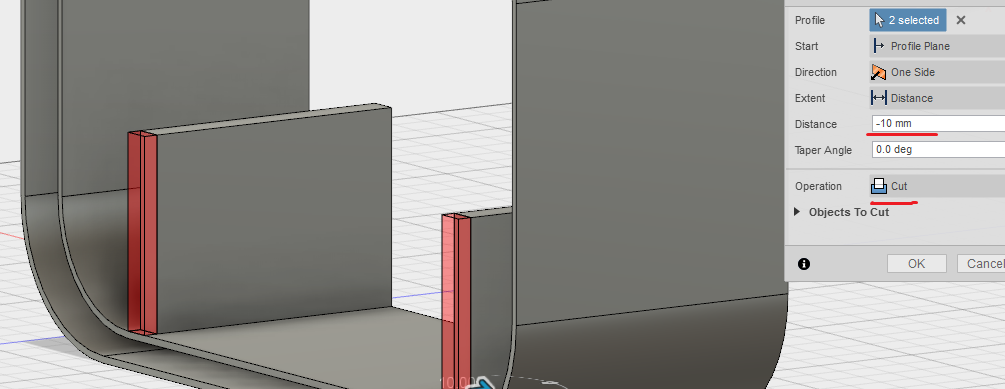
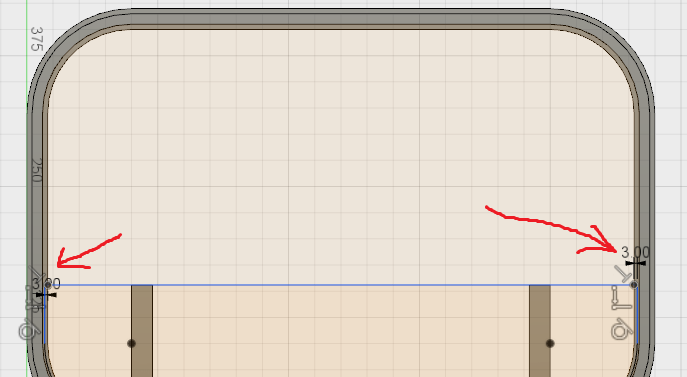
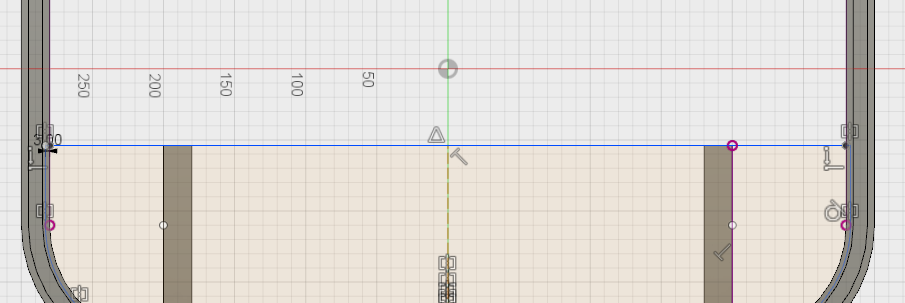
I also decreased a little bit the sides of the fixators, to have some space for the covers, which will hide the business inside!
Now I want to design the actual covers. I make a new sketch, and design this on top!
I design the arc in order to make it the sketch a bit bigger, so I have some space inside for the boolean substraction

I get this sketch at the end:
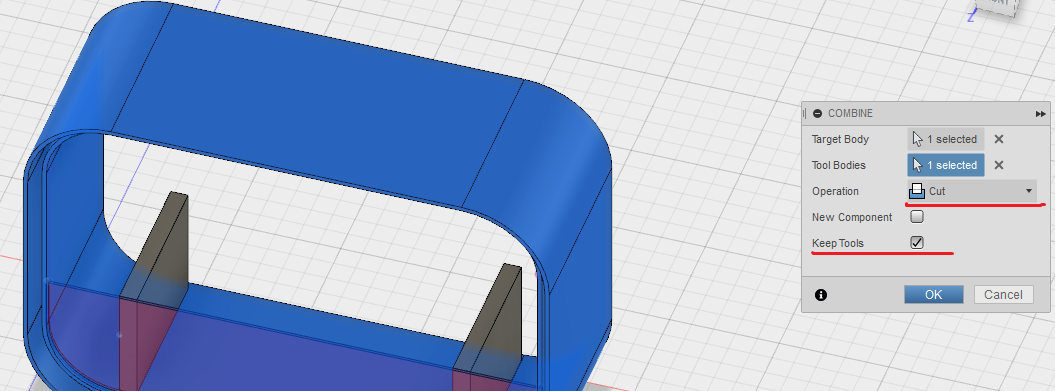
I use the Combine function to cut the piece inside
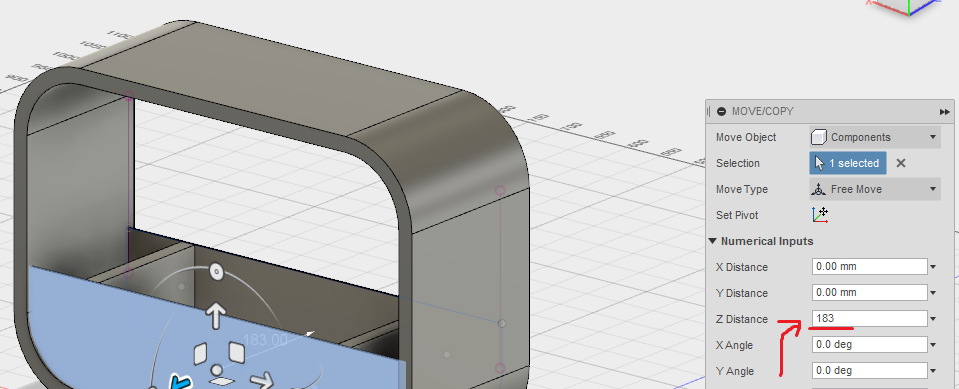
At last, I just copy the cover, and move it to the back side!
And here we are!
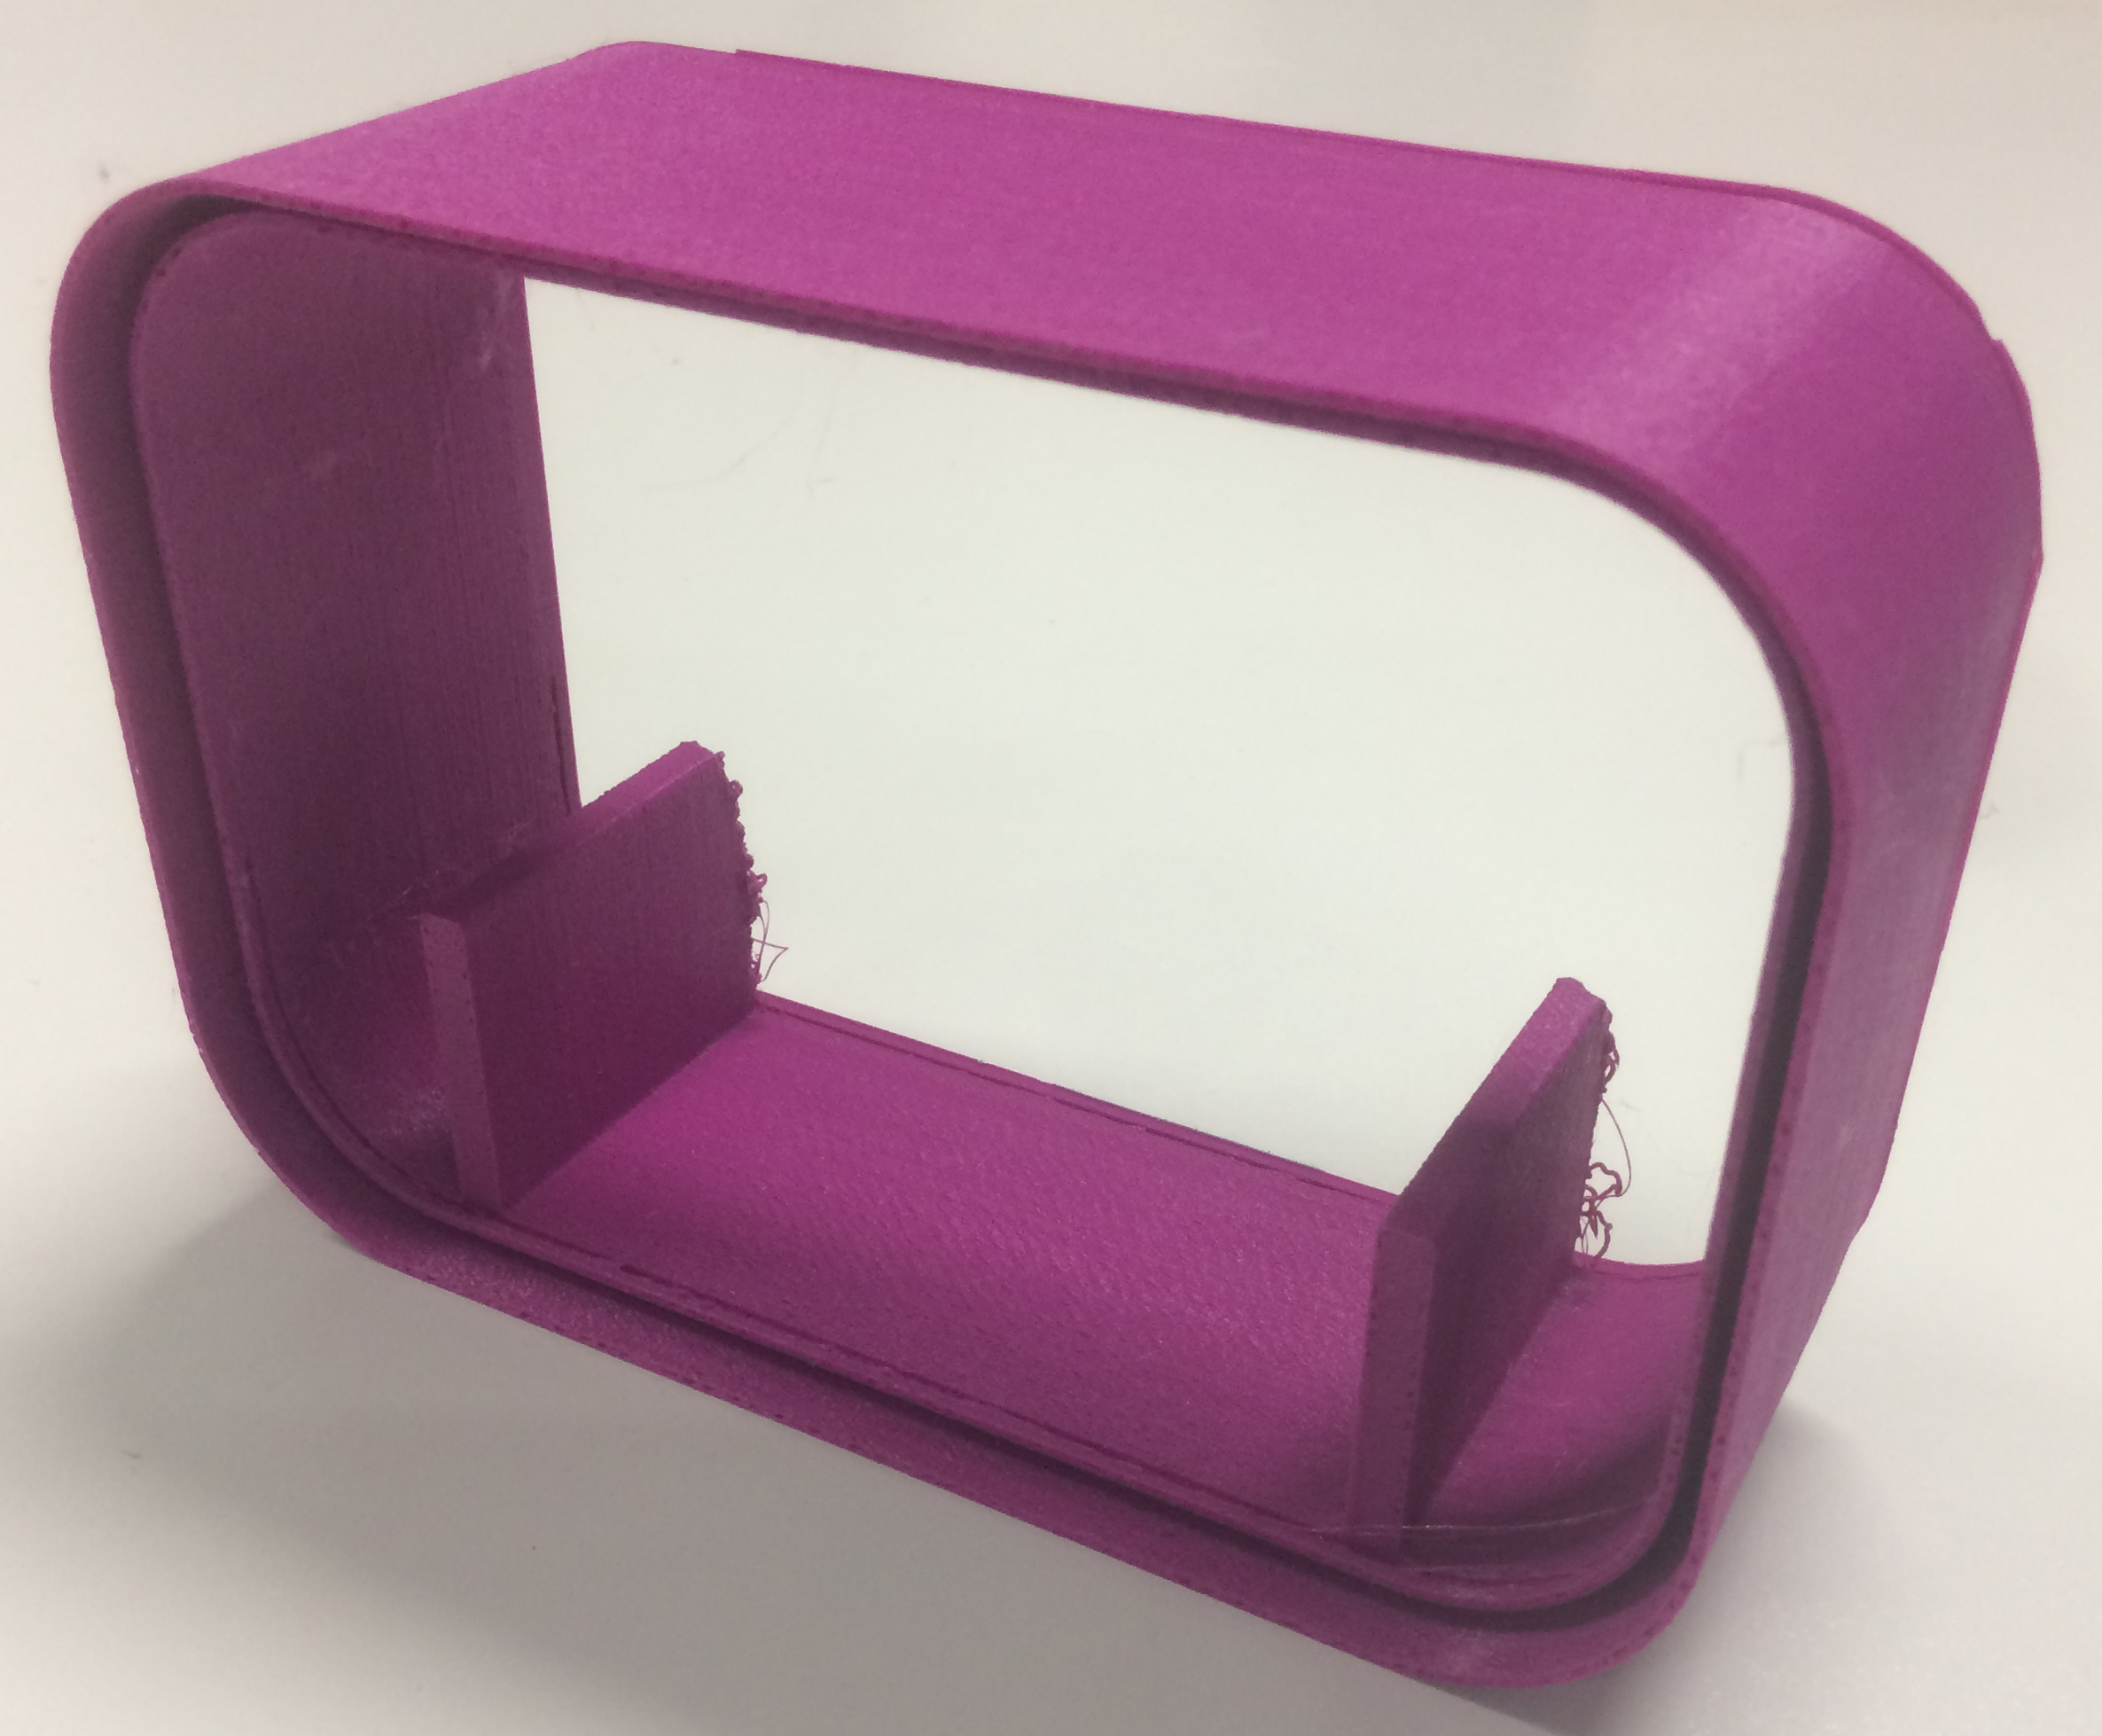
I also decided to 3D print the piece. Because I am not familiar to 3D printing, and I am going to learn about it next weeks, I asked for help with the settings. Here is the finished 3D printed piece:
Download Files:
I wanted to try also another CAD software. For this time, I want to do something in 2D. I will be using  I am planning to design the top cover, or plant holder for my future prototype
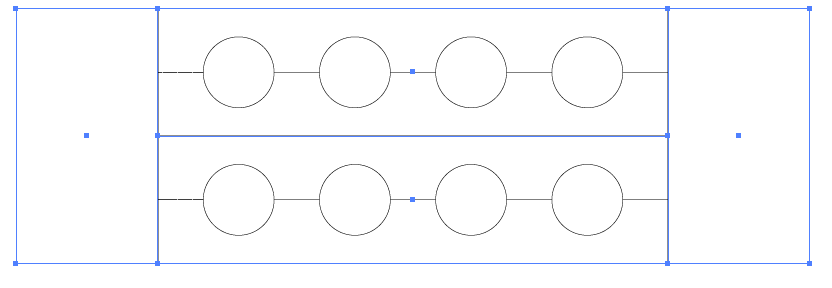
Because Illustrator is not a parametric software, I had to align all the circles for the cups by myself. I was drawing many reference lines, and using the align tool, I placed everything together
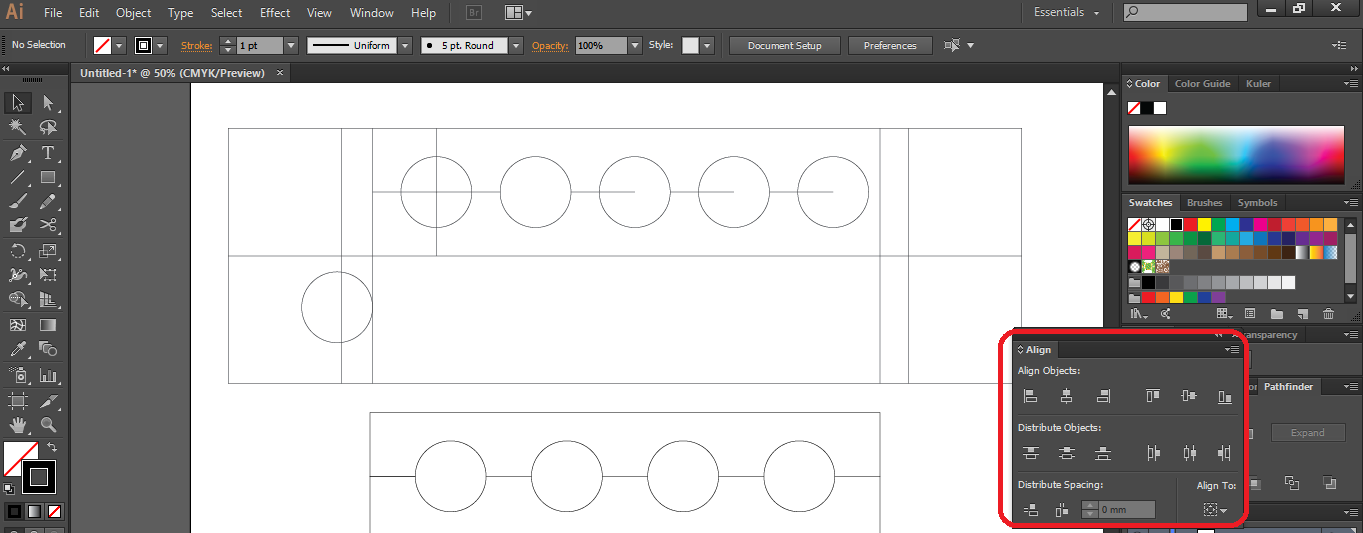
The raw sketch after I aligned everything together
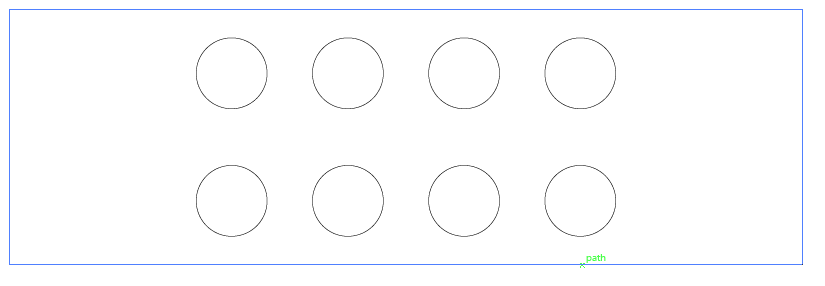
And the final model without any reference lines. This sketch is ready to be manufactured, or sent to the lasercutter
To play a bit with some other softwares, I decided to draw a christmas tree for my friend! I know its a bit late, but stil better that nothing :D
To create a 2D graphic design, I will be using  which is a free CAD software.
It took me a while to think about what could I design, something that would give me some basic understanding about the software, and design in general. Christmas tree is a quite simple, but at the same time beautiful design, which involves just lines, arcs, and simple editing commands. The most difficult part was to draw the star on the top of the tree, since I wanted it to be simetric. I also thought about making a 3D shape using 2D design methods. So basically I designed two similar pieces, but I made some kind of joints, which will alow me to put them together and get the shape that I want.
My 2D design looks like this:
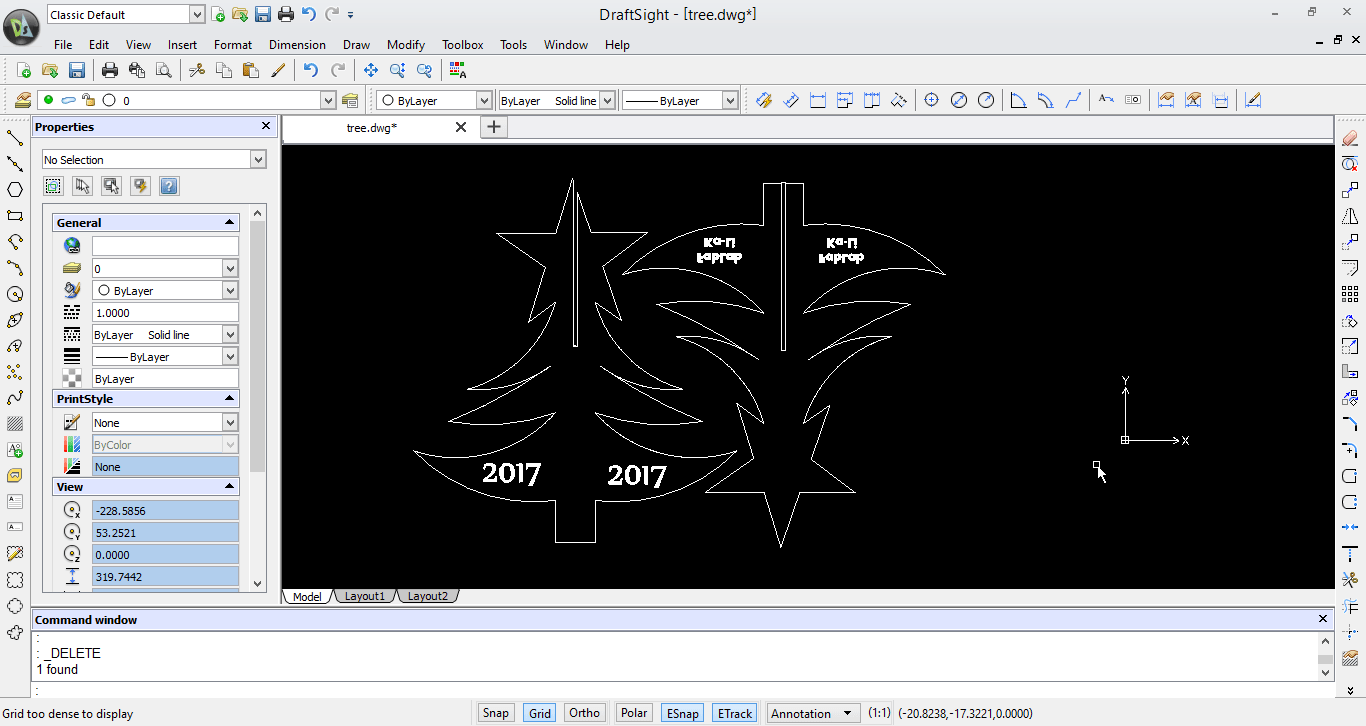
As you can notice, I decided to engrave some nice encryptions, in order to fulfill my assigment. I used 2017, which will represent the New Year, and FabLab Ka-Li, which is the place where all the miracles a happening :p
I was planning to use a 3mm acrylic material, that is why I made the joints 2.9mm distance to have a tough connection bethween two pieces, considering the fact that the lasercutter will "eat" some material. Before cutting the real sized design, I made a small test to check how the joints will stick together.
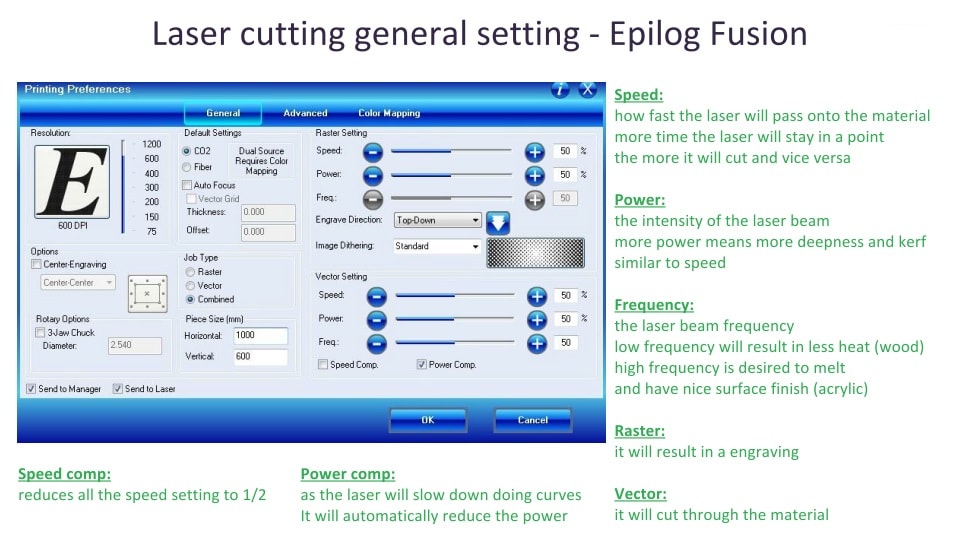
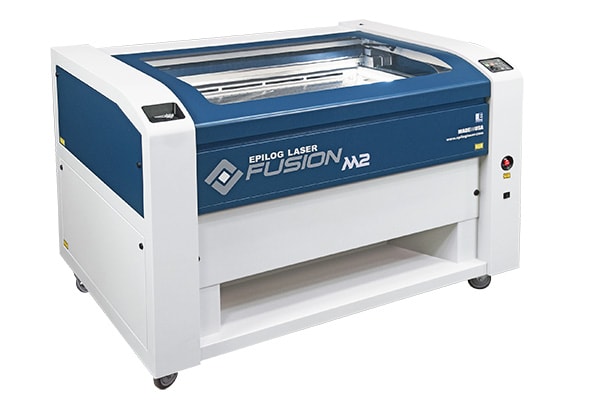 The Laser Cutter that we are using here in FabLab is Epilog Fusion, a CO2 and fiber lasercutter with a working area of 1016 x 711 mm. It can cut and ingrave materials like wood, bare metal, acrylic or other engineered plastics. In order to set up the settings of the machiene, I used the reference from the slides. It looks like this:
After I configured all the settings in the laser cutter, It was the time to finally MAKE IT!
Problem:
Being honest, my first try was a fail :D My design was a little bit too big, and that is why right before printing it, I had to scale it down. Because I was in a hurry, while scaling, I did not take into consideration the fact that I had to adjust the joints again. The first outcome had the joints less then 3mm, and I could not atach it to one another. My last result was almost successful, almost...
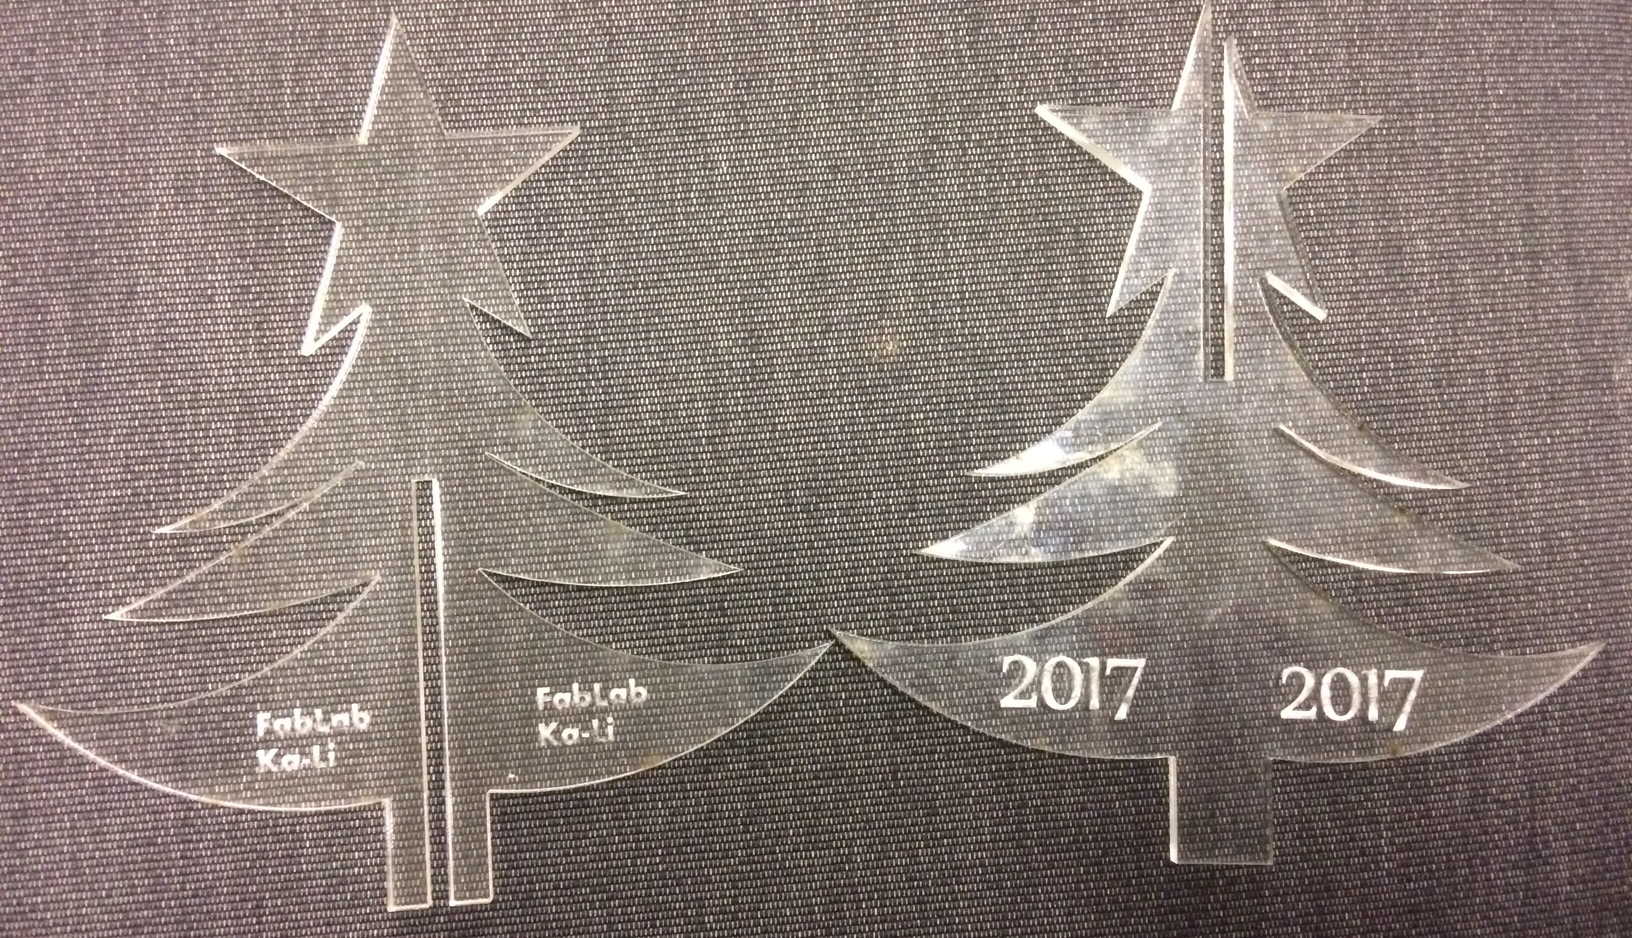
Everything looks fine, the size is good, the engraving is ok, which means that the settings used were the right ones. But...when I tried to stick the two pieces together, I found a mistake.
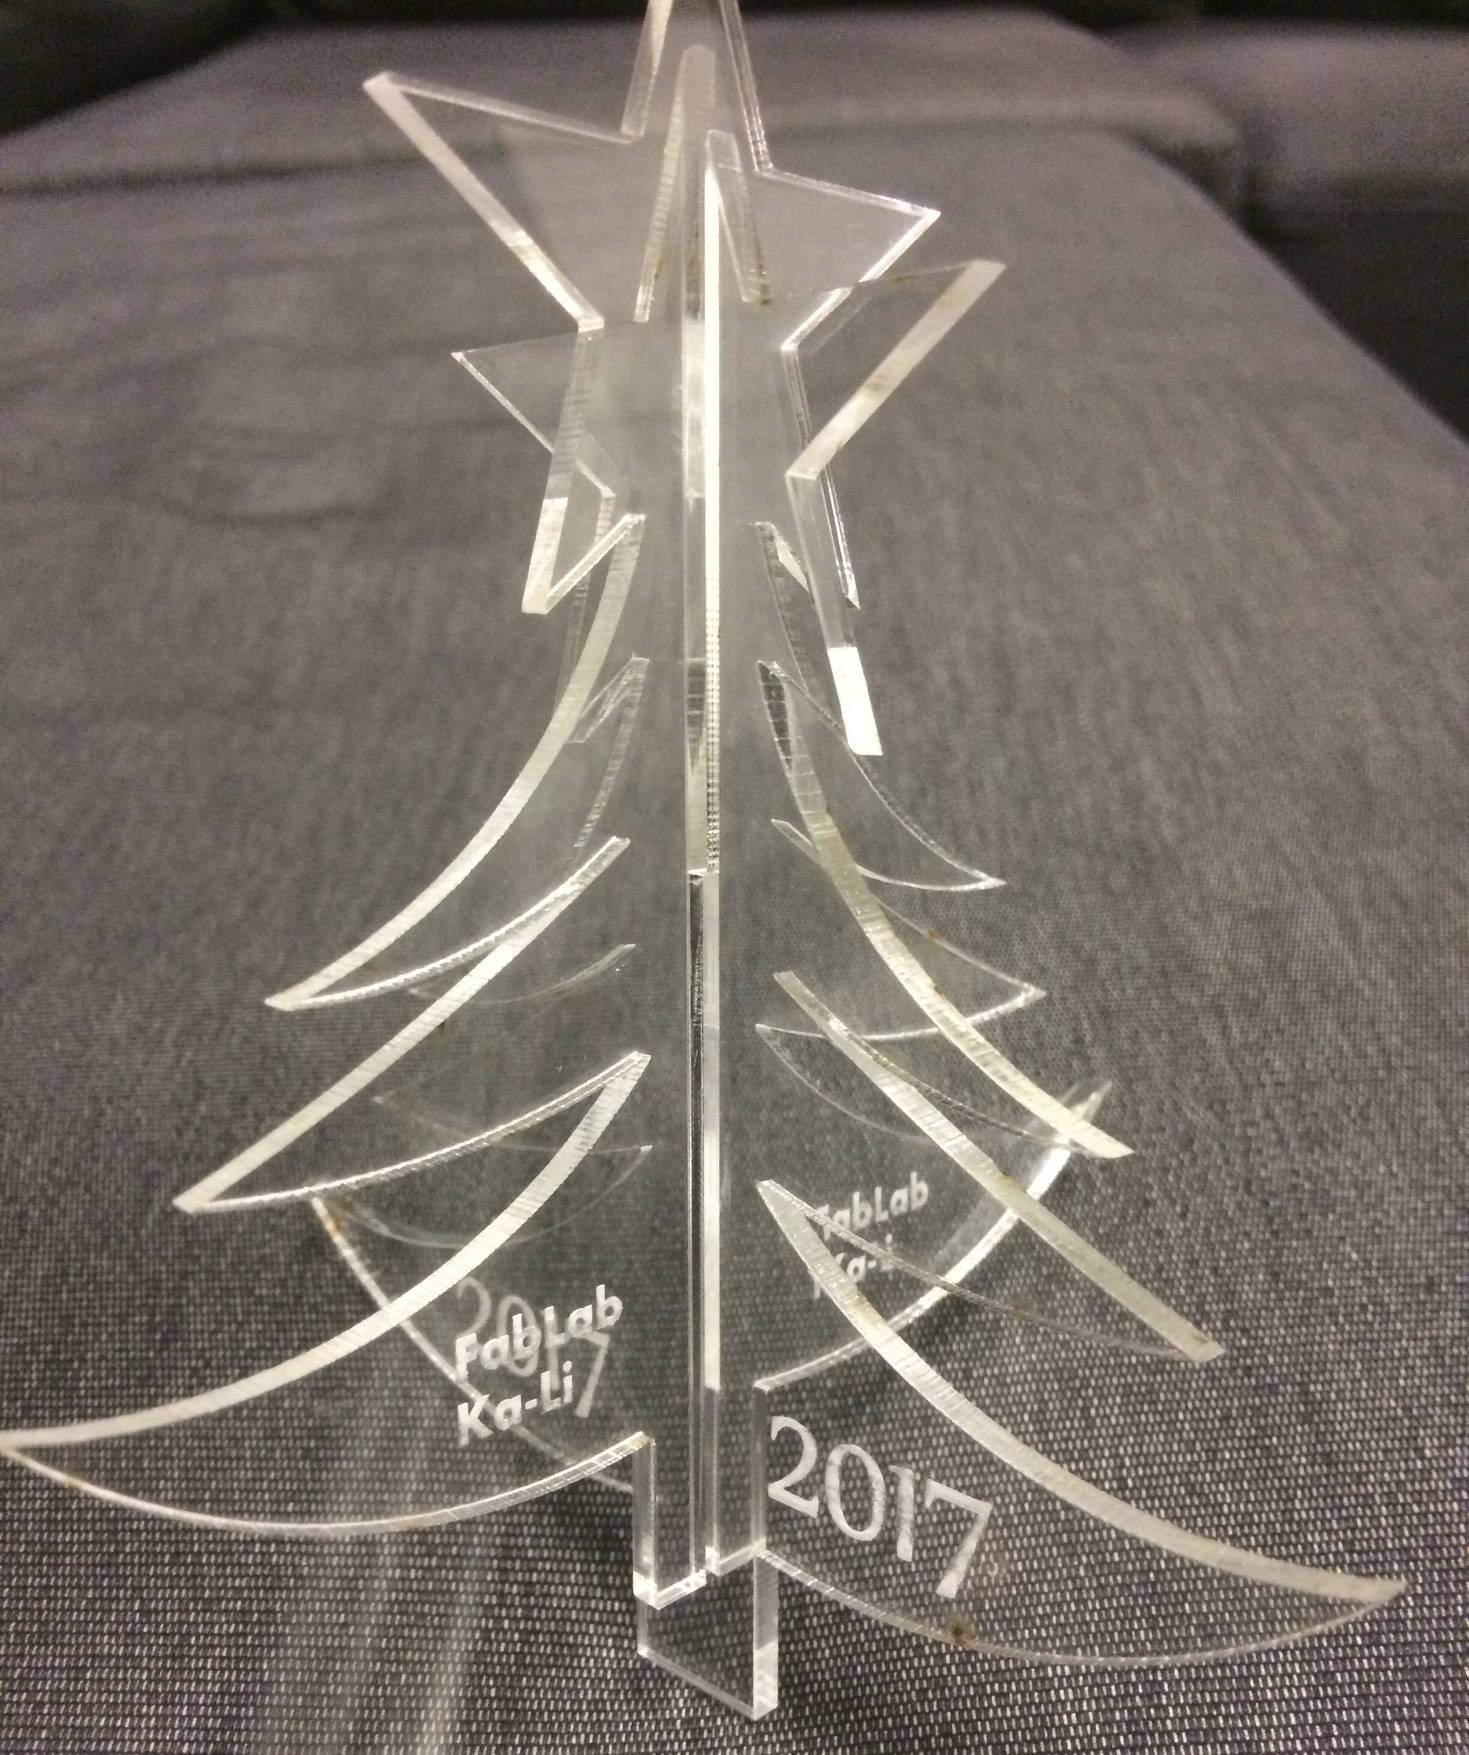
As you can notice, the cuts in the joints are not deep enough, that is why the two pieces do not fit completly. I could not say that I was very dissapointed. Even if it has a little mistake, I am still satisfied. I feel realy proud of it!
I learn on my mistakes, and yeah...there is always room for improvement:)
Download Files:
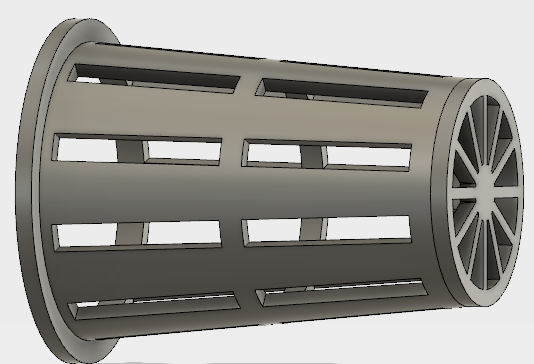
Another part which was necessary to start the experiments with plants for my final project were the Net Cups. I had to design them, 3D print, and place the growing medium and plants to start the Fog System
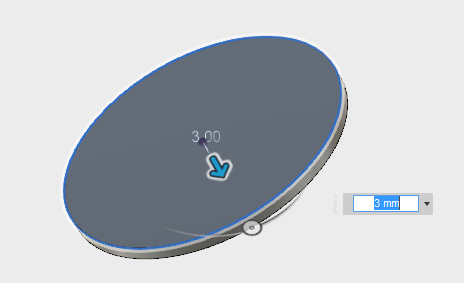
I started the design by making a New sketch and drawing a circle, which I extruded later
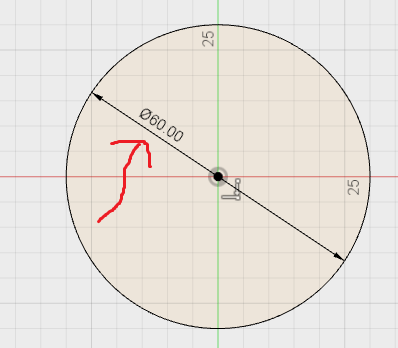
This will be the top of my cup. Now I Extrude it by 3mm
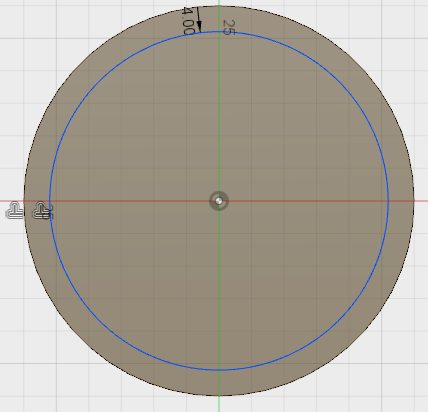
On top of this, I make a new sketch and make a smaller circle, which will be the body of the cup
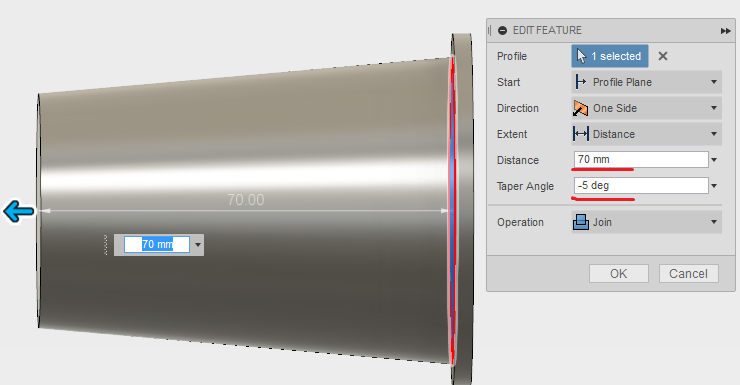
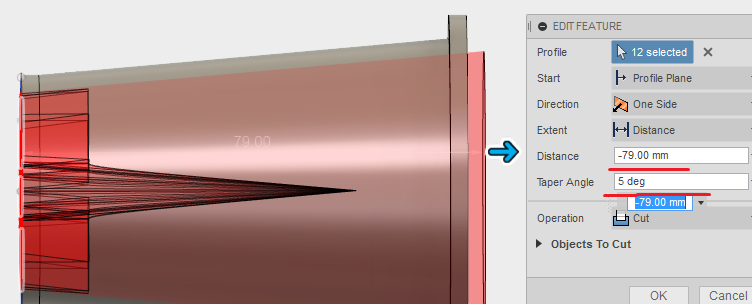
Then I extrude the body at an angle
On the bottom part, I draw a rectangle, and using the Pattern function I create several rectangles with the same center point in a circular pattern
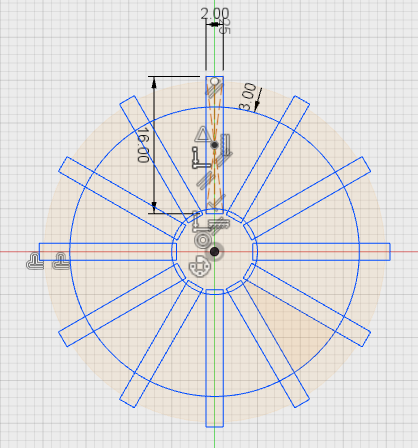
I extrude the pattern at the same angle but with the oposite sign
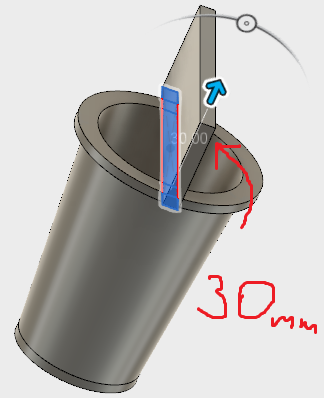
To make the spaces from the sides, I draw a rectangle on top of the cup, and extrude it!
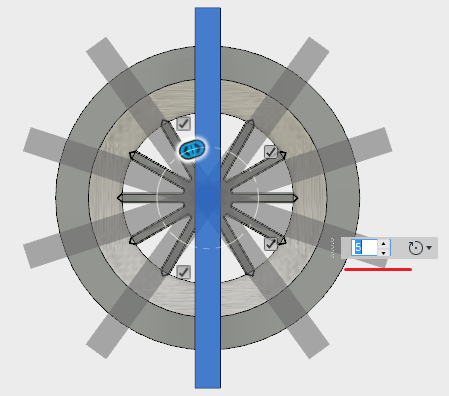
I use the similar approach as for the bottom part. Using the pattern command, I make a circular pattern of rectangles
By moving the pattern to the desired position, I use the Combine function to cut the shape through the body, it looks like this:
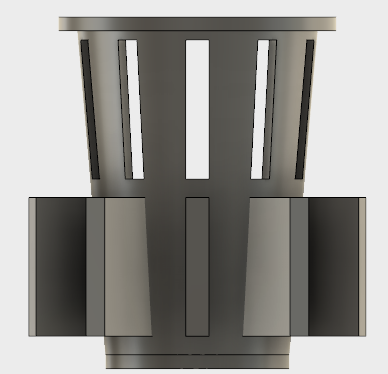
The end result looks like this:
Now let's print it!
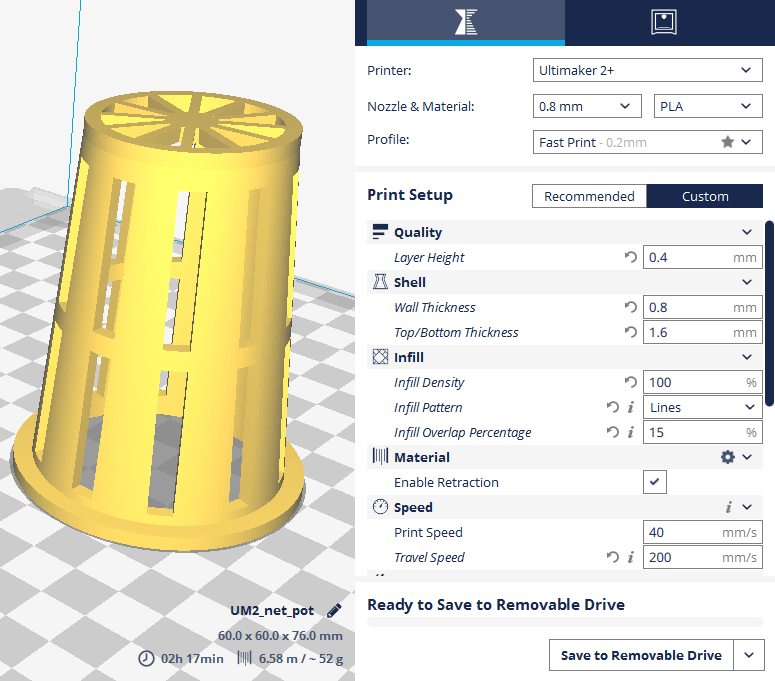
The 3D printer which I used is Ultimaker 2+. To slice my 3D model, I will use  , a very nice software, with an easy interface, and also functional. The material that I am using is
 PLA filament
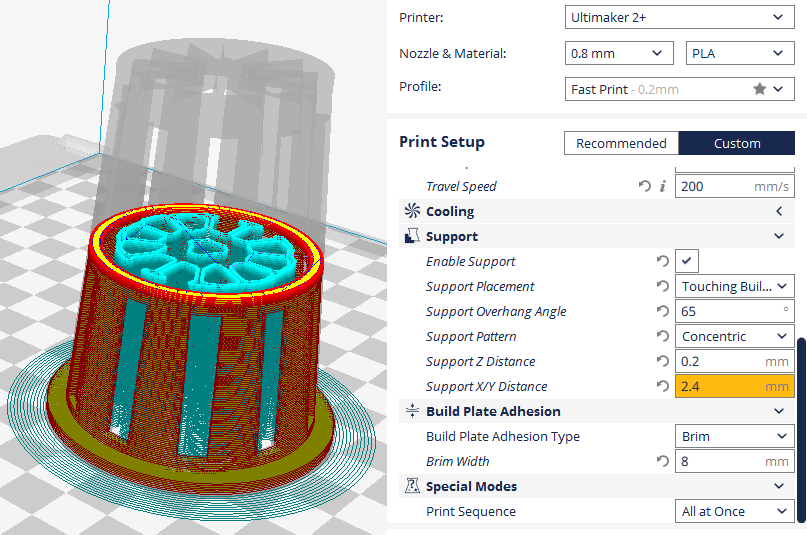
After I import my .stl file, these are the settings that I am using:
Download Files:

