Week 12
MOLDING AND CASTING
ASSIGNMENT
Final Project
- Design a 3D mold
- Machine the mold
- Use the mold to cast parts
Getting started with this week's assignment, following tasks had to be done :
- Designing a 3D mold in Rhino.
- Using Modella for milling my mold
- Using the mold to prepare negative mold from Liquid rubber
- Using the negative mold to cast the positive object using Plaster of Paris.


DESIGN 3D PROCESS
FILES FOR MILLING
GET FILE
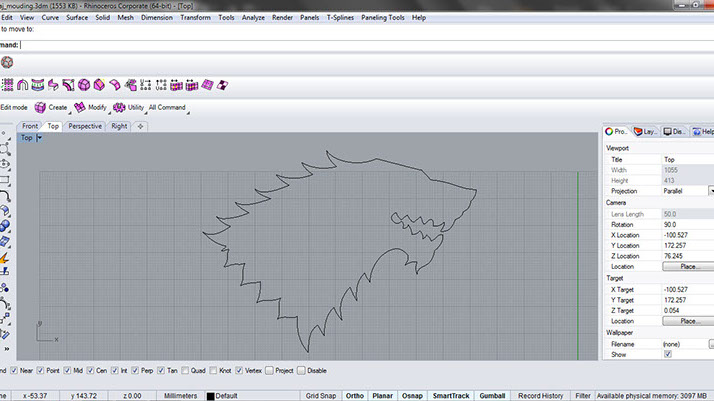
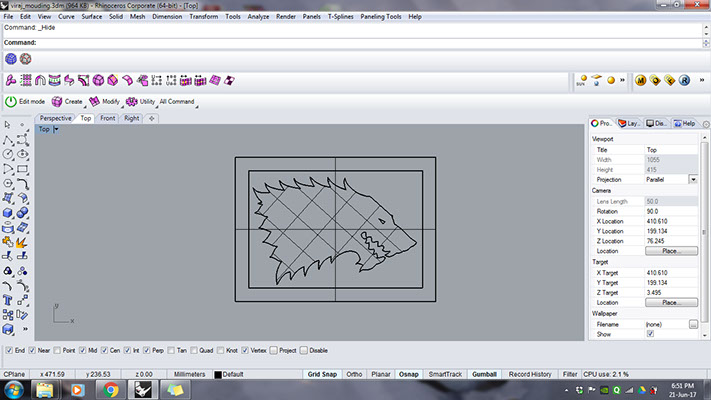
The I used Rhino to design my geometry for th e mold to be used for making molds. I wanted to design tray with Stark logo, Winter is coming !!
I used "curve" command to draw the initial boundary.
Next I used "Planarsrf" command to make a surface from the closed polyline generated above.
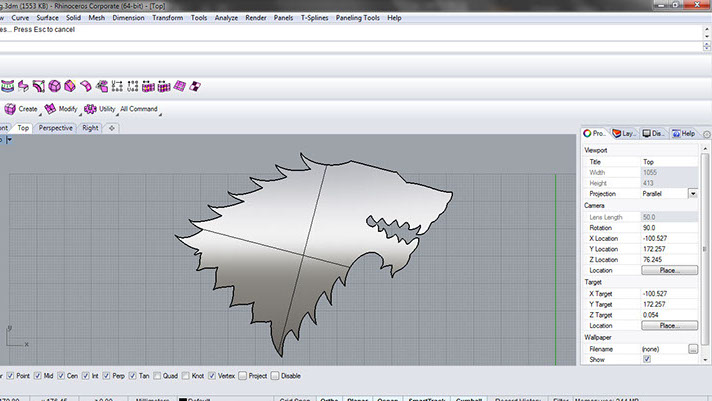
Next I "Rebuild" the surface to obtain control points. I used Gumball to pull the points up and down to obtain a curved surface.
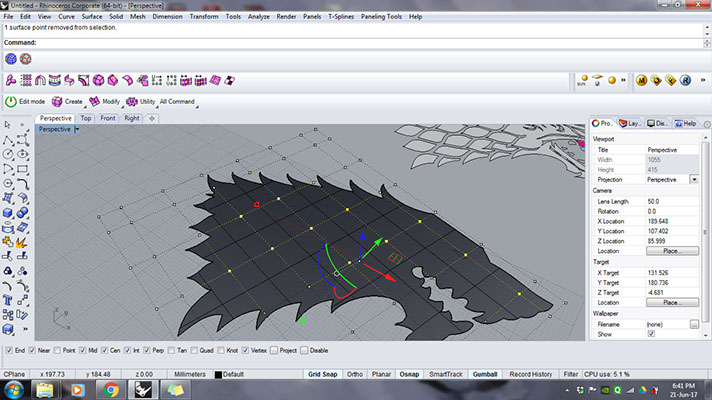
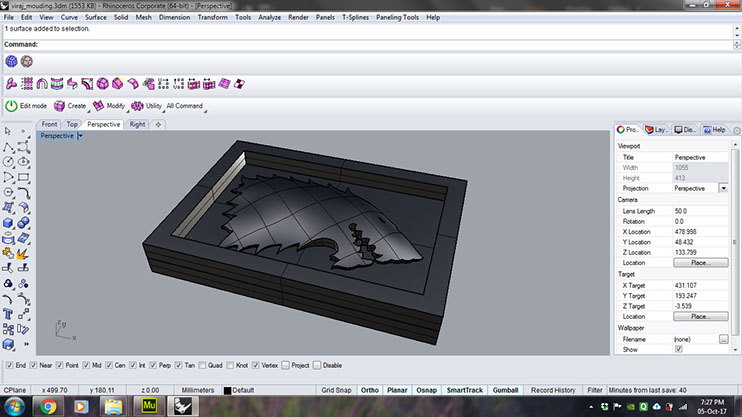
Once I had the surface, I moved it a bit upward. I used "DupBorder" Command to obtain the border of this surface.
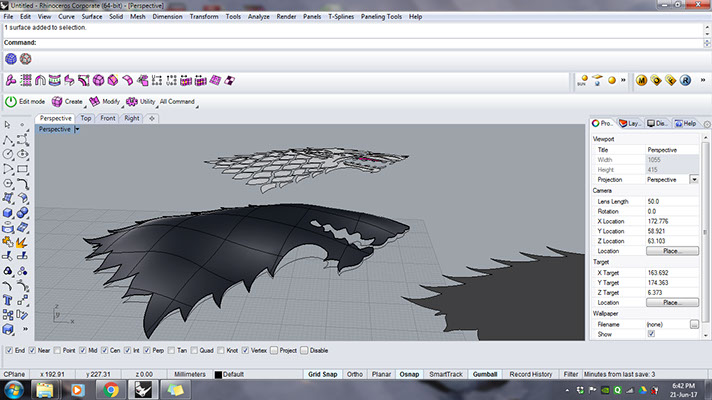
I used "Loft" command to generate the vertical surface using the border and the base curve.
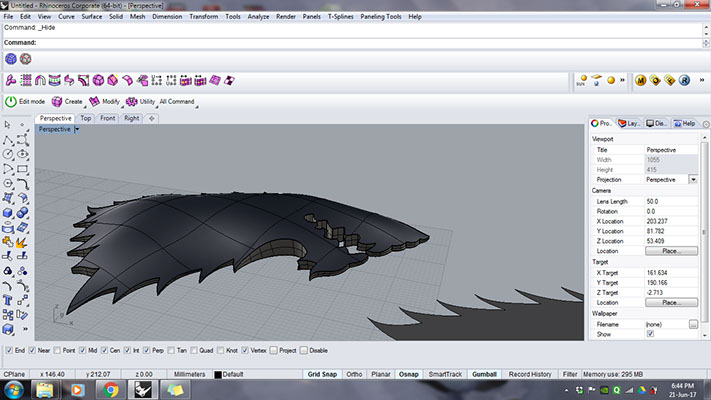
I made a rectangle, offsetted it and the extruded the border to obtain the box for pouring "Liquid rubber"
MILLING PROCESS
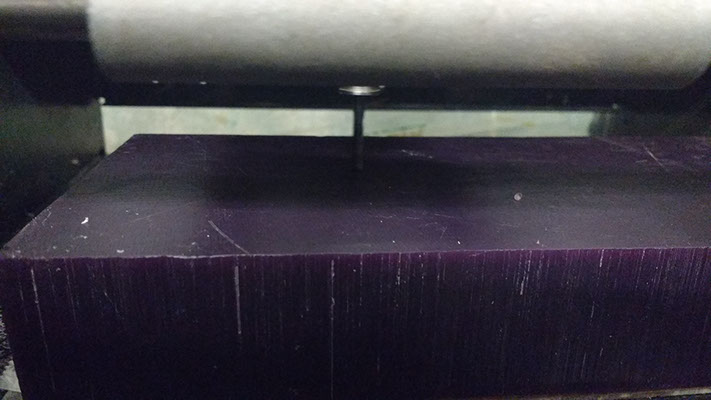
I used Roland Modela MDX-20 to mill my 3D design from wax.
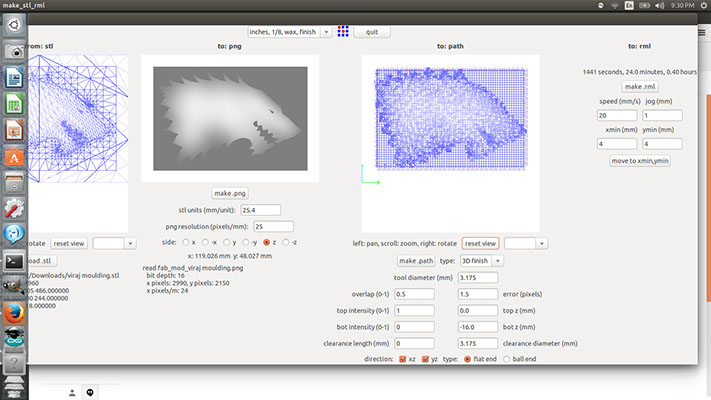
I exported the Rhino file as .stl format and imported in Modela.
Following image shows the settings used for Roughing tool.
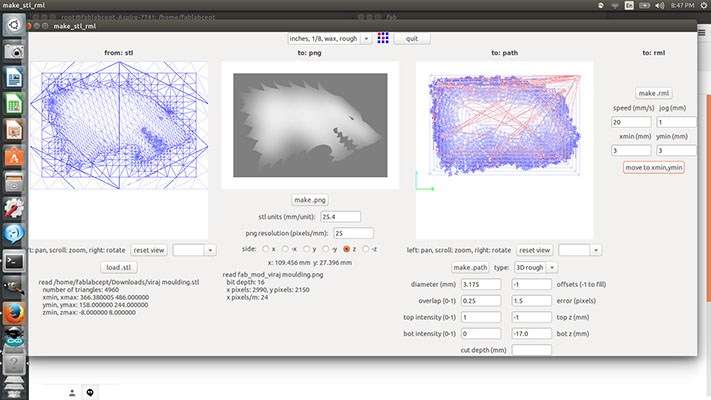
I used 1/8"Flat end for roughing toolpath and 1/8" Ballnose for finishing toolpath.
I stuck the wax to the board using 2-way tape.
Following are the images of the process of Milling

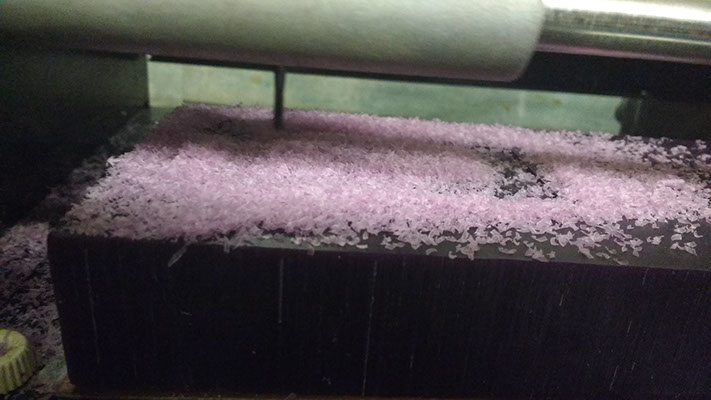

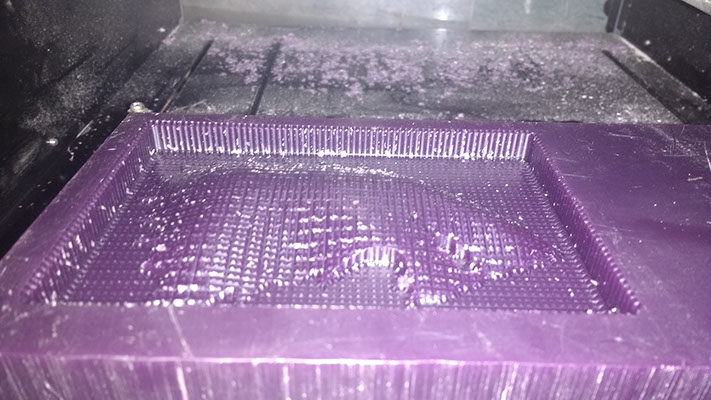
Once the roughing toolpath was completed, I changed the bit to 1/8" Ballnose for finishing toolpath.
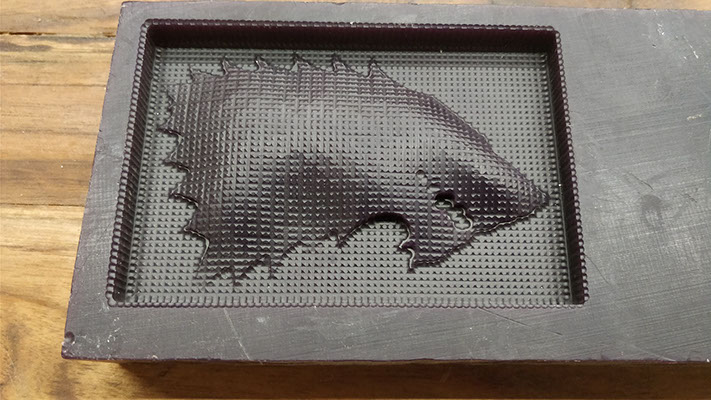
Here are some photos of my milled wax.
Modela Casting Milling Wax from Viraj Gandhi on Vimeo.
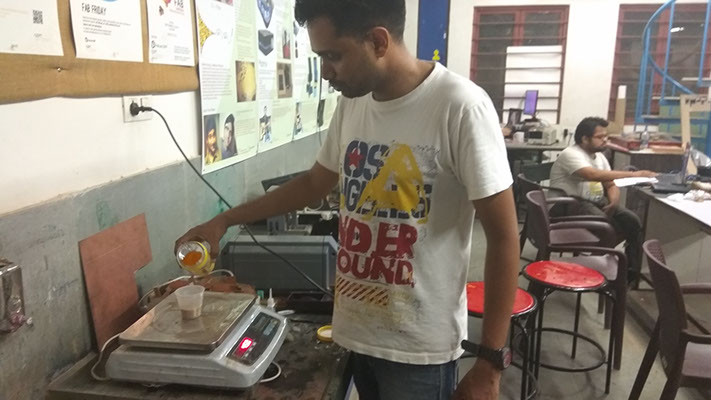
LIQUID RUBBER CASTING
Following things are required to prepare Liquid rubber mold:
- Vytaflex Rubber Part A and Part B
- Weighing machine
- Plastic cup
- Wooden stick to stir
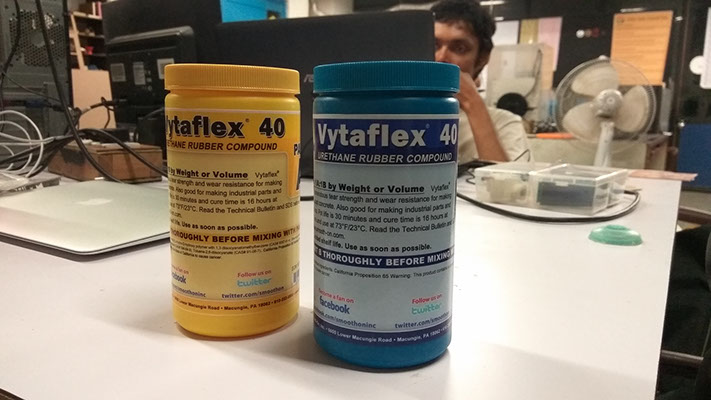
Vytaflex Rubber Part A and Part B was used in the proportion 1:1 to form a solution. I used weighing machine to ensure that correct proportion is used.
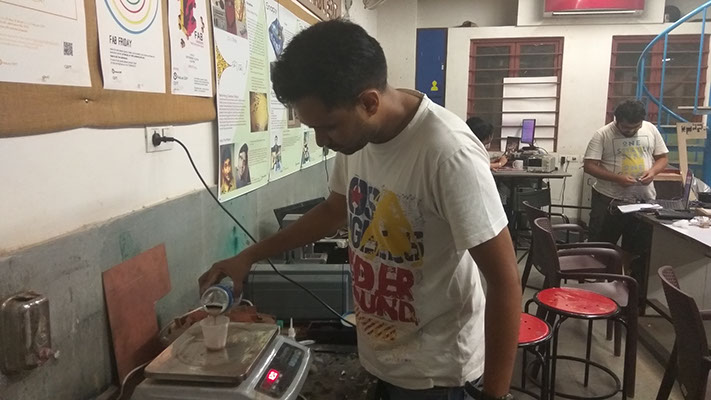
As my mold was small, I decided to go for only 45 units of Vytaflex Rubber Part A.
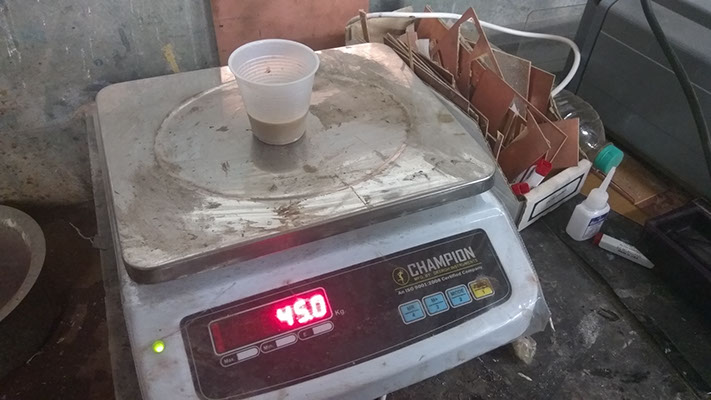
I added 45 units of the yellow colored Vytaflex Rubber Part B solution. Thus both solution were added in 1:1 proportion.
LEARNINGS OF THE ASSIGNMENT
- Learned how to program Attiny based boards using Arduno ISP
- Learned how to download board files and get support for more controllers for Arduino ide.
- Finally I have a board working completely made my myself and self programmed. now more confident to make more such boards
Next, I poured the solution on the rubber mold and let it dry for approximately 16 hours without moving it.
I used the wooden stick to mix it thoroughly so that it forms a uniform mixture. This step is very important.
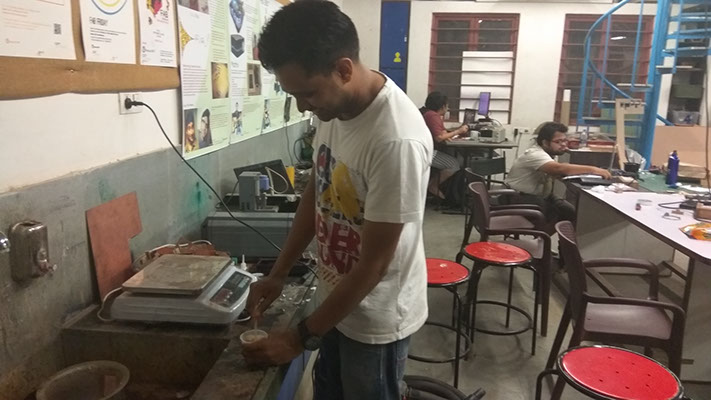

Finally, a very flexible negative mold was ready after 16hours.
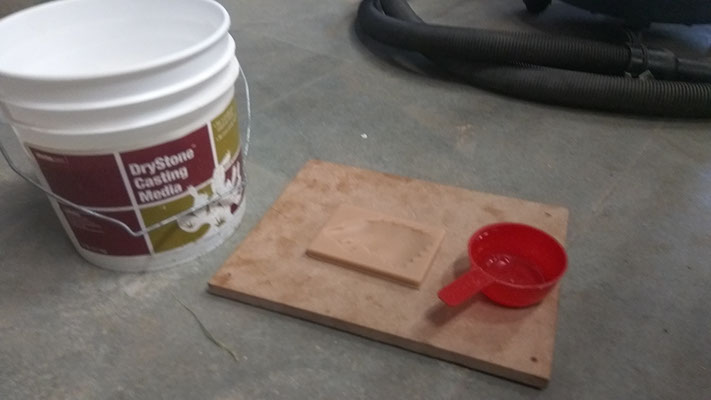
PLASTER OF PARIS CASTING
Following things are required to prepare Plaster of Paris Cast
- DryStone Casting media
- Water
- Plastic cup
- Measuring Spoon
- Wooden stick to stir
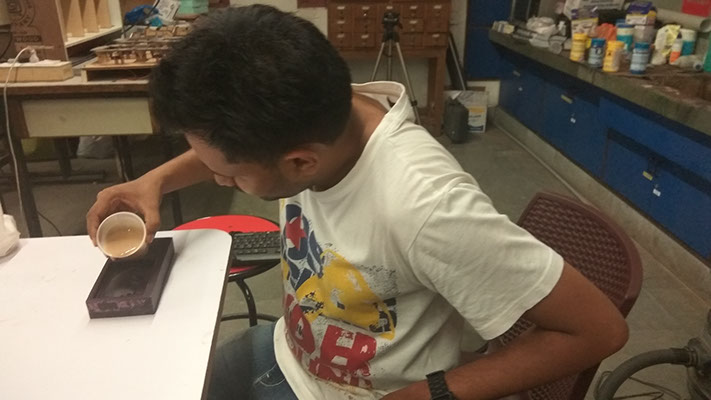
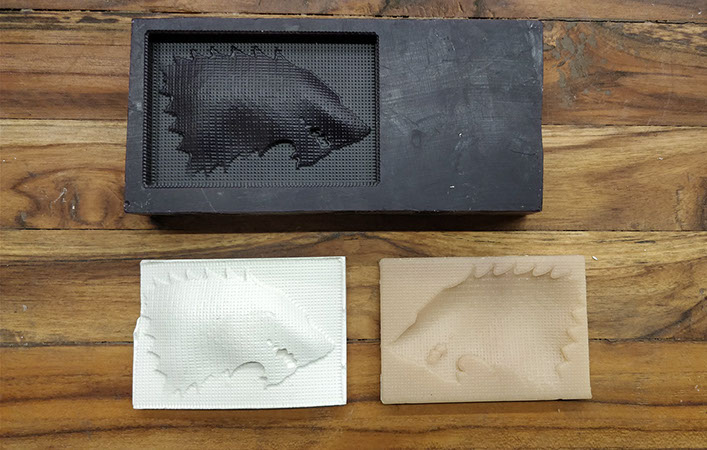
Once my negative mold was prepared from Liquid Rubber, it was time to cast my tile from Plaster of Paris.
I used DryStone Casting media to prepare my tile. It is primarily formed of gypsum. The advantage of using it is that its setting time is only 30mins. Hence, many casts can be prepared quickly once the mold is ready.
.jpg?crc=303762039)
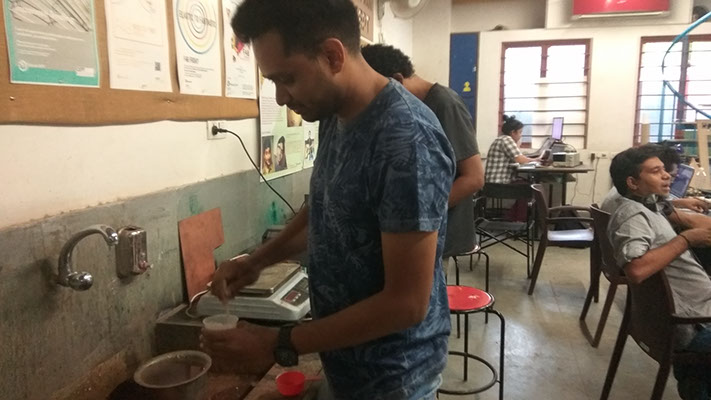
I used red measuring spoon to keep the proportion in check. I used 2:1 proportion for Casting media to water.
I used a plastic cup to make this solution.

As soon as water is added, we can see formation of bubbles. It is very important to mix the solution thoroughly and make sure there are no bubbles.
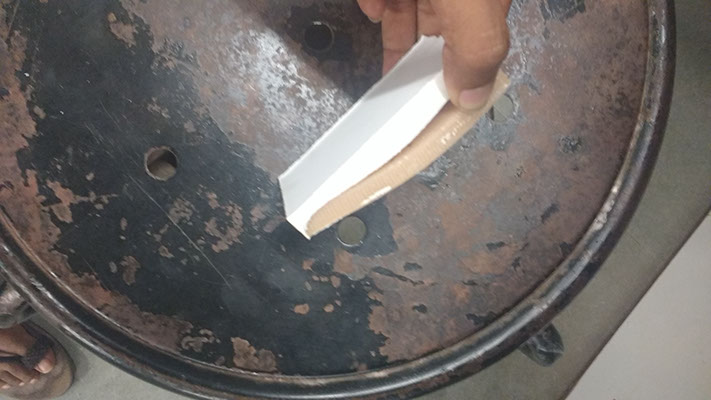
Once the solution was ready, I carefully poured it on the mold.
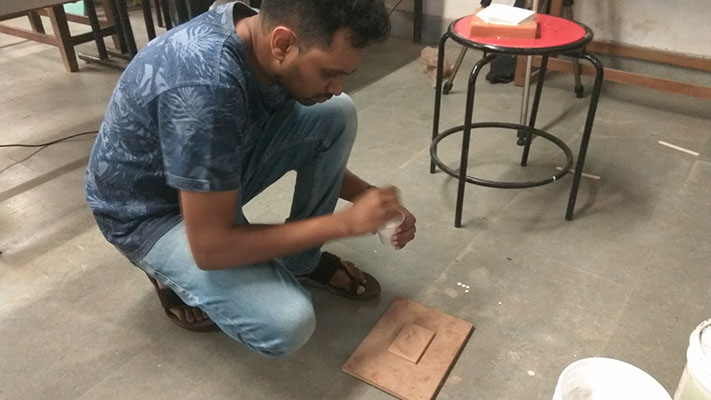
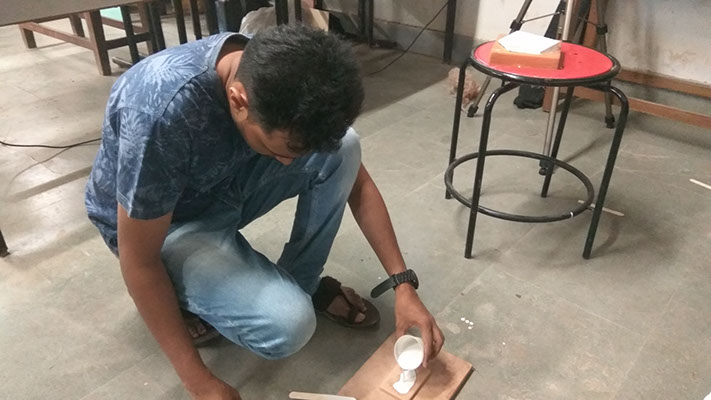
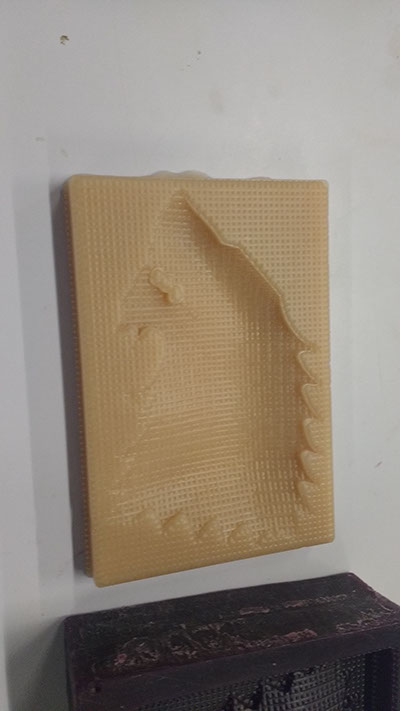
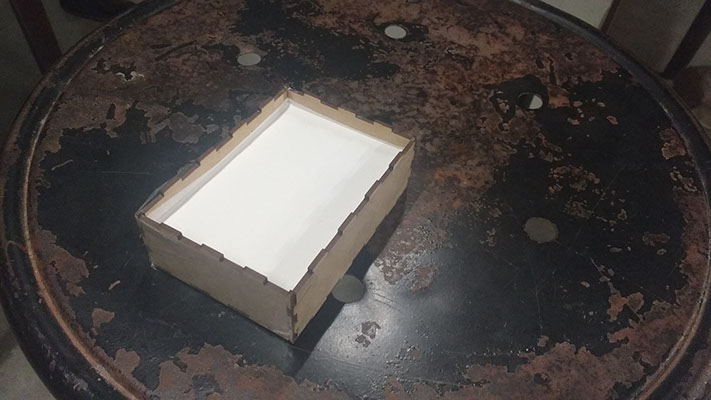
While pouring, I realized that my mold was shallow, hence I quickly made a bounding box using laser cutter and then poured the solution to form a thicker tile.
The cast could be easily removed after 30mins.
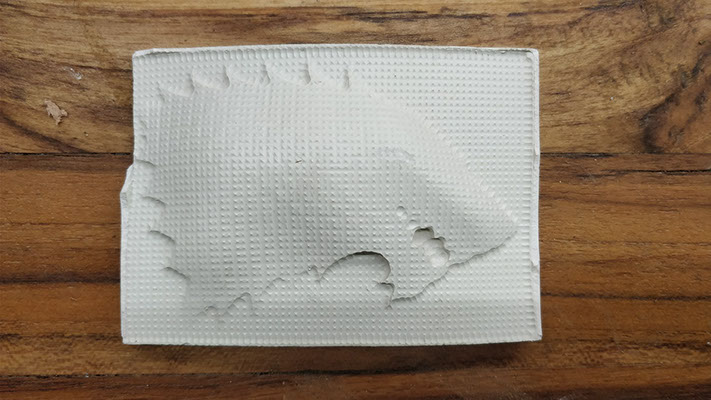
This is how my final tile looked like.
LEARNINGS OF THE ASSIGNMENT
Learned the difference between cast and mold.
Learned the formation of positive and negative molds.
Learned how to work with Liquid rubber for preparing a mold.
Learned how to work with Plaster of Paris for preparing a cast.