
Fab Academy 2017 at Fab Lab Barcelona By Trinidad Gomez Machuca
//LASER CUTTING
Demonstrate and describe parametric 2D modelling processes.
Identify and explain processes involved in using the laser cutter.
Develop, evaluate and construct the final prototype.
//VINYL CUTTING
Identify and explain processes involved in using this machine.
Design and create the final object.
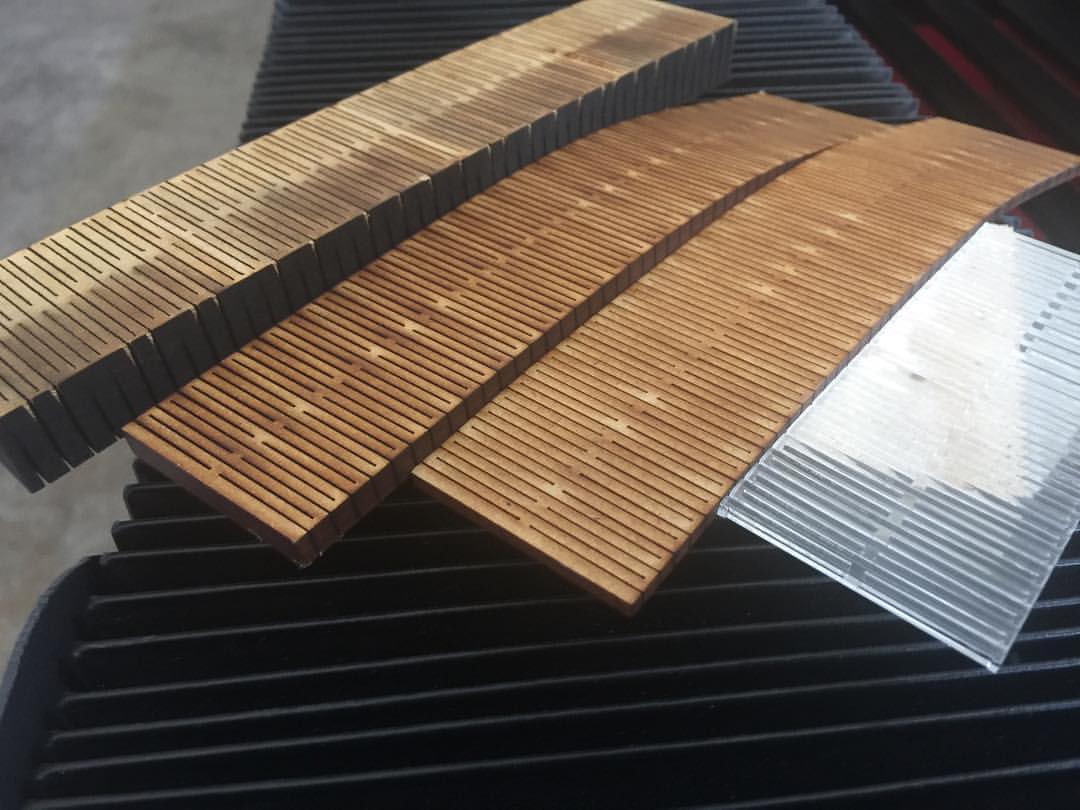
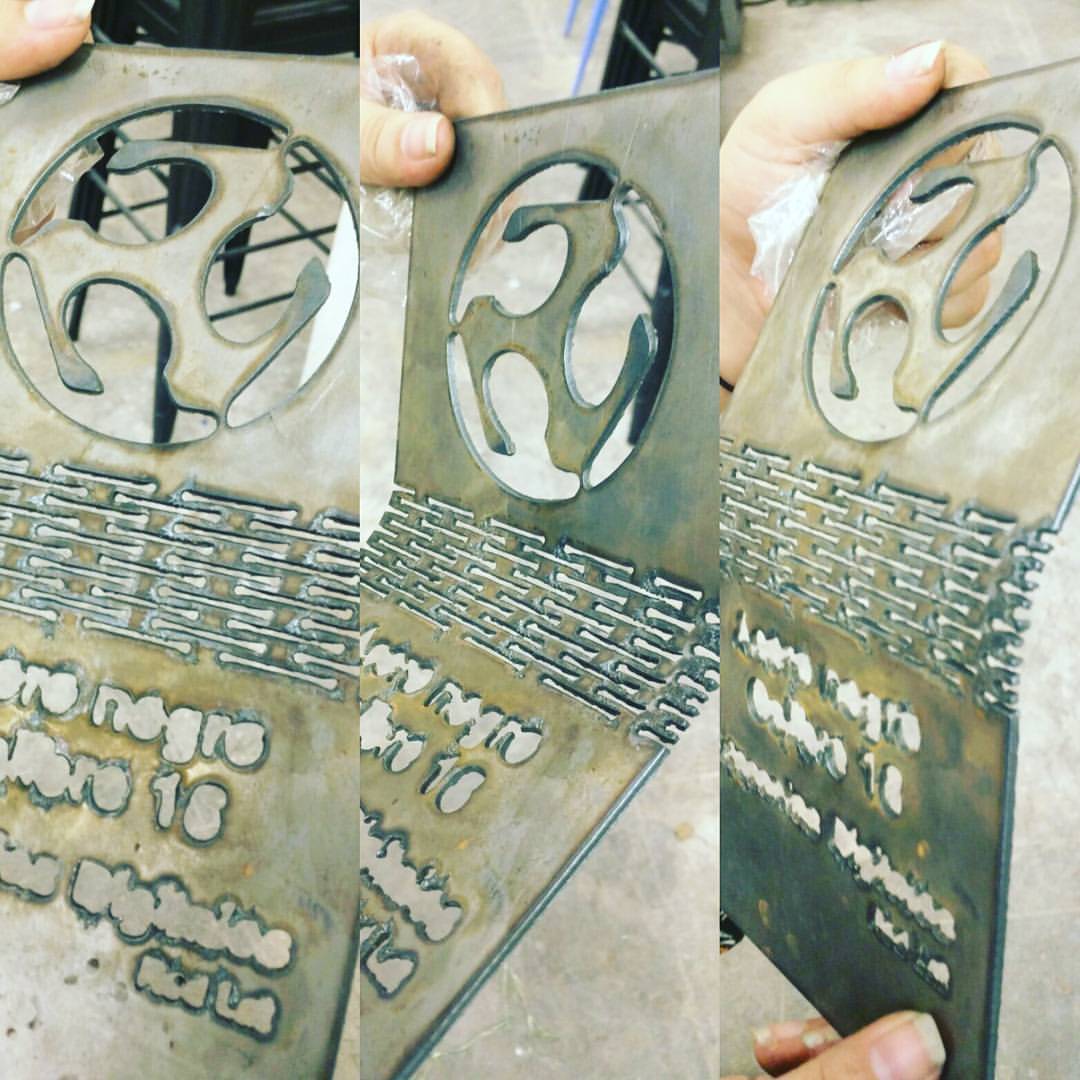
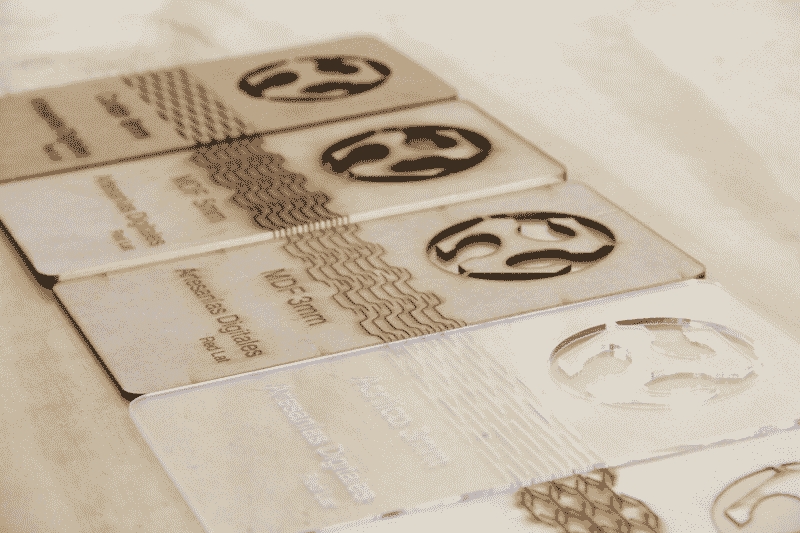
For this exercise I decided to use the tests that I did before in my Fab Lab (México). Here are some pictures of it. I found a very nice instructable with the laser cut patterns for bending hard materials, as you can see, I tried in acrylic, MDF, cardboard, polypropylene, plastic, paper, etc., and I also tried these patterns in different materials thickness. I even tried it in metal with plasma cutter and it also worked very well. I'm very familiar with the cut and engraving setting.
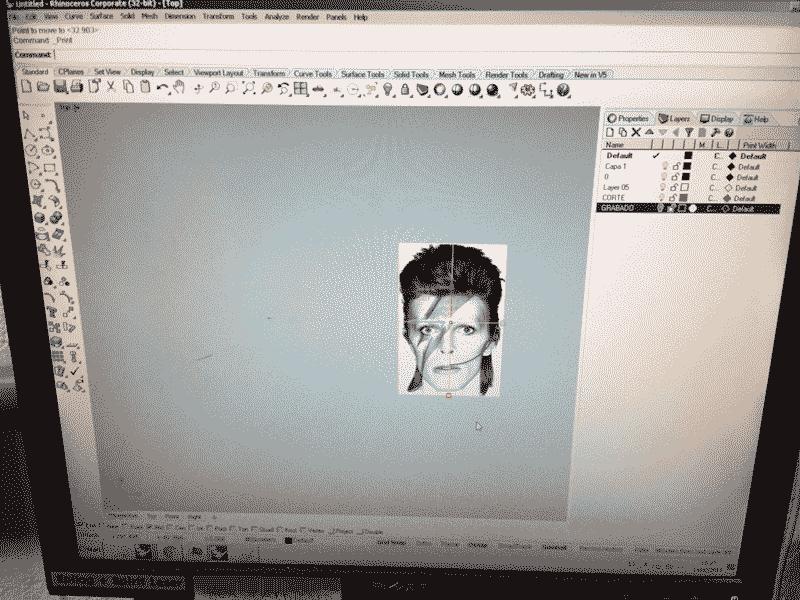
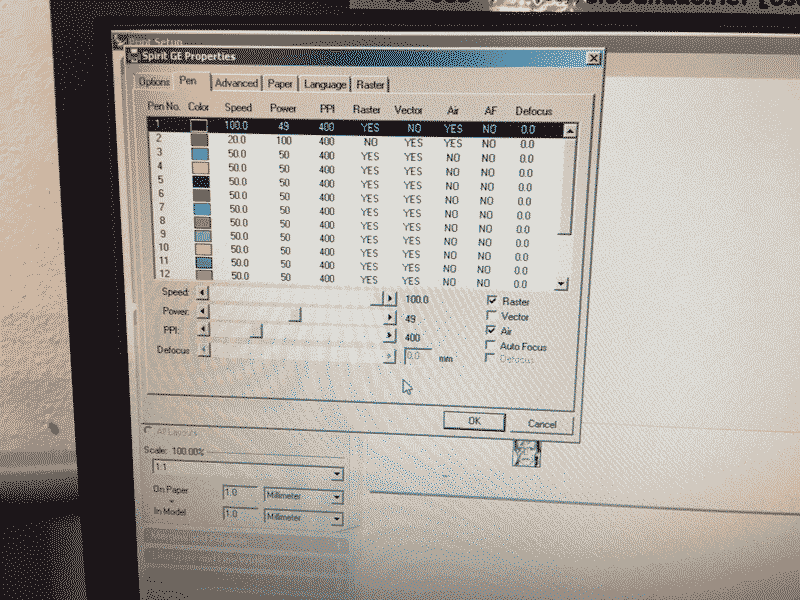
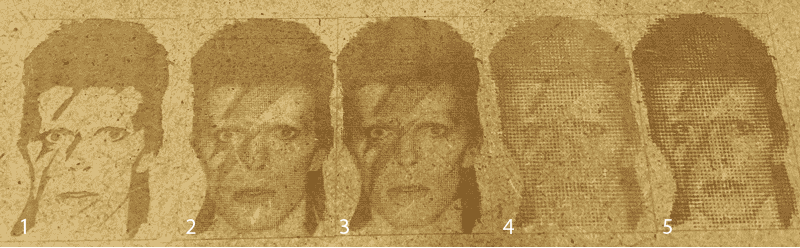
That is why I decided to tried something that I didn't knew before, like how to rasterize an image. I used to believe that in order rasterize images, you had to change the DPI in the Photoshop settings, but then I realized that it is not necessary because you have the direct option in the machine.
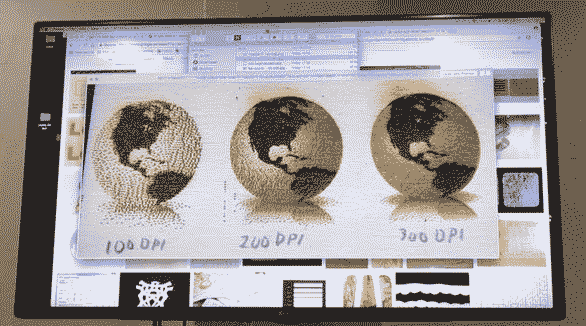
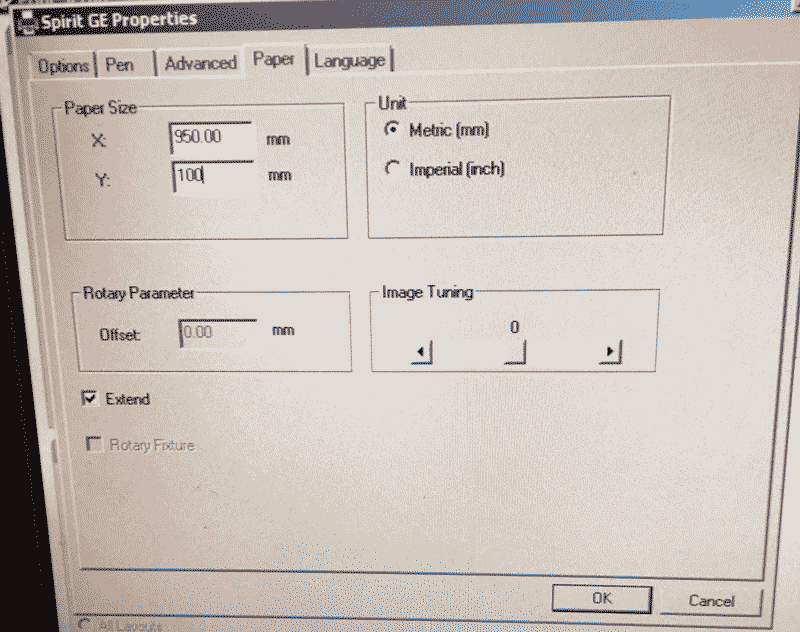
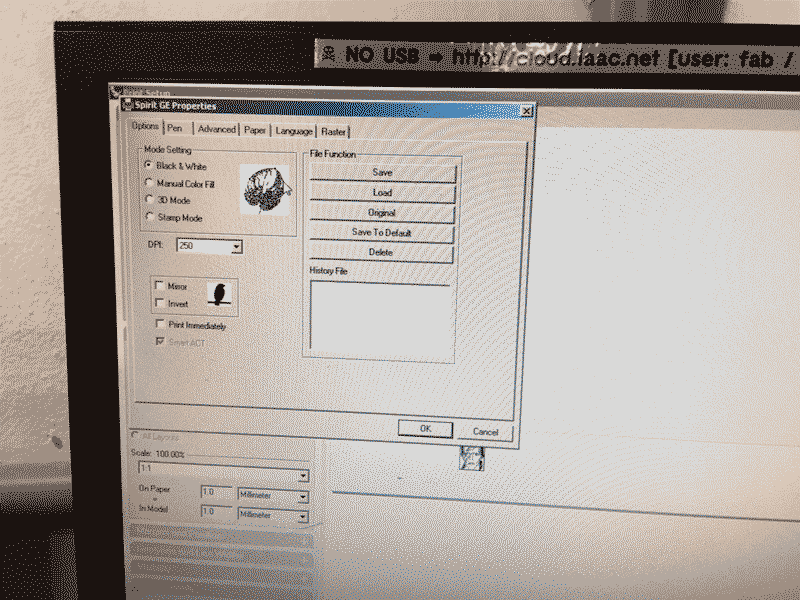
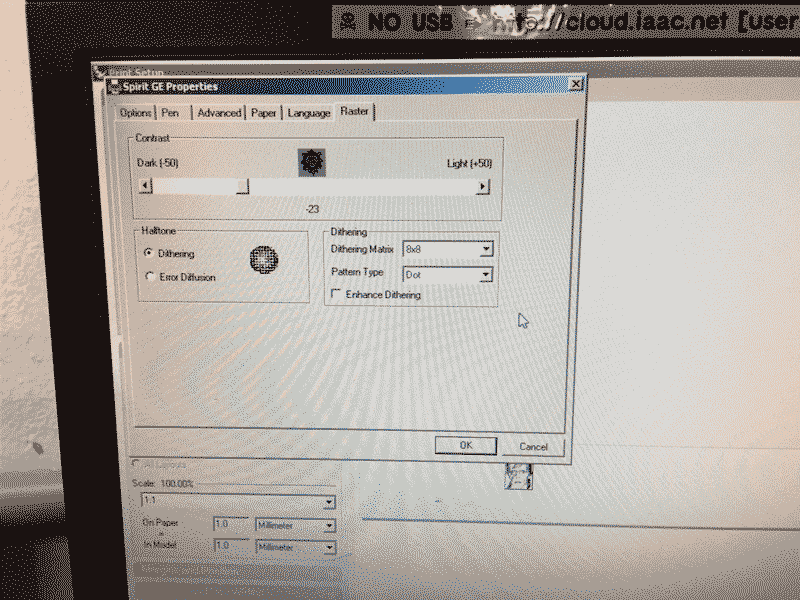
First, I opened in the Rhinoceros a David Bowie's image of 300 DPI, then I set the canvas size for the laser cut, and in the options I changed the DPI for 250 (it was 500 before), in the raster option I changed the level for darker, in the option advanced I chosen the option all raster and finally I increased the power. It sounds easy but it took me about 2 hours to find the correct way to raster an image in the way I wanted.
RHINOCEROS
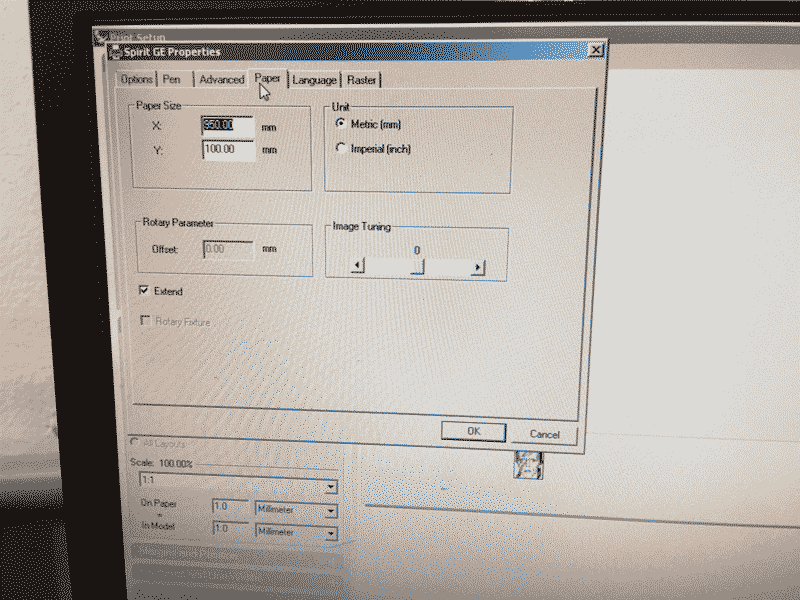
PAPER>> SIZE
OPTION>> DPI
SPIRIT LASER CUT
RASTER>> DARK
ADVANCED>> ALL RASTER
ADVANCED>> ALL RASTER
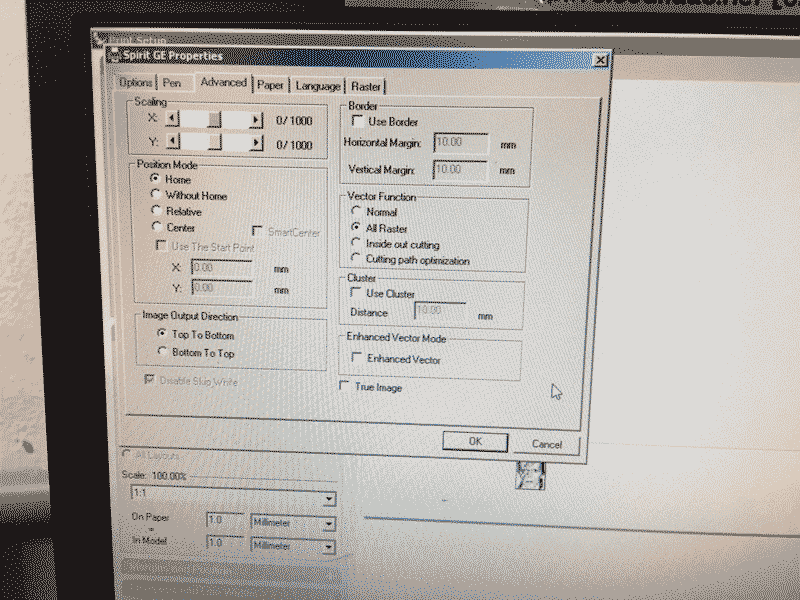
PEN INCREASED>> POWER
DAVID BOWIE
1.- ONLY ENGRAVE
2.- 500 DPI
3.- 500 DPI + 0 DPI FROM THE LASERCUT SETTINGS
4.- 250 DPI + POWER 50
5.- 250 DPI + POWER 100 + ENCREASE THE DARKNESS
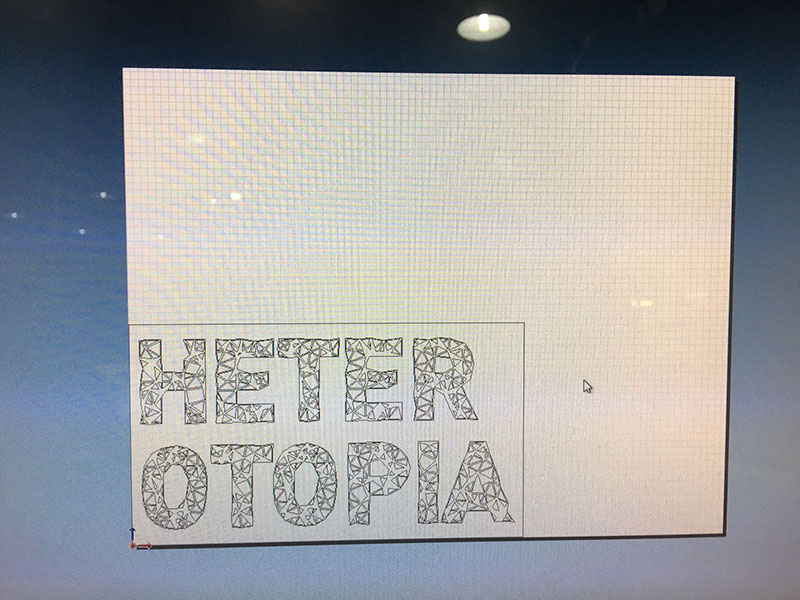
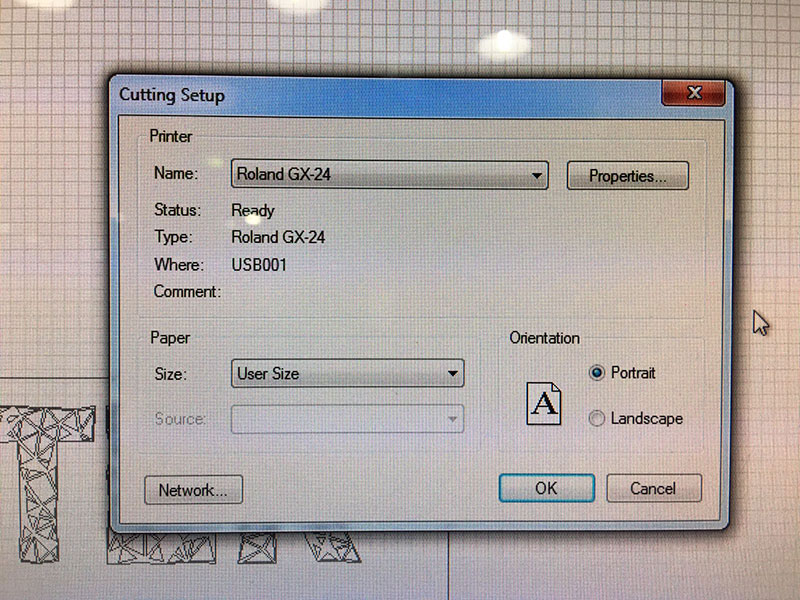
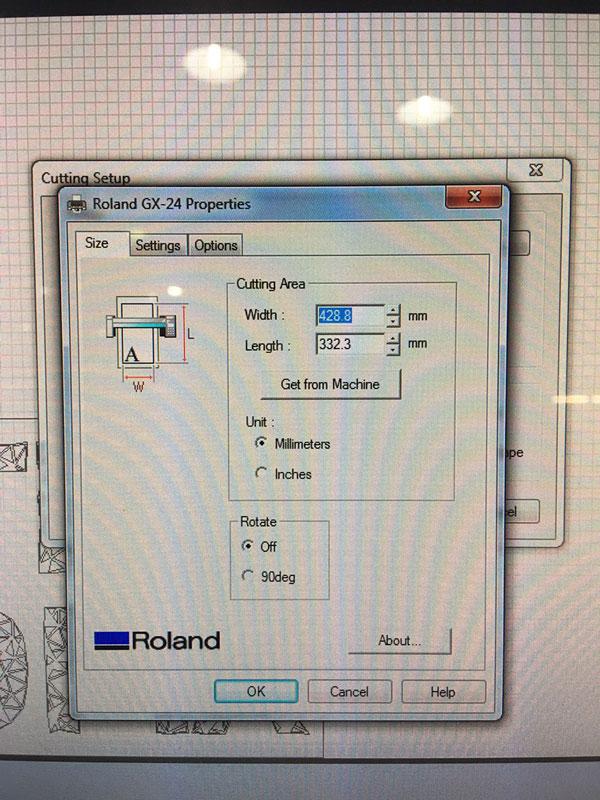
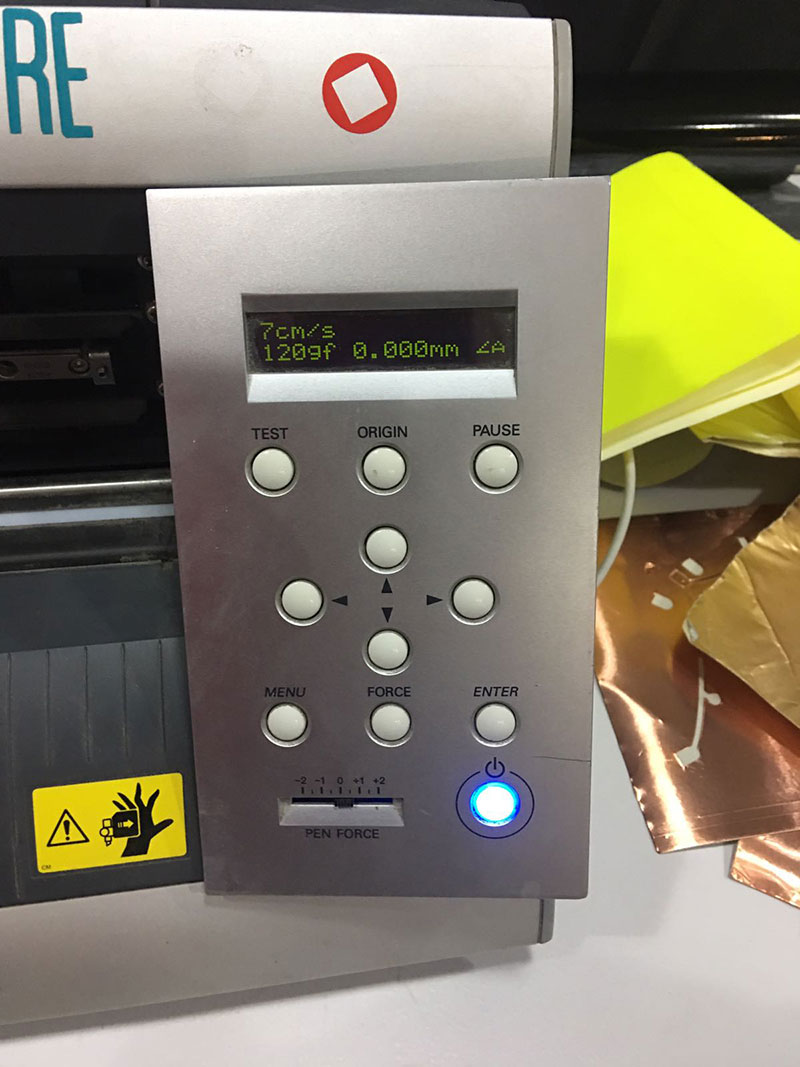
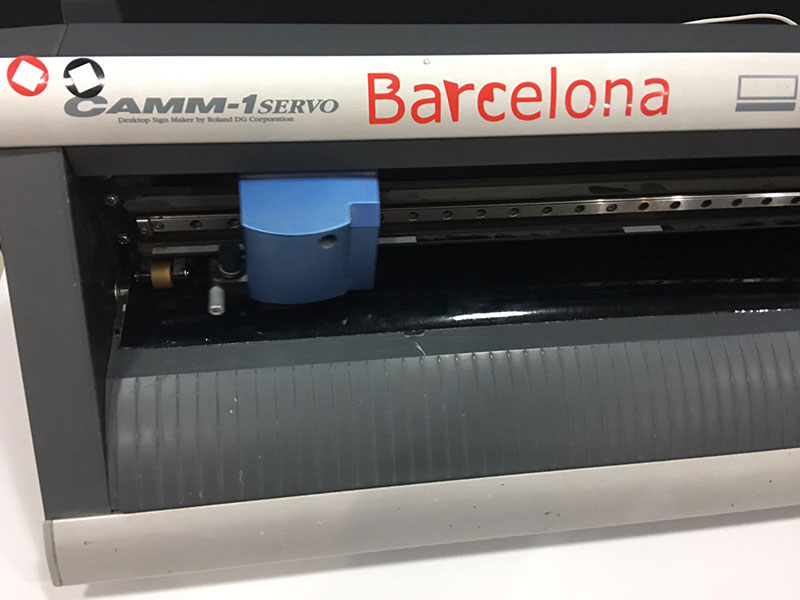
I love the word "HETEROTOPIA", so for the vinyl cutter exercise I decided to cut this word. I used my favorite font in Illustrator and then converted to outlines, but when I exported to the vinyl cutter application I realized that the measure between lines was less than one millimiter, so I manually changed line by line in Rhinoceros with an offset in order to increase the space to at least one mm and being able to cut the word.First in the cutting setup I chose portrait, then in properties I changed the cutting area, when I finished I went to the machine and press the option that I was going to use, mounted a vinyl roll and finally started cutting. There were so many lines that at the end it was a nightmare to paste it in my laptop.
RHINOCEROS
VINYL CUTTER APLICATION
CUTTING SETUP>> PORTRAIT
SIZE
VINYL CUTTER>> ROLL

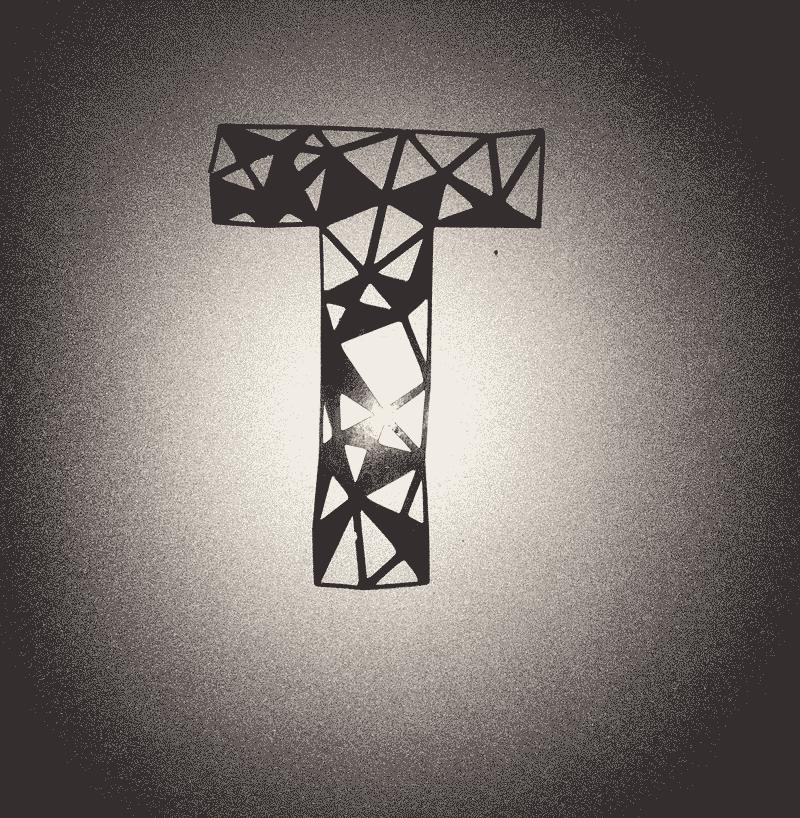
The T
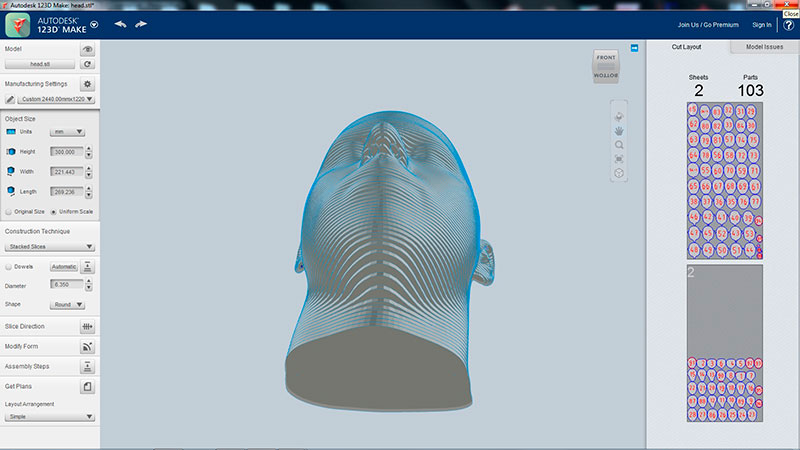
First For the fabrication of the head I used the software from Autodesk: 123D Make. I import the .STL file and choose the area and thickness of my material, then I selected the stacked slices for the construction technique and finally sign in to Autodesk in order to download the file and cut the head model with the laser cutter machine. This is the easiest way to do it parametric, but a very limited one.
123D MAKE
AREA
THICKNESS
EXPORT DXF
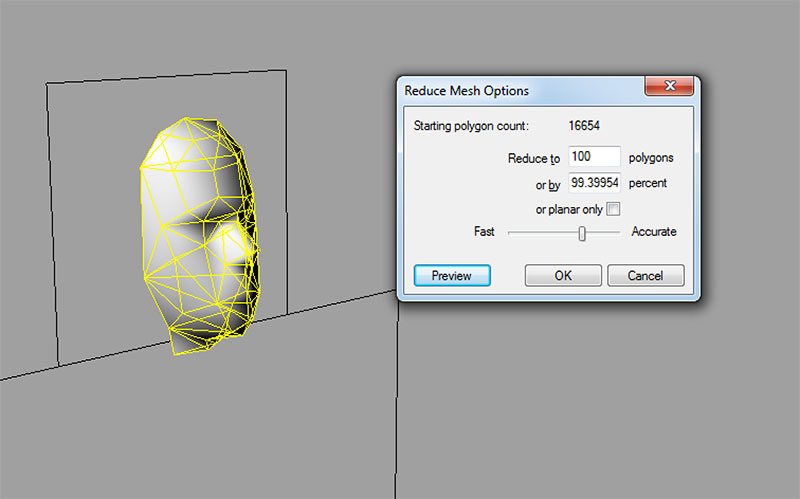
As you can see I made a boolean of the body letting only the Face, and then I reduced the the mesh allowing me to manipulate the object more easy, other wise the model will be very heavy. For this I used the comand REDUCE MESH, this only works in the Rhinoceros on Windows.
After i had my final model, i did a grasshopper concept so I can join the pieces on X and Y axes.
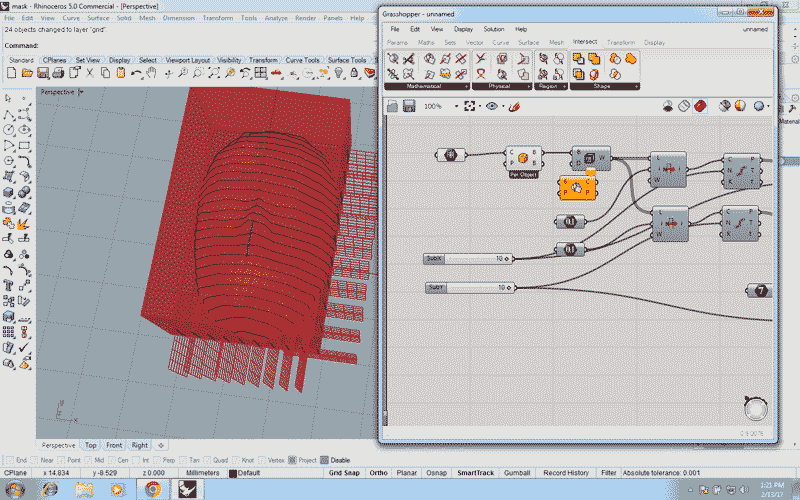
The same concept made automatically the files for the lasercut, the only thing i did after is put the pieces according to the size of the machine.
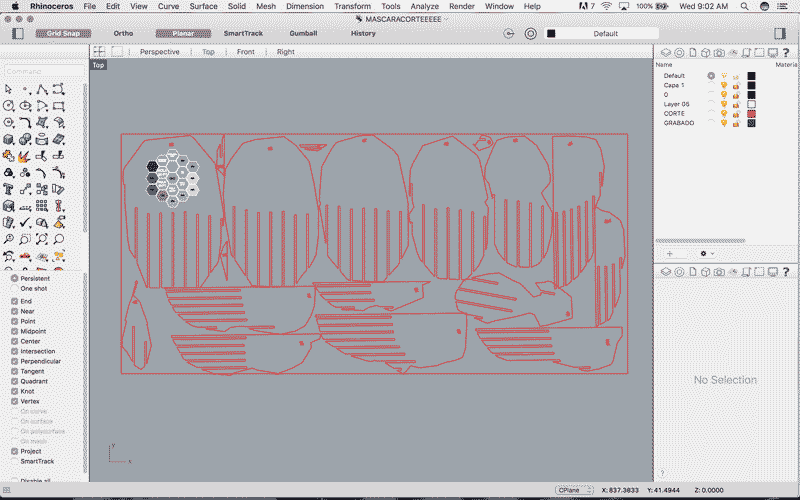
Then i select all the settings for the lasercut, I sent two layers, Red for cutting and blue for engraving. You have to select this in the software of the lasercut and finally send the files.
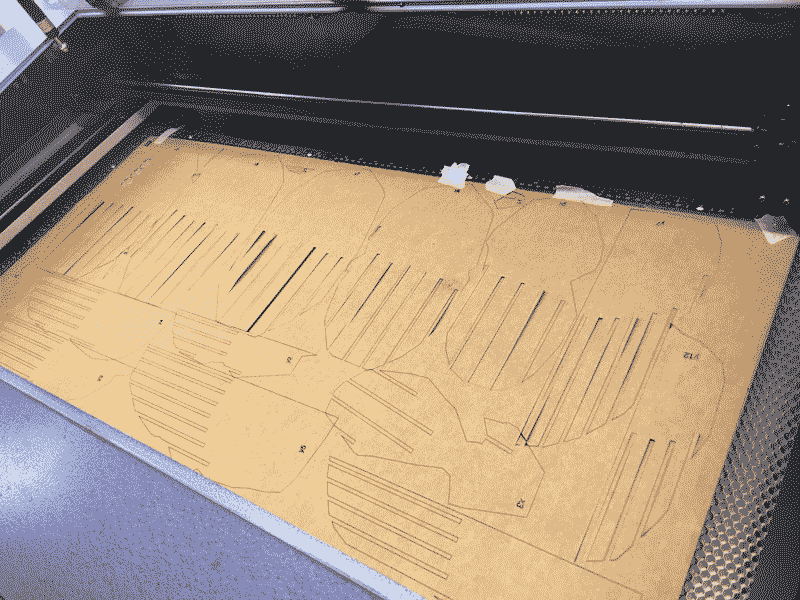
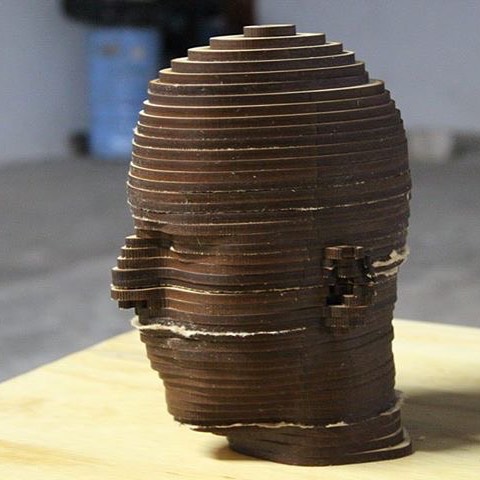
Here you can see the final result, is not what i expected, it needs more layers in X and Y axes to se a detail model.

//Illustrator
//Photoshop
//Rinoceros
//Grasshopper
//123D Make
| Fab Academy 2017 | Fab Lab Barcelona | Trinidad A. Gomez Machuca |
| IAAC | trinidad.gomez@iaac.net | |