Computer-controlled cutting
Week assignments:
(GROUP)
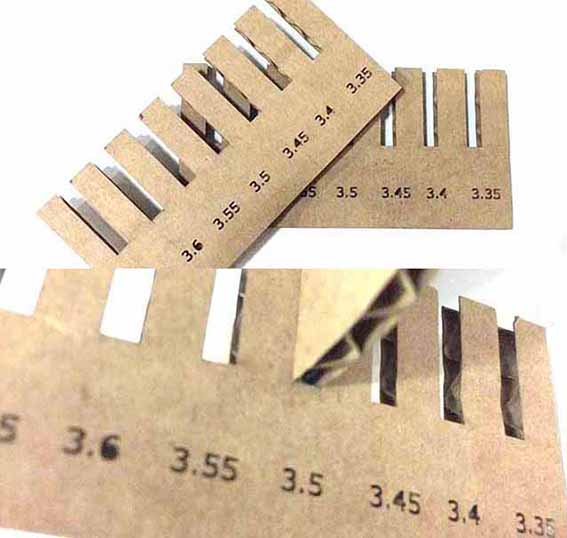
· Make lasercutter test part(s), varying cutting settings and slot dimensions
(INDIVIDUAL)
· Cut something on the vinylcutter.
· Design, make, and document a parametric press-fit construction kit,
accounting for the lasercutter kerf, which can be assembled in multiple ways
Wednesday I attended Neil's class from Green FabLab in Valldaura, as we were doing a workshop there with the company I work for. "Our" relation with Fablab started a few months ago, and since them they have been developing different working stations to show our Packaging department some digital tools and techniques that can be applied to their day to day job, right now or in a few years time.
I was amazed about Green FabLab, I really liked it. It's fascinating to see how to combine quite a rural life with the most advanced and pioneer technologies. It just seem like a dream to me.

Back to IACC's Fablab, the instructors showed us some interesting projects and they introduced us to inkscape. I already started using it last week, so I knew at least the basic commands.
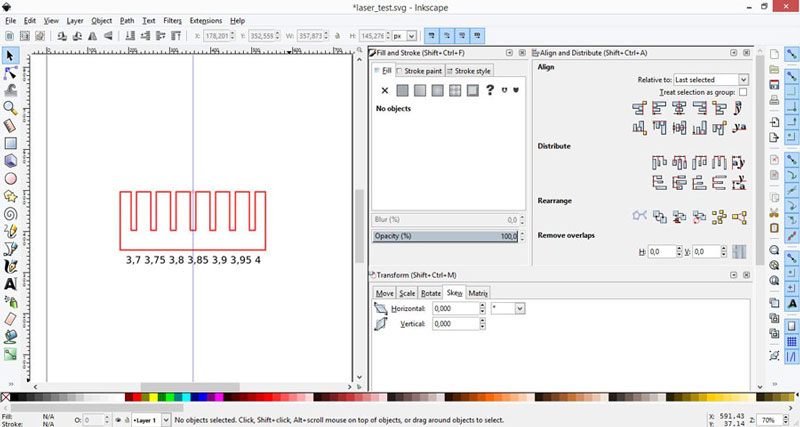
We created a cardboard piece with different whole mesuarements, so that we could check which one was working best with our material and decide the tolerance needed for joining one piece to another.
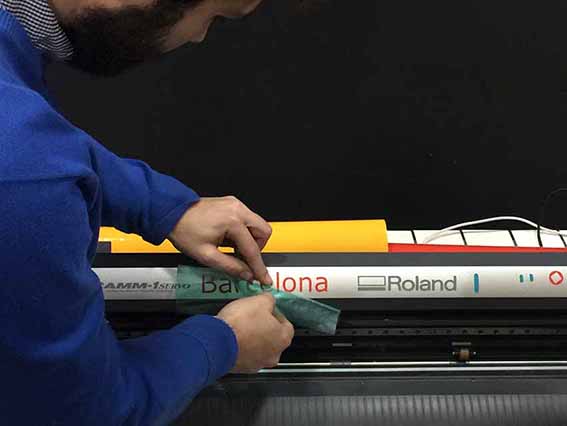
Santi explained us how to use the vinyl cutter, in our case the Roland GX 24 (manual here). We learnt how to charge a new roll/edge/piece of vinyl, how to upload our design to the computer through the FabLab cloud, how to preset the machine, do a small test and cut. We learnt about the vinyl mask too, which can be used to stick our design to it and then stick it to somewhere else. It's really useful when you have different parts and small pieces.
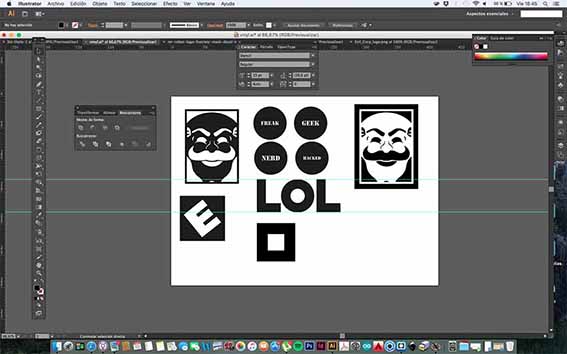
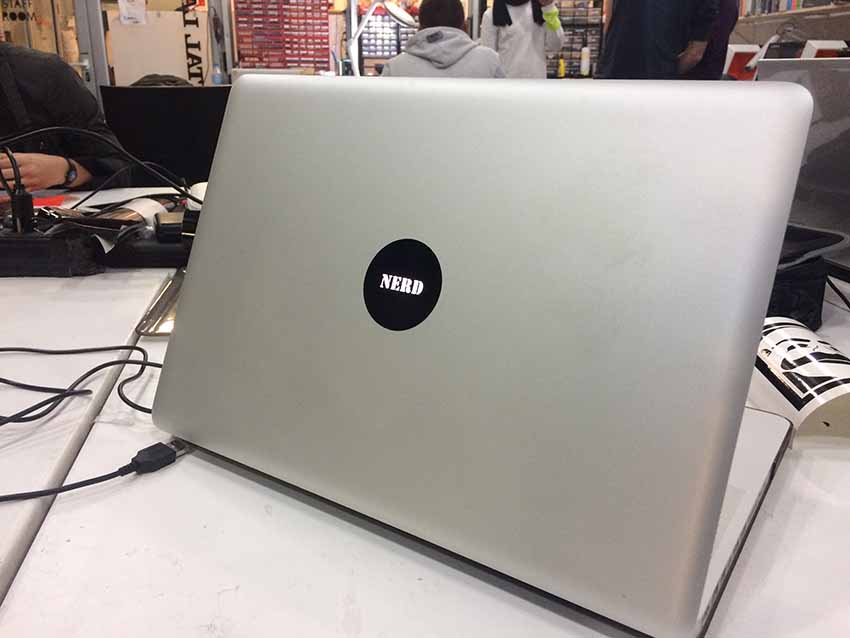
As most of the students, the first thing that came to my mind once I knew how to use the vinyl cutter machine, was to do some stickers for my laptop (I have to say didn't have any until now). I did some drawings with Illustrator, most of them basic circles with words on it like: freak / geek / nerd / hacked. I did some other stuff, inspired by the TV serie Mr. Robot, which I really like.
After that I decided to print all of them to actually see which one I liked the most. I removed the small parts of the design (it takes some minutes, I have to say) and then stick one of it to my laptop.
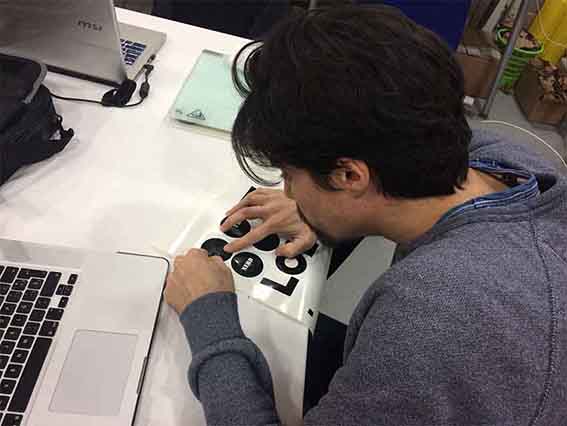
I proudly wear now a geek sticker on my computer.
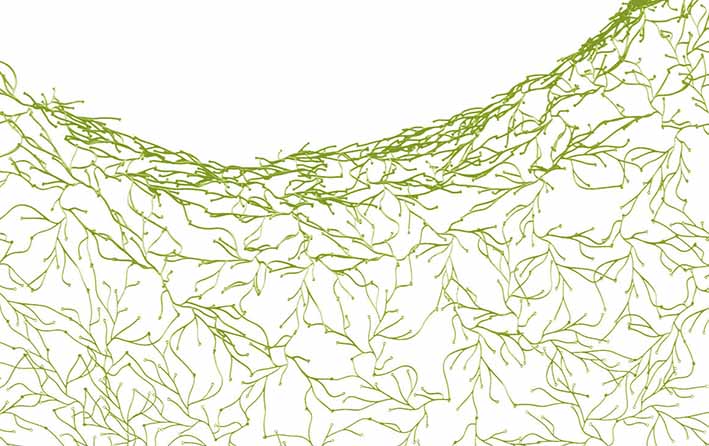
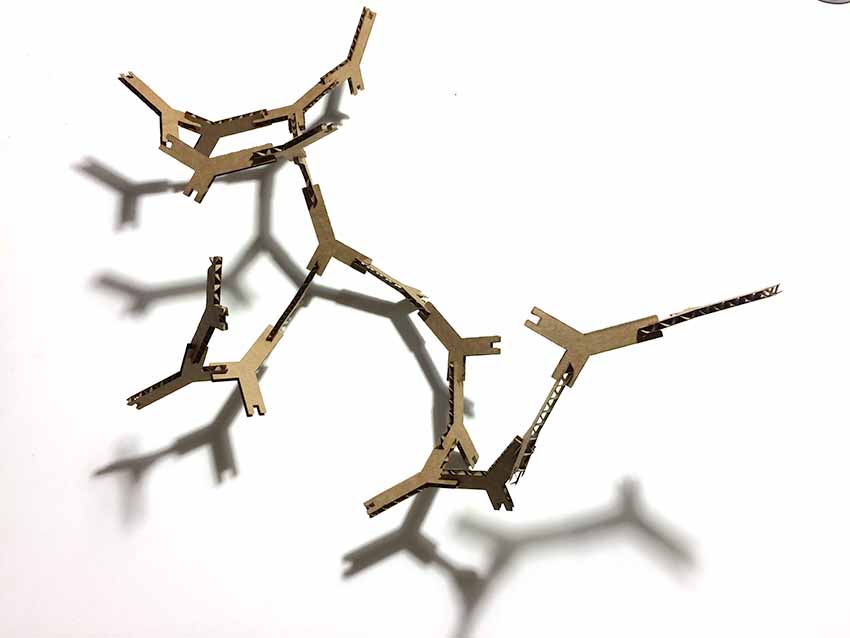
Finally I worked on my press-fit structure. I saw some references from previous years and also investigated on what Neil showed us during the class. I wanted to do some pieces that could reproduce an organic shape, instead of more modular and "mathematic" design. I remembered about Bourellec's algue module, a project that really inspired me some years ago. It consists about a small piece of plastic which can be deformed and joined to other pieces, trough a small whole and a cilinder that fits on it.
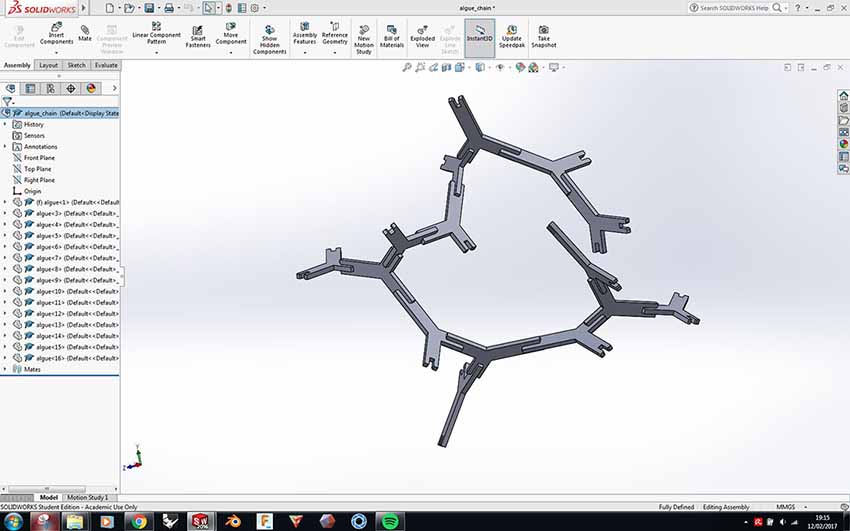
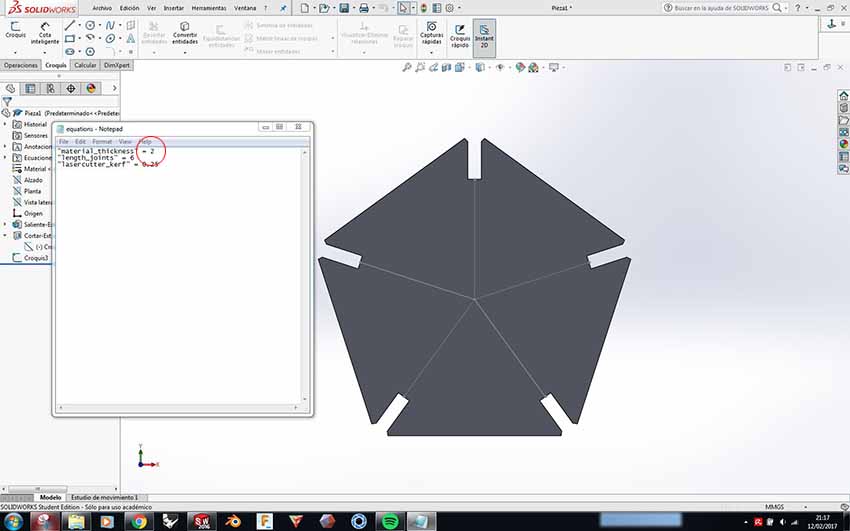
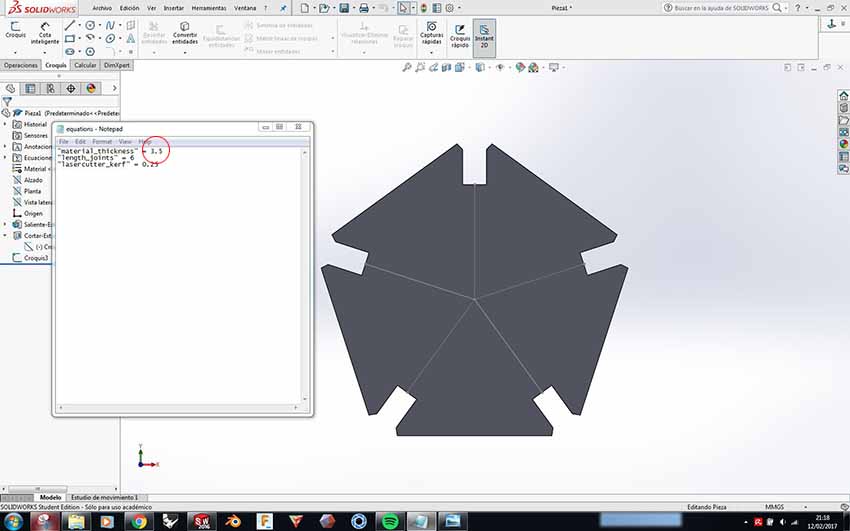
I designed the piece with solidworks, but this time I introduced basic equations, so that every time I changed their absolute numbers, the design may change as well.
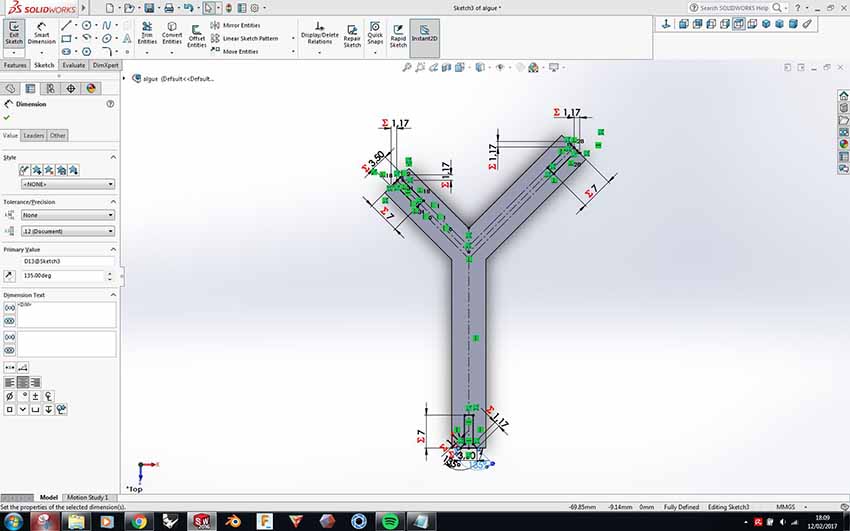
Through assembling the pieces in Solidworks, you can see a full picture of how it will look once produced. I used this system to finetune the design, so that the final piece is not very big nor very small.
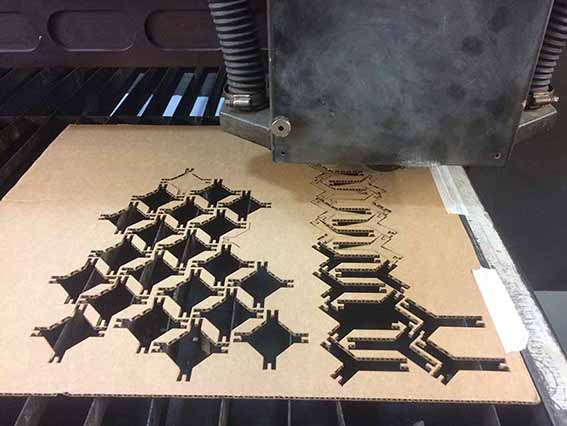
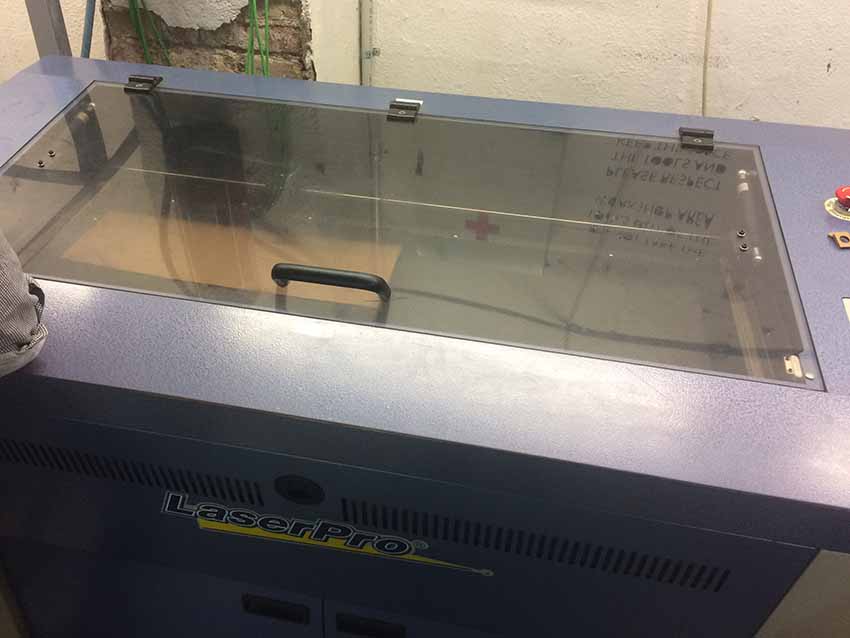
Once I had the design ready I exported it into 2D drawings in the same program, and then exported them into Rhino, as this is the program that the laser machine in FabLab Barcelona is using to make it work. It took quite a few times to set up the machine and make it work. The good think is that there is a tool to make some small tests on the material, so that you don't waste loads of it. For these pieces I used the biggest laser cut there's in the Lab. It's just so amazing to see it work!
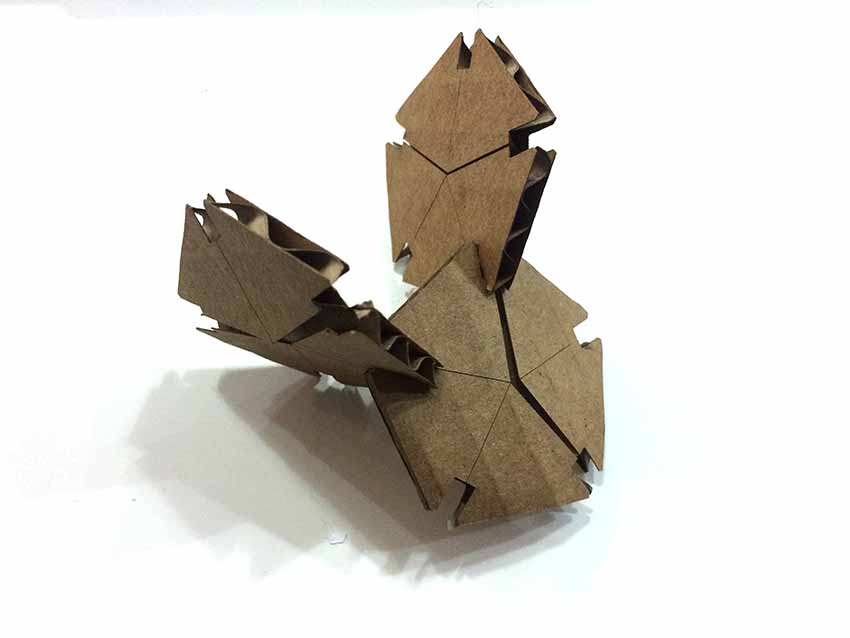
This is the final piece, once cut and assembled. I think I get quite the natural and organic feeling I wanted.
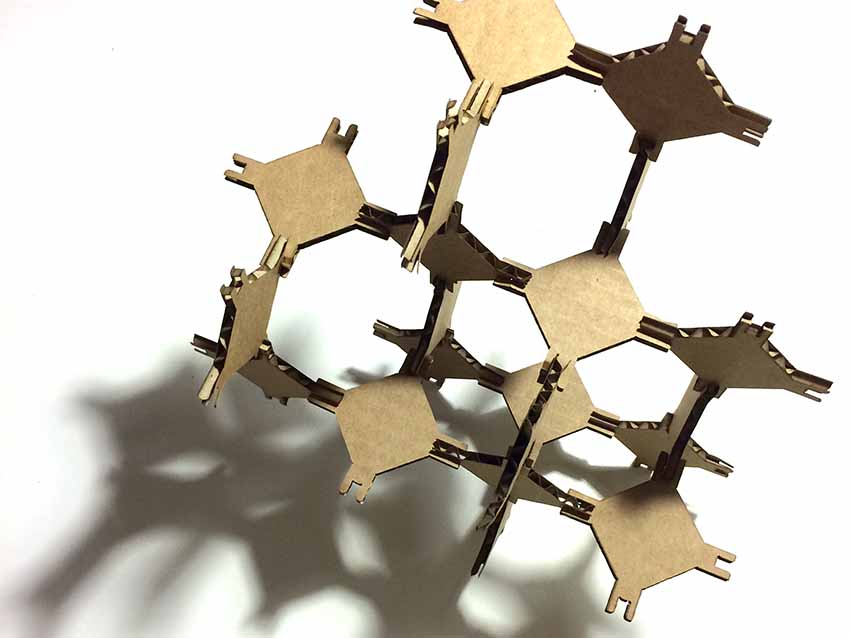
I worked on two more designs, apart from the algue. Next one was based on a structure that Neil showed us during the class, and I wanted to try out. I repeated the same process as for the other piece.

Here is the new assembly, which looks a lot more robust than the previous one.
Lastly I worked on a third design to try not just new ways to connect different pieces, but to get different shapes through the cuts on it. The idea was to make some inner cuts where the material can fold and create 3D structures by twisting it. As you see in the following picture all the design was still parametric and could be changed directly through a .txt file with all the variables of the drawing.
This time I cut the pieces with a different machine, to understand and learn how this might affect into the settings parameters. And it actually affected a lot, as every machine works and need to be set on a different way. We set up the machine with the following parameters for cutting:
SPEED 20 / POWER 100 / PPI 400 / VECTOR and AIR > YES
For engraving: SPPED 50 / POWER = / PPI 400 / VECTOR and AIR > YES
Here are some pieces of the test I did, which actually didn't work properly, as the folding lines where intersecting the joints and therefore where not able to twist.
I have started trying this same principle on a hexagon, so the lines don't interfere with the joints.
As a conclusion I have to say vinyl and laser cut are great tools to prototype really easy our designs, try them and improve in case it's needed.
Download all the files here