This was the officially first week we attended the Neil Gershenfeld's class. He introduced us many new printing and scanning technologies. After attending the first lecture I found myself, I know nothing. I have gained and learned about the technologies and tools available for scanning and printing. There are ton of tools available and for this week we had to practice on those tools, as much as possible.
This week we had two objectives, one group and one individual.
Group Assignment to check the capabilities of 3D Printer
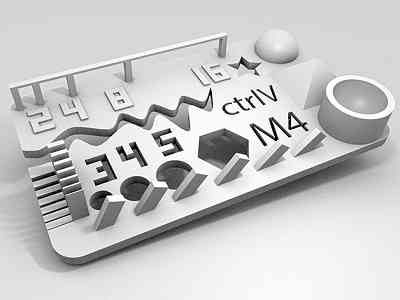
Test File Sample
I learnt multiple things, specially about the printing parameters which effect the model.
Test File Sample
The test objects available on the doc manual of the FAB LAB Barcelona website Assignments.
Well the easiest part of being a computer geek is to know how of how things work, I already has worked on many scanning tools (3d Scanner, Kinect, webcam) and many other, so I started to think what should I scan and a make model of.
The easiest among these scanners, which didn't needed any tool was to get a few pics of any object and use Autodesk Remake to get the model out of it
I tried it, getting a dozen of pics, and using Autodesk Remake to make a model out of it.
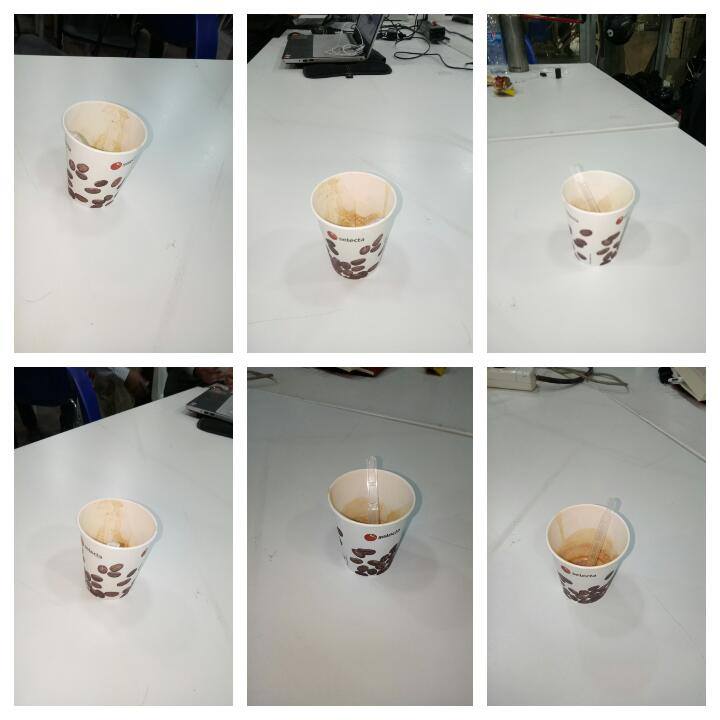
Cup Pics
Then I sent all those images to "Autodesk Remake", and tried online mode to make a model for me. This is the Model I got from it
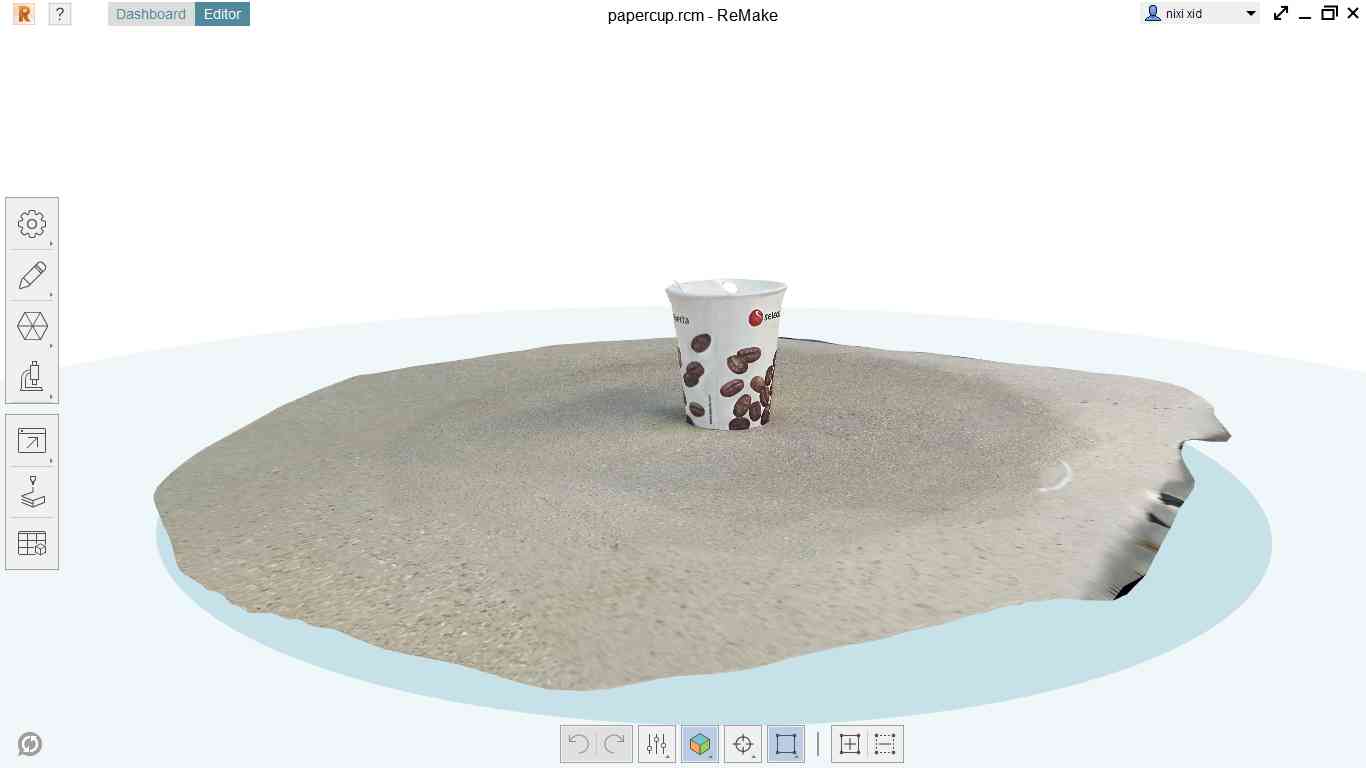
Cup 3D Model (Autodesk Remake)
After this scanning, I tried to scan my self, well we learn one other method to do that, is to use XBox Kinect, and it was really fun to get yourself scanned and 3D modelled, though the results didn't look like it was me.
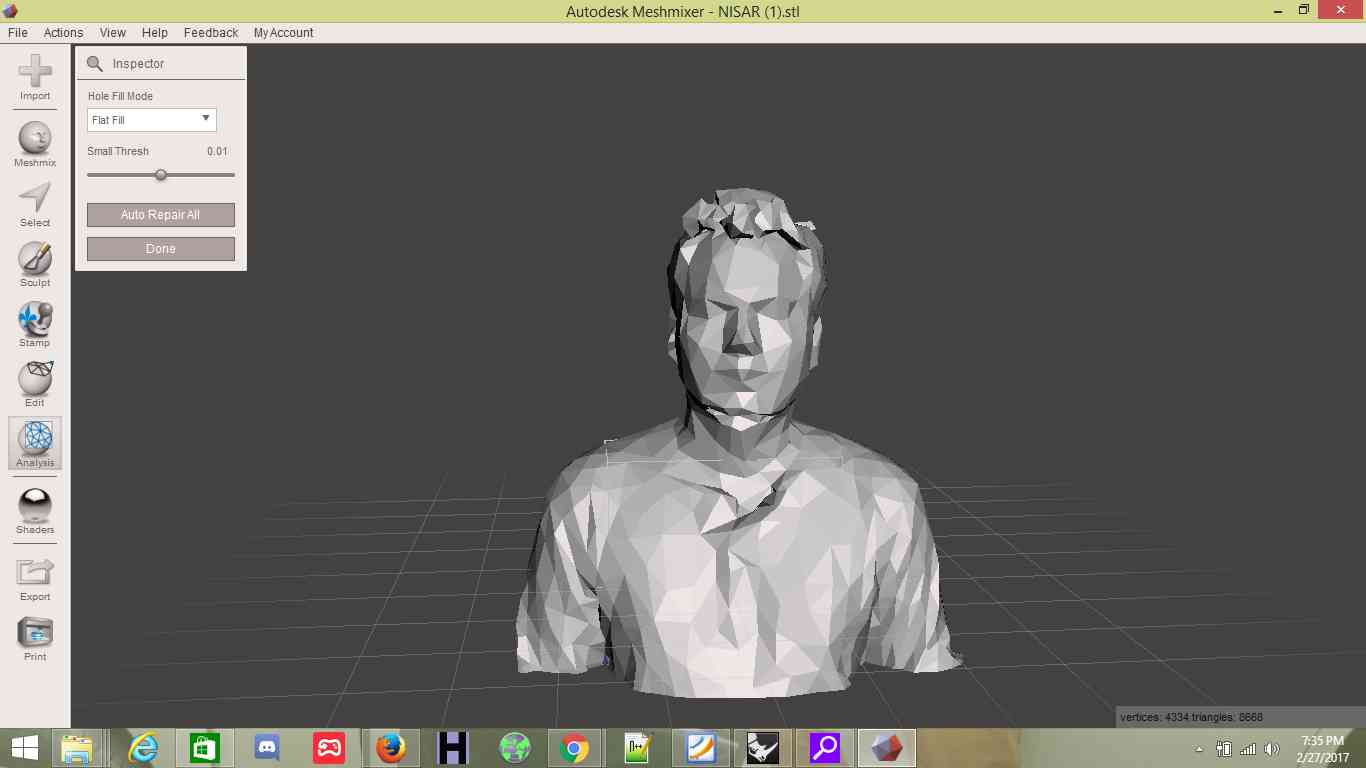
My Own 3D Model
Initially model had many issues like (holes, duplicated vertices and faces and also many disconnected points), so I edited it first in Blender first to try to smooth and decimate a few faces. A few steps I took in Blender :
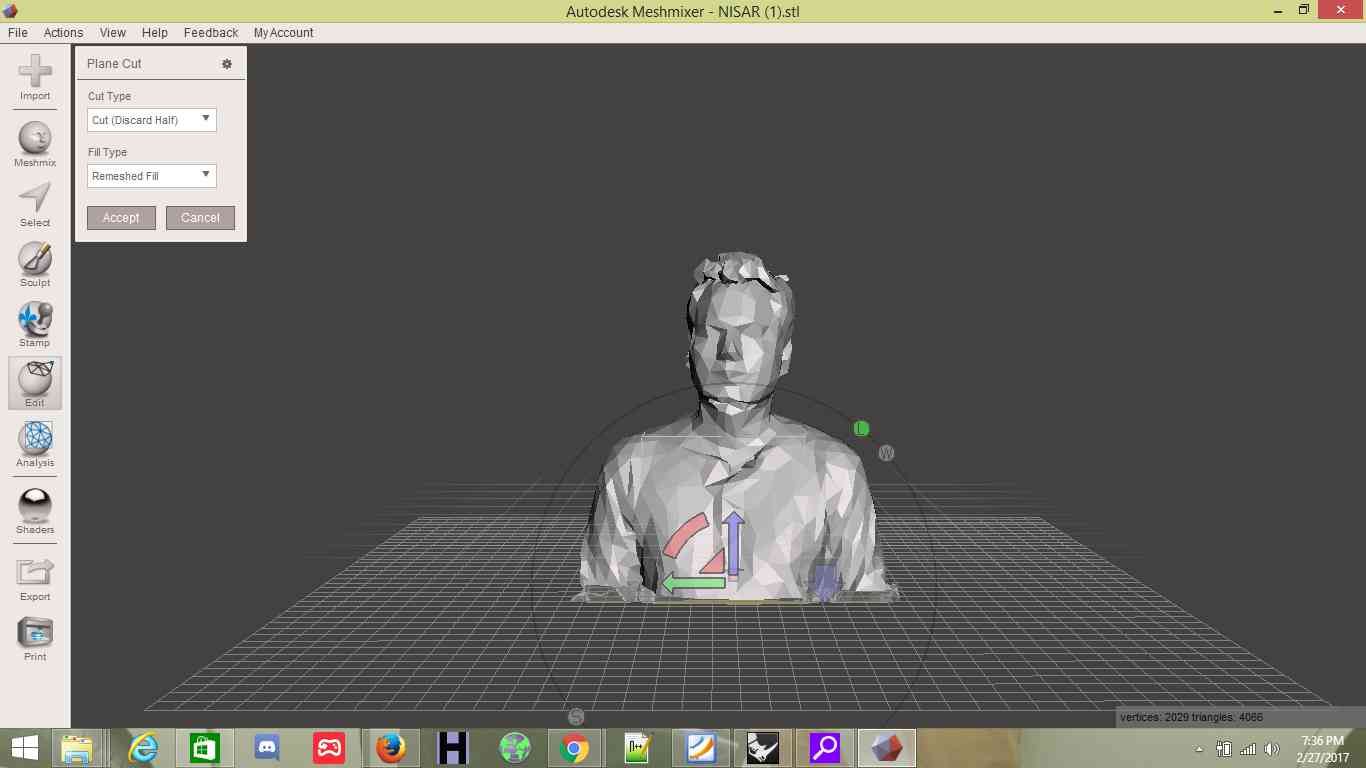
Mesh Mixer Model
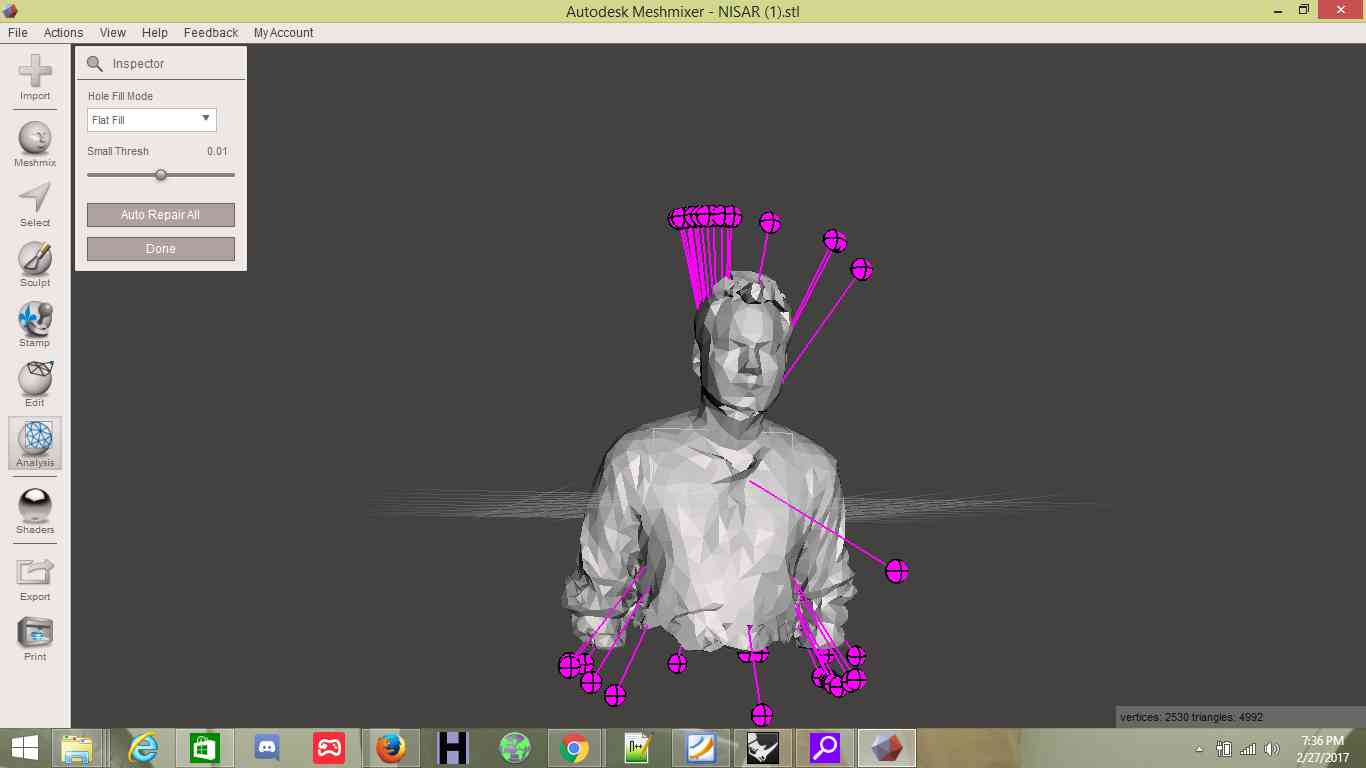
Analyzing Model for possible issues (holes)
Then I tried to scan an Object from the 3D Scanner, which uses a Nosal to touching the surface of object and gets the structure of object.

3D scanner to Scan the objects, by touching it with the Nosal
I wanted to scan something related to My Project, luckily I found a mold of wheel which will be helpfull in my project, as I have to construct my model and its accessories like wheels, board and other objects
Object I wanted to Scan (It is a mould of wheel)
Scanning Results
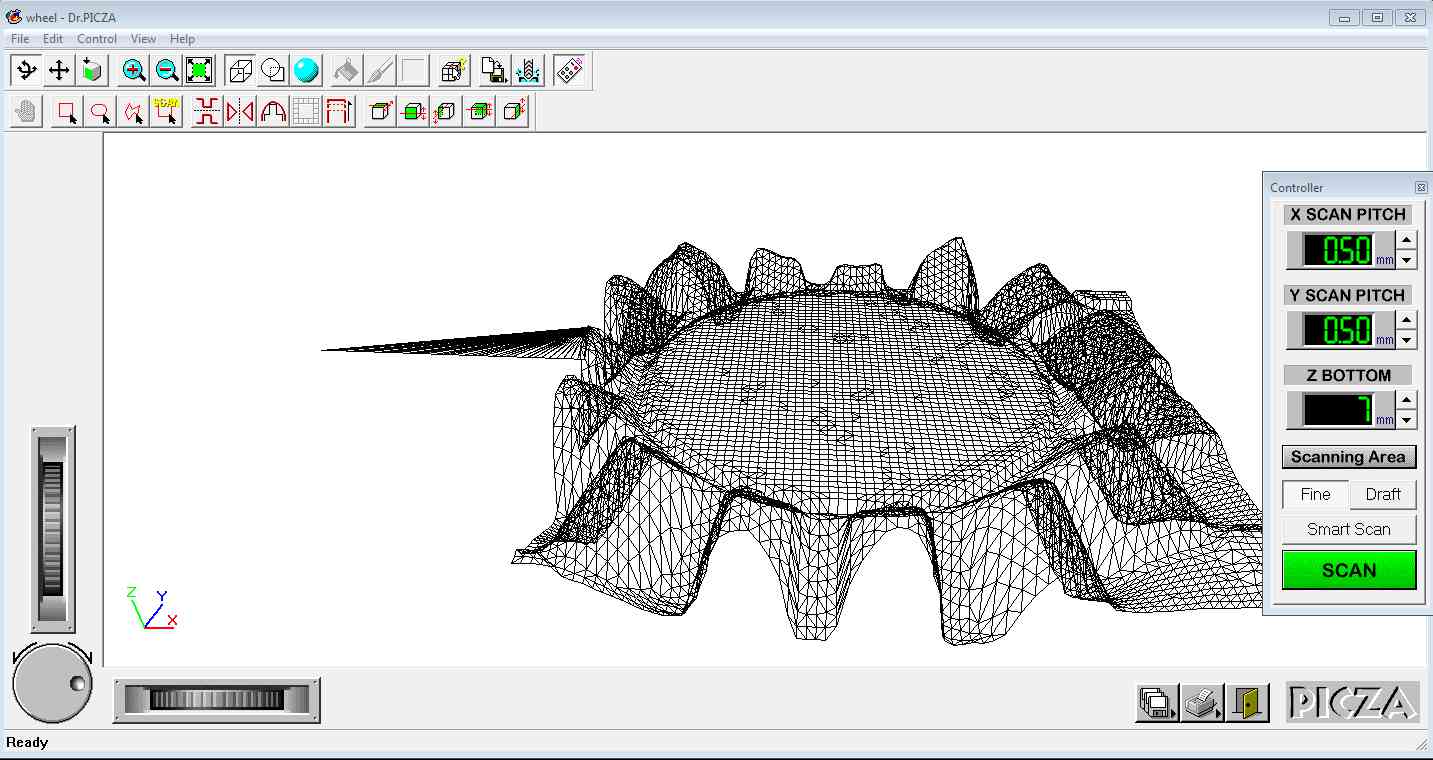
Scanning Results
All the models and Scanning results are here to download and re-use
This was a big challenge for me than the scanning, as I had a very little to no info on the 3D modelling softwares and their working, not only that, but I also had to print something which can't be printed using Non Additive Printer, but I accepted this challenge. I started from the Andrew's Video Tutorials to get the basic knowledge of Blender. I wanted to make a Bulb model where I can put LEDs inside to light it up.
I started working on blender instead of other sophisticated softwares for a few reasons
I started by downloading the 2D image of an Electronic bulb to get a basic sketch for my model, and then started making its model.
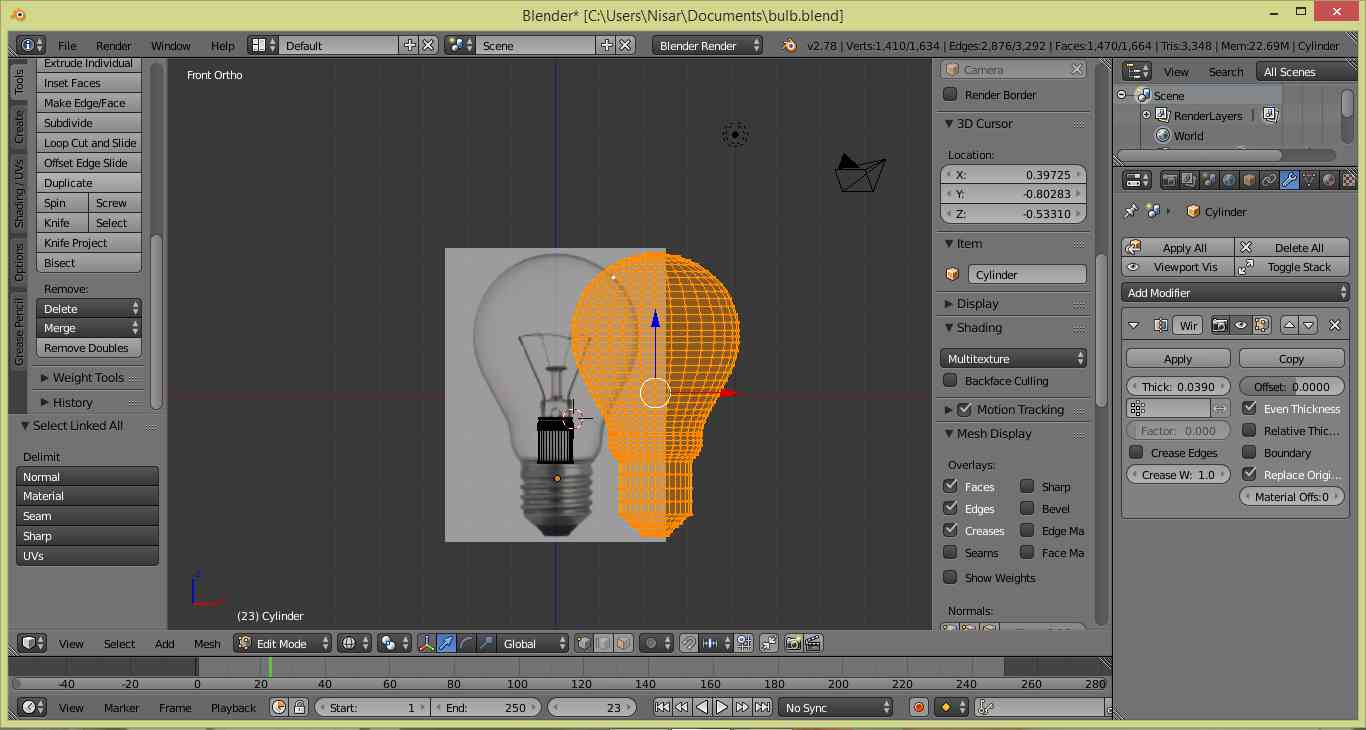
Blender, Modelling Bulb
After making the sketch I added wireframe modifier to get only wire Model, and reduced the solid part, as I didn't wanted that, and then I added the flament part where I have to attach the LEDs separately and combined it in to the main frame.
Blender, Modelling Bulb
Once the model is ready, I imported that model in CuRA 3D to slice it down for the printing. I sliced that part for 0.6m Nosal printer. And printed the model.
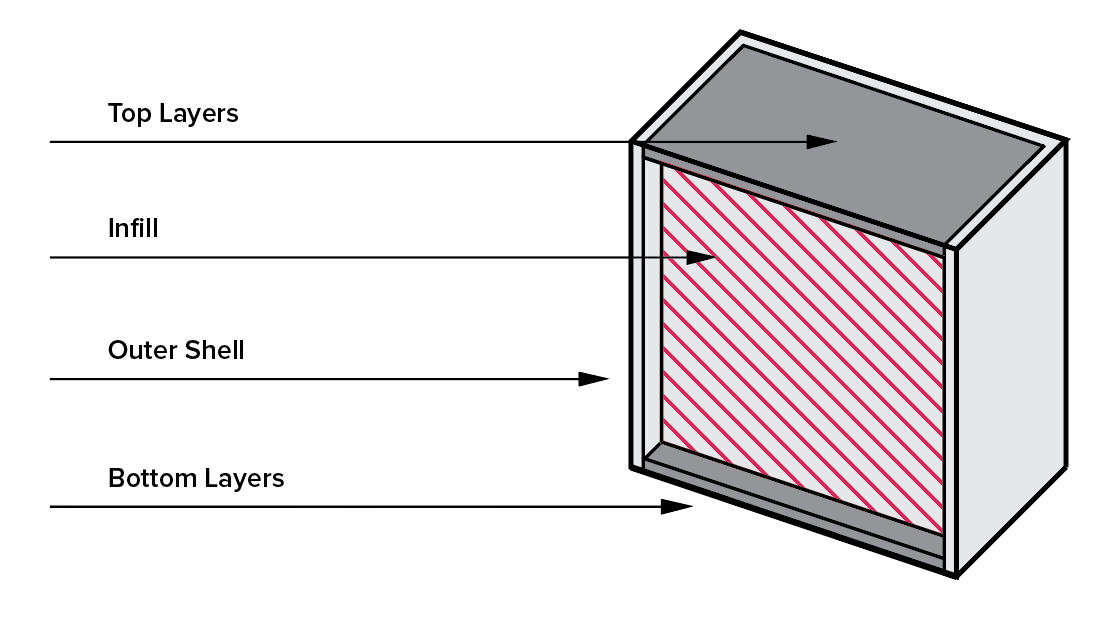
I learnt that all there are many parameters affect the 3D model like Layer Height, Wall Thickness and Supports.
I chose the material to be PLA and as the machine which I was printing on was Ultimaker, I chose line height to be about 0.3mm.
There was one more thing which I learnt during the group assignment, and that was wall thickness. If the wall thickness is less than the 1mm CURA 3D doesn't detect the model at all. So I had to change whole model design according to it.
I changed my model so that I wouldn't need any supports for the model to be 3D printed, if the angle of model is greater than 50, it doesn't need any supports.
Here are the images of the width problem which I faced during the 3D printing, as CURA 3D didn't even detected the wires which should be printed so I had to change the model wire width.
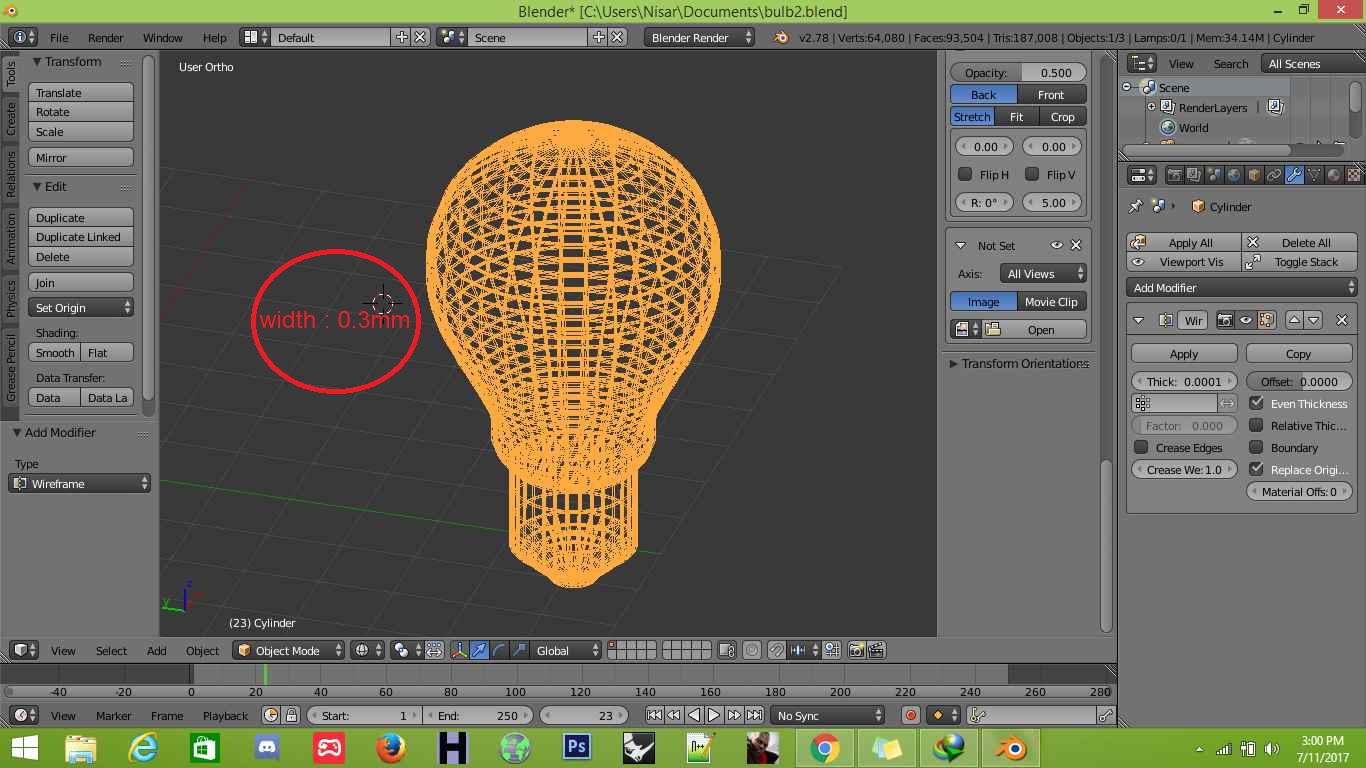
Bulb Model : Wire Width 0.3mm
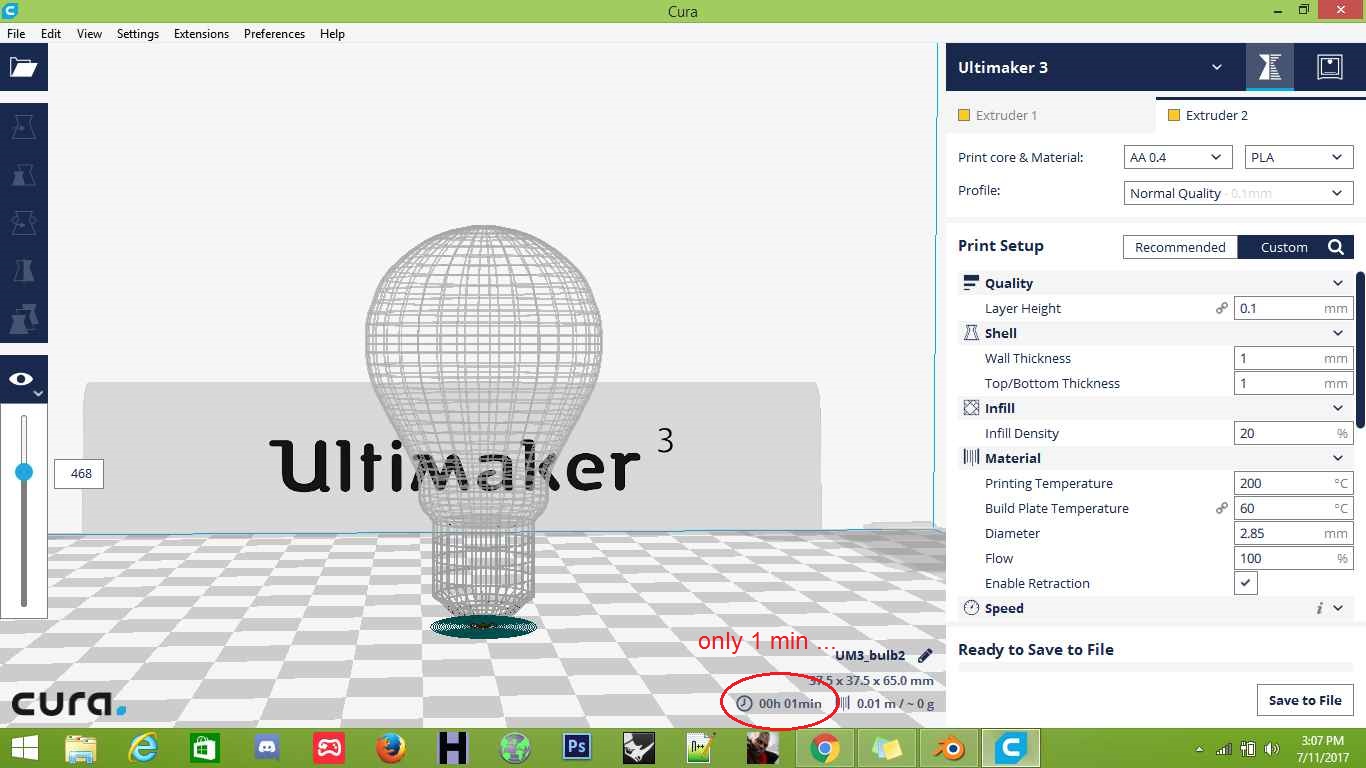
Cura Result (it didnot detected the wires so expected time is only 1 min)
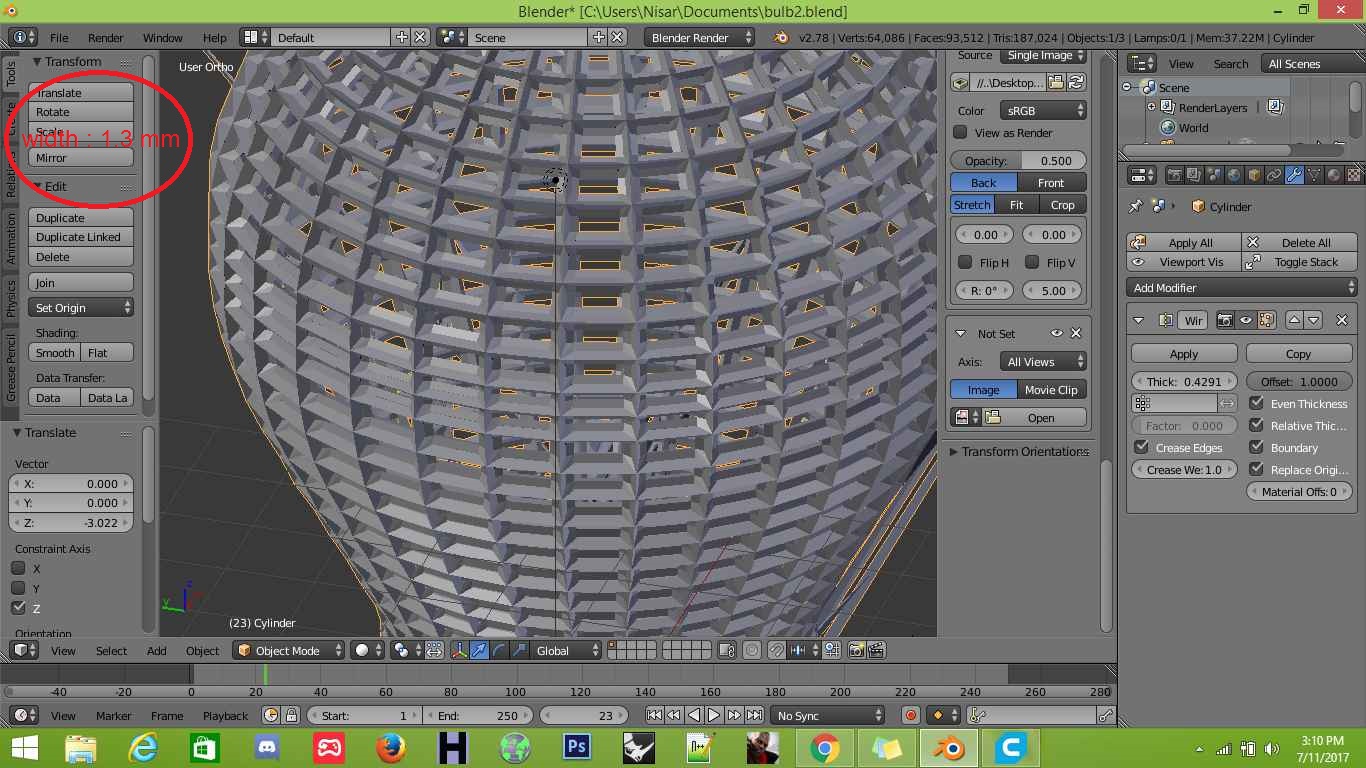
Bulb Model : Wire width 1.5mm
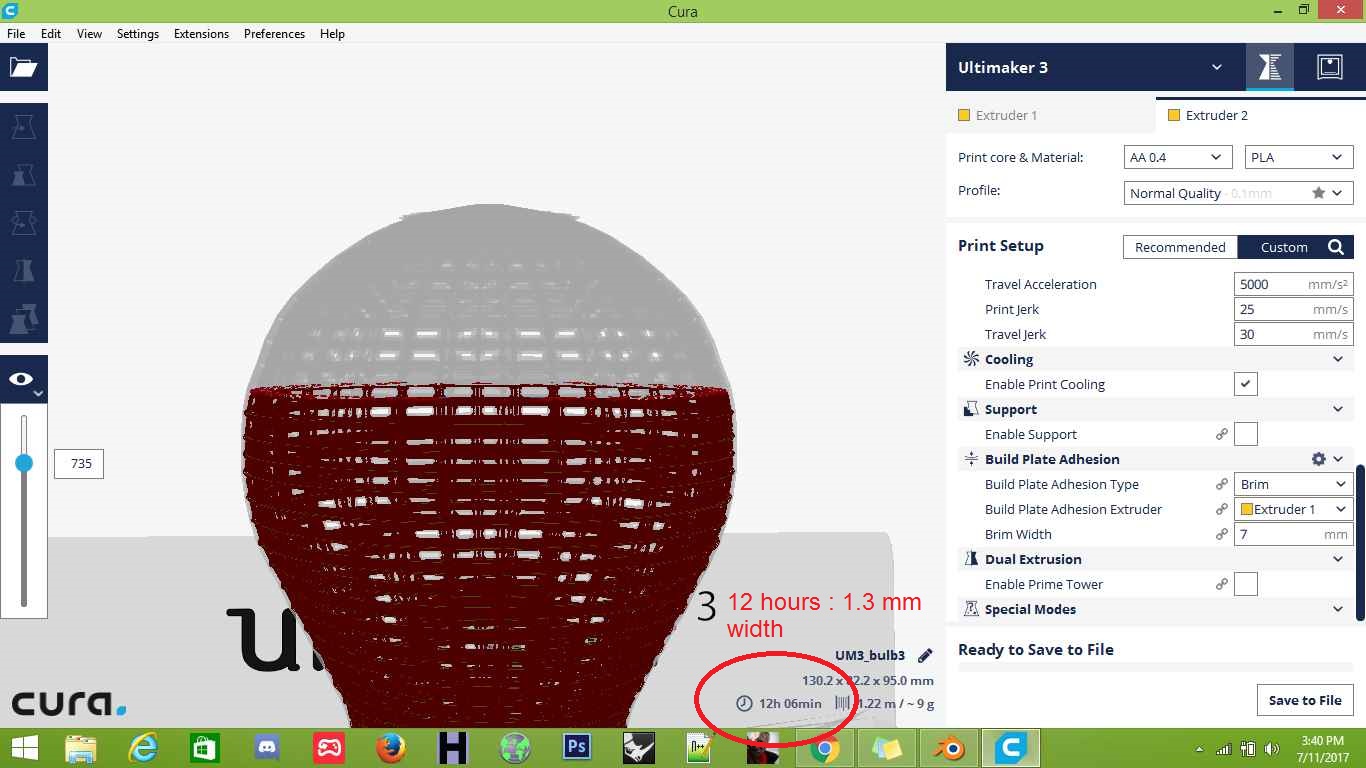
Cura Result (it detected the wire and the time is around 12 hours)
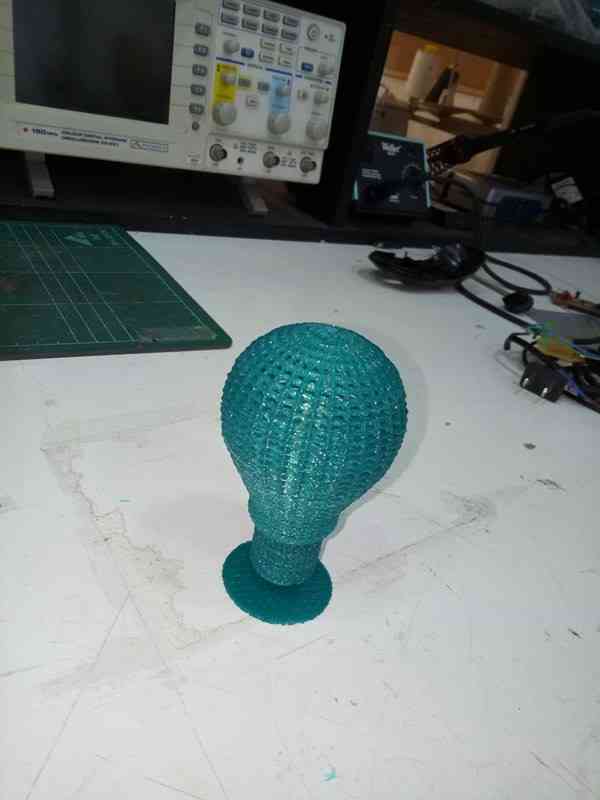
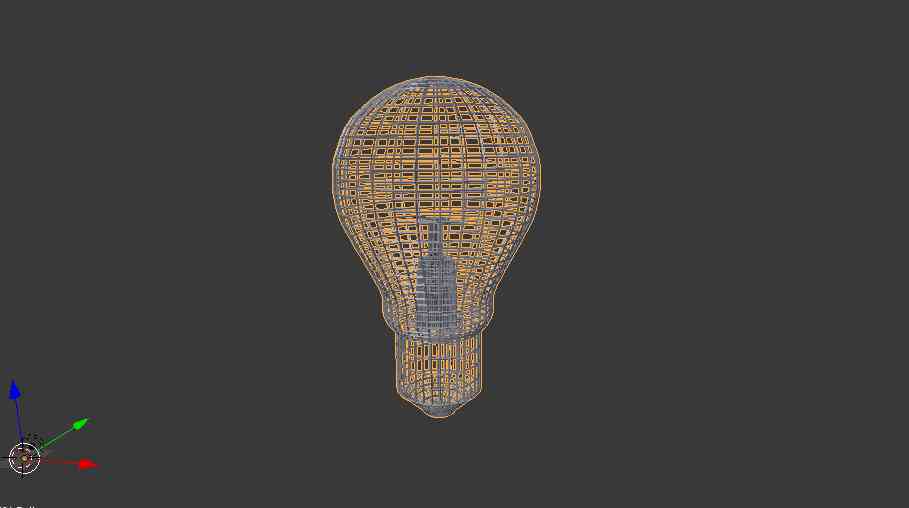
3D Printed Bulb
This model can only be 3D printed, as firstly it is hollow inside and made up of net structure with curves. There also is the flament part inside the model which is further hollowed with wires attached on the both ends of filament. Not only they can only be 3D printed, but only can be done via Additive 3D printer.
Though I couldnot became the full expert but learnt a little about 3D printing and scanning during this week like how to design different and a little complex obejects in 3D printing softwares and most importantly the caliberation and progressive functionality of 3D printers available in the lab and I hope these learning outcomes are very useful for me in near future whenever I needing to print or scan any object.
Printing models to reuse