10. OUTPUT DEVICES
INTRODUCTION
The goal of this assignment is design and program an output device to a microcontroller board.
Students should have:
Described your design and fabrication process using words/images/screenshots
Explained the programming process/es you used and how the microcontroller datasheet helped you
Outlined problems and how you fixed them
Included original design files and code
Electronics design
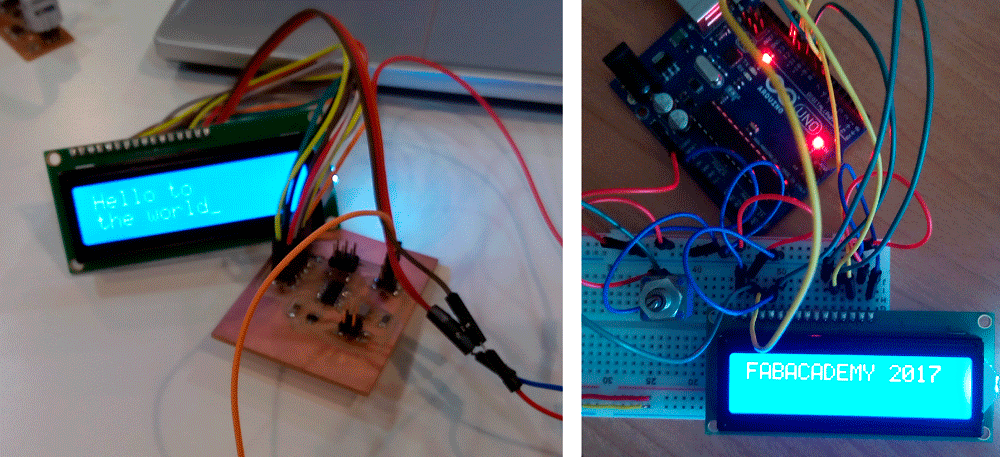
In this assigment I try desing and program a board conneccted to a LCD screen.
First of all, I read LCD datasheet in order to know: how to communicate with and the LCD pinout, which power(5V) it needs and which are Vin and GND pins.
I designed my board with Eagle taking Neil's board as reference, but I changed the microcontroller, I selecte the Attiny84 because it has more memory and I want it to use in my final project (where I will do networking wire with the different boards), and to prevent a possible problem with the space I use this one.
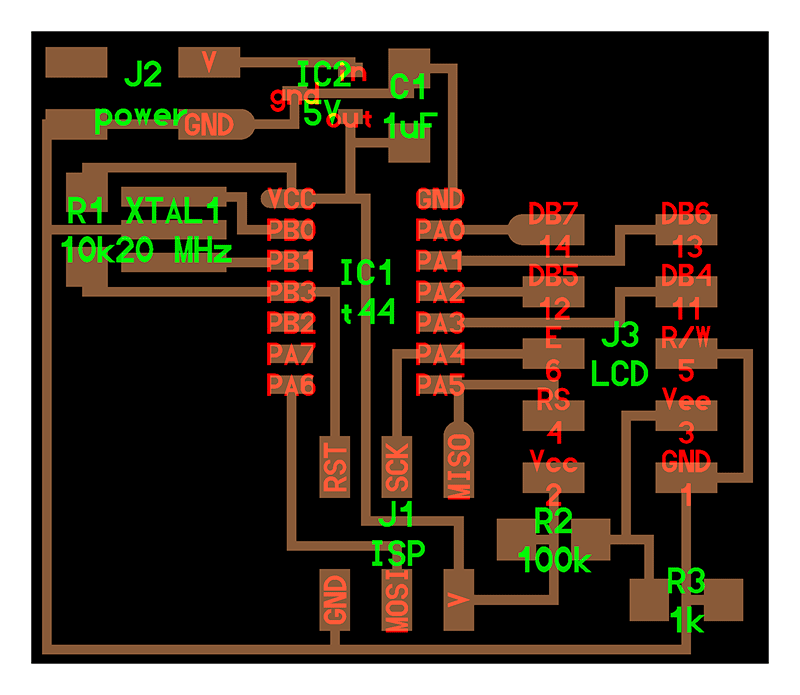
Components list
| Name | Serial number | Quantity | Reference |
| ATTINY84 8K FLASH | ATTINY84 | 1 | IC1 |
| REGULATOR 5V | REGULATOR | 1 | REG |
| CRYSTAL 20MHZ | RESONATOR | 1 | RES |
| CAPACITOR 1UF | CAPACITOR | 1 | C1 |
| RESISTENCE 10K | RESISTENCE | 1 | R1 |
| RESISTENCE 100K | RESISTENCE | 1 | R2 |
| RESISTENCE 1K | RESISTENCE | 1 | R3 |
| HEADER 2X2 | HEADER | 2 | H4_1 H4_2 |
| HEADER 2X3 | HEADER | 1 | H6 |
| HEADER 2X5 | HEADER | 1 | H102 |

After the schematic, I did the board.
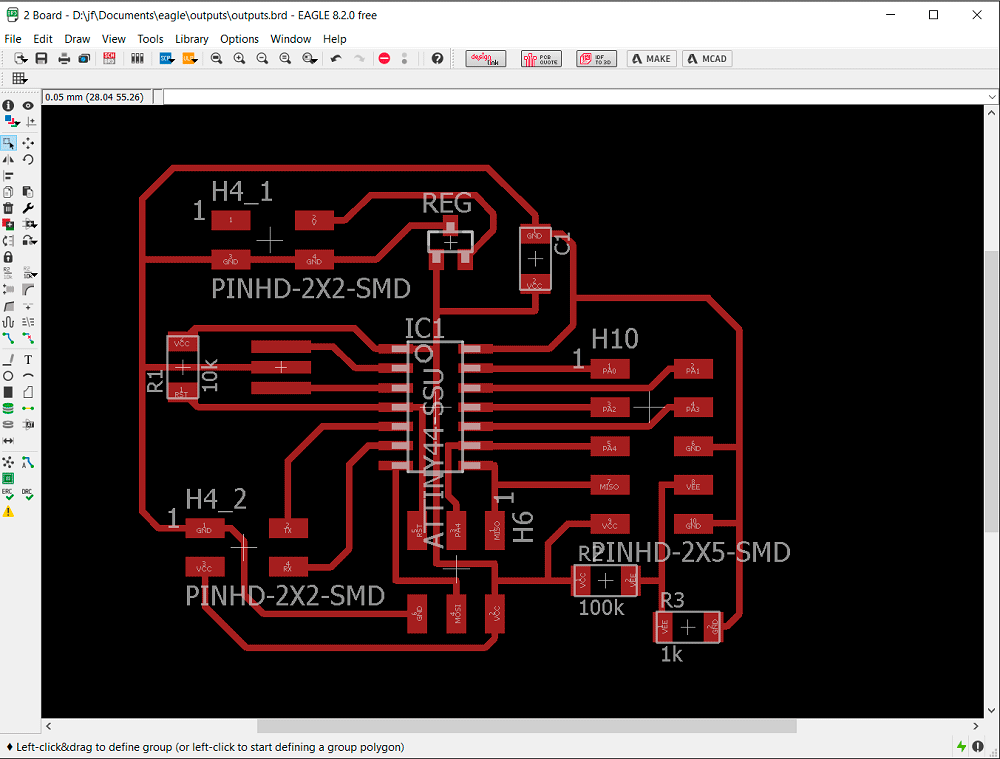
I did the 'CAM Processor...' and I saved the board as a 'eps' (only the 'Top', 'Vias' adn 'Pad'), and with photoshop I generated the 'png' files. With them I generated the two 'rml' files with the FabModules (as the week 04: electroncis production) and I did the board with the milling machine. When it finished, I weld the different components.
Connections
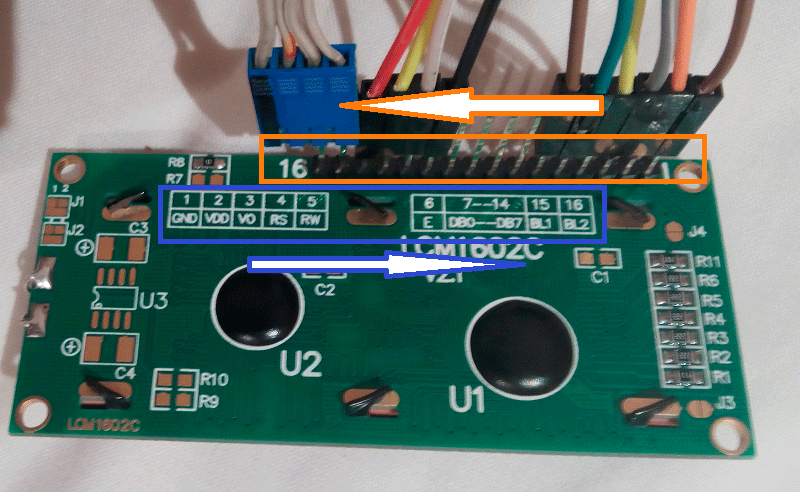
| Description pin board | Pin LCD | Description pin LCD |
| GND | 1 | GND |
| Vcc | 2 | VDD |
| Vee | 3 | VO |
| RS | 4 | RS |
| R/W | 5 | RW |
| E | 6 | E |
| no connection | 7 | DB0 |
| no connection | 8 | DB1 |
| no connection | 9 | DB2 |
| no connection | 10 | DB3 |
| DB4 | 11 | DB4 |
| DB5 | 12 | DB5 |
| DB6 | 13 | DB6 |
| DB7 | 14 | DB7 |
| Vcc | 15 | BL1 |
| GND | 16 | BL2 |
Be careful with the order of the pins, if you take the LCD and read the pins, see that the pins are ordered in the contrary direction, begin with the pin 16 and finish with the pin 1 in the corner. First I connected in the wrong order.
Program
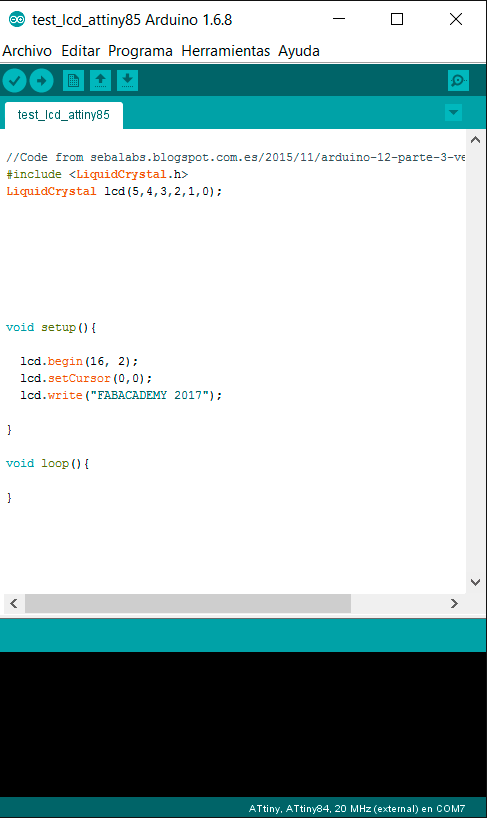
First, I programmed with Arduino and everything was fine. Later I programmed with the Neil's program and finally I did my program.
To upload the program for Attiny I used the FabISP that I made on week 04: electronics production, I connected it with the inputs board, and with Arduino, where I chosen, the Board: Attiny, Processor: Attiny84, Clock: 20 MHz (external) and Programmer: USBtinyISP. As we can see in the picture, I used the library LiquidCrystal.h to program it
DOWNLOAD FILE:
week 10 (RAR)