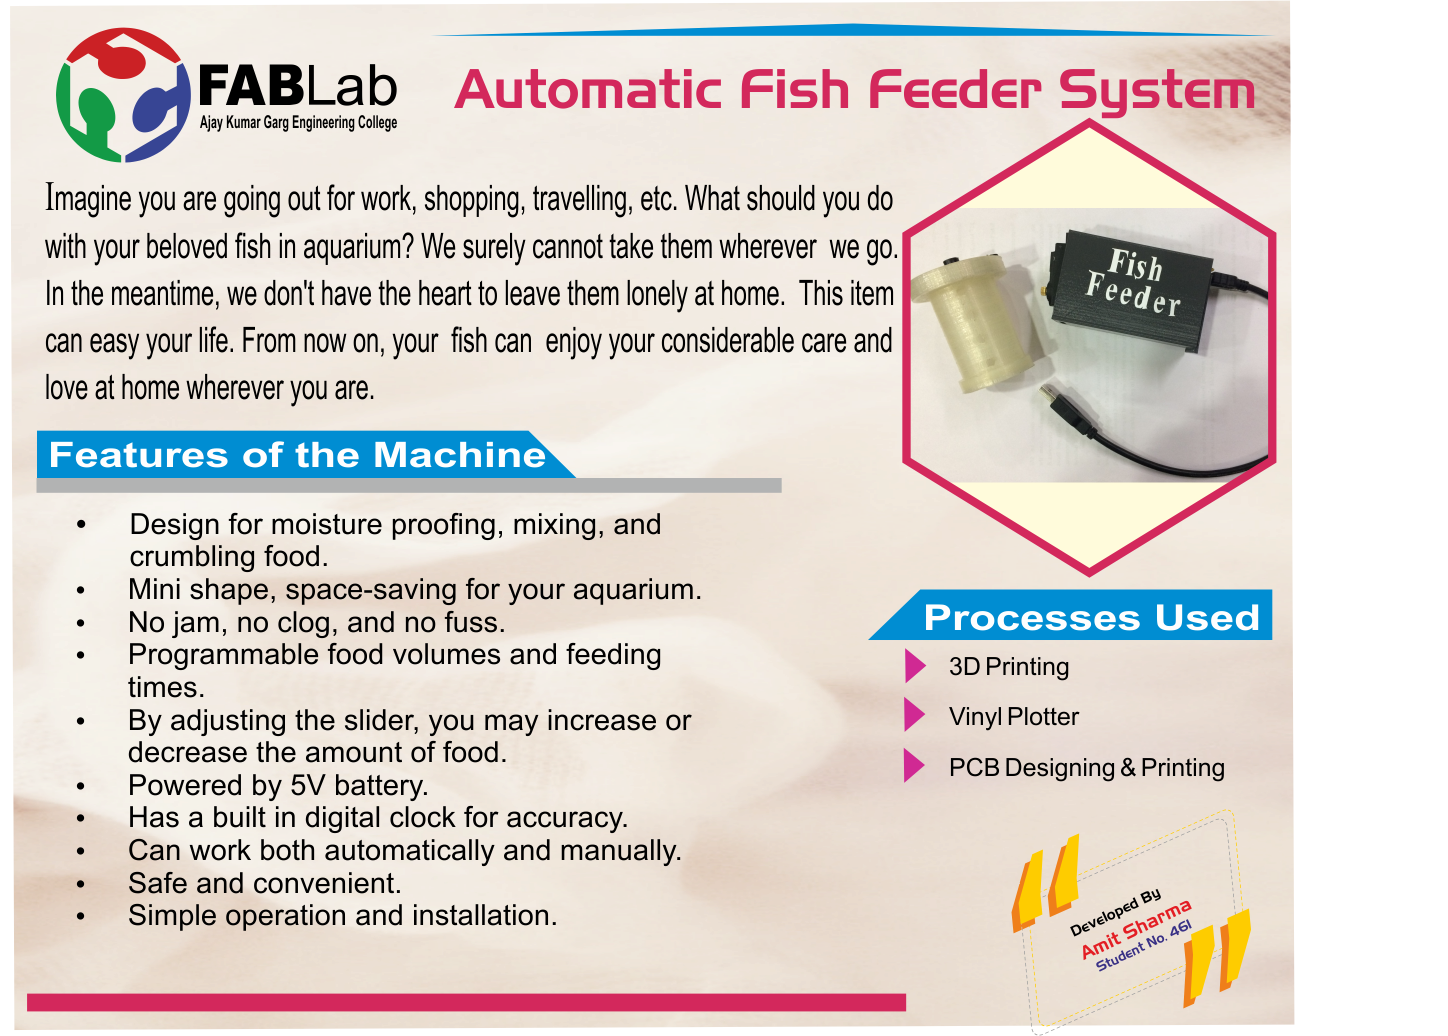
As a final project for FabAcdemy 2017, I decided to make Automatic Food Dispensing machine for fishes in aquarium.
Reason, I decided to make this is because, One of my friend stays alone and loves fishes. So, at his place he is having a fish aquarium. Whenever he stays out of town for more than one day I have to feed his fishes. I am sure most of the people worldwide faces this same problem, which restricts them from going out. So, to overcome this problem, I planned to develop a mechanism which need to be attached with the aquarium and it will dispense fish food automatically at the programmed time.
Steps to create final product
Step 1
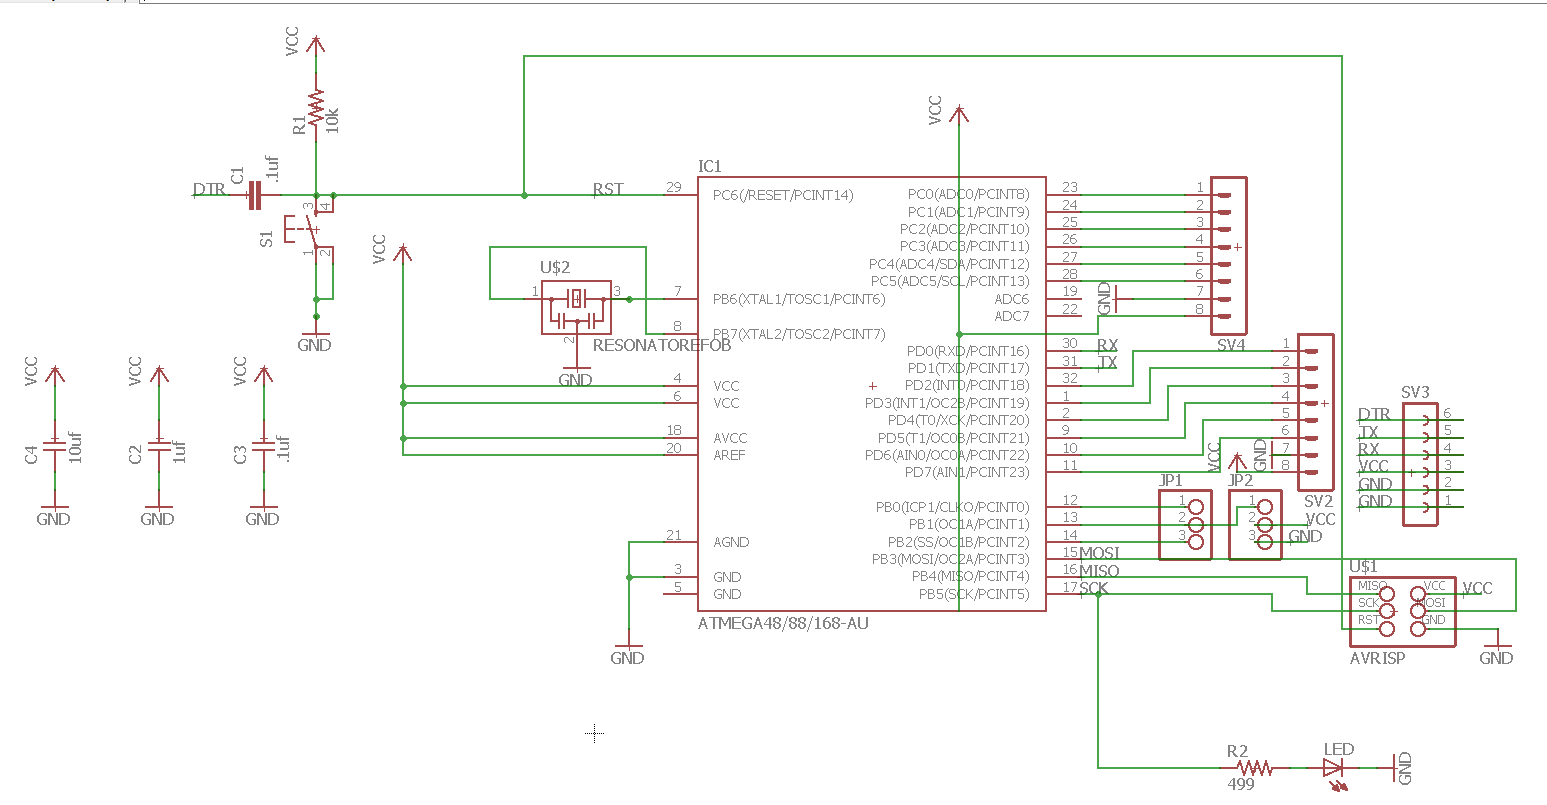
Created PCB for driving servo motor by taking input from DS 3231, real-time clock (RTC). After lot of research and analysis online, I didn't find any reference to understand that "How to set communication between servo motor and DS 3231, real-time clock (RTC) using attiny 45 microcontroller". Therefore, after discussing with my local instructor I decided to use Atmega 328P microcontroller.
List of components need to be connected to the board is as follow:
Atmega 328P.
1x3 Pin header for connecting servo motor.
2x3 Pin header for connecting FabISP.
1x4 Pin header for connecting DS 3231, real-time clock (RTC)
1x6 Pin header for connecting FTDI
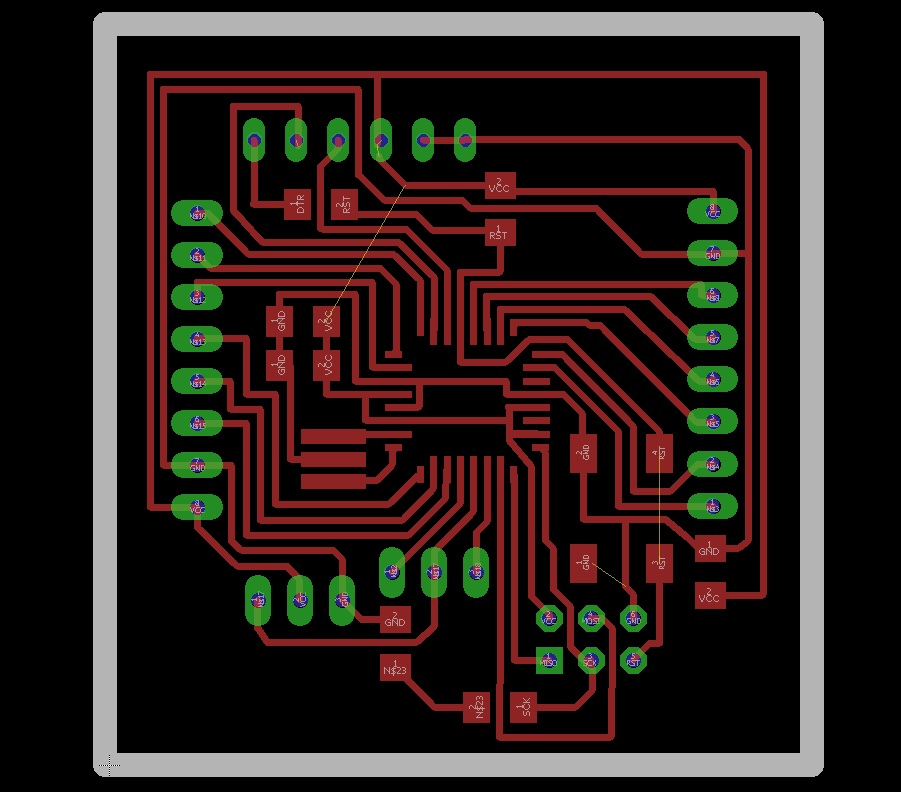
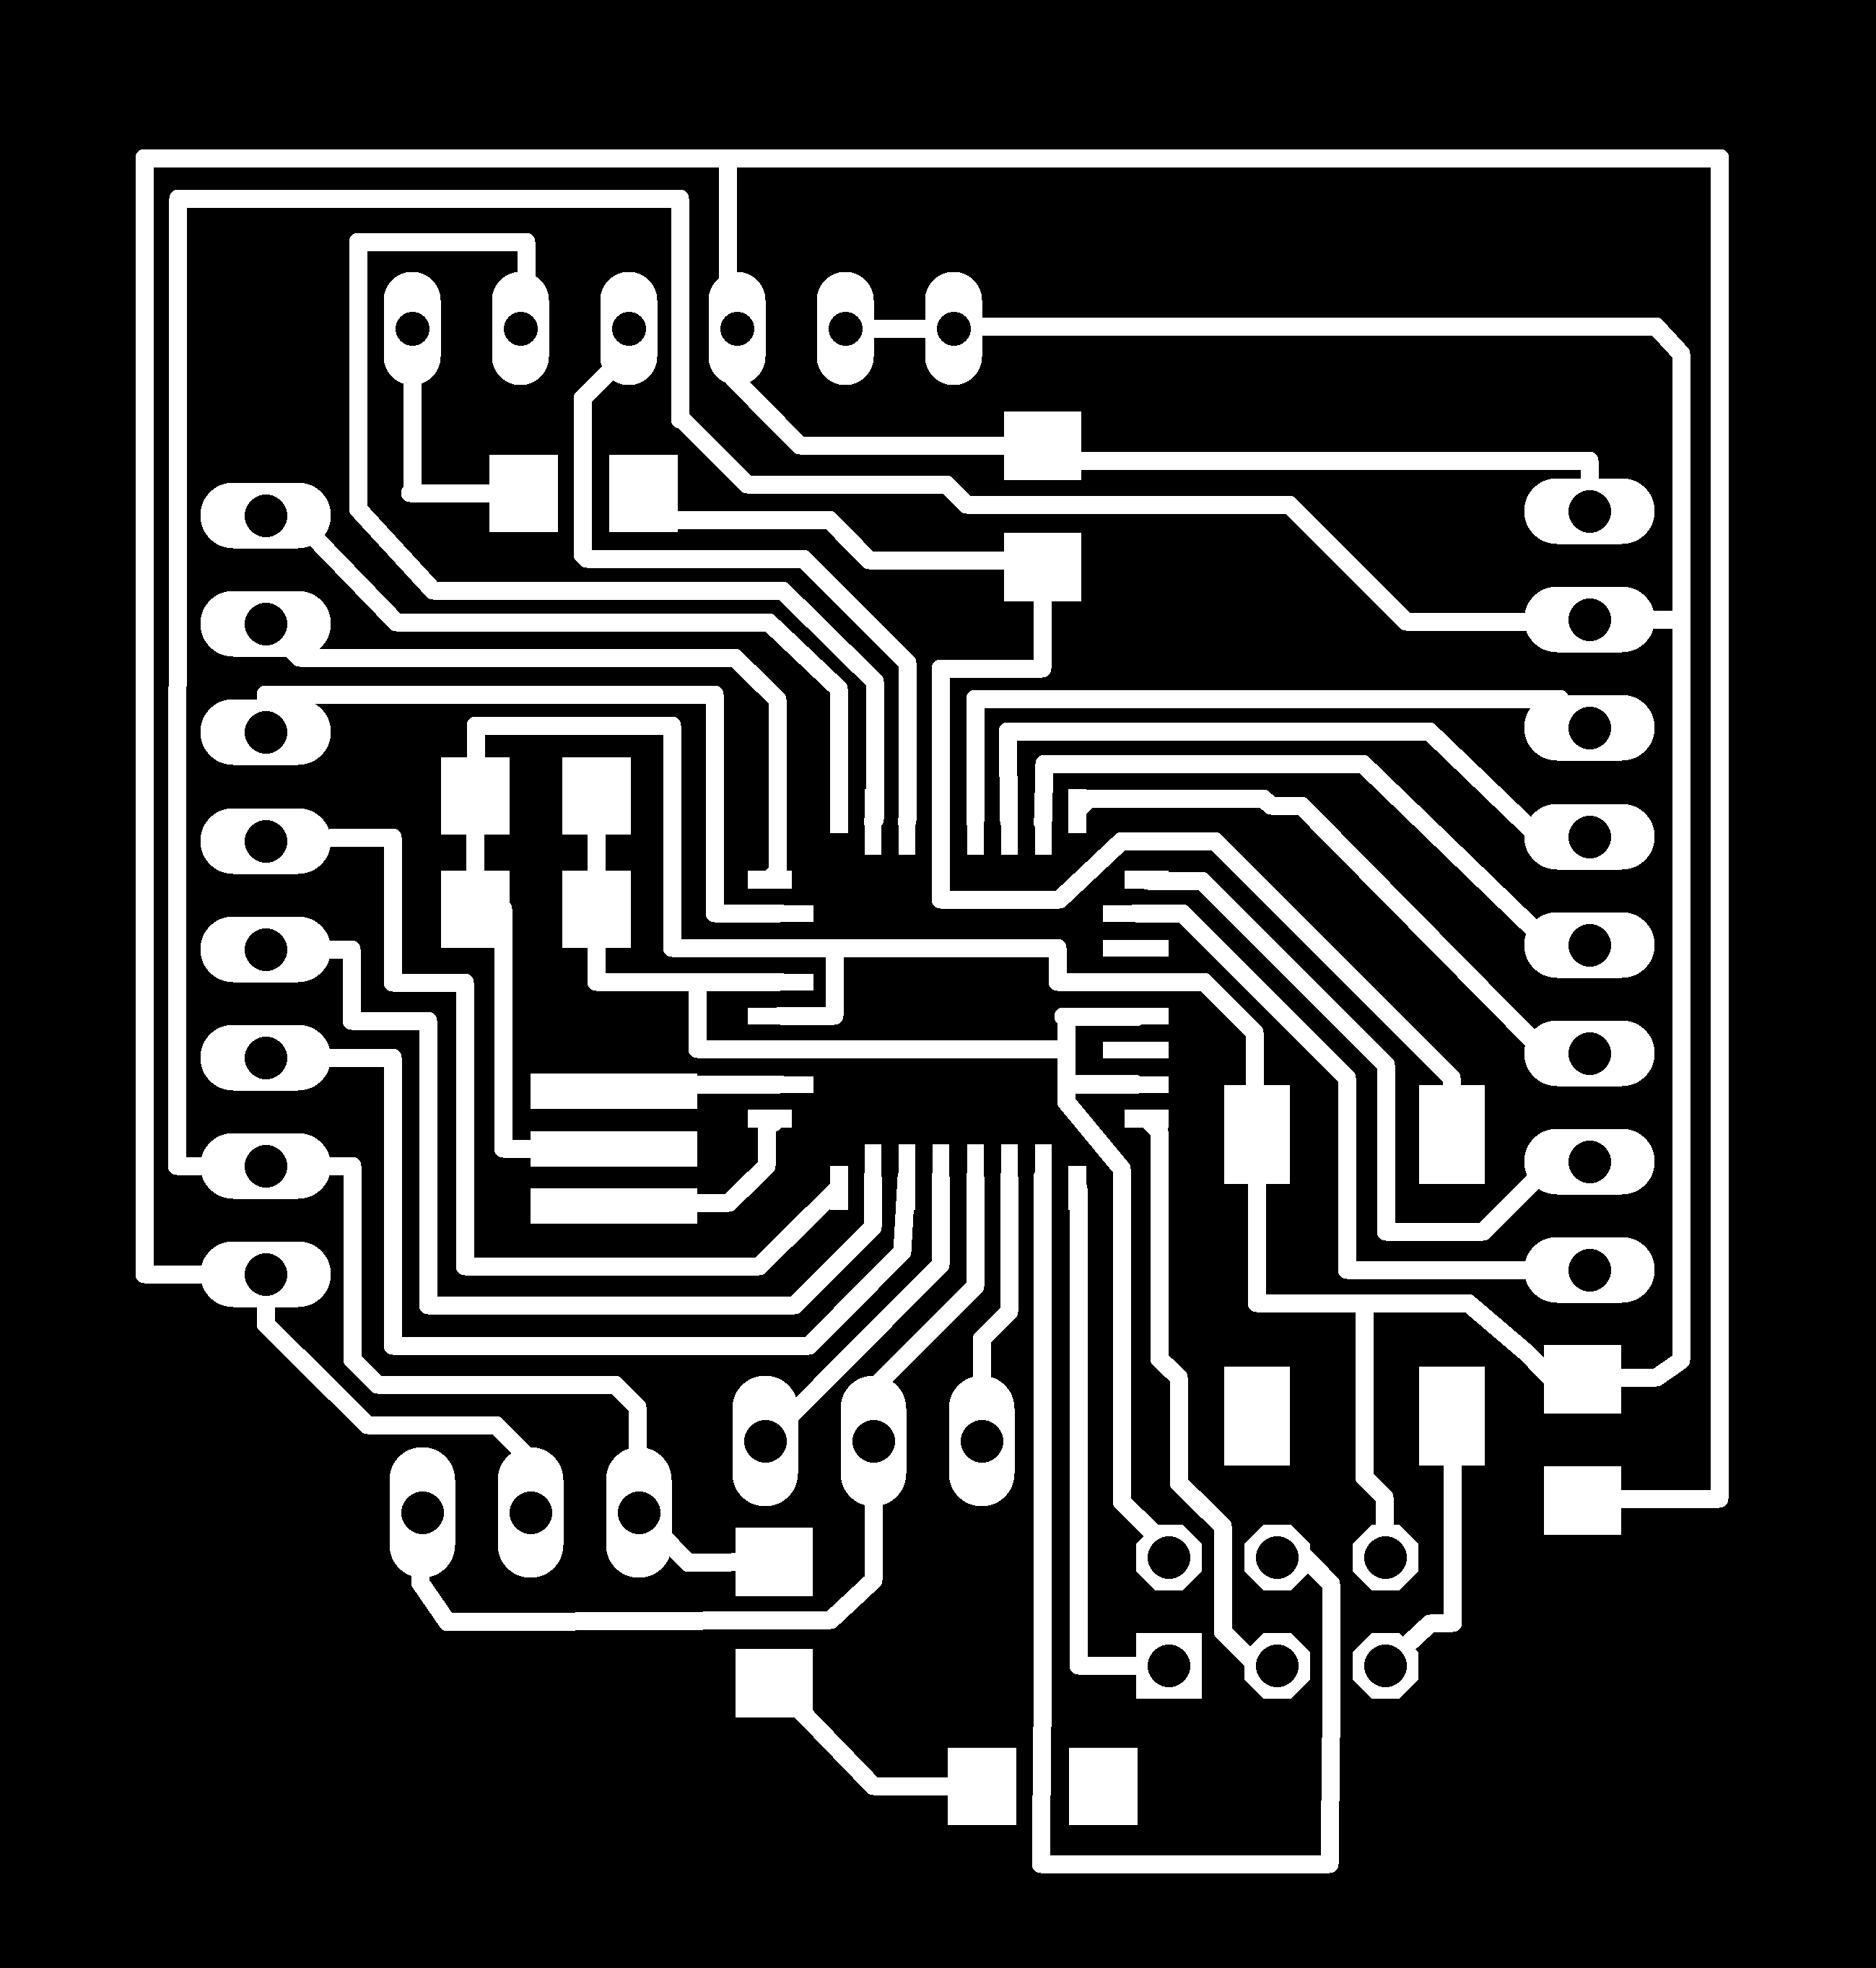
To make my board I took reference of 0.3 version of FabKit. After doing required modifications in the existing 0.3 version of fabkit, I developed my own schematics as shown below.
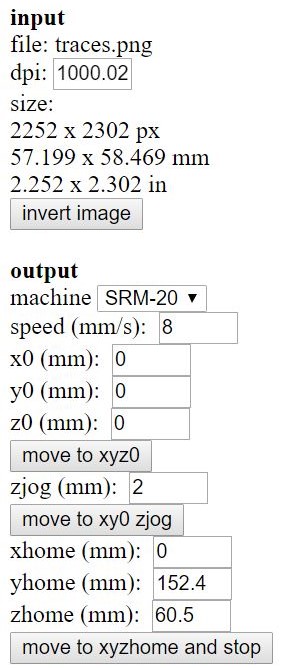
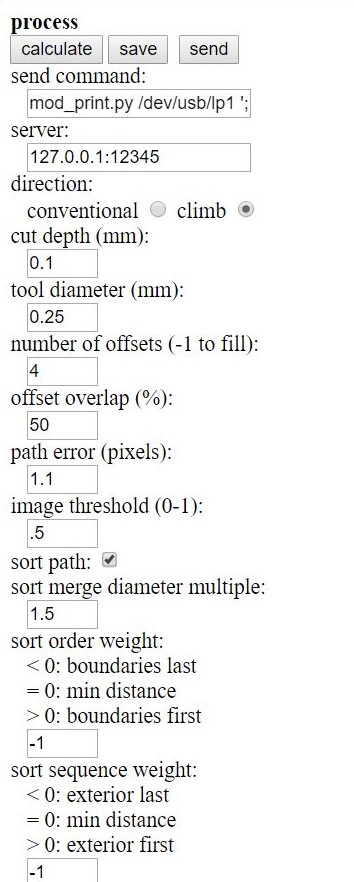
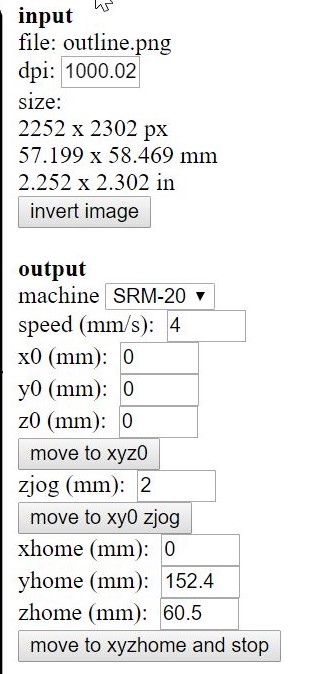
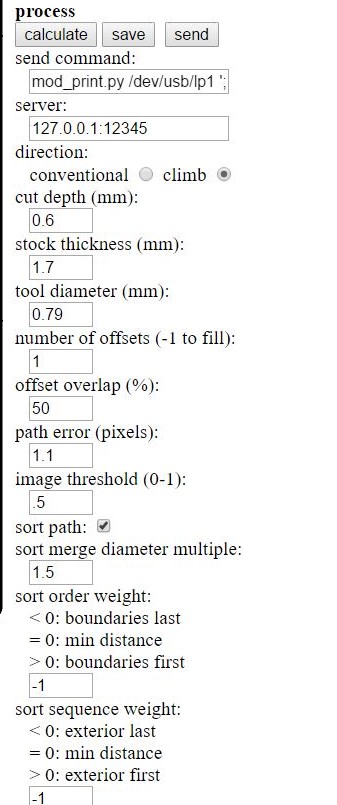
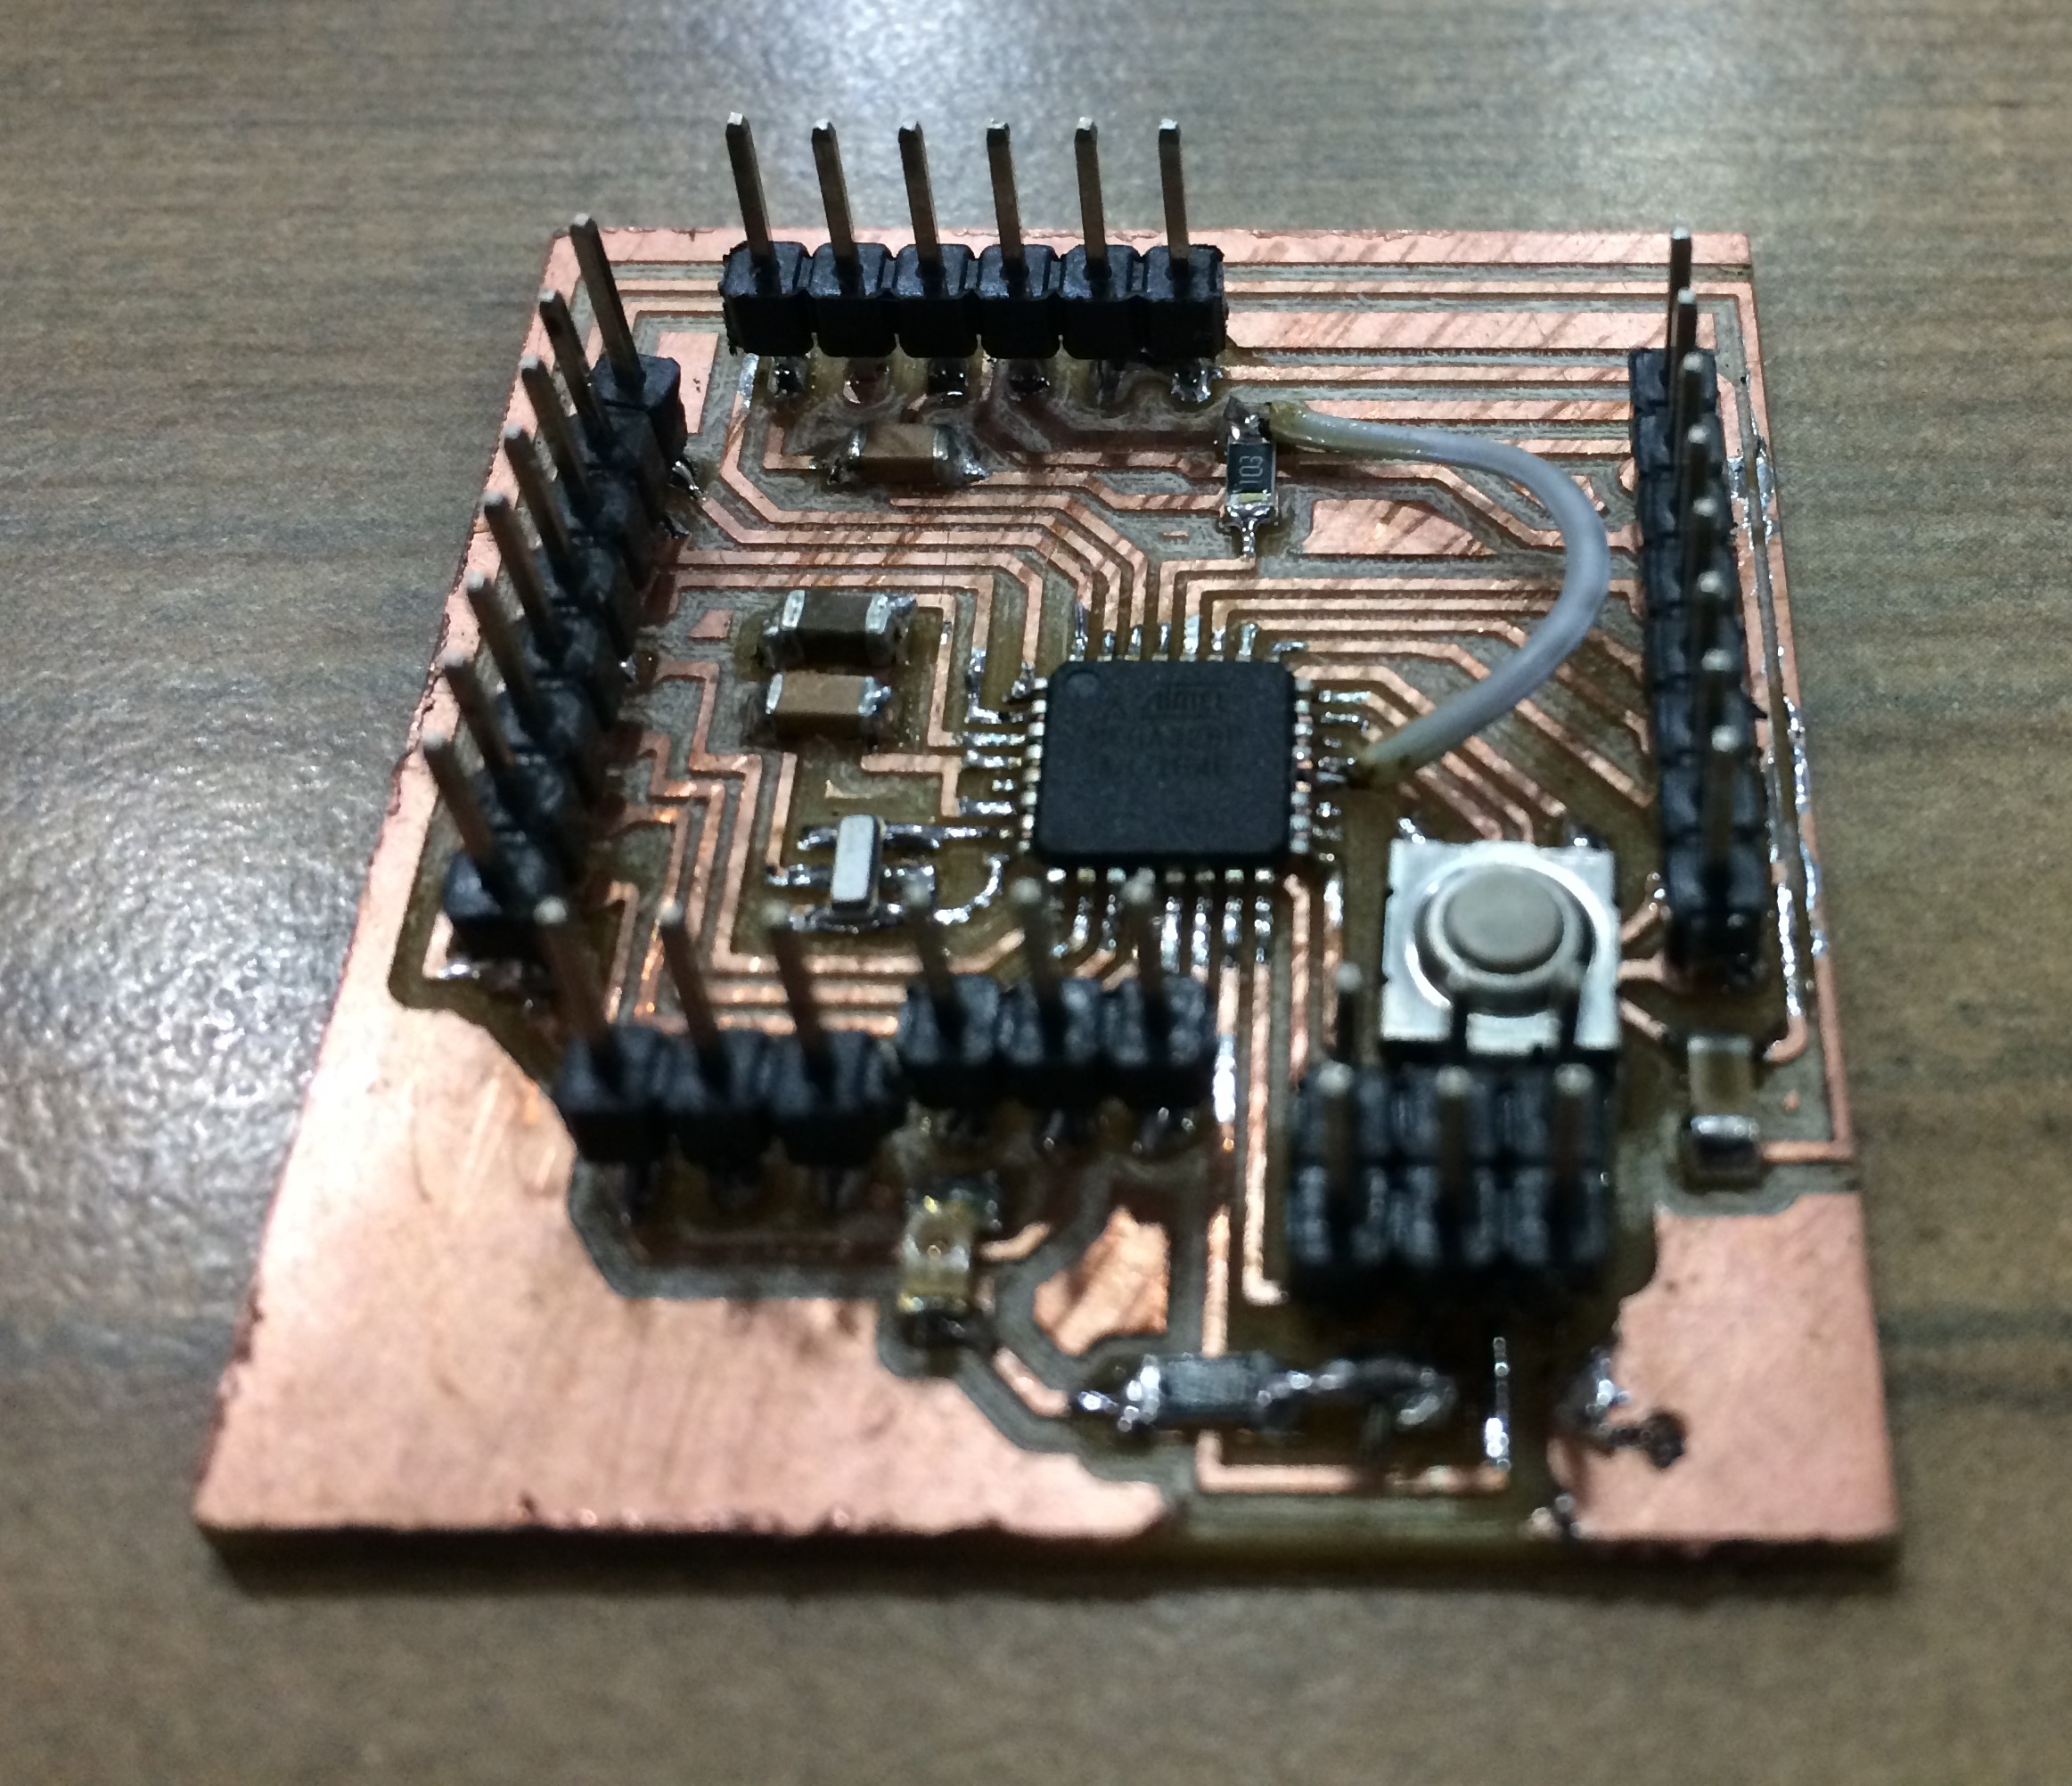
After milling the board on Roland SRM20 machine, in the similar fashion as done in previous assignments and by using the following cutting parameters, it was stuffed with the required components, as shown subsequently.
Cutting parameters for Traces
Cutting parameters for Outline
Milled and stuffed board
Testing of the board
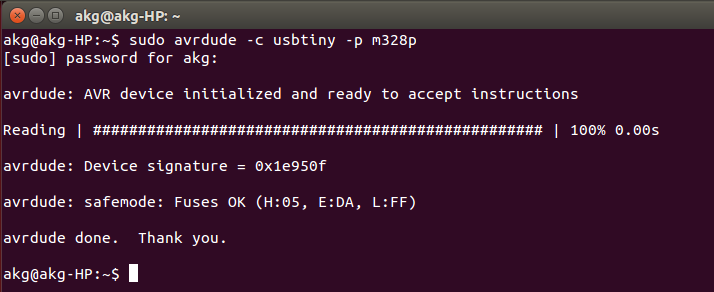
To check the fuses "sudo avrdude -c usbtiny -p m328p" command line is used in Linux terminal, as shown below. Afterwards, a blink arduino program in burned into the microcontroller and it was working perfectly fine, as seen below.
Programming the board
Initially, I checked wheather my board is able to communicate, with servo motor and DS3231 or not. Therefore, separately I burned arduino program for testing the working of servo motor and DS3231, as discussed below.
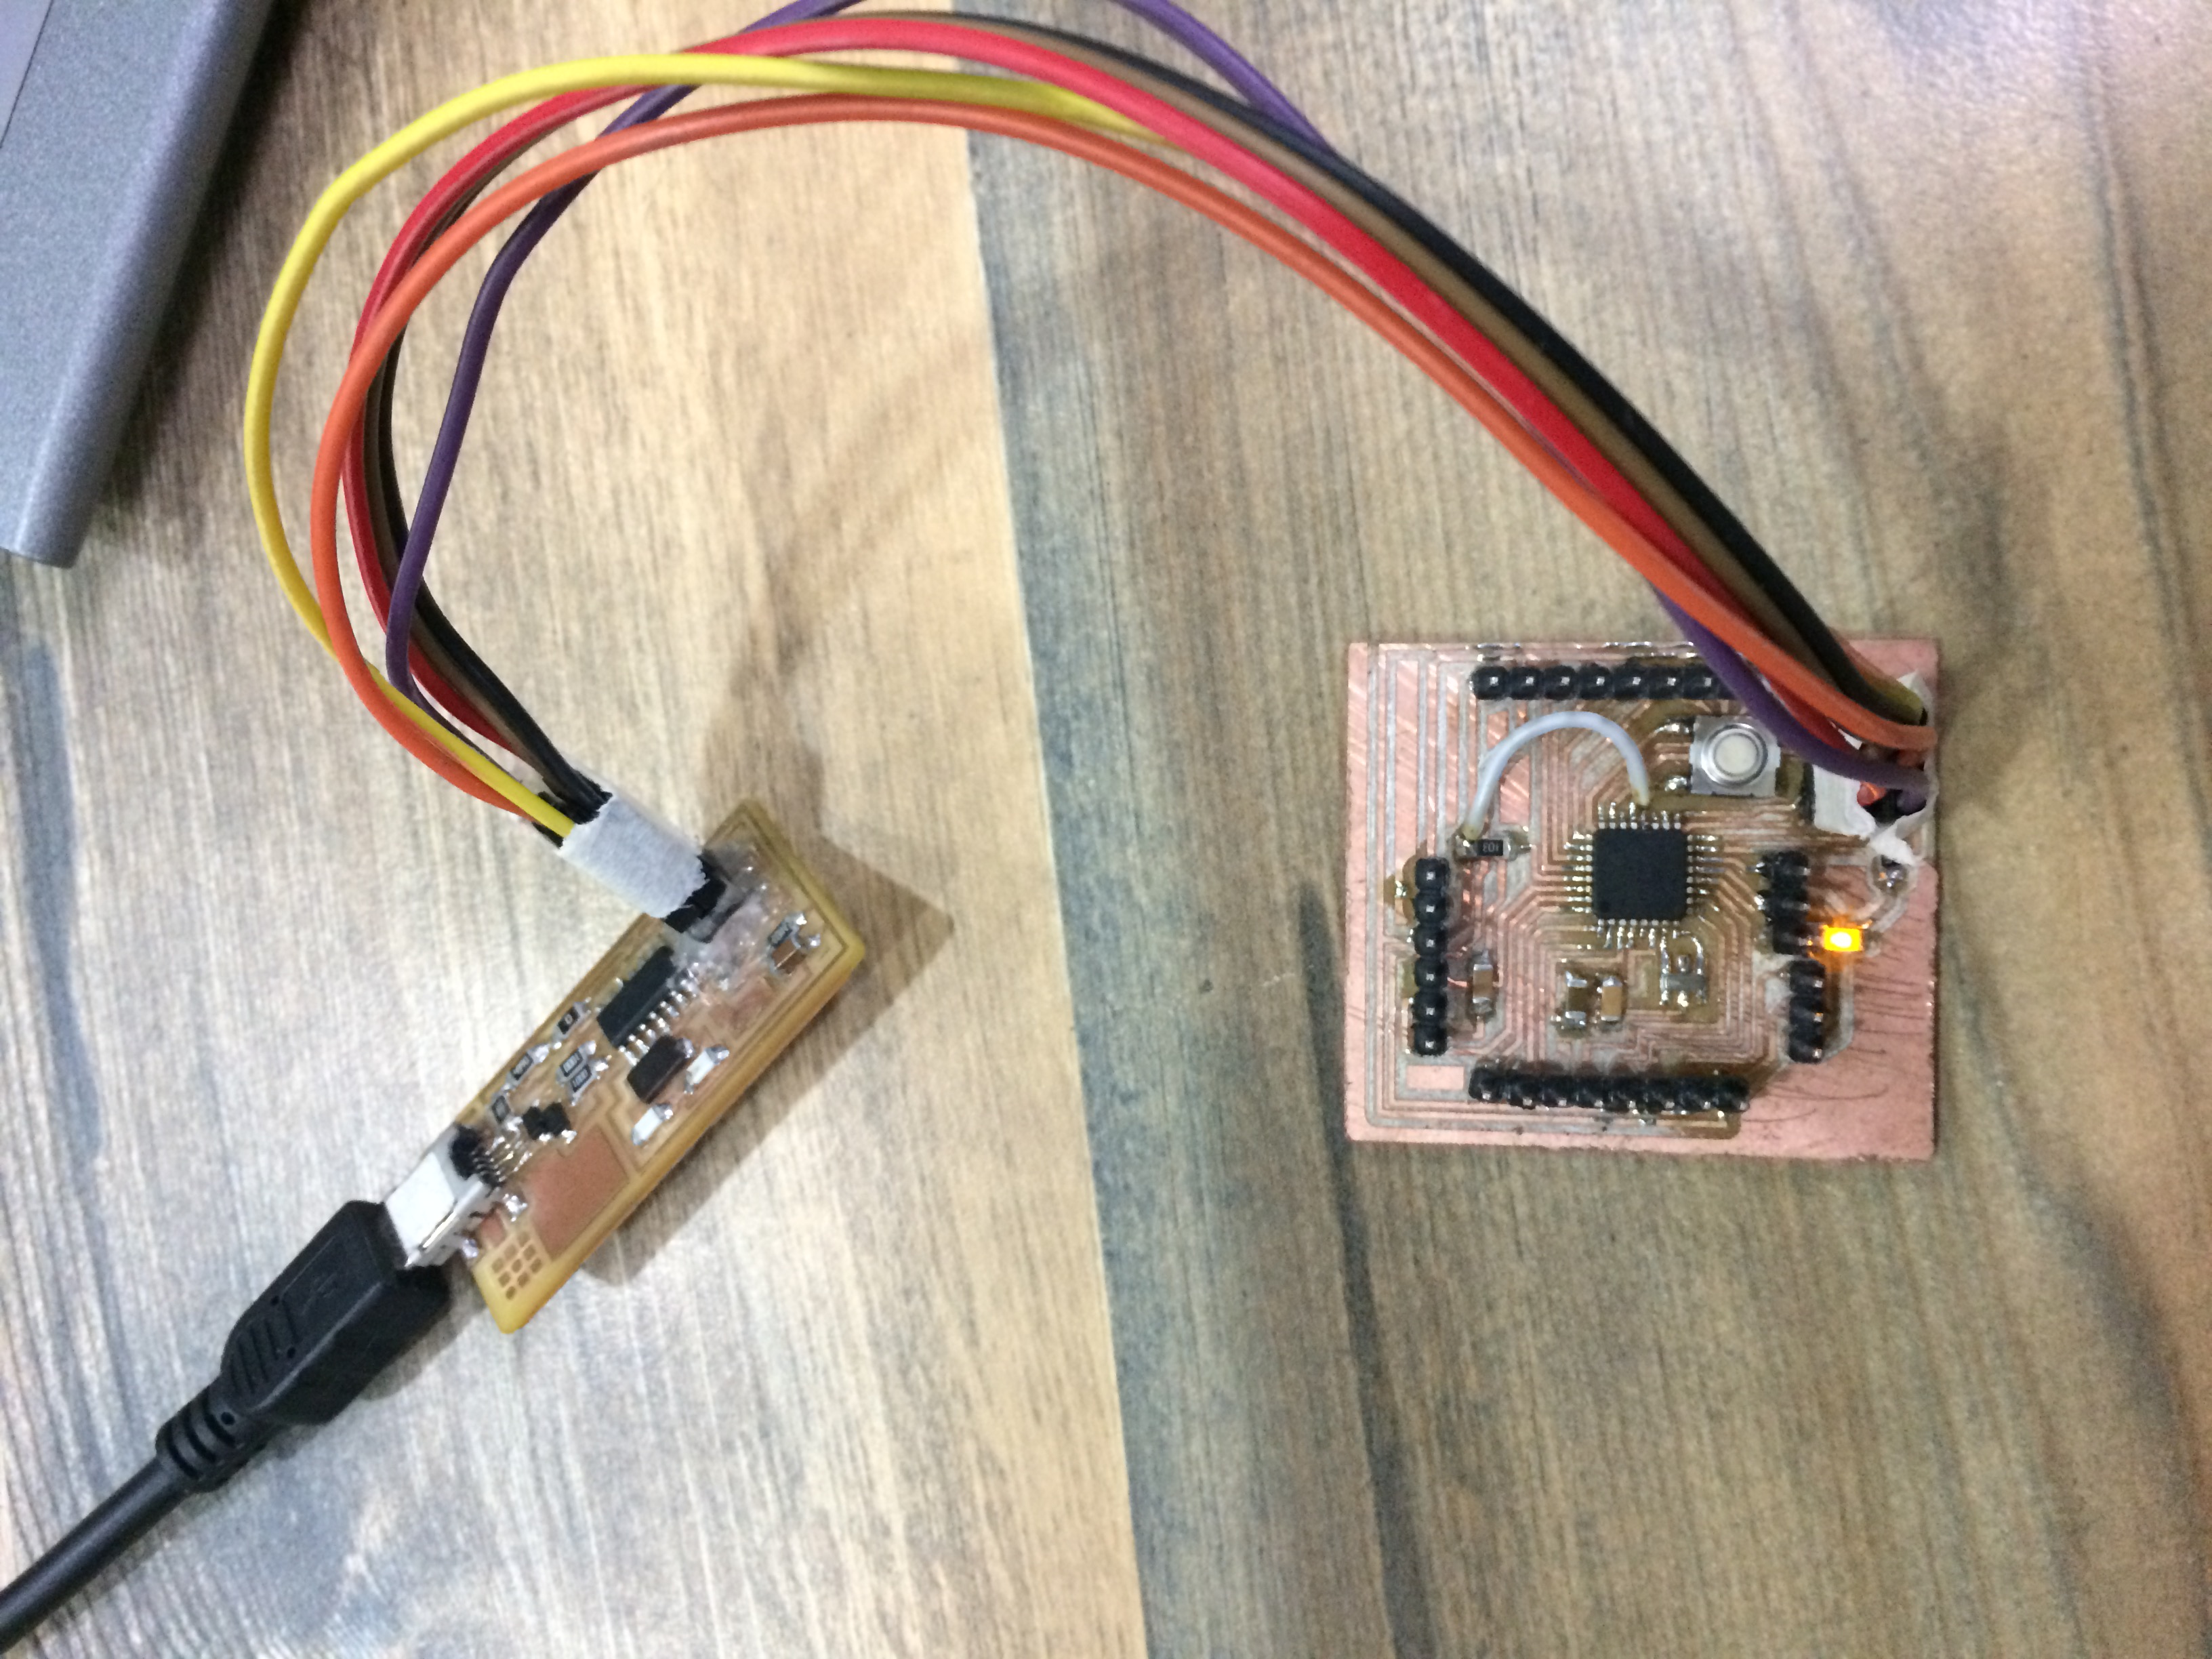
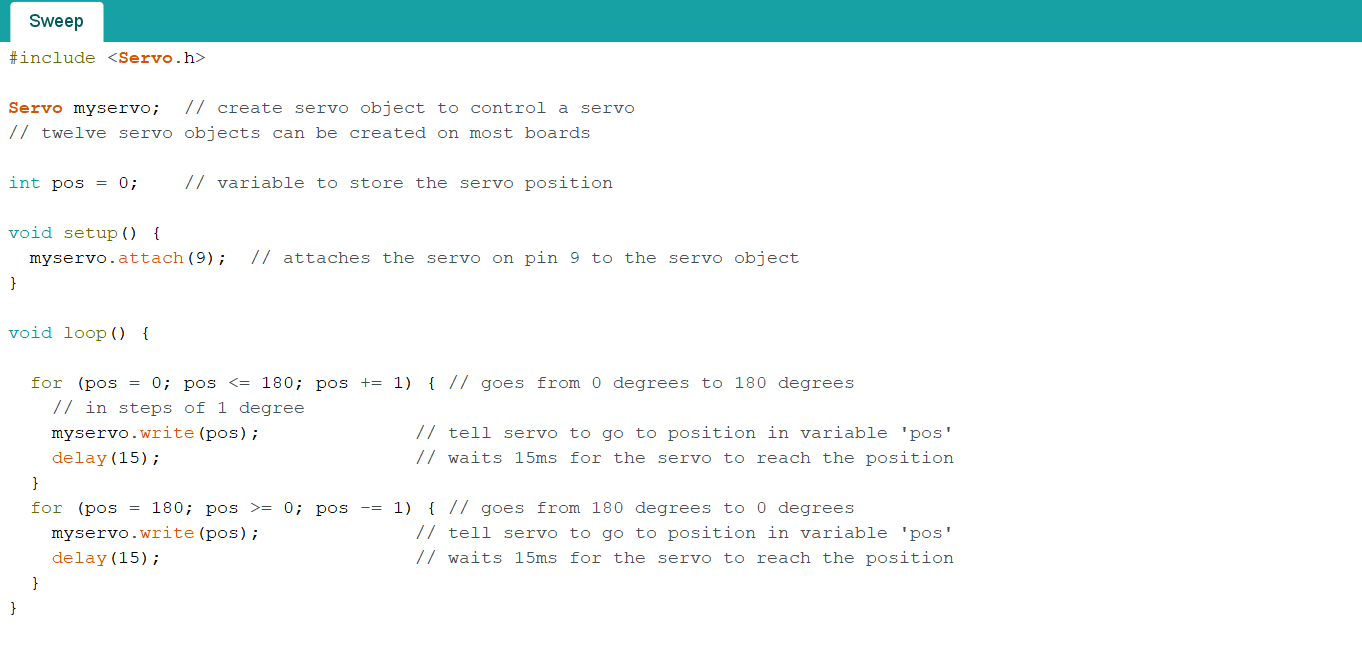
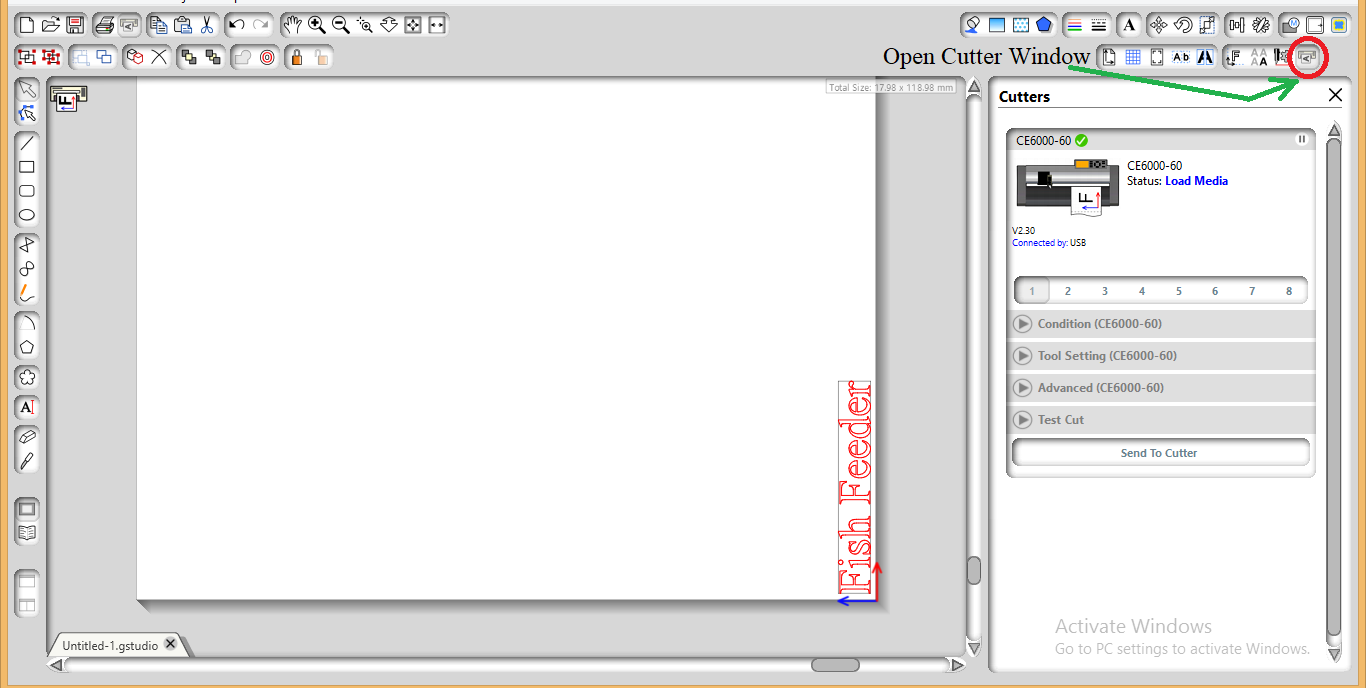
Burned the sweep program of servo motor from the library of the arduino, just by changing the pin input to 9, as shown below. Motor was working perfectly fine.
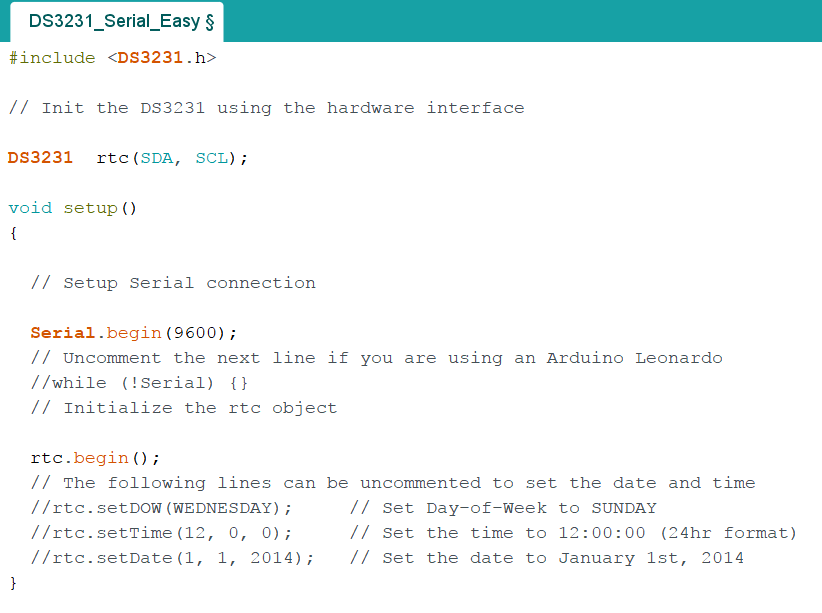
Downloaded library for DS3231 and added it to the arduino library. Afterwards, burned the program, as shown below, which is also available in examples once you upload the DS3231 library. The serial communication was working fine and showing the correct data, as discussed below.
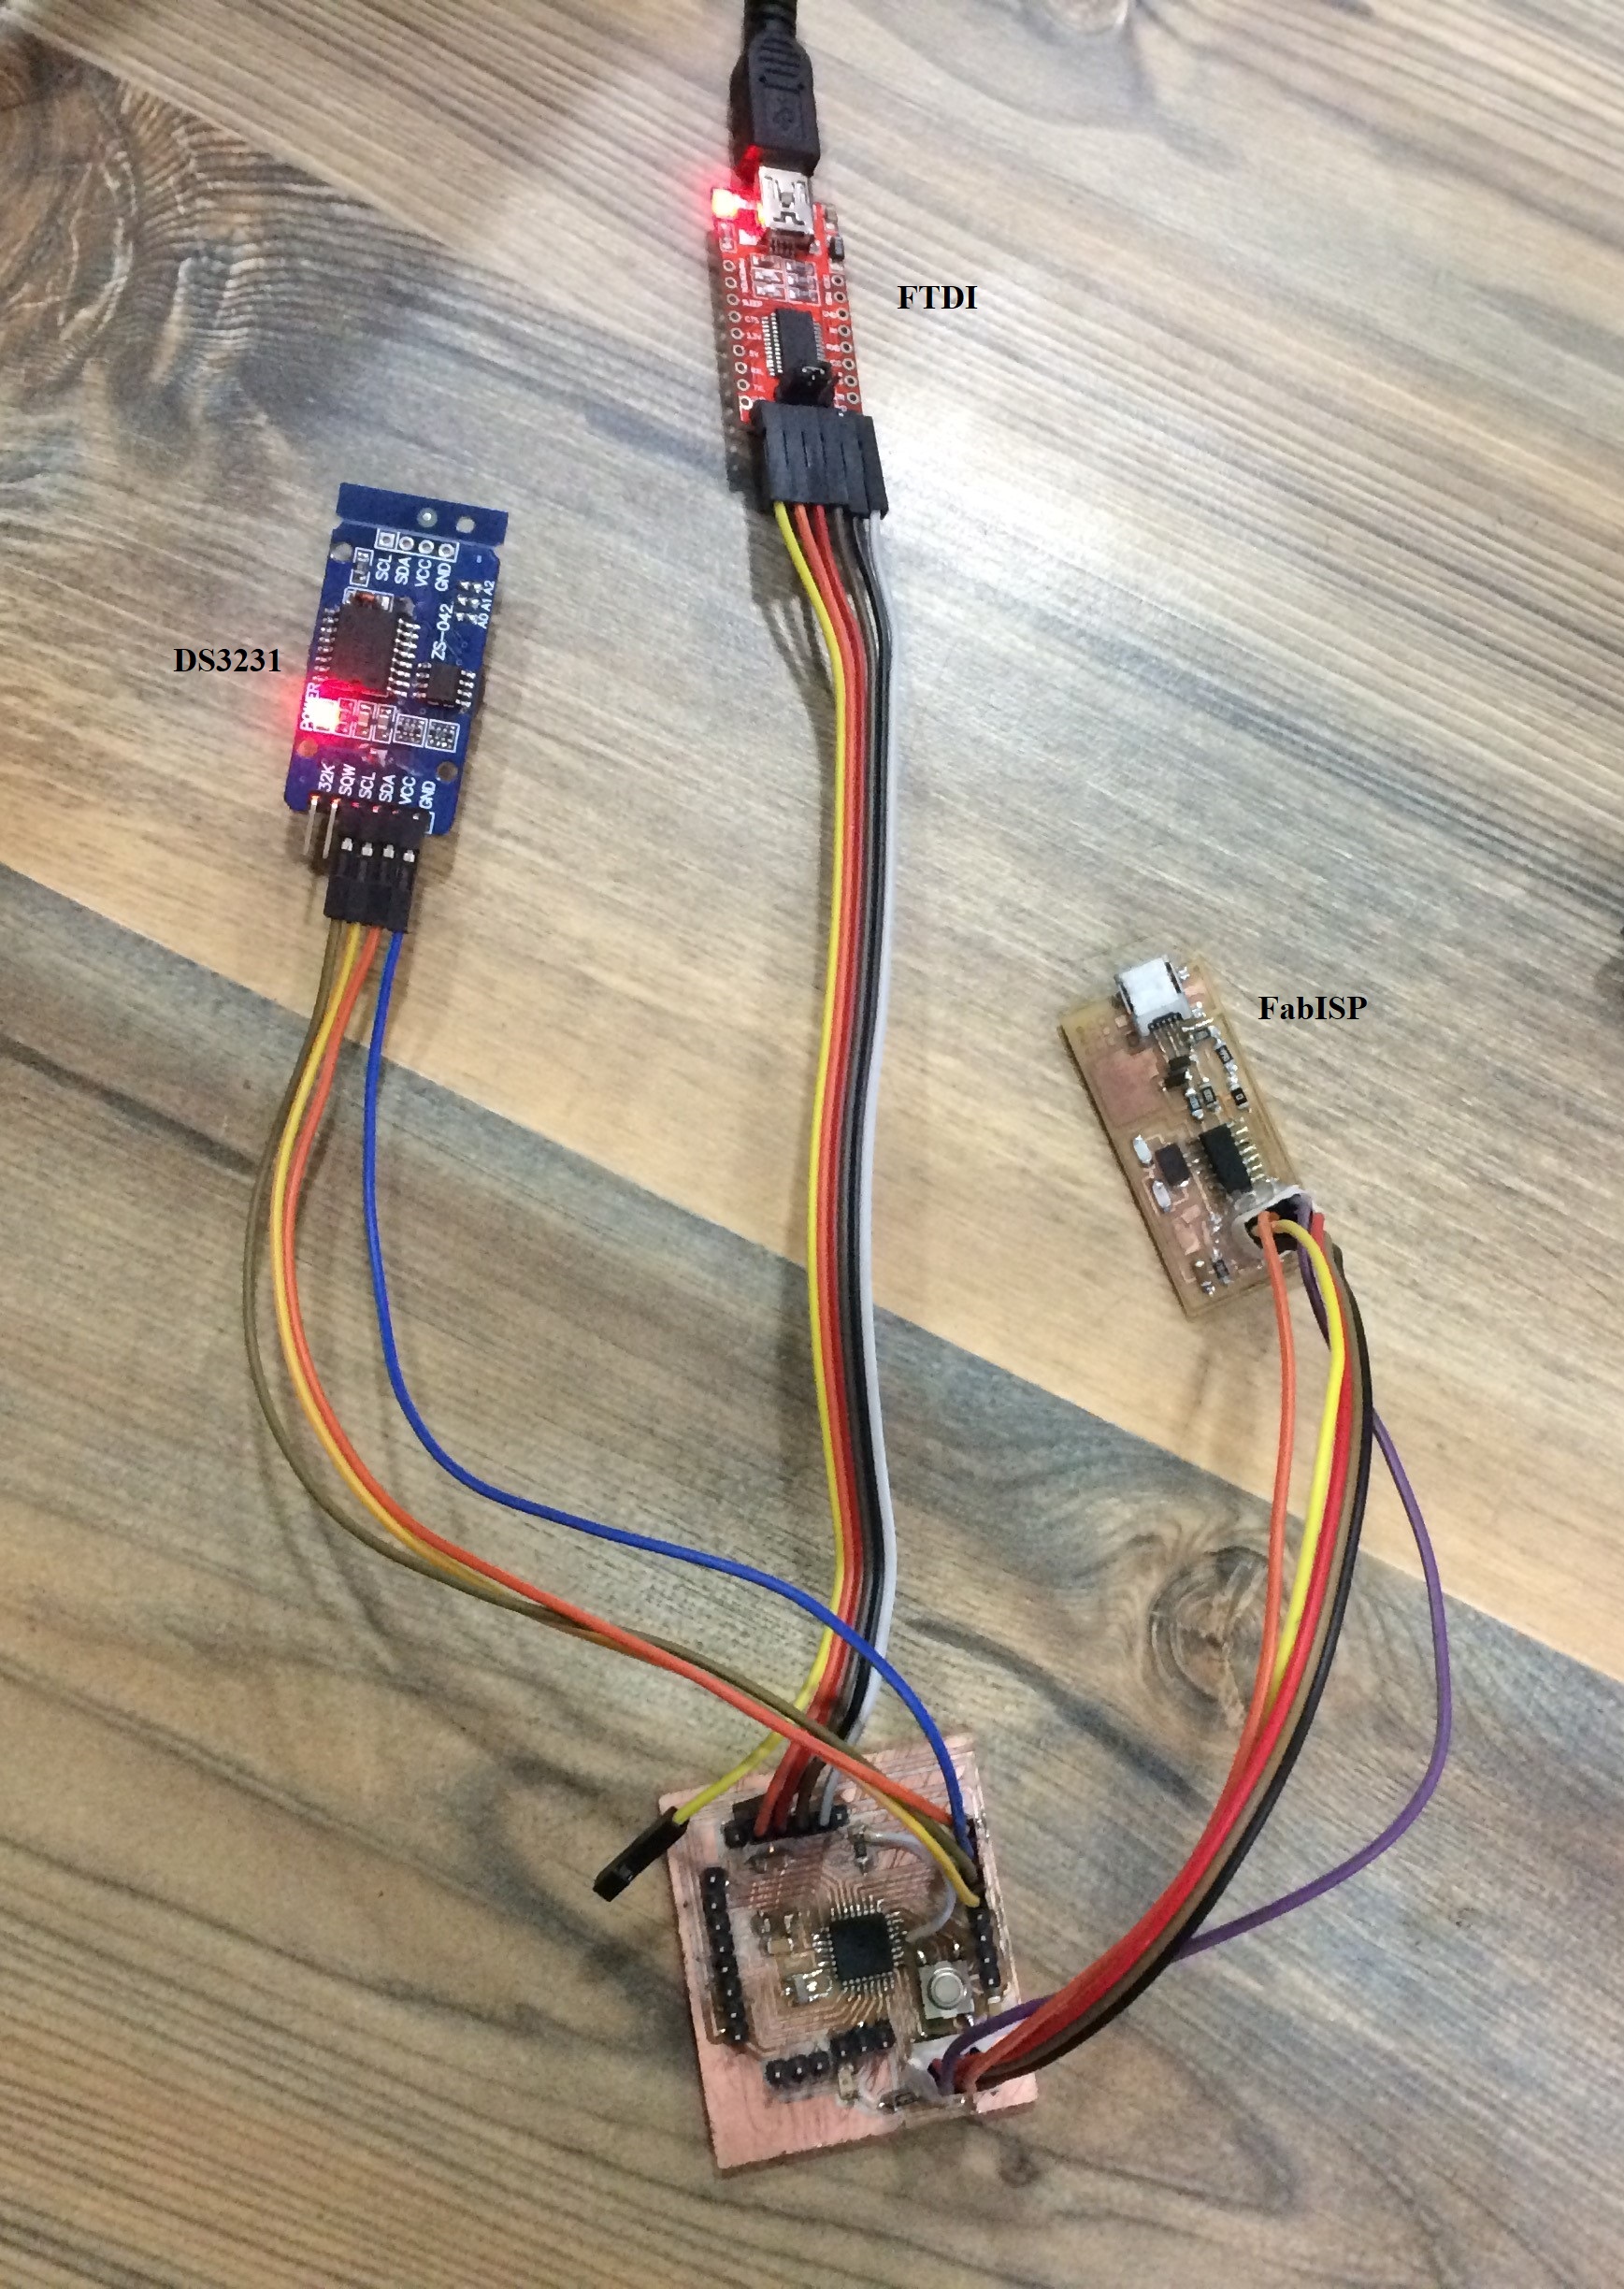
To take readings from DS3231 connections is being done, as shown below.
FabISP is used to burn the program into the microcontroller.
DS3231 is to used to take date and time in real time on serial monitor.
FTDI is used to do serial communication and take data from DS3231 and display it on serial monitor.
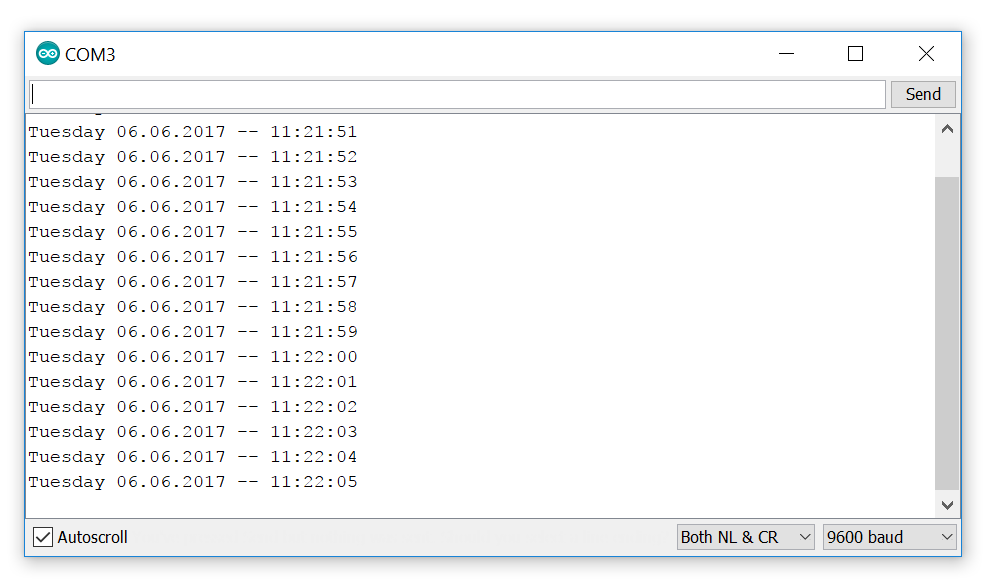
Serial Monitor Display
Step 2
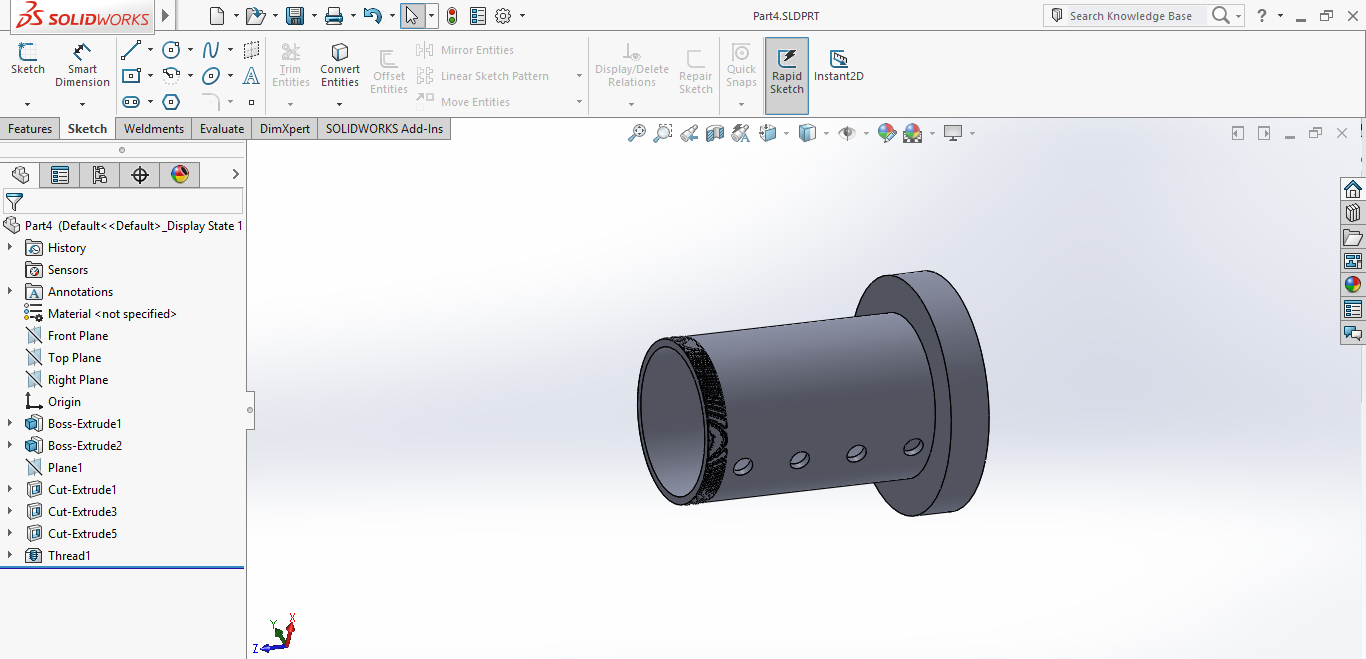
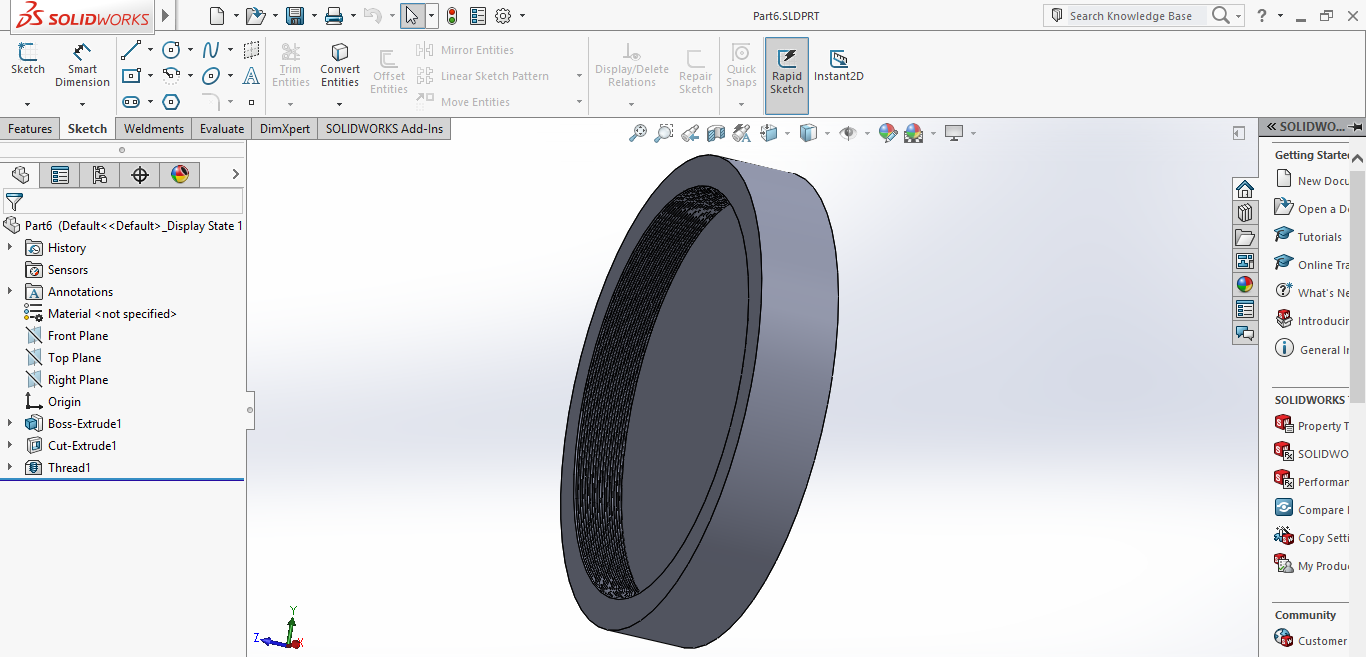
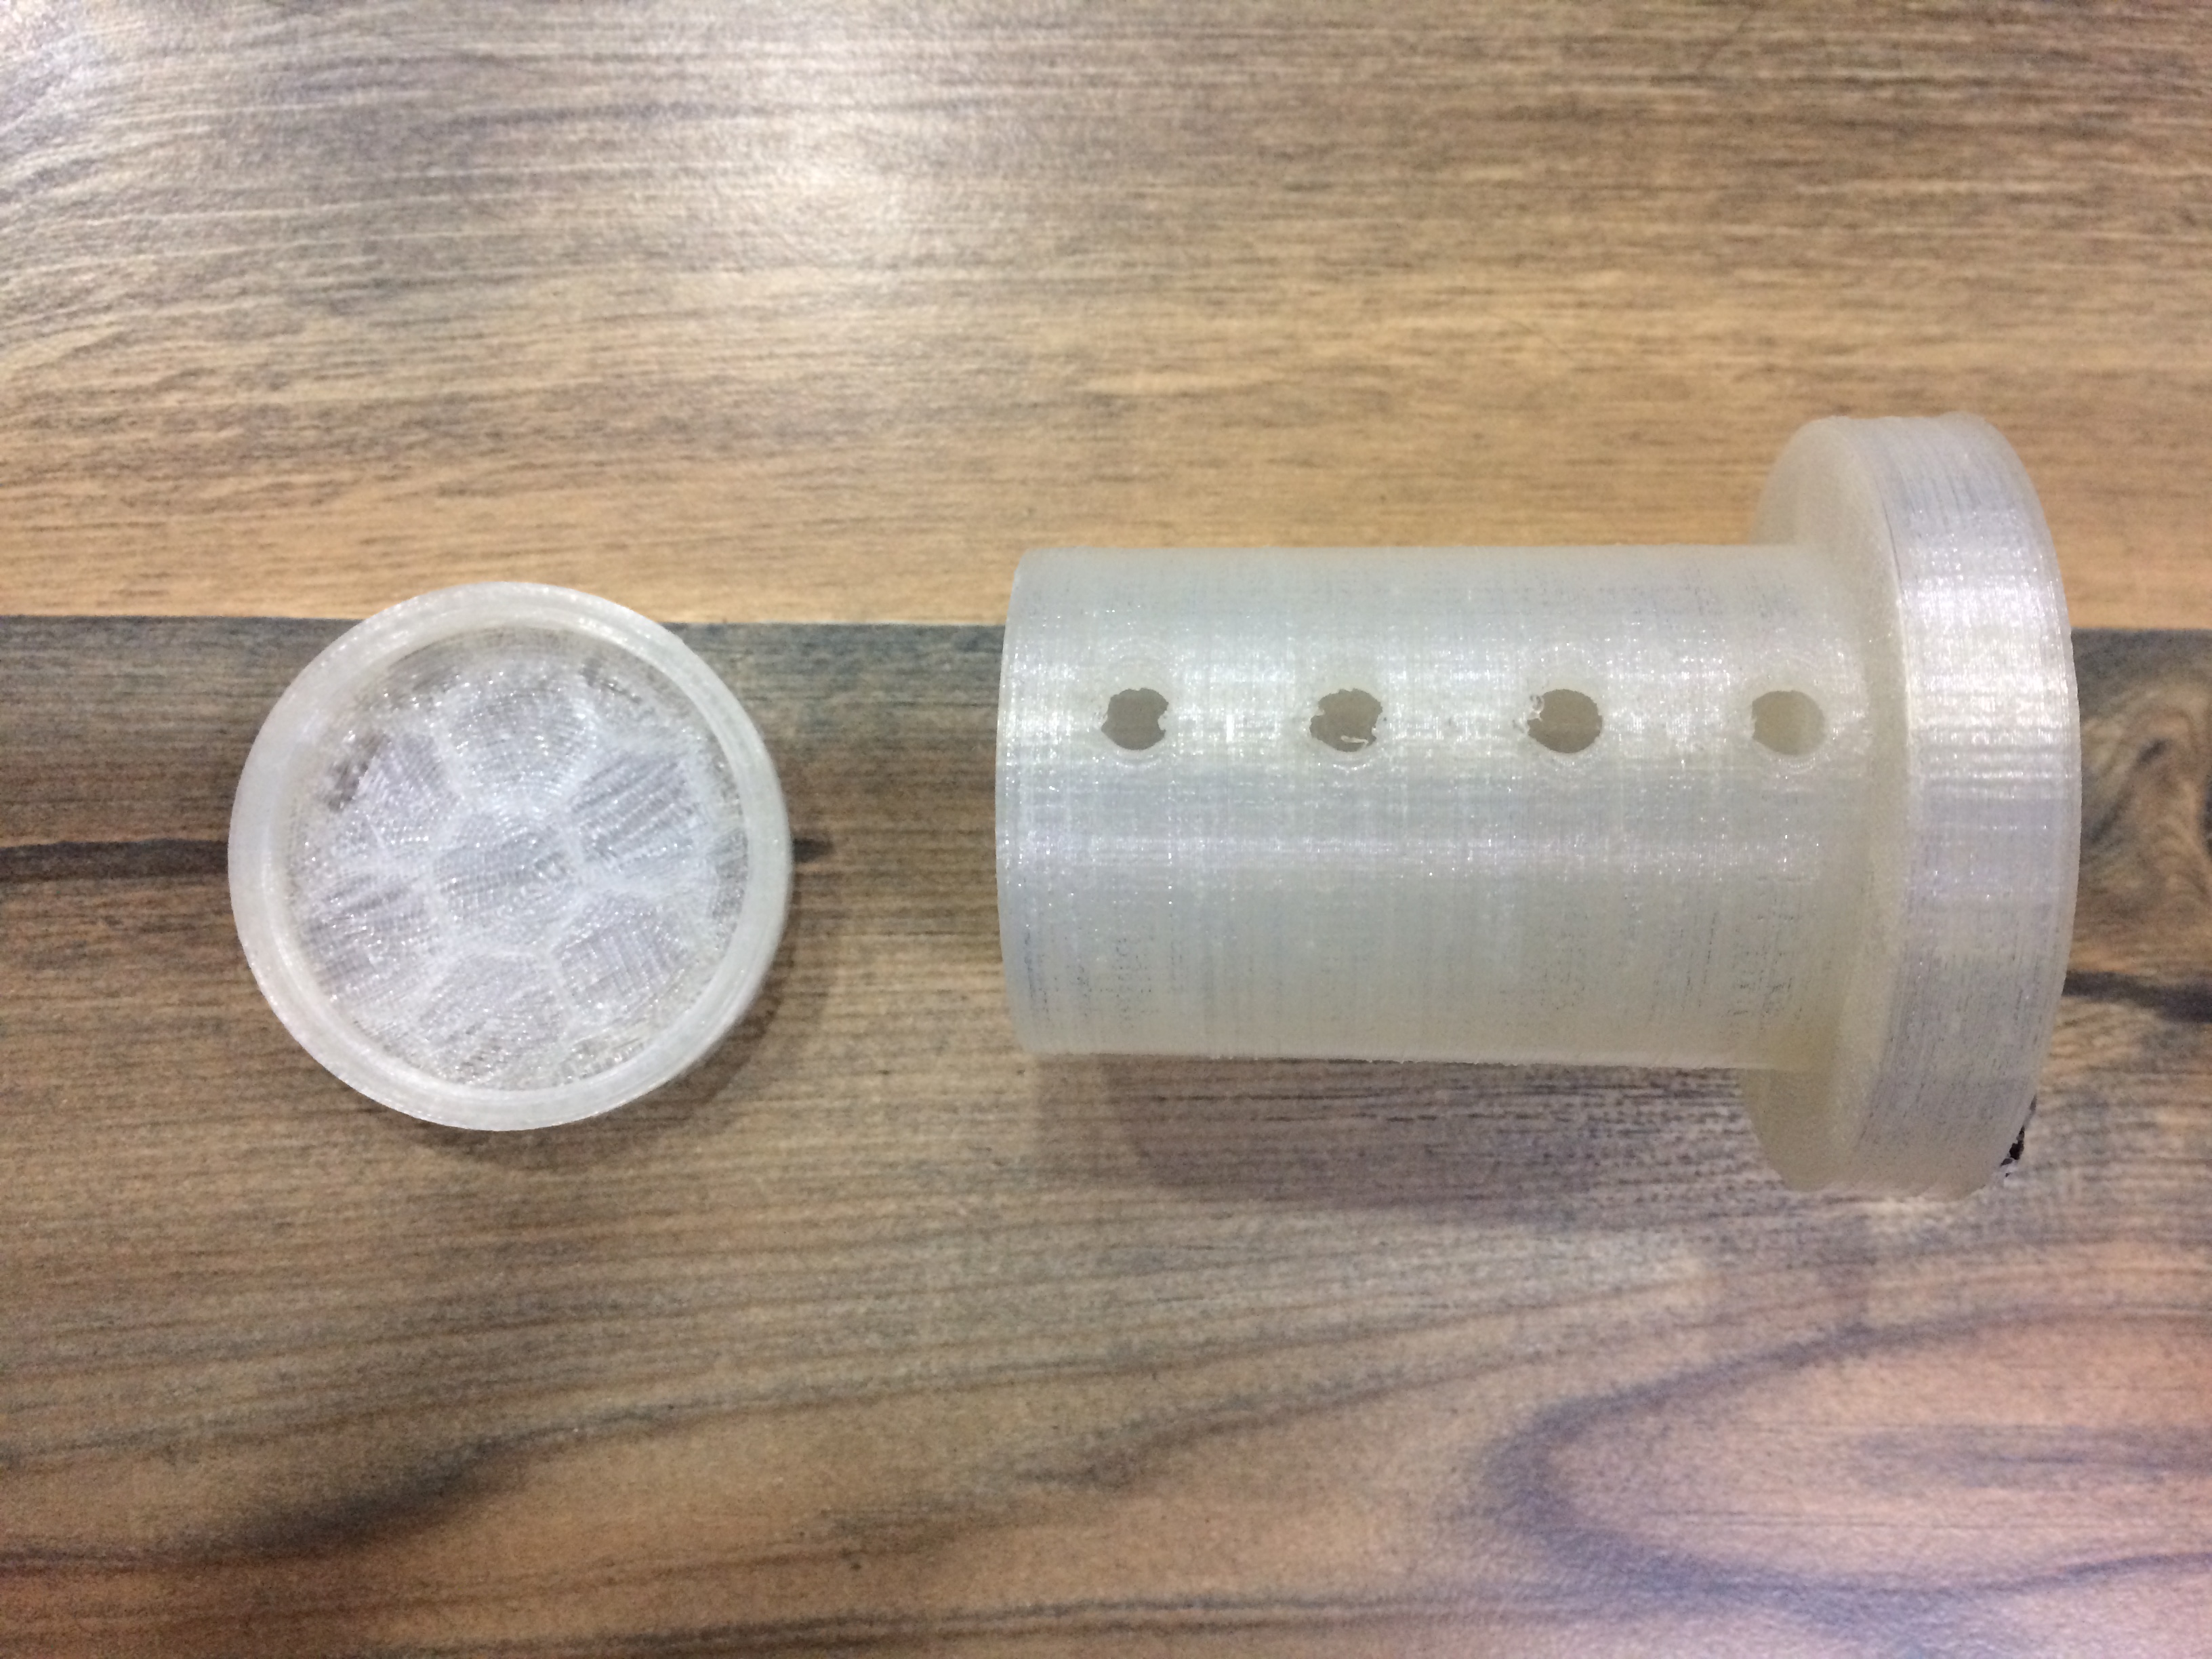
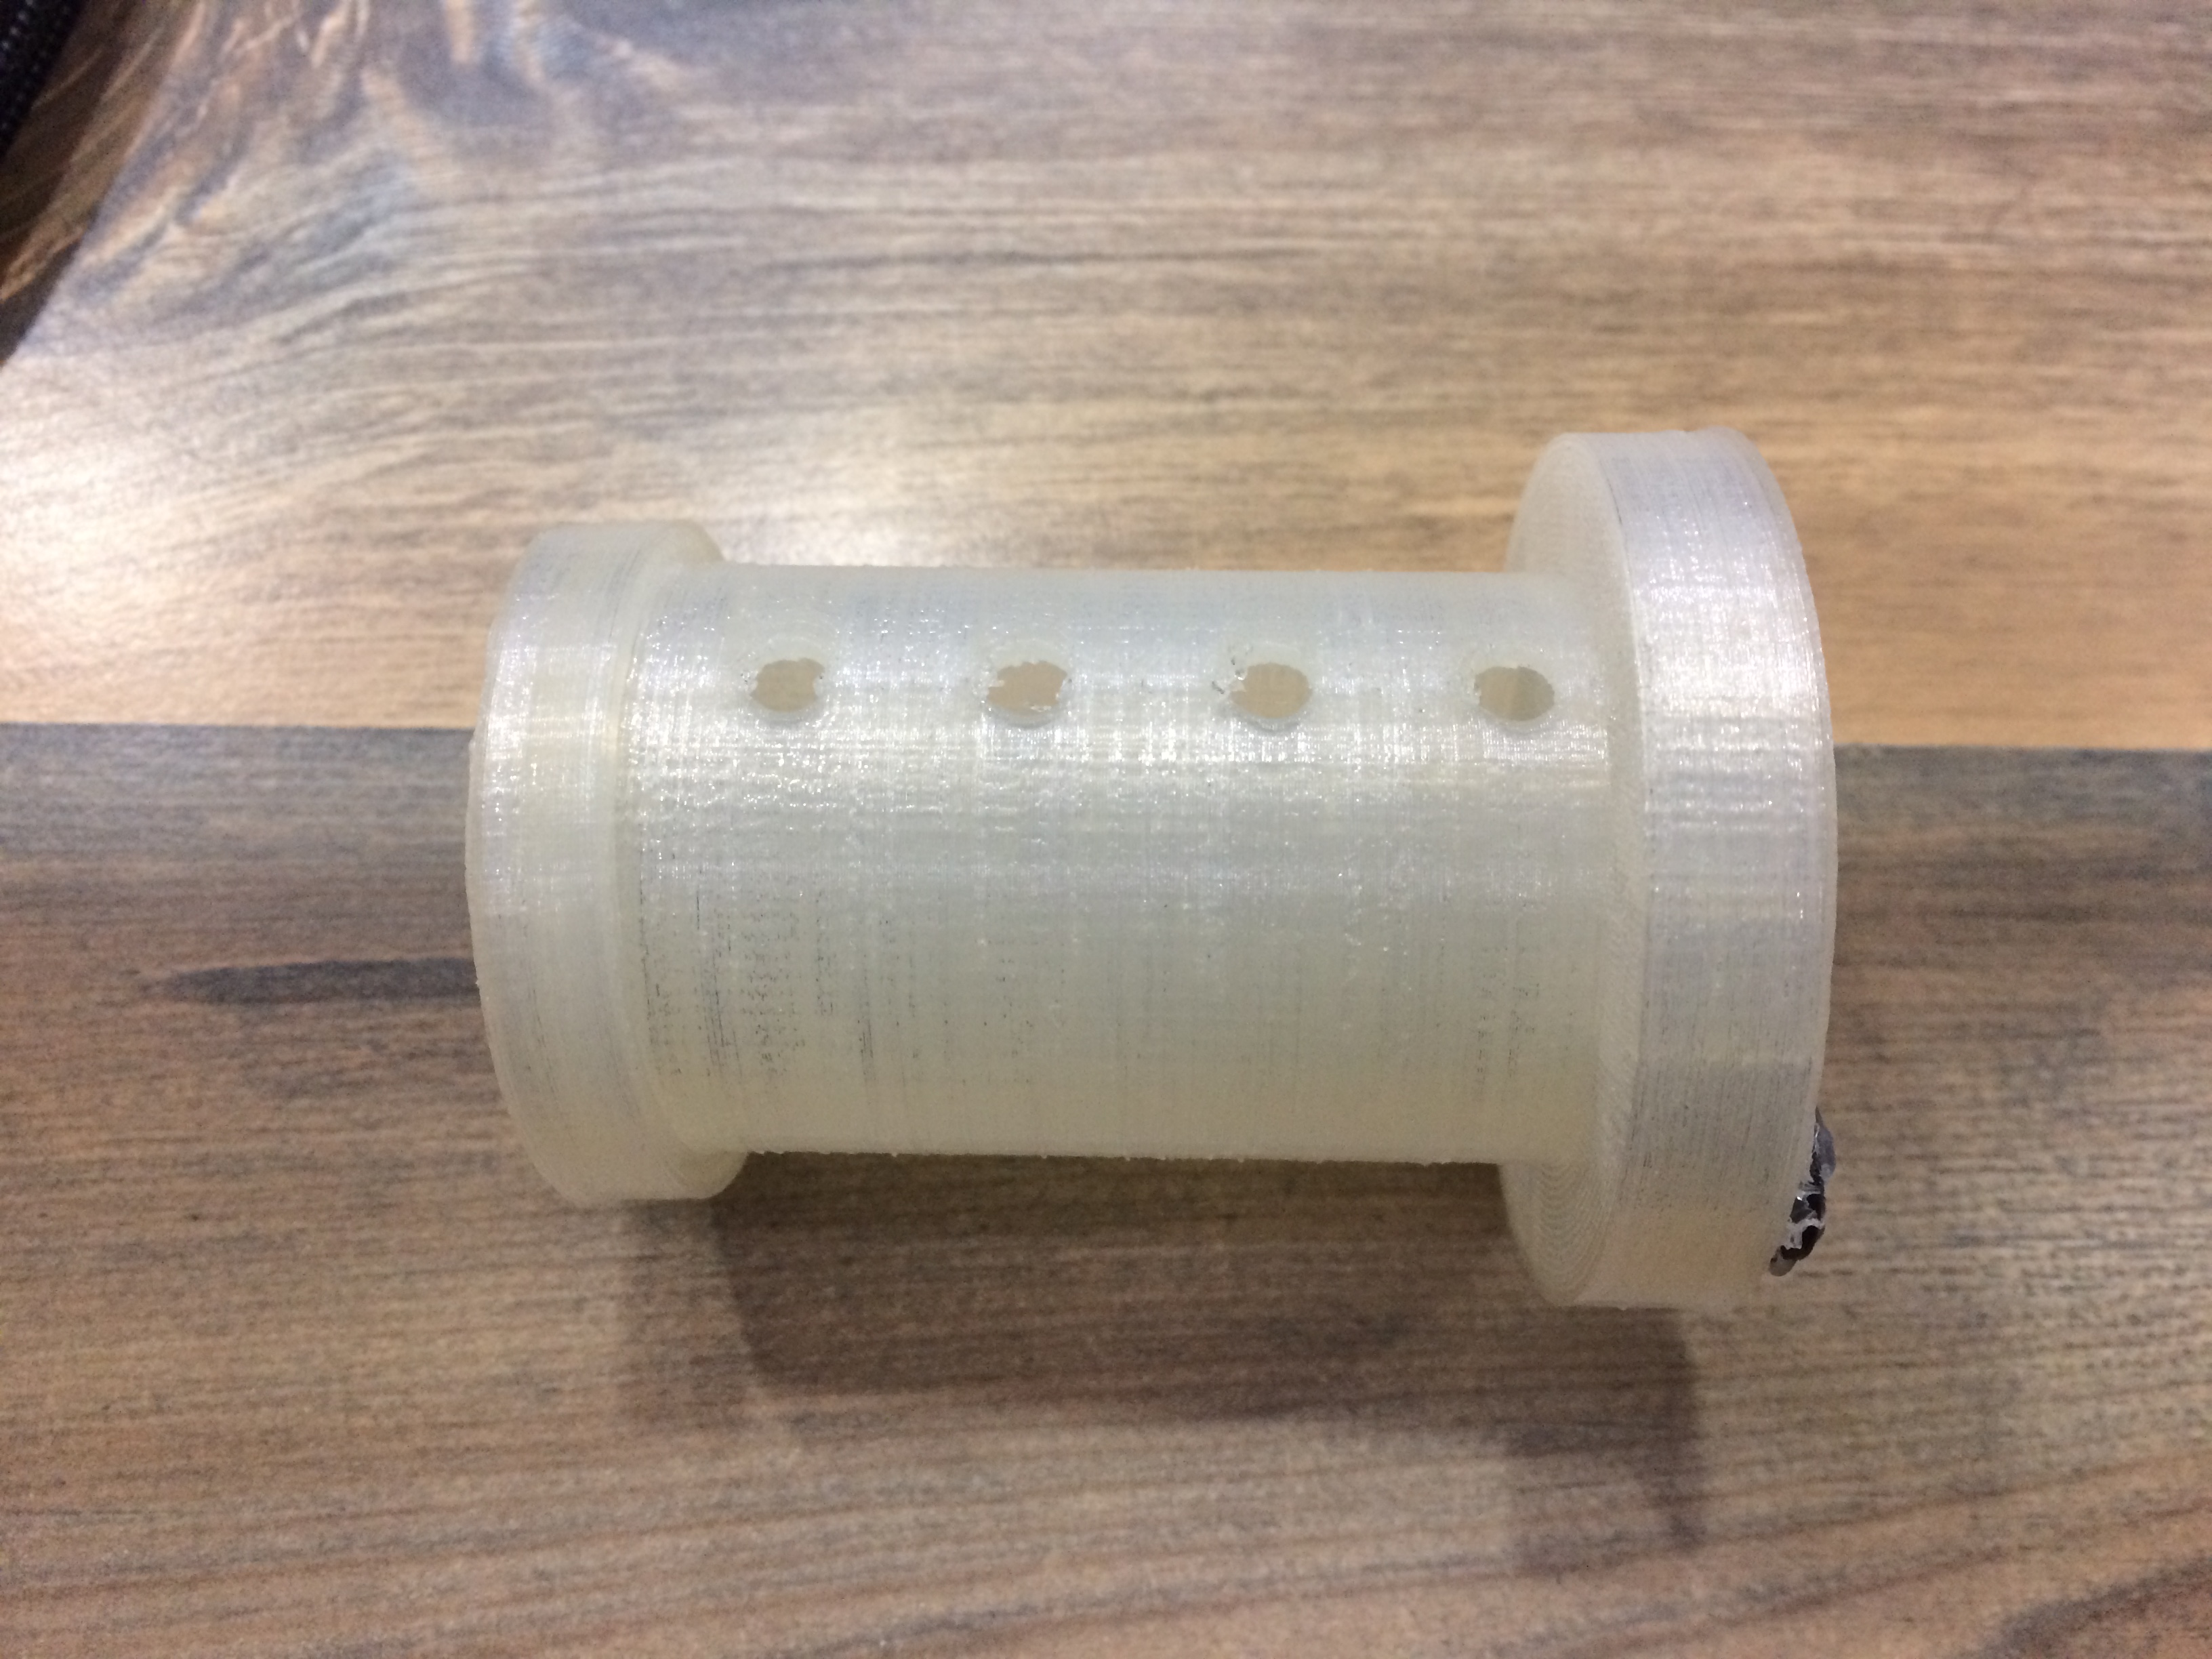
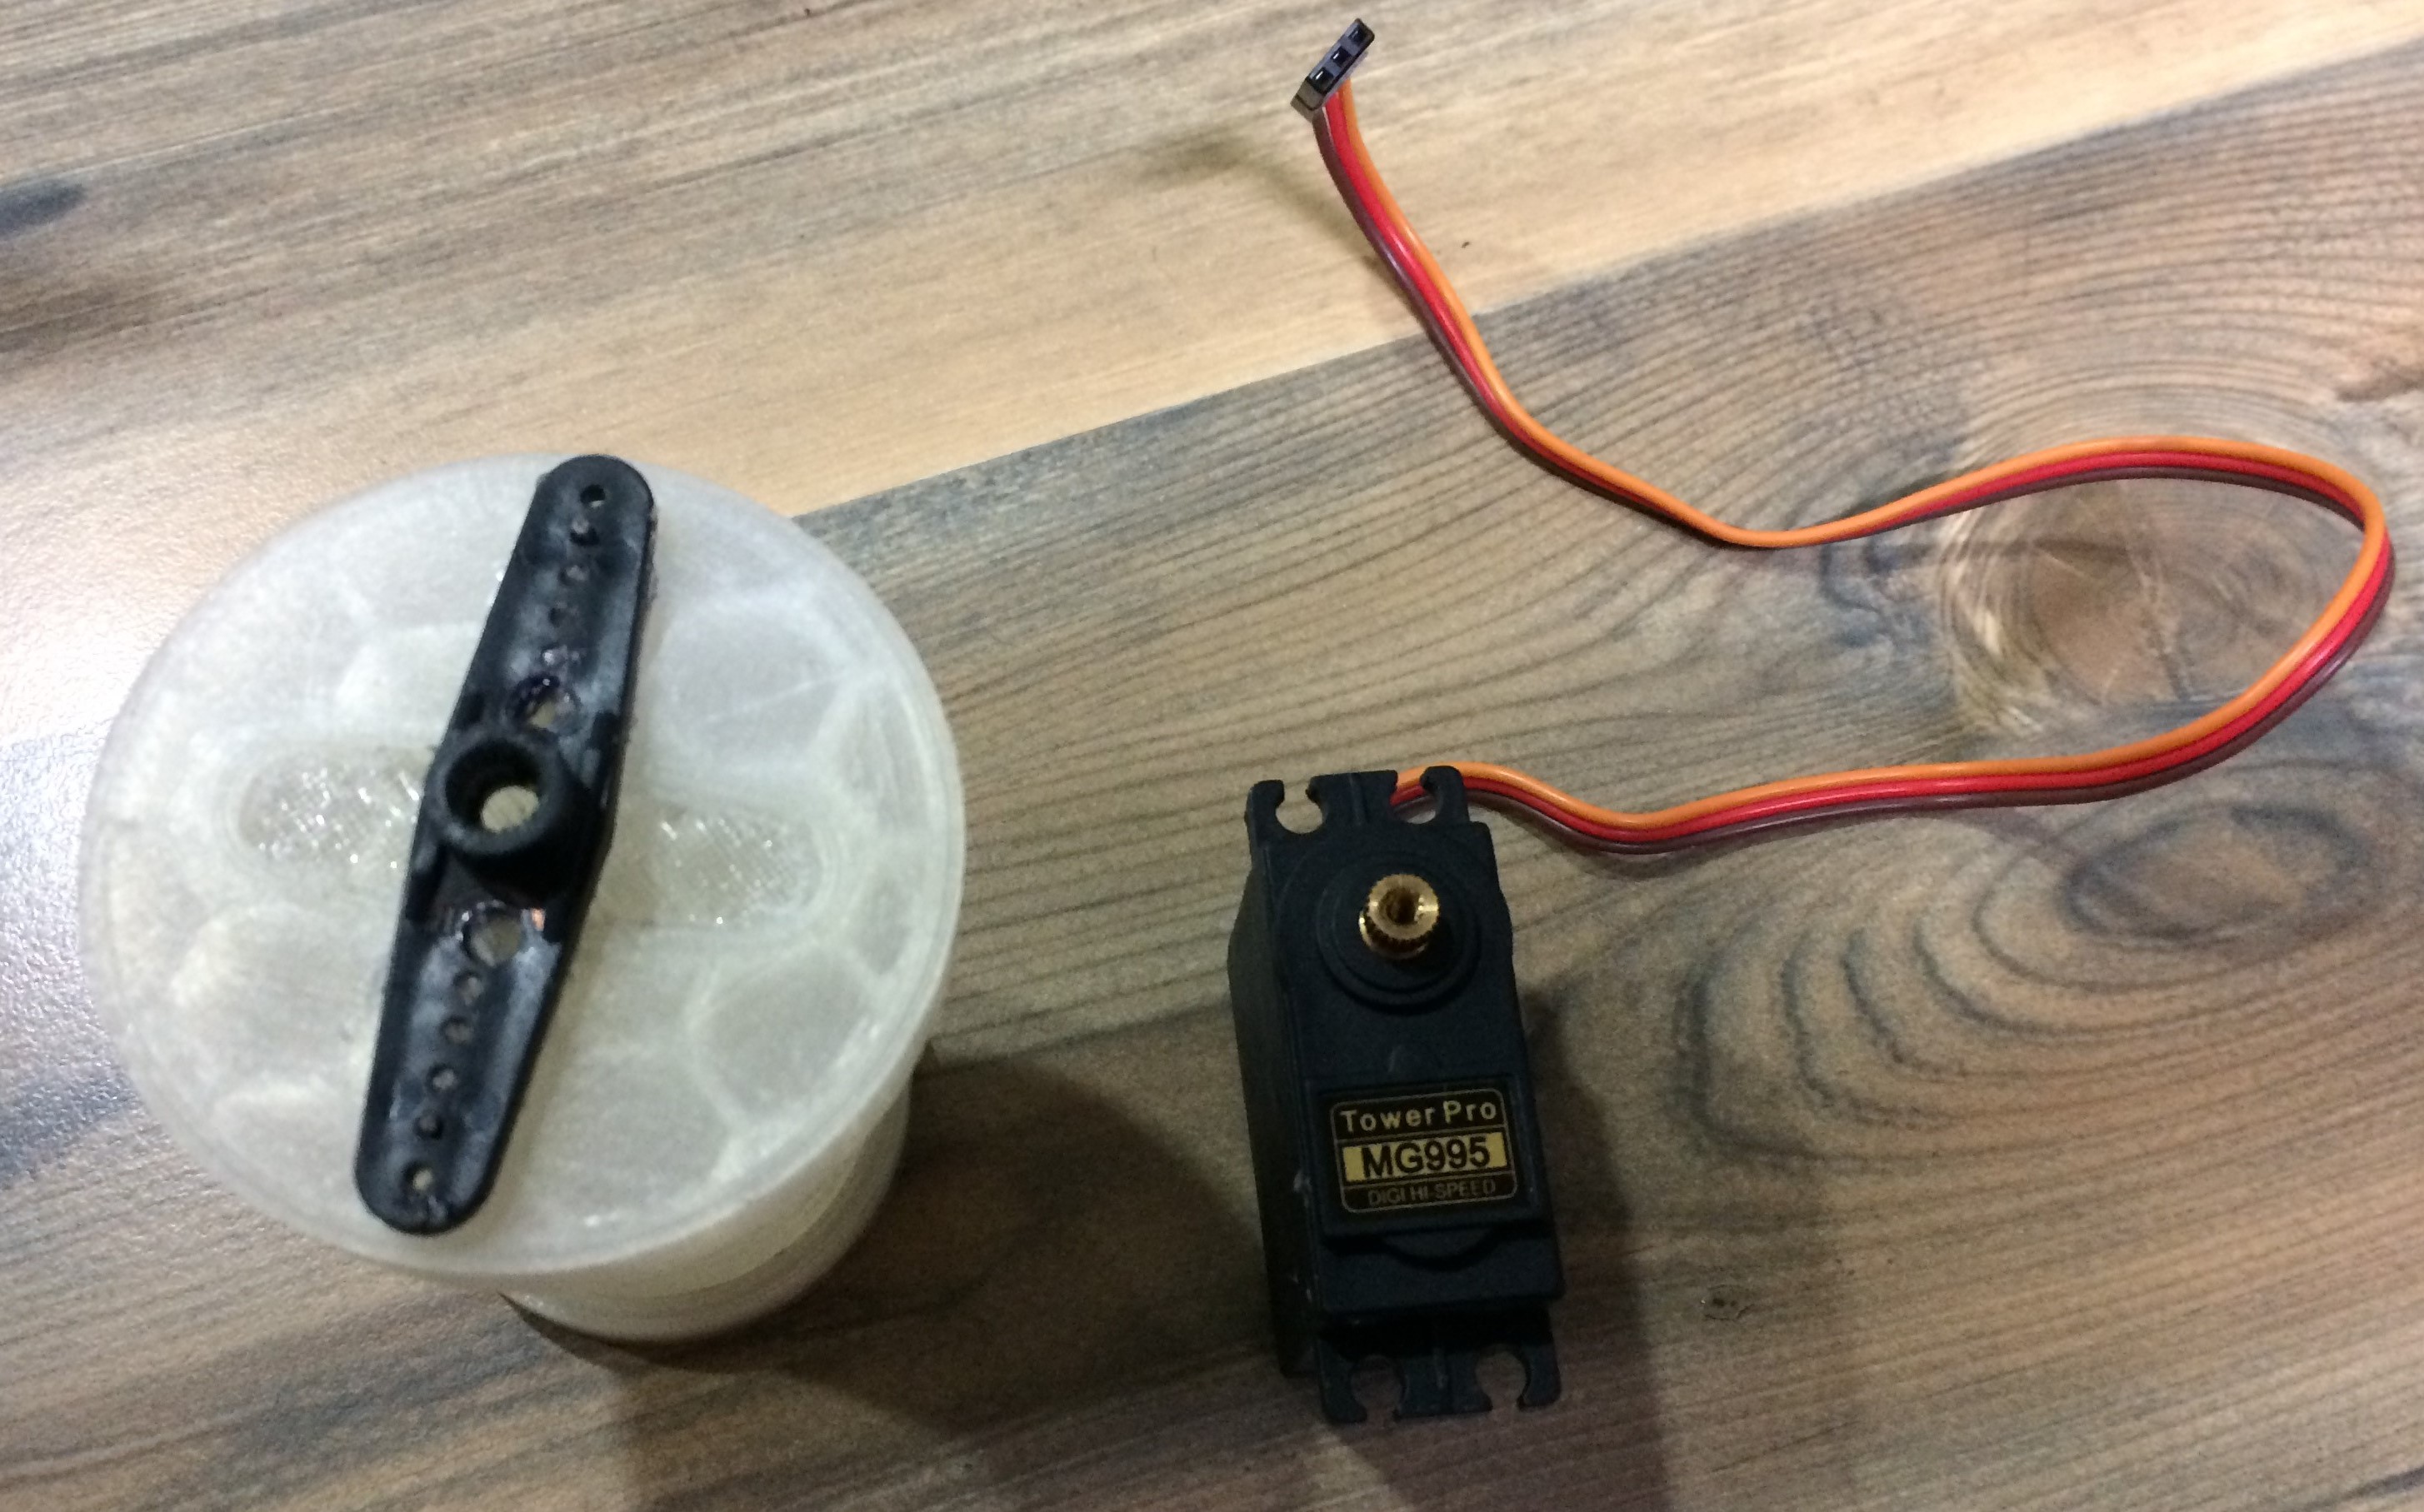
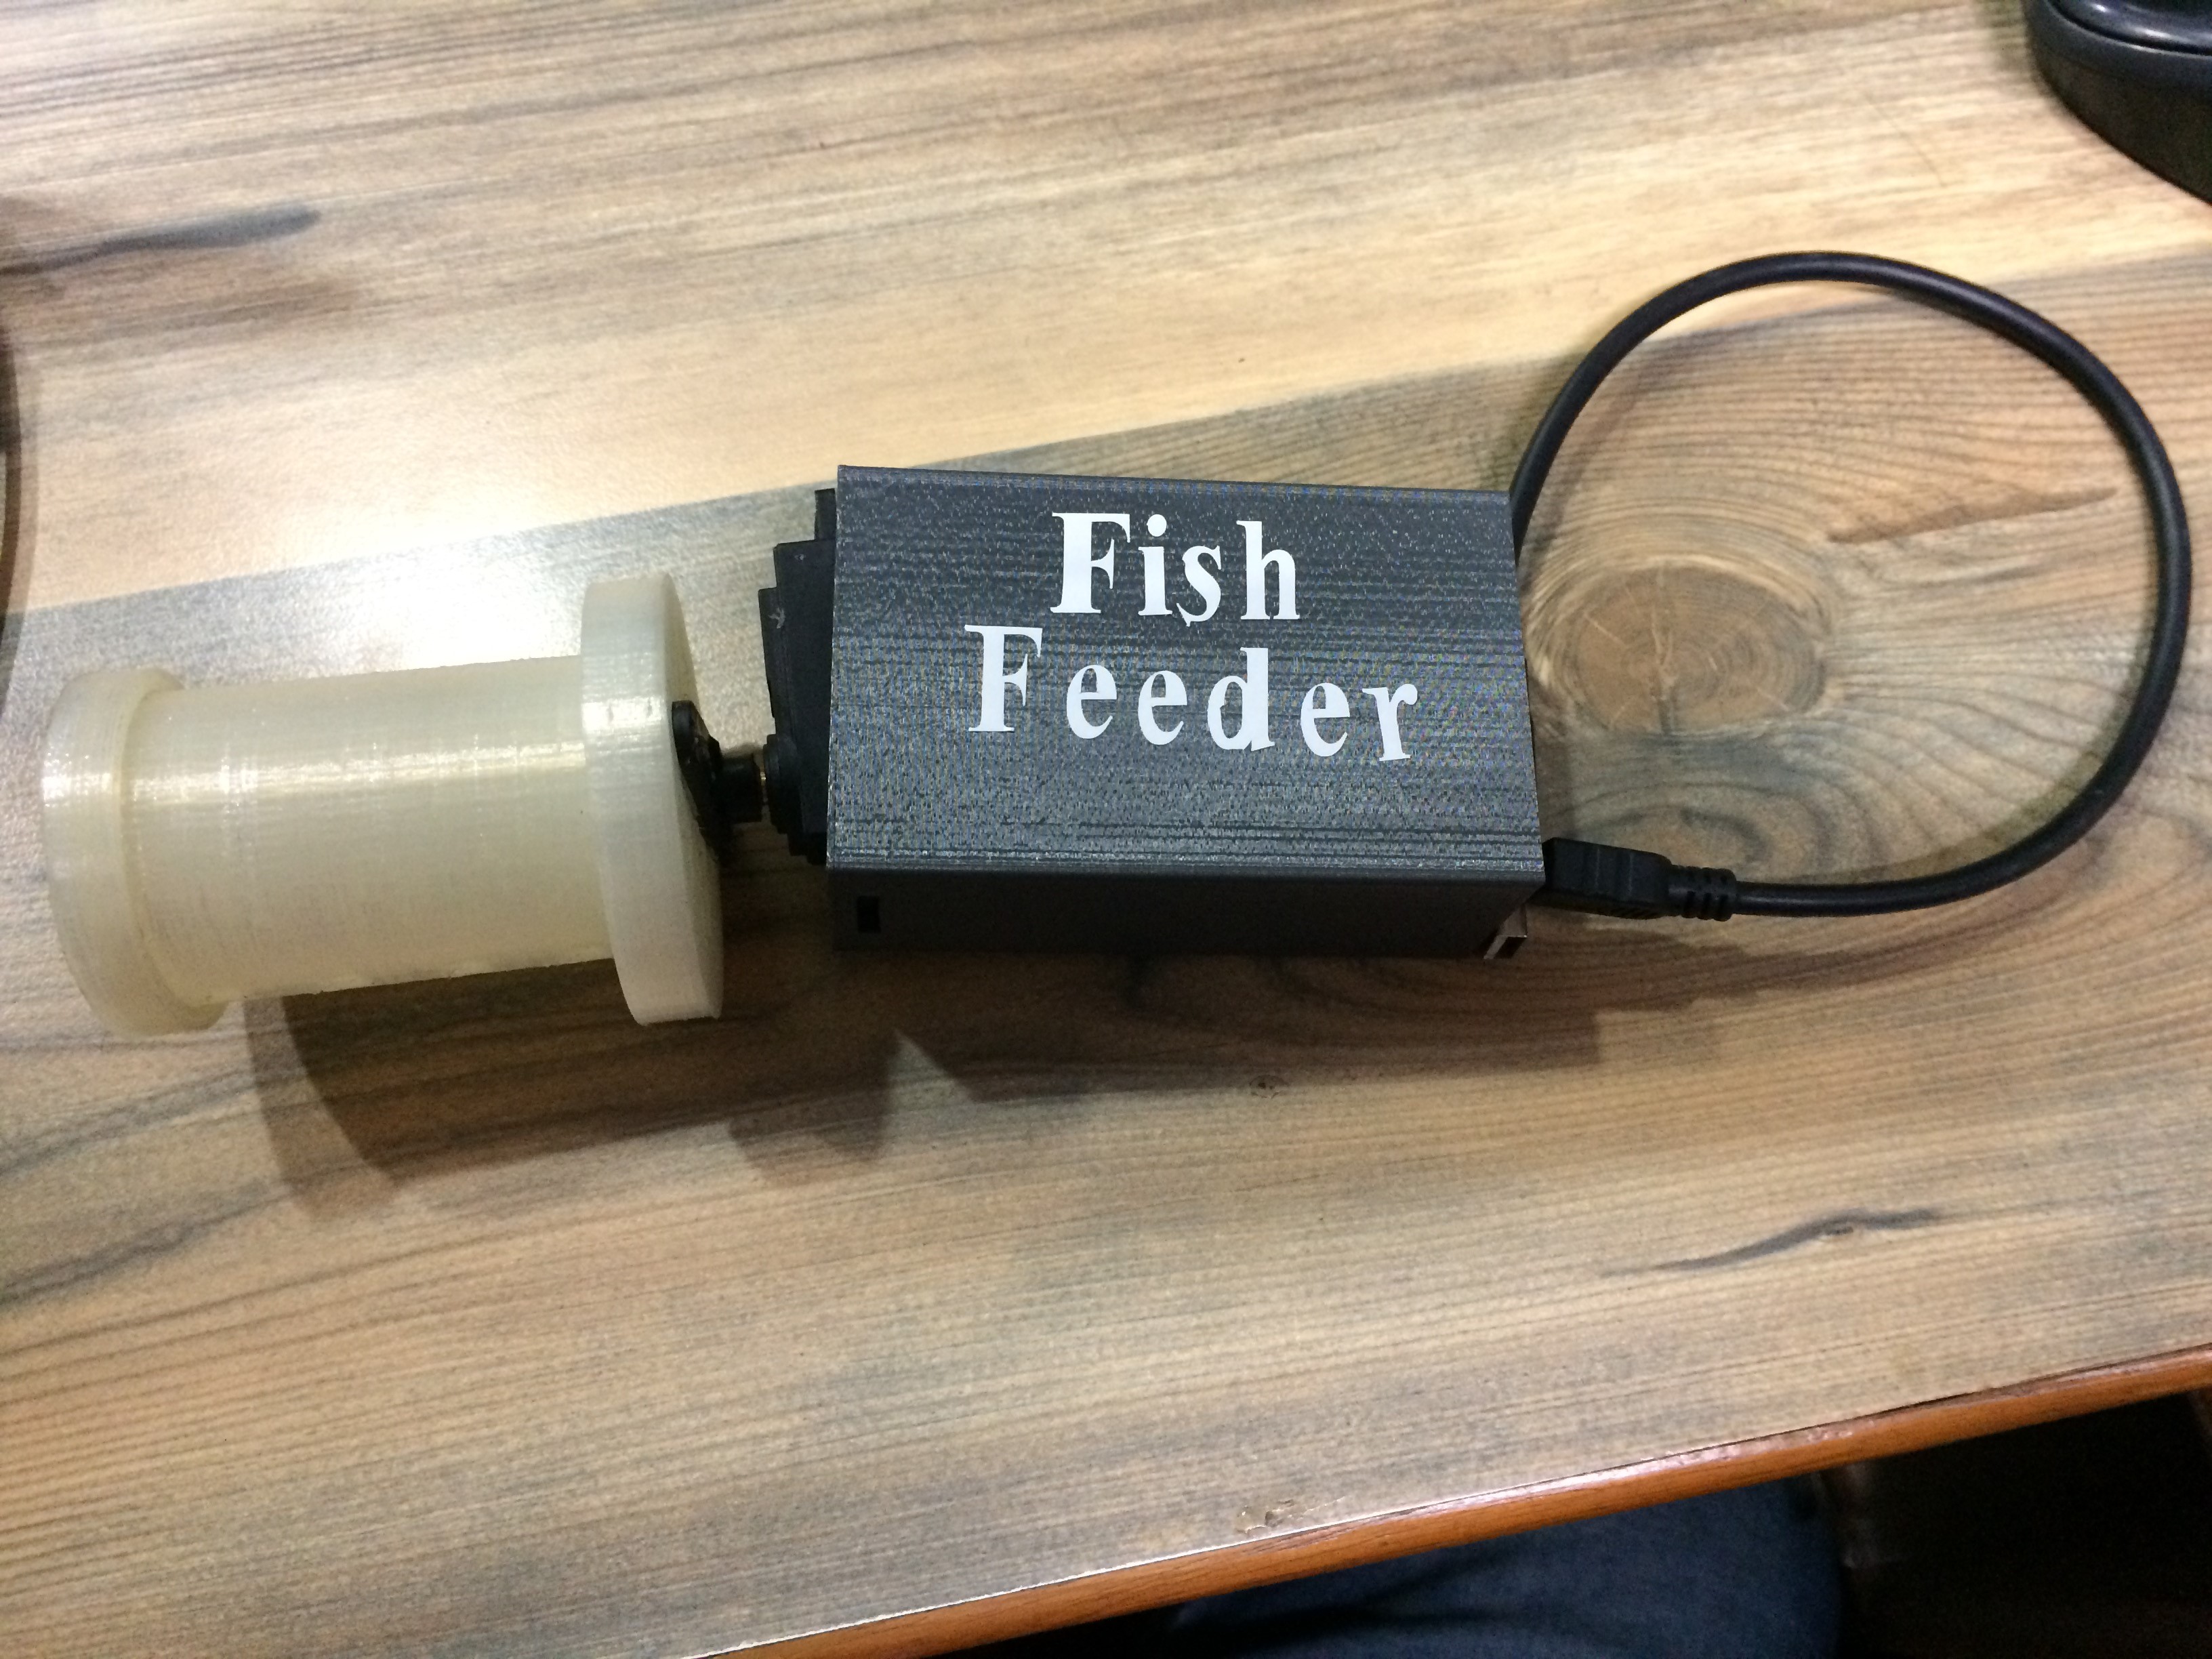
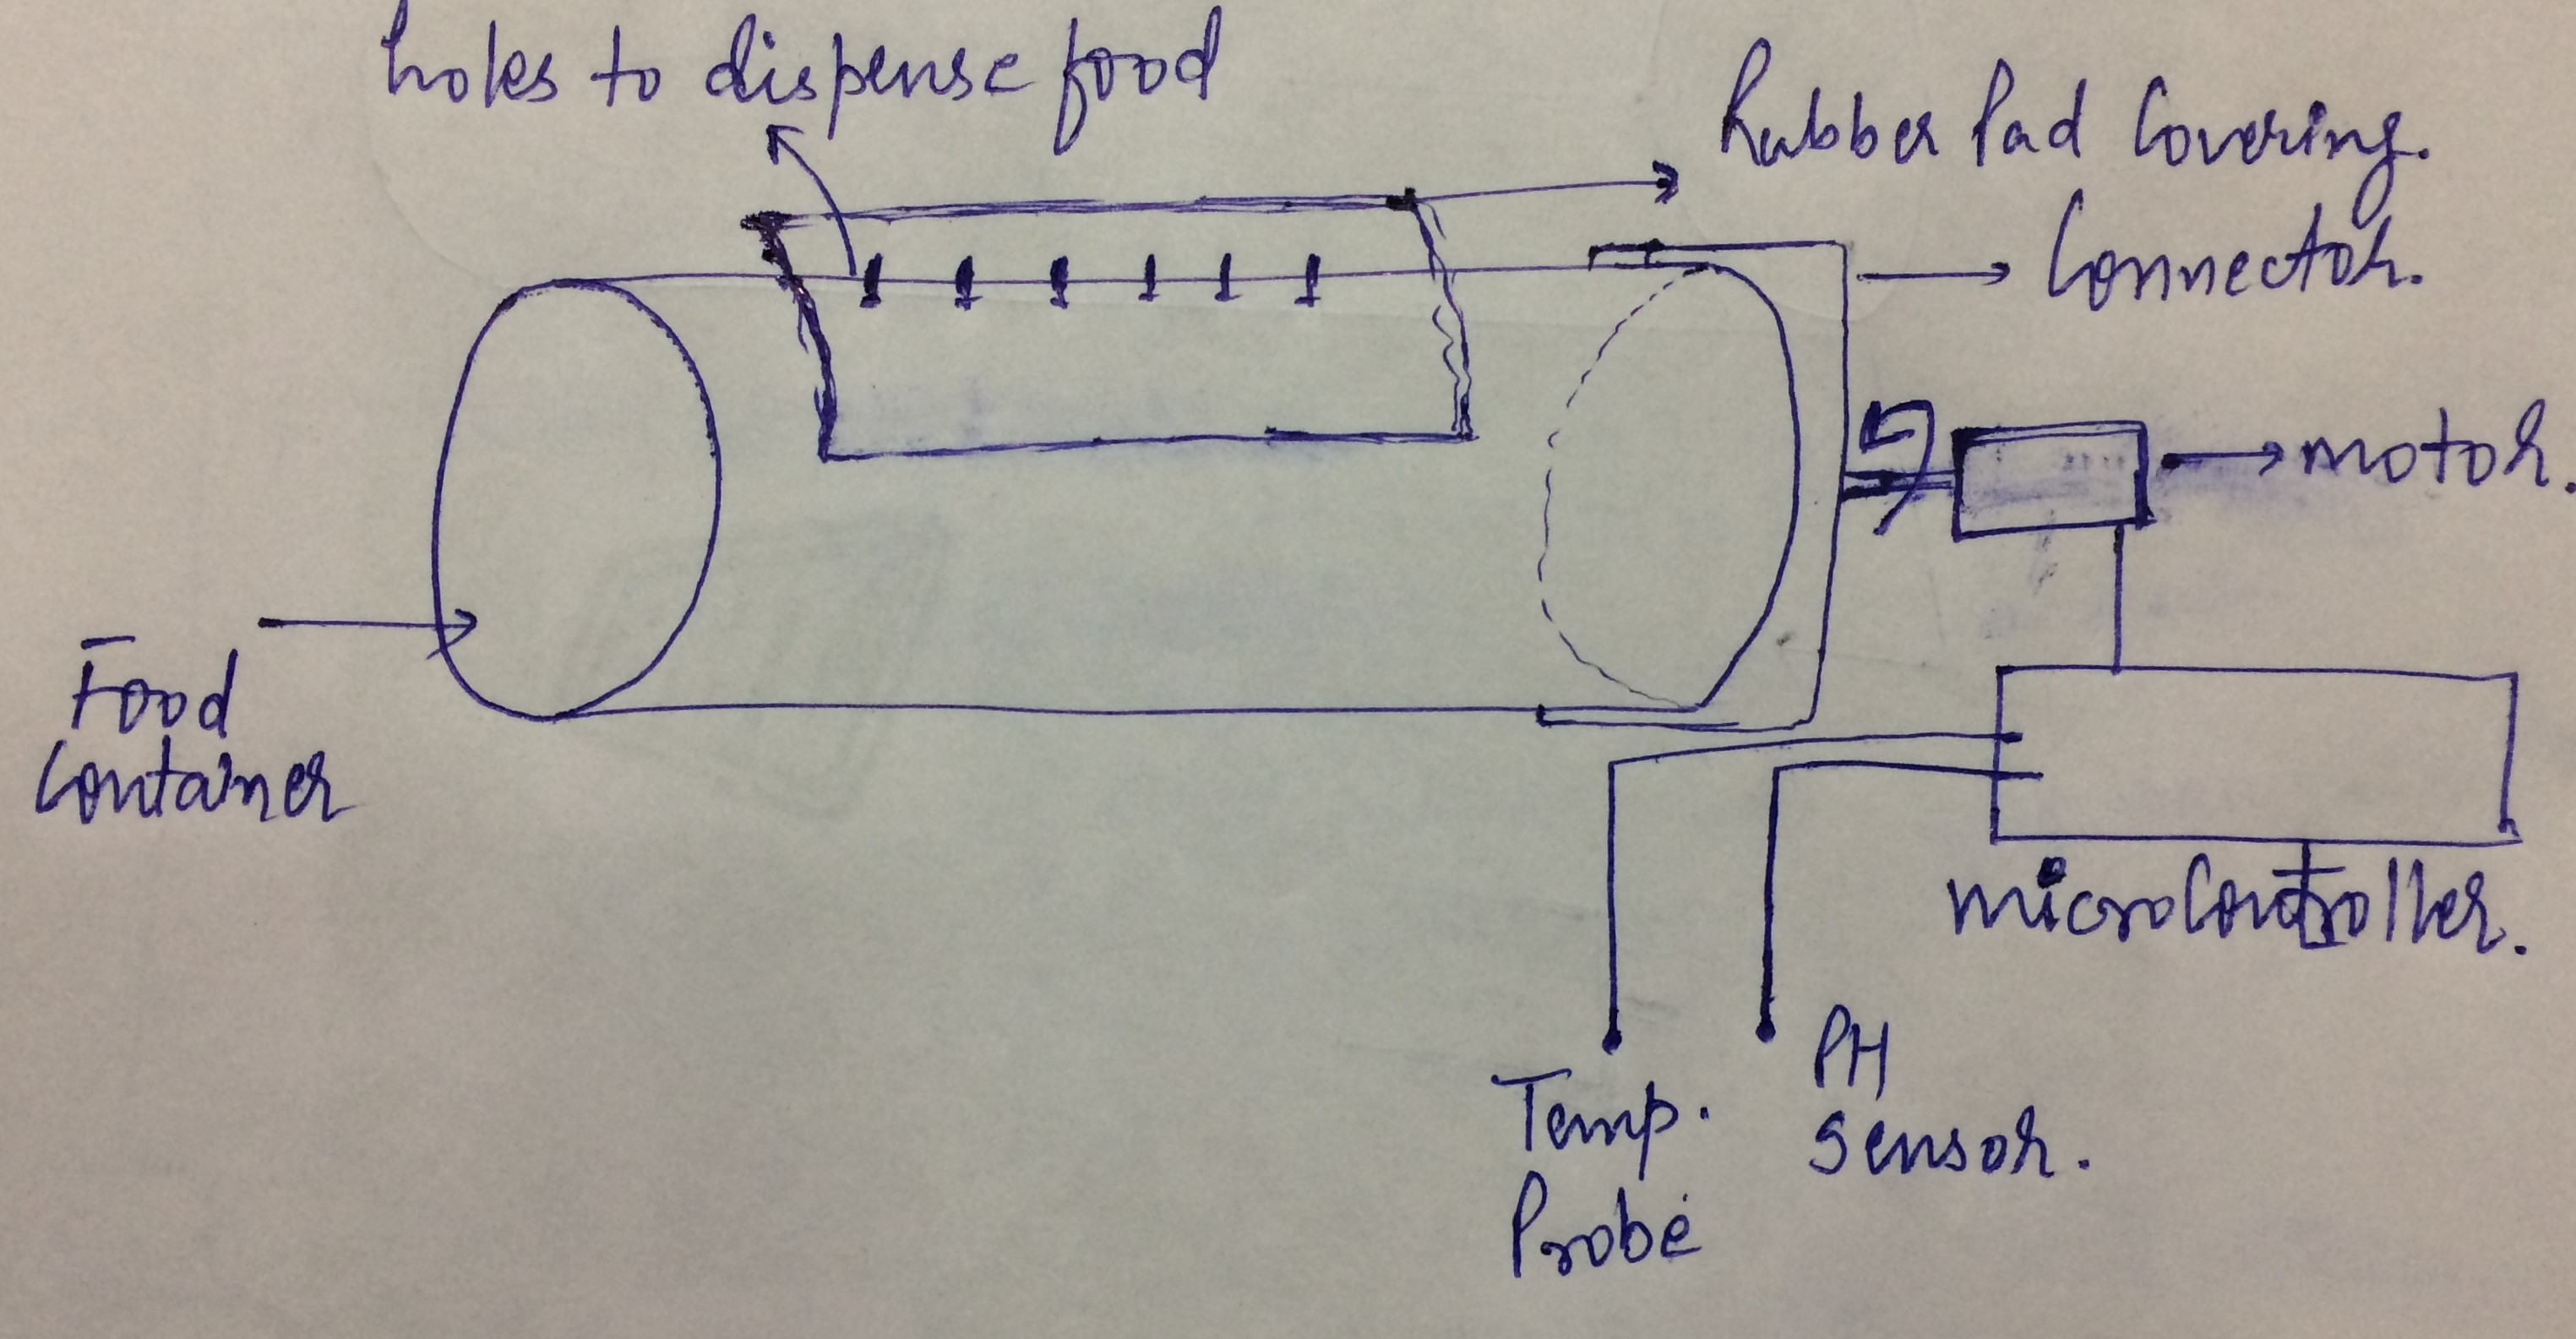
Made a 3D model of the cylinder required to fill fish food and need to be mounted on the motor. I made the cylinder with 4 holes to deliver the food and provided it with a lid to replenish it. Provision is also provided to mount it on the motor, as shown below. Desing was created using Solidworks.
A grove is provided on one end of the cylinder to facilitate the extension of the motor as shown in figure. This extension is forced fixed into the grove and using silicon glue gun it's position is assured. Cylinder is then mounted on the motor as shown below.
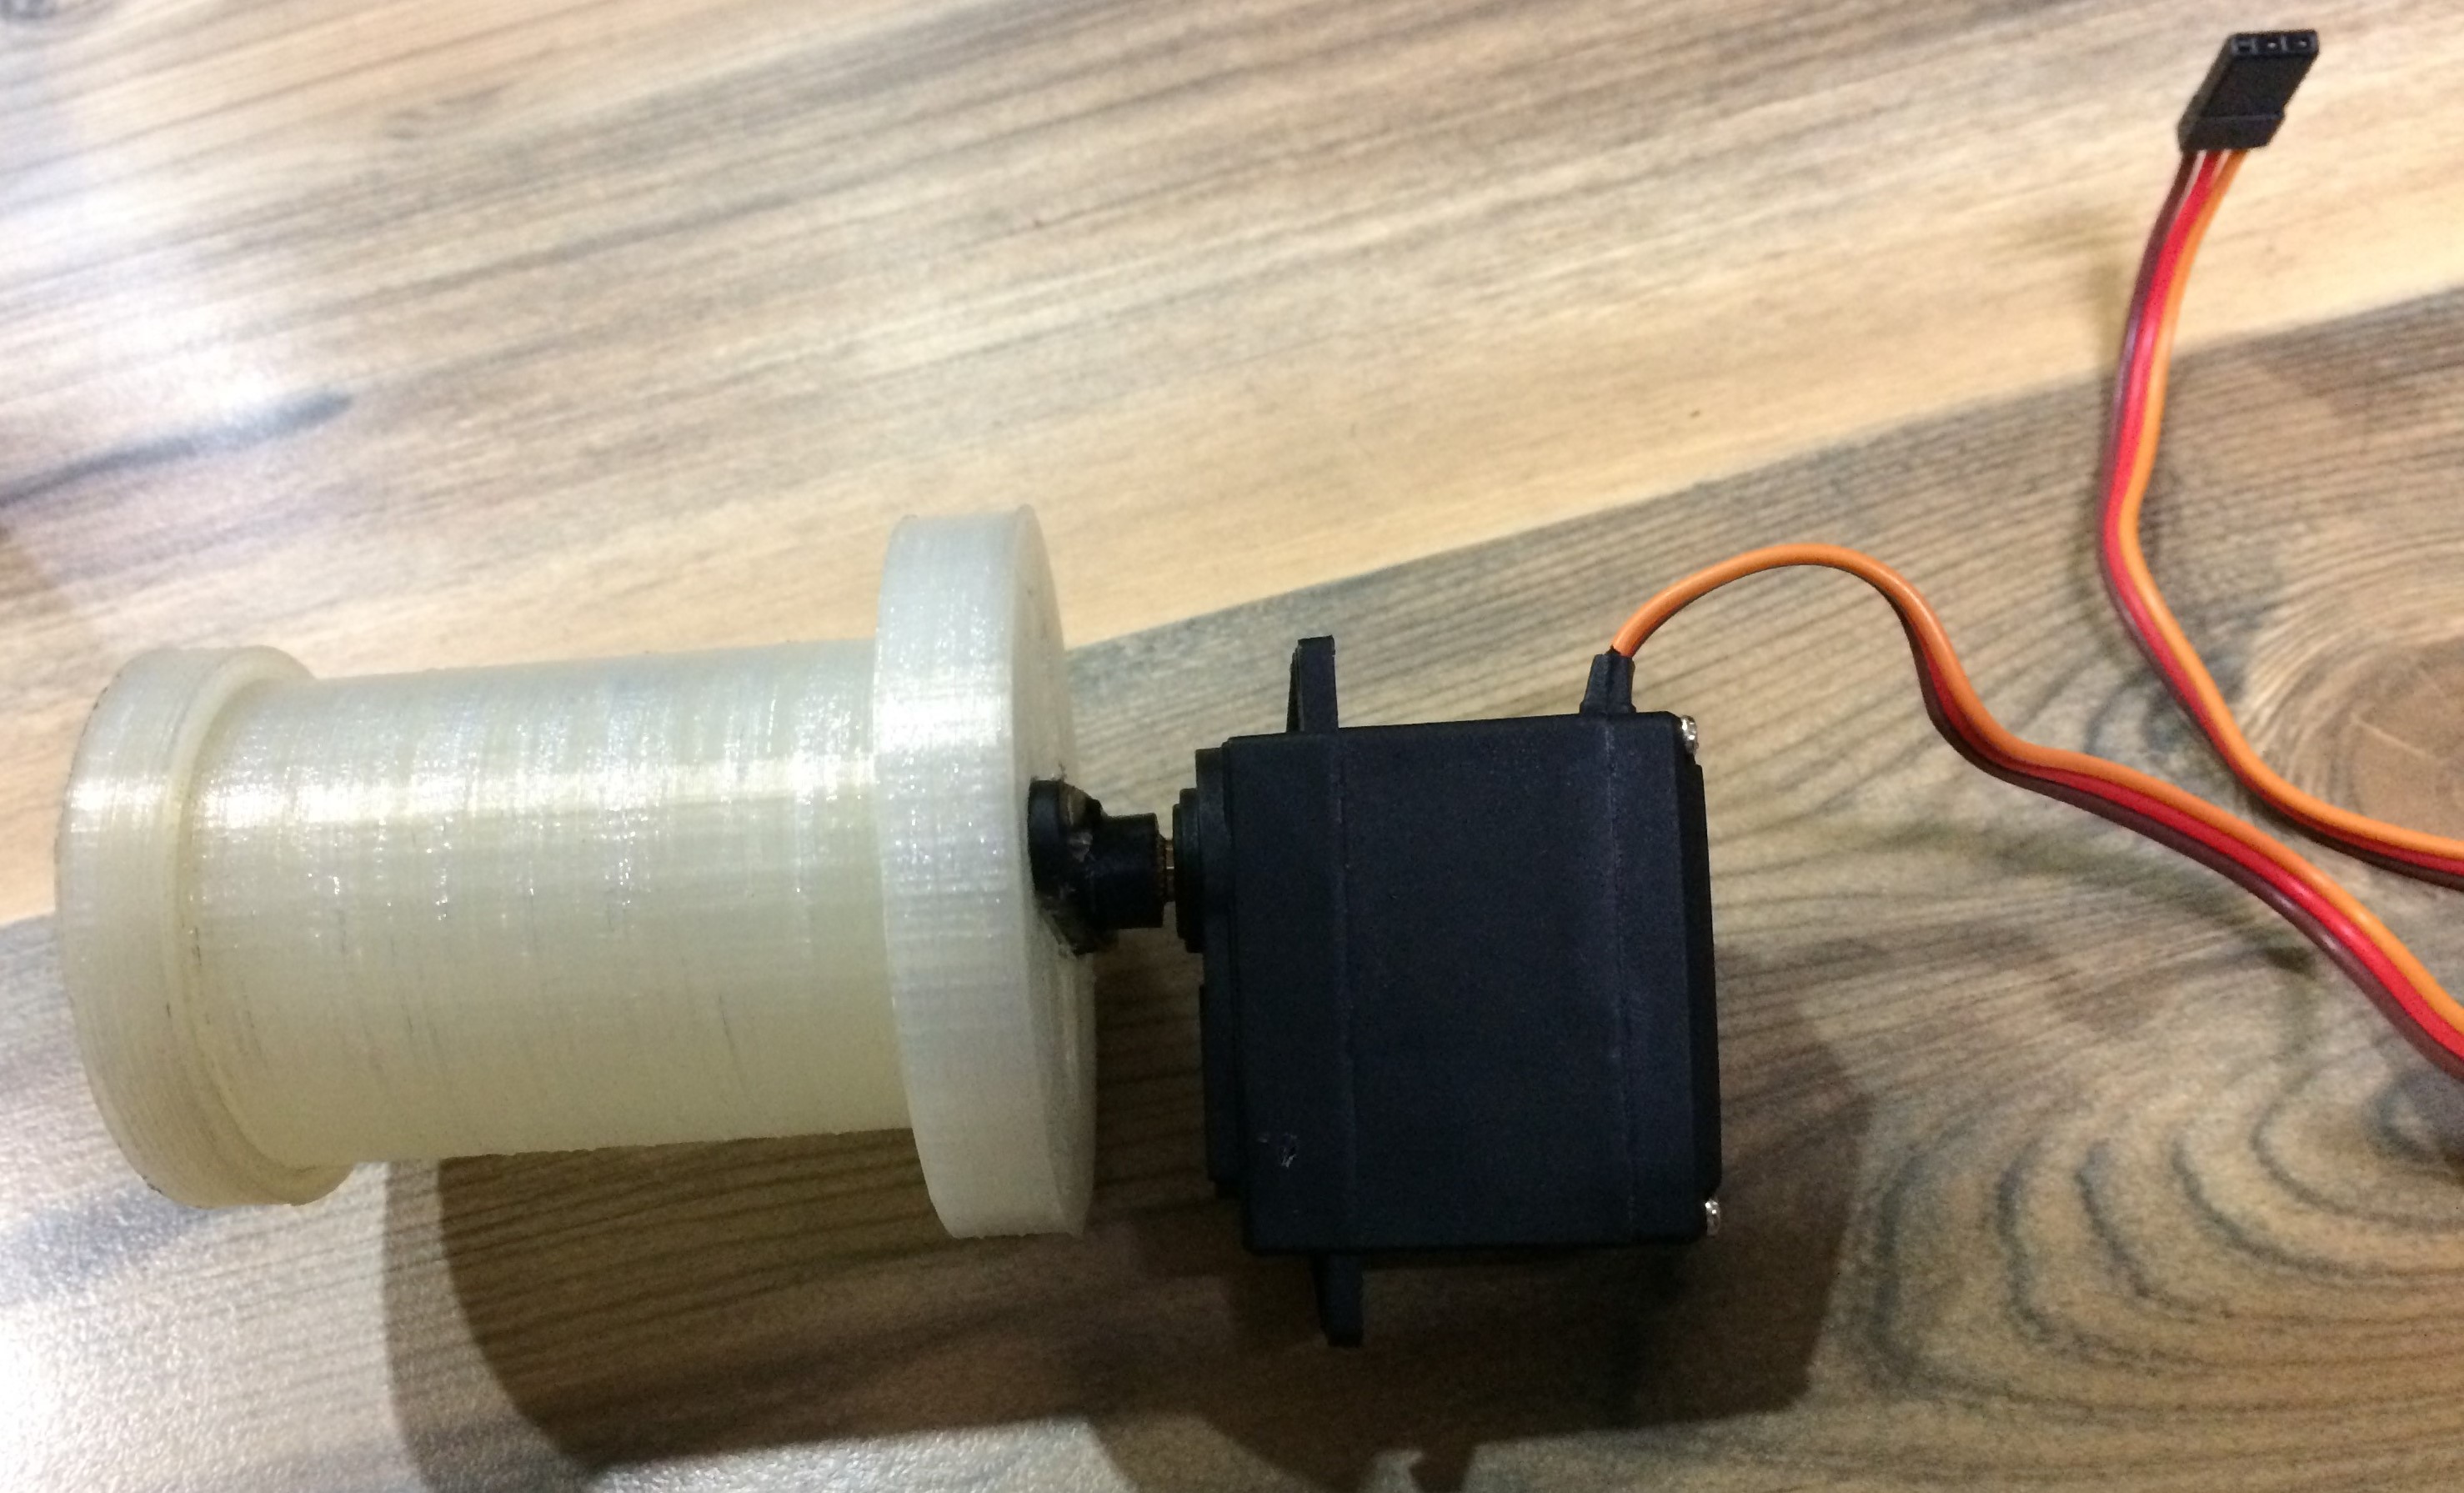
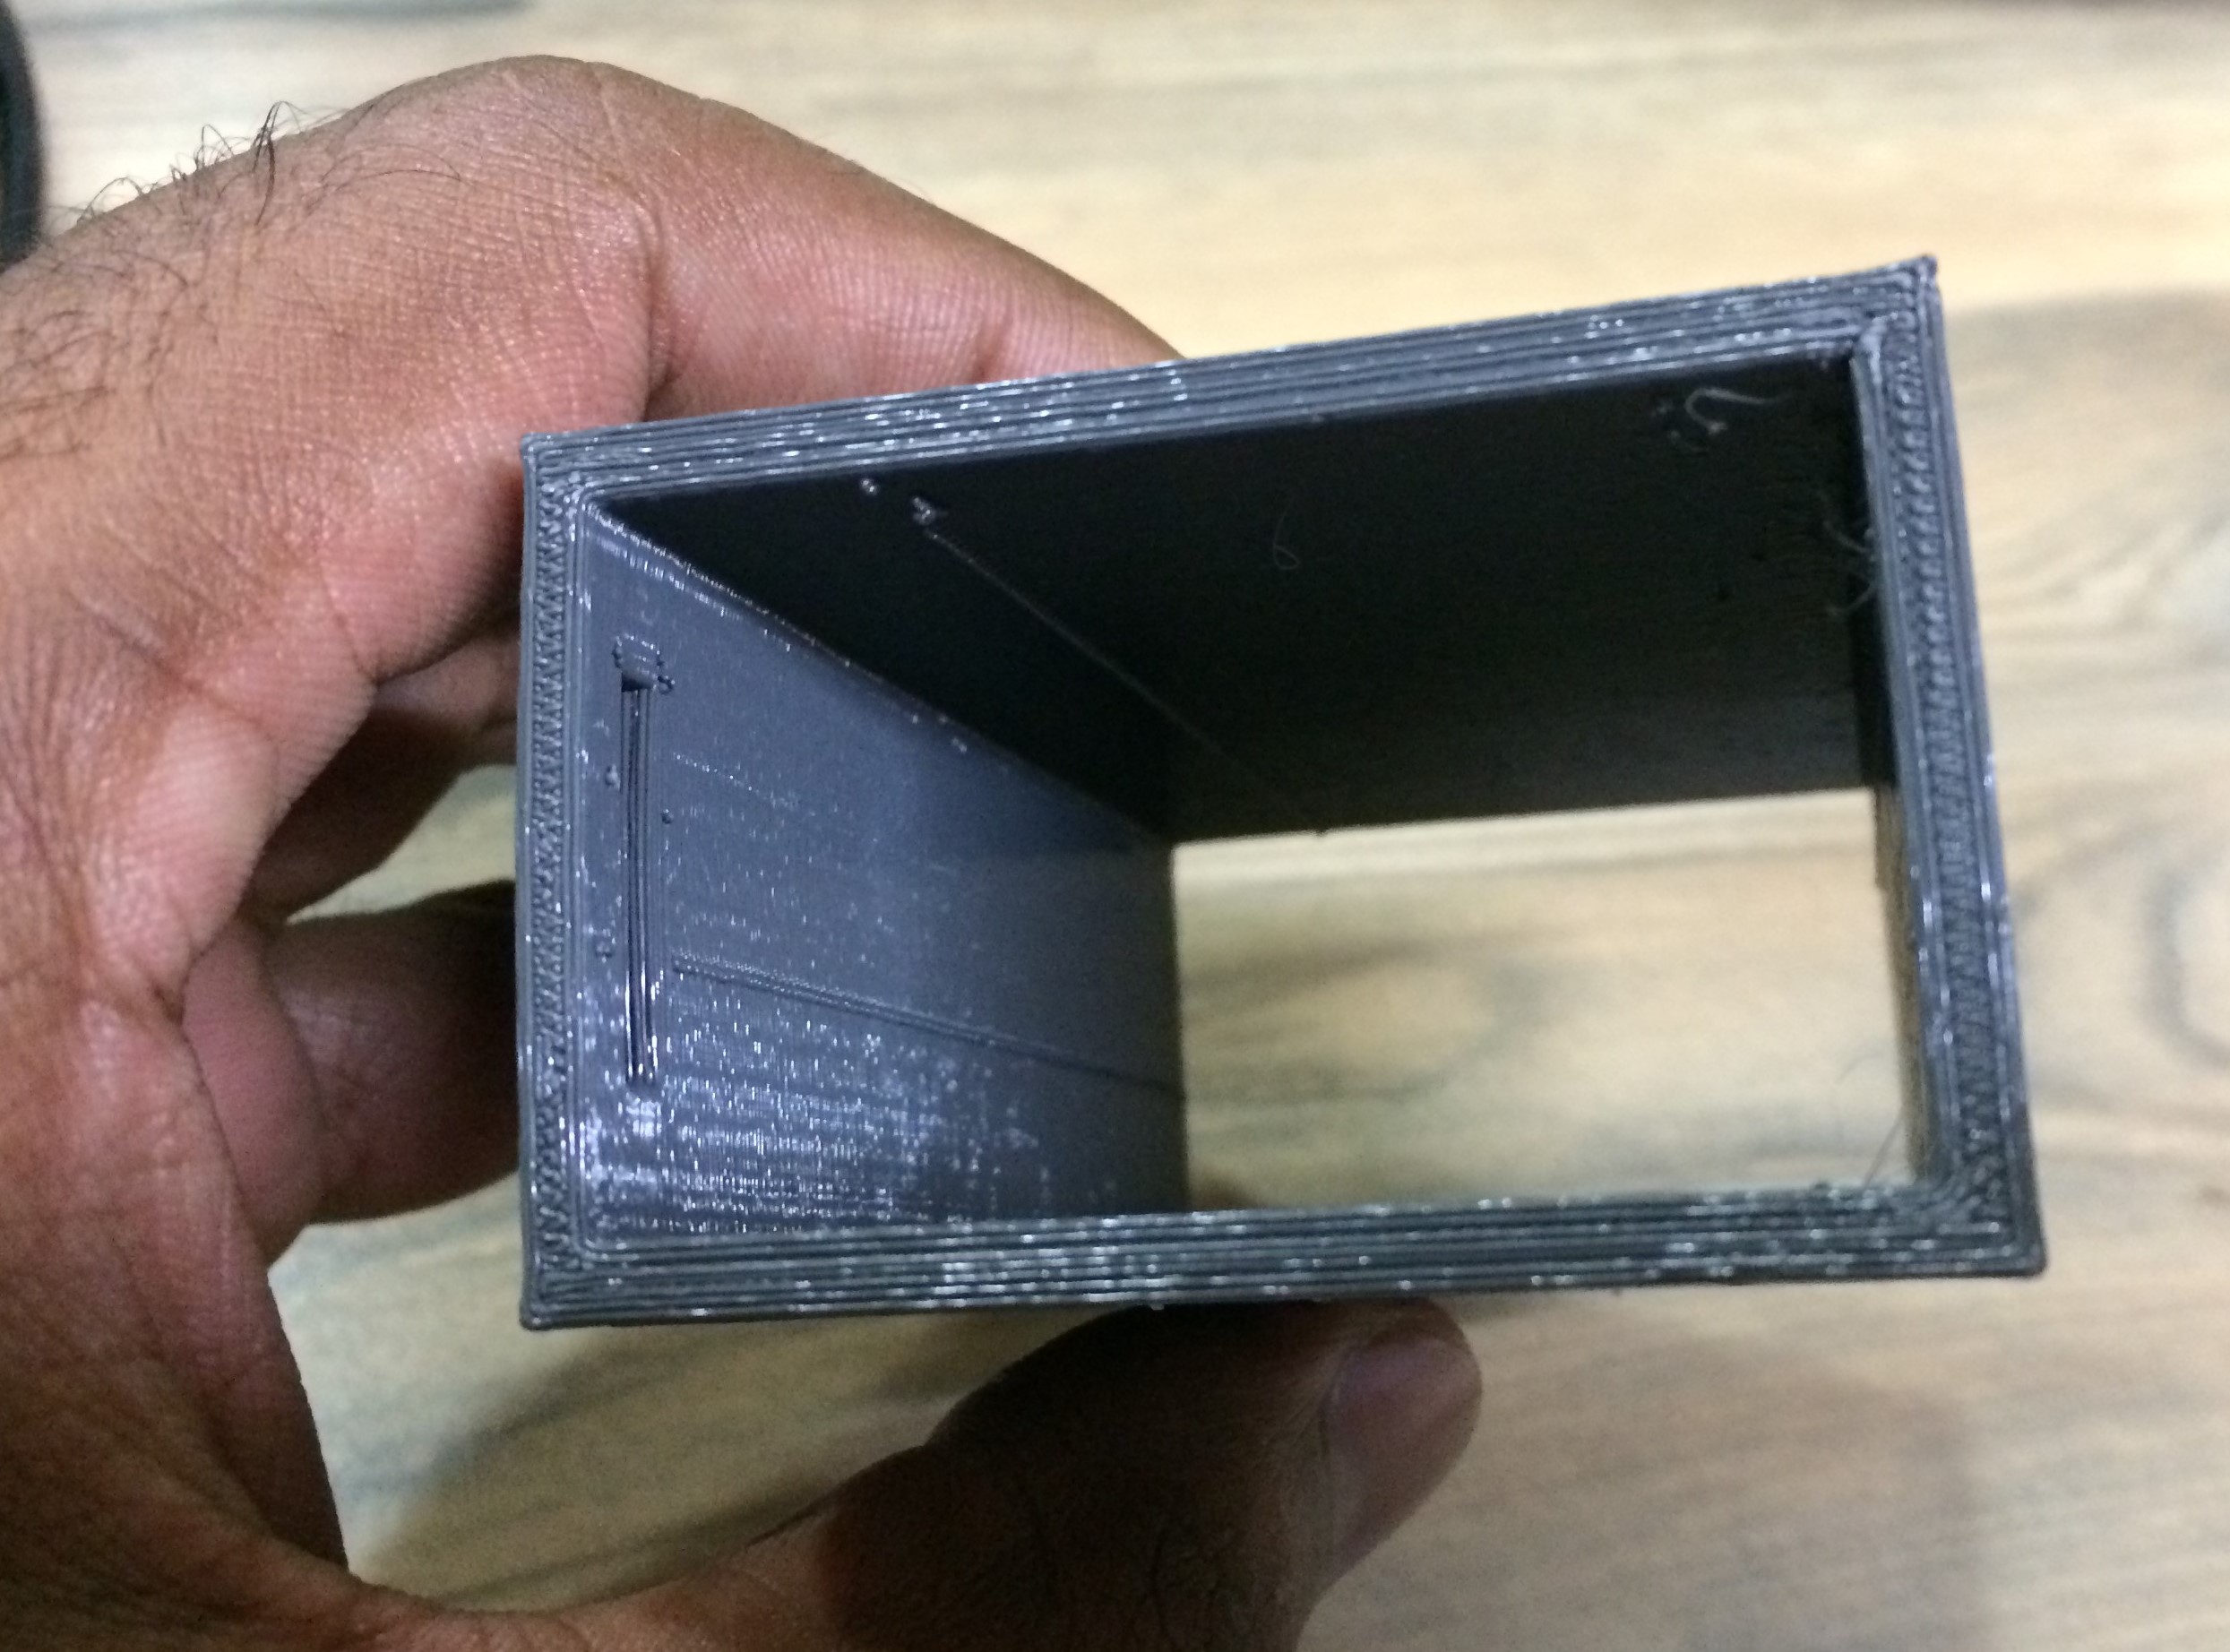
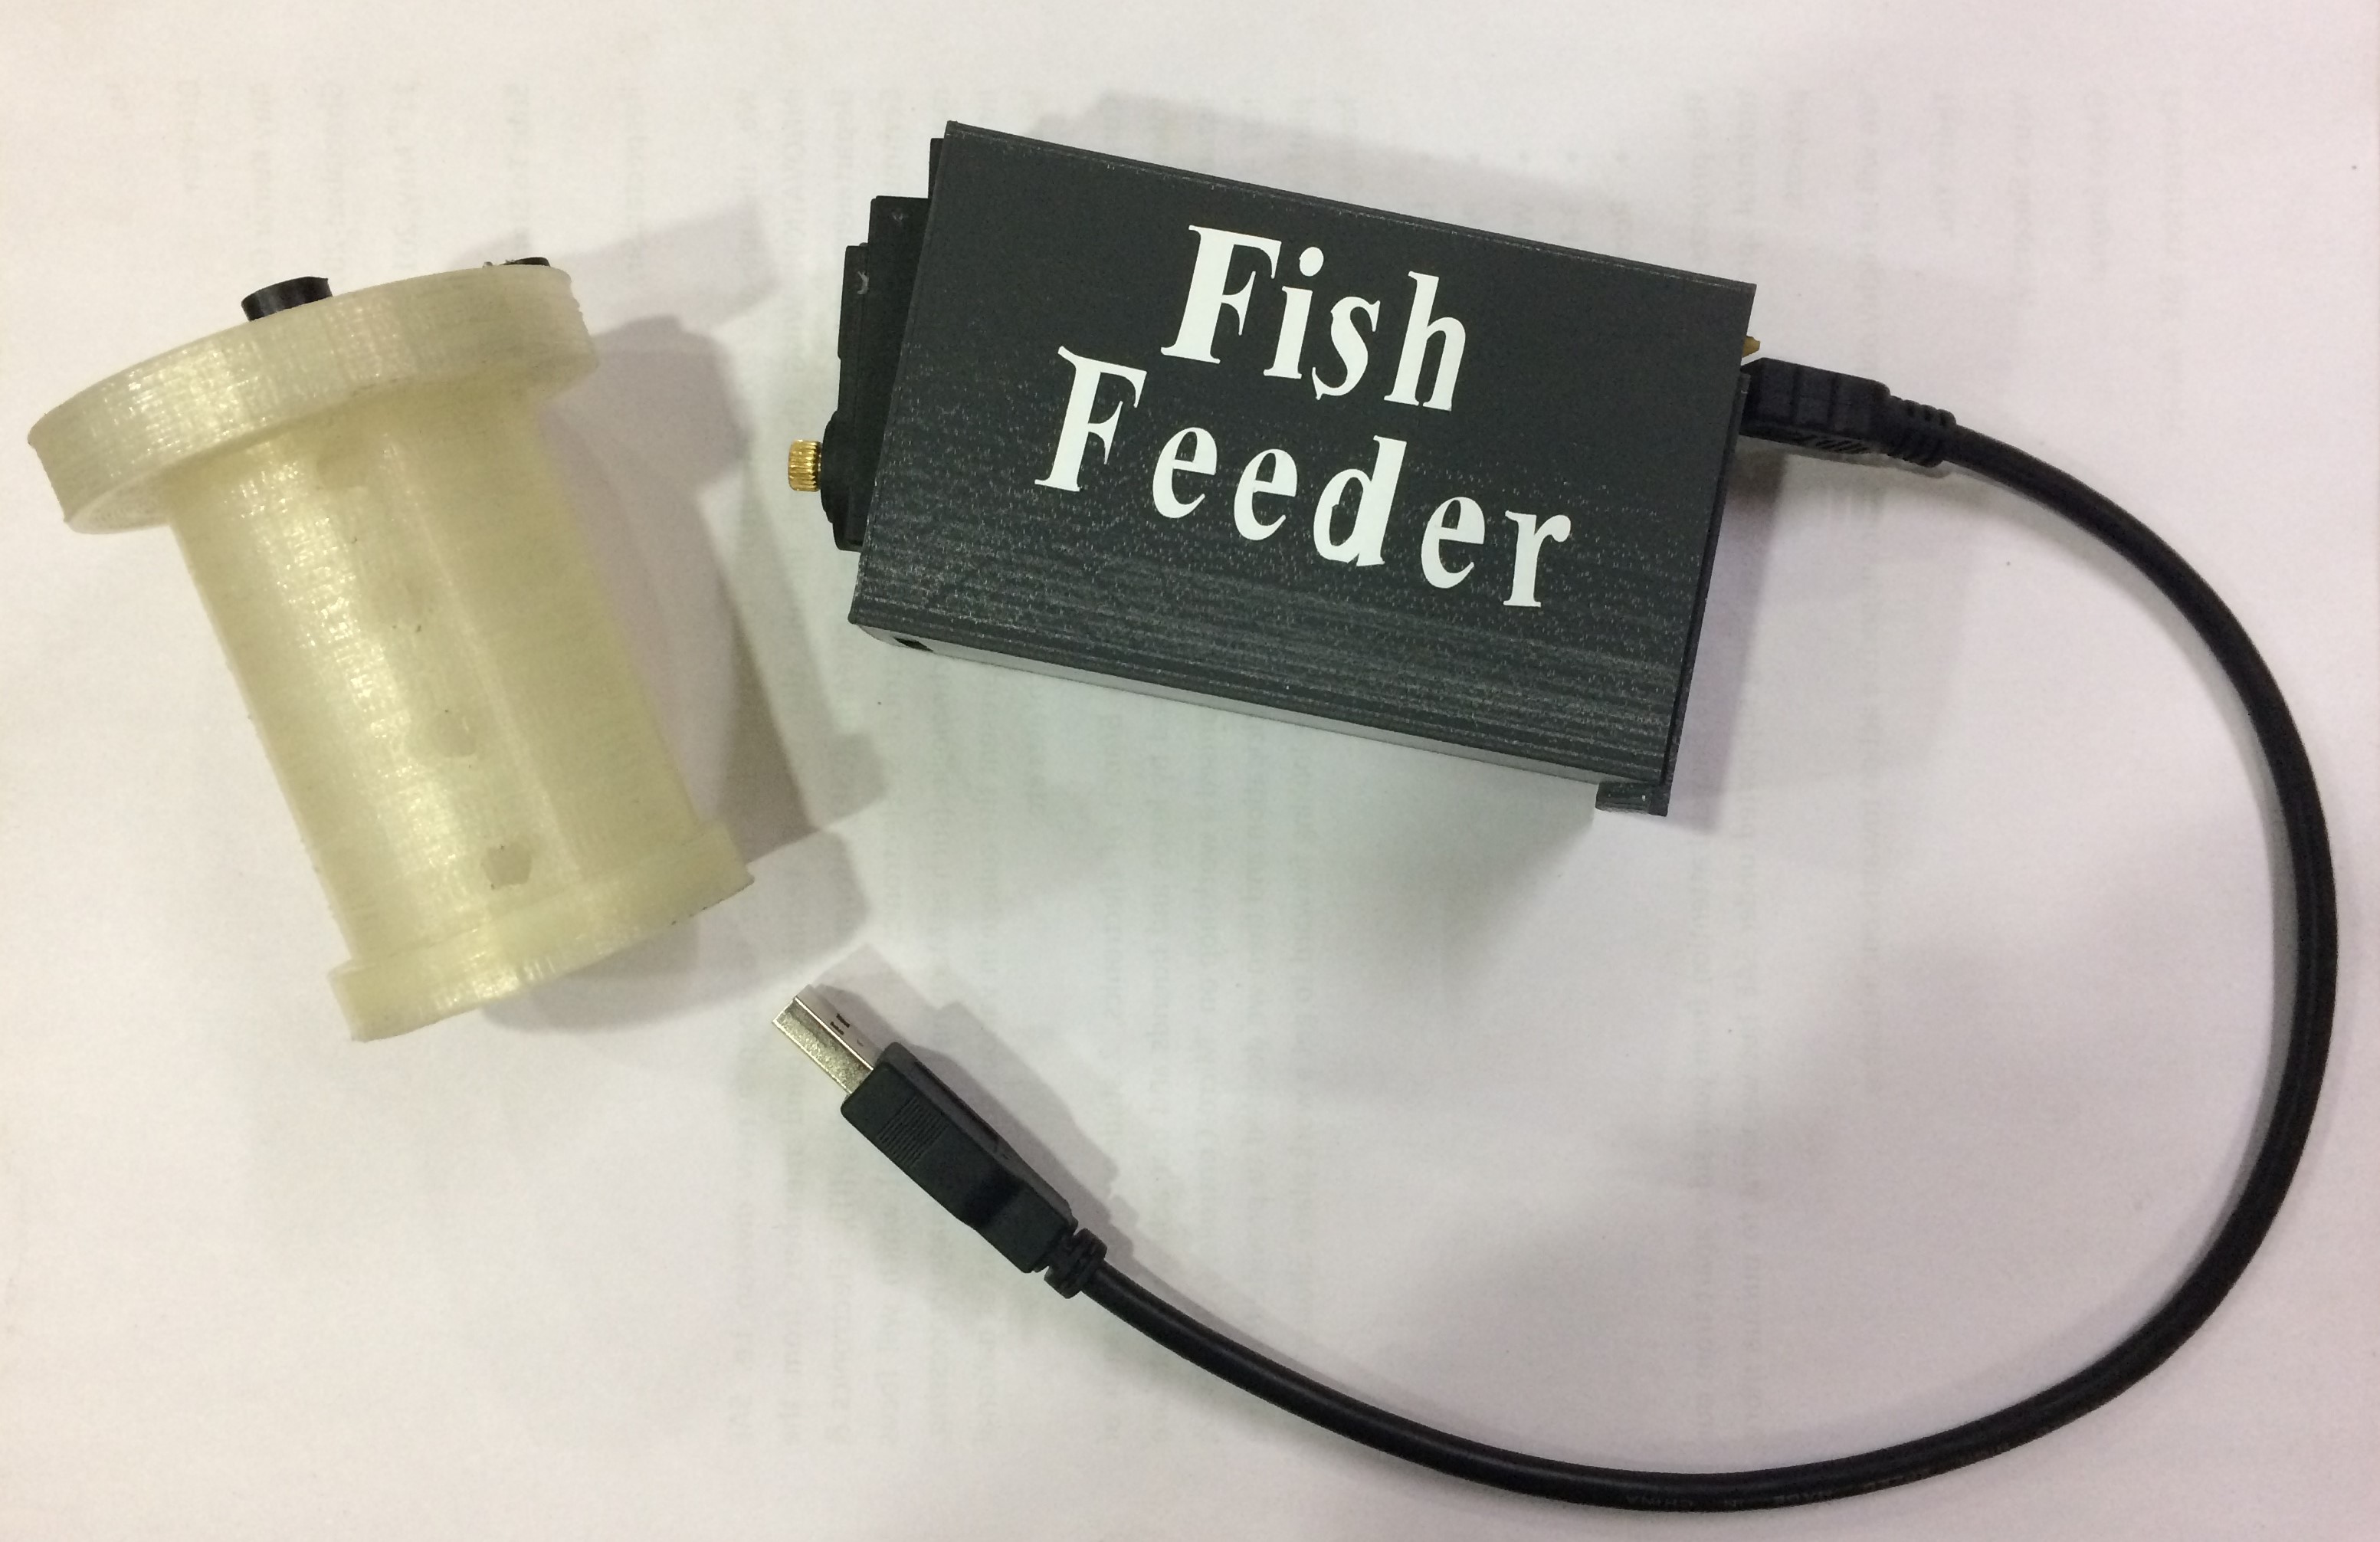
A casing is designed and printed to fit motor and all the electronics into it, as shown below. A slot is provided in the casing to fix motor into it and keep it on place.
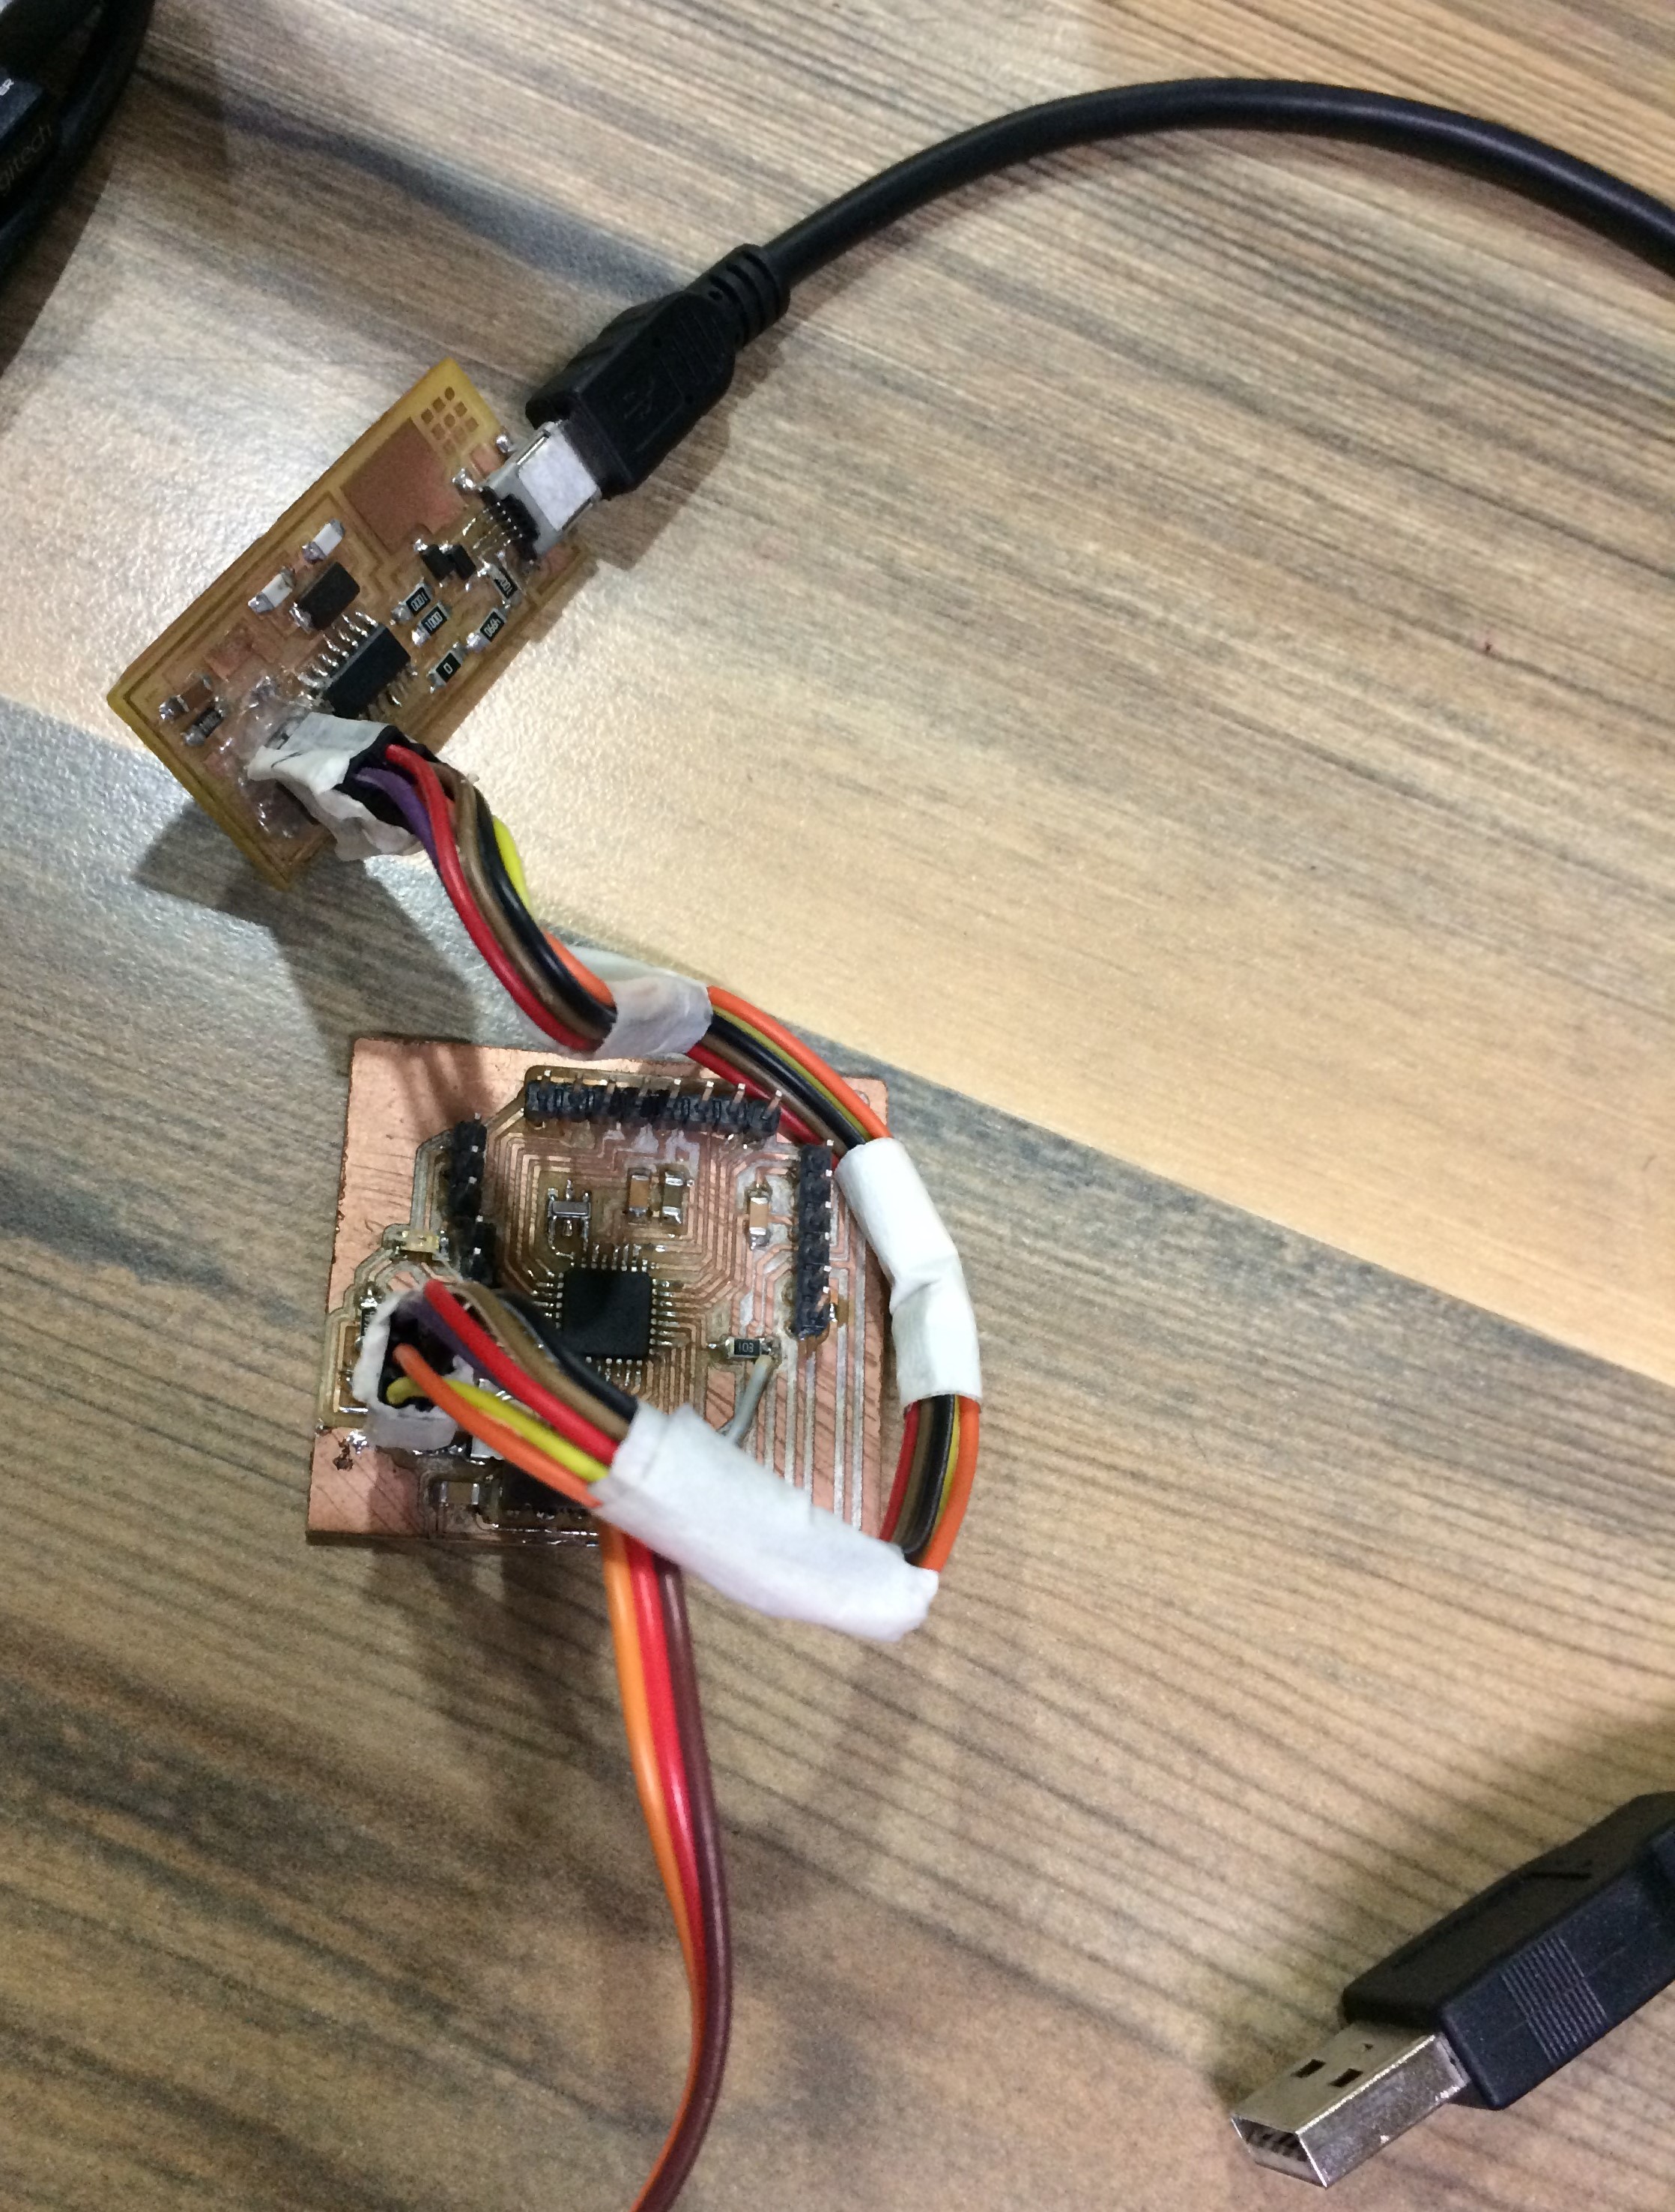
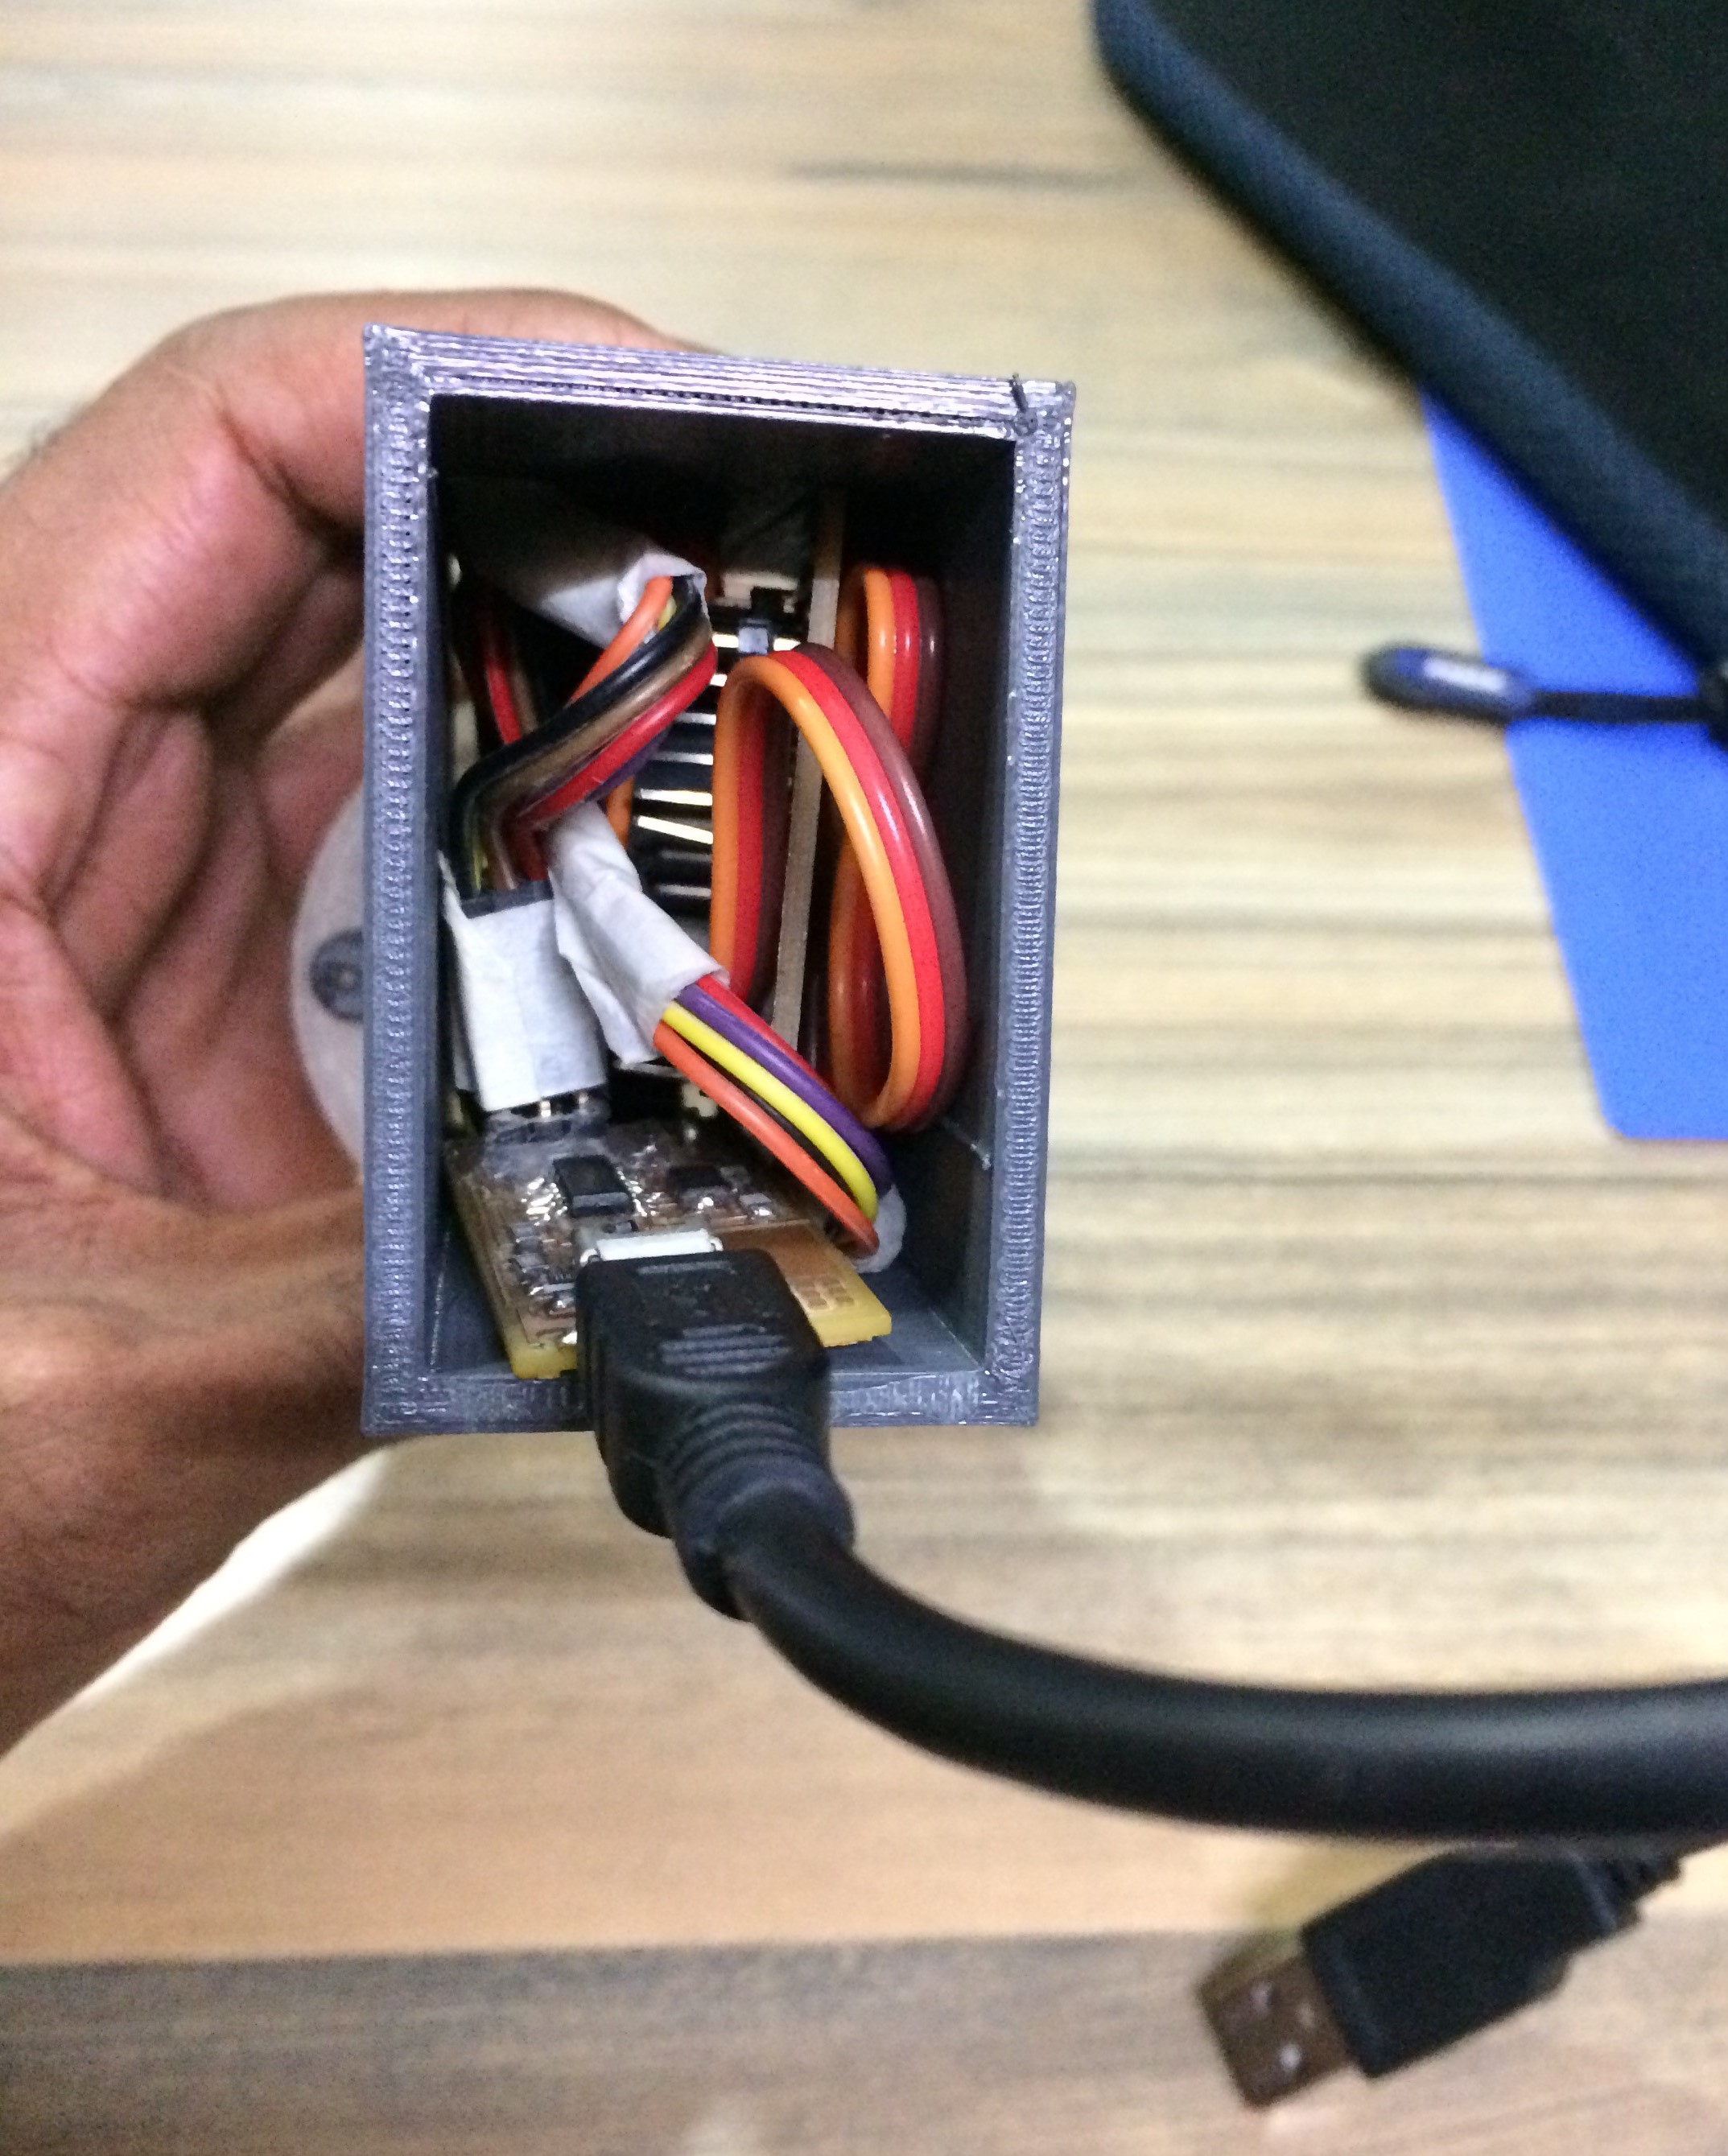
The electronics of this project include two Printed Circuit Board, both the boards are fixed on the walls of the casing using glue. The wiring is fixed together using doctors tape and properly put inside the casing, as shown below.
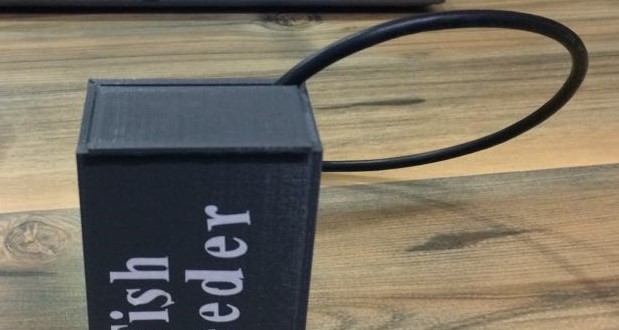
After packing all the stuff inside the box, it is been closed using a plate and the final product looks as follow.
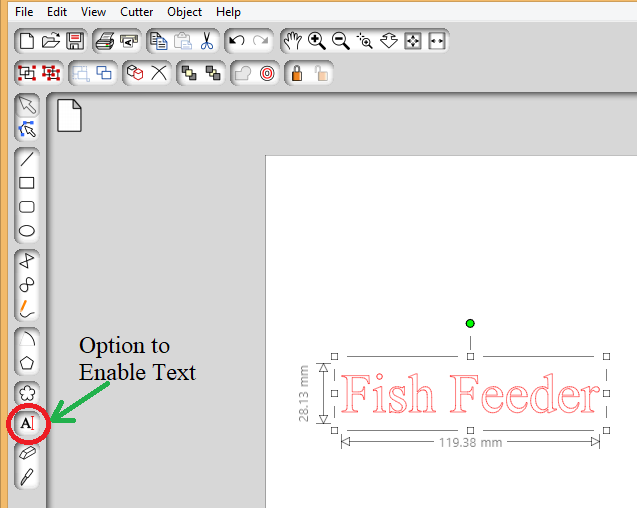
Initially I used a cardboard box and covered it with white vinyl sheet, as shown in presentation video. Afterwards my local instructor asked me to make something solid, so made a lasercut box, that's why Lasercutting is mentioned as one of the process in presentation slide. But, after my final project presentation Neil asked me to make the packaging a bit fancy. Therefore, finally I designed and made a 3D printed box.
Project Developement
What is the deadline? How much time do I have left?
My project has a working model for now. I can dedicate a week for improvment now.
What task have to be completed? What tasks remain?
3D Design, 3D printing and electronics are completed.
Working of project ensured
Have to add production value to the system.
How will I complete the remaining tasks in time?
I need a thin walled component for enclosing the electronics which is complex for a molding and casting process and I suspect I can't remove air bubbles. I can 3d print it and there's enough time.
What has worked? What hasnt?
All system have worked fine
What questions still need to be resolved?
How to make it look more appealing
By adding a camera to the system, which can give live feed of the aquarium. It can be made more appealing.
How to better productize.
Learnings
I need to stop relying on shortcuts. Need to improve time management and not think everything will work out in short time and stop assuming things will work out and put more effort in exploring how to make things work.
