
Interface & Application Programming
Week 16: Assignment
The assignment for this week is to write an application that interfaces with an input &/or output device that I made and compare as many tool options as possible.
My Approach
- I will be using LabVIEW to make an application that will interface with my input board made in Input devices week and will display the Output from IR sensor on the GUI.
- Next Will be using processing platform to blink the led of the Bridge board developed in Networking and Communication's week.
- Lastely will be using python to display the output from IR sensor on the GUI.
LabView
Laboratory Virtual Instrument Engineering Workbench (LabVIEW) is a system-design platform and development environment for a visual programming language from National Instruments. The graphical language is named "G"; not to be confused with G-code. Originally released for the Apple Macintosh in 1986, LabVIEW is commonly used for data acquisition, instrument control, and industrial automation on a variety of operating systems (OSs), including Microsoft Windows, various versions of Unix, Linux, and macOS.
Steps
- Download the evaluation version of LabVIEW.
- Download NI- VISA driver.
NI-VISA is a software API that greatly reduces the development time of test and measurement systems. It gives developers the ability to easily create code to communicate with any instrument, over any bus, on most operating systems in use today. It also allows the generation of code that can be moved from one platform to another or from one bus type to another with little or no overhead in the change. This opens the door for creating hybrid systems that make the best and most cost effective use of multiple bus types all used in one test system. To know in depth about National Instruments followTutorial on NI-VISA.
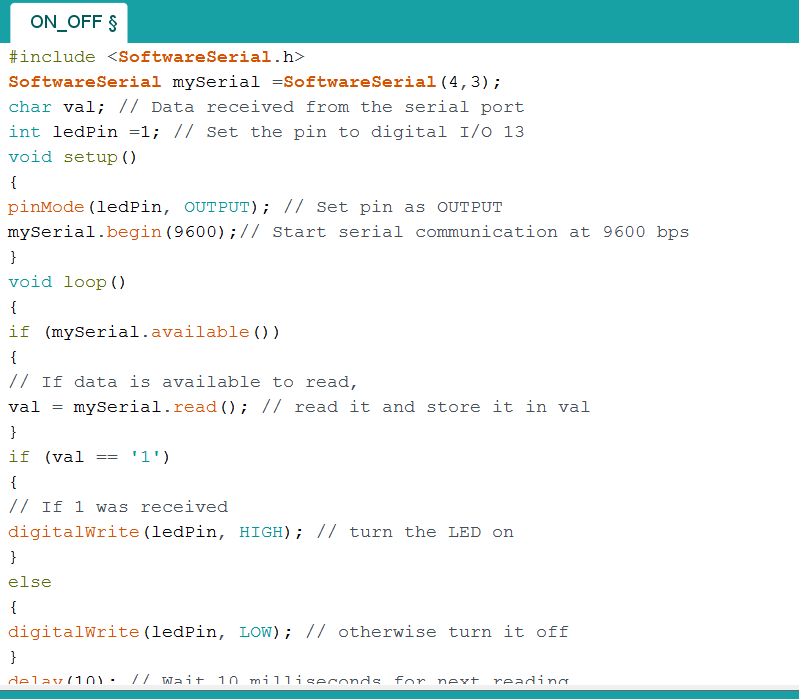
- Burned the following code into my board and checked the output on serial monitor of the arduino, as shown below:
#include
 const byte rxPin = 4;
 const byte txPin= 3;
 SoftwareSerial mySerial =  SoftwareSerial(rxPin, txPin);

void setup() {

  pinMode(rxPin, INPUT);
  pinMode(txPin, OUTPUT);

  mySerial.begin(9600);
}

// the loop function runs over and over again forever

void loop() {

//listen to serial port
if (mySerial.read()=='1')
{
  mySerial.println("one");
  delay(1000);

}
else
 {
 mySerial.println("zero");
  delay(1000);
 }
  }

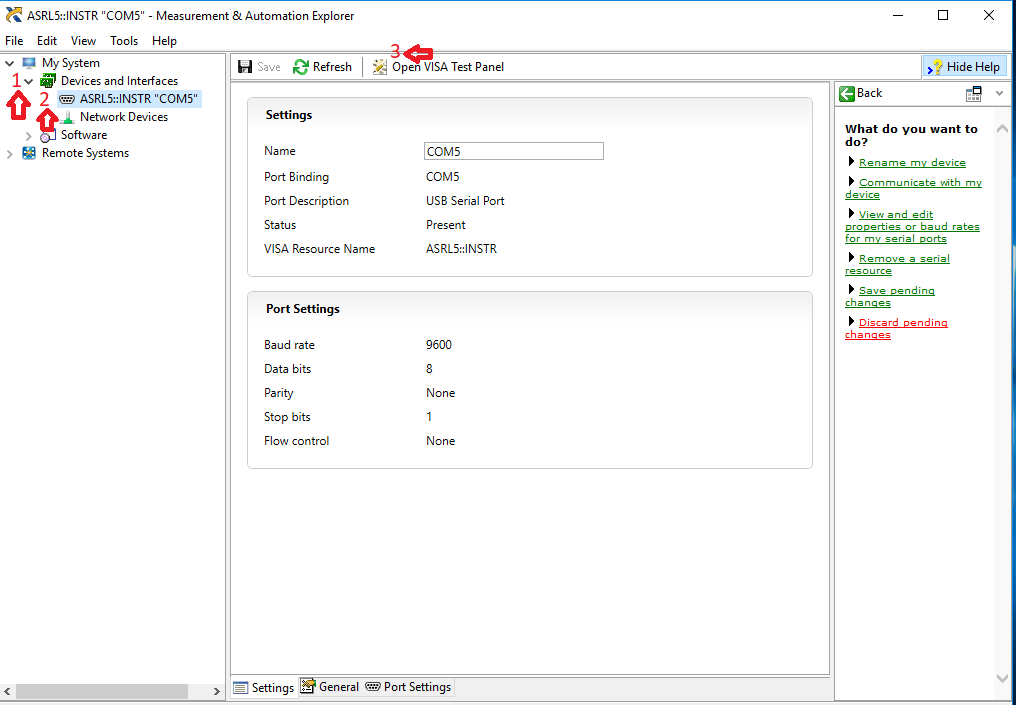
- Now to check, wheather my board is detected by Labview or not we can use NIMax Software. Therefore, I connected my board to a desktop and opened NIMax, after opening followed the following steps (as shown in figure):
- Devices and Interfaces.
- Network Devices.
- Open Visa Test Panel.
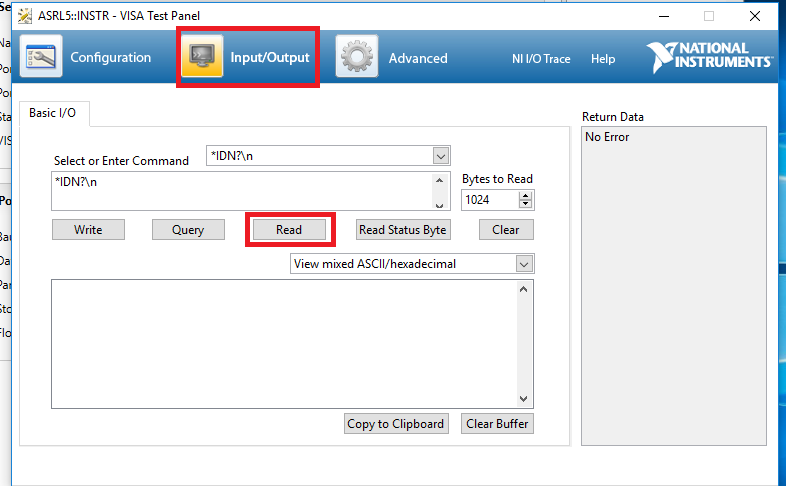
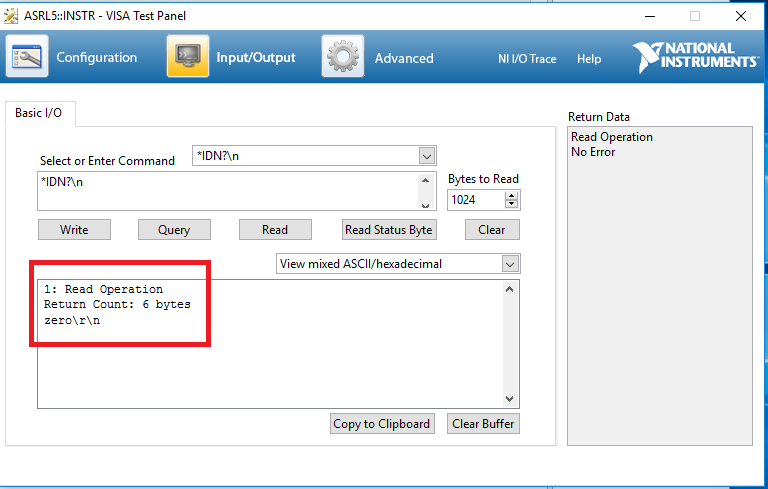
- After opening the Visa Test Panel, following window will be opened. Clicked Input/Output option and then read, If board is connected properly, output will be shown (as shown in figure). This activity will confirm, that my board is detected by LabView successfully.
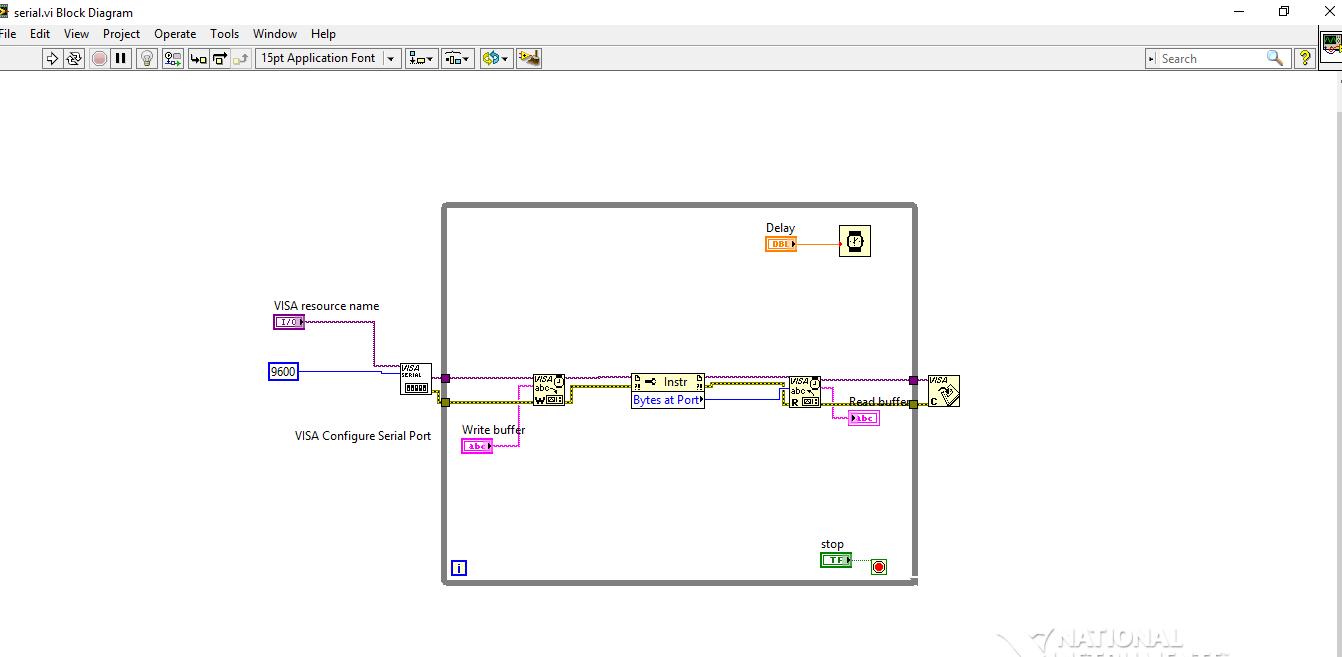
- Developing GUI:
After installing labVIEW, open a new VI. Now in LabVIEW you have to just pick and place all the icons from library to make a block diagram. Procedure to take icons from library are discussed below. We just have to place the blocks one by one and make a block diagram, after arranging them in proper sequence connect it using wires.
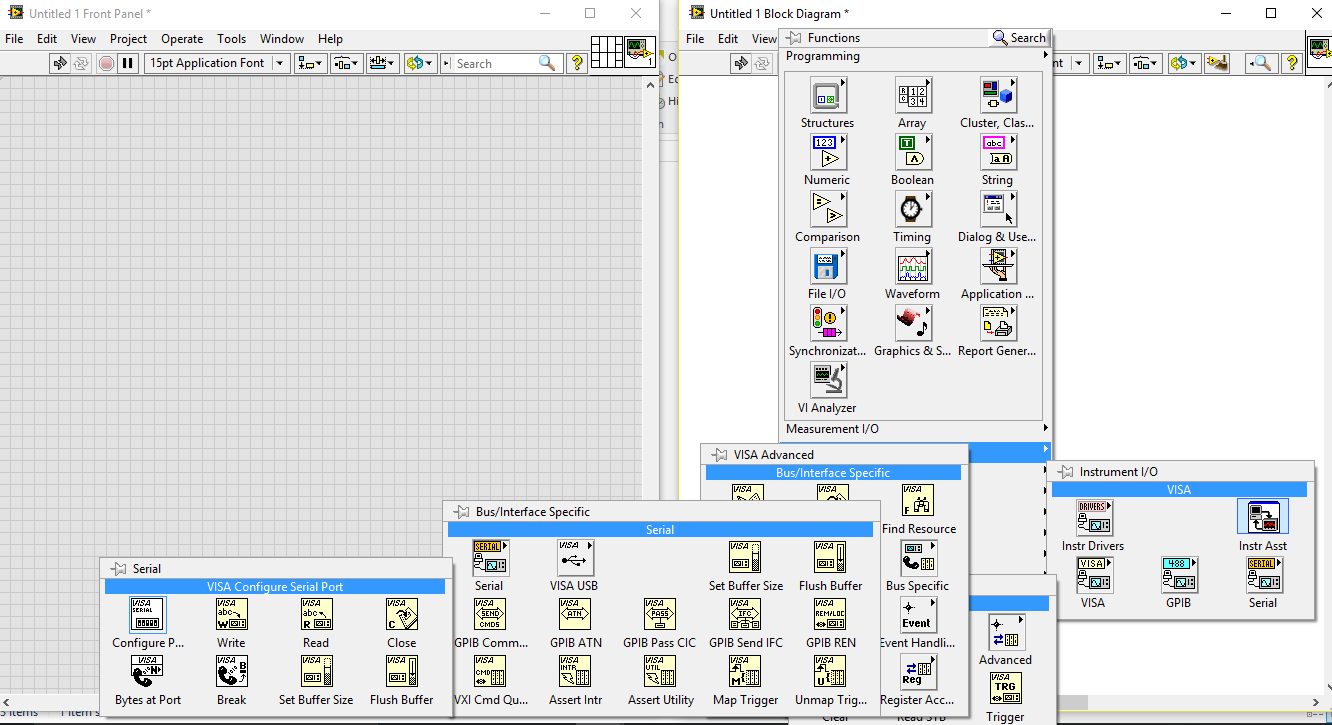
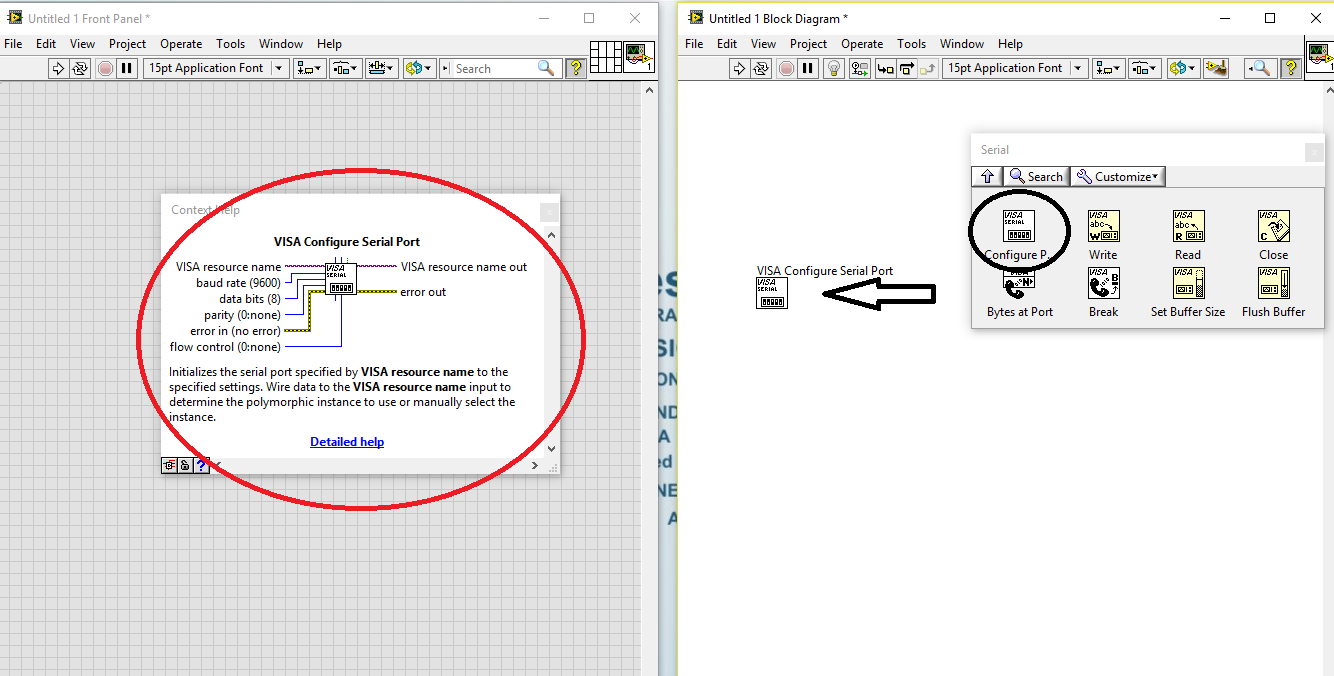
- VISA Configure Serial Port:
This icon initailzes the serial port specified by VISA resource terminal according to the settings given through its terminal.
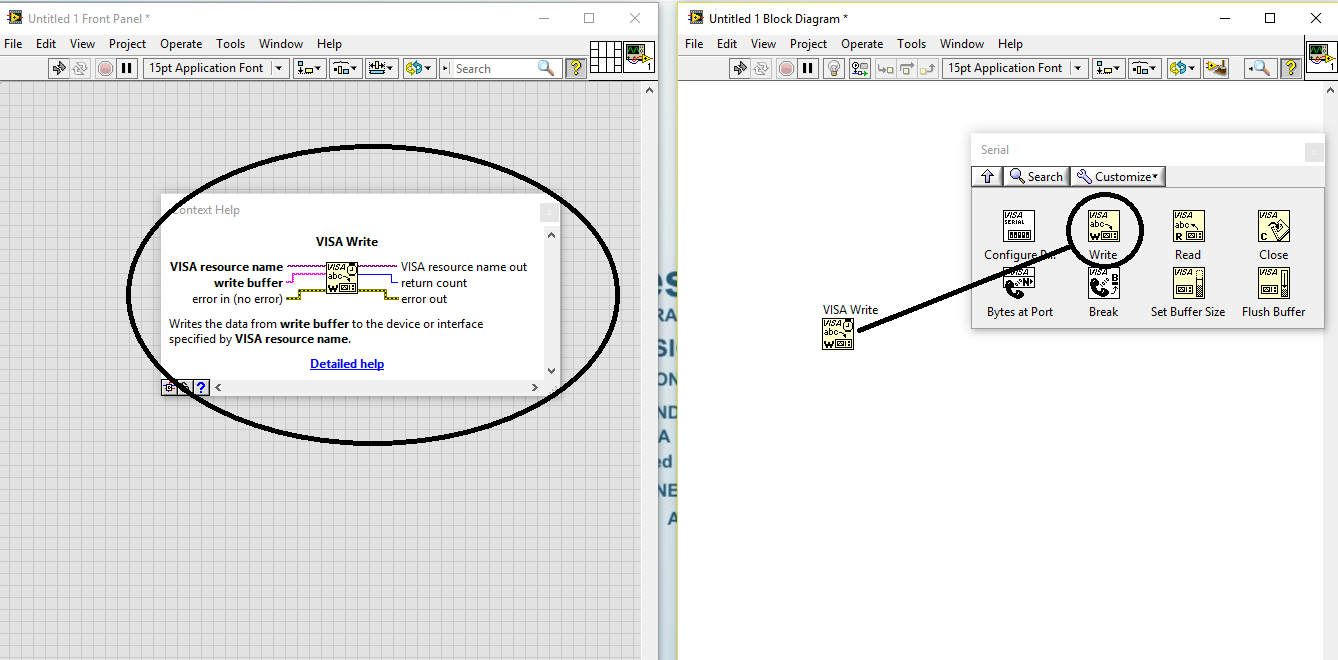
- VISA Write
This write the data from write buffer terminal.
- VISA Read
Reads the specified number of bytes from the device or interface specified by VISA.

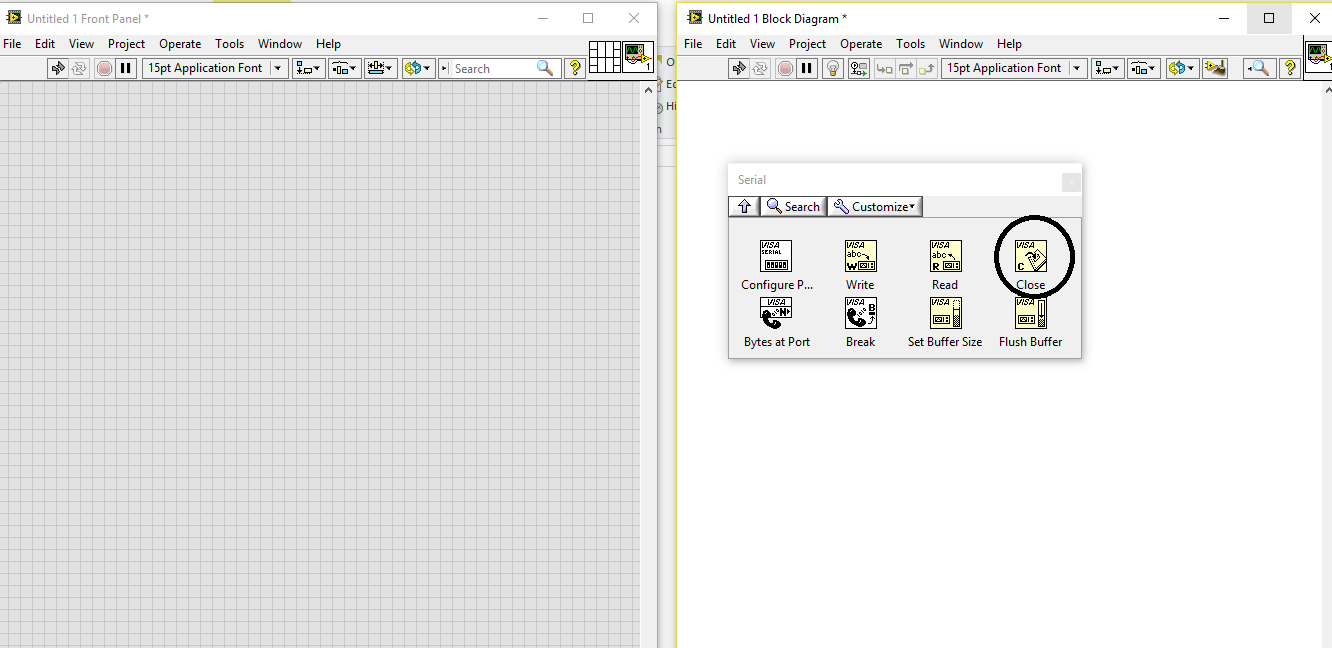
- VISA Close
Closes a device session or event object specified by VISA resource name.
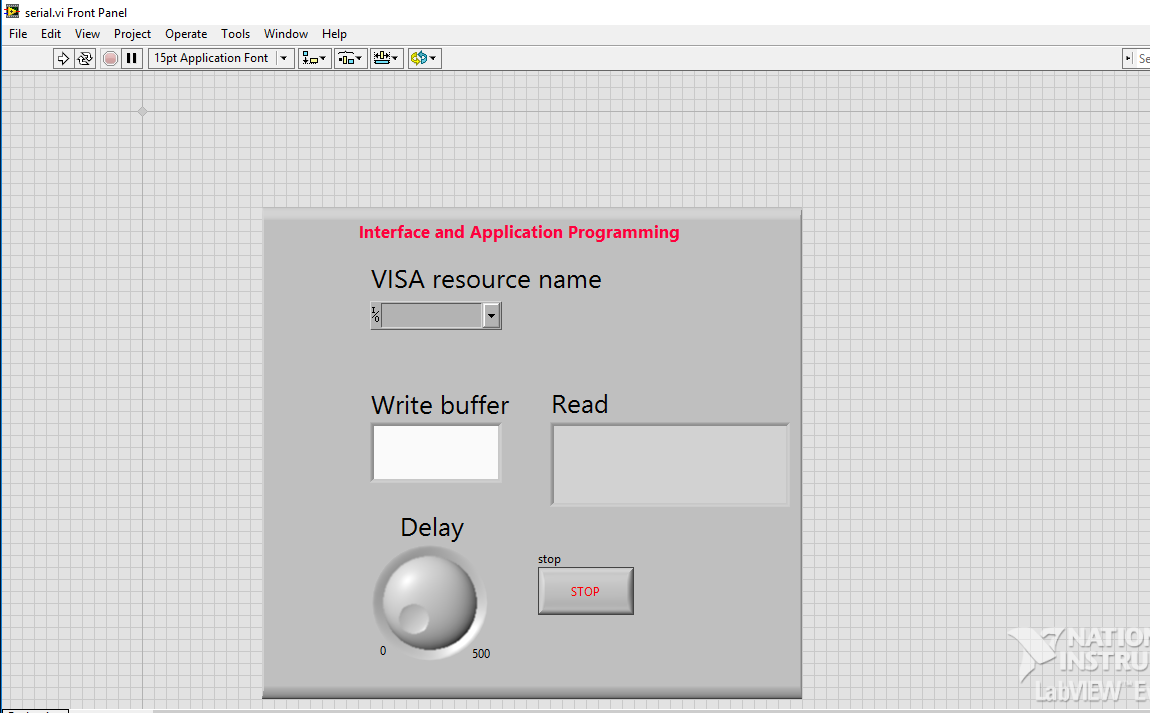
- Final GUI developed:
- Coding part of the application developed on LabVIEW platform.
#includeconst byte rxPin = 4; const byte txPin= 3; SoftwareSerial mySerial = SoftwareSerial(rxPin, txPin); void setup() { pinMode(rxPin, INPUT); pinMode(txPin, OUTPUT); mySerial.begin(9600); } // the loop function runs over and over again forever void loop() { //listen to serial port if (mySerial.read()=='1') { mySerial.println("one"); delay(1000); } else { mySerial.println("zero"); delay(1000); } }
- Devices and Interfaces.
- Network Devices.
- Open Visa Test Panel.
|
|
Working Video
Processing
Steps
- Download Processing platform.
- Go through Various tutorials and videos online to understand the basic functioning of the Processing Platform.
- Wrote one program on arduino to turn on the signal high on the led for 10 millisecond, when 1 is given as input on serial monitor.
Download arduino code.
- Burned the program in my node board developed for Networking & Communication assignment. Afterwards serial communication was checked on serial monitor and it was working fine.
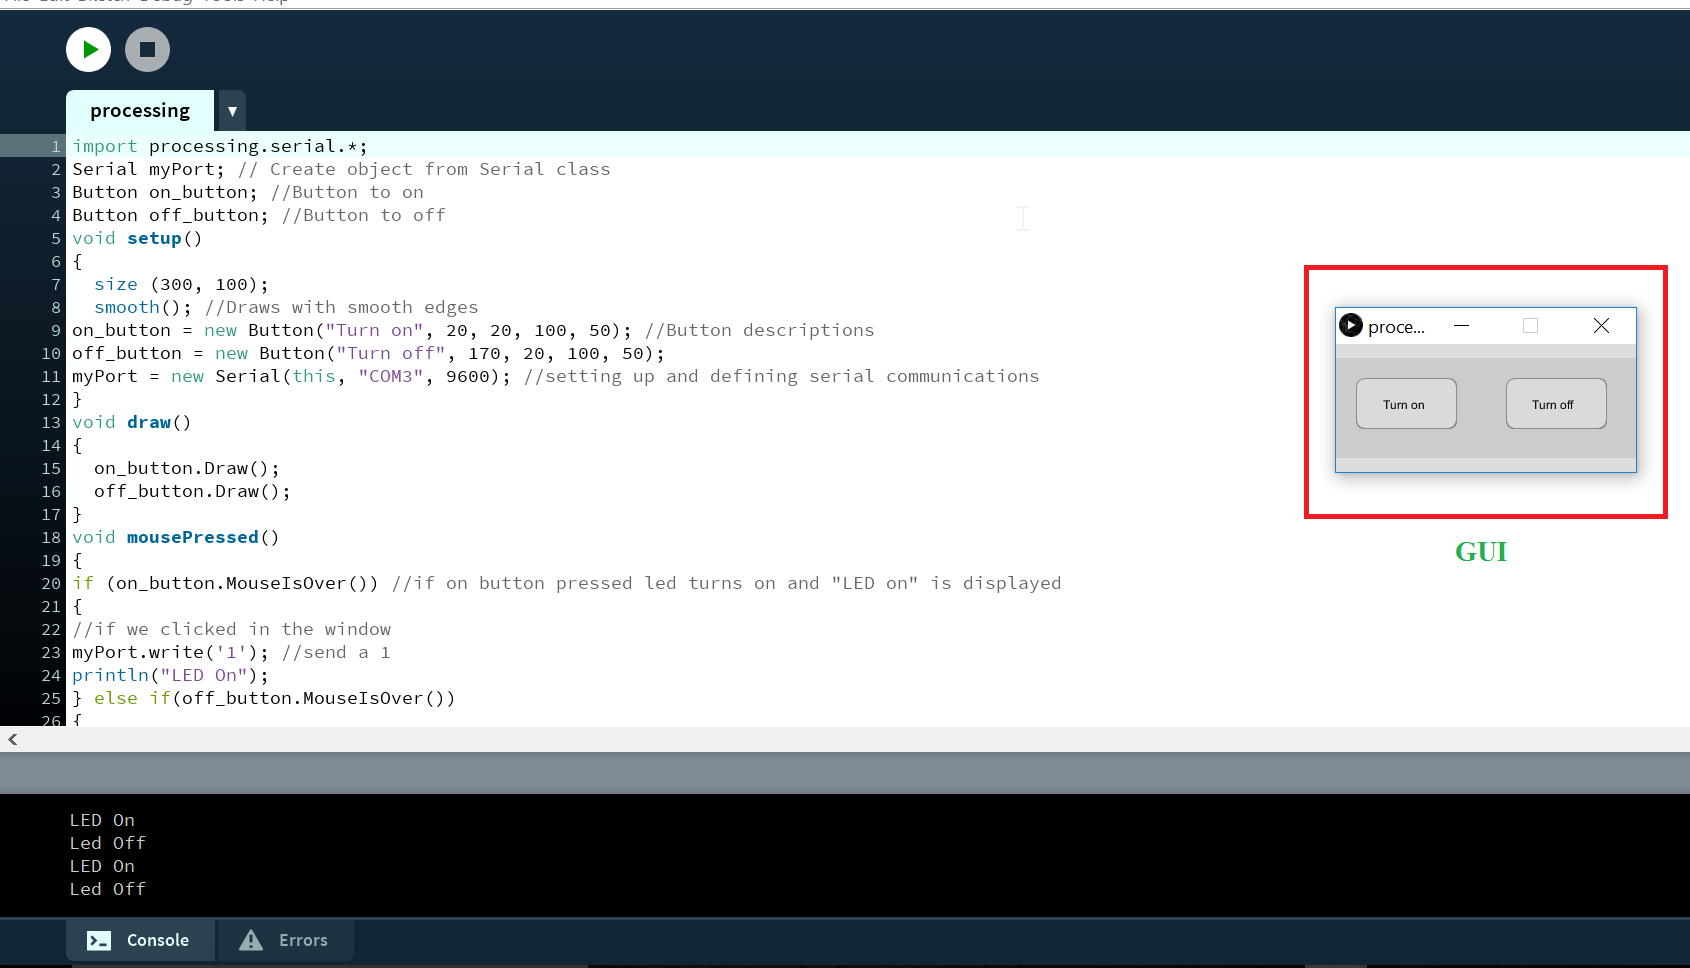
- Now to make a GUI on Processing platform and making it interact with the node board, I referred Nisha Elsa Johnson code and did some manipulations on the same as shown below.

Download arduino code.
Download processing code.
Interaction of the GUI with node board
Python
Steps
- Download Python.
- Download pip for Python. pip is a package management system used to install and manage software packages written in Python.
- Have gone through Various tutorials and videos online to understand the functioning of the Python. Following links can be referred:
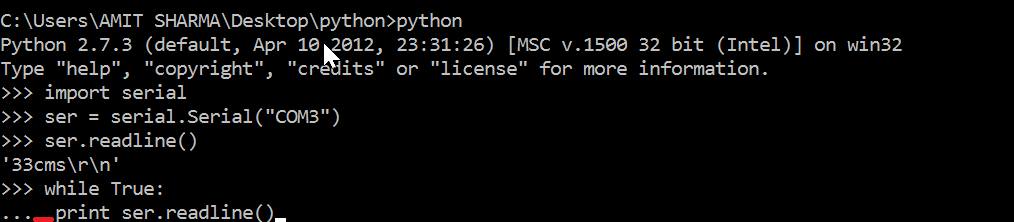
- After installing pythona and pip, Connected my board to my laptop via. USB and checked, the communication using python command line.
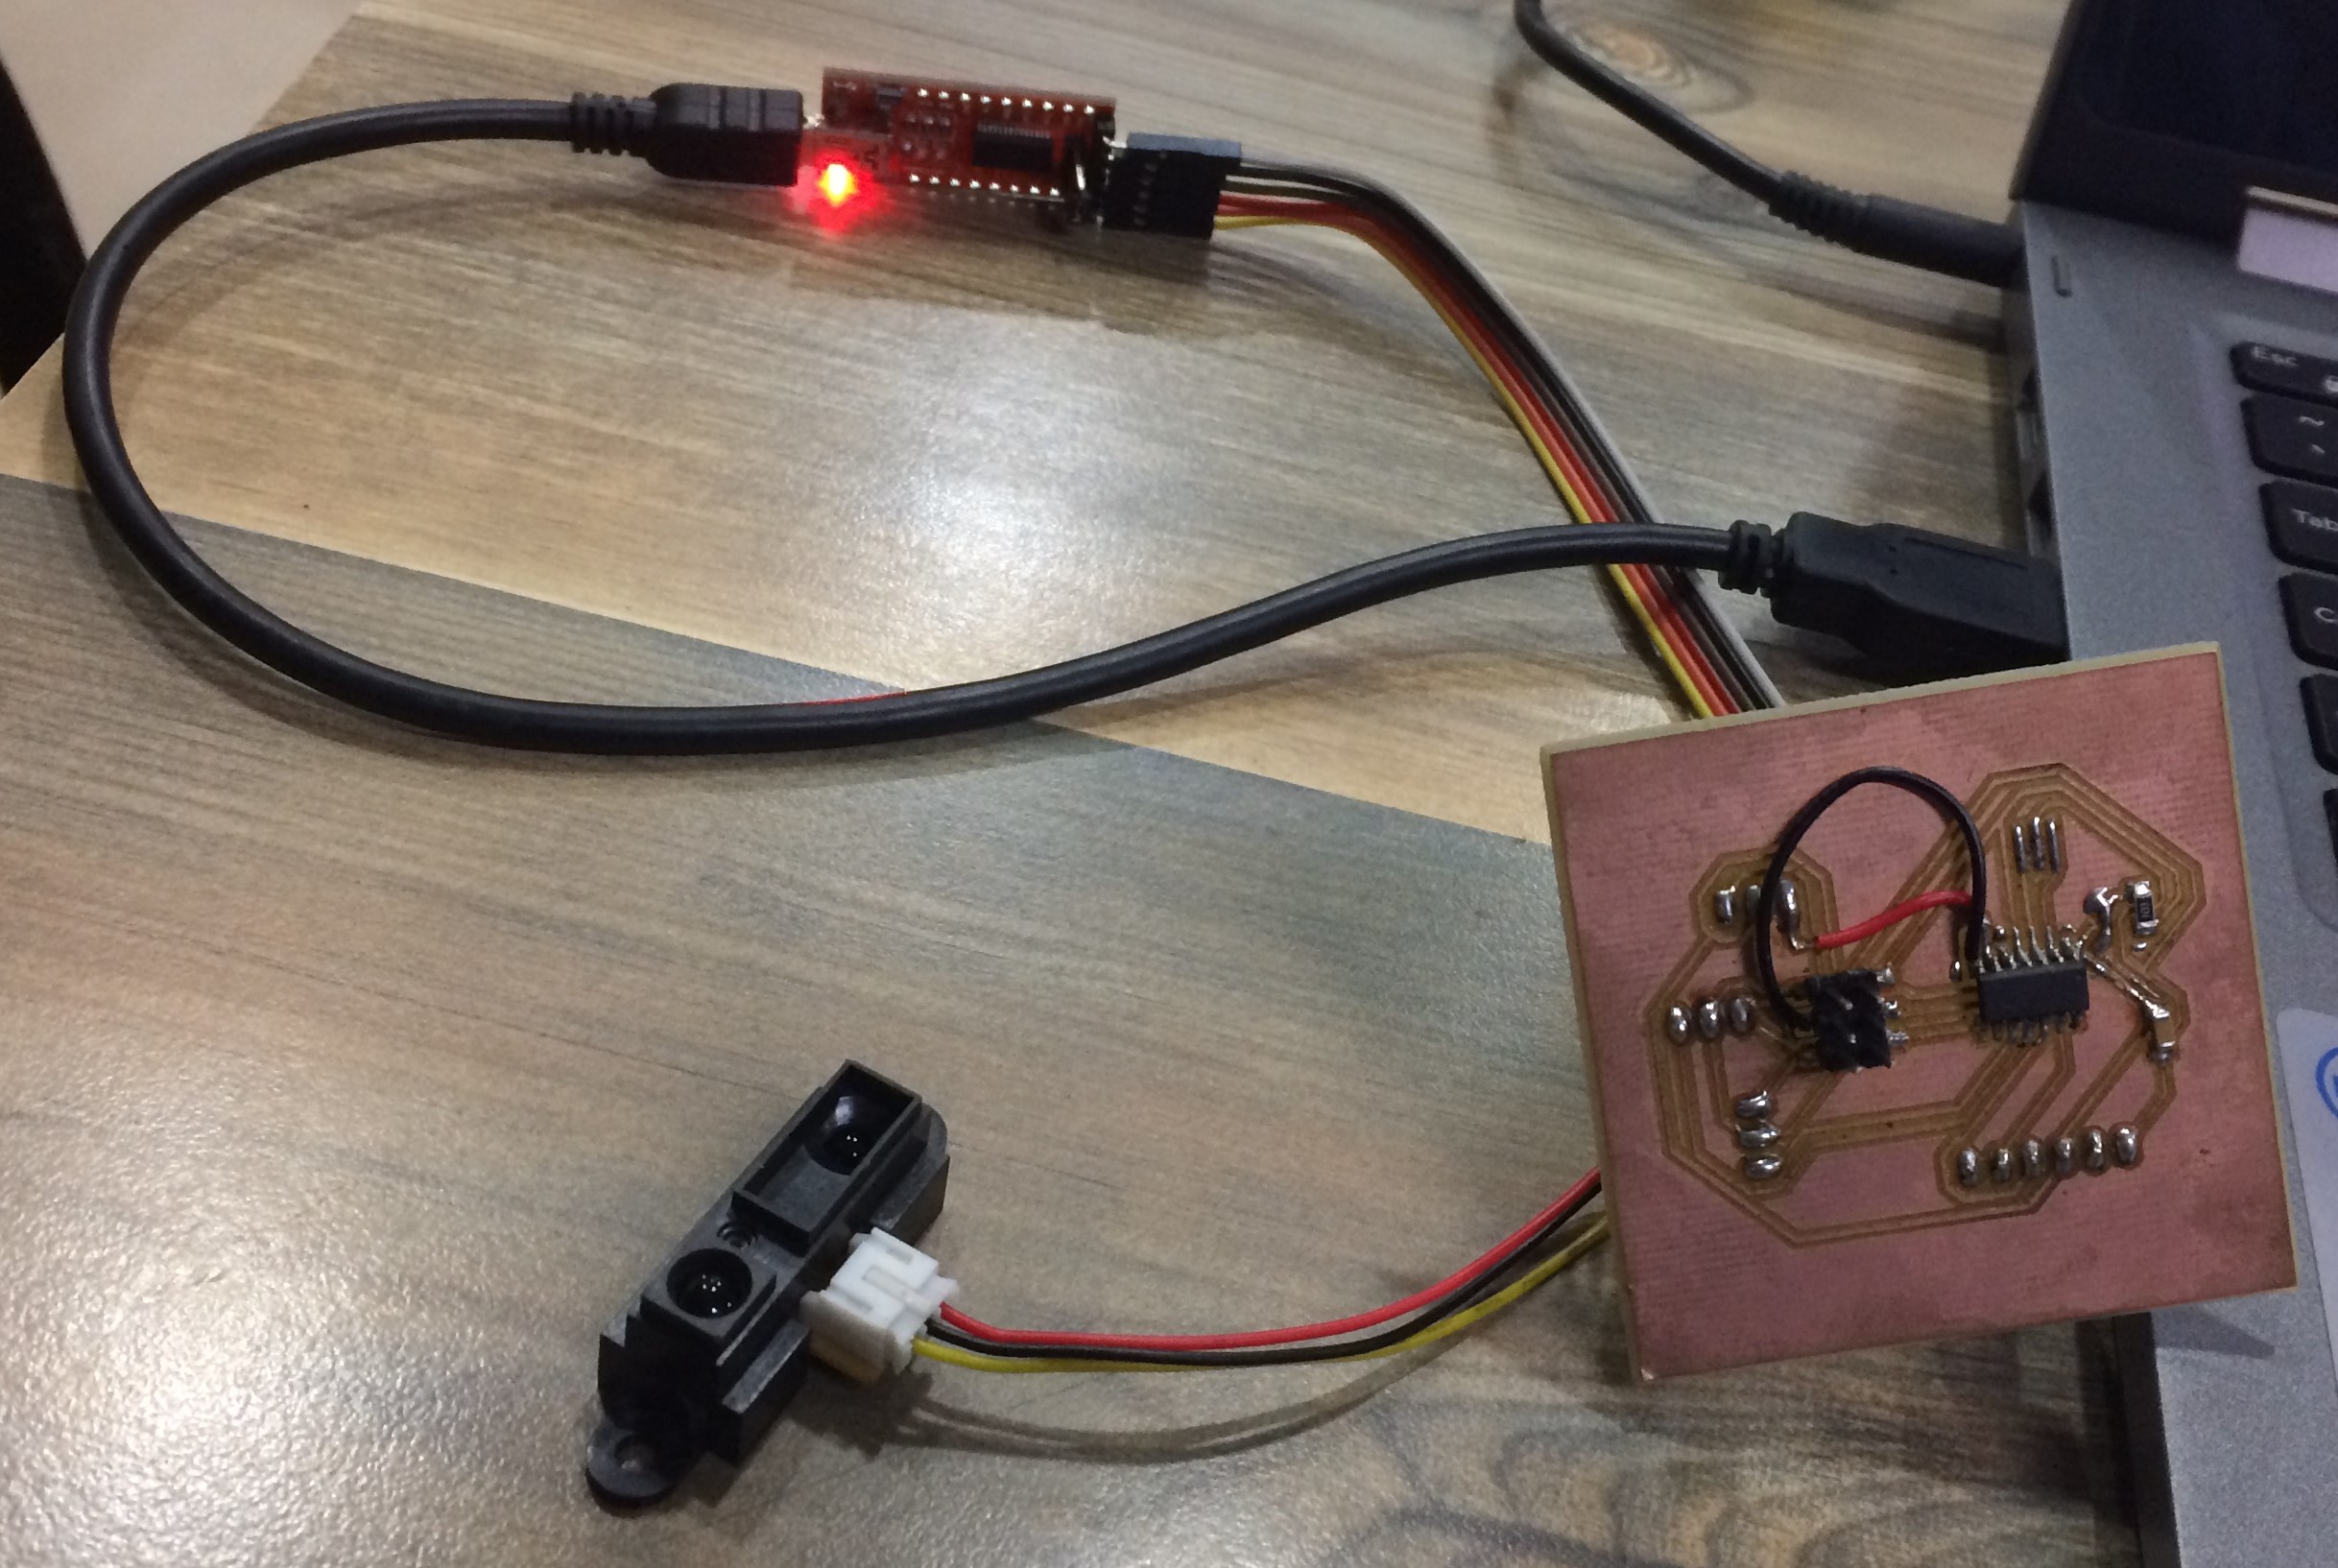
Sequence of command line of python on command promt to check the communication of my board with the laptop
- Type python on the command promt.

- Import library for serial communication by typing "import serial".
- To check the serial communication of the board just type "ser=serial.Serial("COM3")". Where COM3 defines the communication port, if it's communicating we will get a error message. In my case it was working fine.

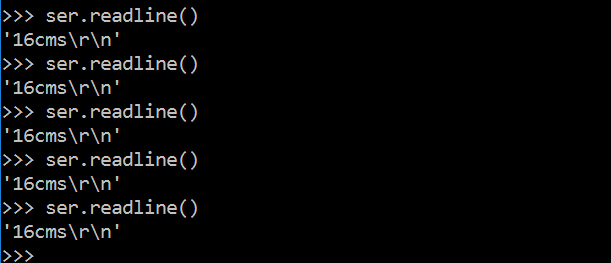
- To check the output from the ir sensor type "ser.readline()"
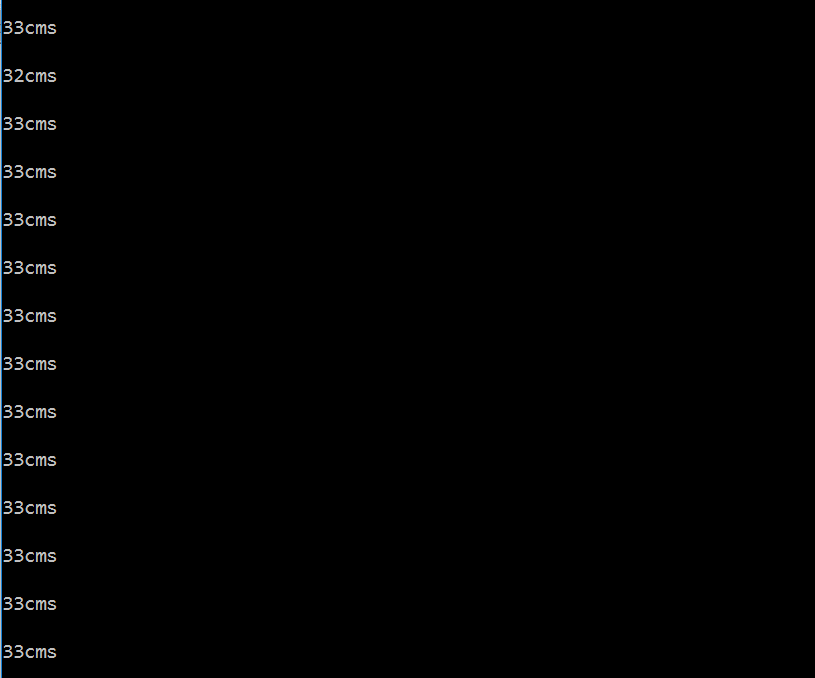
- To get continuous output on the command promt, type the following command line. Python is case sensitive and very much sensitive to indentation. So, utmost care should be taking while writing the code. In the picture shown below space should be gives at the red marked area.
- Now it is seen that my board is communicating fine on python platform also. So, it's time to make GUI. To develop GUI, I wrote following code, with the help of one of my student (Animesh, ECE Department, Final Year).
import re
import serial
from Tkinter import Tk, Label, Button, Scale


class MyFirstGUI:
    def __init__(self, master):
        self.master = master
        master.title("A simple GUI")

        self.ser = serial.Serial('COM3')

        self.distance = 0

        self.label = Label(master, text="Sensor data GUI")
        self.label.pack()
        self.w = Scale(master, from_=0, to=50)
        self.w.pack()

        self.read_sensor()
        self.update_gui()

    def greet(self):
        print("Greetings!")

    def update_gui(self):
        self.w.set(self.distance)
        self.master.update()

    def read_sensor(self):
        raw_data = self.ser.readline().strip()
        try:
            distance = int(raw_data[:2])
        except ValueError:
            pass
        else:
            print("Distance: {}".format(distance))
            self.distance = distance

    def run(self):
        self.read_sensor()
        self.update_gui()


root = Tk()
my_gui = MyFirstGUI(root)

while True:
    my_gui.read_sensor()
    my_gui.update_gui()
- I have saved this code with the name GUI.py
Therefore, to run the GUI following command line need to be used.

- After using the above command line and pressing enter, a GUI will appear showing continuous variation of the values.

import re
import serial
from Tkinter import Tk, Label, Button, Scale
class MyFirstGUI:
def __init__(self, master):
self.master = master
master.title("A simple GUI")
self.ser = serial.Serial('COM3')
self.distance = 0
self.label = Label(master, text="Sensor data GUI")
self.label.pack()
self.w = Scale(master, from_=0, to=50)
self.w.pack()
self.read_sensor()
self.update_gui()
def greet(self):
print("Greetings!")
def update_gui(self):
self.w.set(self.distance)
self.master.update()
def read_sensor(self):
raw_data = self.ser.readline().strip()
try:
distance = int(raw_data[:2])
except ValueError:
pass
else:
print("Distance: {}".format(distance))
self.distance = distance
def run(self):
self.read_sensor()
self.update_gui()
root = Tk()
my_gui = MyFirstGUI(root)
while True:
my_gui.read_sensor()
my_gui.update_gui()