Computer-controlled cutting
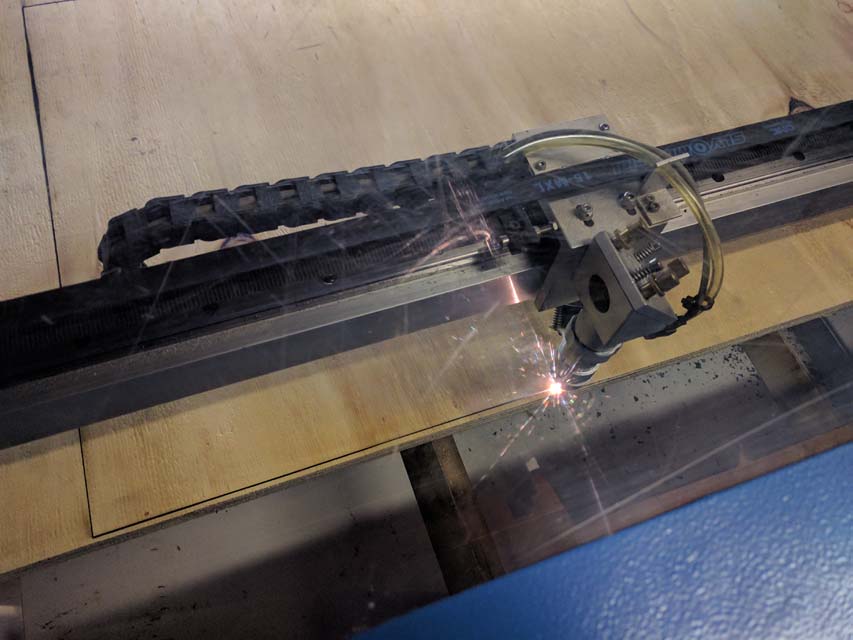
For this week, Matthieu - the Fab Manager - and I ran some tests on the Laser-cutter. First we tried to cut plywood in order to do a small stand. This plywood is 2cm thick and has we discovered, it was a bit much for the laser-cutter. We tried to do two rounds, but we had to finish the cut with a rotating saw.
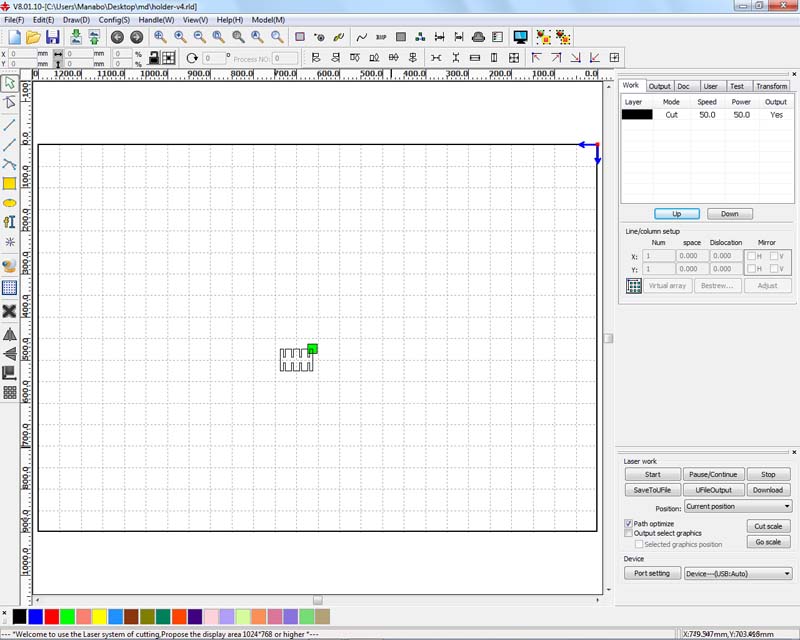
In order to plan the path of the laser we have to use a software called RDWorks (that runs on Windows7). It takes some time getting used to and I very much understand now (and appreciate) the reasoning behind CBA’s fab modules and mods. I also had the chance to watch a video of Dr. Nadya Peek’s presentation of her work and also skimmed through her doctoral thesis. If we draw the analogy of printing, it is as if we had a software for writing and a second one for typesetting, before being able to print.
We calibrated the machine, made sure that all the safety requirements were followed.

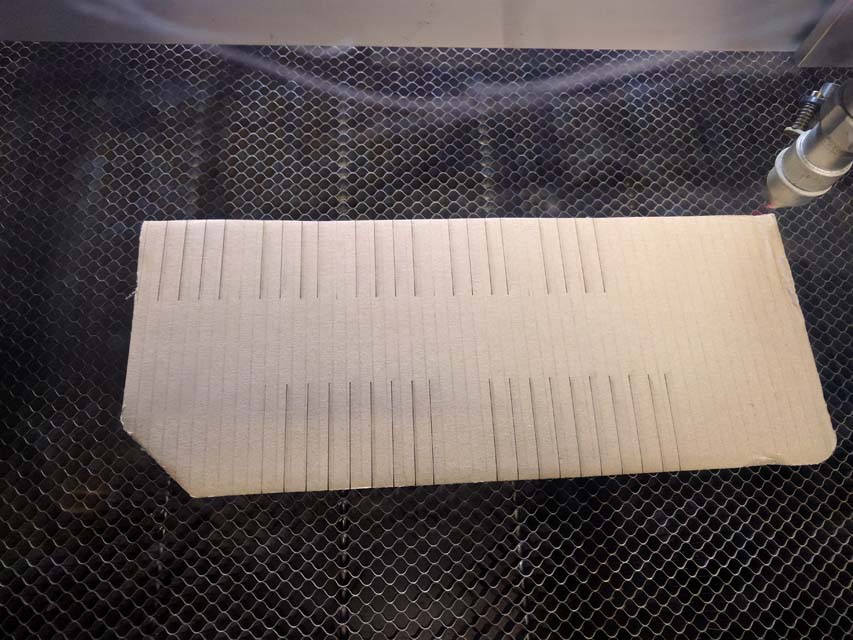
After the plywood trial, we decided to test the two parameters (speed and power), on a 4mm cardboard for cutting, and for engraving.
Because of time constraints, for the parametric press-fit kit, I used my design that I did last week. I went back to my Fusion360 design sketches, adjusted the parameters to 4mm for the thickness of the cardboard. This changed the width of the slot in head shape and the spacing of the holder.
I then right-clicked on each sketches and exported them in DXF. I knew that RDWorks could import this file type. When I opened RDWorks, I had the surprise of seeing more lines than I cared for, because RDWorks does not differentiate between construction lines and proper line (in Fusion360).
I had to go back to Fusion360, do some cleaning up: trim a few lines. I then re-exported again the files as DXF, opened them in RDWorks and then download them in the laser cutter again.

I did a test run with one element, setting the parameters of the laser cutter as 50mm/s for the speed, and 50% of the laser power.
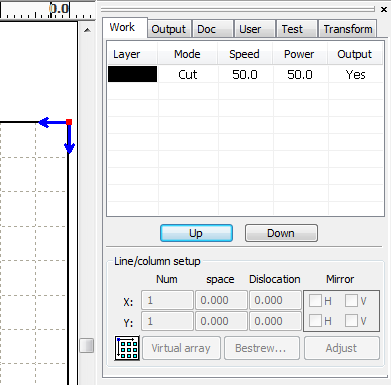
These parameters were the ones that we discovered were the best for this cardboard.
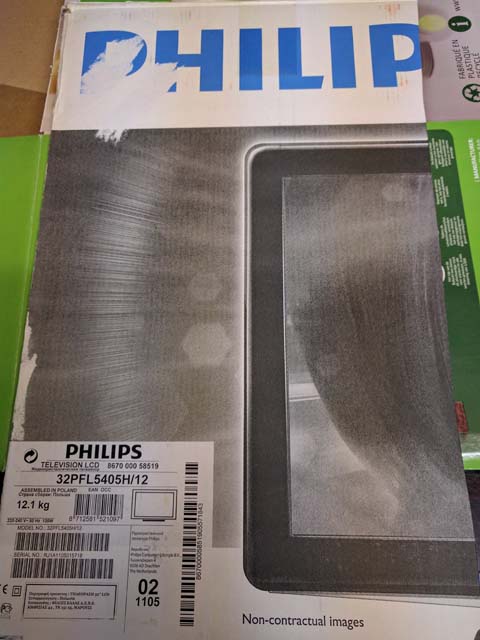
The cardboard came from a screen box, that was repurposed.
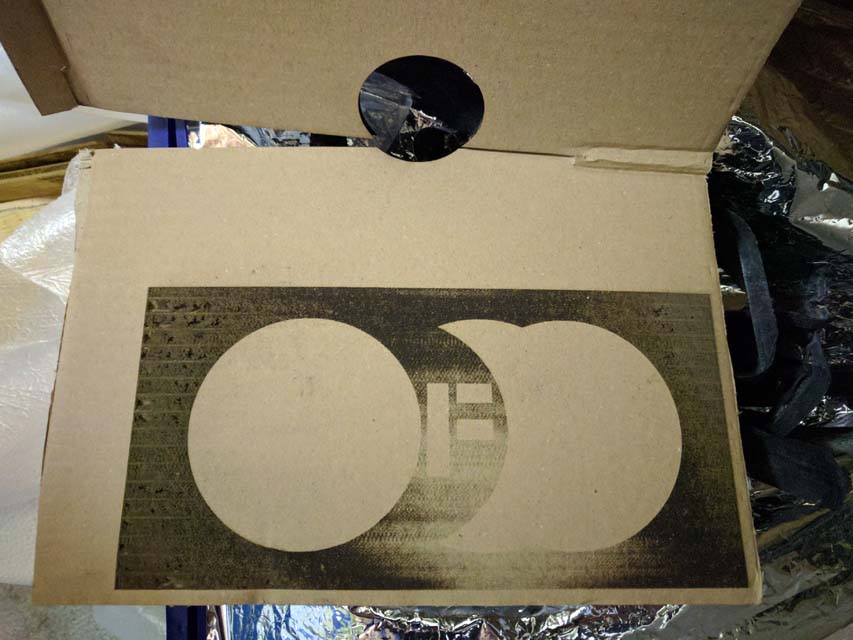
The result was the following cuts, four (abstract) head-shape and one holder.
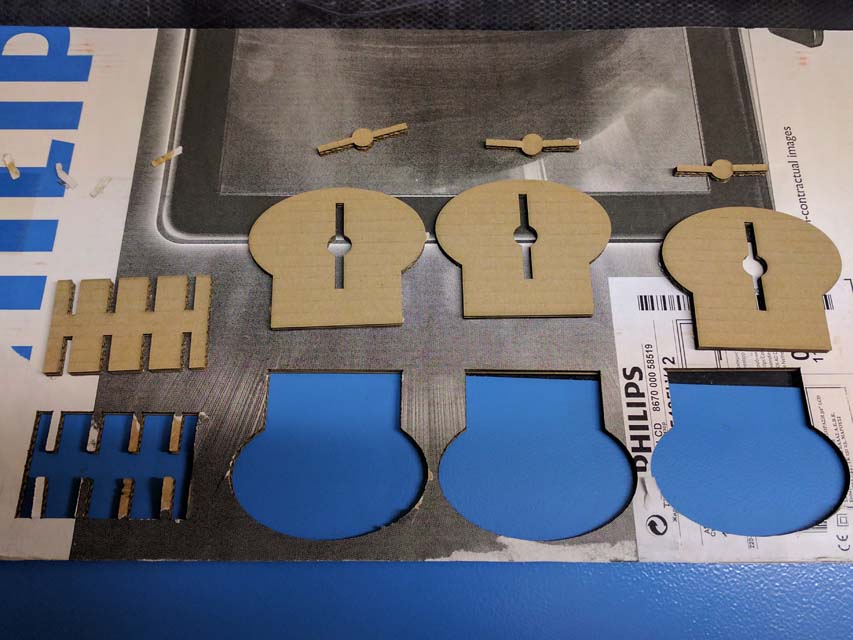
I went on to assemble my head-shape prototype.
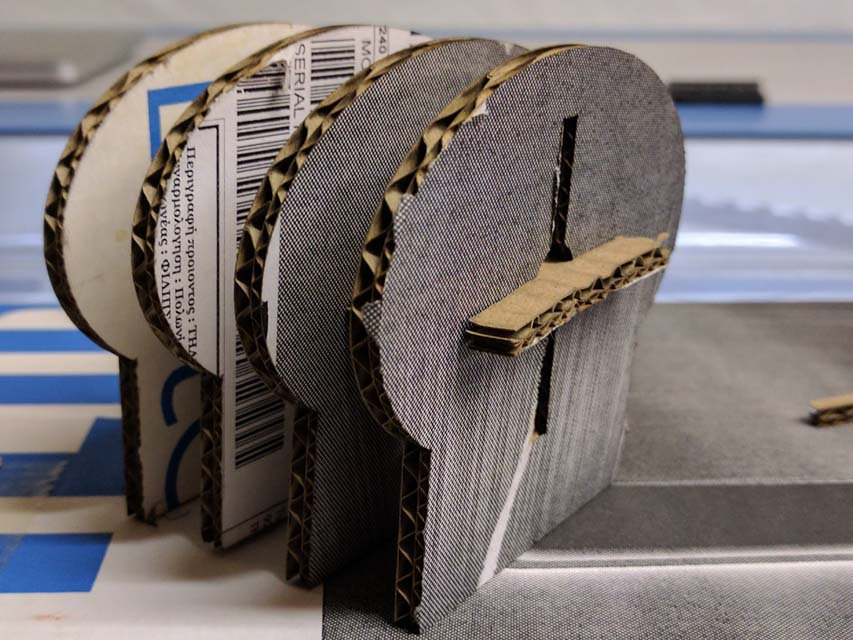
The next step is to do a 3D scan of my head (during week 5), ingest the file into Fusion360, cut slices of the shape and laser-cut these. For the holder part, I might switch to another material (i.e. plywood), so that the holder part does not bend during rotation.