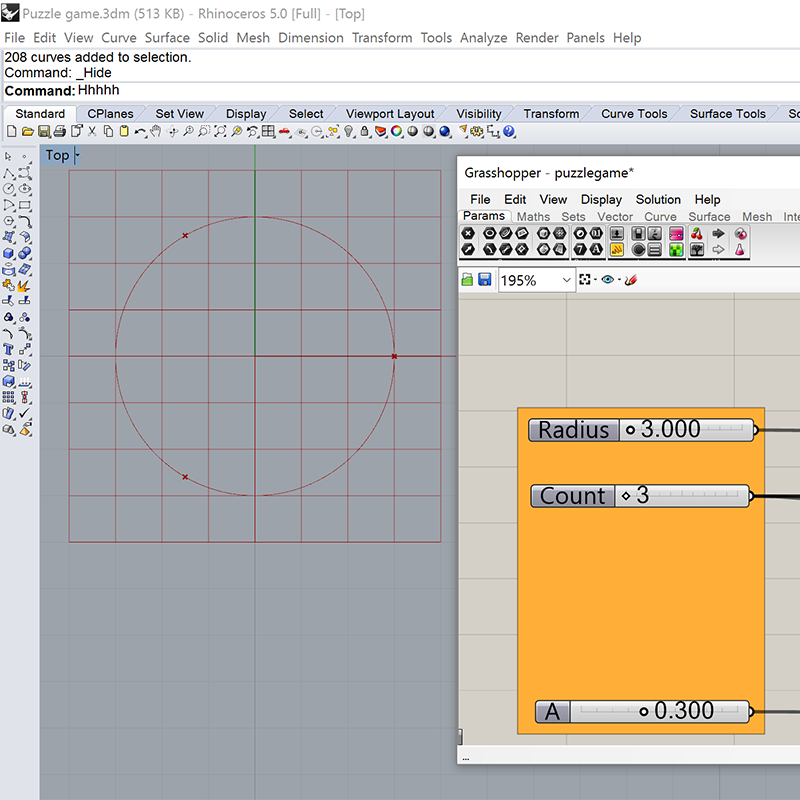
For the design of the puzzle game I decided to use grasshopper since I already used for few past projects. Anyway this was a great chance to know something new.I started by settling the rule of definition for each piece of the puzzle. The first is the dimension of the construction circle, the second is the number of corners.
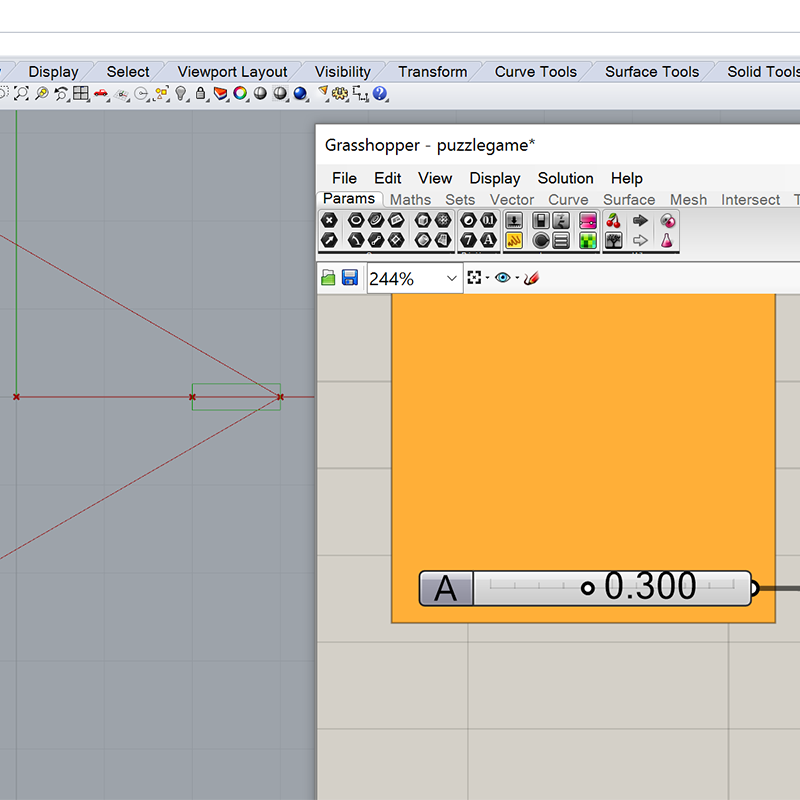
The third is the thickness of the material used to produce the puzzle. This dimension is linked to the creation of cuts for joints. The leght of cuts depends on dimension of the piece, now it measures 1/6 of the initial circle. I can set this parameter arbitrarily.
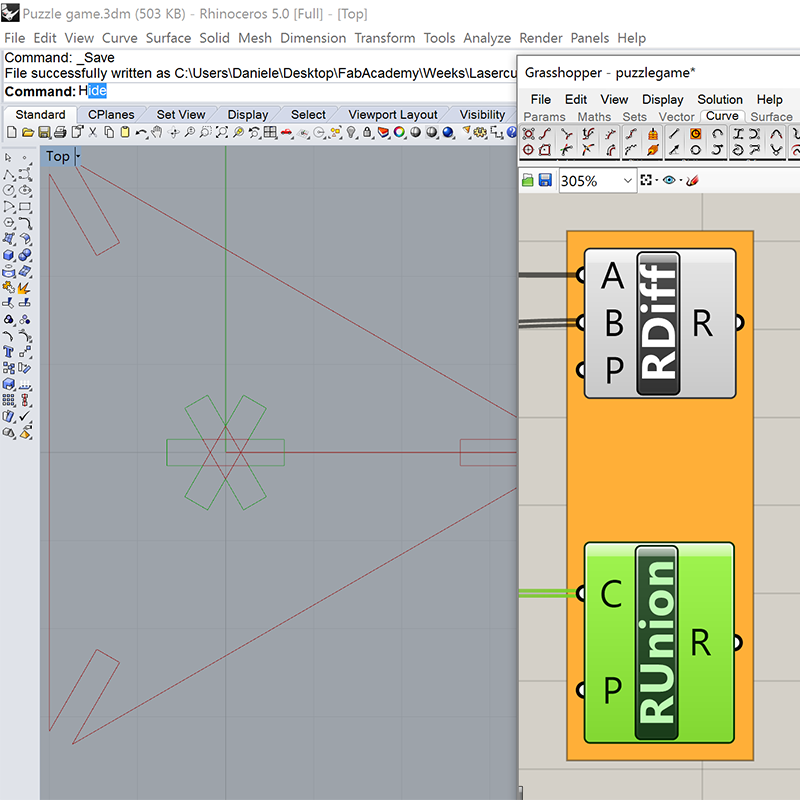
These cuts are than reproduced on each corner as well as in the center of the piece. This will encrease linking opportunities.
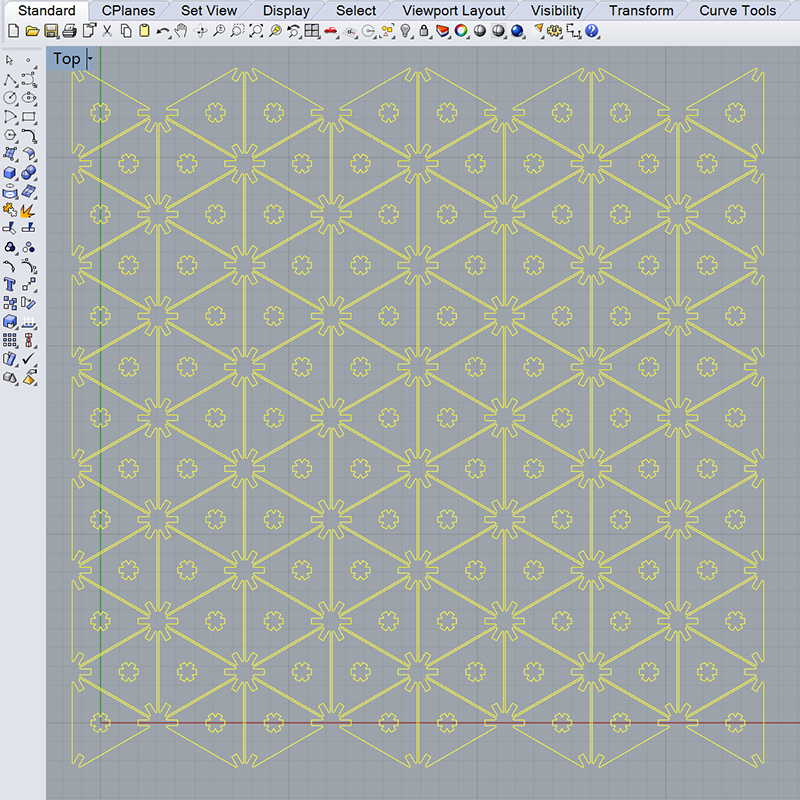
The piece is now reproduced several times on Rhinoceros environment trying not to waste material.
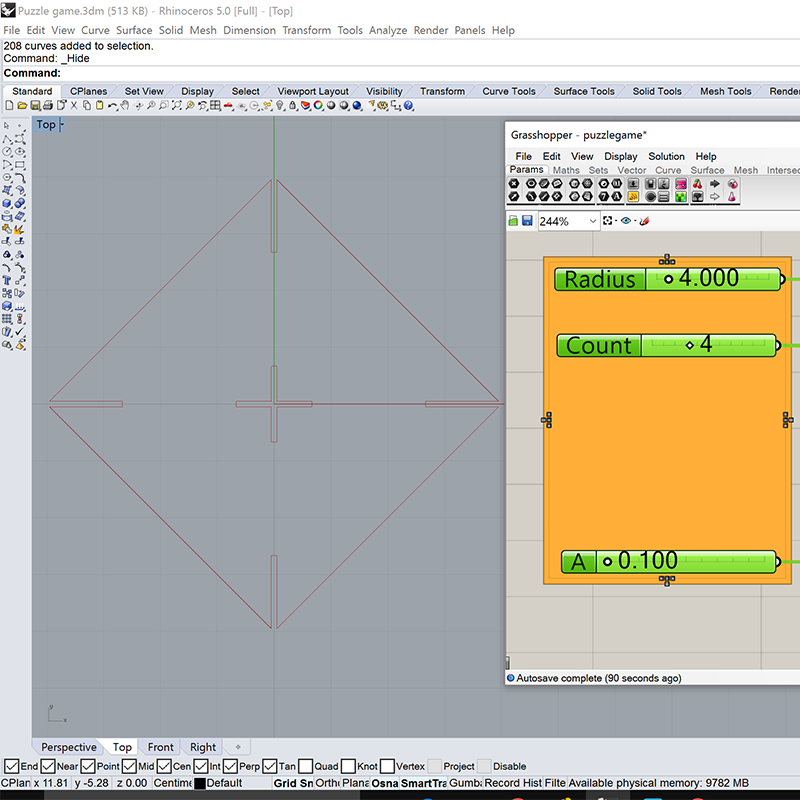
Different values for the main parameters produce modifications on the shape. In this exemple we can see how to settle parameters for a square pice (4x4cm), produced with a 1mm thick material.
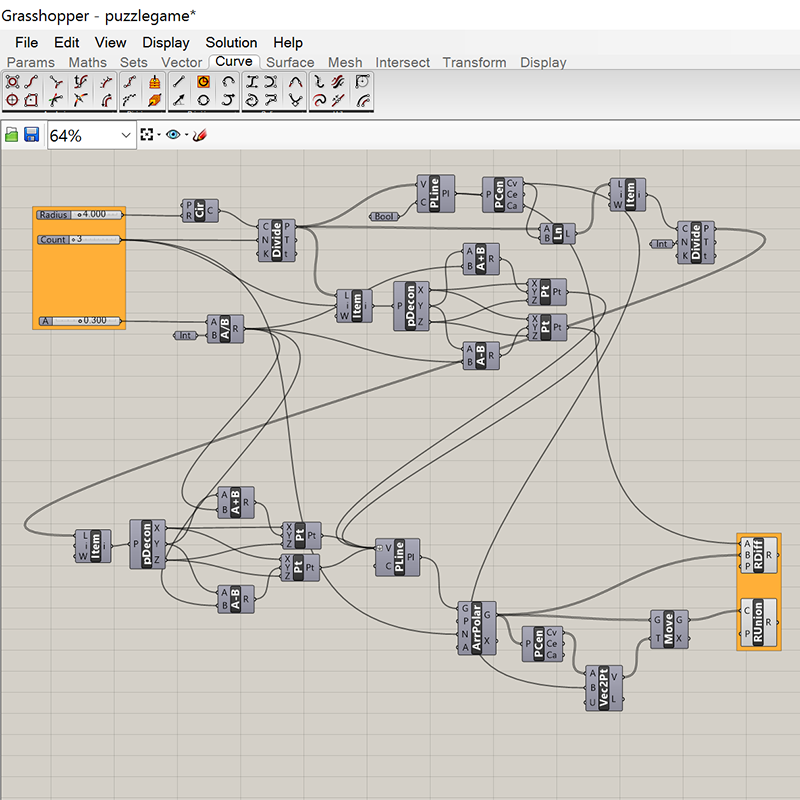
The whole function in grassopper ambient. I tried to include all the algorithm, usually the function is designed orizontally beeing more clear. Input and output are orange colored to better understand how to interact with the function.

The pieces are produced with a 3mm thick cardboard. The material is quite solid due to its double wave layer.
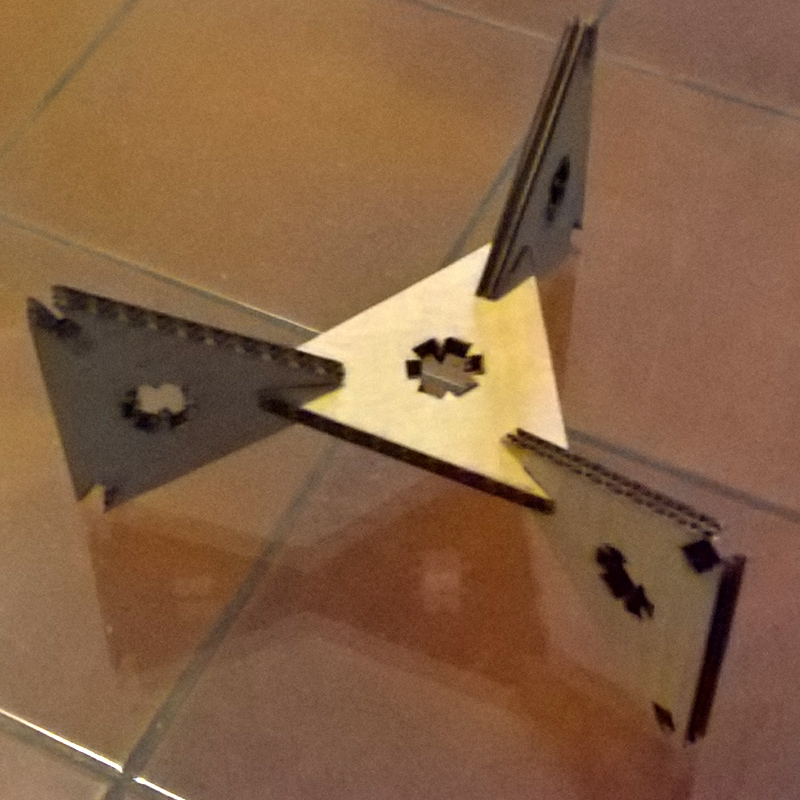
Joints on the corner are sturdy even if they are not deep cutted toward the center of the piece.
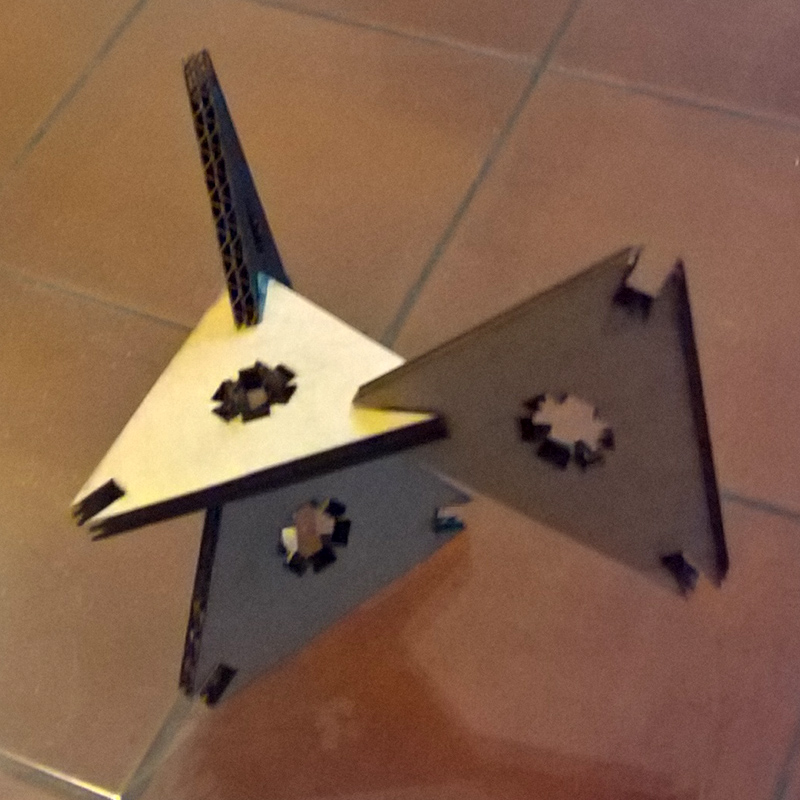
Joints in the middle of the piece work as well, pheraps these could have been larger to let a piece joining deeper through another one.
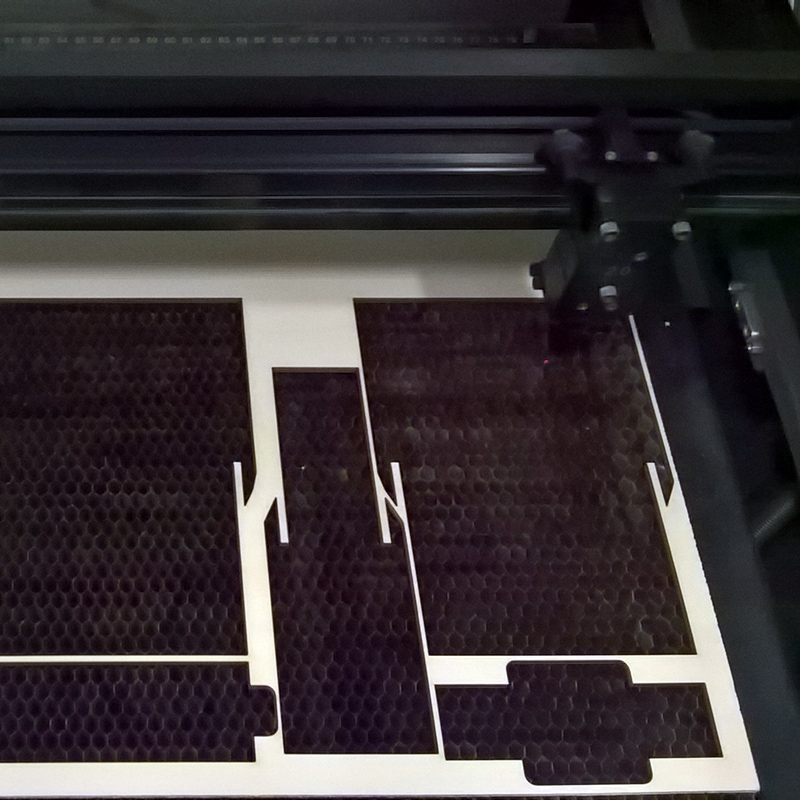
The first exercise made me hungry to try something different. I went back to Rhinoceros and designed pieces for a wood box. This time I had to increase laser power up to 50% (for 3mm cardboard was just 10%)becouse the material is harder to cut and it has bigger thickness.

Joints are a bit loose but this let me build easely the box. I think otherwise would be a nightmare to put all the pieces togather.
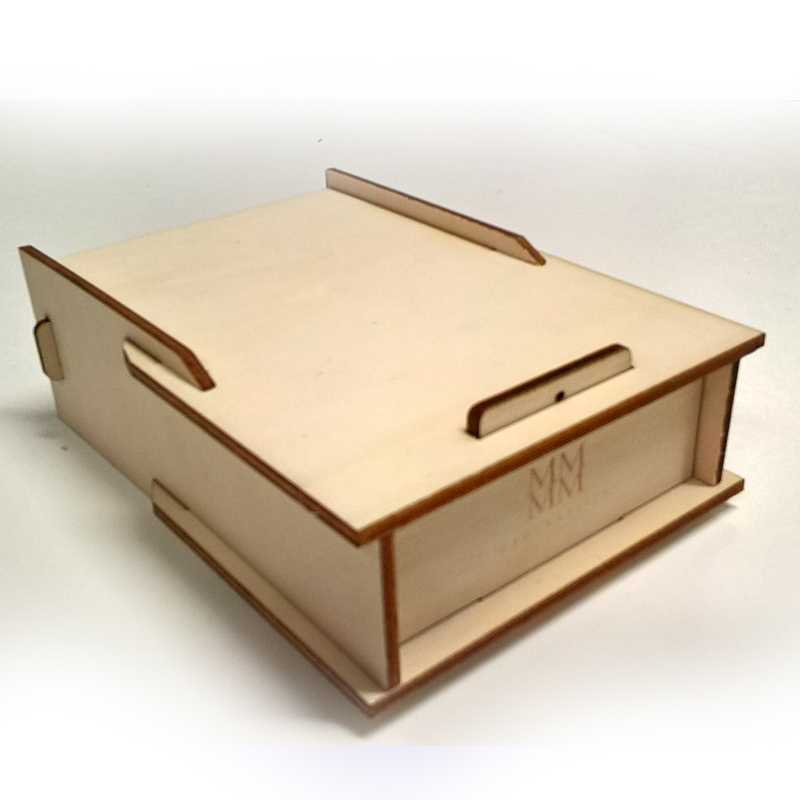
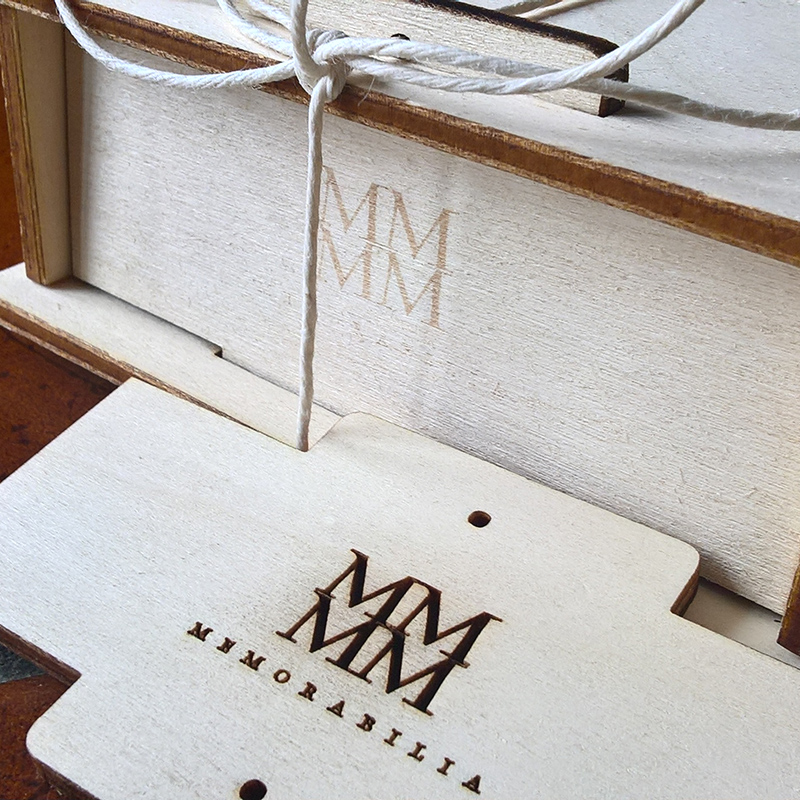
A view of the box reveals a logo engraved on the front face. A you see tha box is stable thank to the leght of the joints.
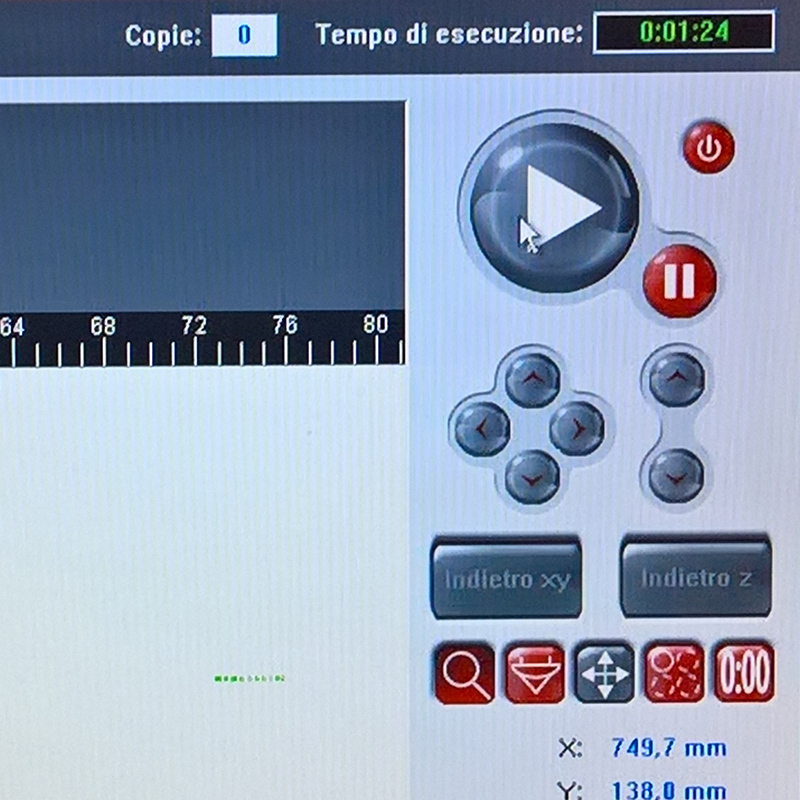
To engrave with the right result I made few attempts, balancing te laser power.Here i check the laser path while the lasercutter is working.
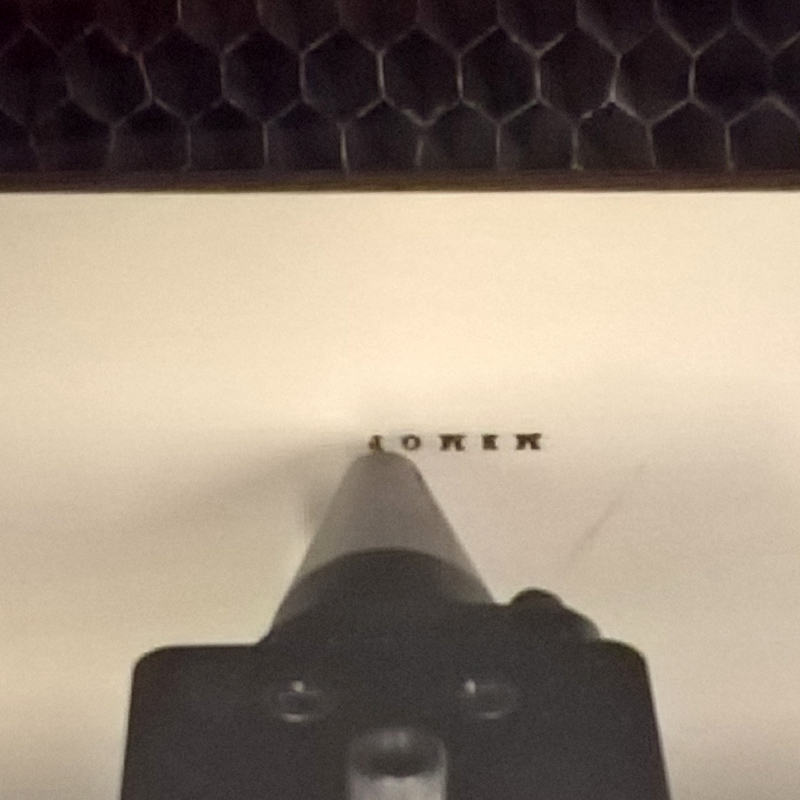
The lasercutter produced this result as the power was setted on 5%. This was too dark for me.
Setting power on 0.5% was right to obtain the pale engraving I wanted. Here it's compared with the more engraved piece already produced.
The last experiment was on leather. I designed shapes with rhinoceros again and tested that the right power for lasercutting a 2.5 mm thick leather is again 50%.I made the laser cut all the holes for sewing as well just to have fixed holes in the right position.
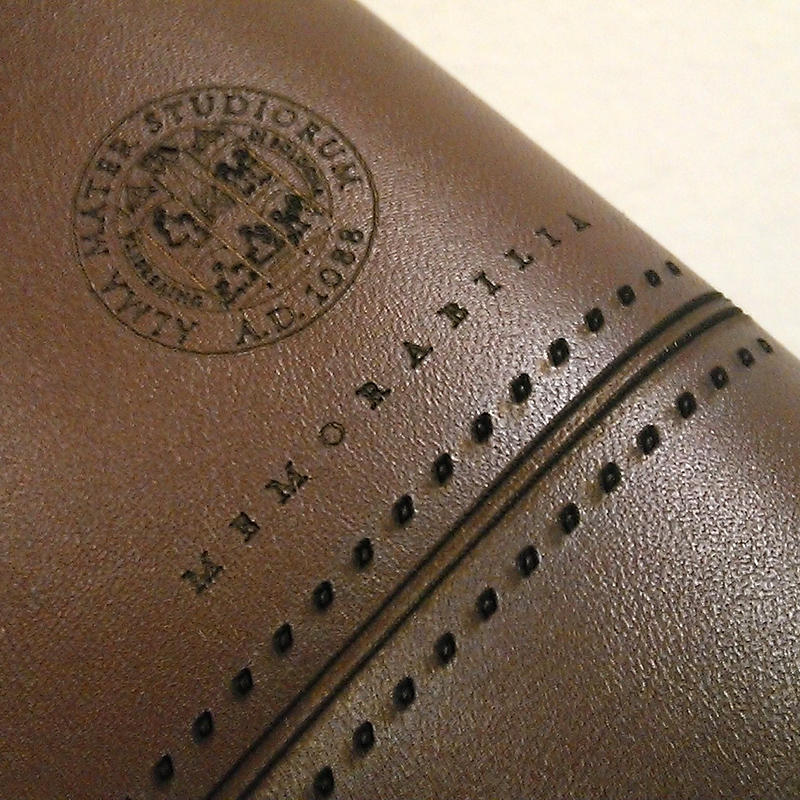
To obtain the right result in engraving the logo I had to reduce a lot the complexity of the vectorial. This is a delicate phase since too much lines will make the laser working too much and even create holes.
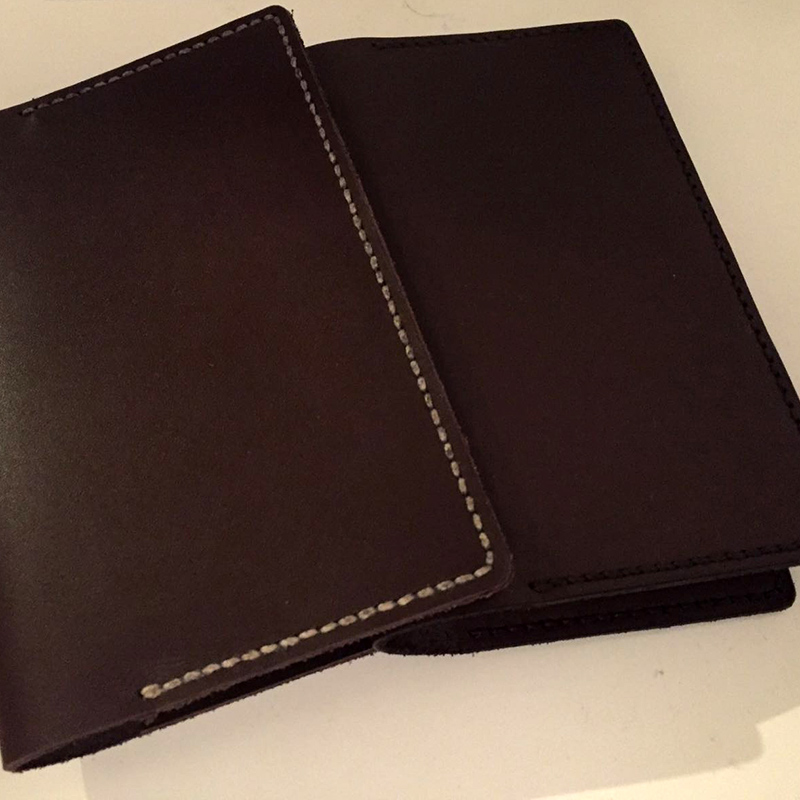
The next phase was asking to a friend to sew the pieces. He is a leatherworker for hobby and confirmed that with holes already cutted on leather the work is much faster and easier.
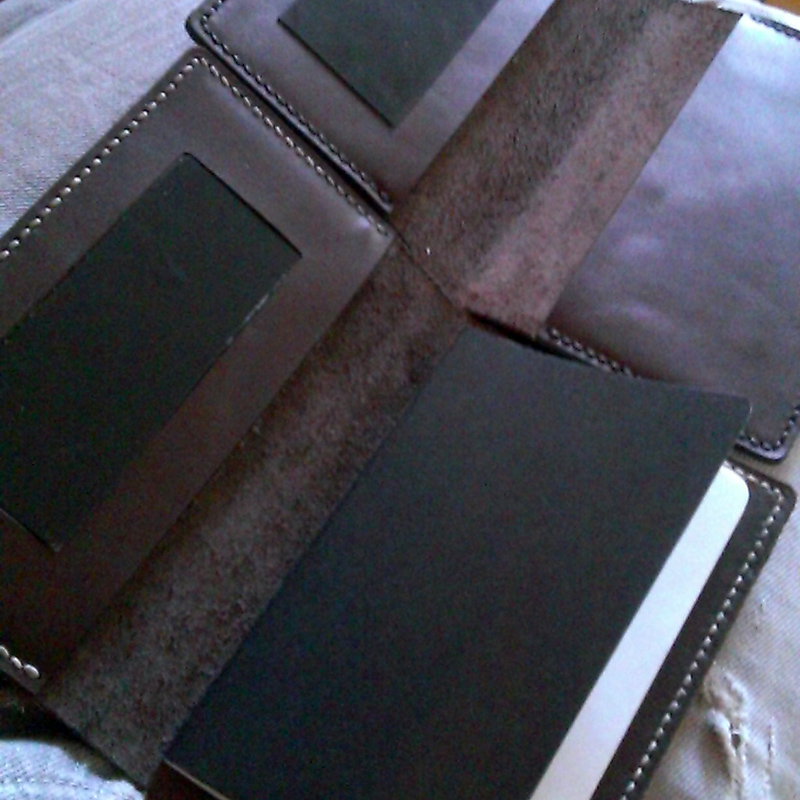
With a small agenda fixed thank to a pouch on the right and a microsuction sheet on the left the holder is now ready to keep notes as well as phones. In the two versions there are different colored sewings.
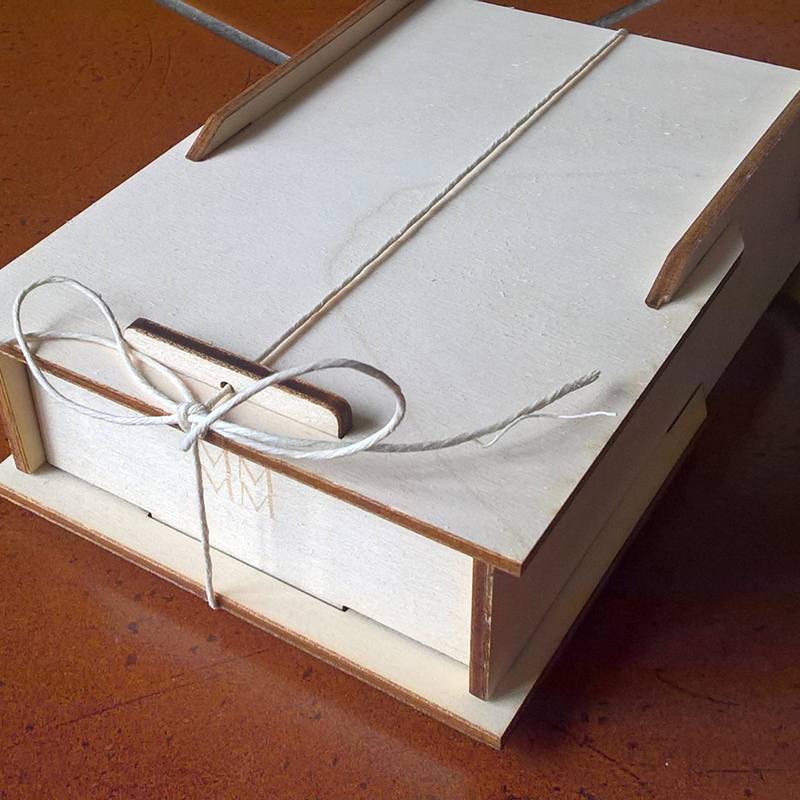
The agenda is than placed inside its box and the box is closed with a twine that keeps everything firmly stuck. This is now a ready gift almost totally autoproduced in lasercutting.
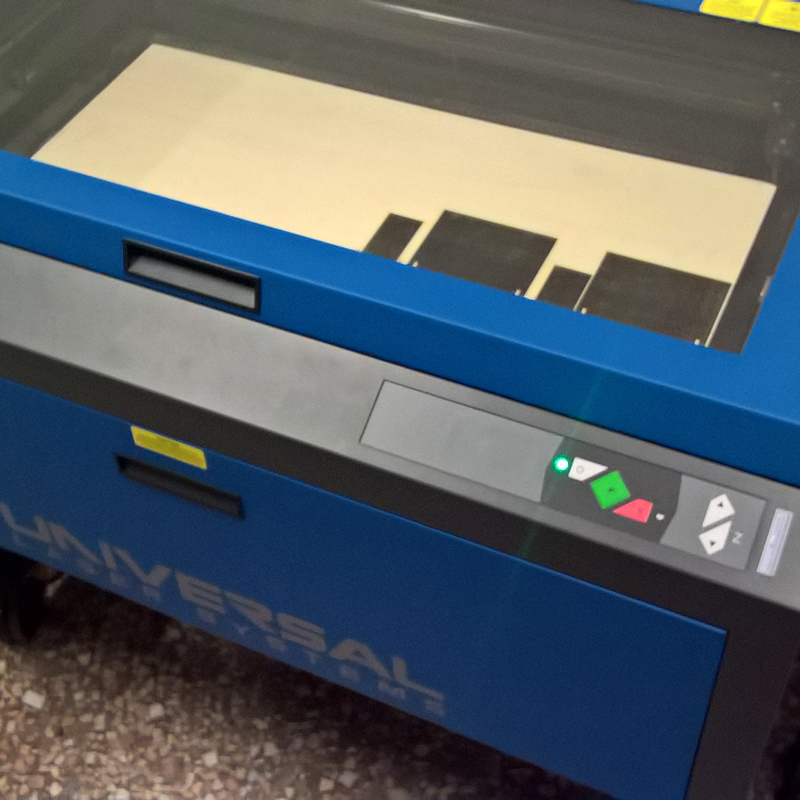
All theese works were made with a Universal PlS lasercutter with a cutting area of 40x80cm. The paths were designed in rhino and grasshopper when parametric.
All this was thanks to Opendot lab in Milan as well as the Digital Factory Lab in Bologna, the prototype lab of the Industrial Design program of the University of Bologna. Here is where I work as phd researcher.