Embedded Programming
- Index
- Introduction
- Datasheet
- Installing AVR Toolchain
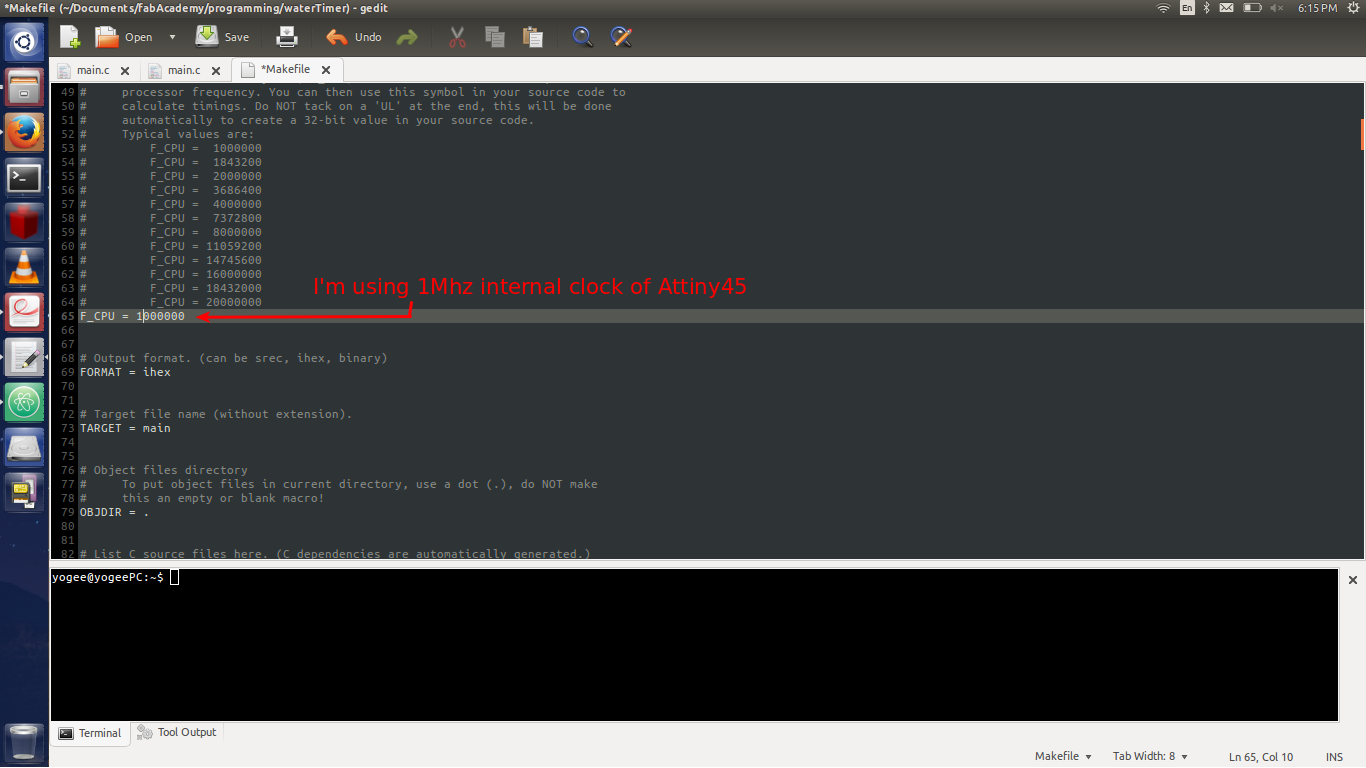
- Changes in Makefile
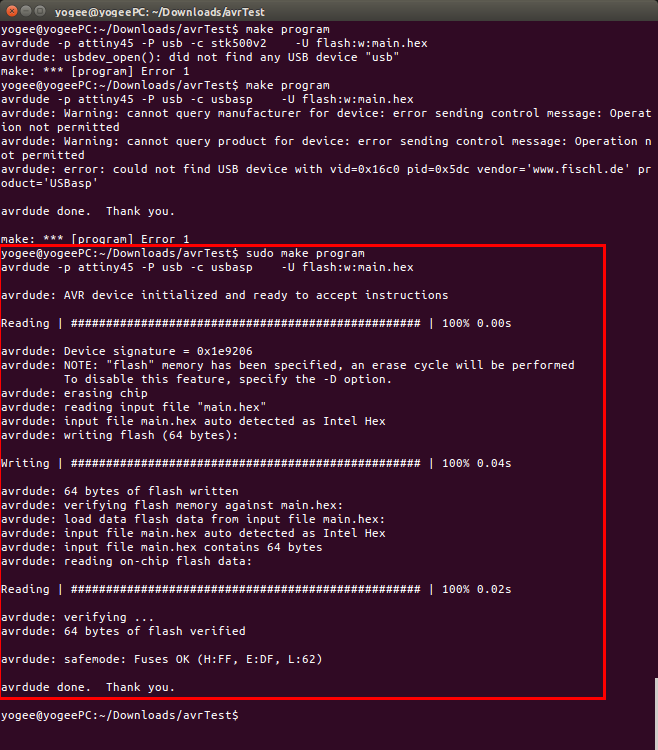
- Burning the first program
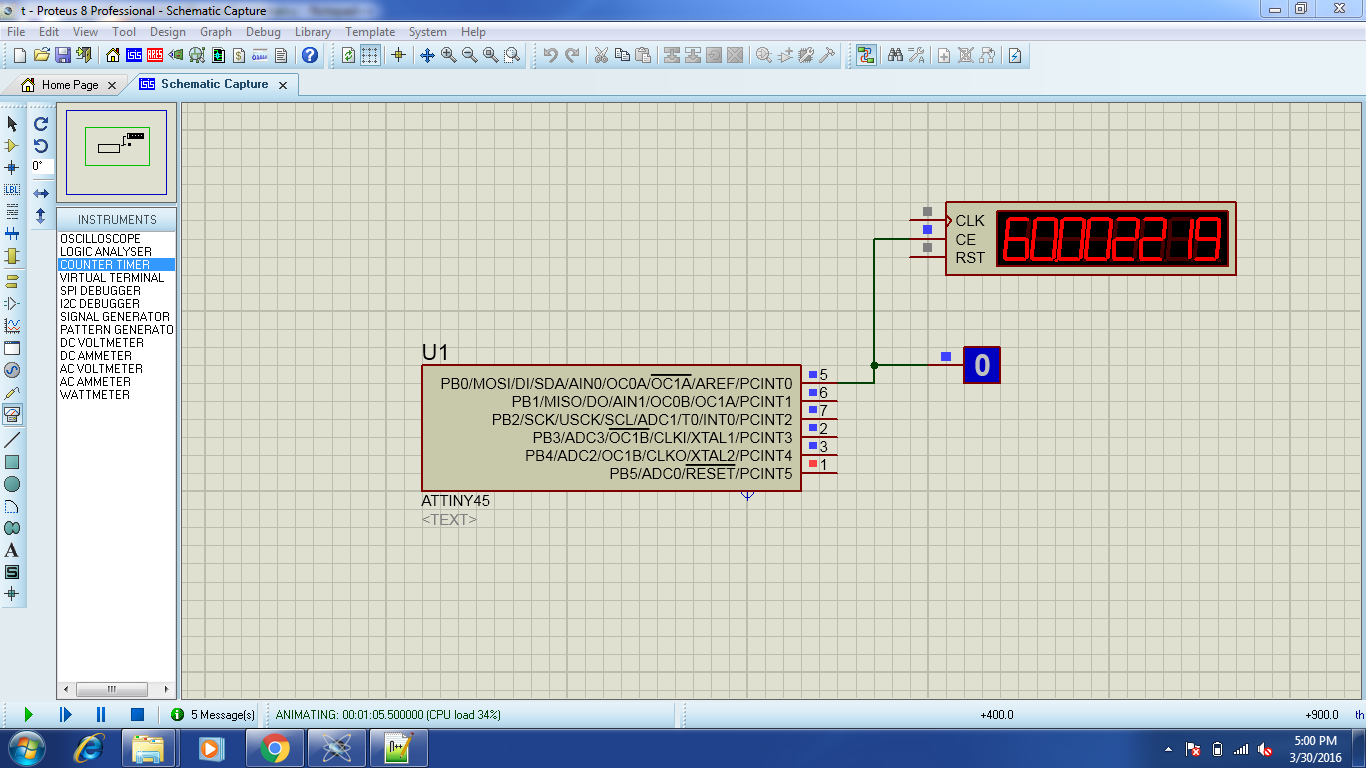
- Testing of 1 minute timer
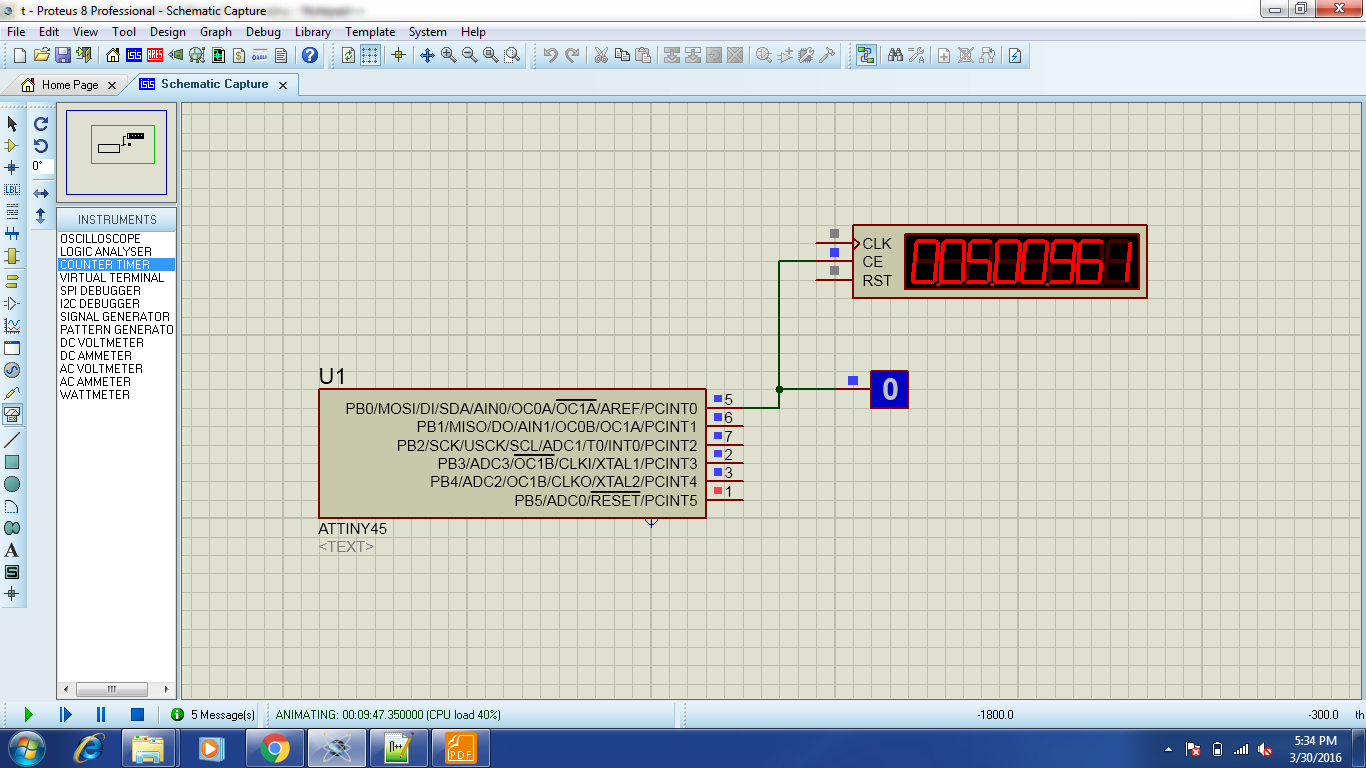
- Testing of 5 minute timer
- Embedded programming - result video
- Debugging AVR programs - GNU De-Bugger (GDB) for Atmel AVR micro-controllers
- Original Files
I will be developing timer which will give you alert after particular time interval.
The problem statement
I just forget to drink water on time which makes fluid imbalances in the body. I thought of making the timer which can be worn as the wrist watch or else as pendent. The ornament will is enabled with a set of LEDs and a small battery.
Datasheet
What the heck! A "Datasheet". What's that? Is a instruction manual for electronic components. It thoroughly explain exactly what a component does and how to use it. Unfortunately these documents are titghly packed with the information and hence can often be difficult and super confusing to read, especially for newcomers. Nevertheless, datasheets are still the best place to find the details you need to design a circuit or get one working.
It is very important to have the latest revision of the device datasheet before referring it. It may happen that vendor have found some issues and they got documented in later revision of the datsheet.
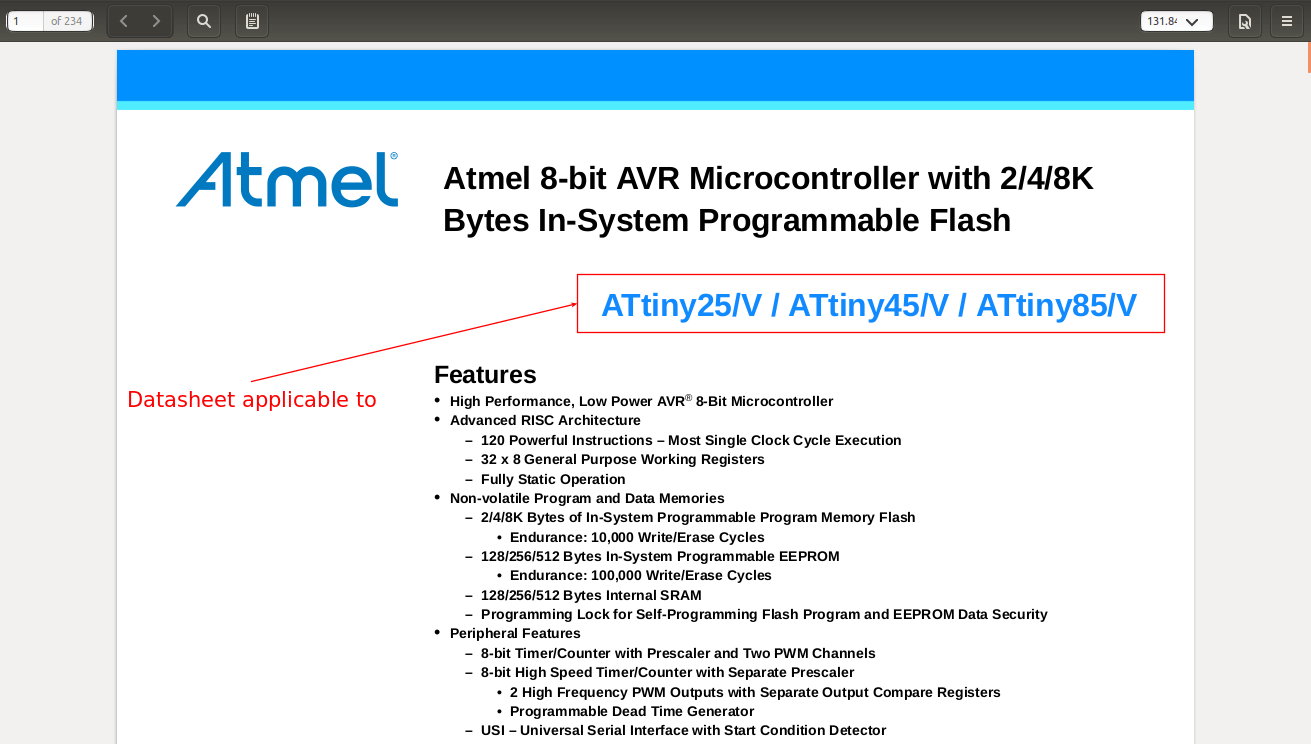
At the beginning of each of the datasheet. The author have mentioned the part number for which it is applicable as shown in the adjacent figure. The figure is showing the datasheet of a micro-controller Attiny series devices. Many a times vendors carefully packs the datasheet of the multiple devices into one huge datasheet, this is the one more reason why datasheet becomes bulky and tricky to read and extract the exact data from. The adjacent datasheet is applicable to ATtiny25/V / ATtiny45/V / ATtiny85/V.
Also above the part number it says what that part is, e.g. in here they have mentioned that it is a micro-controller and specifically it is a Atmel 8-bit AVR Microcontroller with 2/4/8K Bytes In-System Programmable Flash
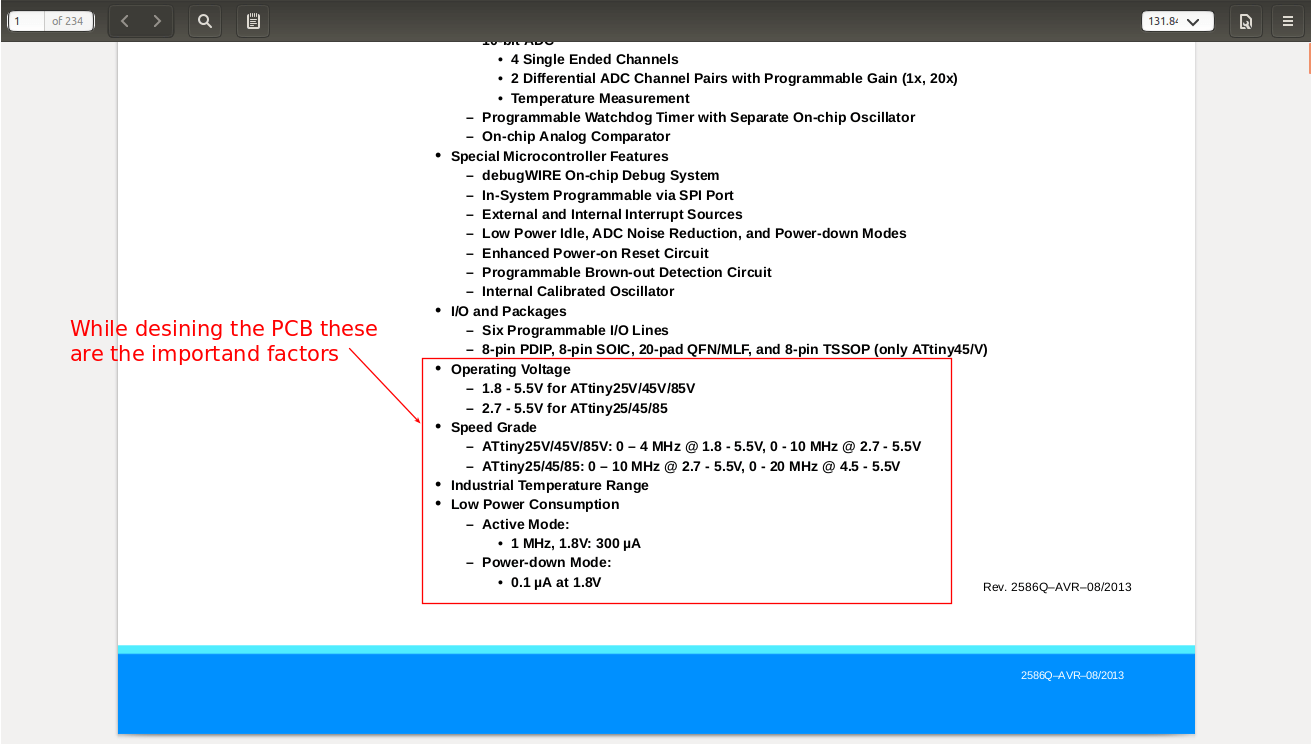
Before desining any of the circuit using any device we have to first look at it powering conditions. The Feature section in the datasheet tells us about the same. The Attiny chip designed to work between the voltage range of the 1.8V to 5.5V for ATtiny25V/45V/85V and 2.7 - 5.5V for ATtiny25/45/85. Exceeding this will fry up the device. Other things below that which tells the specific clock speed that we can and can't use while using different voltages.
In addition to this feature section tells about some unique features of these devices. Here we can oserve the different power saving options. Other parameters listed under the Feature section are the RAM, ROM, Peripheral ports, Architecture etc.
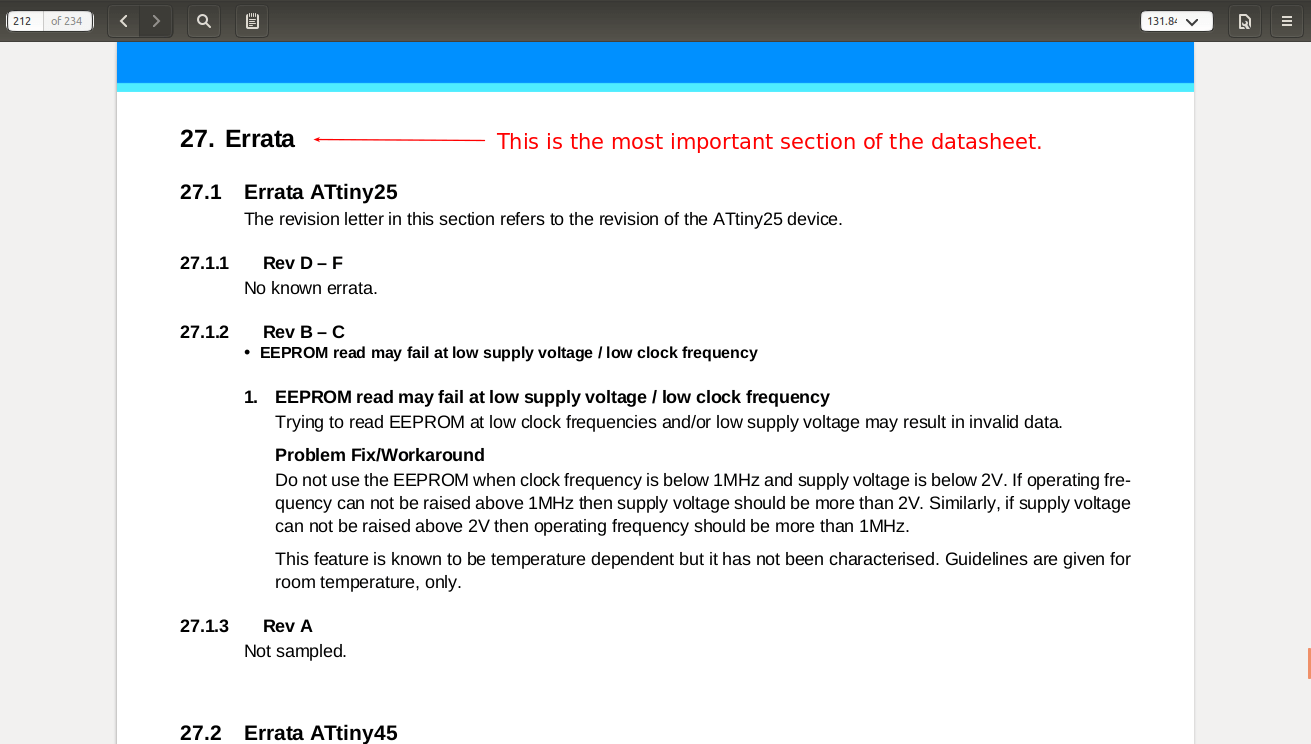
Errata section documents updates and corrections to a part's specifications often found after the part went to production.
If it happens that we won't able to understand the errors which are happening within the circuit functions even if there's no solution found in datasheet, errata is the place to look for. Many times it tells us what's wrong in datasheet and it's respective revisions and suggests the methods to work around
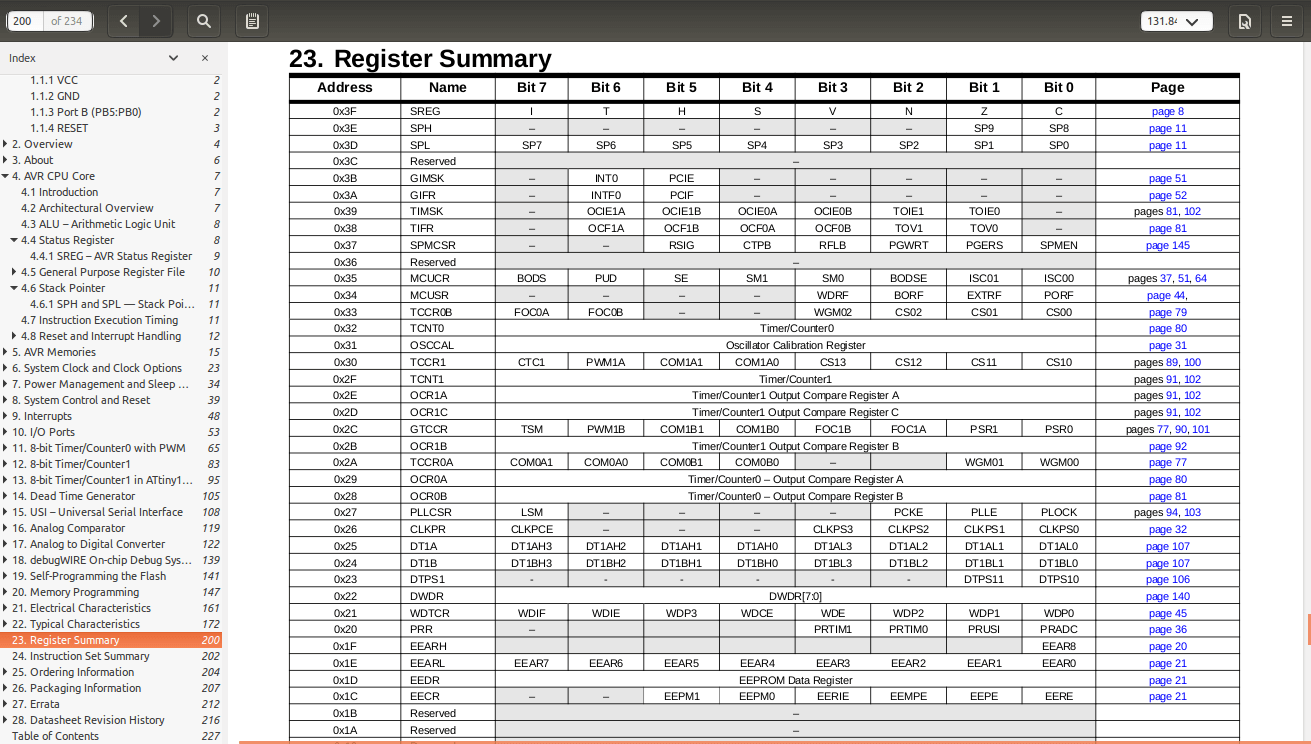
Resisters are the data holding spaces where micro-controller holds the specific data. These resistors can or can't be read or written with the content. Few resister holds the status of the device, some of them holds the configuration of the device.
Each resister is 8-bit long and holds the data. Some, of the resister are combined into one to hold or generate larger results. Such as 10-bit long or 12-bit long.
e.g. we can take a look at the ADC's output resister which is 10-bit long and divided into two segments. ADCH and ADCL.
Installing AVR Toolchain
AVR Toolchain is required for the compiling and building the hex and other object files. The AVR toolchain can be installed as follows.
I took reference from the http://maxembedded.com/2015/06/setting-up-avr-gcc-toolchain-on-linux-and-mac-os-x/
sudo apt-get updatesudo apt-get install gcc-avr binutils-avr avr-libc #Toolchainsudo apt-get install gdb-avr #Debugging Utility
Changes in Makefile
Burning the first program
Testing of 1 minute timer
Testing of 5 minute timer
Embedded programming - result video
Debugging AVR programs - GNU De-Bugger (GDB) for Atmel AVR micro-controllers
Debugging the programs is the process of finding out the bugs from the code. Which are basically run time errors because other errors such as syntax errors will get trashed at the time of compiling code. The GNU De-bugger is the tool.
Although I didn't evaluated the debugger.
http://winavr.sourceforge.net/AVR-GDB_and_AVaRICE_Guide.pdf
How I added attiny in Arduino IDE
When I installed fresh copy of Arduino IDE there's no Attiny family installed. I searched it on Google about how to add these Attiny devices which will help me program them directly using Arduino IDE.
Basically what I did in short is, in later version of Arduino software started offering easy of customization such as installing additional board and the libraries. So, I open up Arduino Preferences settings located under the Edit menu and added the Additional board URL which is given on HiLow tech website. URL is below
https://raw.githubusercontent.com/damellis/attiny/ide-1.6.x-boards-manager/package_damellis_attiny_index.json
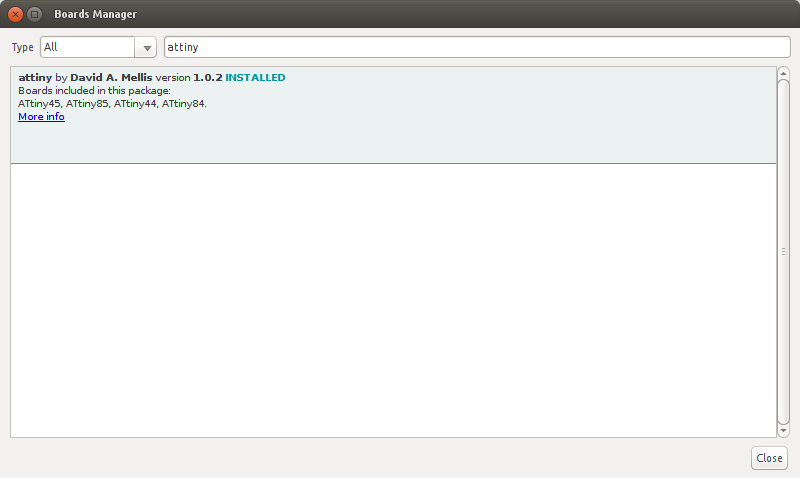
Once I did that then I restarted the Arduino IDE, and then again visited the Board Manager and searched for the Attiny version of the chip availability. I found it on search result then I clicked on Download to install them.