This week Prof. Neil introduced class with the magical materials that we can make at Fablabs, those are nothing but the composites. After lecture when I was Googling about, I got landed on Wikipedia very first and this is what they talk about composite,
A composite material (also called a composition material or shortened to composite which is the common name) is a material made from two or more constituent materials with significantly different physical or chemical properties that, when combined, produce a material with characteristics different from the individual components.
Basically it is multi layer material which is super strong, and waterproof as the resin is. Specially these materials are used for building boats, repairing boats, making light weight but super solid things. So, the composite materials may be used to build aircrafts, kayaks, space-shuttles, gliders, armors for vehicles, personal armor and lot more, wherever strength and weight ratio is really crucial.
Goal

This time I wanted to make a case for my laptop in which I can store my laptop and protect it against the hot-n-cold conditions. Thi case if inspire by the mac book case that I've seen may time and that stuck on my mind.
Get Started
Step 1: Measurements and Sketches
As I wanted to make the case for my laptop I have to measure the laptop. I Googled it on the internet with the model number of my laptop and magically he returned me the dimensions of my own laptop, east huh? After which I sketched the rough drawing of the dimensions and the adjustments that I'm making in my design, which I'm using for making the mold. My laptop turned out roughly be 345x250x31mm. I made the mold using wood which are pretty strong and can be procure easily as compared to foam.
Step 2: Drafting on Solidworks
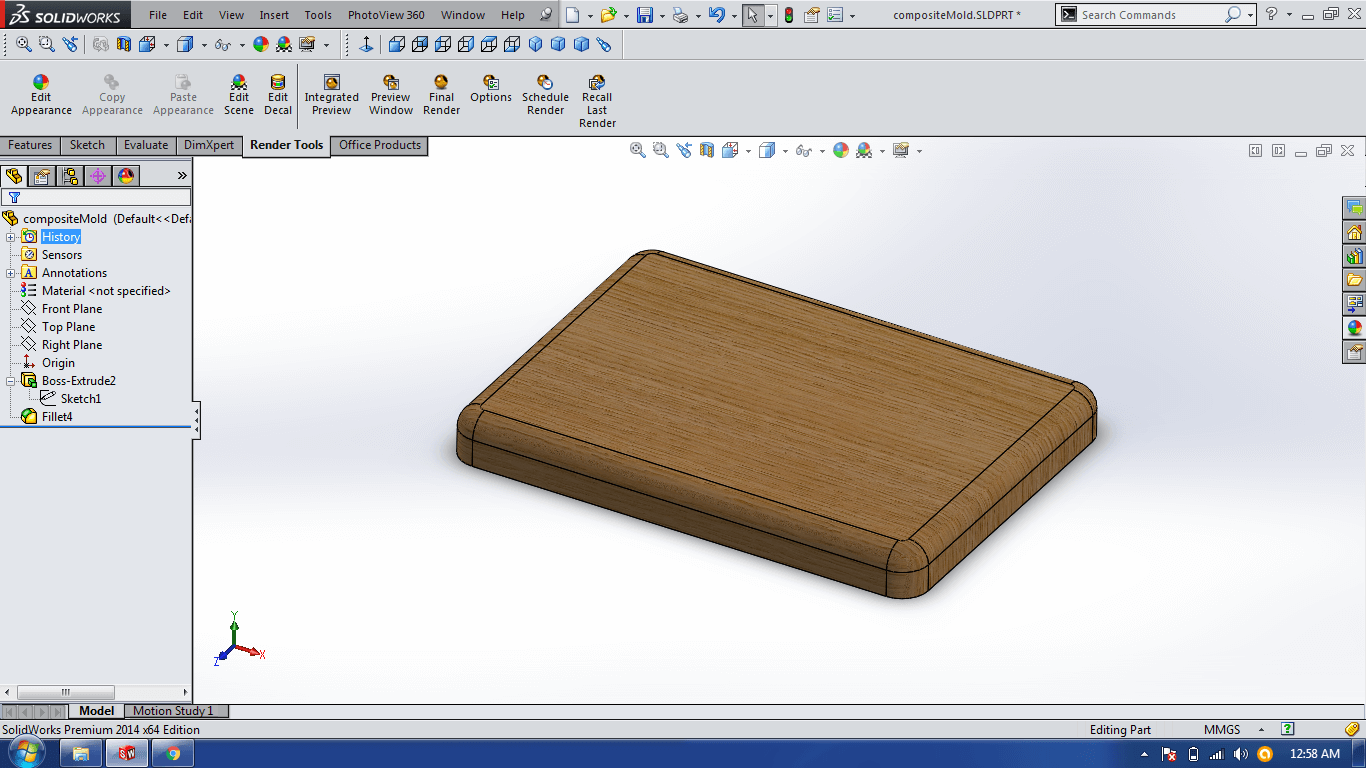
Now I have everything in place. I booted up the SolidWorks and started drawing the shape and sizes of the things that I wanted to get machined. For this week I going to eliminate the masculine bumps that we have on the Thule's case for which I've attached the image in above section. I've thought of keeping the design less complicated and making the mold for composites in following way.
I've used top plane to sketch and then boss extruded to the required height of the case I'm aiming at which is 35mm. Then I used fillets at the corners which added in the look and design and the functionality that is when I carry the case in my backpack the rounded edges won't hurt my bag interior.
Step 3: Machining

The output of this step gonna be the perfect mold ready to take the material on top to make what I'm aiming at a laptop case.
As I have machined the mold in milling machine I thought of using laser cutter to make the mold. I took the piece of cardboard which I can turn in to snap-fit mold and then I can use it for molding. This time I used the website to make the box.
Improper cut due to structure
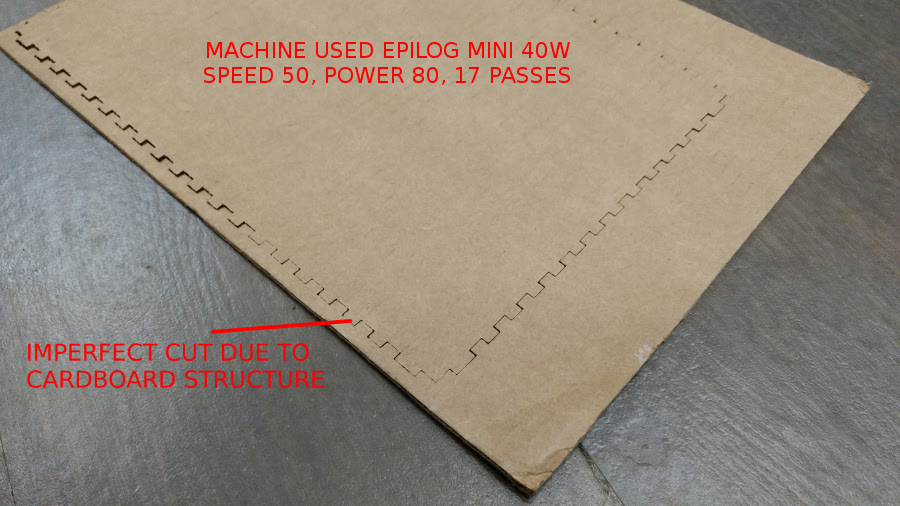
Due to corrugated cardboard structure the lase didn't able to reach the bottom most layer properly, as a result cardboard is not perfectly separated by laser cutter, later I did it manually. Other small pieces of cardboard got nicely separated from big piece of cardboard.
Epoxy resin comes in two part, one of which is hardener and other one is resin itself. Both individually can't do anything, when they are mixed the curation process starts and then after curing period it becomes rock solid. Curing time is depends upon the environmental parameters which are,
- Temperature
- Humidity
- Ratio of hardener and resin
Step 4: Mold preparation
As I made mold using the box make which is website I have to stuff the mold with something that will avoid the collapsing of mold while vacuum bagging. Where vacuum creates much higher magnitude of pressure on mold, to avoid that I've added few layers of thermocol inside the mold.
Then I added the layer of the vacuum bag film on top of the mold to make it non-stick. If I wouldn't have done that then the mold itself will get stuck to composite and I have to repeat the task.
Step 5: Mixing Epoxy Resin

Epoxy resin comes in two part, one of which is hardener and other one is resin itself. Both individually can't do anything, when they are mixed the curation process starts and then after curing period it becomes rock solid. Curing time is depends upon the environmental parameters which are,
- Temperature
- Humidity
- Ratio of hardener and resin
I've used the Areldite epoxy resin which is available in lab. I mixed them in a cup using stirrer. Well mix it using the mixing stick, as the replacement of professional mixing stick I've used a piece of wood to mix it. Mixing the parts for about 1 minutes ensures the proper homogeneous mixture which is what is required. Look out for the color of the mixture, there should not be any element remained mixed. Color of the mixture which I made was like the tile attached. And it was not transparent and thick in consistency.
- Mixing Ratio:
- By Weight : 100R/80H
- By volume : 100R/100H
Step 6: Laying down the layers

I've prepared epoxy and the pieces of fabric. I first layer of fabric and applied the uniform layer of epoxy on it. Epoxy got into the fibers of the cloth which are woven in to a piece of the uniform fabric and the density of the the fibers were very less compared to the cloth we wear. I've attached the image which is displaying the texture of the cloth which I've used. It's a white cotton fabric.
This fabric was not so strong with little force also, one can tear it apart, now the resin's job is to make it stronger and bond the pieces to other layers of composite which in total adds the strength.
One by I added the epoxy on the layers, and saturated each of the layer with the resin. Then I applied each of the layer on the mold one by one. Once all the layer are applied successfully it's time to weight for them to cure.
Step 7: Vacuum Bagging
But, wait now I have to drain the excessive amount of resin left between the layer. Vacuum bagging does the same and it make the layer to get properly shaped. This is not the rocket science though it sounds vacuum. Here, I took the vacuum bag film and vacuum sealing tape to make the vacuum bag. Here in the lab there was no vacuum pump, so I've used the large vacuum cleaner to suck the air and epoxy out and regularly turned on and off the vacuum cleaner to avoid any mishaps. The pressure difference between the outside and inside pressure makes layers to take shape of the mold and helps to drains excess amount of resin from the layer.
To make the vacuum bag I cut the piece of vacuum bag film the size should enough to wrap the entire mold and space to stick ends together. Then I took the sealant and added it on each edge of the film and then kept small opening for vacuum cleaner hose to go in. then I kept the layered mold inside the bag, and used a piece of flat wood and pressed the sealant to ensure there's no air gap remained. It is important because I don't want to any of the leakage takes place.
As I've seen in many tutorial the pressure should be around 25psi, which was not the case with me I feel experiment of making vacuum bag was failed. Then I applied pressure using the clamps and pieces of acrylic and wood which ultimately helped the layers to take desired shape letting the vacuum bag on top of all layers which prevented wooden pieces and dust from sticking in.
Step 8: Removing the mold
After vacuum bagging I applied pressure as mentioned above, and waited almost for 20 hours to cure the resin, as I was the rainy and humid day I've to wait that long. Then I ripped apart the vacuum bag to access the mold and layer, after that huge gap the resin was totally cured and the dried completely. Then with spatula I took the layer apart from the mold and then I stripped off the excess amount of composite using the scissors.
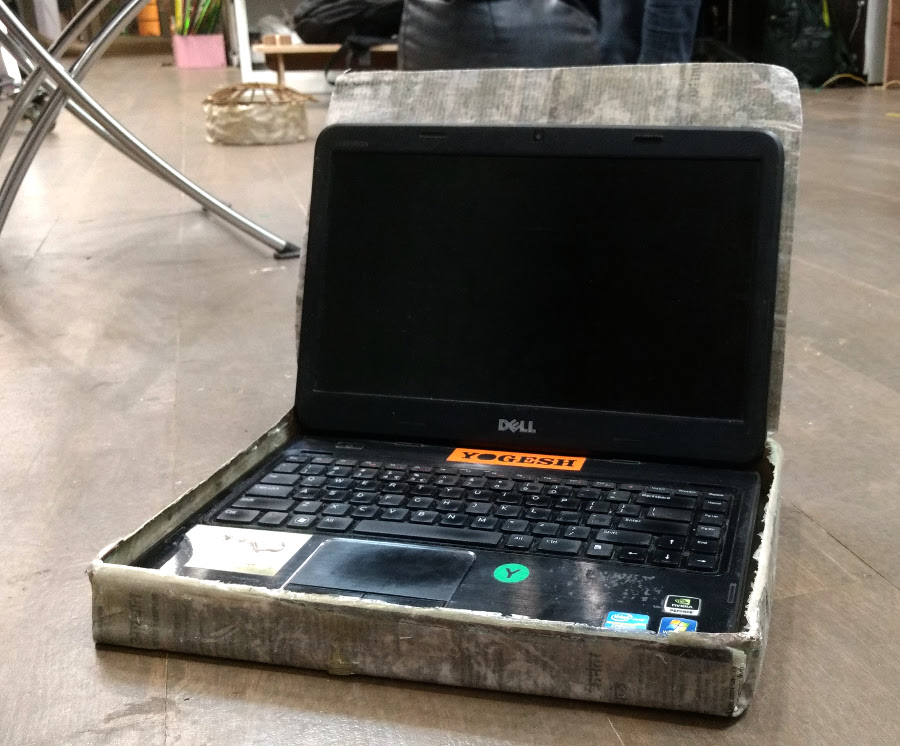
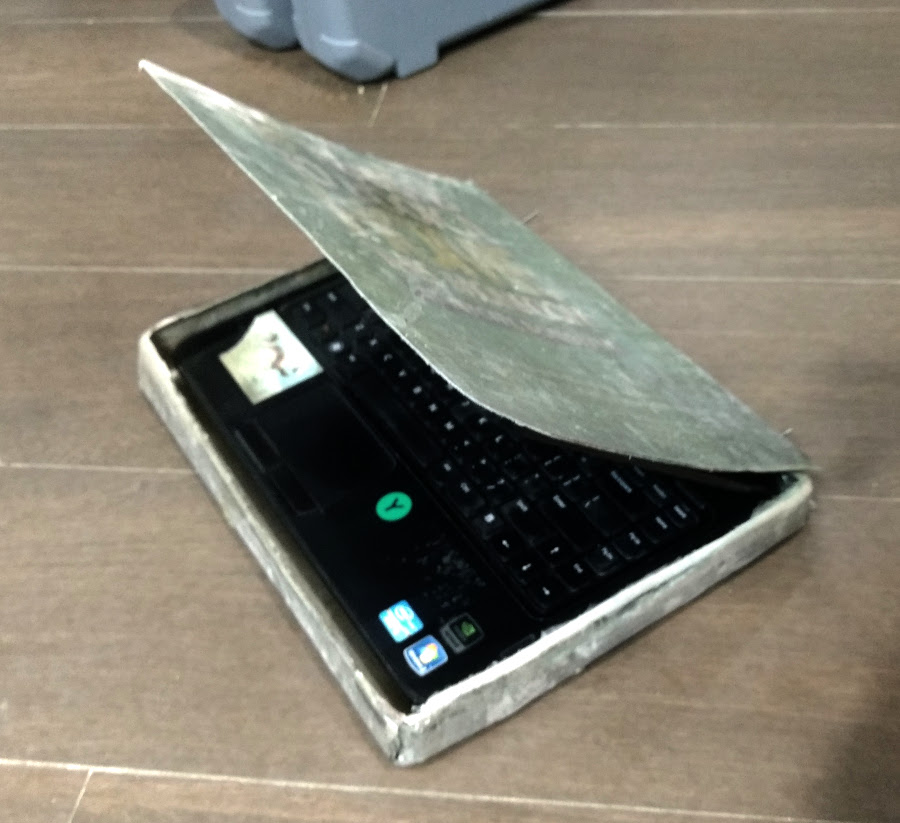
Using above mentioned procedure I made two composite objects,
- Cavity, which hold laptop
- Lid, which covers the cavity and laptop
Hero Shots

Working with burlap
Step 1: Designing
I've used Corel for this design, and exported in .dxf file. This DXF is nothing but the outline of the object, and the features of the object in 2D. Later while milling the MDF I entered the depth of the each section which I've created in the design. The depth I set for the rectangles is 10mm.
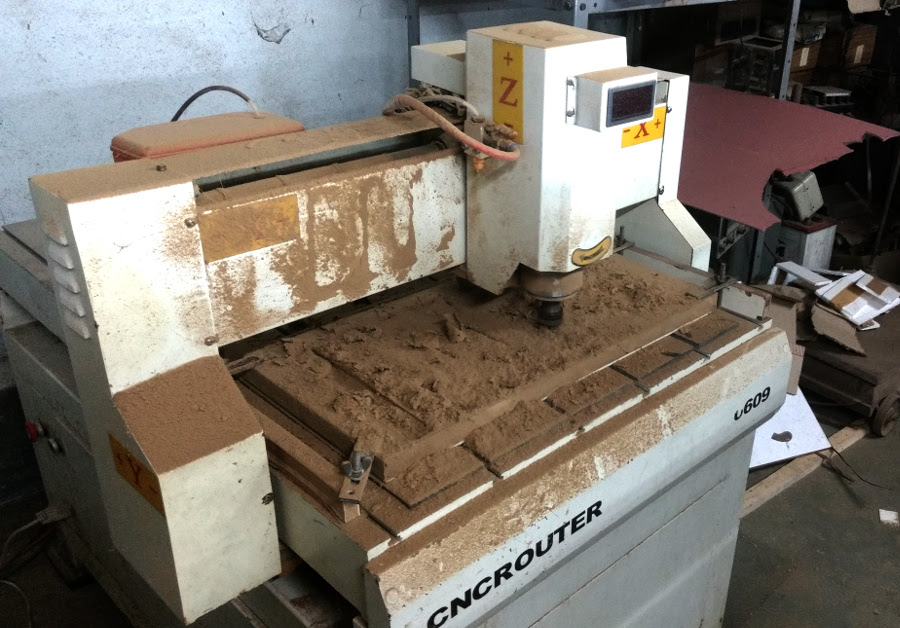
Step 2: Machining
For the machining of this object I've used the CNC router which is available as our Shopbot is ill. So, here as the software I've is to used following softwares:
- ArtCam: is the design software with which I made the tool-path.
- NCtool: is the machine software which control the machine movements.

Step 5: Mixing Epoxy Resin
The epoxy I've used is I got from a contact from an industrial area. He's manufacturer of composite doors and roofs. I got the following resin and hardener in hand.
- Resin: Araldite GY250
- Hardener: HY840
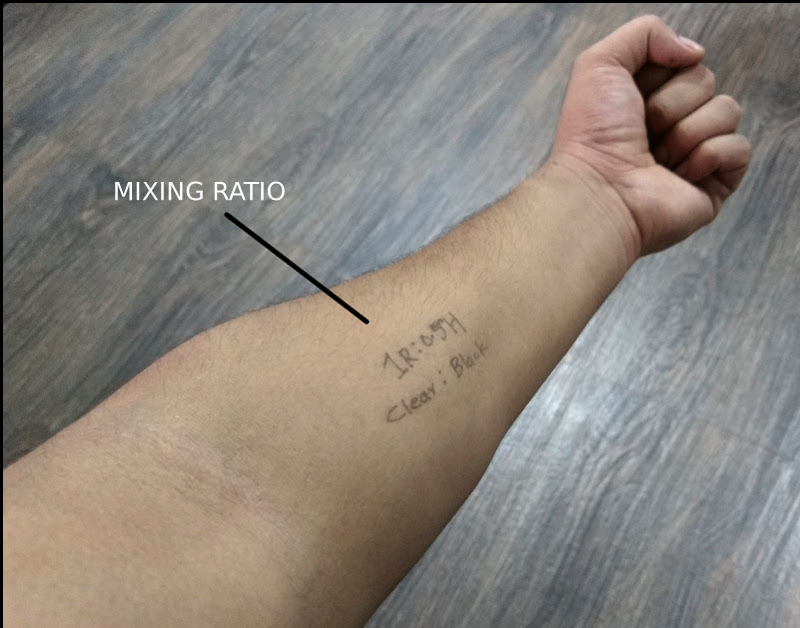
The resin is clear in visual appearance where as the hardener is dark brown in color almost black and opaque. To avoid the confusion of the mixing ratio what I did it you can see in the picture attached.

Reaction between resin and hardener is EXOTHERMIC
As I've mentioned it previously both counterparts are of no use unless another comes in, when I added the resin and hardener in the mixing container I've observed that the reaction is exothermic which means that I generates heat as hardener cures the resin. The mixture is became so hot that when I tried to touch mixture I can feel the quite elevated temperature even when I'm touching it using hand-gloves.

Mixing Ratio: 1R:0.5H
Step 6: Cutting and applying burlap

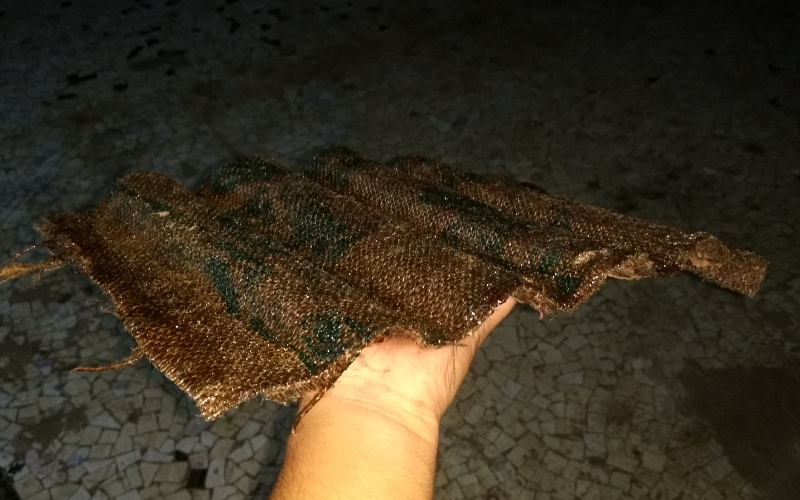
Now the resin mixture is ready it's time to apply them on the burlap. I started cutting the pieces of burlap as desired. Then I took the pieces of wood to apply the resin on burlap. The reaction of hardener and the resin is exothermic, it generates large amount of heat when mixed. And the curing process is exponential in nature.
The very first layer of burlap I got it saturated with plenty of epoxy on top, Then on later pieces it was needed to make it saturate as we did the first layer. I applied the epoxy on top surface of the burlap in second pieces, and made sure that epoxy has covered 100% area present on burlap, if not then bond becomes weak.

Mold got stuck to composite
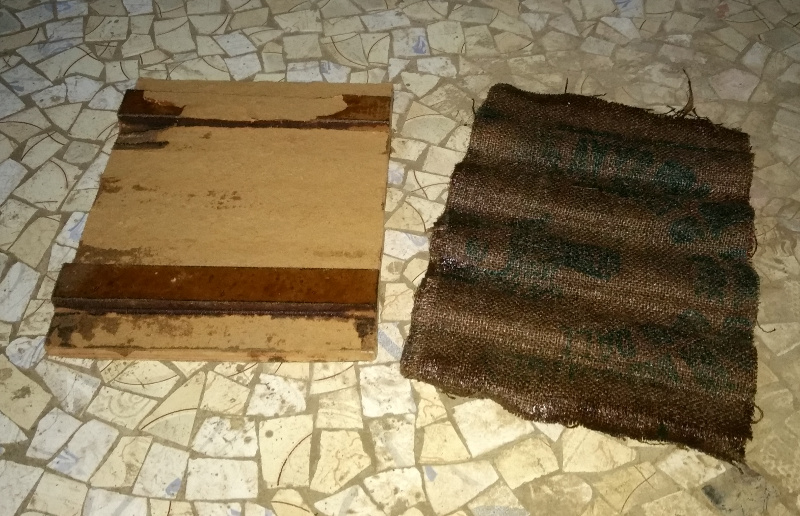
This time I've made the mold using MDF. As it is wood I thought of adding one layer of Fevicol to have as release layer, but this case it didn't worked like that. The epoxy made very-very strong bond with the underlaying mold of MDF, after curation the epoxy. To remove the composite out I added some extra force left with me and resulted in to the broken mold as shown in the picture.