Week 8 Assignment: Microcontroller Datasheet Reading + Board Programming
Go back HOME
Week 8's assignment had us understand how a Microcontroller worked. We read this datasheet: Atmel 8-Bit AVR Microcontroller with 2K/4K/8K Bytes In System Programmable Flash
Reading the ATtiny44 Datasheet
- Reading Datasheets fro any kind of Microcontroller Device is definitely a daunting task :) Looking at the 286 page count, it is not quite the novel or interactive narrative one would hope if they planned to go through it from end-to-end!
- However, just as with any Technical Documentation, the benefit of referring to such collateral would be to seek crucial information with respect to the inner workings of the subject/object being discussed -- in our case the ATtiny44 chip
- As I breezed through the chip's datasheet we were supposed to read, I realized that beyond all the technical jargon, technical specifications and limits of the device/substance in question --> there were some salient features that this document imparted with respect to the "configuration and layout" of the chip e.g. which pins mapped to which logical inputs/outputs.
Key Highlights
- The PINOUT DIAGRAM was probably the most useful characteristic of the datasheet:
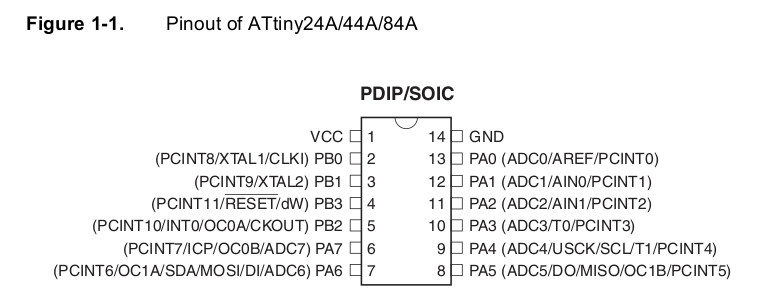
- The Voltage and Current requirements for the ATtiny44 were also good to know
- Following the visual reference provided by the Pinout Diagram, it was then possible to understand how to communicate with the ATtiny44 chip with respect to the echo hello world board.
Programming the echo hello world board
We also had to program our Hello World board from Assignment 6 to do "something" with as many different programming languages and programming environments as possible.
Update: Wednesday March 30th, 2016
Even though I had the whole of last week to catch up on this task, I was unable to really explore all the different programming environments and architectures I wanted to try, mostly because I was catching up on assignments earlier to this one! I will, however, be updating my Week 8 Assignment page as soon as I can.
Update: Friday April 1st, 2016
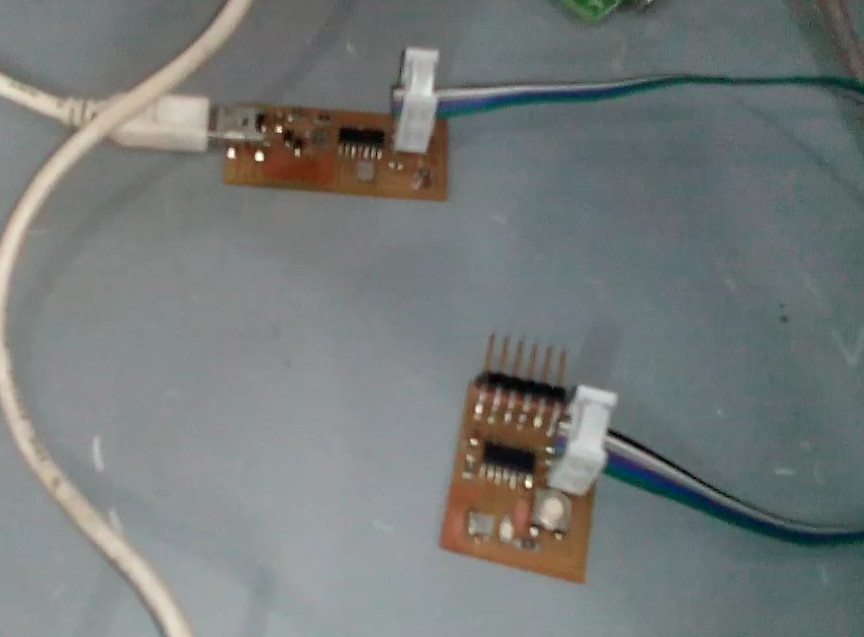
Since I had not yet milled my Hello World board, I had to use a "spare hello world board" from our Fab Lab's inventory (a board that had been previously fabricated by another student from Pre-Fab Academy)
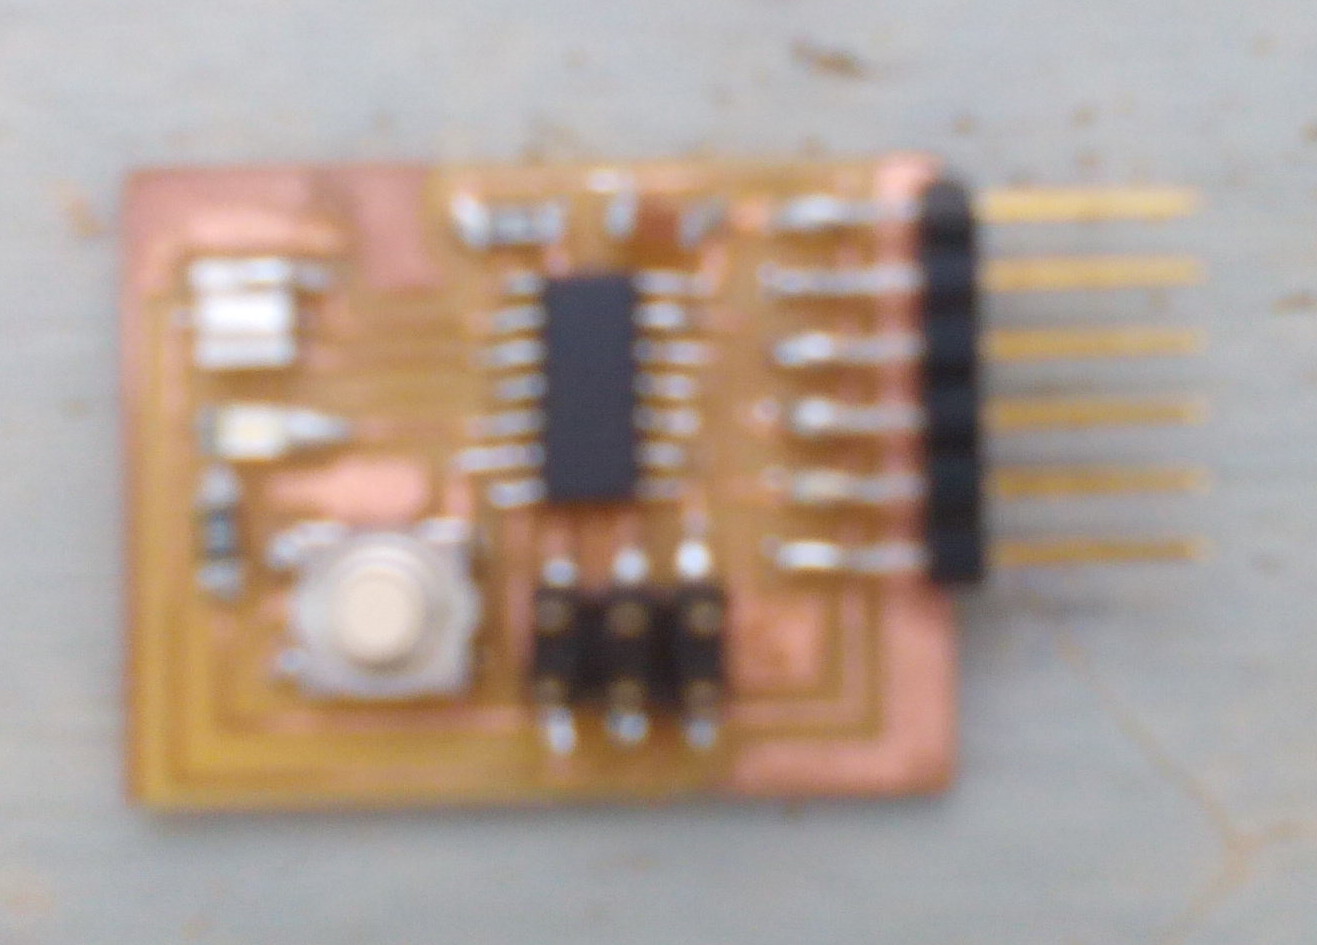
A spare echo HelloWorld board fabbed at Fab Lab Kerala
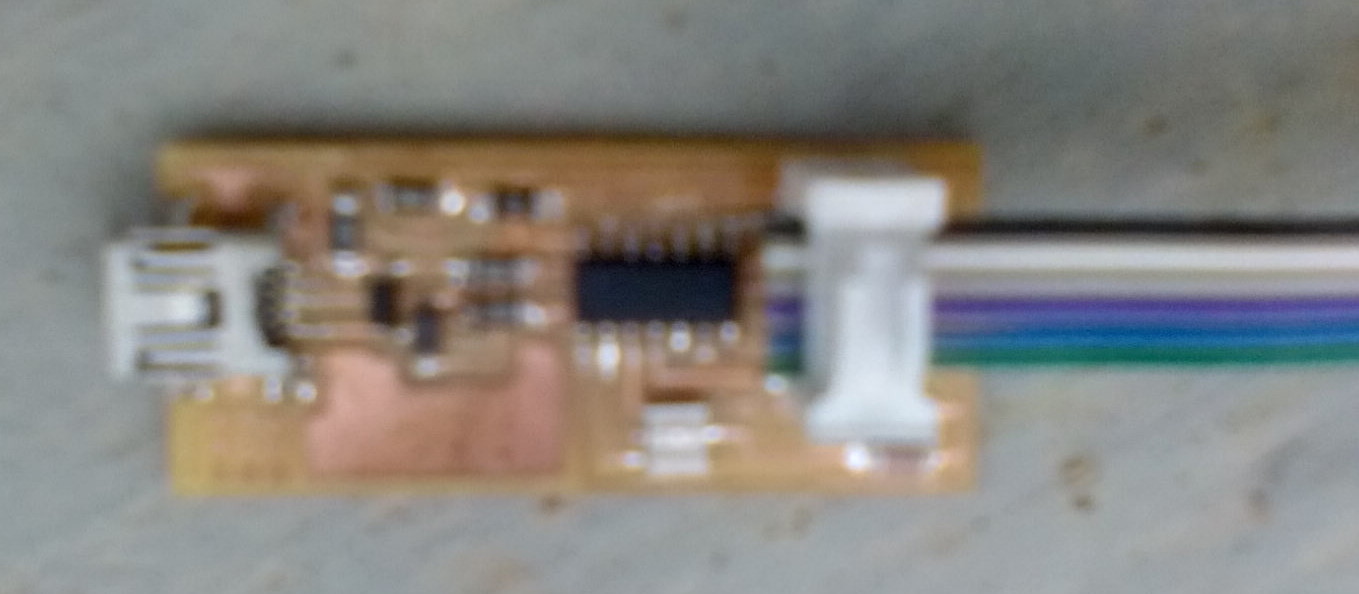
A spare FabISP board fabbed at Fab Lab Kerala
This spare (echo hello world) board had already been bootloaded by the FabISP module so the only thing left to do was to "make it do something".
Since I already had the Arduino IDE installed on my Mac machine, I fired it up and loaded the "blink.cc" code from the examples. I connected a USB to Mini USB cable to the spare FabISP module which was connected to my Mac machine; and used a 6-pin AVR header cable to connect the AVRISP pins of each module (echo hello world and FabISP) to each other
I modified the Blink code to read the digital pin 8 as an output; which was the pin connected to the LED on the echo hello world board.
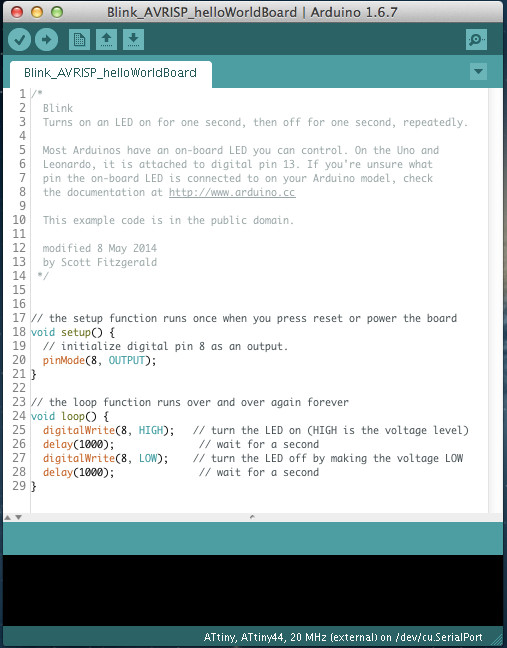
Compiling and running the code, my (for the time being) echo hello world board started to blink:
For now, I had "programmed" the echo hello world board to "do something".
Assignment Updates are STILL in Progress! Please return soon :D
Go back HOME