Week 4 : Electronics Production
Assignment
This week assignment is to make an in-circuit programmer,for that first,to use a design and the design is used to mill a board moreover to choose what are all the components are wanted then solder the board finally program it.we are using Roland MOdela MDX 20 To milling process.
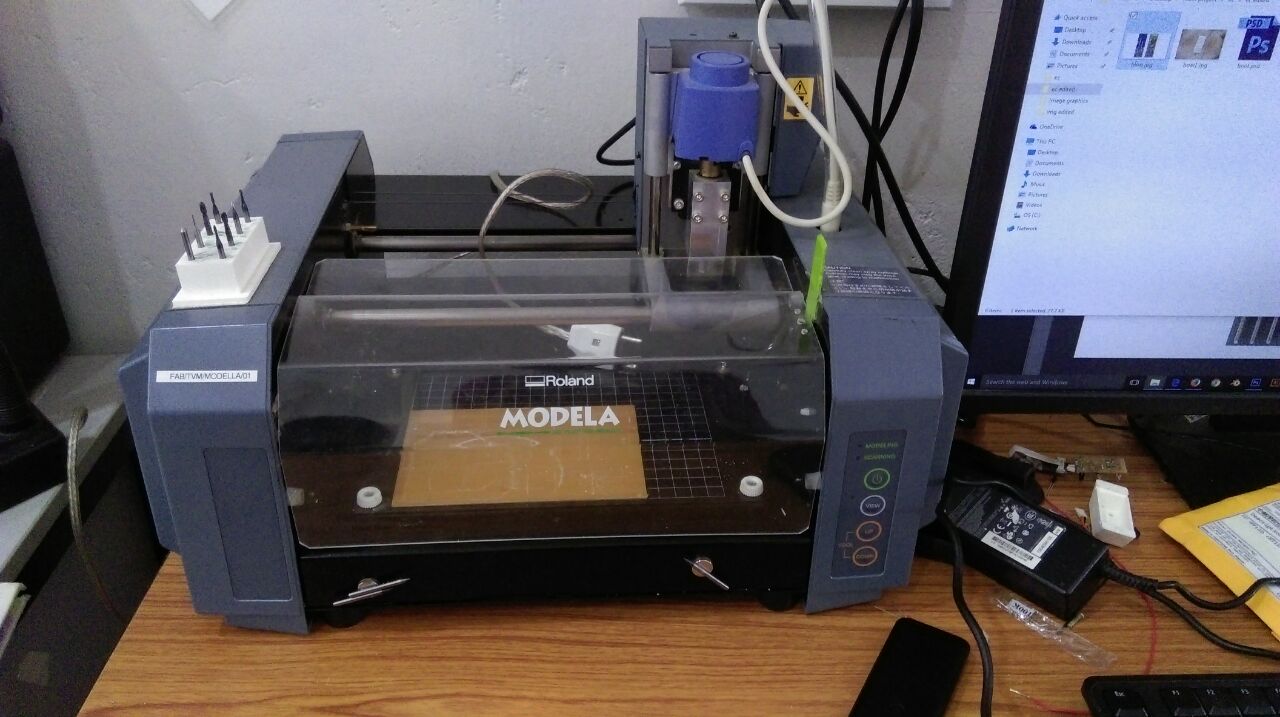
The Roland Modela MDX20 is used to control the power of 3D scanning and milling on our desktop.the maximum working area of Modela is: 203.2 mm (X) x 152.4 mm (Y) x 60.5 mm (Z)
steps
1)choose a design
2)milled the board
3)stuffing the board
4)program
choose a design
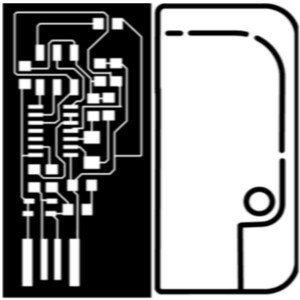
firs,we want a proper design for the the electronic production.actuly I have no more idea about elctronic design but i hope to study the design in the fab academy period.In her I am download a design from here
designed files
Milling the board
The milling process is,it remove the unwanded part of the pcb and it make our wanted traces.the rolend mdx has used differnt types of bits and this are used in different types of uses.the different types of bits are
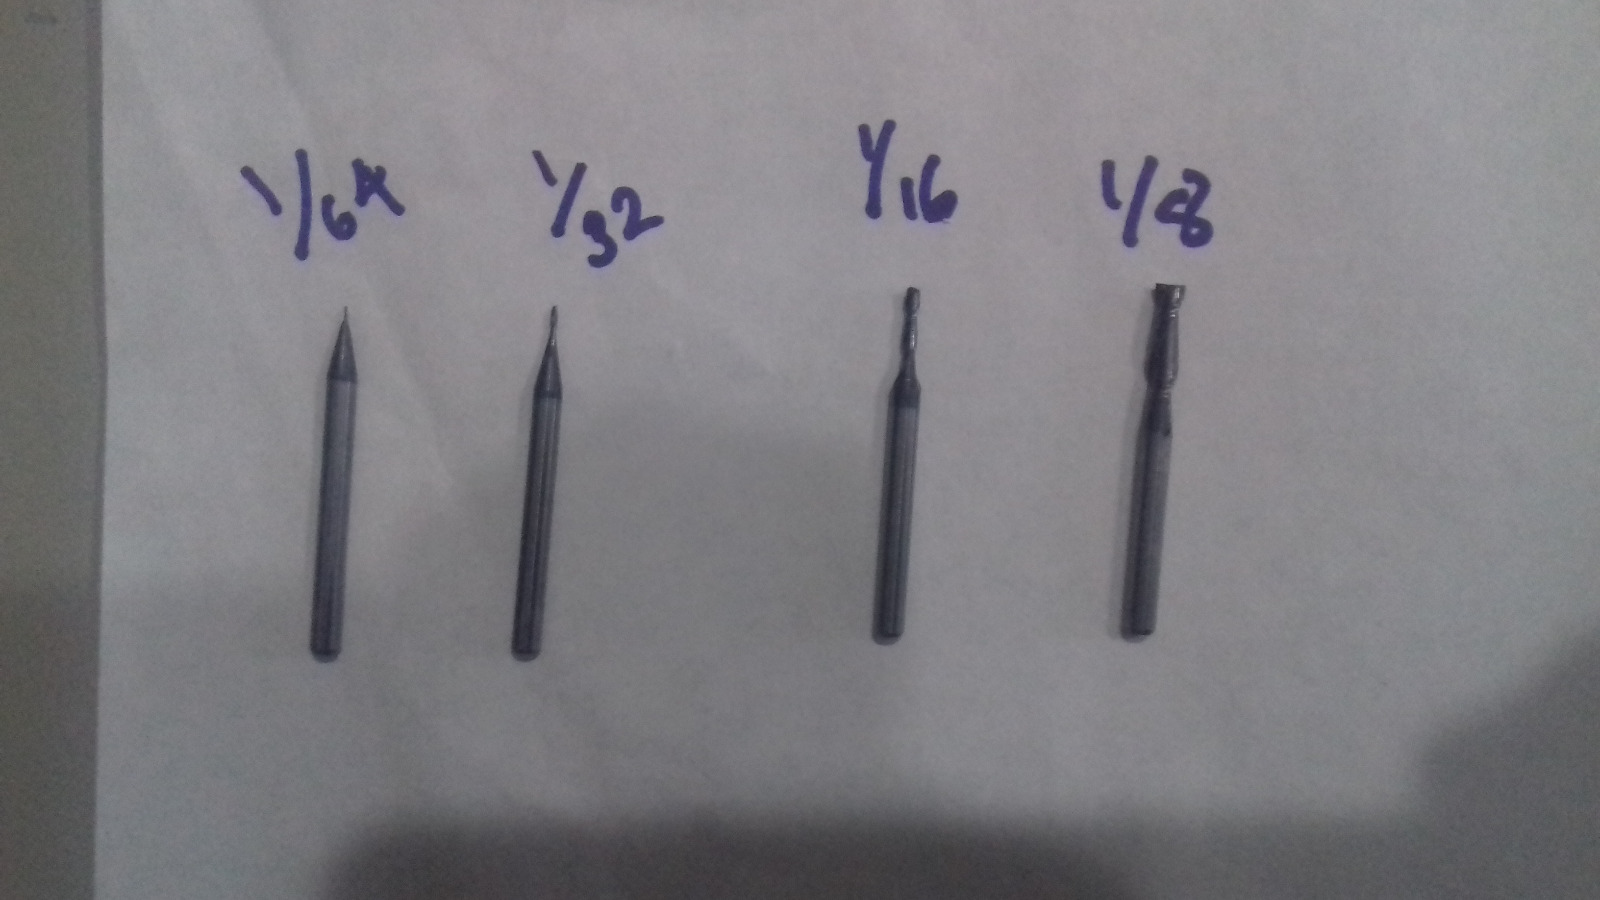
But in here we are using two types of bits (1/64) and (1/32).(1/64) is used for the trace milling process(removing copper) and (1/32) is used for the cutting process.
ok.then I start my work firstly,double side Tap is used to fix the board tightly, in this time we must ensure the PCB board is fixed correctly or not,when we milling time it is not fixed correctly the milling process will be failed that is why it fix correctly.
machine setup
machine case,we must use machine carefully otherwise ther are lot of problem
will be occured.we can see how the machine setting
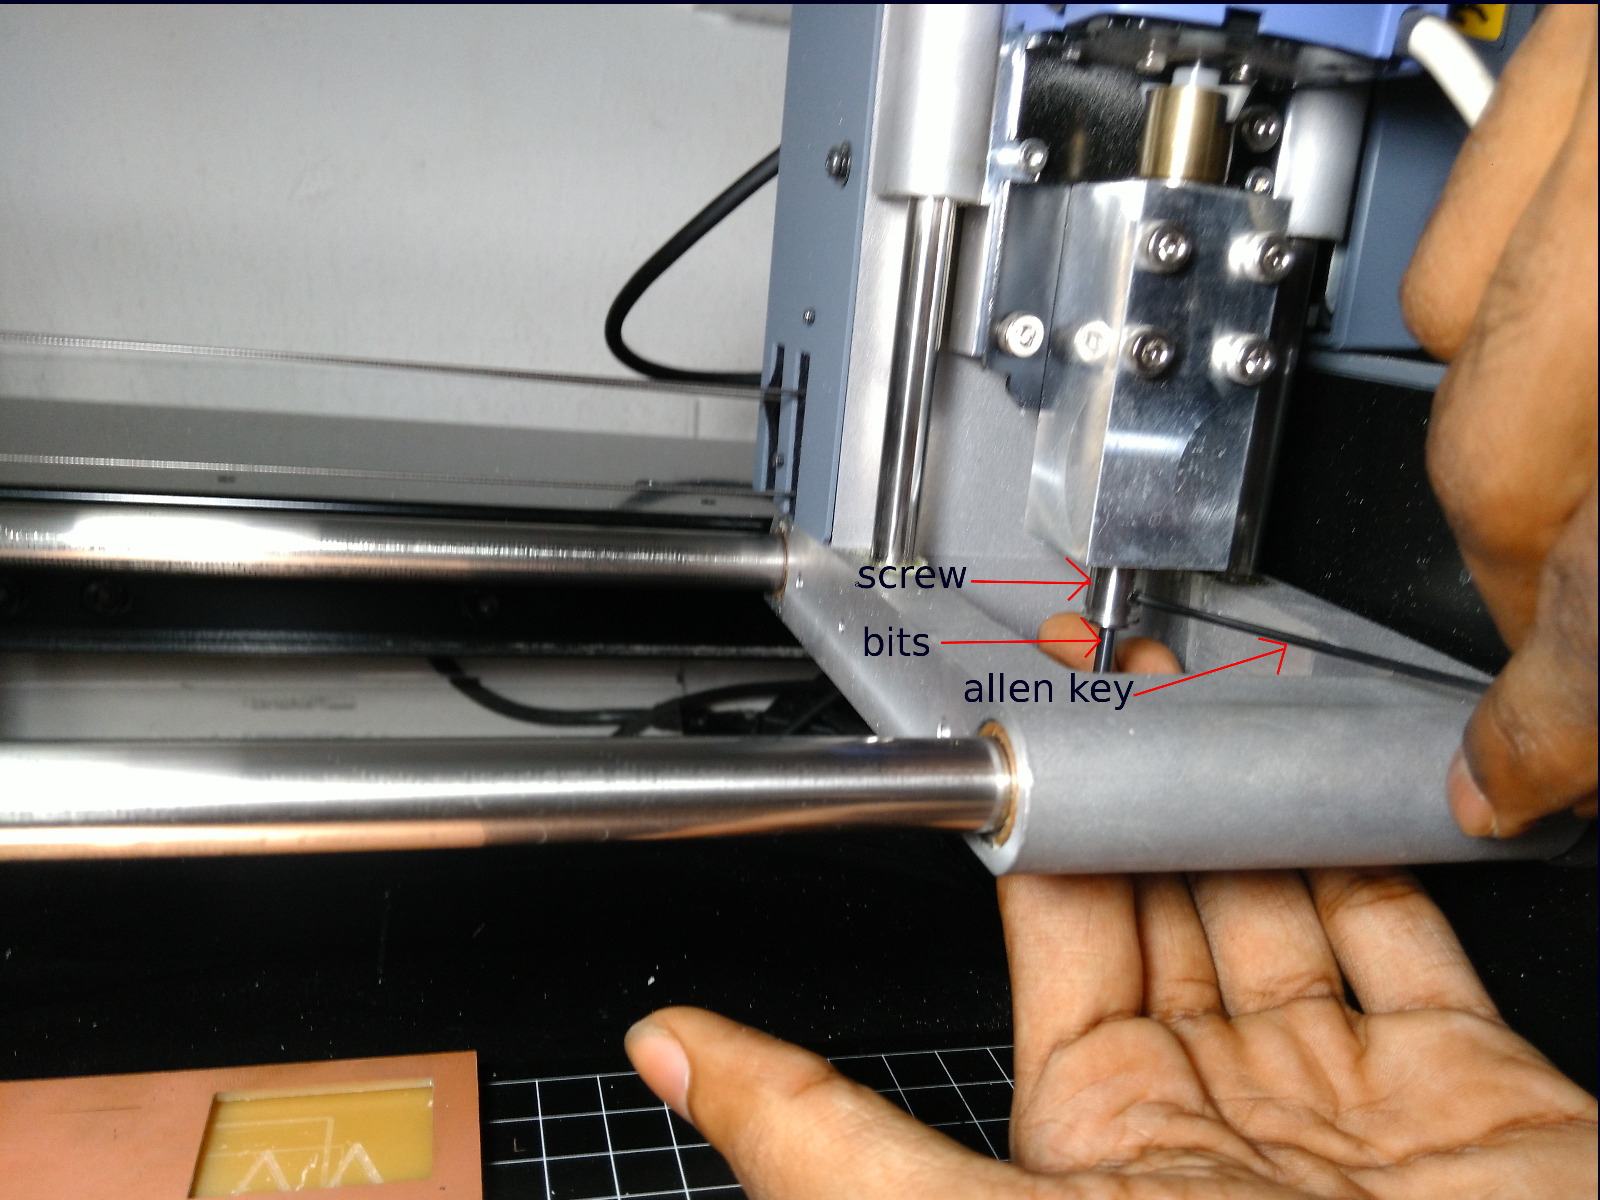
first we fix the copper board correctly. then chage the bit which bit we want
and be carefull when we will remove or insert the bit ,in this removing and
inserting time just hold the bit becuse if it is drop the bit may chance to
brekdown.
How to change bits
in this project we are using above mentioned two type of bits 1/64 and 1/32,removing the copper parts and cutting the copper plate respectively.Allen key is used for screw loosinng and tighting purpouse
using fab modules
FAB module is the software part of the controlling ,Modela MDX20.for that, install the FAB module .then type “FAB” in terminal that time a new box will be open
in that we choose the input format=image(.png) output process=roland MDX-20 mill(.rml) then click “make_png_rml” A new window will be opened
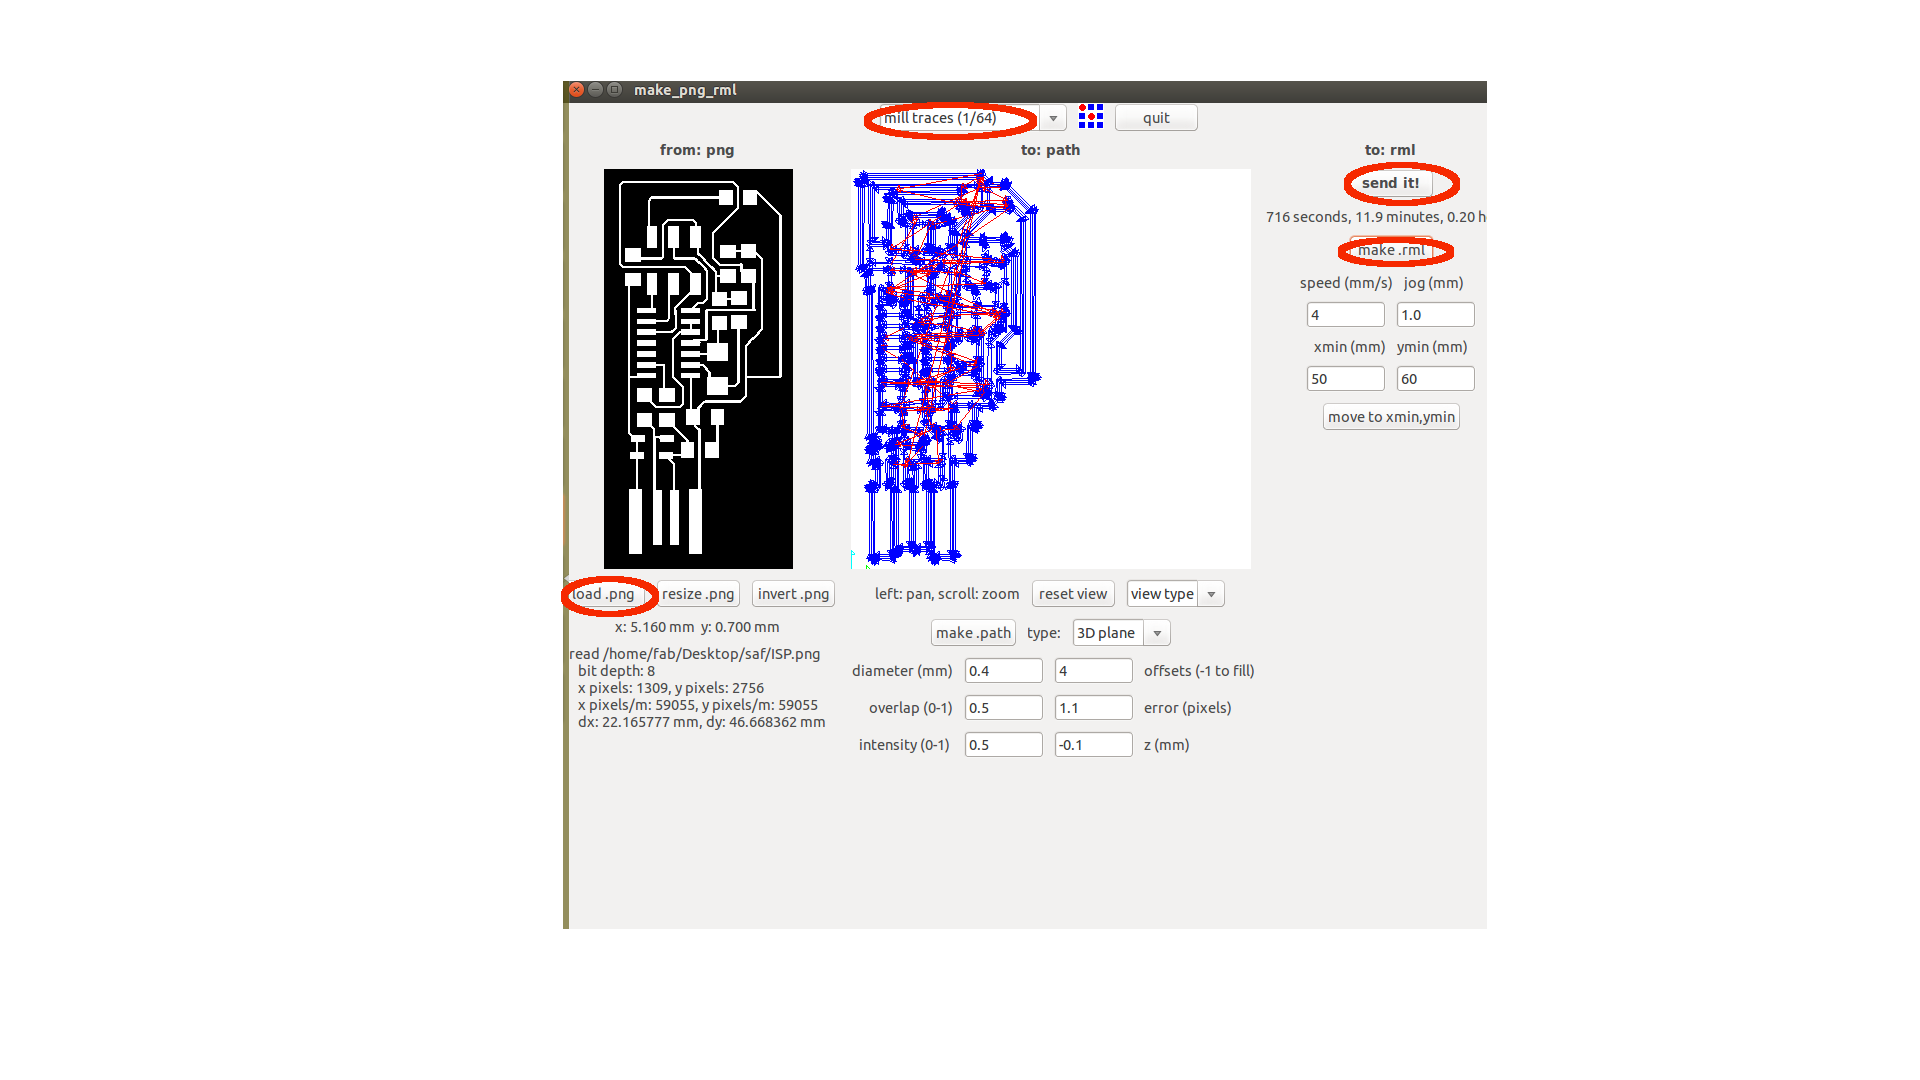
1)In the upcomming window first we choose which bit is using.in her first I am using 1/64(for milling traces )
2)then click “load png” and choose our image
3)click “make.path”
4)click “make.rml”
5)finaly click “send it” button
the upcomming box to gave detail about how much time will be required for the milling process,in that box click “begin milling”
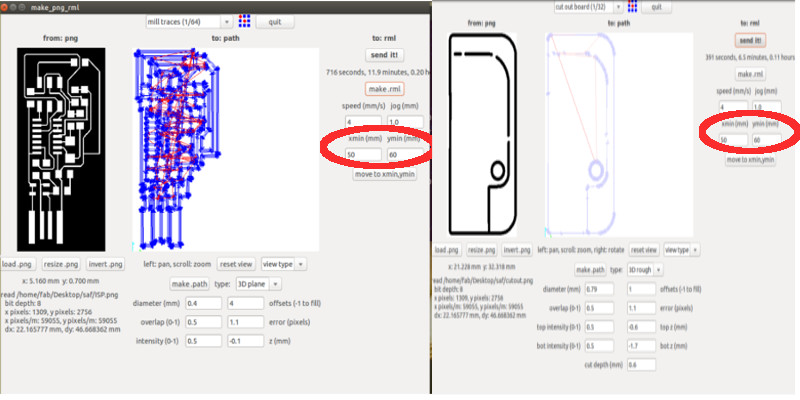
After the milling traces next stage is cutting process for that we using 1/32 bit that is why we can choose 1/32 bit cut insted of 1/64.moreover to load our cutting image and follow the remaining step same as above mentioned steps.
note***** we must keep the same axis when we milling and cutting time.
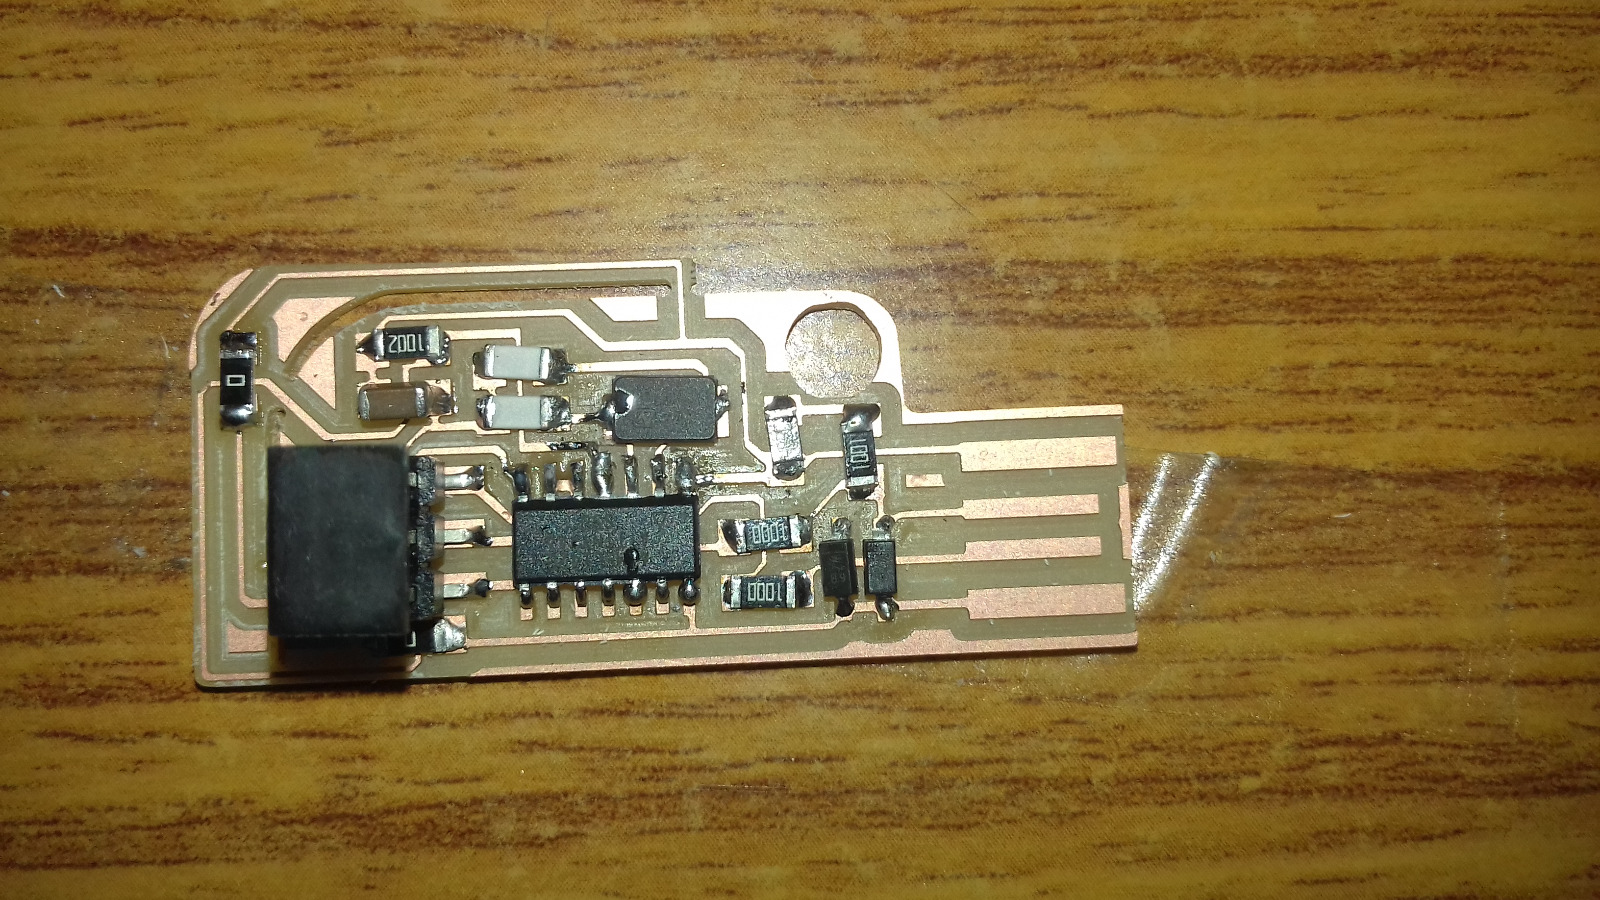
Milling Result

soldering
then I refere the plan of fab isb and I solderd

program
for the programming of isb in ubandu first want install AVRdude for the communicating in our code .
Open Terminal and type:
sudo apt-get install flex byacc bison gcc libusb-dev avrdude
gcc-avr is a compailer for the gcc- avr installetion type:
sudo apt-get install gcc-avr
type “y” when asked to do so by your system
after install avr-libc.AVR Libc is a Free Software project whose goal is to provide a high quality C library for use with GCC on AVR microcontrollers
Then type:
sudo apt-get install avr-libc
programming steps
Type :
make clean
Type:
make hex
then Type:
make fuse
Next step is program the board to be an ISP for that type:
make program
if it all are ok then we will get a successful message