Week 17: Interface and Application Programming
Assignment:
This week assignemt is to write an application that interface with an Input or Output device I've made as well as to compare as many tool options as possible. I Explored through MIT App inventor, Scratch and then moved on to processing for doing the assignment.
I did go through the processing tutorial page to get some idea regarding the software and how to use it. Also, a few youtube tutorials seemed helpful. Processing is very similar to Arduino IDE.
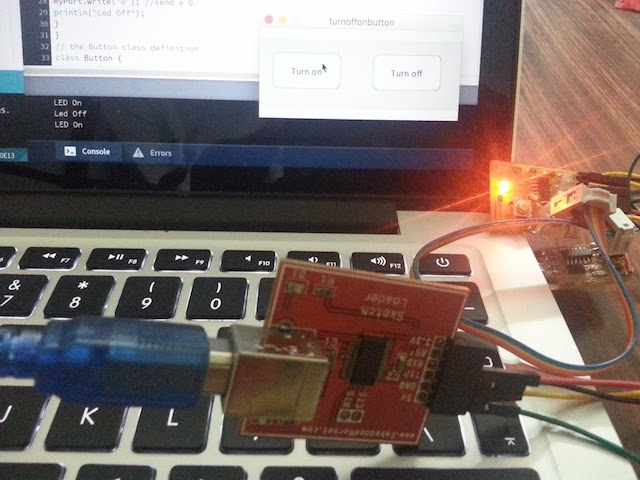
On and Off LED using buttons in processing
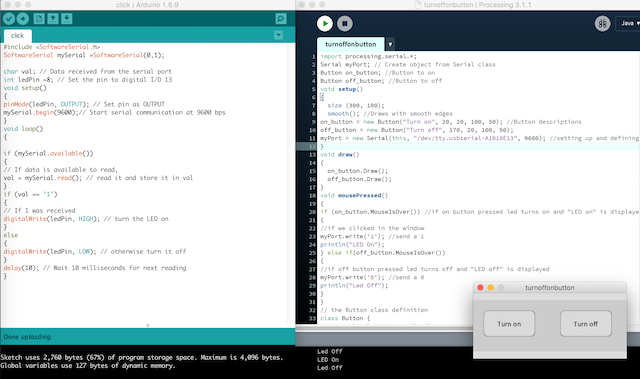
I used sketch loader breakout board to load the arduino sketch to the board. There were a few hurdles that I faced. first one being, finding the serial port number in Mac. Type
in the terminal and then you can read that serial port using the screen command screen
After this was updated in the sketch, still my board was not being interfaced, after doing a lot of checkings, I realised that this was because my serial port in arduino IDE was open. Once I closed it, then there was no issue.
Design Files
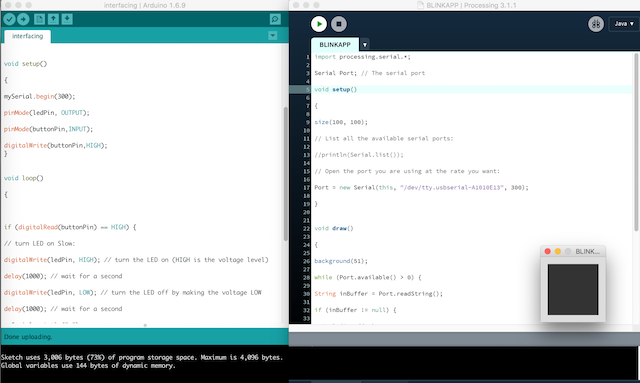
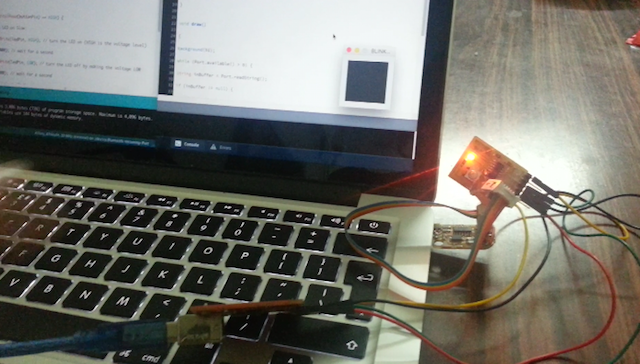
Using button in board to control the processing screen
Here, the sketch is written is such a way that the led blinks in low speed at the same time the screen too blinks slow. When the button is pressed the led blinks fast and so is the screen blinks in yellow. The Debouncing capacitor is not connected, hence for every press of button there occurs bouncing effect
Design Files
Different tools to do Interfacing
Scratch
MIT App Inventor
Insights:
- Easy to use interface, which is divided into two views for creating apps - Design and Block view
- First with design view, you create the front end view of the mobile app
- Then with the block view, you give in the codes that control the app
- Save the project, download the apk file