Week 13 : Molding and Casting
Assignment :
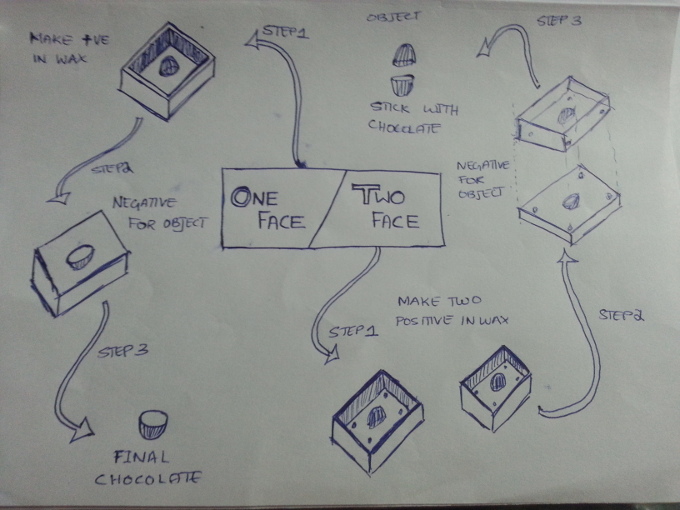
The assignment can be divided into four steps:
- Create 3D object for molding
- Create the positive object in a millable wax using shopbot or modella
- Create the negative part that is the "mold" of the object milled
- Cast the object - your final product!
I'm planning to make chocolate mold!
1. Creating of 3D object for molding.
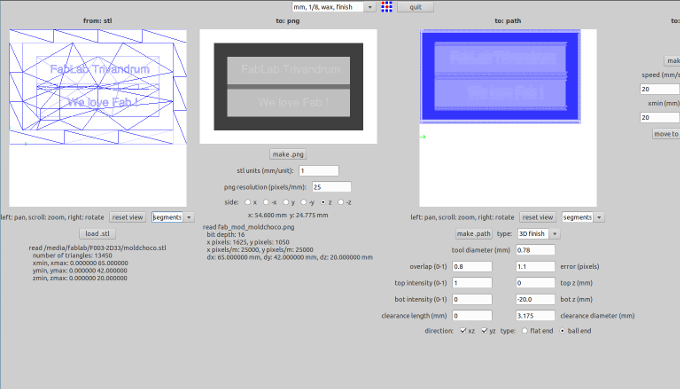
I used Rhino software for designing the mold to be milled in the wax. There are two ways to do chocolate molds. Which is one face or Whole body. I am making flat with one face, so that the CNC machine is going to mill the positive design. Then when you pour the silicon, it make the negative and you have the mold ready.
For making whole body chocolate, you need to dividing your object into two faces and leave connection joints to then be assembled and fill it with chocolate.
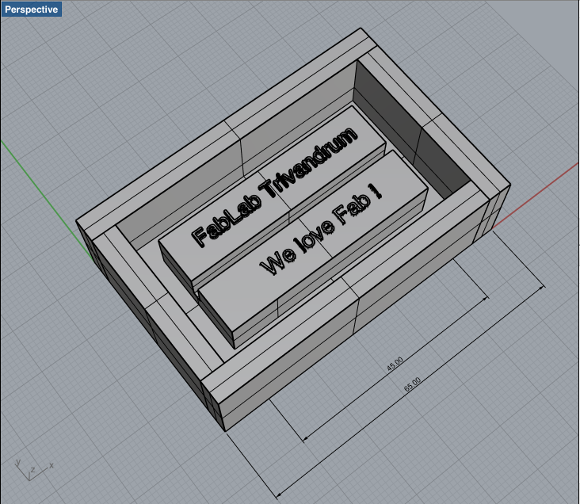
I designed a mold in rhino as shown in the below image. Making a mold, you need a container that is you need walls. There are a few points to consider while making molds. They are:
- The object to be casted height must be atleast 5mm less than the walls.
- The object to be casted should be located near to the centre of the mold, atleast 5mm away from the walls.
- Walls for silicon should be atleast 5mm thickness, similarly take care that wax walls are not too thin
- Either that the letters were so small for the bit to consider the paths.
- The 1/32 bit used was ball nose, so the edges could be curve only.
- While doing the first finishing cut with 1/16 bit, I accidentially mentioned the bit as ball nose, inspite of it being flat nose. Even this could be the reason.
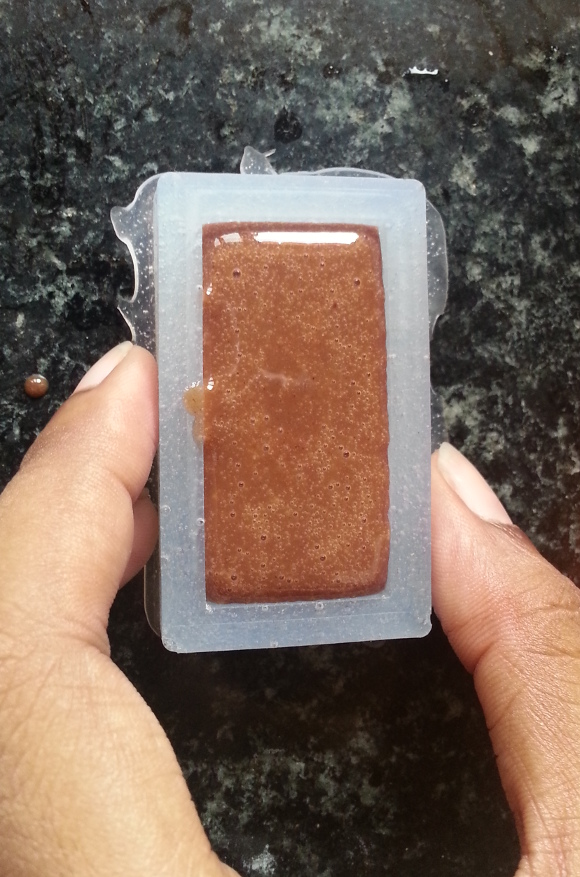
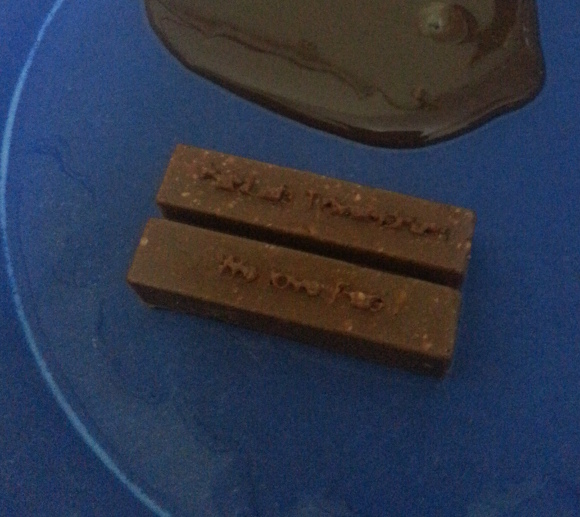
I did design the chocolate like a kit-kat bar and had a projection of writings "FabLab Trivandrum" and "We Love Fab!". The positive and negative of the mold is shown below.
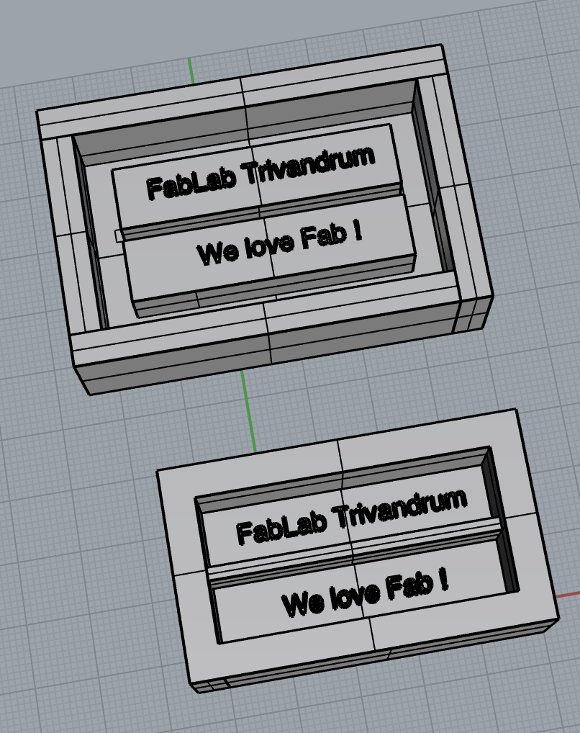
Final Mold Design
The Design files of the mold can be downloaded here
: Design Files [.3dm format]
2. Creating the positive object in millable wax
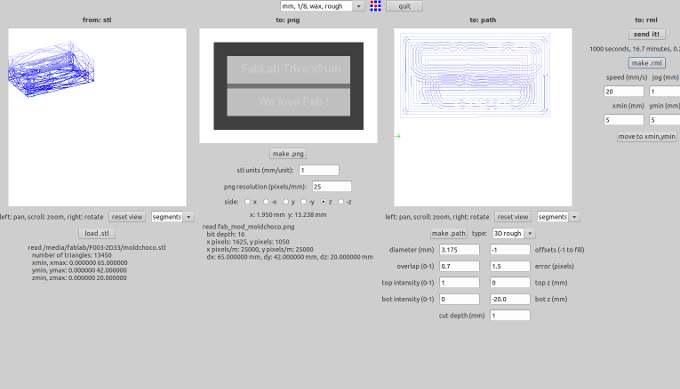
I used Roland Modela to mill the wax. I exported the model from .3dm format to .stl format and opened the .stl mesh in fab modules to be processed with the Roland Modela.
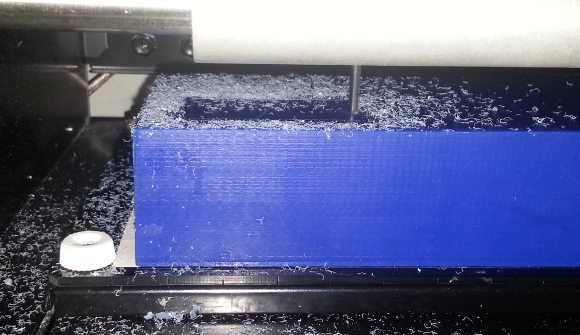
I loaded the .stl file and made it to .png file. Then I choosed 1/8 wax rough and the bit diameter was 3.175mm. Then I finally made the path. Next step is to fix the wax on the machine with double sided tape. It is to be done just as fixing a copper clad on to the board, but no need for sacrificial layer. The bit should be fixed such that it does not plunge into the wax.
After the rough cut, I realised that the milling was not done in the middle part of the
two fingers. So, directly doing the finishing cut with 1/32 bit would strain the tool and
result in the bit breaking. Idealy to solve this I used 1/16 FN bit at first to mill only
along xz direction at first. So this was the first finishing cut done.
Finally, the middle portion was milled well that it would put less strain to the 1/32 bit while doing the final finishing cut.I used 1/34 inch Ball nose bit. Flat not bit was not available, So the edges of the letters in the mold was not milled as expected. I found out that this could be due to the following reasons:
Milling the wax in pictures...
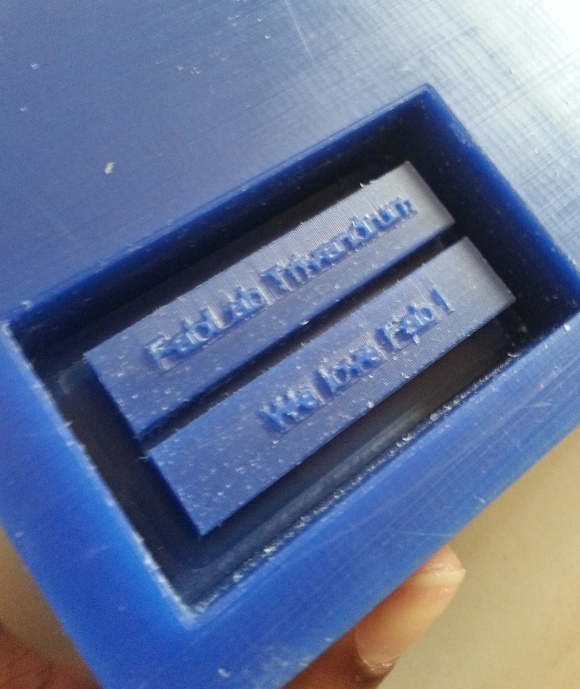
I am happy with the texture that is left on the wax, just that the letters did not come off well as expected. I hope the silicon mold could transfer the letters pretty well for my chocolates.
3. Creating the negative part - The Silicon Mold of object!
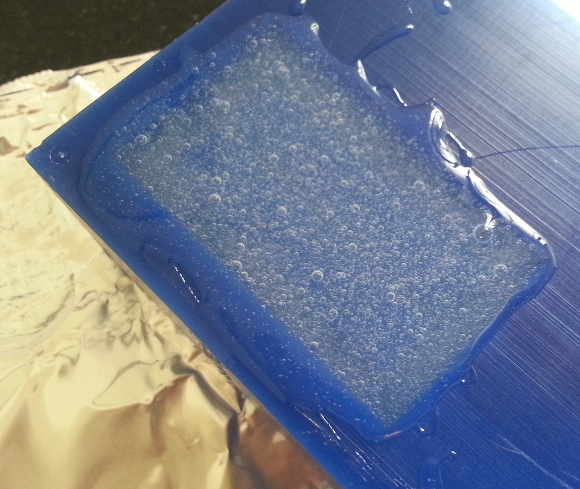
I am going to use food safe silicon. First step is to read the instructions and safety of the silicon and be sure that you take all the safety measures. Second step is to measure how much is the volume of the mold. Then we need to translate it into proportions of the product A and B (Base and Catalyzer). The ratio is 50:50 so we mix equal amount of A and B. While Mixing do not mix vigorously at first as it puts much air inside the mix which means more bubble. Once both A and B are mixed, the mixture should be poured into the mold in 40 minutes.
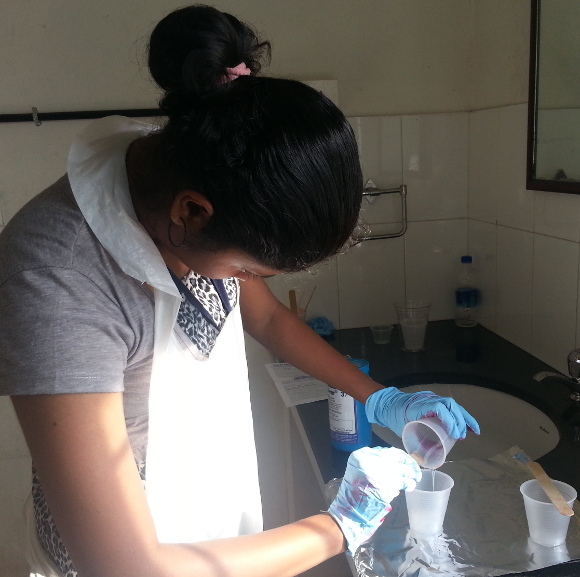
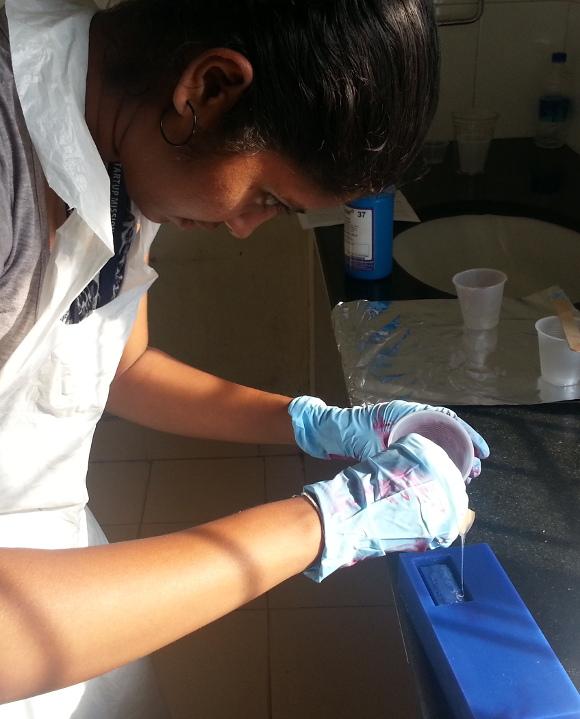
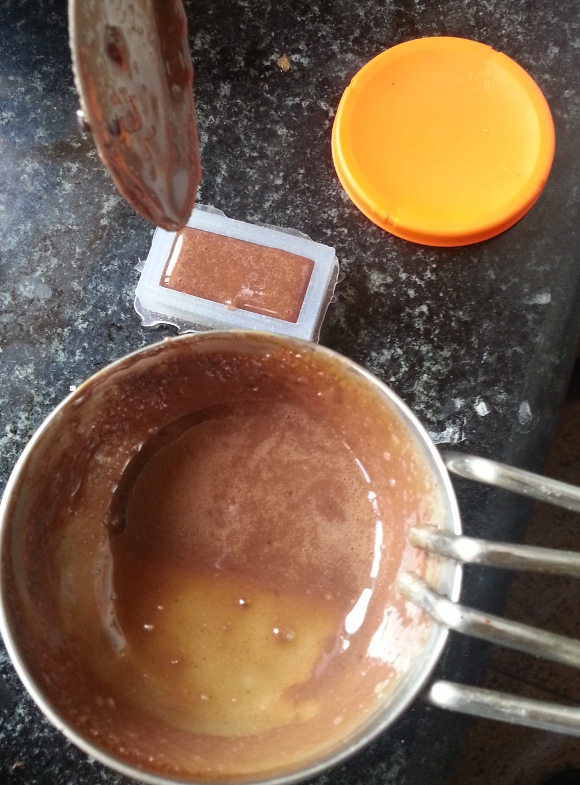
While pouring the mixture to the mold, I took extra care that silicone gets filled in all those letters. For this I poured the silicone like strands to avoid air bubbles getting stuck in between the letters. Since I did not use vacuum bag for removing the air bubbles, after I filled the mold, I tapped the mold several times to make the air bubbles come up. The curing time is 4 hours. But what I found out was the silicon mold cured even earlier.
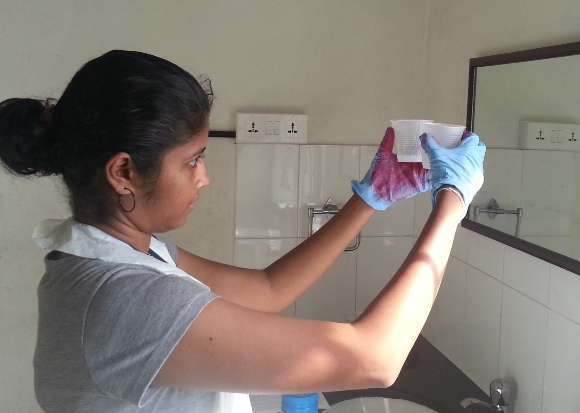
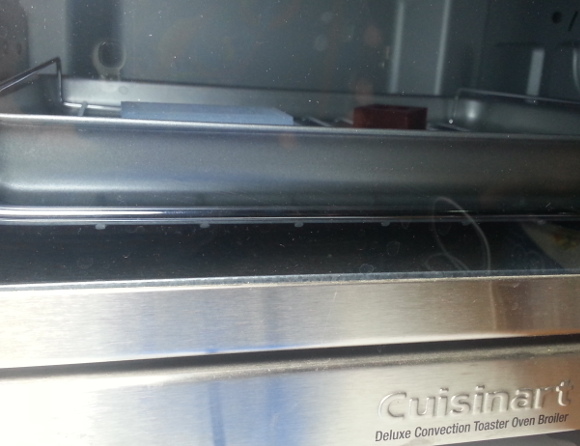
After the mold was removed from the wax, punith suggested to wash the mold, place it in the oven for 3 minutes and heat it. This is to remove the wax particles and to sterilise the silicone mold.

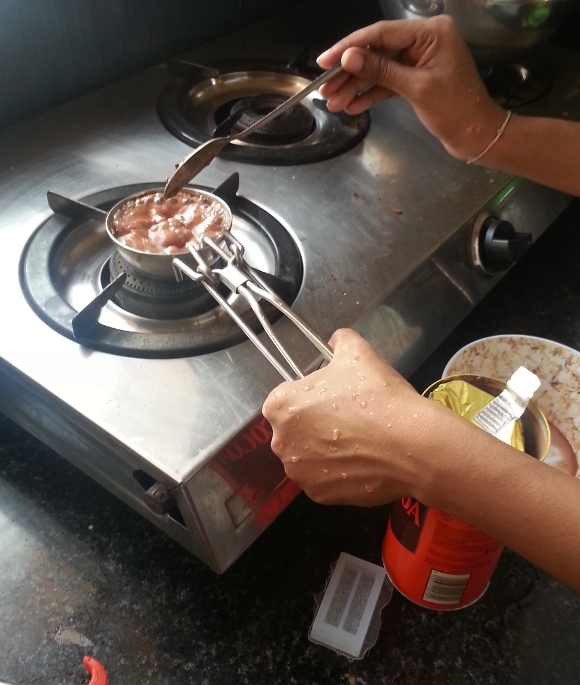
4. Cast the Object : Chocolate
It's Kitchen time!!!
I took the mold home, and tried to make my own version of chocolate with cocoa powder. Melting the cocoa powder, I also added sugar...which was too much more than required. So, when I poured the mixture to the mold and put it to freezer, it did set but got too sticky to the mold. So, since it was a failure and I didn't want to make my own version of chocolate flavour and keep on experimenting right now. I just melted toblerone and poured it to the mold. To get the chocolate to difficult places drop it vigorously against the table a couple of times. Then leave it in fridge. Finally when ready take the chocolate out of the mold and enjoy!