3D Scanning and Printing
Overview
Last updated: 25/02/2016
Objectives 1.Test the design rules for your printer(s) (group project); 2.Design and 3D print an object (small, few cm) that could not be made subtractively; 3.3D scan an object (and optionally print it). Learning outcomes 1.Identify the advantages and limitations of 3D printing and scanning technology; 2.Apply design methods and production processes to show your understanding. Have I... Described what I learned by testing the 3D printers? Shown how I designed and made my object and explained why it could not be made subtractively? Scanned an object? Outlined problems and how I fixed them? Included my design files and ‘hero shot’ photos of the scan and the final object? Summary This week consisted of both group and individual work. As a group we did test all the printers. Individually I did build a voronoi object with the 3D printer and I used 123D Catch, PhotoScan and MeshLab as tools for 3D scanning.Printers test This part consisted of a group project and can be found here.
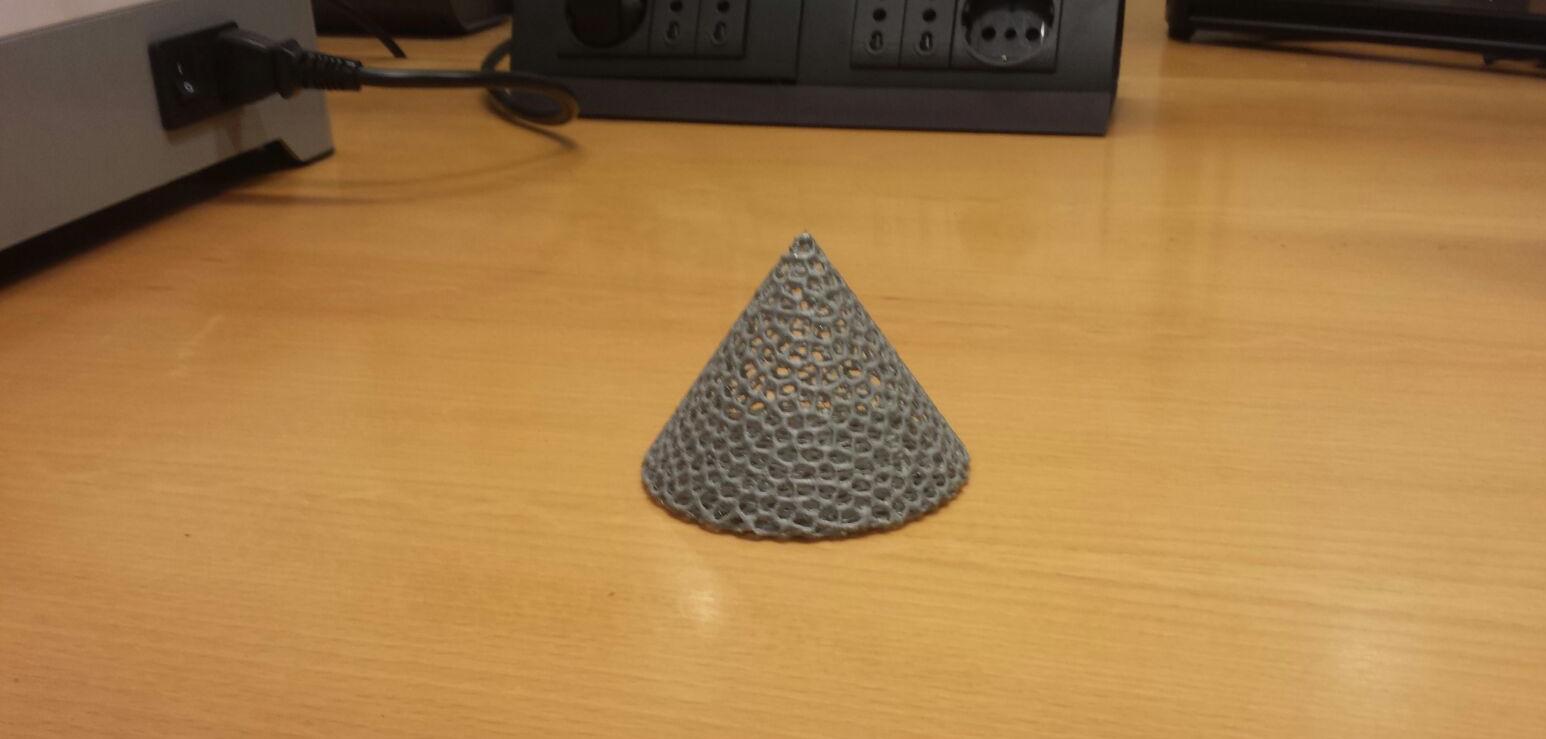
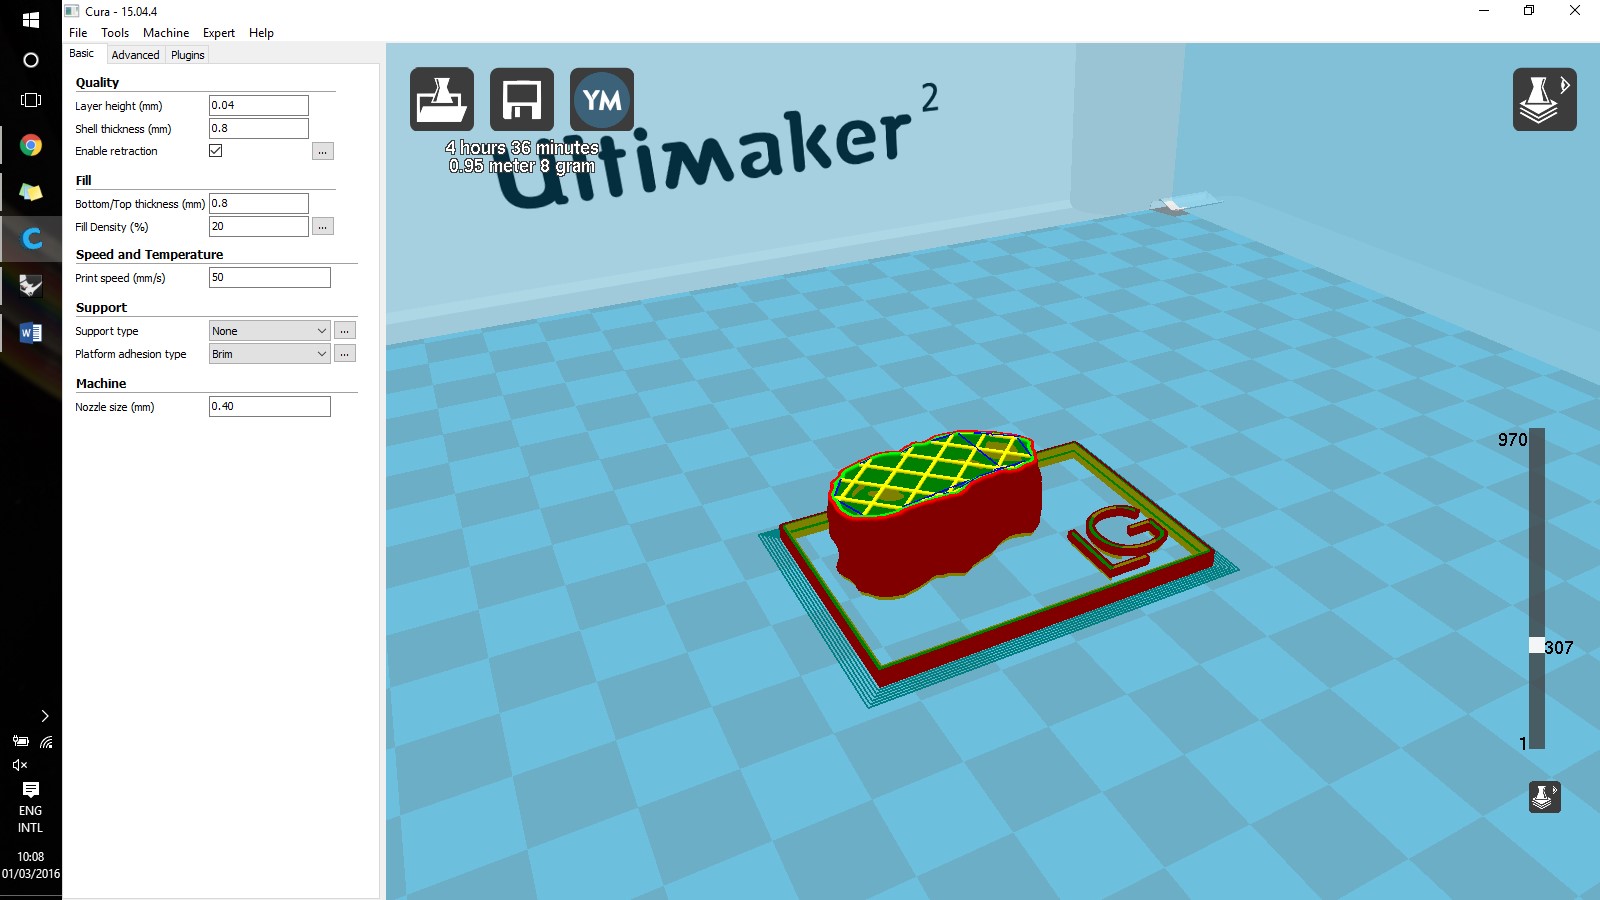
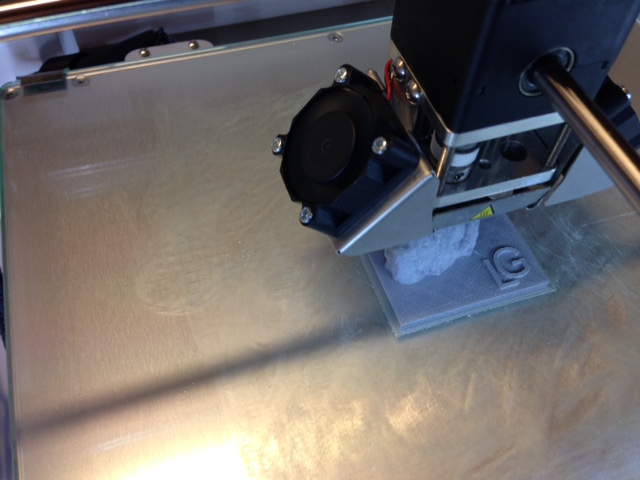
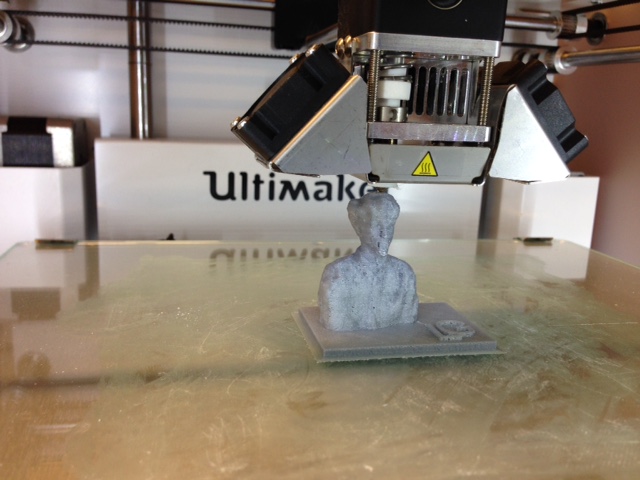
Additive Technology The goal of this assignment was to print an object that can not be manufactured with subtractive technologies. I decided to build a simple voronoi object, using this solid-to-voronoi converter, which is actually quite fun to play with. You upload a solid and it automatically converts it into a voronoi [1]. On the negative note, though, you can not control any parameter and you take what you get.
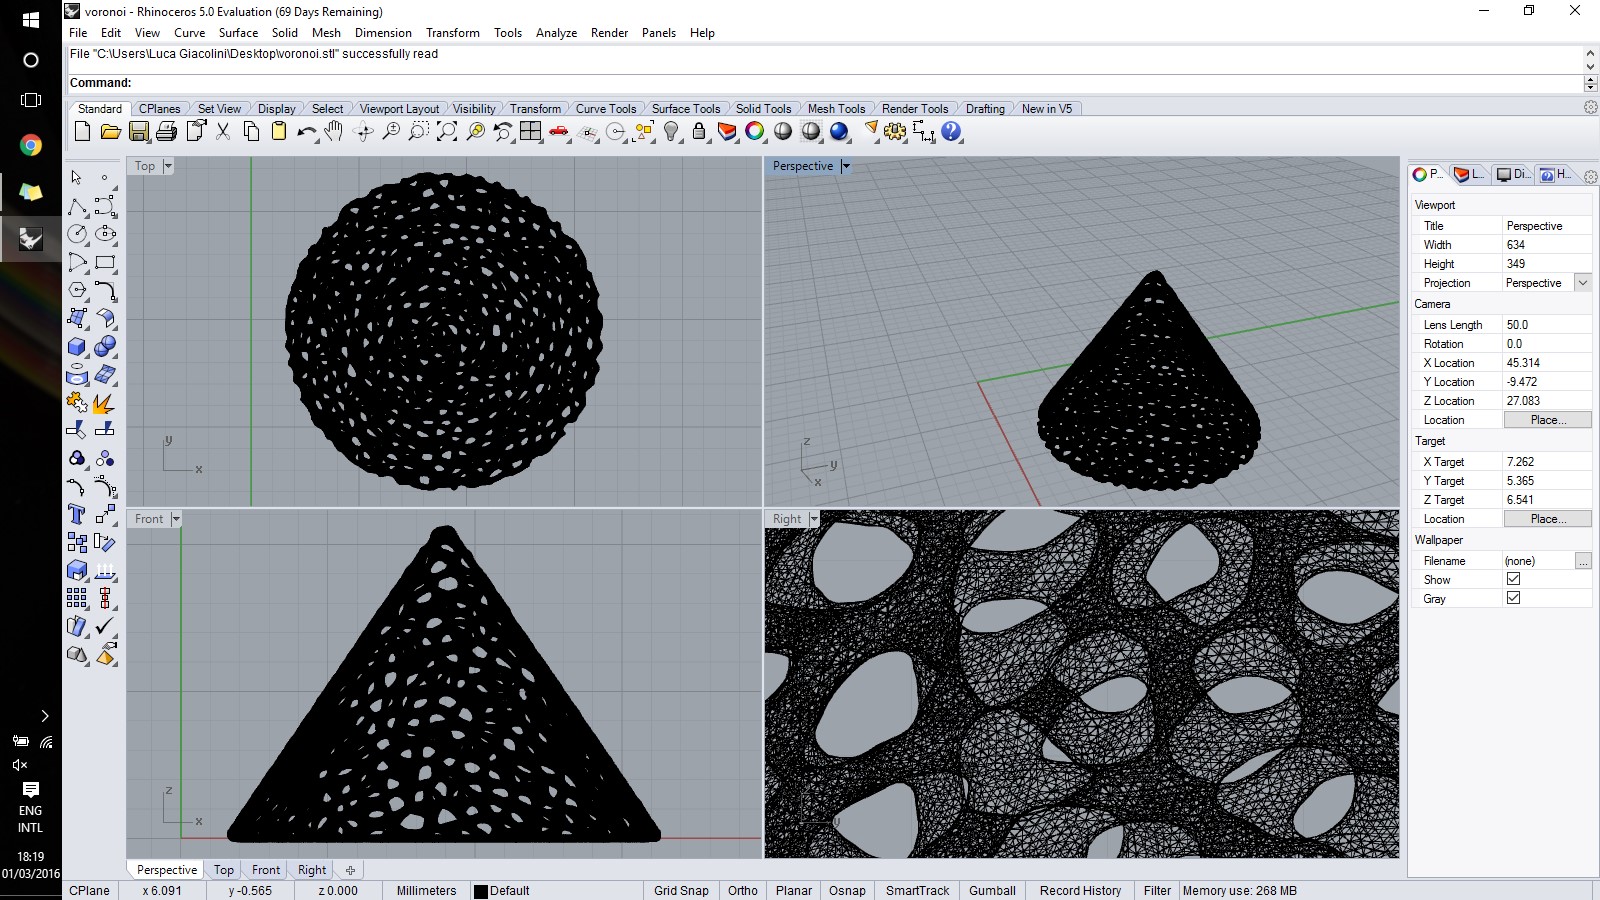 I printed the object with the Ultimaker 2, setting the quality to "high". After few times in which the printer ruined the object at the beginning, I realised that the only way to get to the top of the cone was to print slow. I set the print speed at 20% and let it go overnight. I think it took something close to 8 hours to print the object, but the result is actually quite satisfactory!
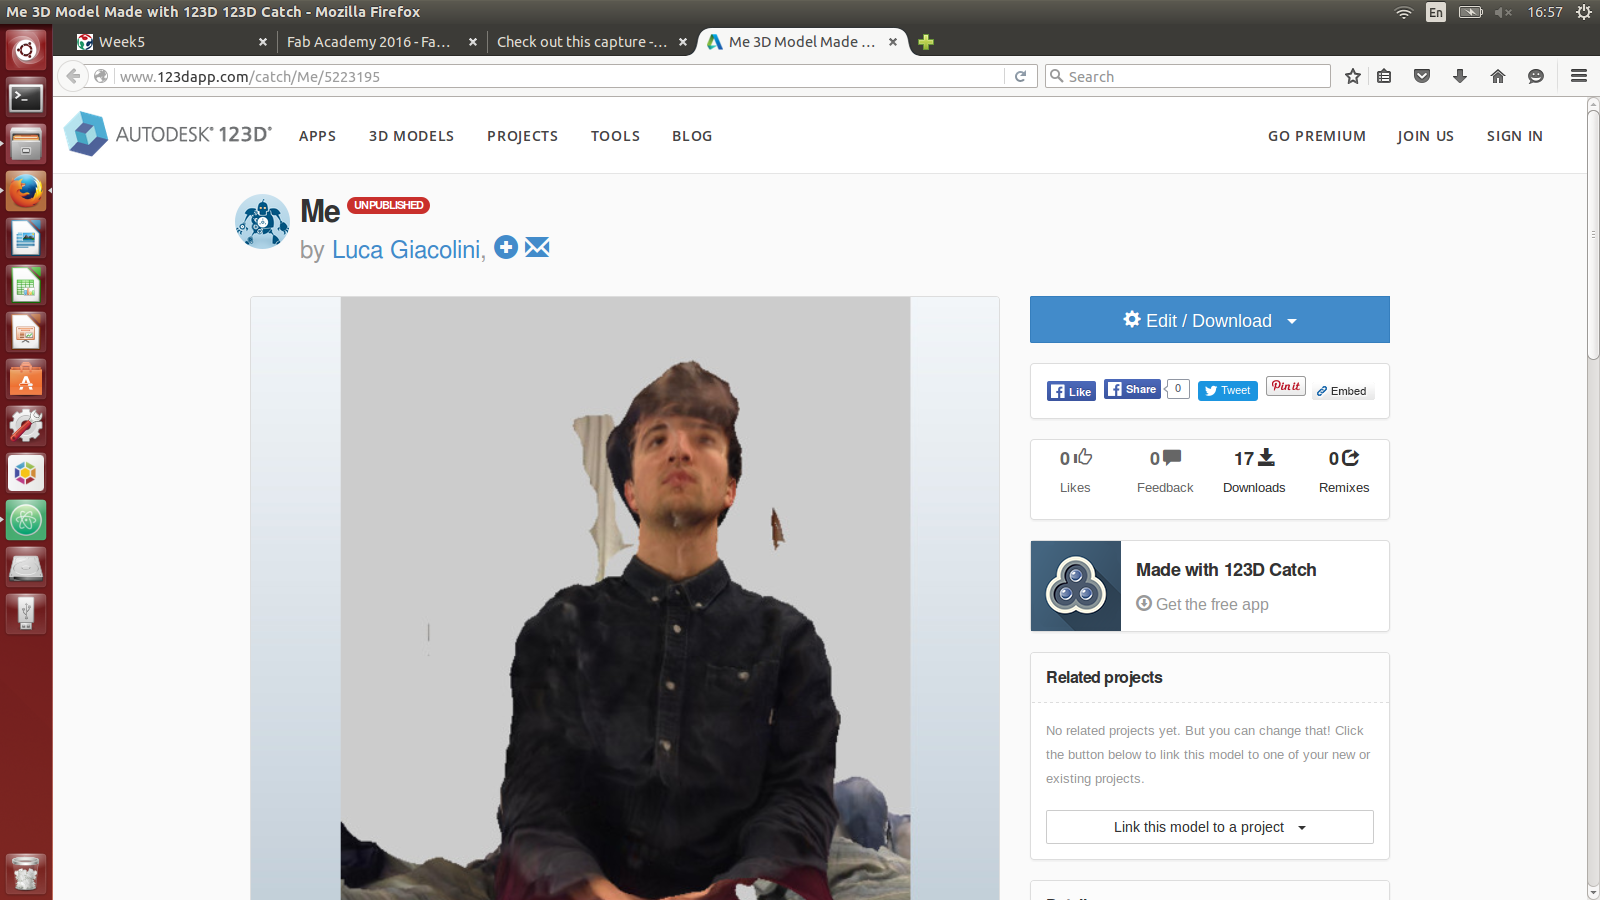
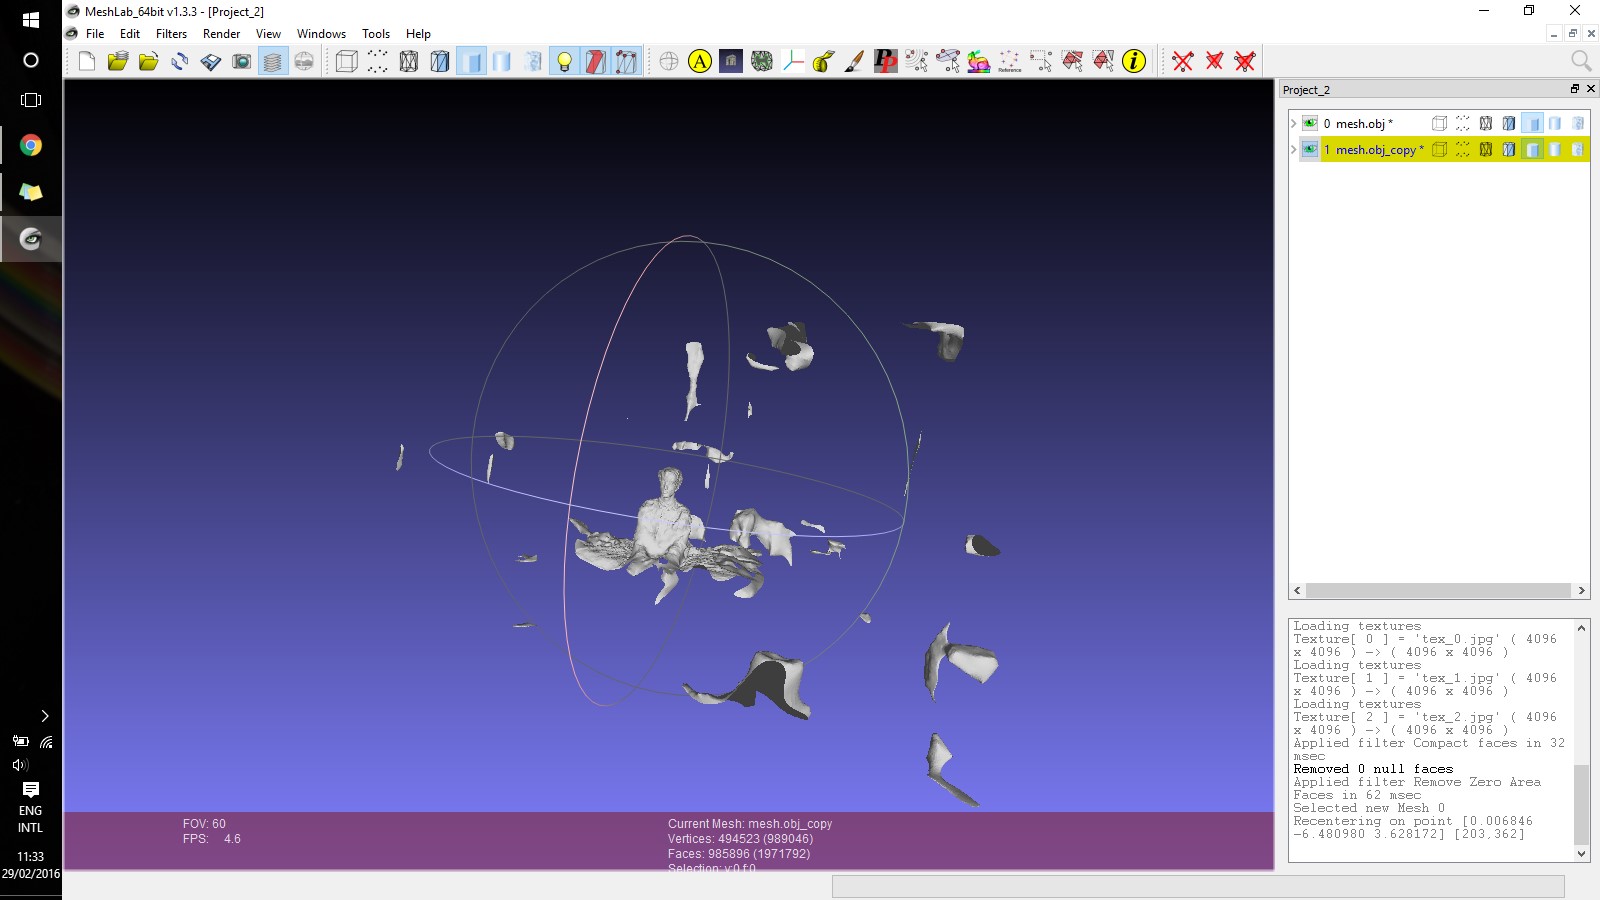
3D Scan: 123D Catch The first photogrammetry software that I used is the free-licence 123D Catch, distributed by Autocad. Through the iPhone app I took about 70 pictures which were automatically converted into a .stl file. The main drawbacks of this free tool are: 1.It needs really bright environments or it does not work; 2.Since the processing happens on a cloud, you do not have your model immediately but it ends up in a queue. After that, I used Meshlab to clean the model. Meshlab allows you to delete meshes and clean your model for a print and is available in both a browser and desktop version. Useful tutorials can be found at: 1.Meshlabstuff; 2.Youtube Tutorials;

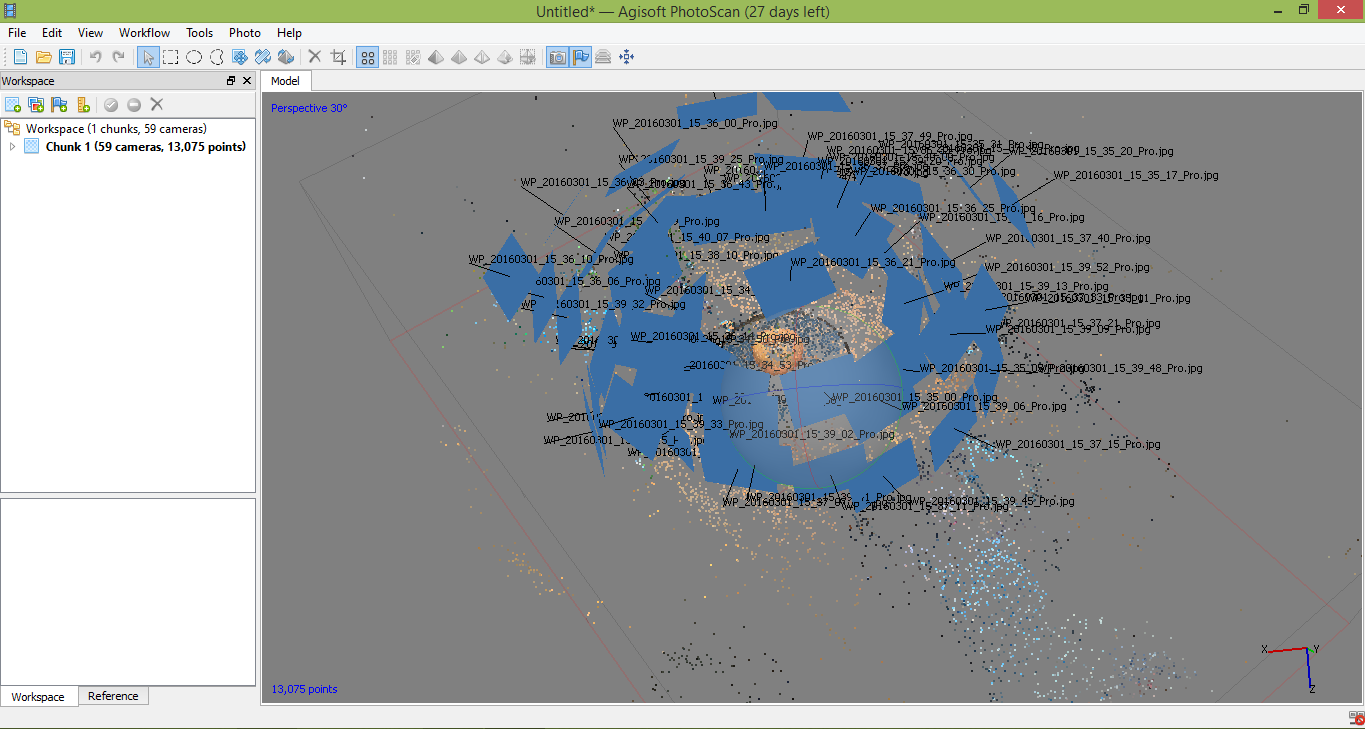
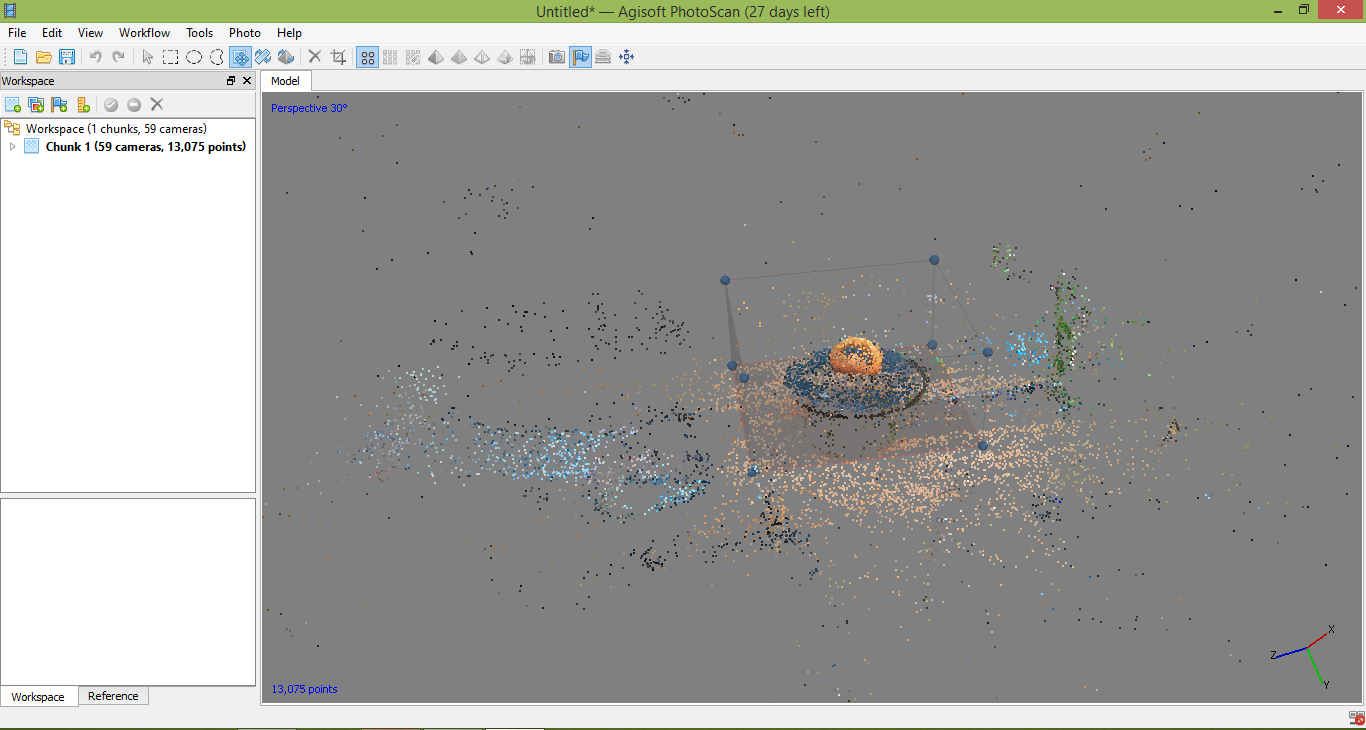
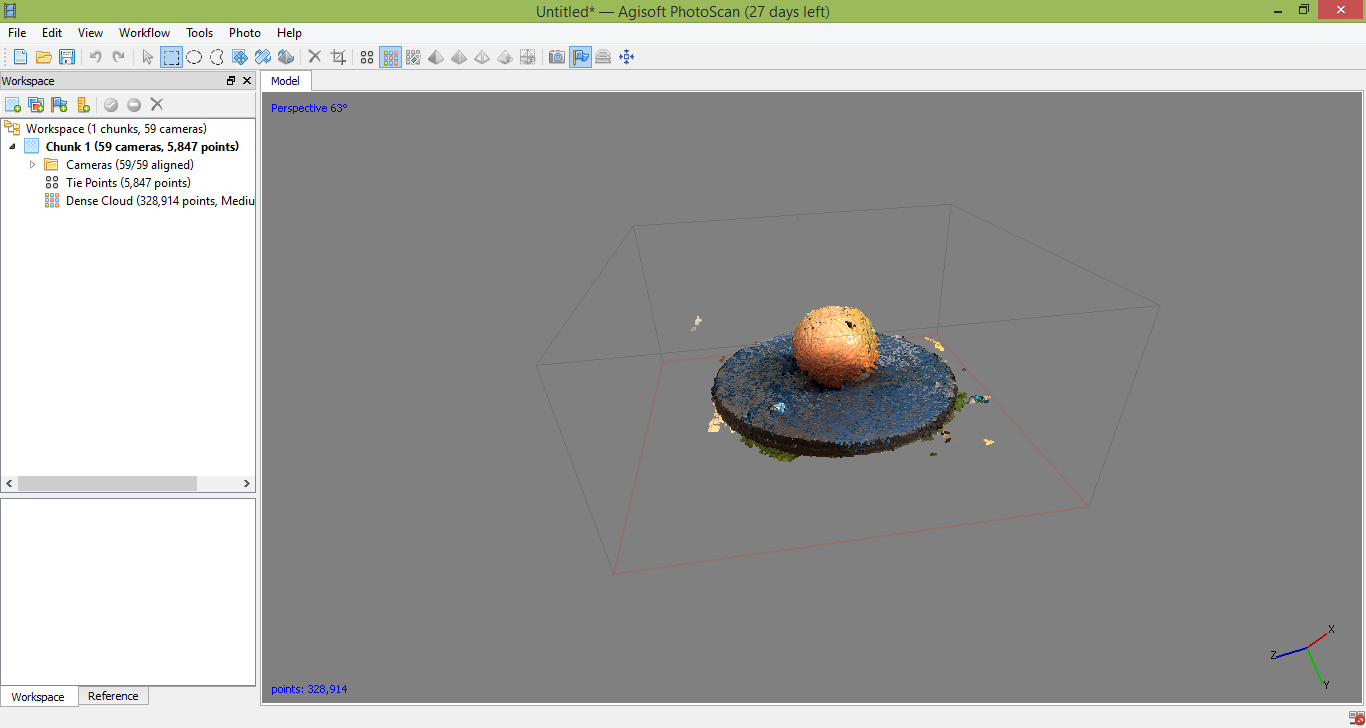
3D Scan: PhotoScan PhotoScan is a professional tool to do photogrammetry. The sequence of action is the following: 1.I made approximately 60 pictures of a clementine, I opened a new project and loaded the pictures; 2.Workflow-->Align pictures; 3.Manually remove the background with the selection tool; 4.Resize the binding box; 5.Workflow-->Dense Cloud; 6.Workflow-->Texture; 7.Workflow-->Mesh.
Conclusions In the first place, I realise how little of a fan I am of 3D printers. The main problem is that "cheap" printers which cost around 2k$ do not ensure sufficient quality to build anything more than a prototype. Not everything can be printed and complex geometries most of the times require multiple prints, such as it happened with my voronoi cone. Printing is a nice technique, though not amazing. When it comes to 3D scanning, I did not particularly appreciated the softwares other than PhotoScan, which is a professional tool and delivers a much better quality result. Overall, I must say that the content of this week did not really capture my attention.
Table of Content
Resources
- [1] Voronoi STL
- [2] Me STL