Networking & Communications
As the march for final project begins, I decided I should try some communication method that will be useful for my work.
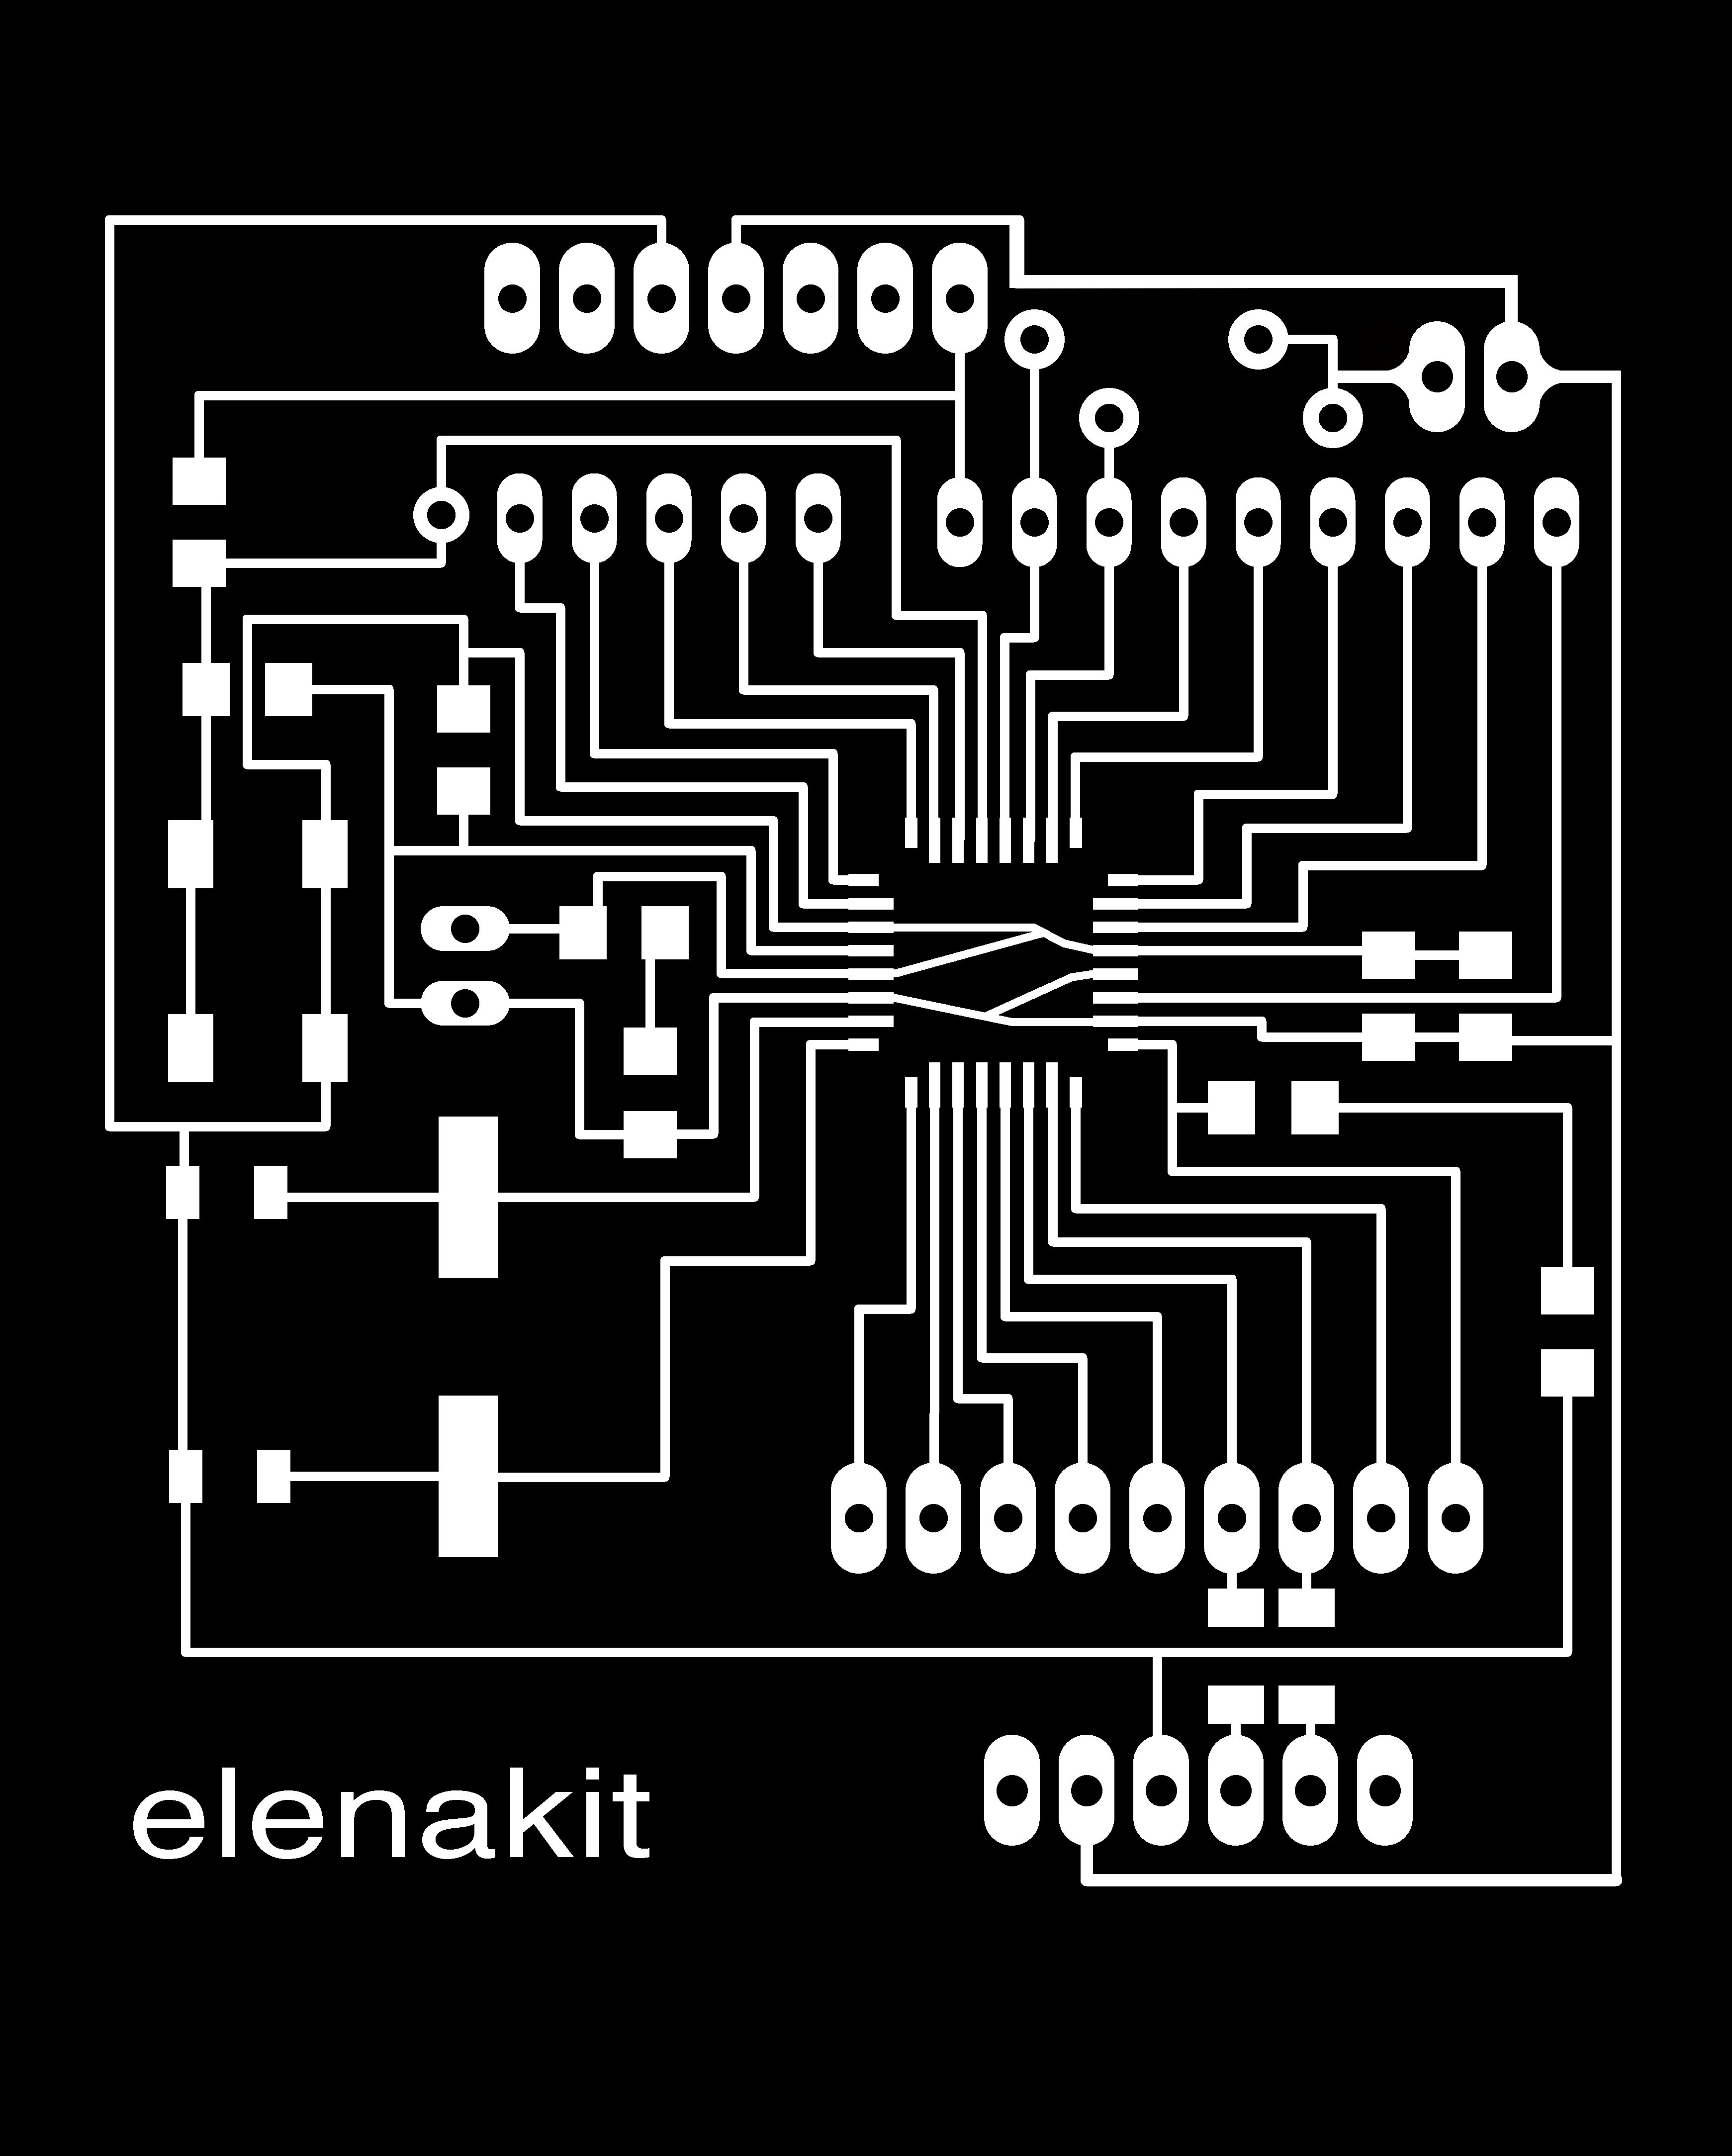
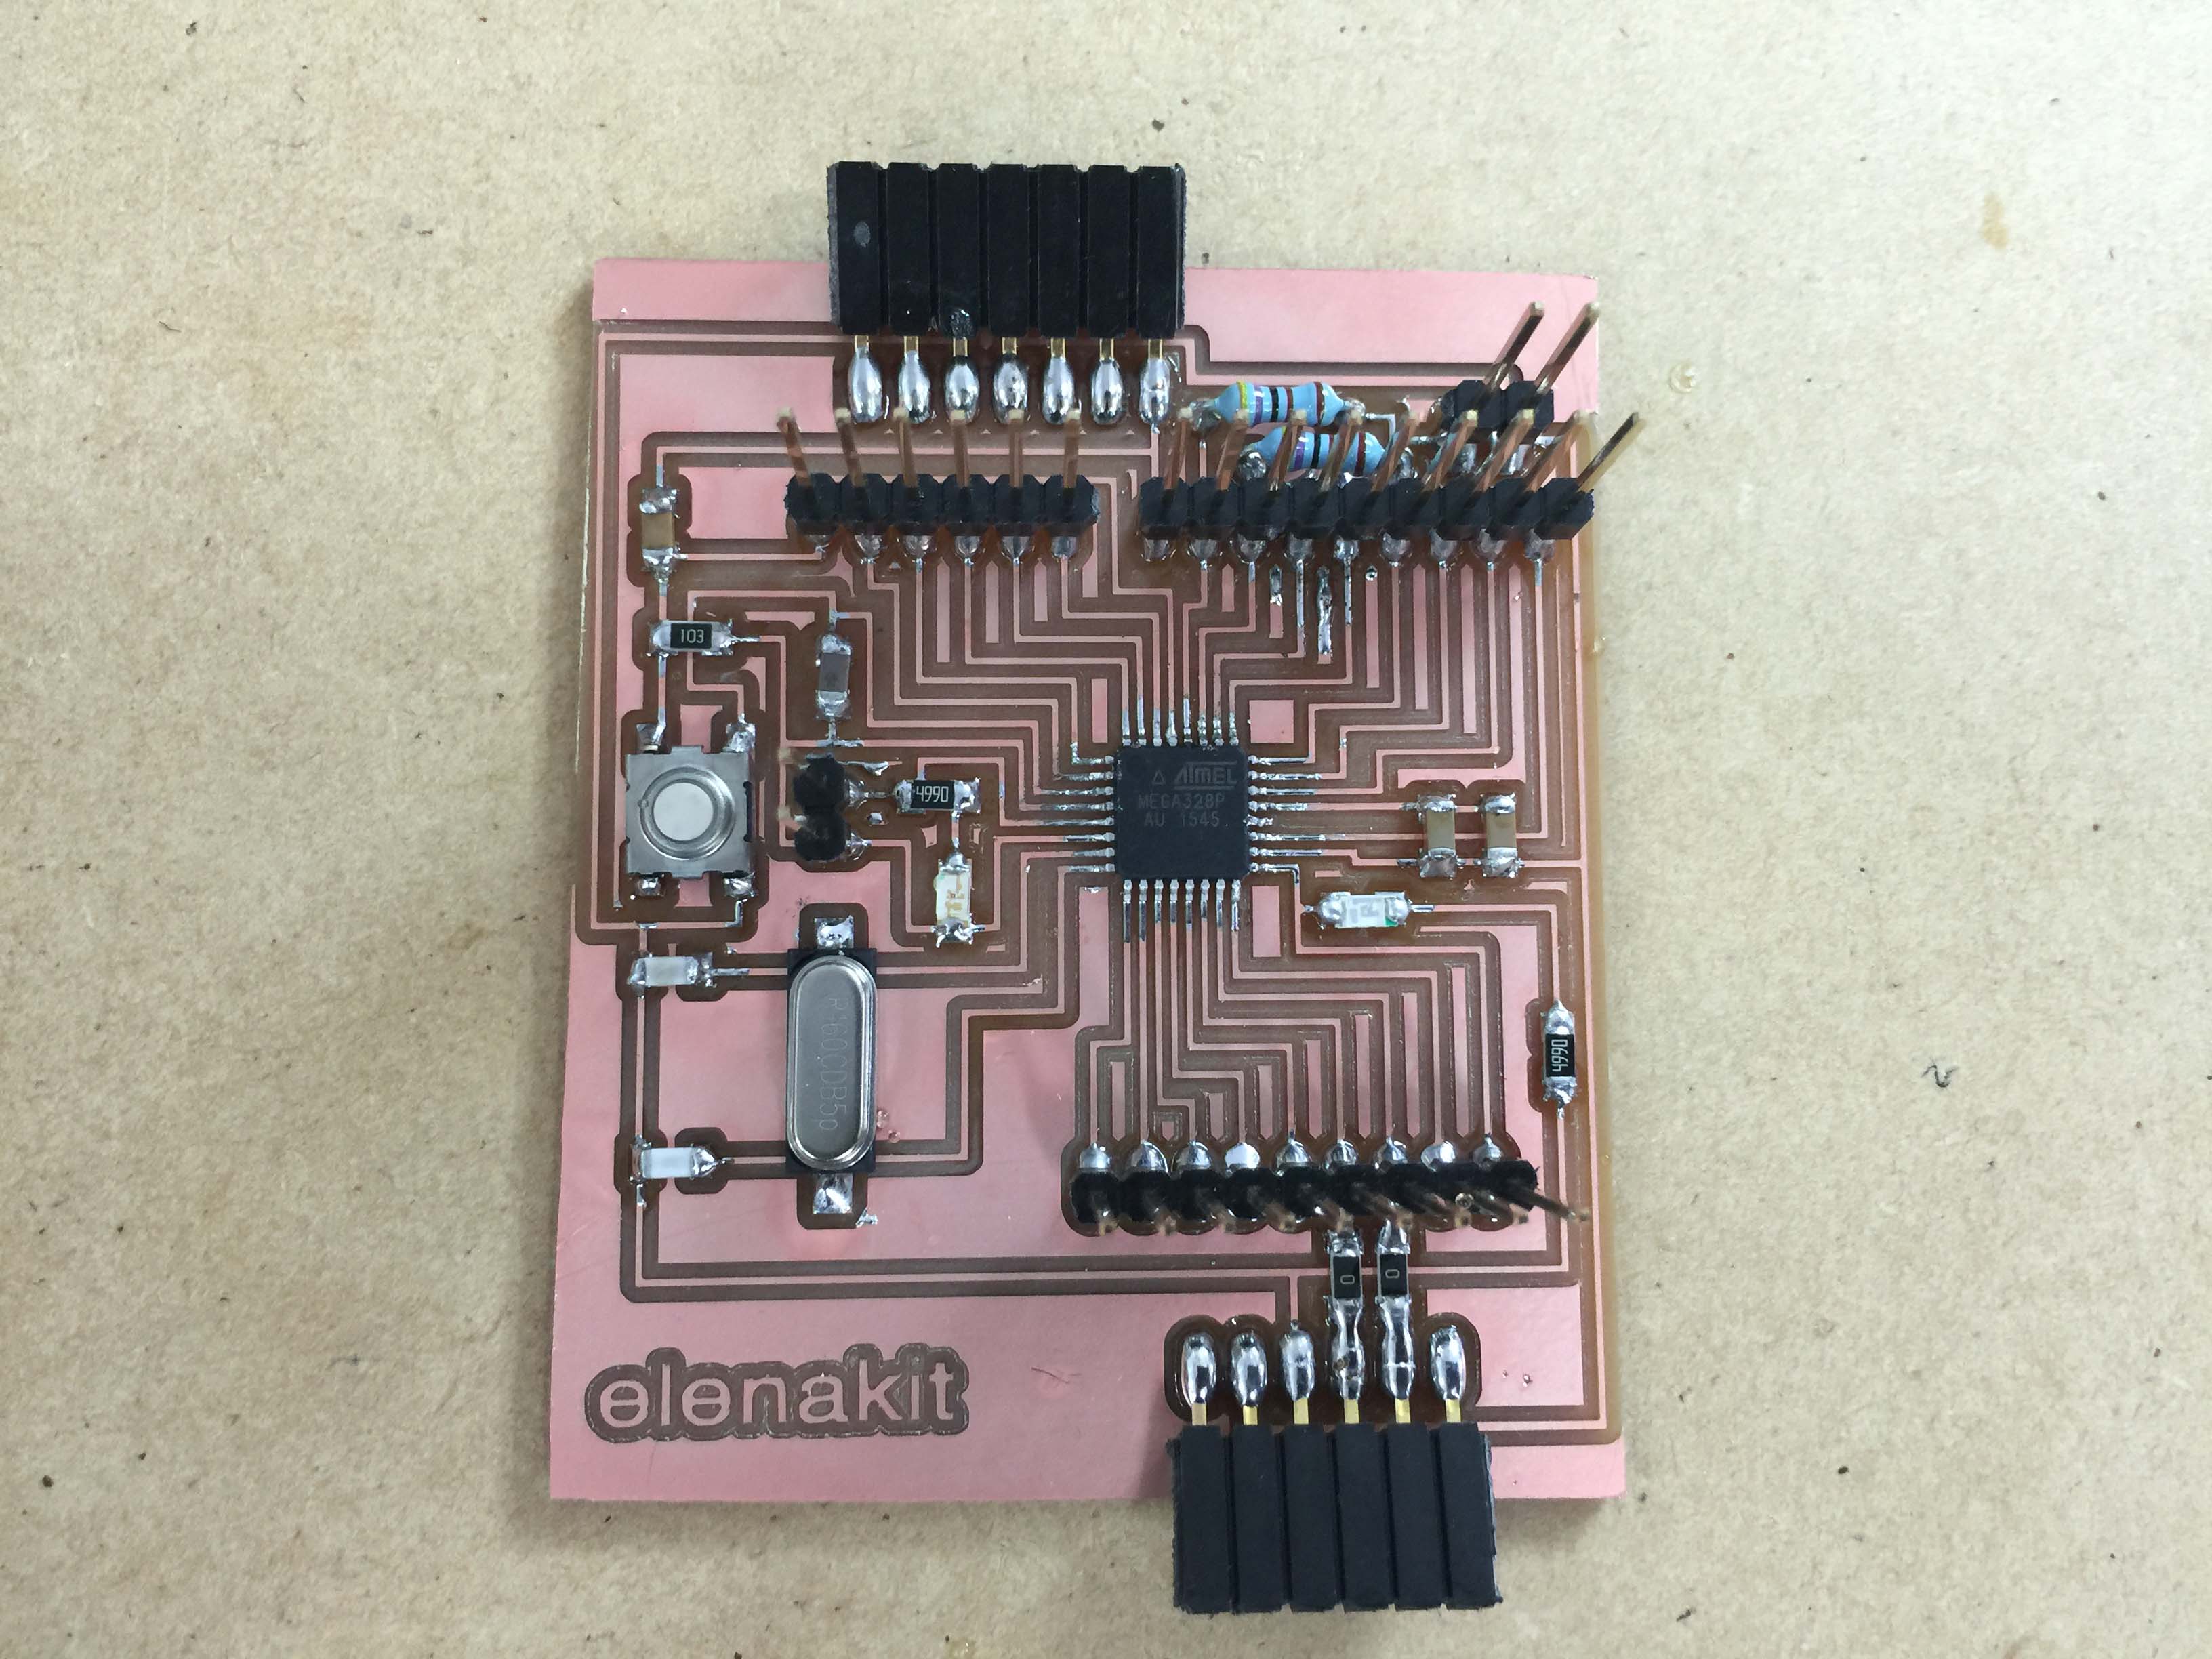
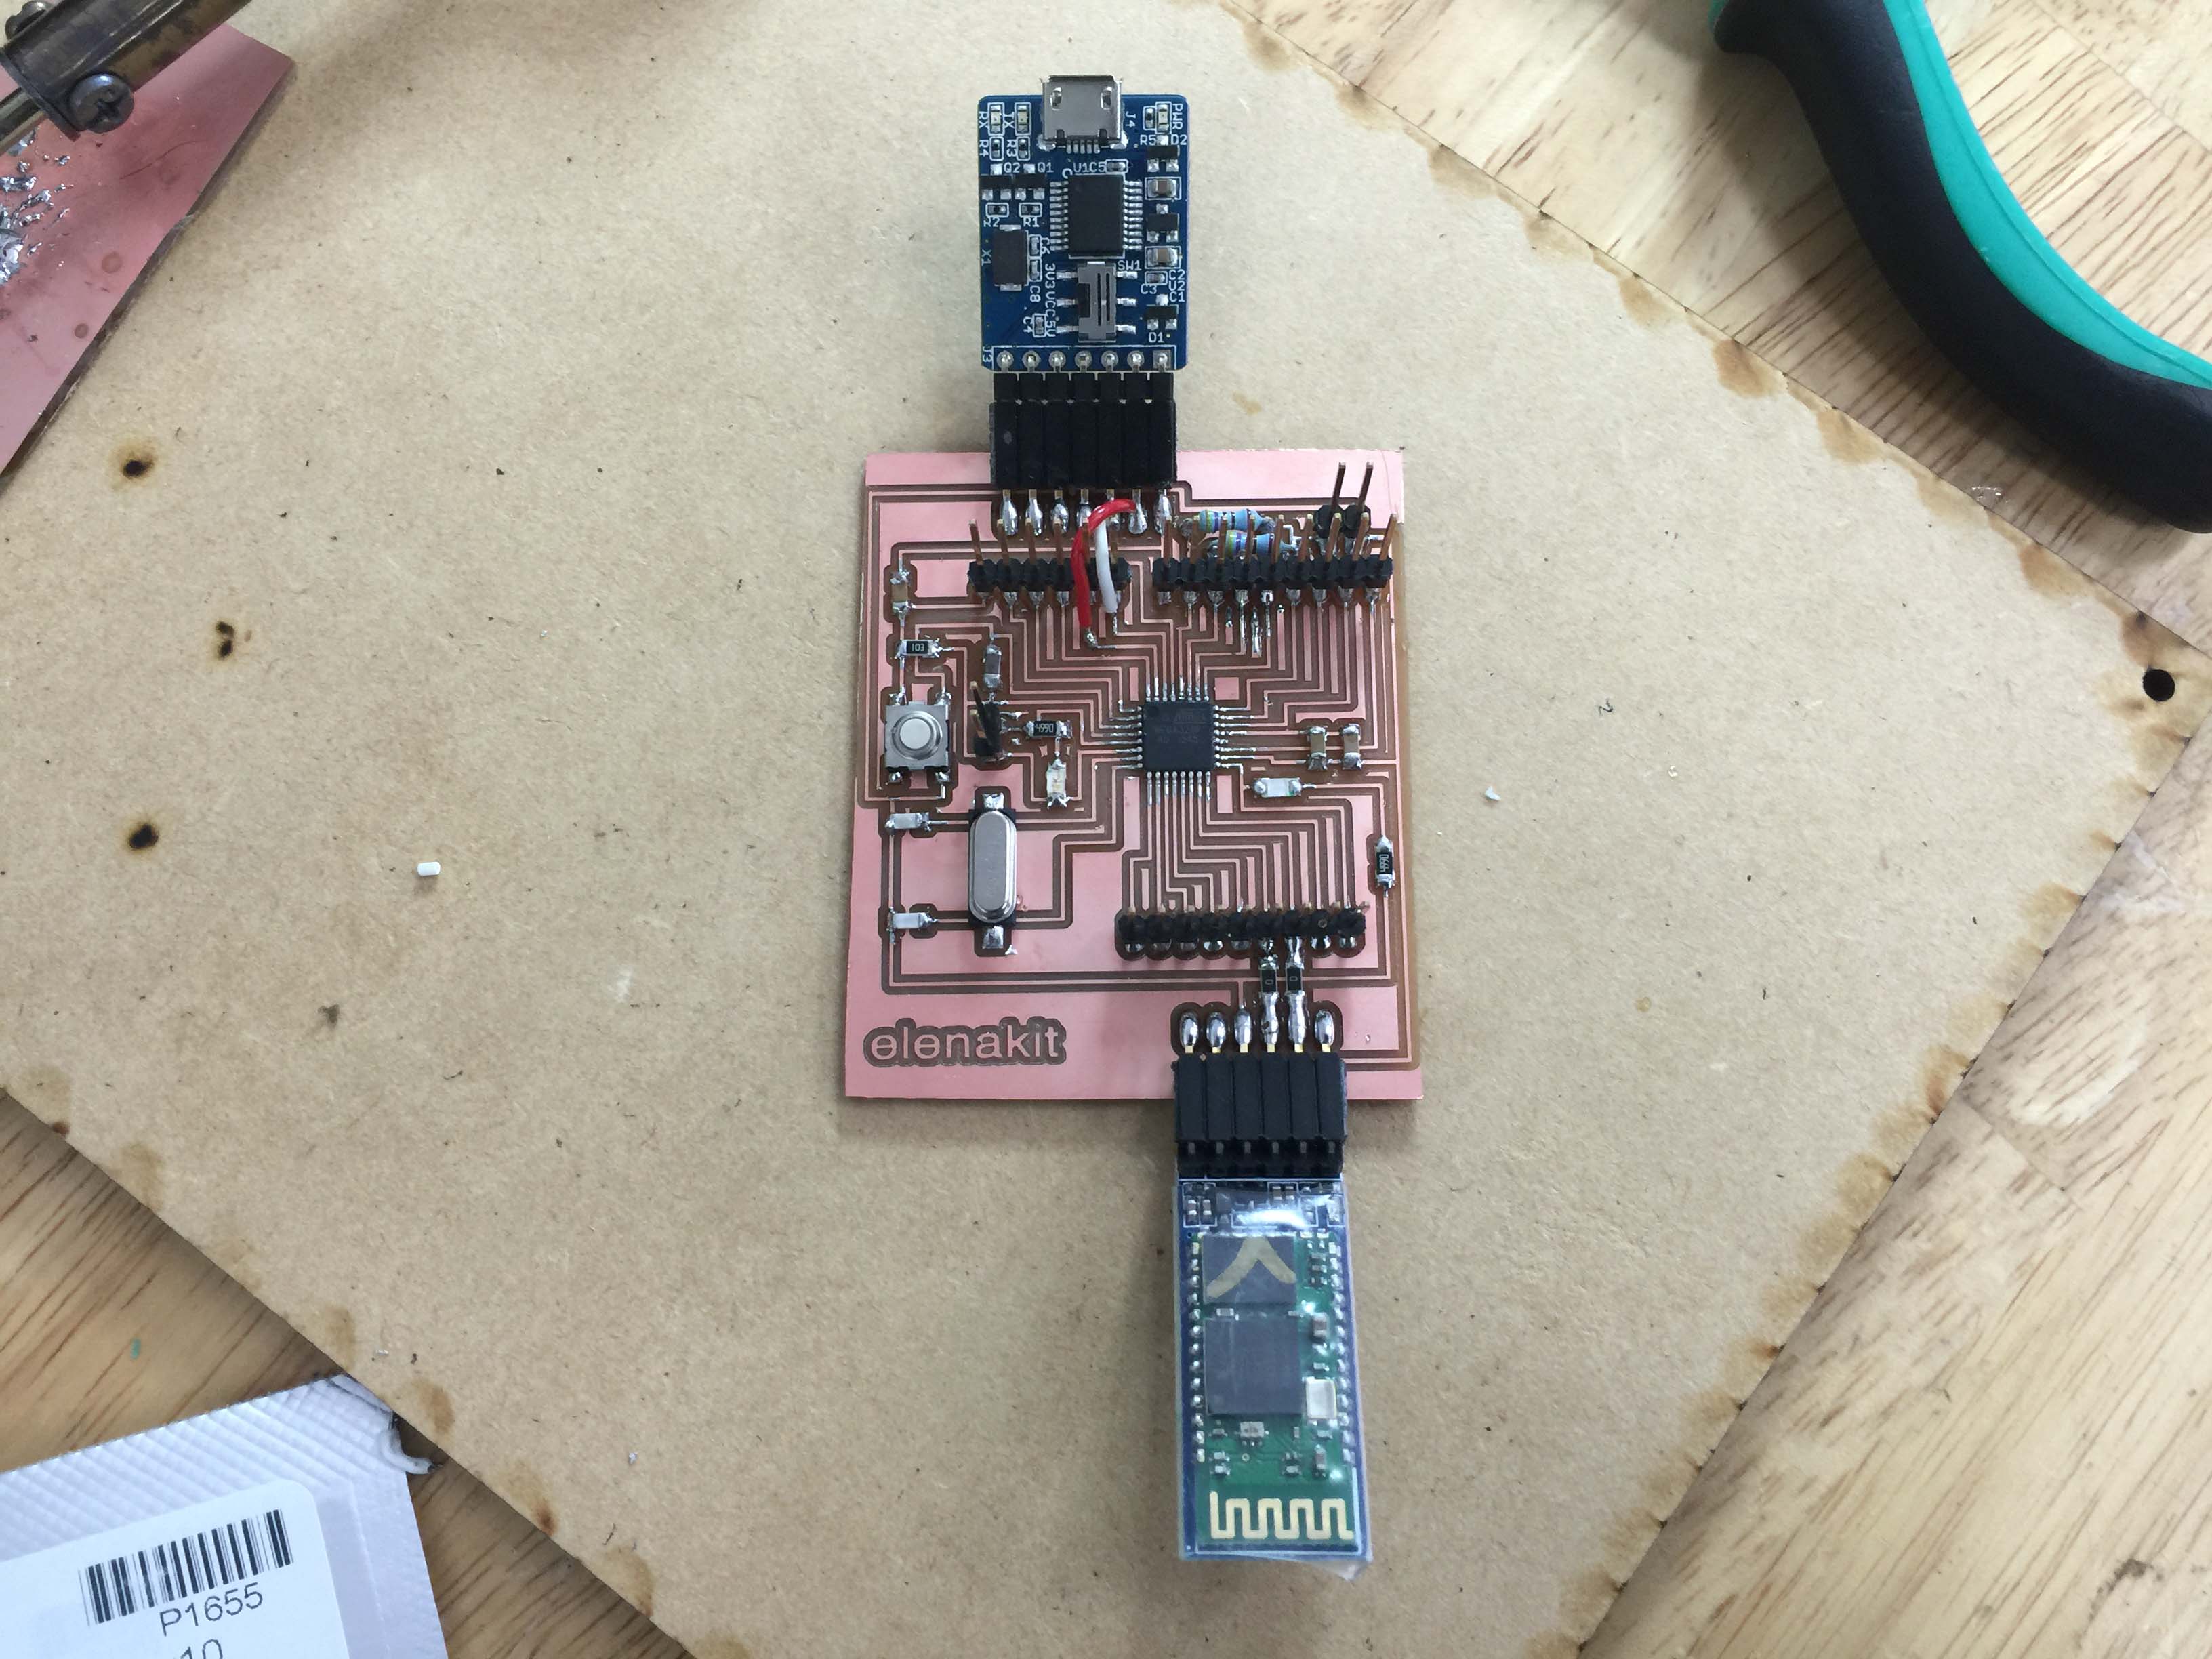
I modified the Satshakit a bit to make it more easy to use with HC-05 bluetooth module and USB-UART breakout (can work with FTDI FT232 or Chinese CH430 series boards). Also I added a pair of 4.7k resistors between pin 4/5 of elenakit and VCC as pull-up resistors for I2C. To enable the I2C feature, just simply put a jumper cap on the pins close to the pull-up resistors. Say goodbye to breadboard and messy wires!

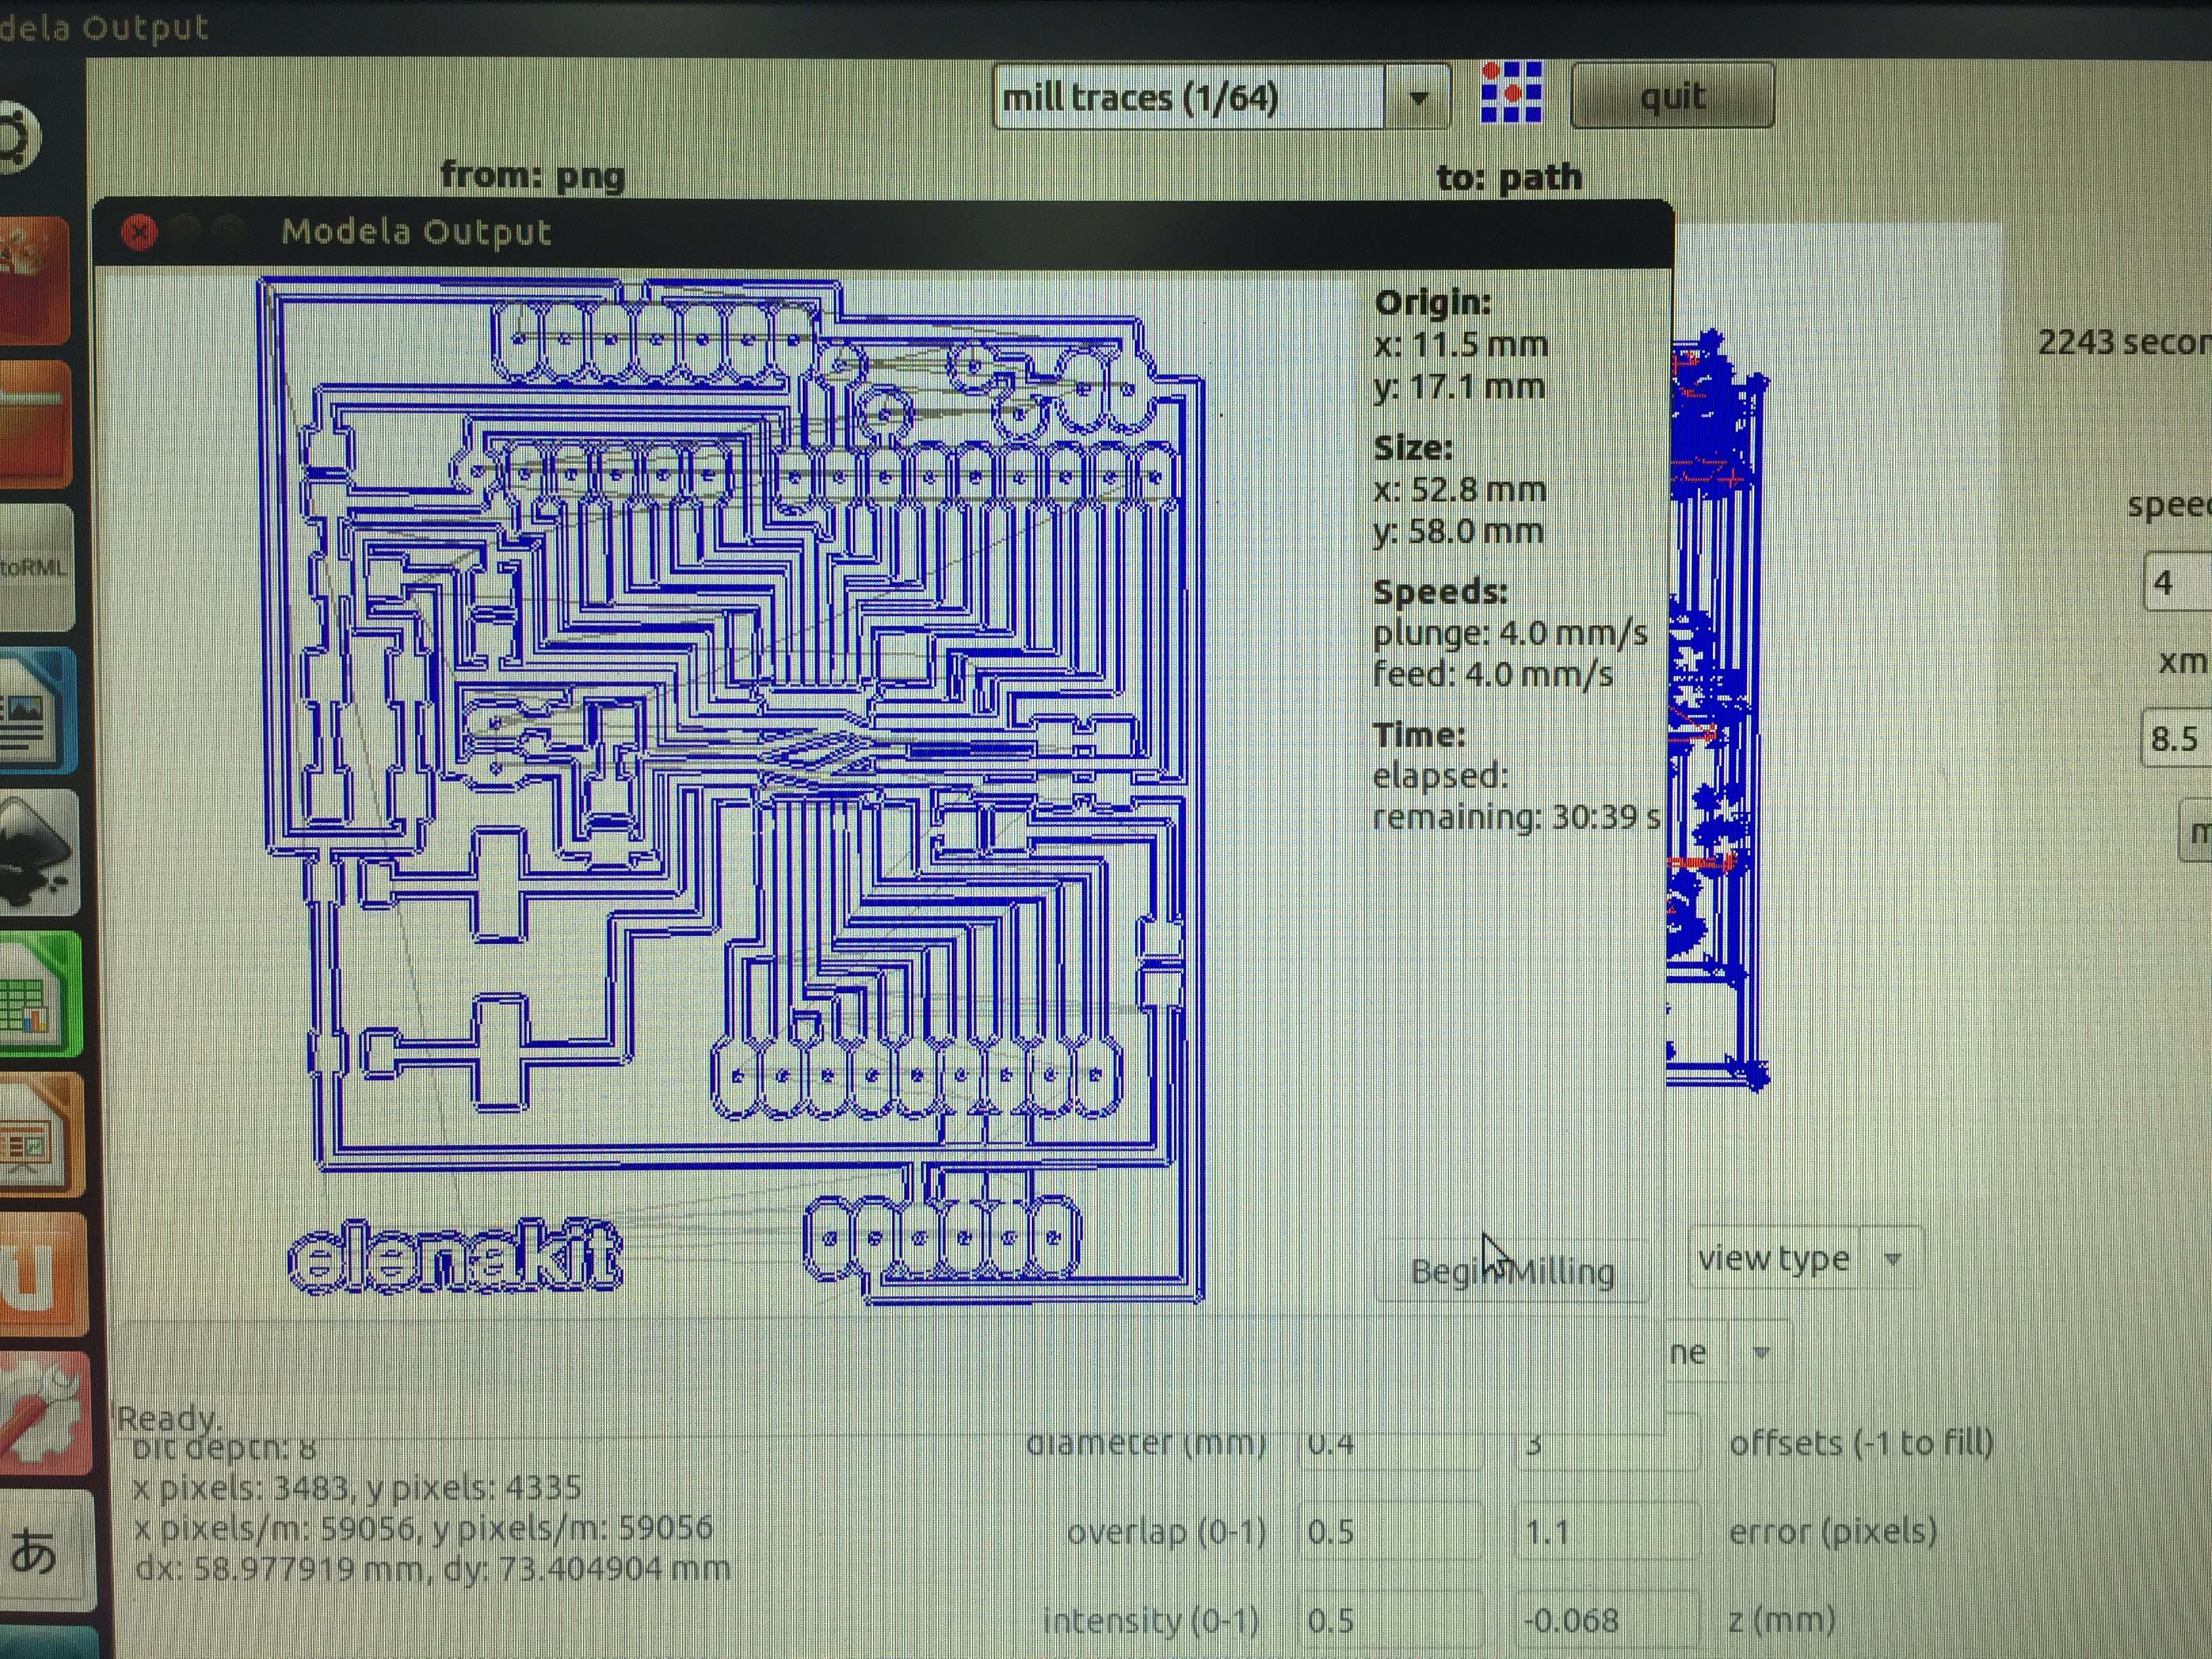
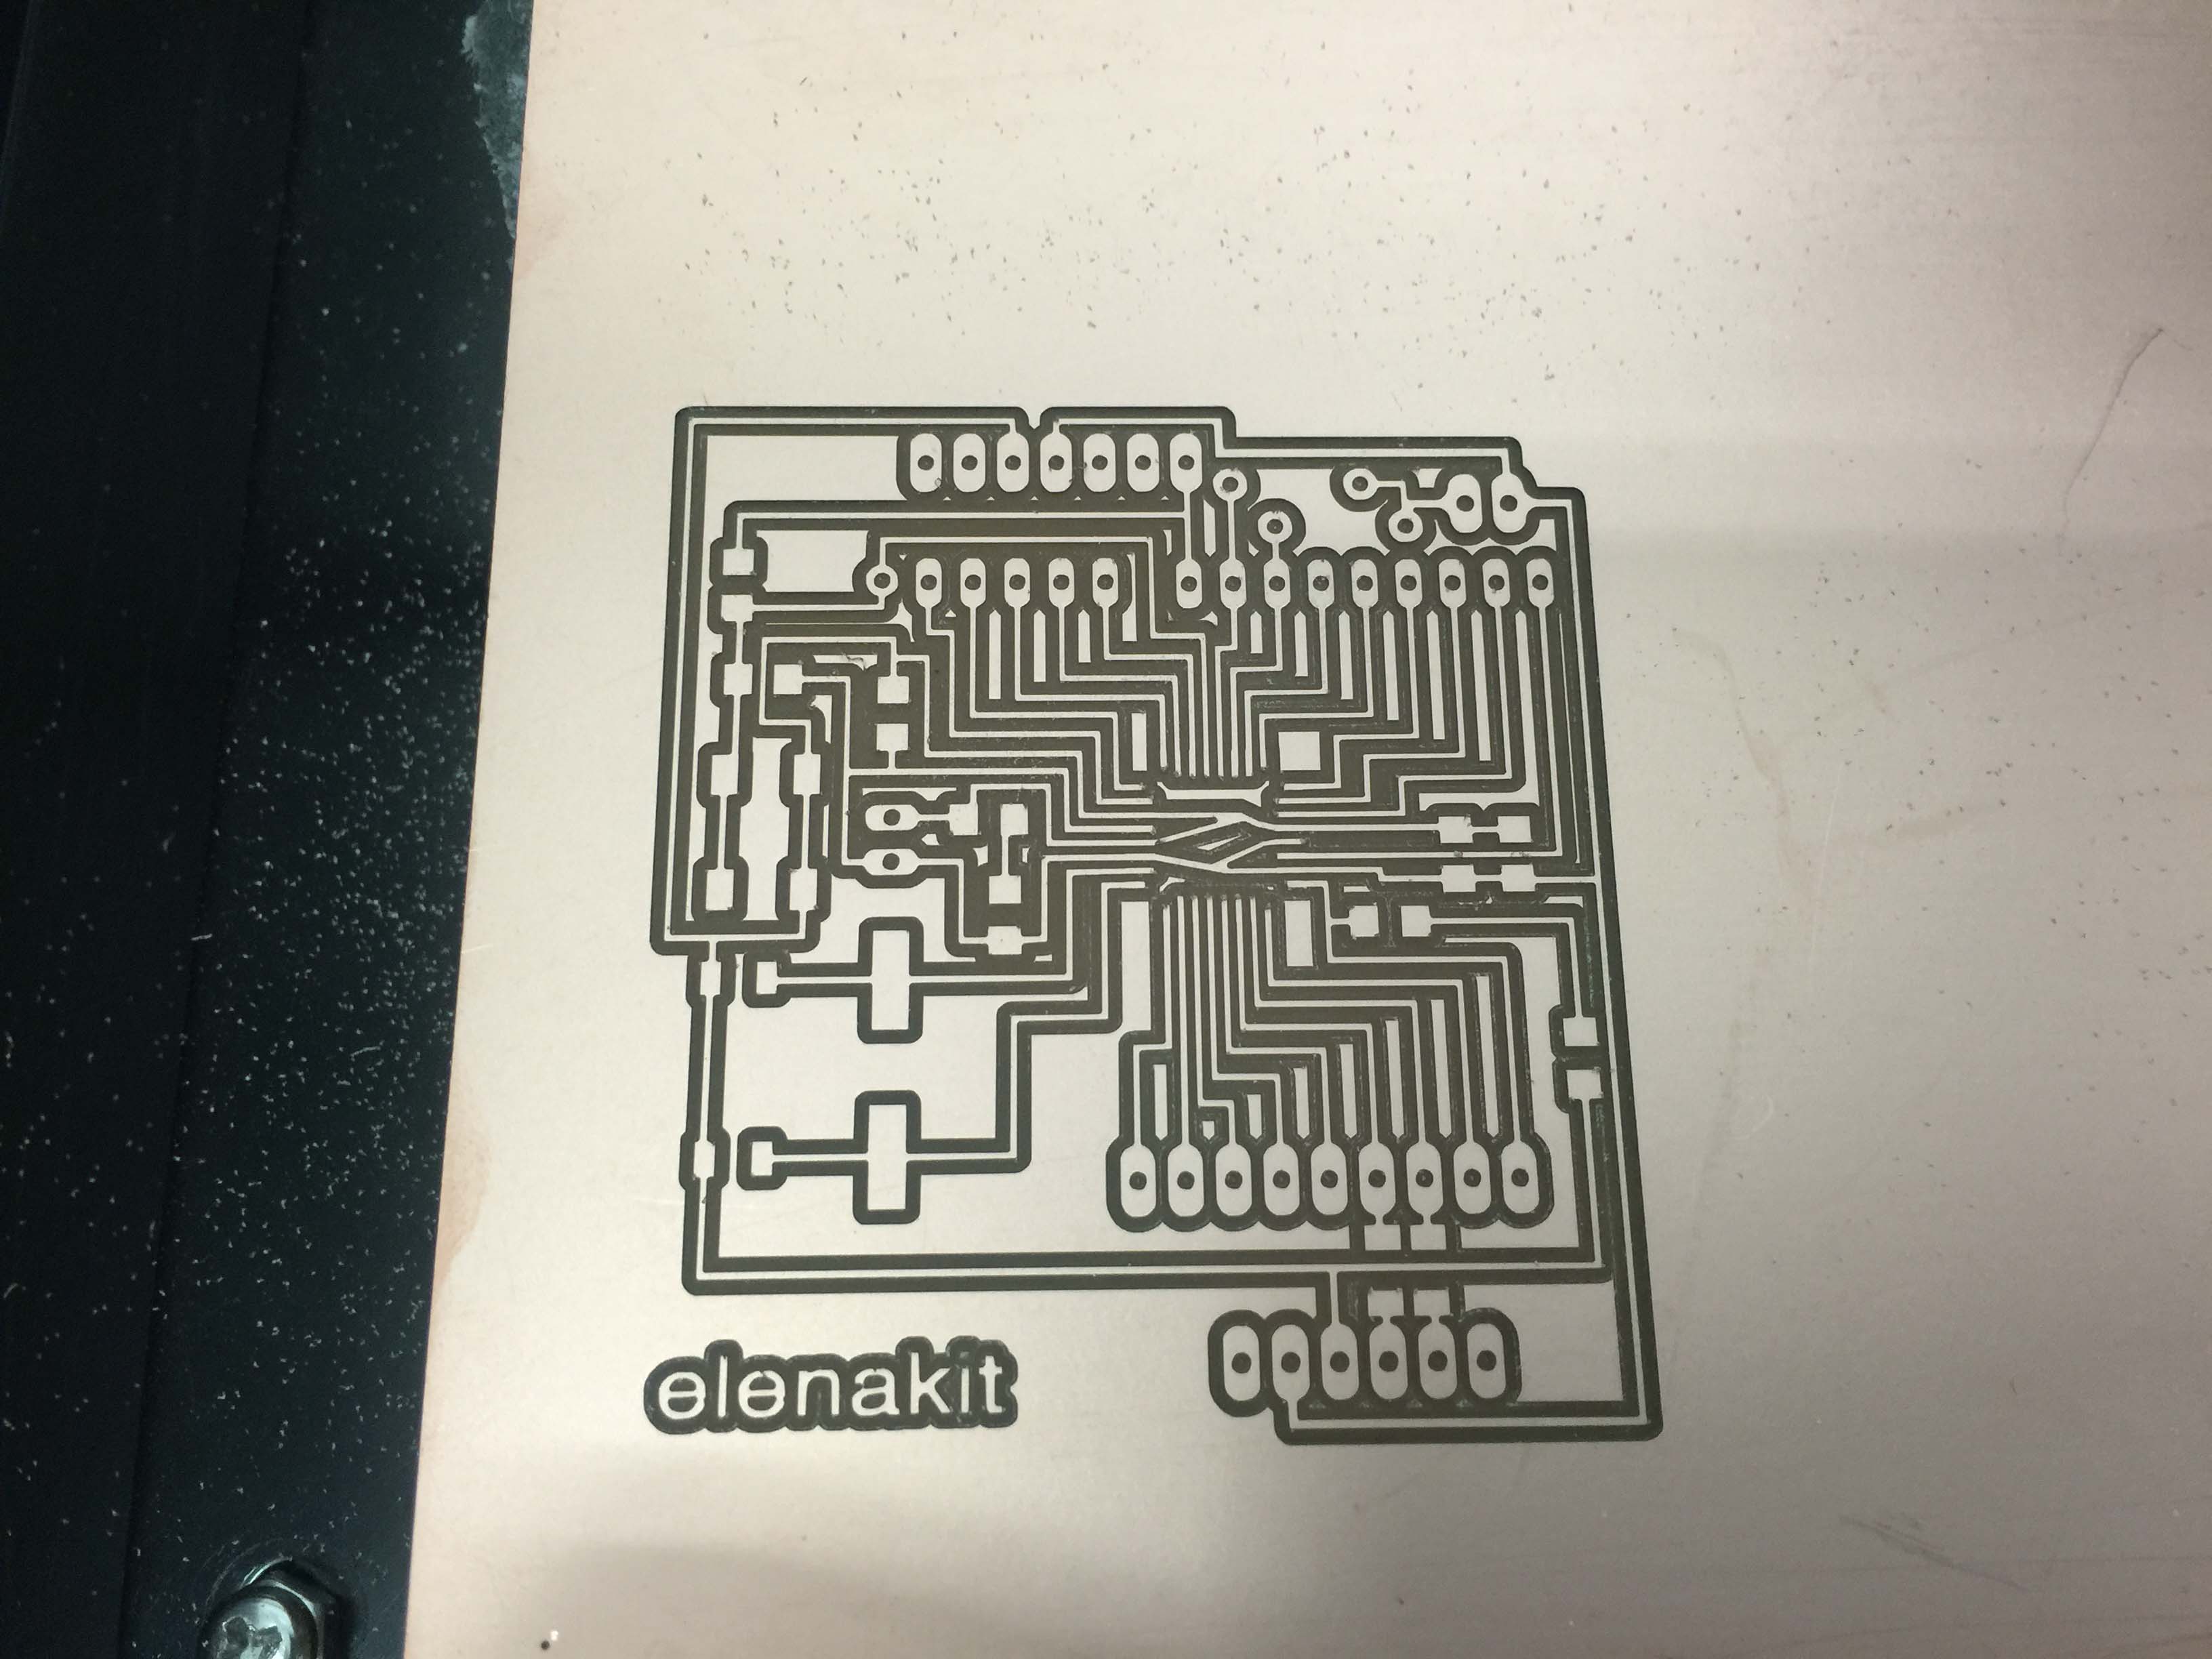
You can save the pngs above to fab them with fab module directly.
And this is how it works like.
You can download the file for elenakit here (Eagle files): .sch .brd
In previous weeks, I programmed on Satshakits for my I/O devices. It is very handy for its Arduino compatability. But there are two things I am not satisfy about it. One, you cannot program it as online as its Arduino cousins since you always needs a programmer. In my tool box I have Arduino as ISP, FabISP and Atmel ICE, this should not be a problem, but I still want it more "responsive" just like any other Arduino, which means serial communication with my computer. Two, I have no experience of using above programmers to do serial monitor like the one in Arduino IDE. So the best option to me seems like getting a UART/RS-232 prgrammer and make it works with dear Satsha.
Thus I bought Seeed Studio's USB to UART module to serve the role.

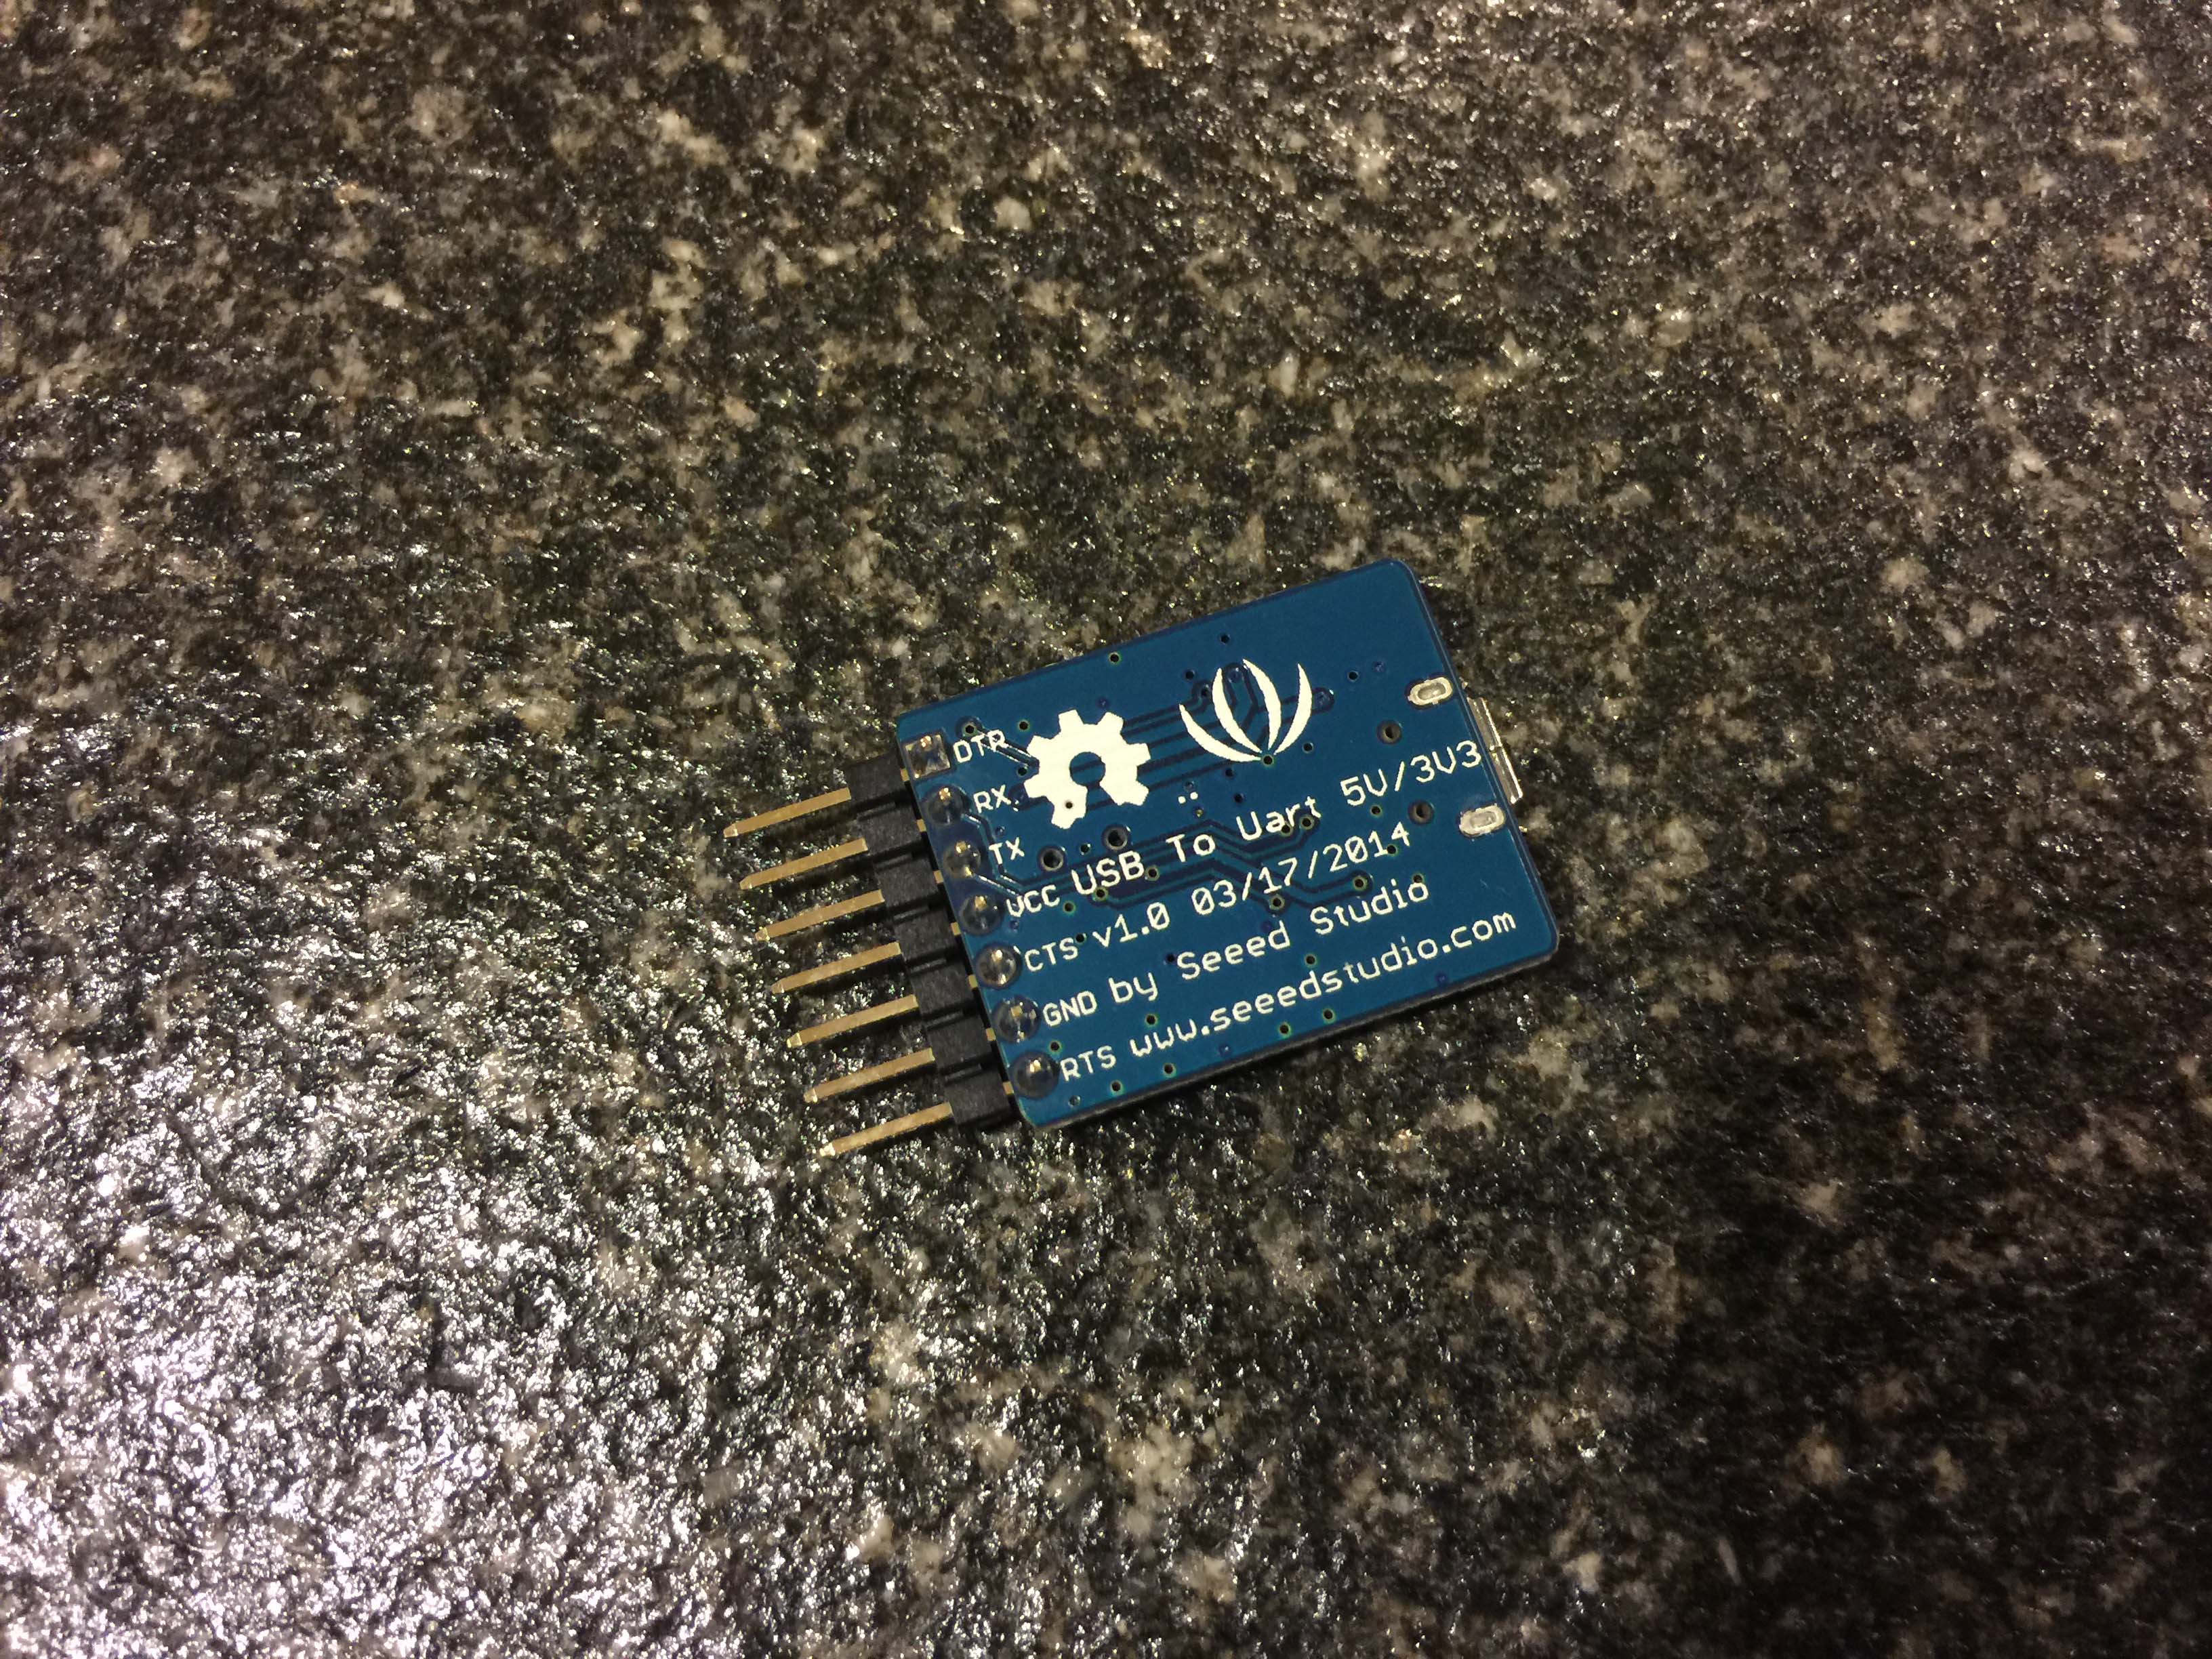
At the first glance it looks like a common FTDI FT232R breakout, and it should work like one too. The major difference is the module utilized a CH340, which is manufactured by a Chinese company.
Because I cannot get much detail about the module from Seeed Studio's wiki, so I turned to datasheet of CH340 instead. From the datasheet it should work with Arduino IDE just like a FTDI cable.
However, I spent two days try to get the module working. Arduino IDE just keep showing the infamous
avrdude stk500_recv() programmer is not respondingAt one point I even thought the module I get might be a funny product. Yet when I connected it to oscilliscope, the DTR pin of the module did send pulses as it should.
Finally, a guy in our lab gave me a hint, that I should try to burn the bootloader to Stashakits again. And the method works like wonder. My speculation is, that "Upload Using Bootloader" feature of Arduino IDE somehow changed the bootloader or fuse settings. I would really like to know the root cause.
So the problem solved after upload bootloader to Satshakits (as Arduinos) again, programming info as below:
avrdude: Version 6.0.1, compiled on Apr 14 2015 at 16:30:25
Copyright (c) 2000-2005 Brian Dean, http://www.bdmicro.com/
Copyright (c) 2007-2009 Joerg Wunsch
System wide configuration file is "/Applications/Arduino.app/Contents/Java/hardware/tools/avr/etc/avrdude.conf"
User configuration file is "/Users/JCChang/.avrduderc"
User configuration file does not exist or is not a regular file, skipping
Using Port : /dev/cu.wchusbserial1410
Using Programmer : arduino
Overriding Baud Rate : 115200
AVR Part : ATmega328P
Chip Erase delay : 9000 us
PAGEL : PD7
BS2 : PC2
RESET disposition : dedicated
RETRY pulse : SCK
serial program mode : yes
parallel program mode : yes
Timeout : 200
StabDelay : 100
CmdexeDelay : 25
SyncLoops : 32
ByteDelay : 0
PollIndex : 3
PollValue : 0x53
Memory Detail :
Block Poll Page Polled
Memory Type Mode Delay Size Indx Paged Size Size #Pages MinW MaxW ReadBack
----------- ---- ----- ----- ---- ------ ------ ---- ------ ----- ----- ---------
eeprom 65 20 4 0 no 1024 4 0 3600 3600 0xff 0xff
flash 65 6 128 0 yes 32768 128 256 4500 4500 0xff 0xff
lfuse 0 0 0 0 no 1 0 0 4500 4500 0x00 0x00
hfuse 0 0 0 0 no 1 0 0 4500 4500 0x00 0x00
efuse 0 0 0 0 no 1 0 0 4500 4500 0x00 0x00
lock 0 0 0 0 no 1 0 0 4500 4500 0x00 0x00
calibration 0 0 0 0 no 1 0 0 0 0 0x00 0x00
signature 0 0 0 0 no 3 0 0 0 0 0x00 0x00
Programmer Type : Arduino
Description : Arduino
Hardware Version: 3
Firmware Version: 4.4
Vtarget : 0.3 V
Varef : 0.3 V
Oscillator : 28.800 kHz
SCK period : 3.3 us
avrdude: AVR device initialized and ready to accept instructions
Reading | ################################################## | 100% 0.03s
avrdude: Device signature = 0x1e950f
avrdude: reading input file "/var/folders/m8/sgsy253d09v4vzv_kqxljzr80000gn/T/buildd5ae82e677127ac286f51de66781d807.tmp/test.ino.hex"
avrdude: writing flash (3776 bytes):
Writing | ################################################## | 100% 1.93s
avrdude: 3776 bytes of flash written
avrdude: verifying flash memory against /var/folders/m8/sgsy253d09v4vzv_kqxljzr80000gn/T/buildd5ae82e677127ac286f51de66781d807.tmp/test.ino.hex:
avrdude: load data flash data from input file /var/folders/m8/sgsy253d09v4vzv_kqxljzr80000gn/T/buildd5ae82e677127ac286f51de66781d807.tmp/test.ino.hex:
avrdude: input file /var/folders/m8/sgsy253d09v4vzv_kqxljzr80000gn/T/buildd5ae82e677127ac286f51de66781d807.tmp/test.ino.hex contains 3776 bytes
avrdude: reading on-chip flash data:
Reading | ################################################## | 100% 1.80s
avrdude: verifying ...
avrdude: 3776 bytes of flash verified
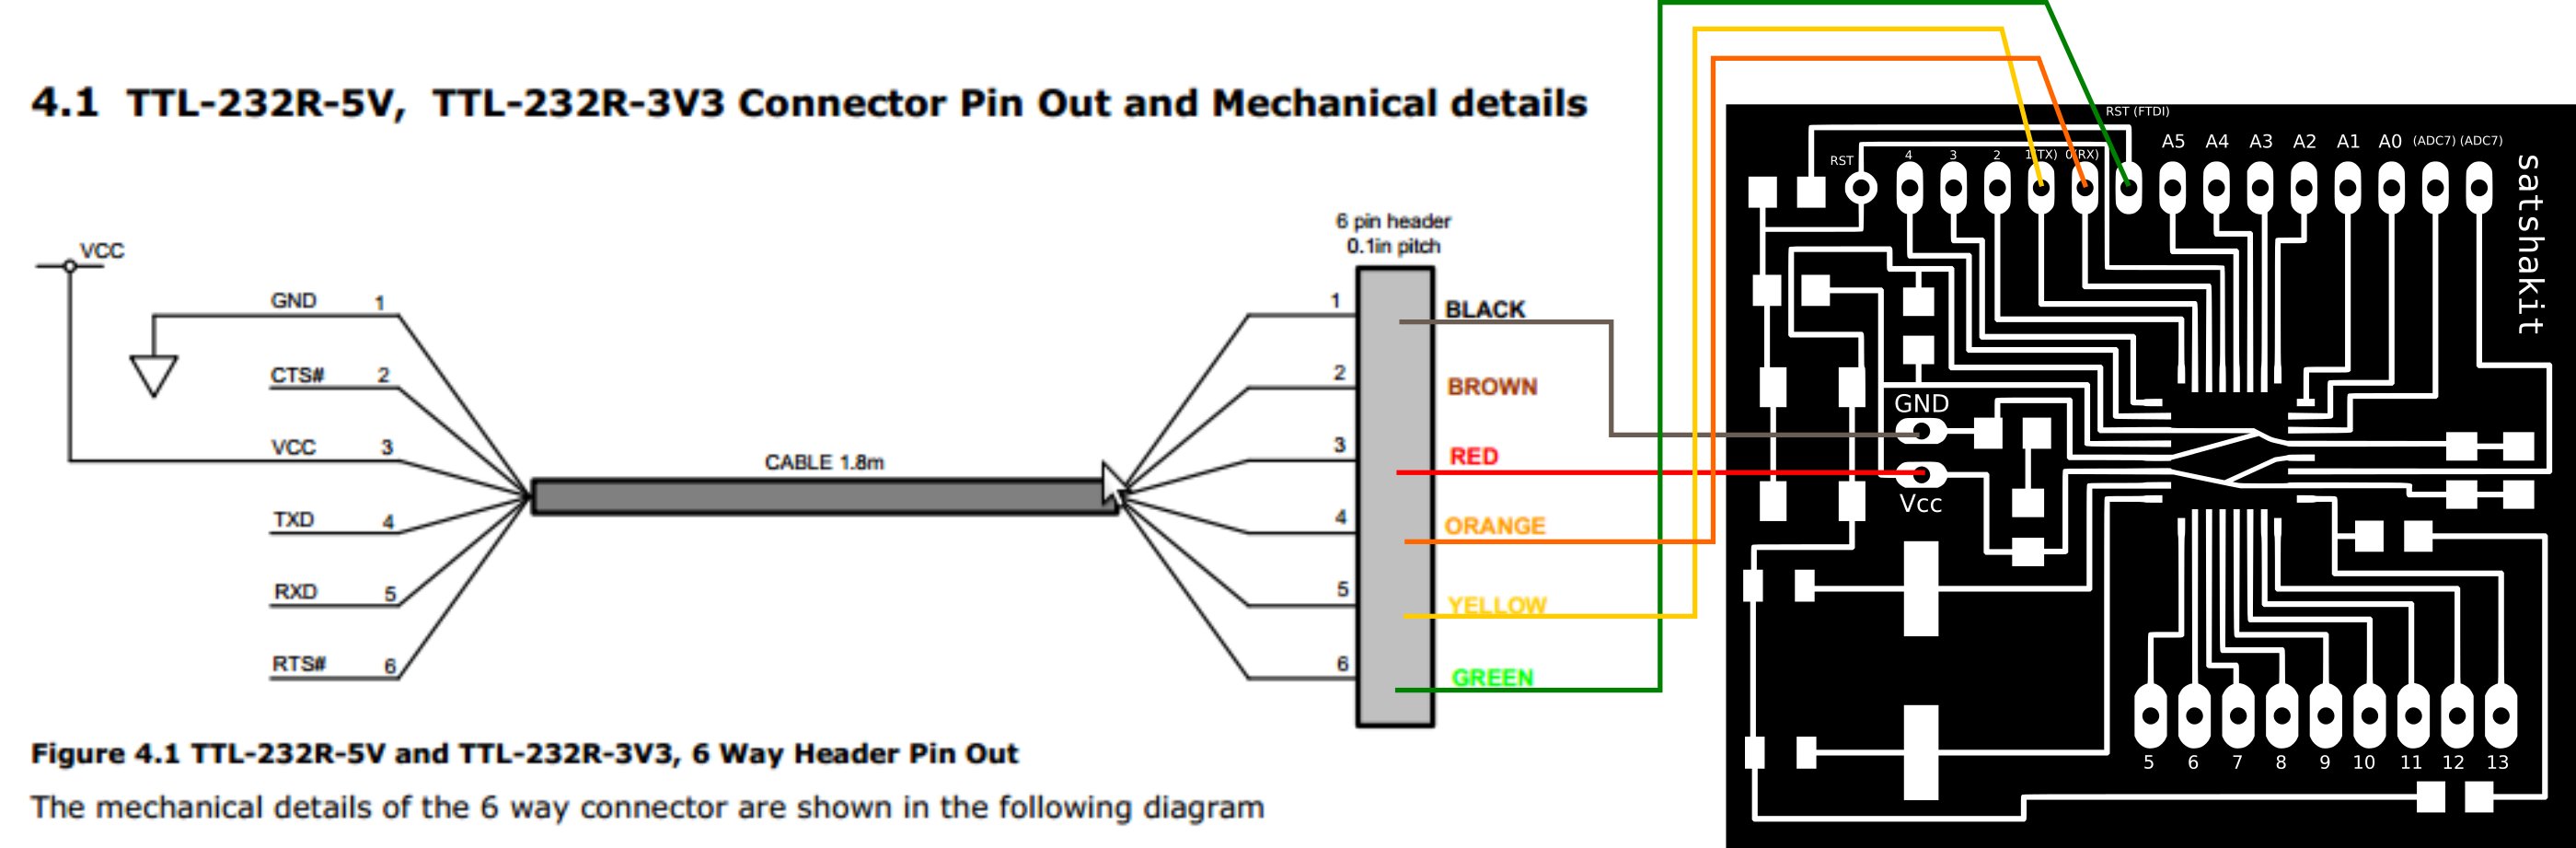
avrdude done. Thank you.To use I2C, you need to connect SCL/SDA pins of the devices, using the two-wire communication you can easily . The connection is relatively simple:

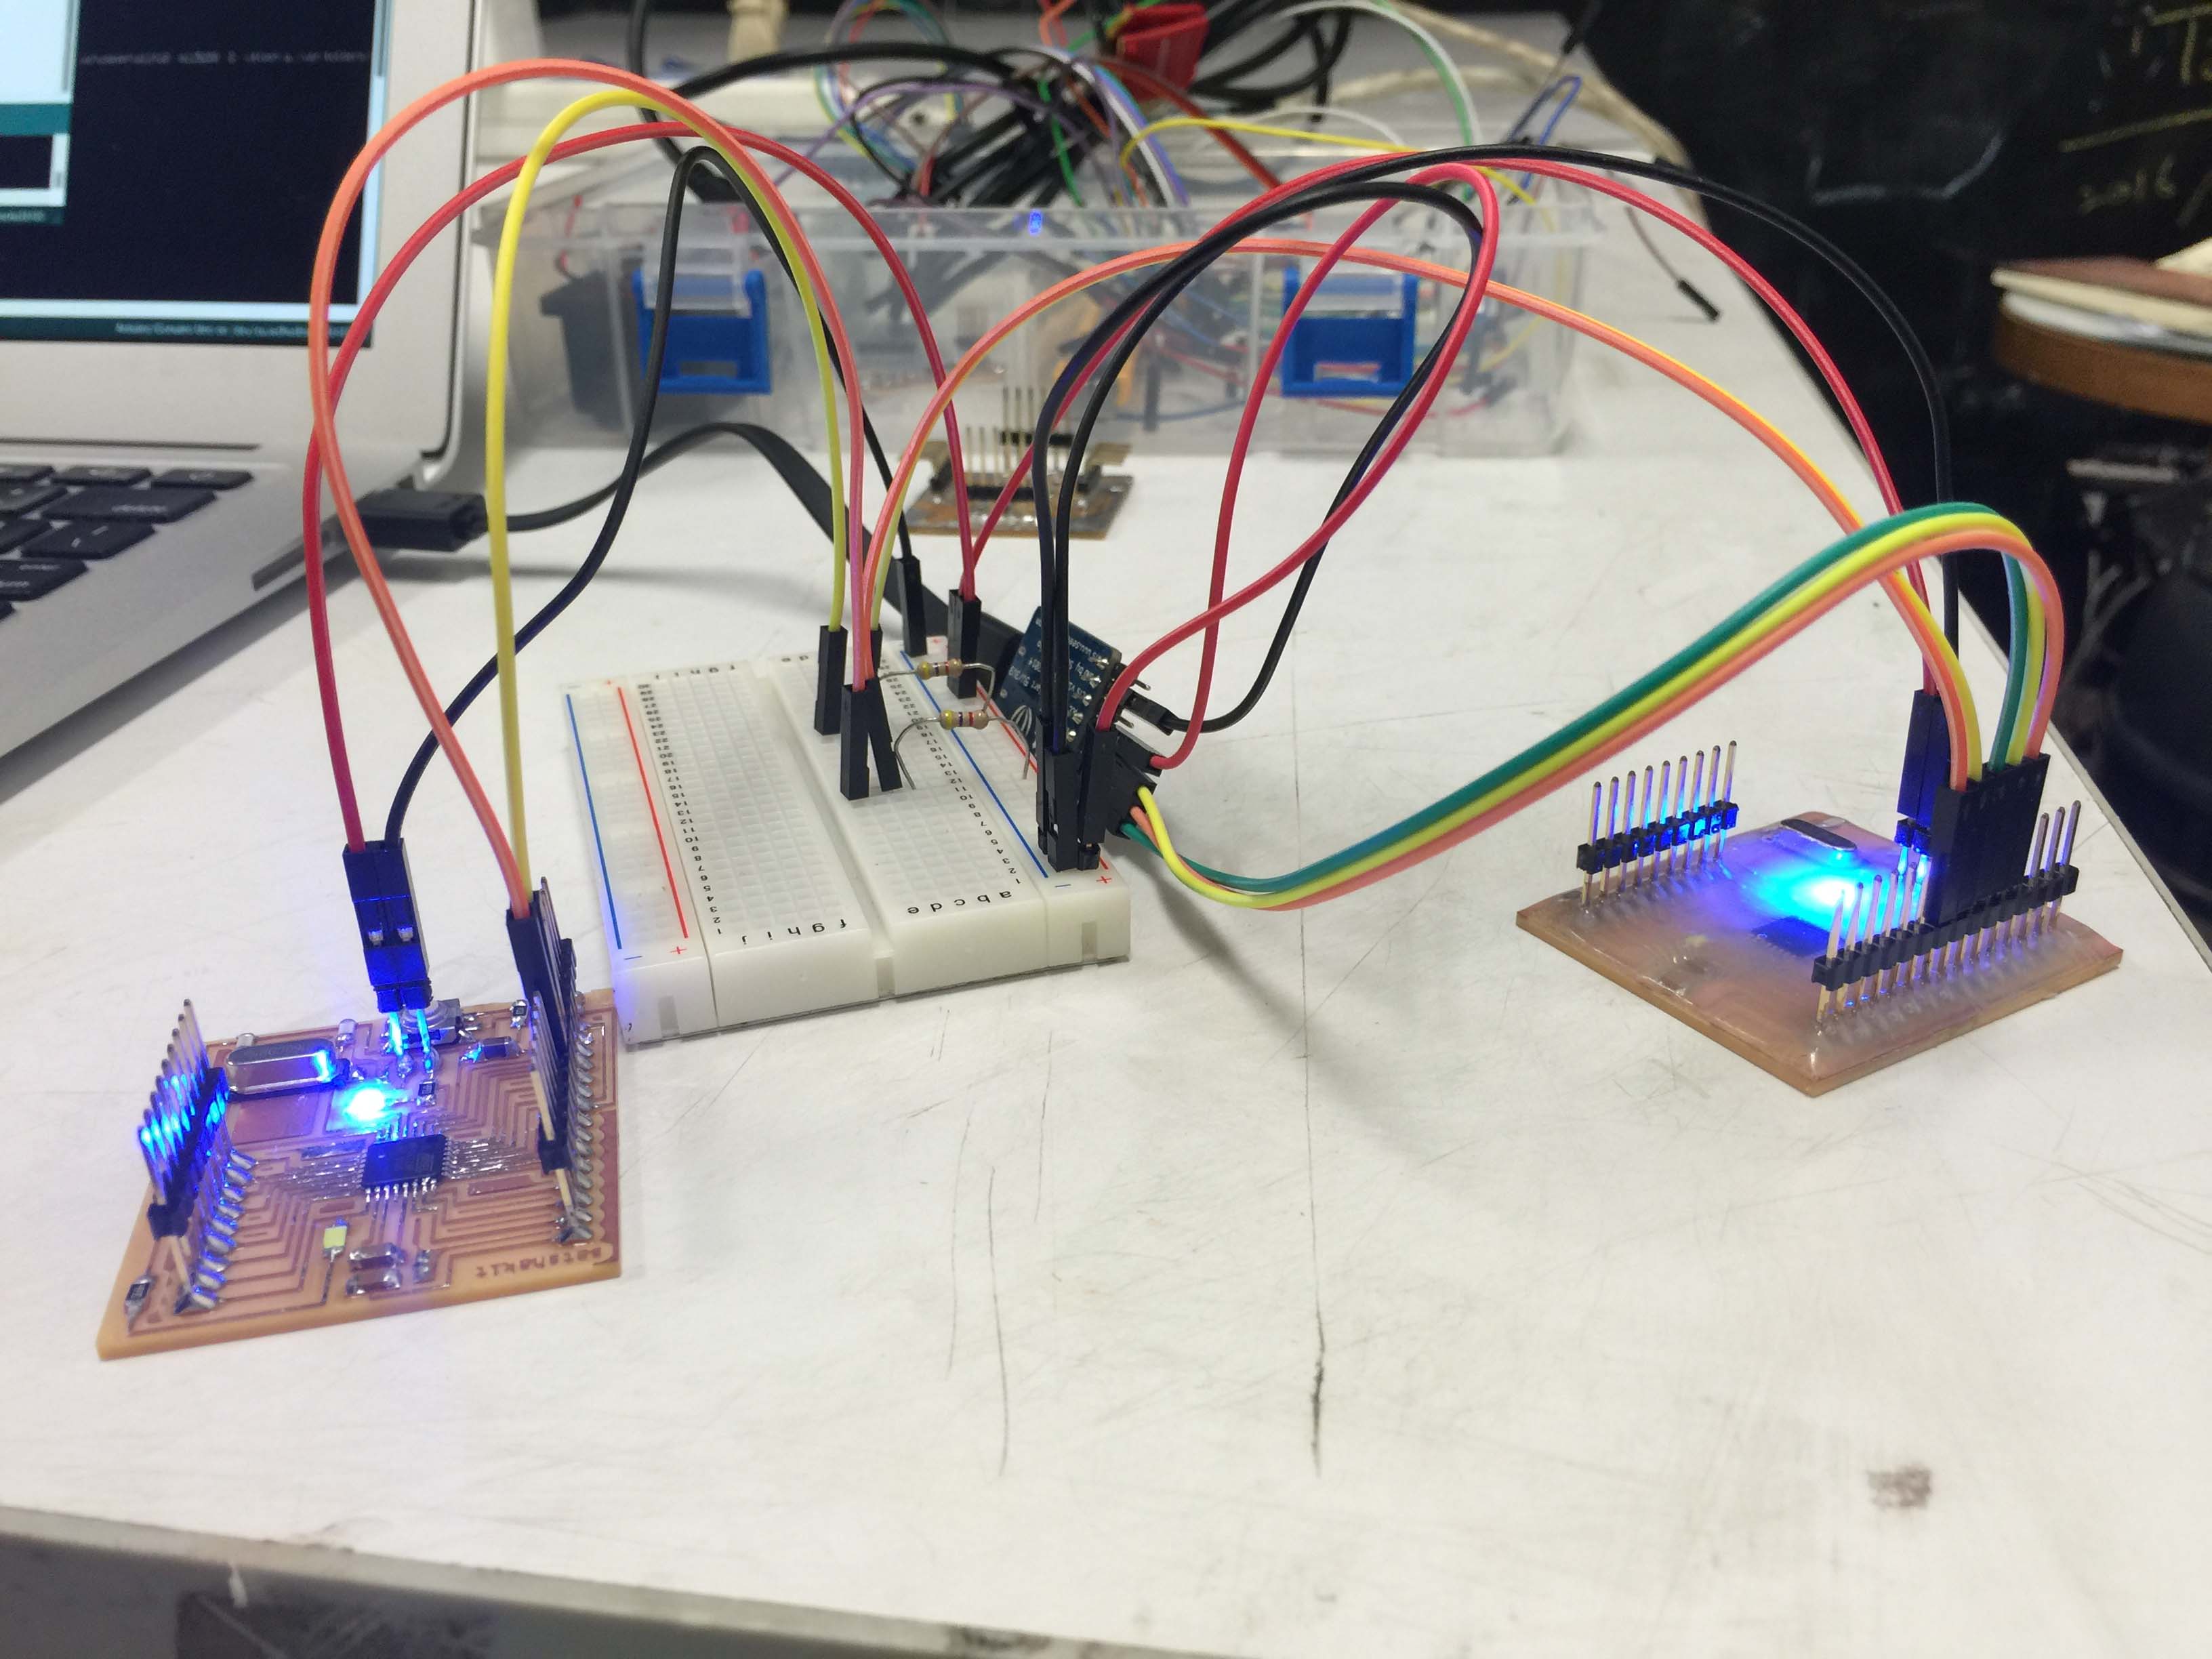
The codes I use here are just Arduino example sketches, a master counting numbers, a slave receiving numbers via I2C, you can find it in Arduino IDE Wire library example, still you can check them below just to save few seconds.
This is how it operates:
With the hardware serial, I can now monitor the behavior of my code and devices. Also, with I2C, it will be possible for me to add more sensor and output device to MCUs. Though I am taking shortcut (Arduino: love me or hate me) for the assignment, I will still look for more fundamental methods like gcc toolchain or Atmel Studio.
This week I tried bluetooth also, since In my final project I plan to use bluetooth to communicate with PC or a mobile device as my project interface. The bluetooth module I chose is a HC-05 from a Chinese manufacturer.
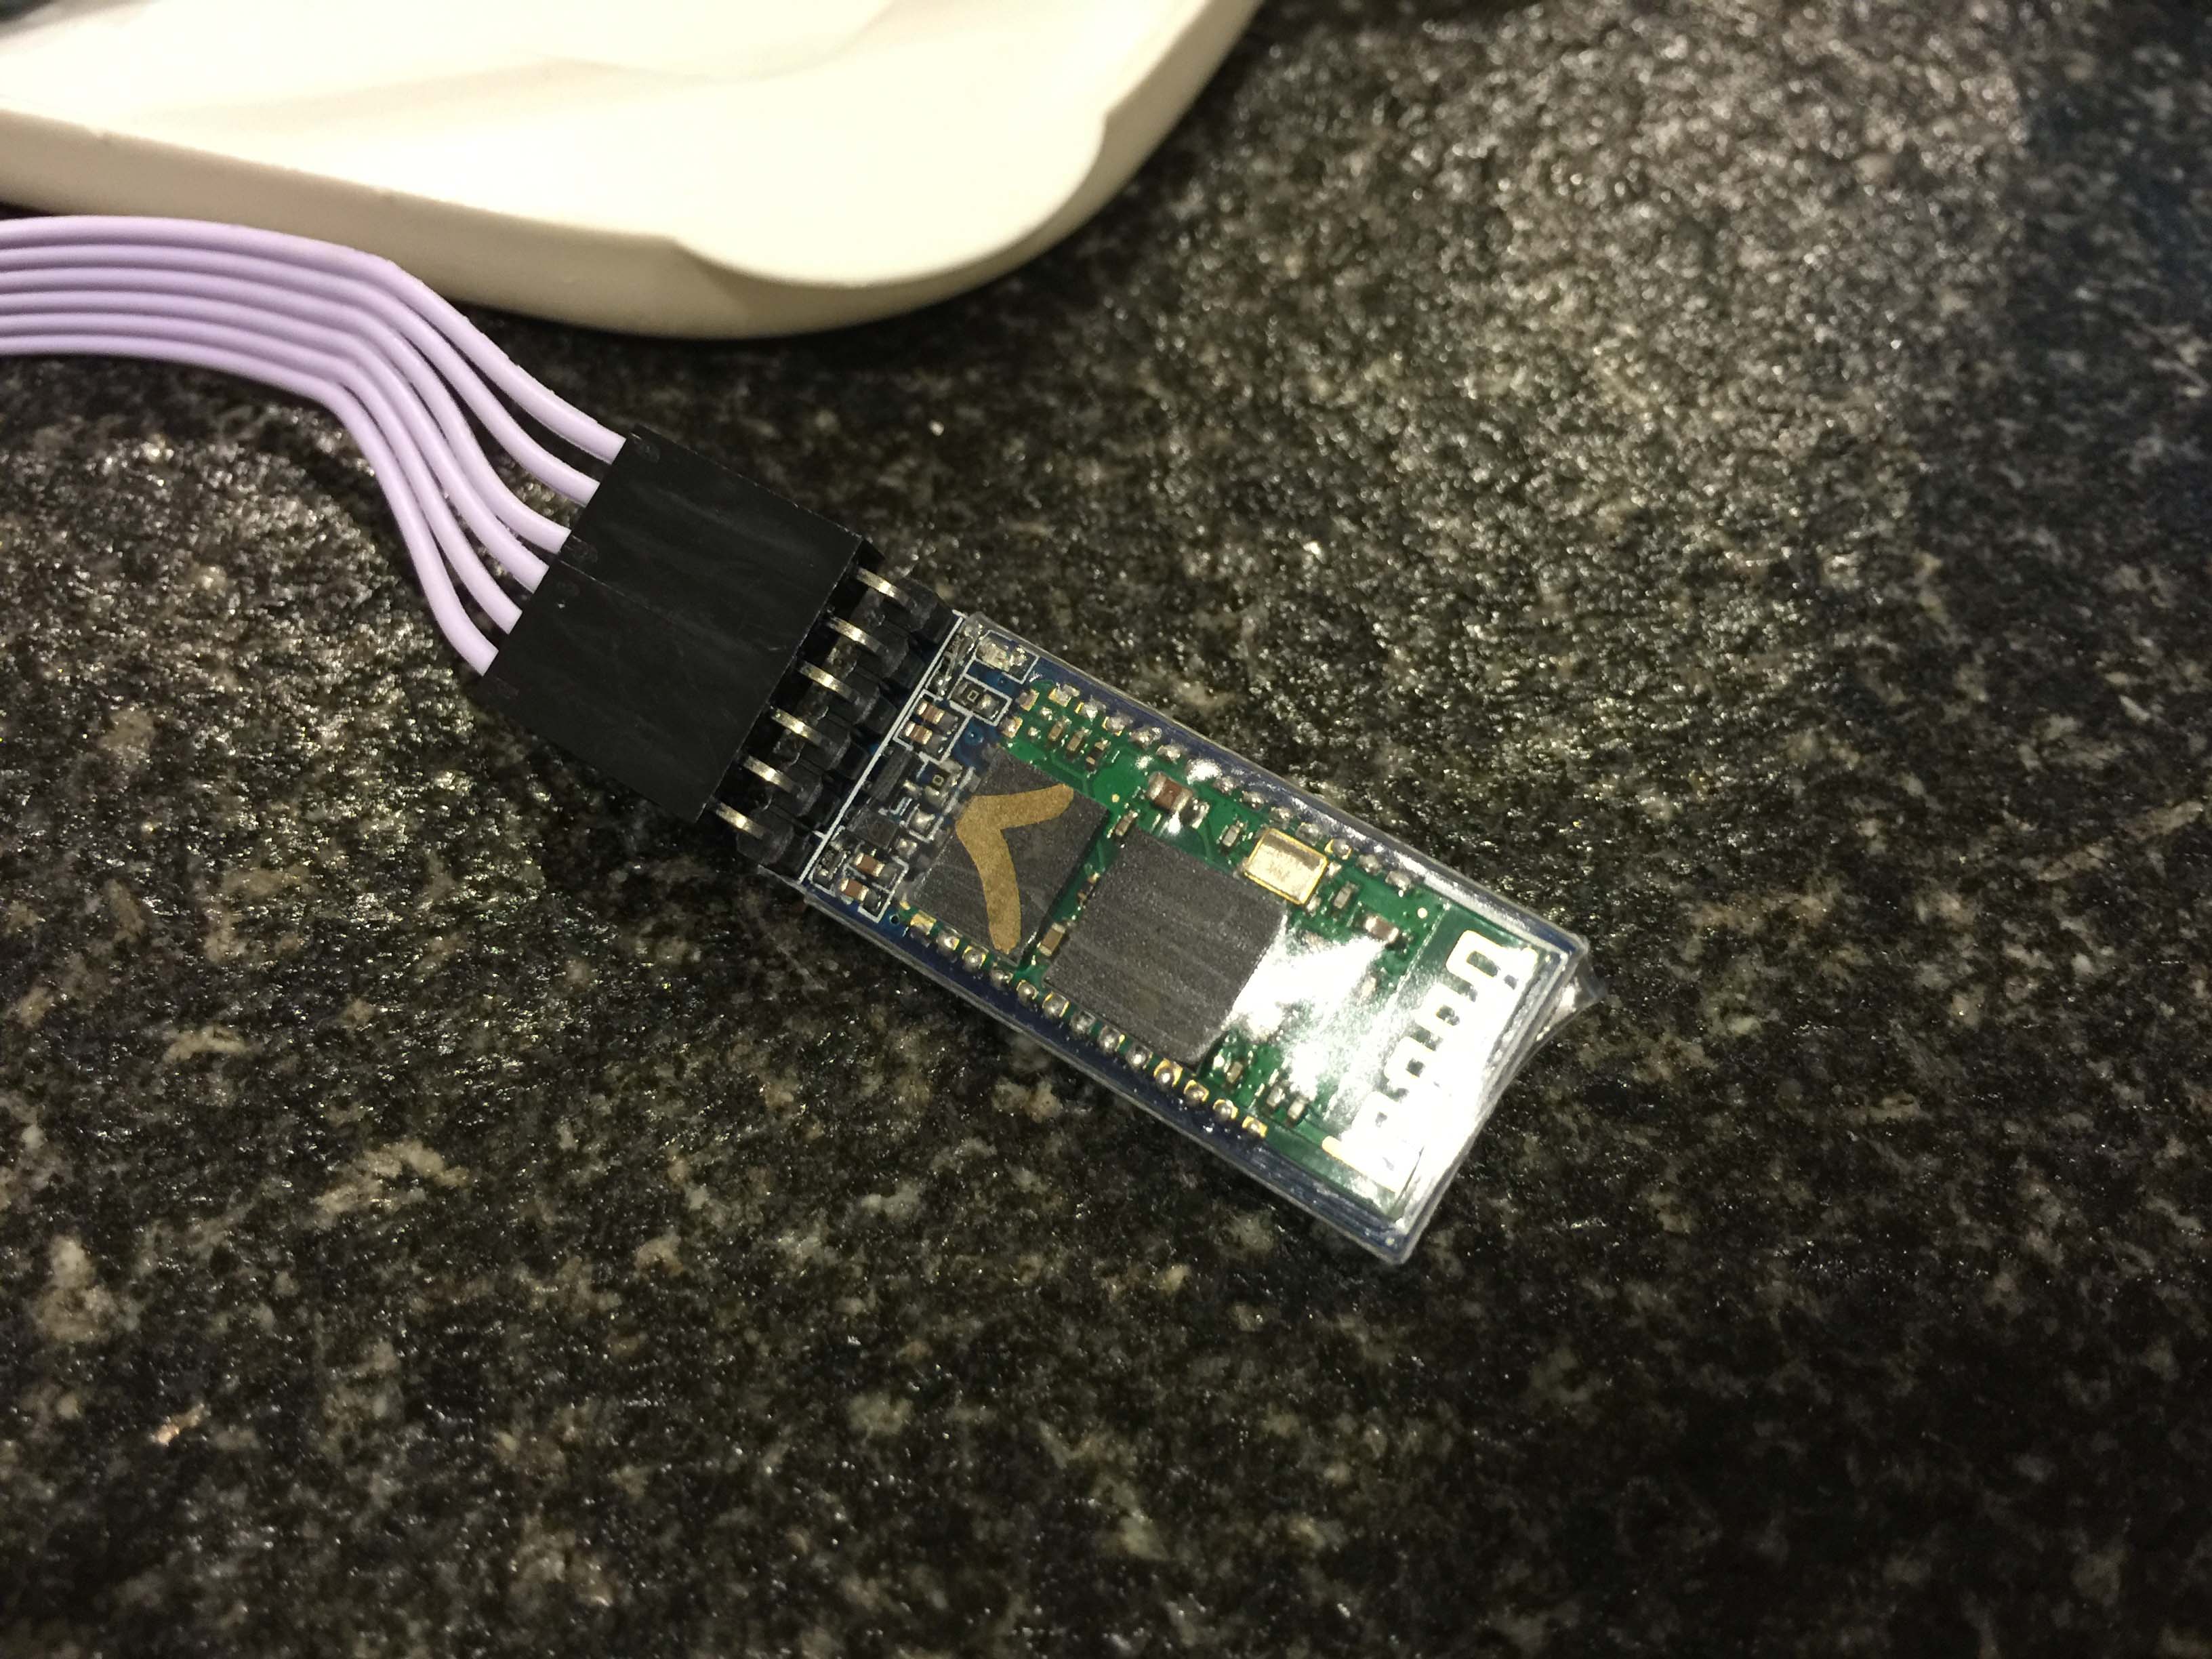
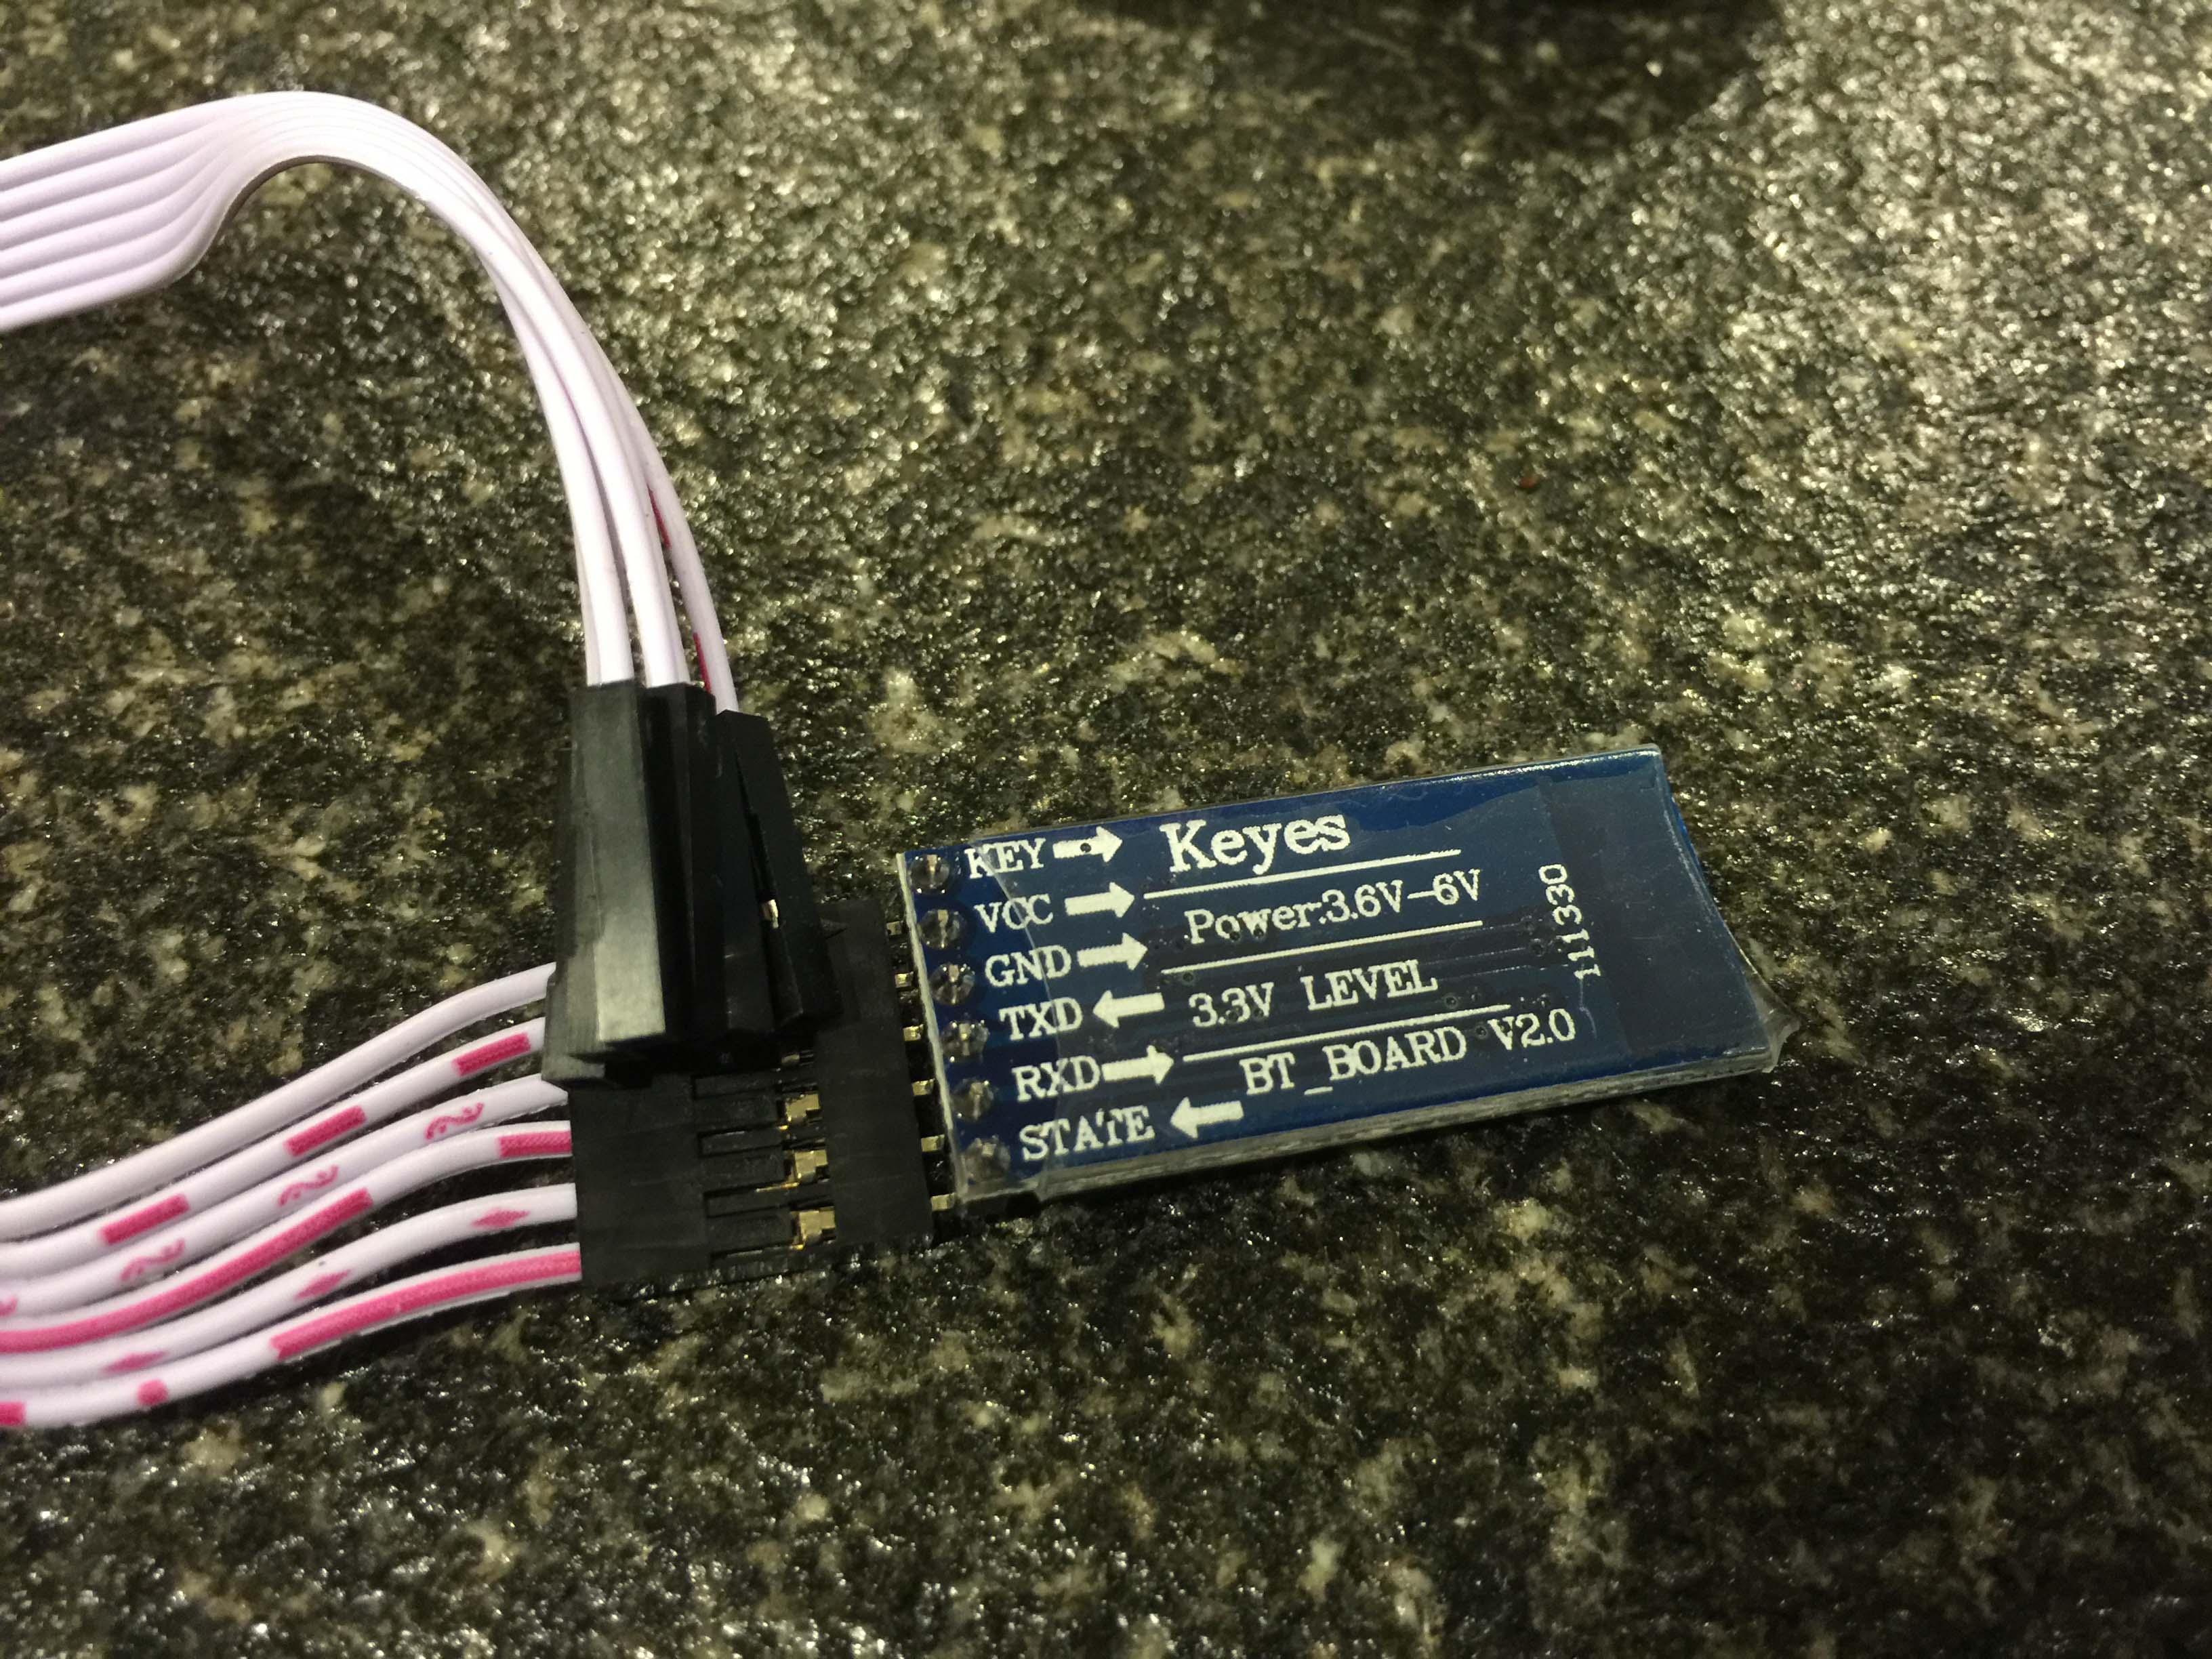
HC-05 is cheap (~$5 USD) and its popularity makes it super easy for novice like me to find a lot of examples.
There are 6 pins on HC-05, for this example I only use 4 pins: TX/RX/VCC/GND
TX/RX connected with RX/TX (pin 0 / pin 1) on Satshakit, and we are set to go!
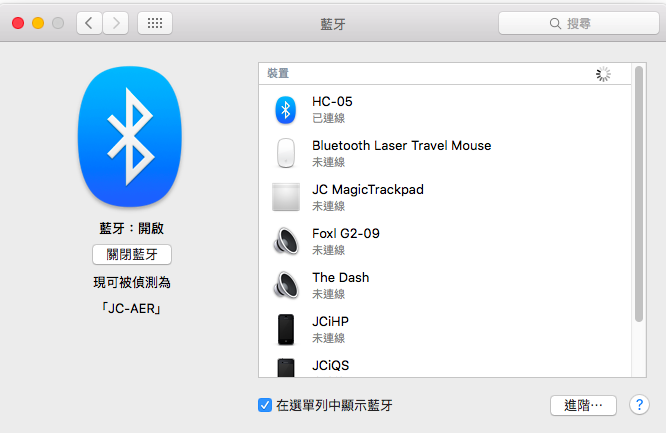
On the Macbook side:
1) open the bluetooth preference setting panel, the preset passcode is 1234 (very silly)
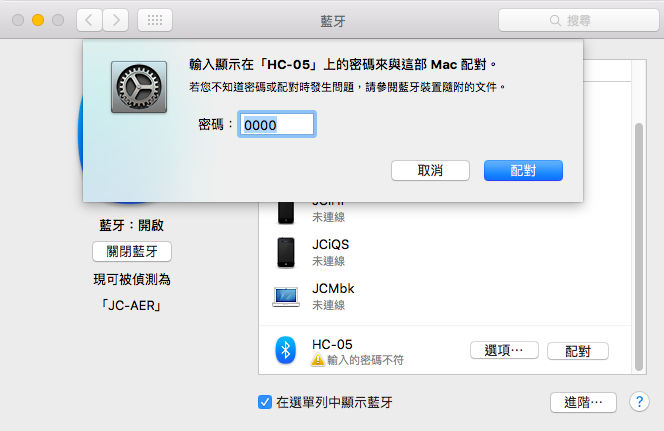
2) Connected!
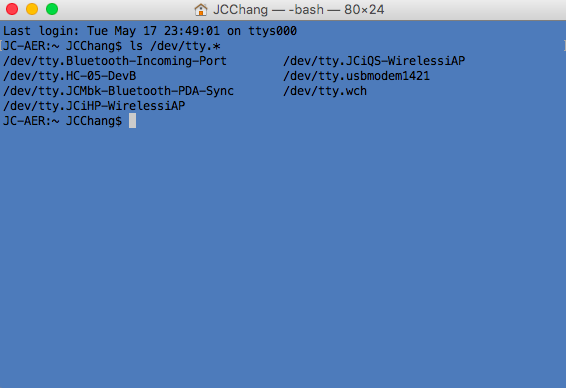
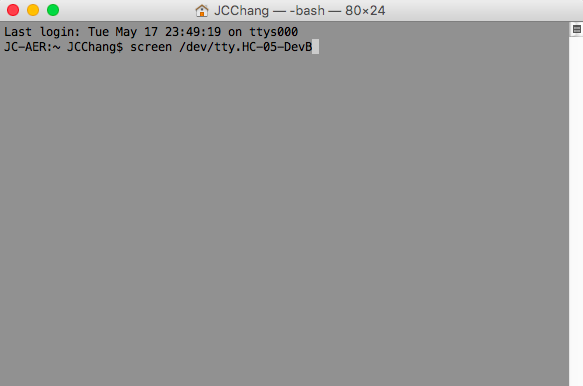
3) Open the terminal, the device will show up as something like tty.HC-05-DevB
4) type screen /dev/tty.HC-05-DevB in command line
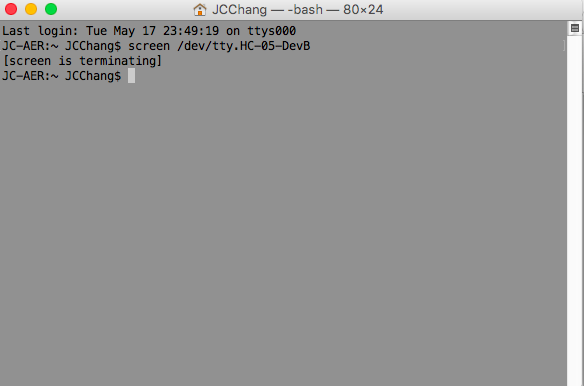
5) Fail, the connection dropped somehow... I guess it could be HC-05 being idle for too long (>3 mins)
6) Successfully connected

You can see the result from the video:
reference for pairing multiple HC-05 I might give it a try.