Week 1 - Principles & Practices, Project Management
Final Project
Please click on the link to access the Final Project pages.
Basic Web Design
2 of the core technologies for building web pages are HTML and
CSS. HTML provides the structure of the page and CSS the layout.
Together with graphics and scripting, HTML and CSS provide the
basics of building web pages and web applications.
3 good sites to learn more about HTML and CSS are
http://www.w3.org/standards/webdesign/htmlcss
HTML tags control the formatting and appearance of a web page.
The basic HTML web page contains the following:
<!DOCTYPE html> <html> <head> <title>Title of Webpage</title> </head>Result:
<body> <!-- contents of webpage --> <h4>Hello Fab Academy!</h4> </body> </html>
Hello Fab Academy!
CSS is used in stylesheets to control the visual and aural layout of the webpage. For instance, my website, which I downloaded from a template in the Fab Academy tutorials page, makes use of CSS to control the visual layout of my web pages.
CSS stylesheets can be embedded within the HTML document or linked from an external file. Embedded CSS is located between the <style> and </style> tags. External CSS stylesheets use the <link> tag.
	<!DOCTYPE html>
	<html>
		<head>
		<title>Title of Webpage</title>
		<style>
			<!-- Define your document styles here -->
		</style>
		</head>

		<!--> Other code... <-->
	</html>

	Linked stylesheets:
    	<!-- Custom styles for this template -->
    	<link href="media/fabacademy.css" rel="stylesheet">
Since there is already a fabacademy.css stylesheet, I decided to modify the stylesheet to add in a 40px indentation for tabs. This is achieved by defining a tab{ } element in the stylesheet and adding it to the <p> tag in my HTML document.
	In fabacademy.css:
		.tab { margin-left=40px; }

	In the html document:
		<p class="tab">This is a tab</p>
Images
In HTML5, you add images to your webpage using the <img> tag. For example:
<img src="images/steven_kyoto_thumb.jpg" alt="Kyoto pic">
Would produce

Since this website includes a custom CSS stylesheet (fabacademy.css), the code to display images is modified to make use of the layout defined in the CSS. You can set it up with:
	<p class="pic>><img src="images/2013WSC_thumb.jpg">
	<legend>Describe your picture here</legend>
	</p>
Result:

Hyperlinks
Use the <a href=""> tag to set up hyperlinks within your web document. For example, if I want to create a hyperlink to the Fab Academy 2016 class archive within my document:
<a href="http://archive.fabacademy.org/archives/2016" alt="Fab Academy 2016">Fab Academy 2016 Class Archive</a>
Result:
Click on the link to go to Fab Academy 2016 Class Archive
There are lots of really cool things that you can do using HTML5 and CSS. I haven't even touched on the topic of Javascript yet. Javascript brings us to a whole new level of functionality. For instance, the online Fab Modules are all written in node.js
To close this section, I'll just include another code for displaying and manipulating 3D Models directly in a web browser. The code example is directly lifted from the Fab Academy web template in our Archive Tutorial pages. I've included it here just to show an example of how powerful the web environment has become. The other reason is that I find it kind of cool!
3D Model
The model can be rotated and zoomed with the mouse/trackpad. You can set it up with:
	<canvas id="cv" width=640 height=480>
	It seems you are using an outdated browser that does not support canvas :-(
	</canvas>
	<script type="text/javascript">
		var canvas = document.getElementById('cv');
		var viewer = new JSC3D.Viewer(canvas);
		viewer.setParameter('SceneUrl','media/monkey.stl');
		viewer.setParameter('ModelColor','#CAA618');
		viewer.setParameter('BackgroundColor1','#E5D7BA');
		viewer.setParameter('BackgroundColor2','#383840');
		viewer.setParameter('RenderMode','flat');
		viewer.setParameter('MipMapping','on');
		viewer.setParameter('Definition','high');
		viewer.setParameter('Renderer','webgl');
		viewer.init();
		viewer.update();
	</script>
You can set up the path to the 3D model (.stl/.obj) within this line:
viewer.setParameter('SceneUrl','media/monkey.stl');
Result:
HTML Editors
I've used various IDEs and editors, ranging from Brackets, Sublime Text, Frontpage, Dreamweaver, Coffee Cup HTML, Notepad, etc to create webpages. I have been using mainly text-based rather than wysiwyg editors. I'm no master, but I know enough to create simple websites.
For this Fab Academy course, I decided to look for web editors which support multiple platforms, since I work on OSX, Windows and Ubuntu. Since Neil encourages us to try different software, I decided to give wysiwyg editors another go, if I could find one which supports the 3 platforms that I work in.
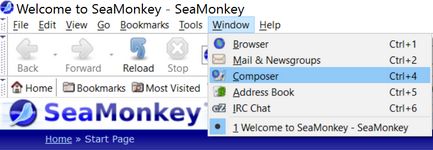
SeaMonkey is a wysiwyg web editor which is available for Windows, Mac and Linux. Great! Download the portable version for Windows and installed it. On launch, SeaMonkey browser opens at the project site. The editor module is called Composer and is available from the Windows pull-down menu (see figure below).
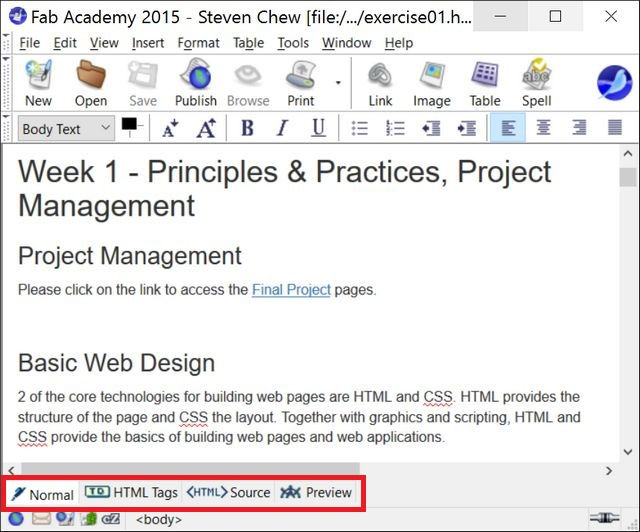
Clicking on the menu item brings us to Composer, where you can create a new document or open an existing document to edit. At the bottom of the Composer window, you can see the different views available - Normal, HTML Tags, HTML Source and Preview. Click on the image to view it.
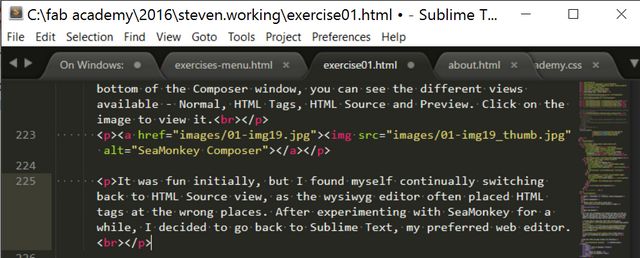
It was fun initially, but I found myself continually switching back to HTML Source view, as the wysiwyg editor often placed HTML tags at the wrong places. After experimenting with SeaMonkey for a while, I decided to go back to Sublime Text, my preferred web editor.
HTML Editors Update
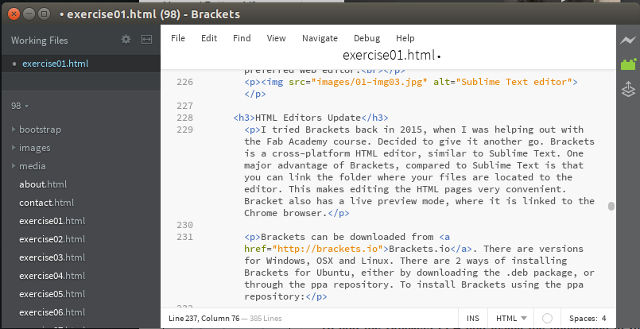
I tried Brackets back in 2015, when I was helping out with the Fab Academy course. Decided to give it another go. Brackets is a cross-platform HTML editor, similar to Sublime Text. One major advantage of Brackets, compared to Sublime Text is that you can link the folder where your files are located to the editor. This makes editing the HTML pages very convenient. Bracket also has a live preview mode, where it is linked to the Chrome browser.
Brackets can be downloaded from Brackets.io. There are versions for Windows, OSX and Linux. There are 2 ways of installing Brackets for Ubuntu, either by downloading the .deb package, or through the ppa repository. To install Brackets using the ppa repository:
  sudo add-apt-repository ppa:webupd8team/brackets
    sudo apt-get update
    sudo apt-get install brackets
Project Management
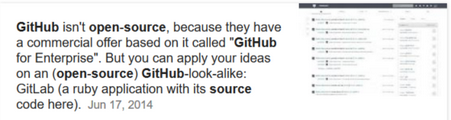
The Fab Academy Class uses GitLab as a repository for our work, for project management and version control. The main differences between GitHub and GitLab is that GitLab is open source, whereas GitHub isn't. GitLab also has more features and functionality, compared to GitHub.
I use Git on Mac, Ubuntu and Windows. All 3 platforms are very similar, with the same workflow and set of commands, so I will only document my experience with Git on Windows, where it is not native.
The first step is to download and install Git for Windows. I decided on the portable version of Git, as I am a big fan of portable software :) The software is available at this link: Git for Windows
Install the program on your computer and run it. Generate your SSH key-pair.
	git-bash.exe
	$ ssh-keygen -t rsa -C "$user.email"

	You should find 2 keys generated:
	$ ll ~/.ssh
		id_rsa		#private key
		id_rsa.pub 	#public key
Copy your public key to the clipboard
clip ~/.ssh/id_rsa.pub
Login to your Fab Academy Git account @git2.fabcloud.io. Click on Profile Settings, then click on SSH Keys. Click on the +ADD SSH KEY button to add your SSH key.
To clone your Git archive, execute the git clone command to clone your archive.
	$ git clone git@git.fabacademy.org:fabacademy2016/<fablab name>.git

	For example:
	$ git clone git@git.fabacademy.org:fabacademy2016/fablabsingapore.git
If everything is alright, you will get the message asking you to enter your ssh passphrase, followed by the files being cloned from the git archive to your local hd.

Updating Files in Your Archive
Change to your personal directory on your local archive.
Note: It is very important that you work in your own personal directory, else you may mess up the files for others!
Working on the local copy of your archive consists of 4 steps:
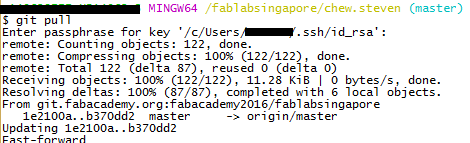
For instance, my website is based on the Fab Academy template from the Class Tutorial. After extracting the template files to a local folder, I executed git pull in my personal archive folder to ensure that my archive was up to date. I then copied the template files to my archive folder and added it to my git archive using git add *, committed the changes and pushed my archive back to the Class repository.
$ cd chew.steven
$ git pull
Copied files from template to my personal folder using File Explorer
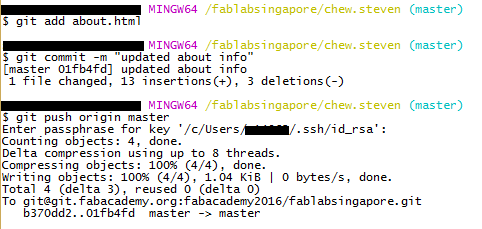
$ git add *
$ git commit -m "Creating website from template"
$ git push origin master
Once the structure of my website was in place, I edit the files as I worked on the assignment, updated the files on my local archive and pushed them to the Class Archive after testing that they were OK.
Other Useful Git Commands
There are a number of other Git commands that I found useful:
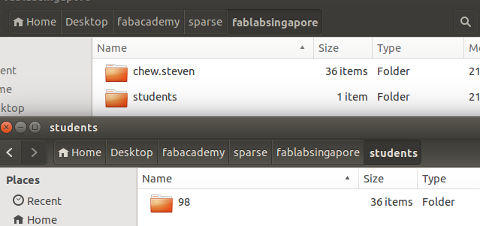
One of the issues that I've been trying to figure out is how to archive only the files in my directory, rather than everything in our fablab repository. After some research, I discovered that this can be achieved using the sparse checkout feature of git.
There is a tutorial on sub-directory checkouts using sparse checkout at Jason Karns' blog. following the information from Jason's blog, I managed to do just that!
The steps:
  1. Create and initialize your new repository:
      mkdir fablabsingapore && cd fablabsingapore
      git init
      git remote add -f origin git@git.fabacademy.org:fabacademy2016/fablabsingapore.git

    2. Enable sparse-checkout:
        git config core.sparsecheckout true

    3. Configure sparse-checkout by listing your desired sub-trees in .git/info/sparse-checkout:
        echo students/98/ >> .git/info/sparse-checkout

    4. Checkout from the remote:
        git pull origin master
There are many references for learning Git. Some of the resources I used are: