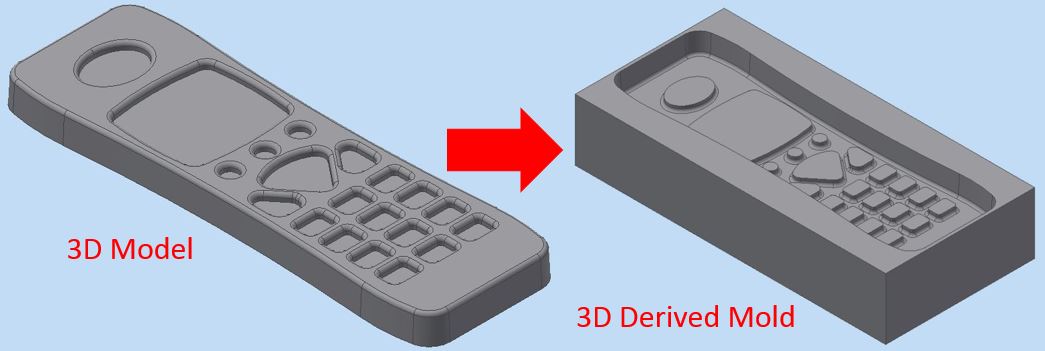
The old NOKIA phone case was used as the model. The model was designed in Autodesk Inventor and the mold was derived from the model itself as shown in the following.
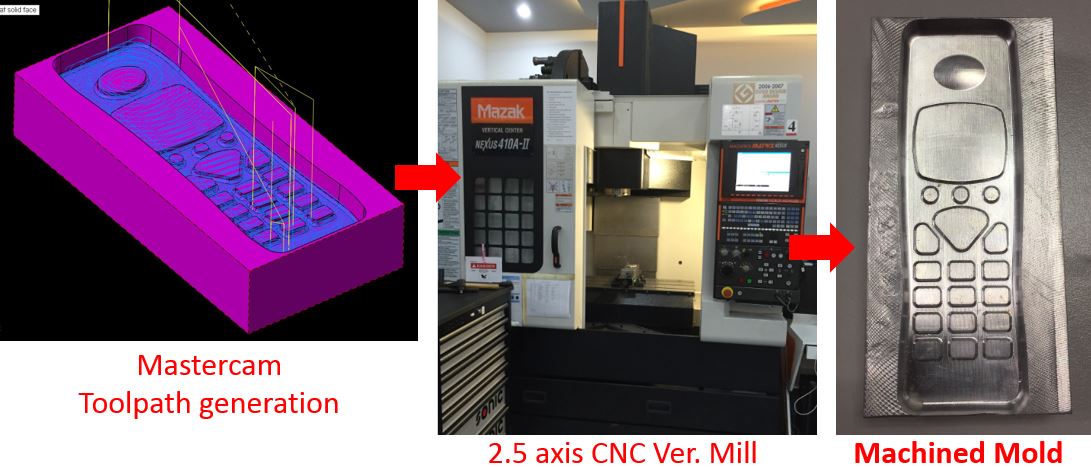
The 3D derived mold was then imported into Mastercam X9 for g-code generation. The mold material used was Aluminium Alloy 6061. The g-code was loaded into CNC Milling machine and the mold was machined.
To produce a fiber composite part in it
According to Google, composite means thing that made up of several parts or elements.
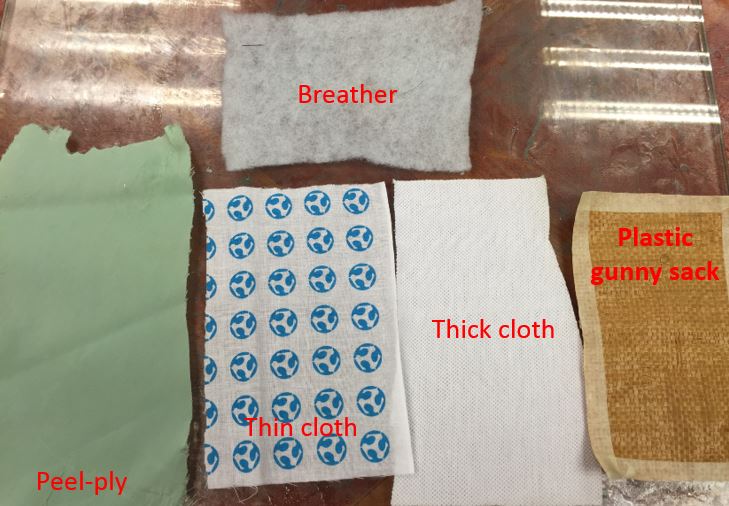
Thus, this task used fibre materials like cloth and plastic gunny sack. The following showed the material prepared before making composite part from the mold.
The following showed step-by-step to produce composite part from the mold.
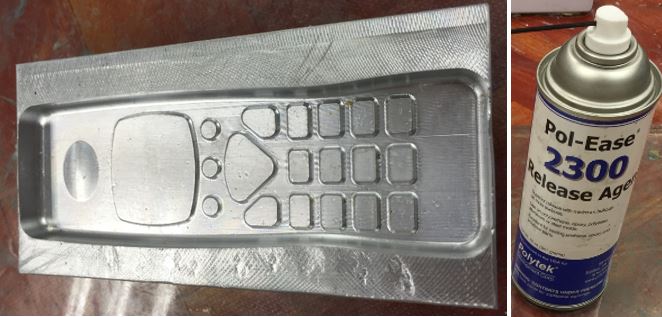
Apply mold releasing agent (right) onto the mold (left), at least 3x at interval of 10 mins or at each time the agent/fluid dried.
NB. The releasing agent could be in form of spray liquid or solid wax.
Prepare the material used to size ie. thin cloth, plastic gunny sack, thick cloth, peel-ply, breather, sealant tape, vacuum bag film and tubing. (see above image on the material prepared)
NB. Wire-mesh was not used since the composite process used did not involve any infusion.
Prepare the resin and harderner following the recommended ratio 10:6 by weight. The epoxy resin used in this task was 1006A Part A (Resin) and Part B (Harderner). Stir the mixture slowly and thoroughly until they are uniform (this will take about 4-5 minutes).
Pour a little amount of the resin onto the first layer of cloth that lay onto the mold. Brush it on until it covers the whole area. Add on the resin where needed. Once done, repeat the process as you place the second layer plastic gunny sack on top of the thin cloth. Press onto them so that the cloth and resin covers the whole area. Place the third layer, ie. thick clotch, forth layer, ie. peel-ply, fifth layer, ie. breather, onto it. Press them and ensure it covers all the mold.
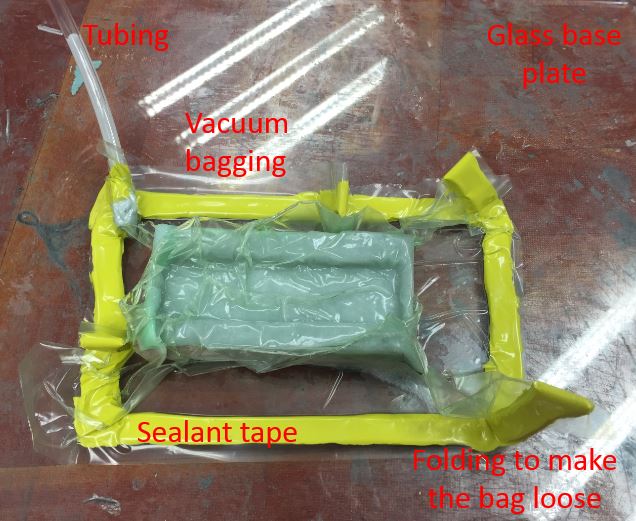
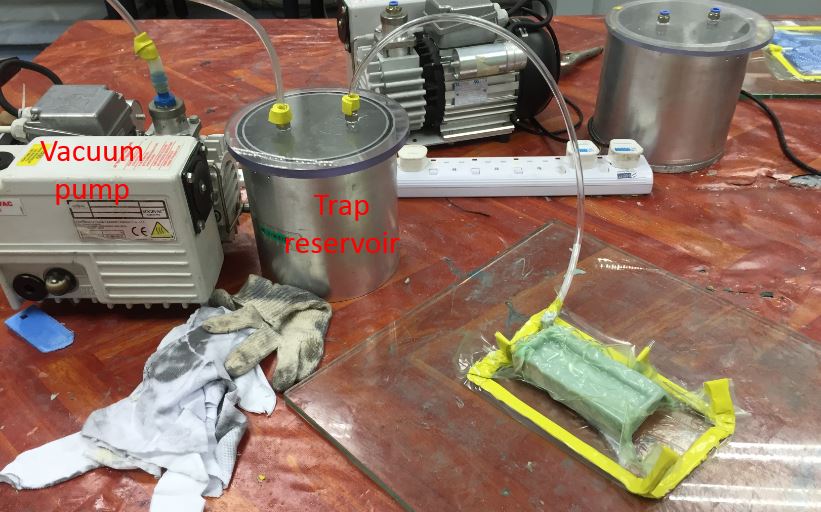
Layout the sealant tape and place the vacuum bagging film. Make sure the vacuum bagging is loose enough so that it has sufficient length to reach and press onto the inner detail of the mold. Place the tube and the set up shall look similar to the following image. Once ready, turn on the vacuum pump and check for leakages. Rectify the leakages by pressing the sealant tape at leak positions until the set-up is able to be fully vacuumed.
For good result, turn on the pump for about 8 hours and let the resin cured under vacuum. Vacuum pump is needed to remove air bubbles, excess resin and press the composite to have better details. Turn off the pump after 8 hours, clamped the tube (to continue vacuuming the composite) and let the composite to fully cured (another 8 hours or more).
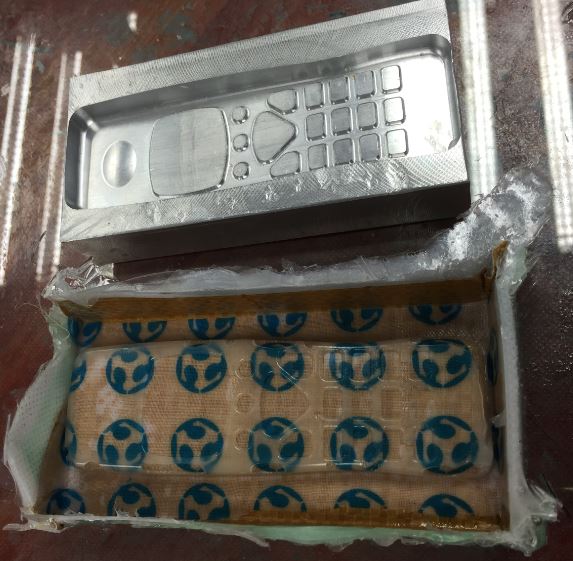
When the composite is fully cured (after 8 hours) ie. fully hardened. Strip the vacuum bagging, separate the mold and the composite part.
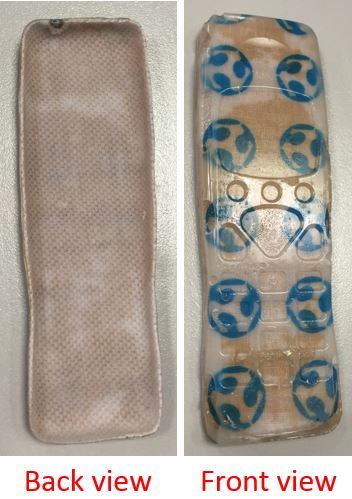
Remove the peel-ply and the breather layer, trim the composite.
Interested to try the same model on your own? The working files can be downloaded here.