This week's assignment
- Learn how to use laser cutter
- Make press-fit kit
- Make parametric design
- Use vinyl cutter
Laser Cutter
As you can guess from the name, laser cutter is a cutting machine using a laser. A laser beam comes from a moving nozzle to cut(actually burn) a matrial.
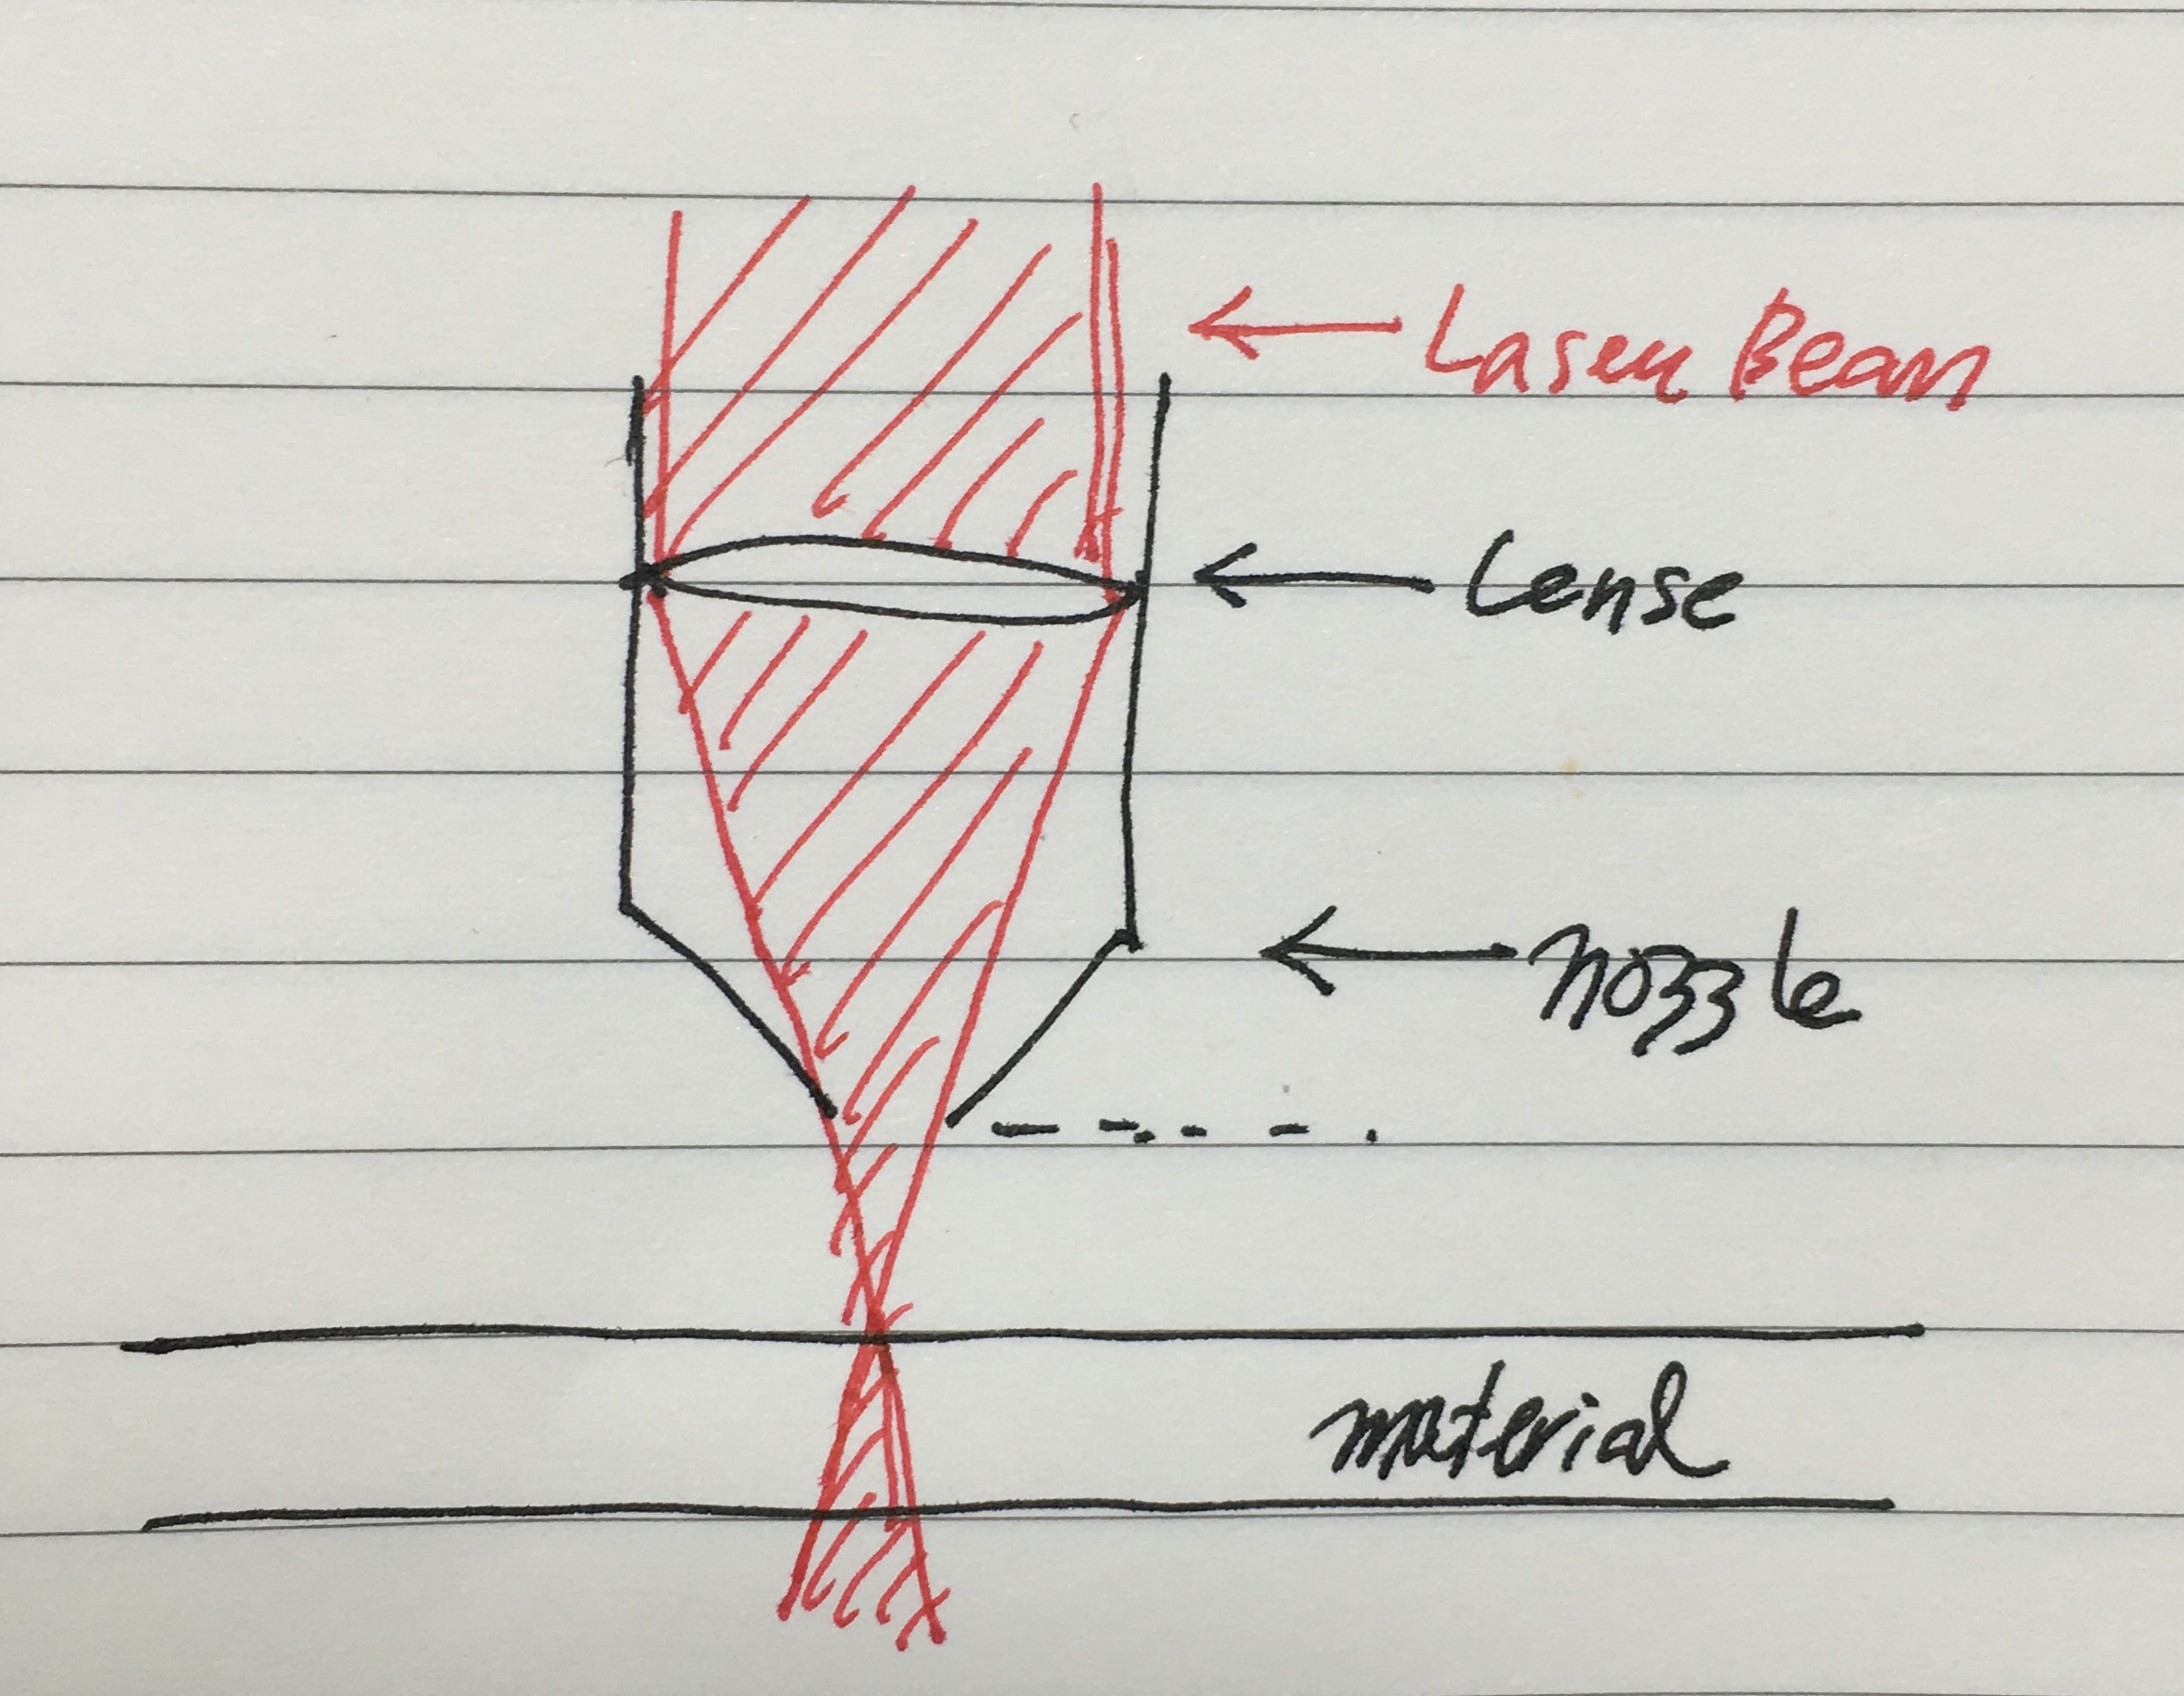
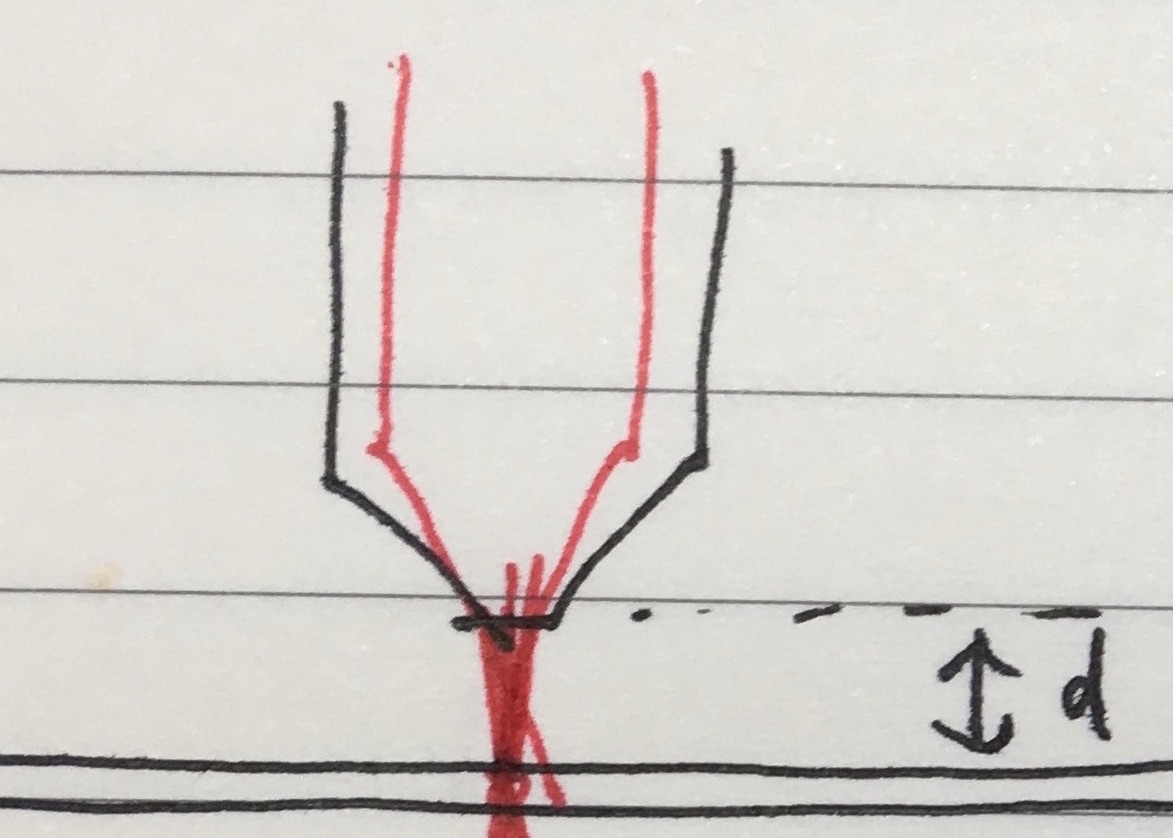
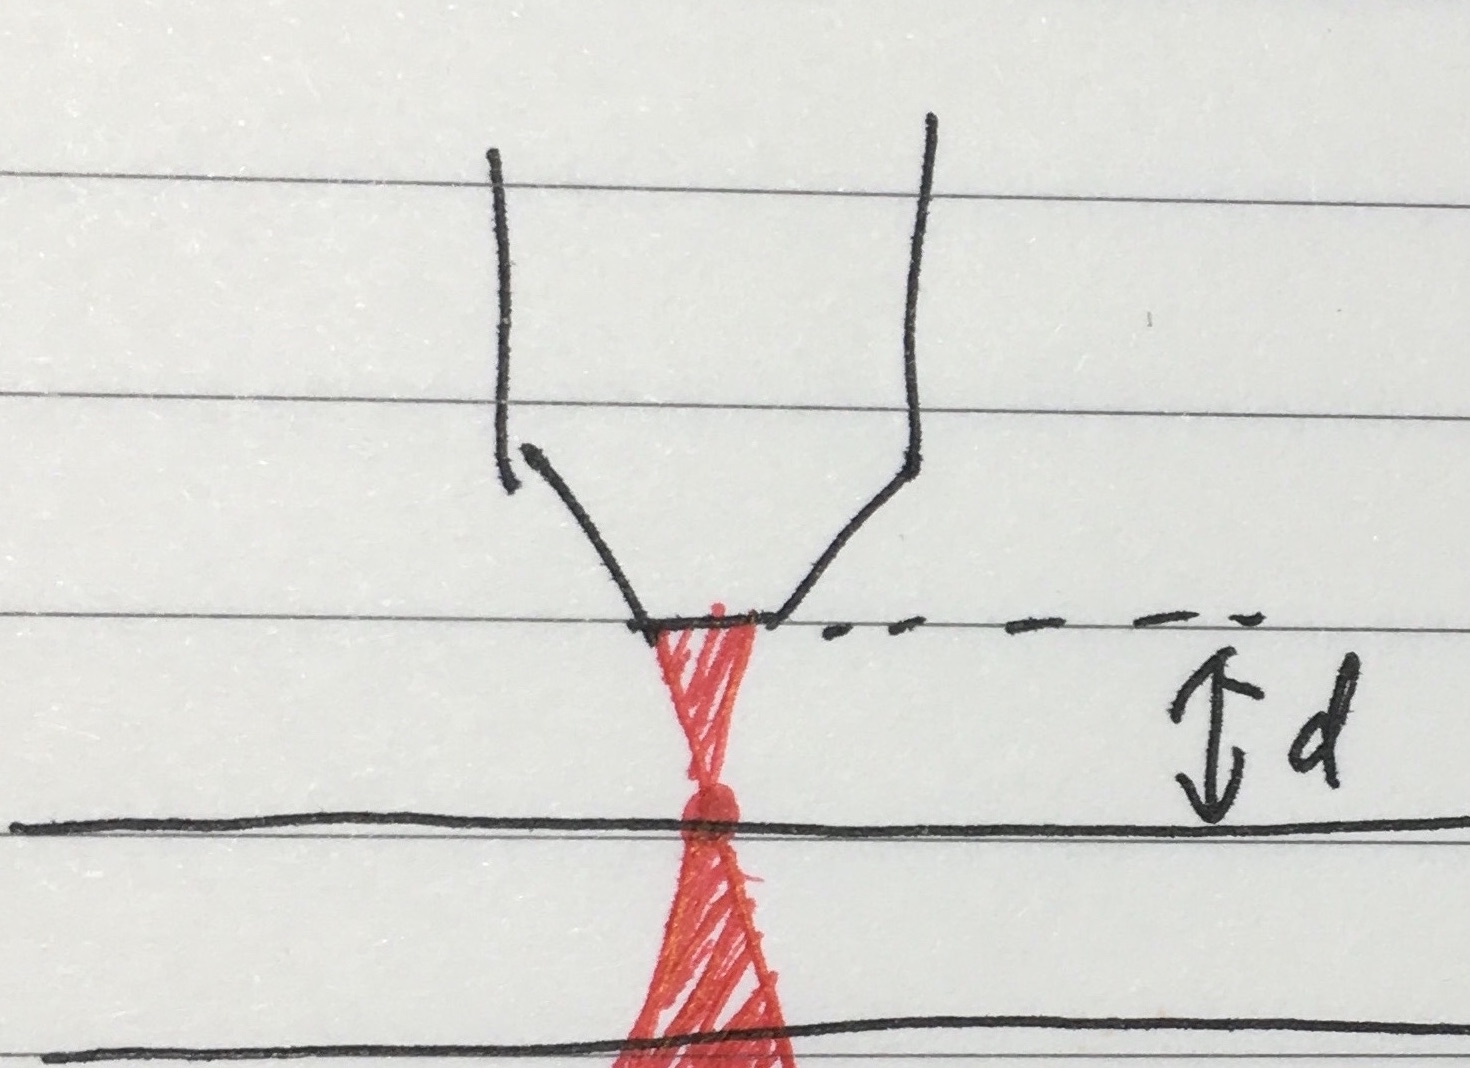
A laser beam is focused when it's passing the lense. So this is the reason why adjusting a distance between the nozzle and material is important. If the nozzle is either too close or too far to the working space, it has less power because it is not focused properly. It applies to the importance of the material thickness.
 thickness of material makes differences
As you can see above, when the matrial is thin, there is no problem. But, if the material is thick, a cutting edge is not excatly virtical. Therefore, a laser cutter is not suitable for cutting thick material.
So, how can we use laser cutter? What should we control? There are two main aspects we can control; power and speed
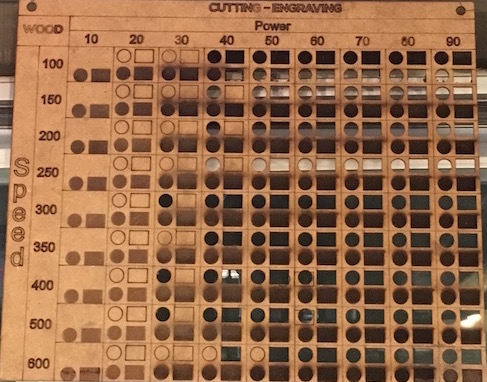 The result depends on a combination of power and speed.
Press-fit kit
I wanted to make a tetrahedron.
design basics
Here, I'm using adobe illustrator. In illustrator, rectagle or polygon tool helps people make a simple shapes.
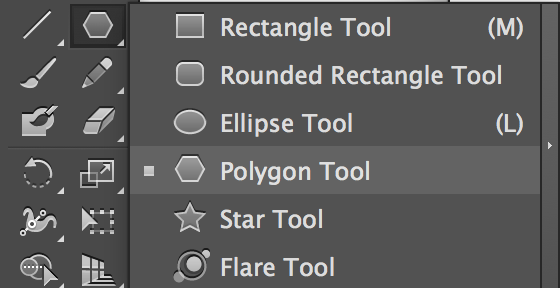 Select polygon tool and press arrow key up or down to adjust while you holding mouse.
 After draw shapes, you can see the paths are seperated. For lasre cutting, we want to make a one path. Select the pathfinder and click unite button, then all selected paths are merged into one.

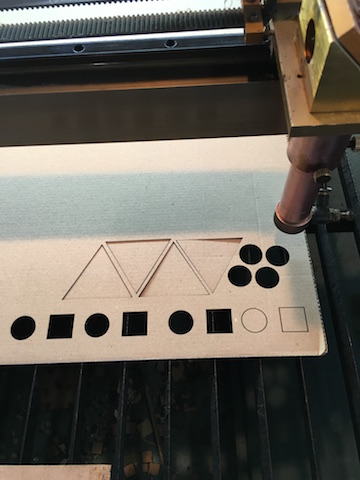
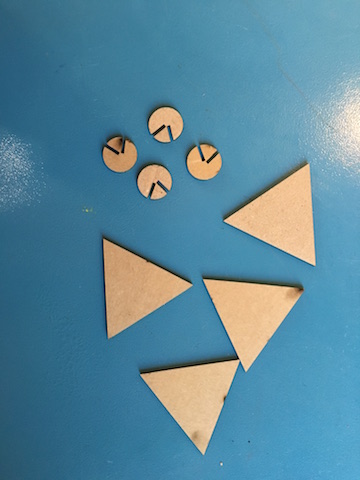
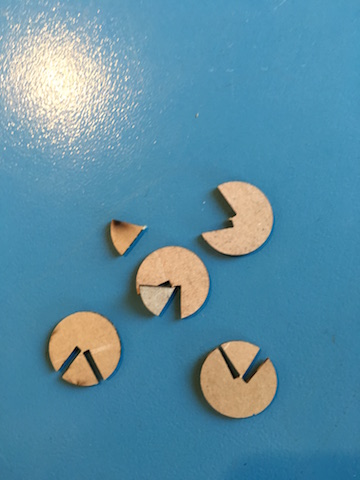
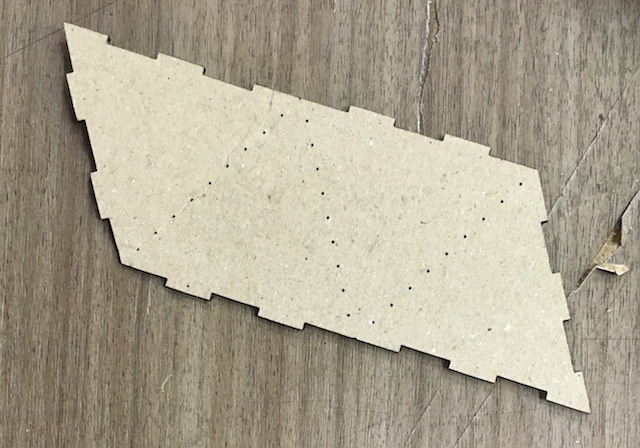
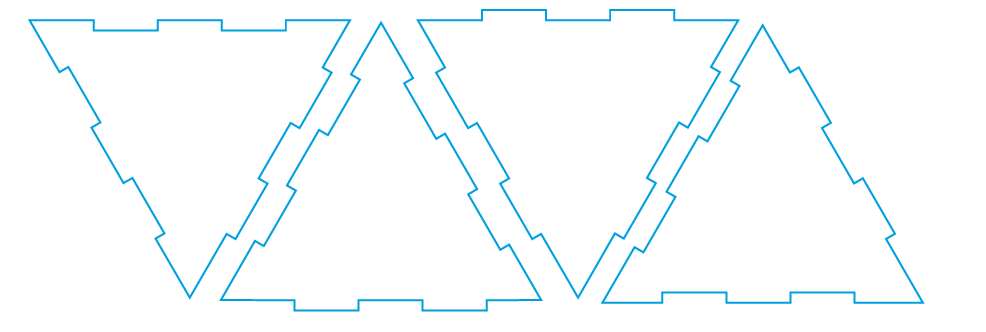
So I made a four trinagle with circle joint. You can use inkscape or illustrator for design. In here, I used Adobe illustrator. Click the pen tool at the tool bar, then you can draw anyting you want easily. Because I wanted to draw a triangles, I used polygon tools. Important thing is design should be exported ad dxf format. When laser cutter work is done, it is good to check whether all parts are completley cut without moving the material. Therefore you can cut it again simply by pressing a 'start' button. If you move your material for checking, you have to start from the beginning. Laser cutter works pretty fast but imagine your work space is huge and how much time you're gonna waste to start agian to repeat process. Anyways, My first didn't work well. Some joints are even burnt. I guess the joints was too small.
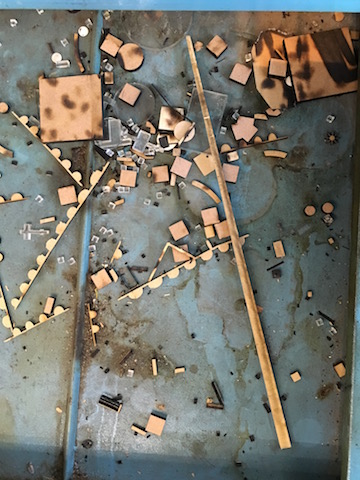
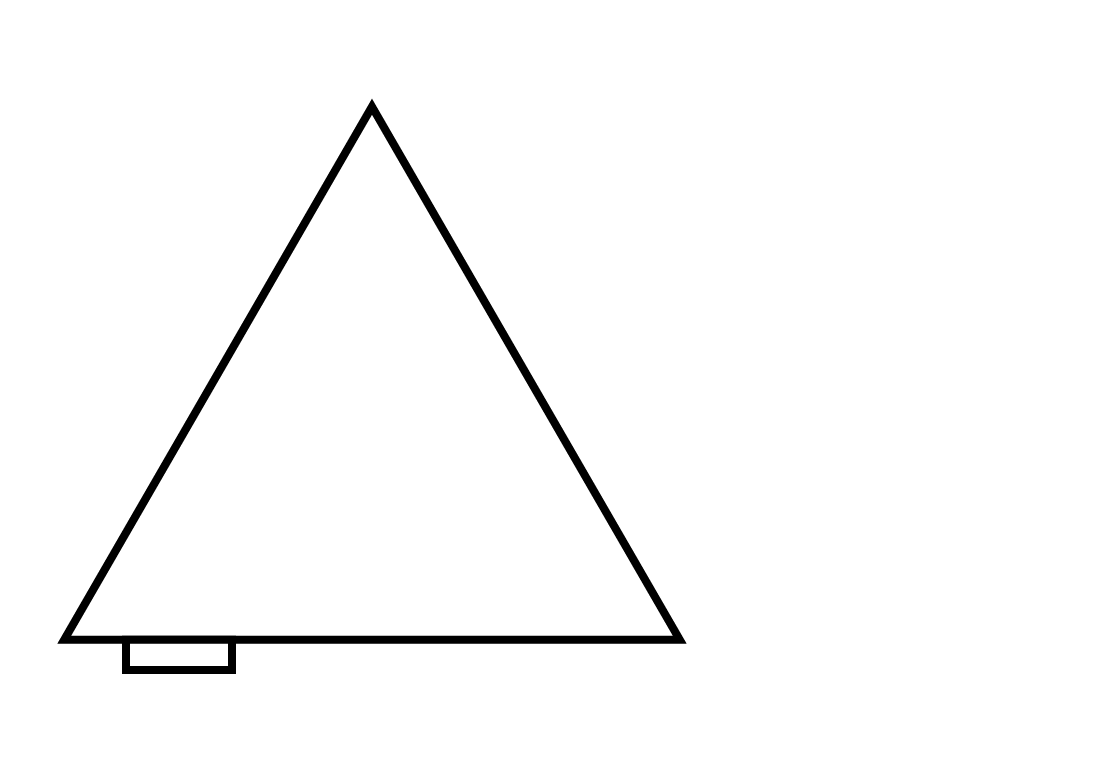
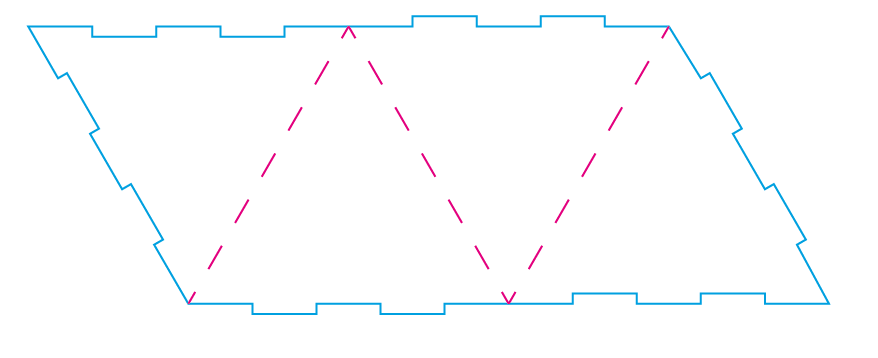
So made another design. This time, I made a planar figure with square bumps. The height of bumps should be a thickness of the material. Make several rectangles and merge the path by using pathfinders. And add lines. I made it dashed, becaus I dont' want to compeletly cut it.
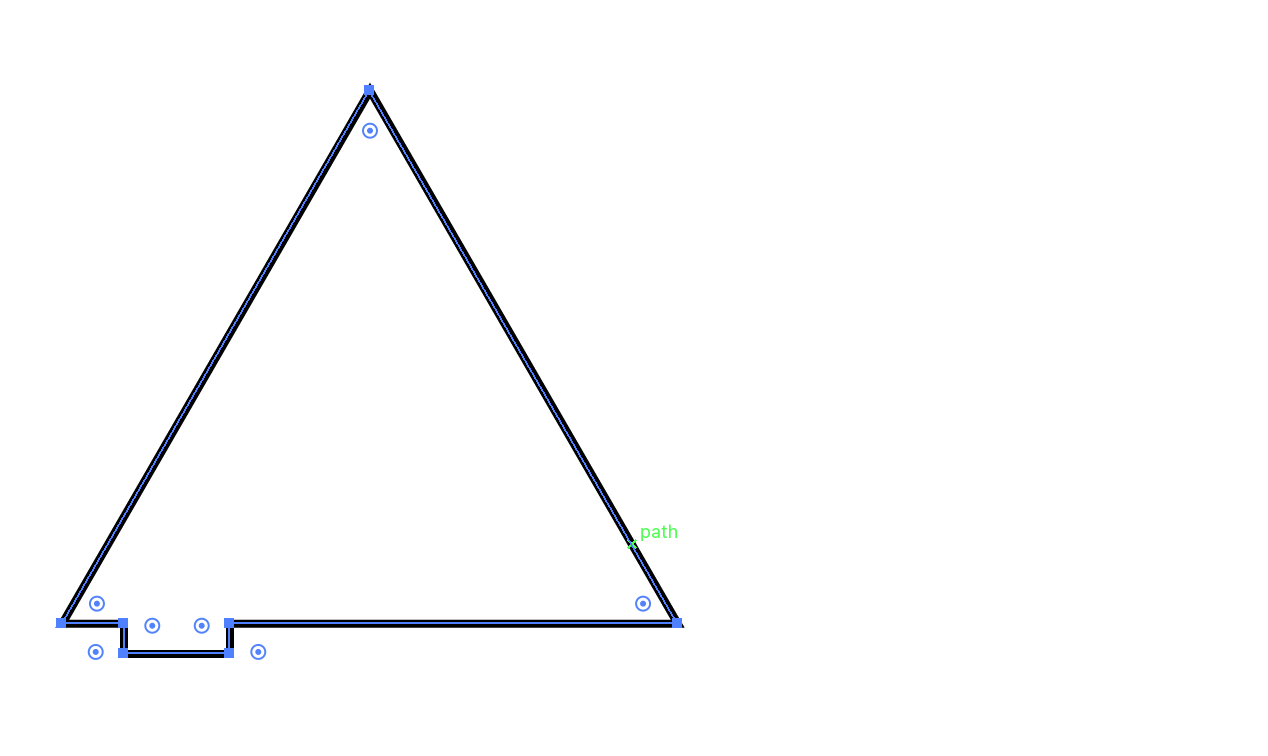
 I used pen tools in Abode illustrator
I expected it works but seemed not actually... it didn't fit stable enough.
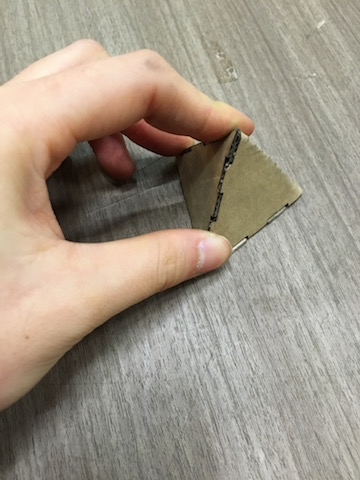
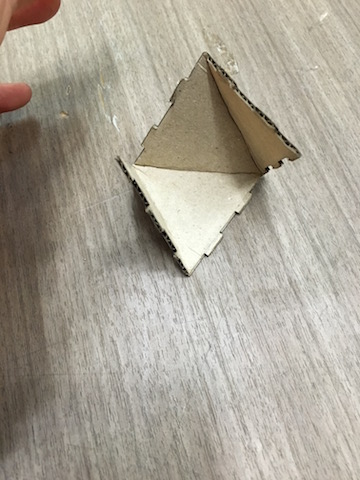
Now I became annoyed. I just wanted to make a simple tetrahedron, not even a icosahedron! I made a third design.
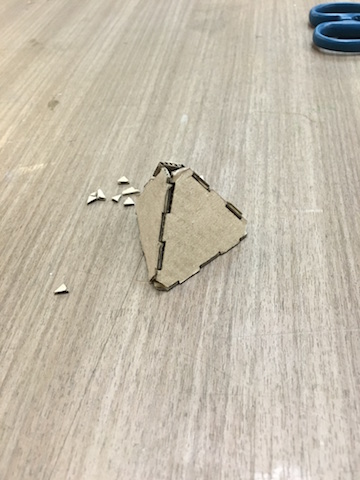
It kinda worked after I cut out some parts.
Vinyl Cutter
Seoul Fab lab has a silhouette cameo vinyl cutter.
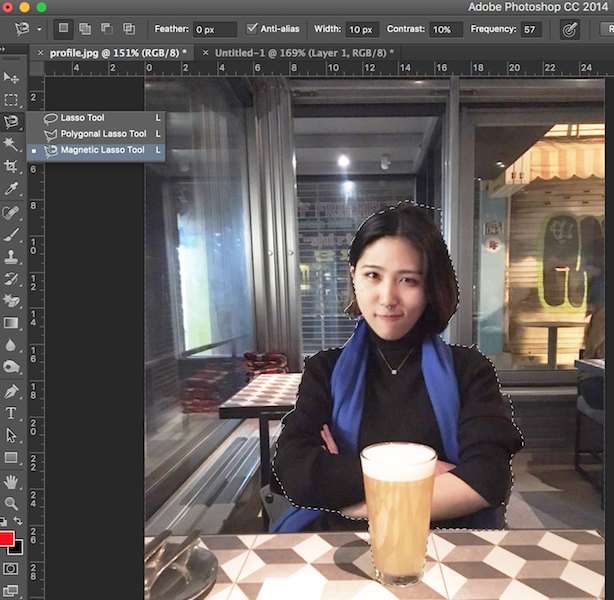
To vinyl cut, I need a vector image. I tried to make vinyl cutted image of myself. Firstly, I opened a photo of me in Photoshop and selected only a wanted parts by using a magnetic lasso tool.
 it automatically detects outlines
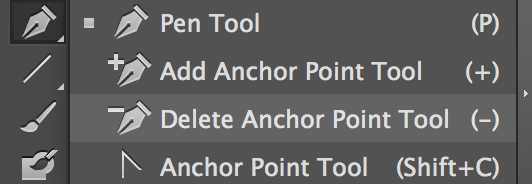
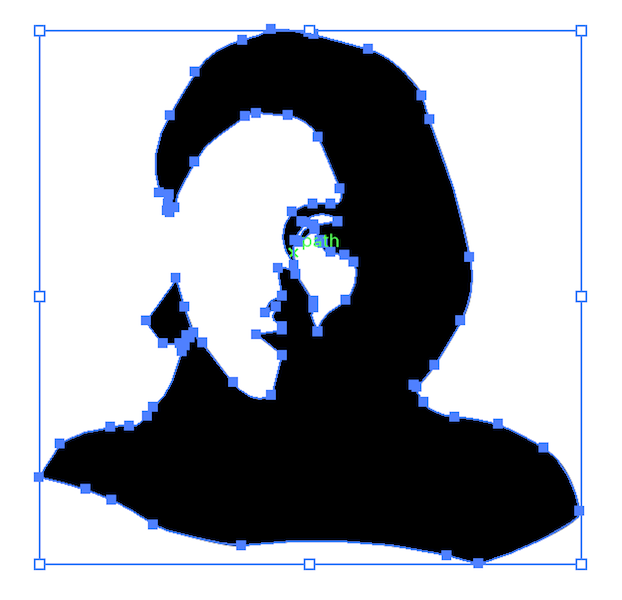
And then, I opened selected image in Illustrator. To transform a pixel image into a vector image, import the image and click the 'Object' in menu tab, 'Image Trace' and 'Make and Expand'.
 vector image what I got from image trace tool
I though that maybe it has too many details. It might not be good idea to have many details for vinyl cutting. I was just not sure about the vinyl cutter. So, I decided to test out how much my image should be detailed. Since it is a vector image, I can easily remove a details by pen tools in illustratot.
 I made several images to see the difference
When vector image is ready, import the data in silhouette programme.
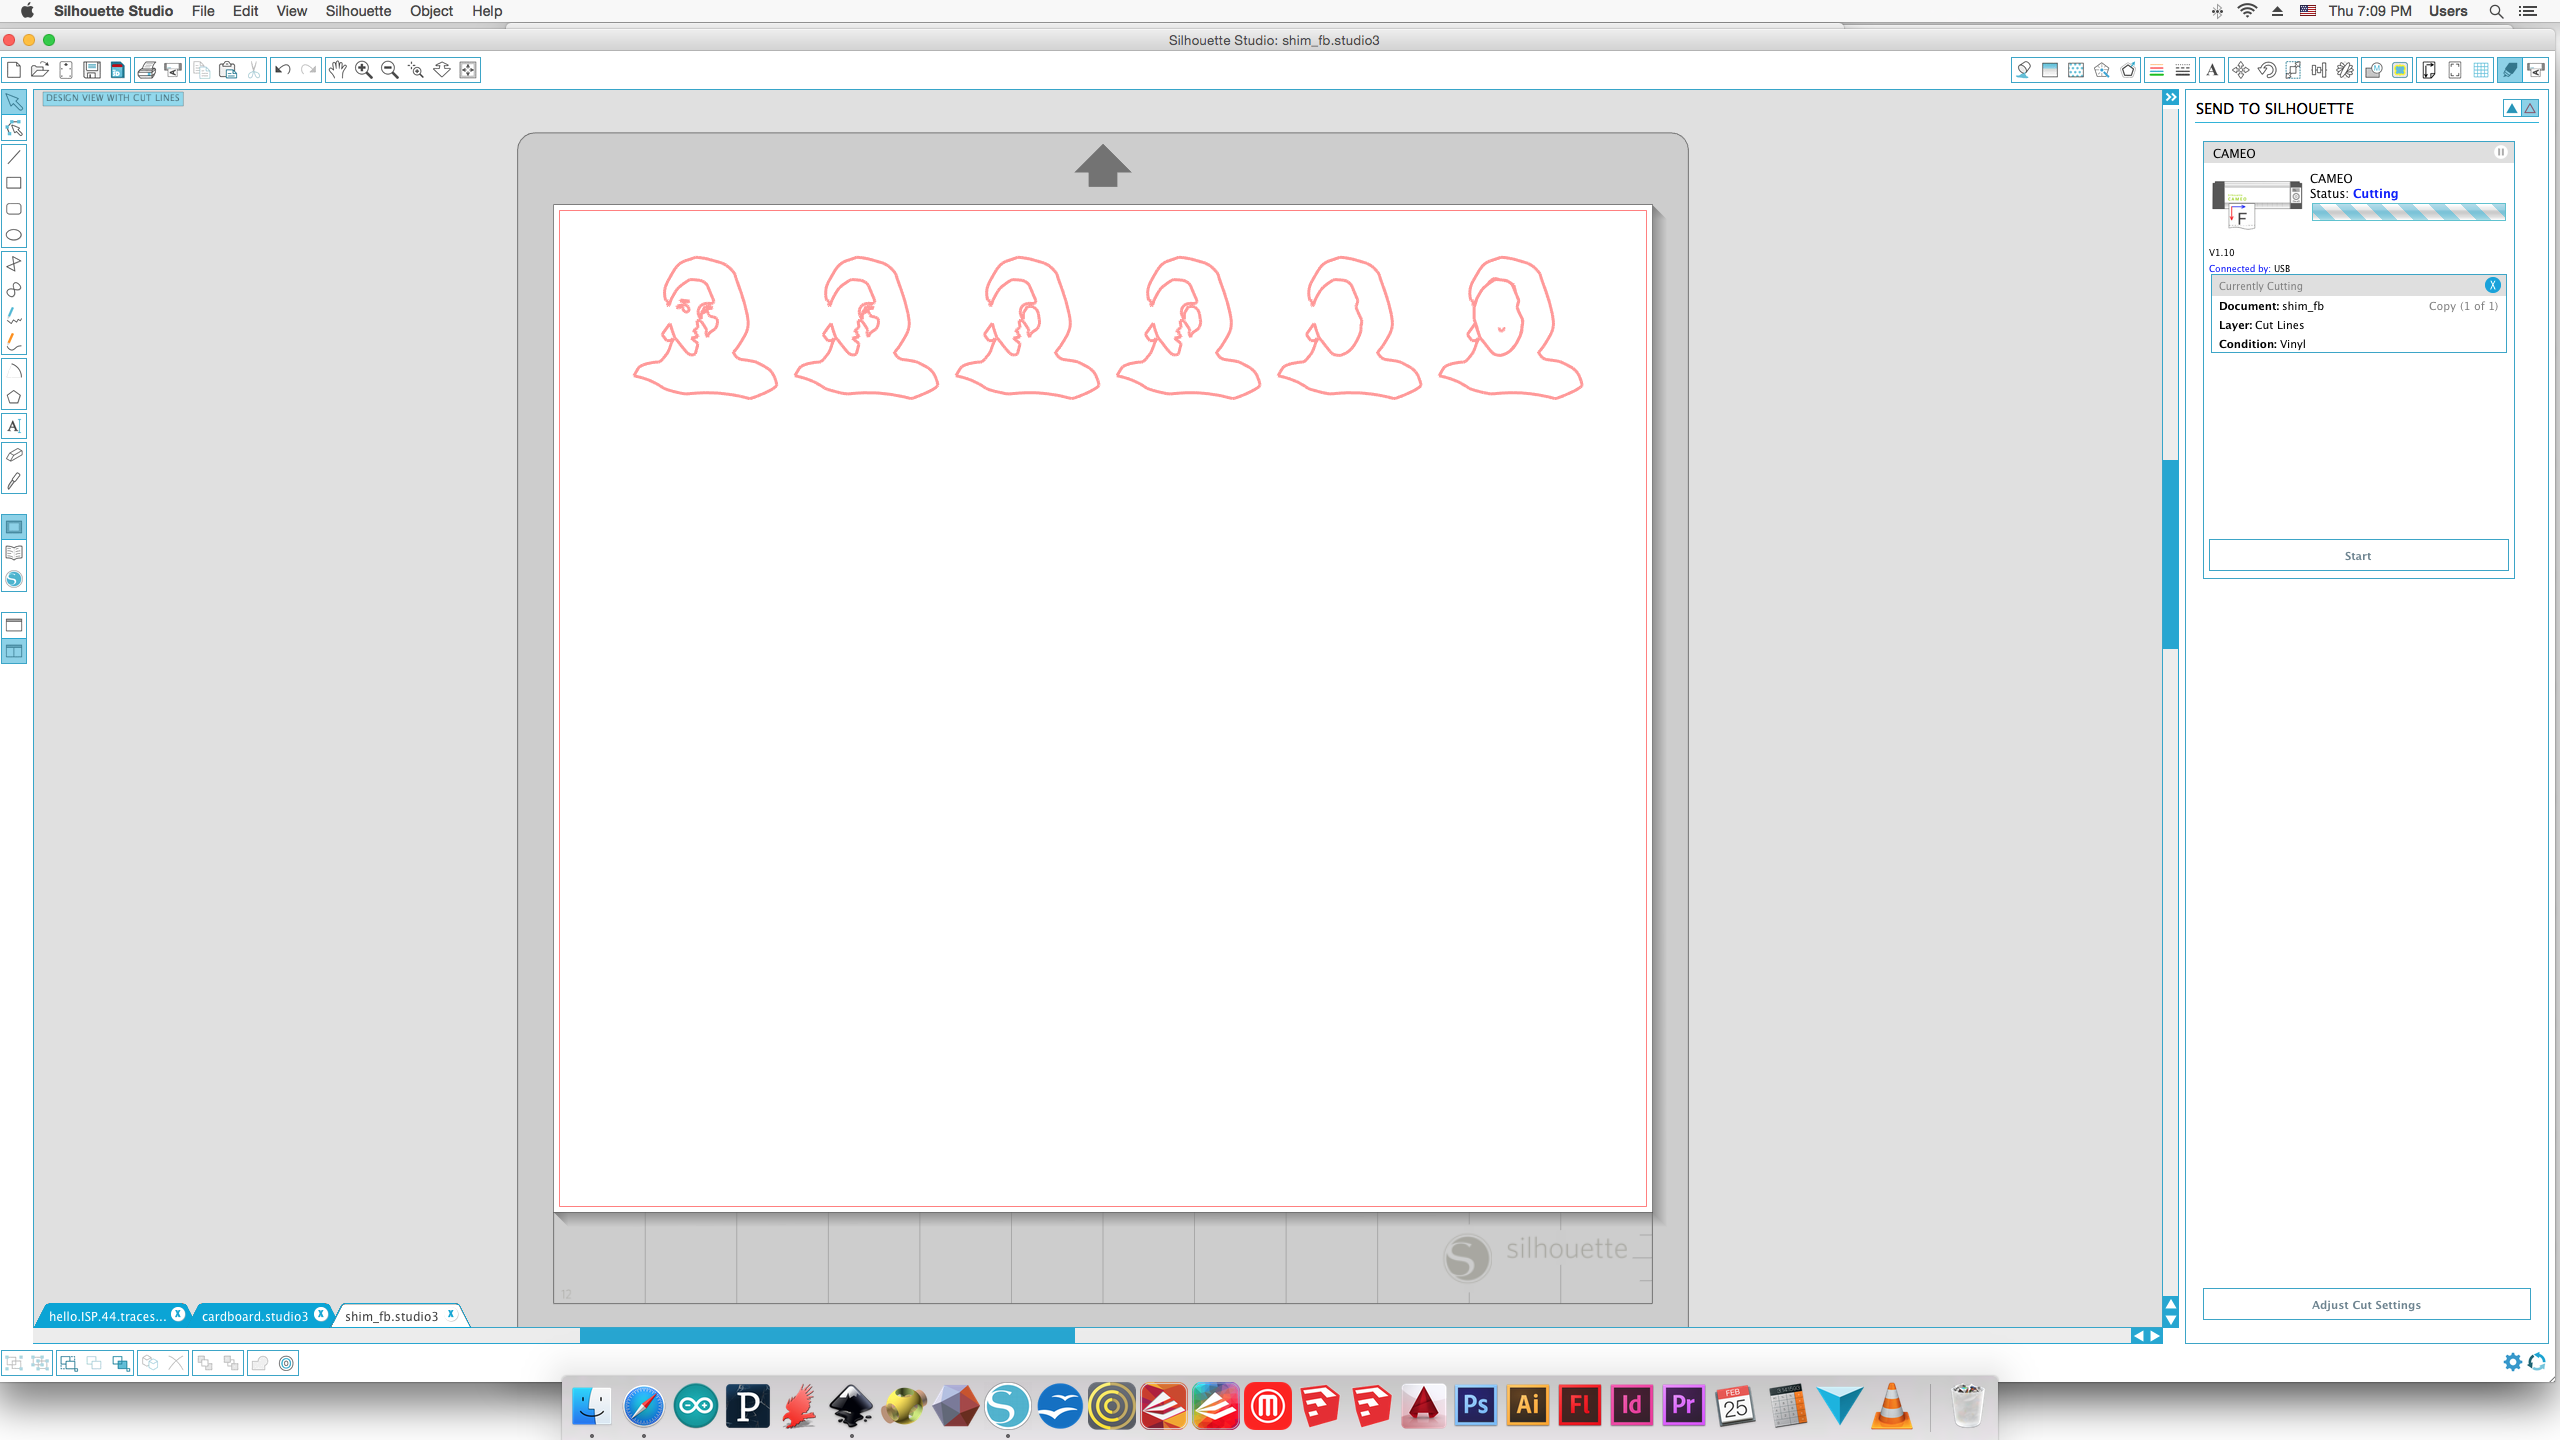
Check your vinyl cutter and setting in programme.
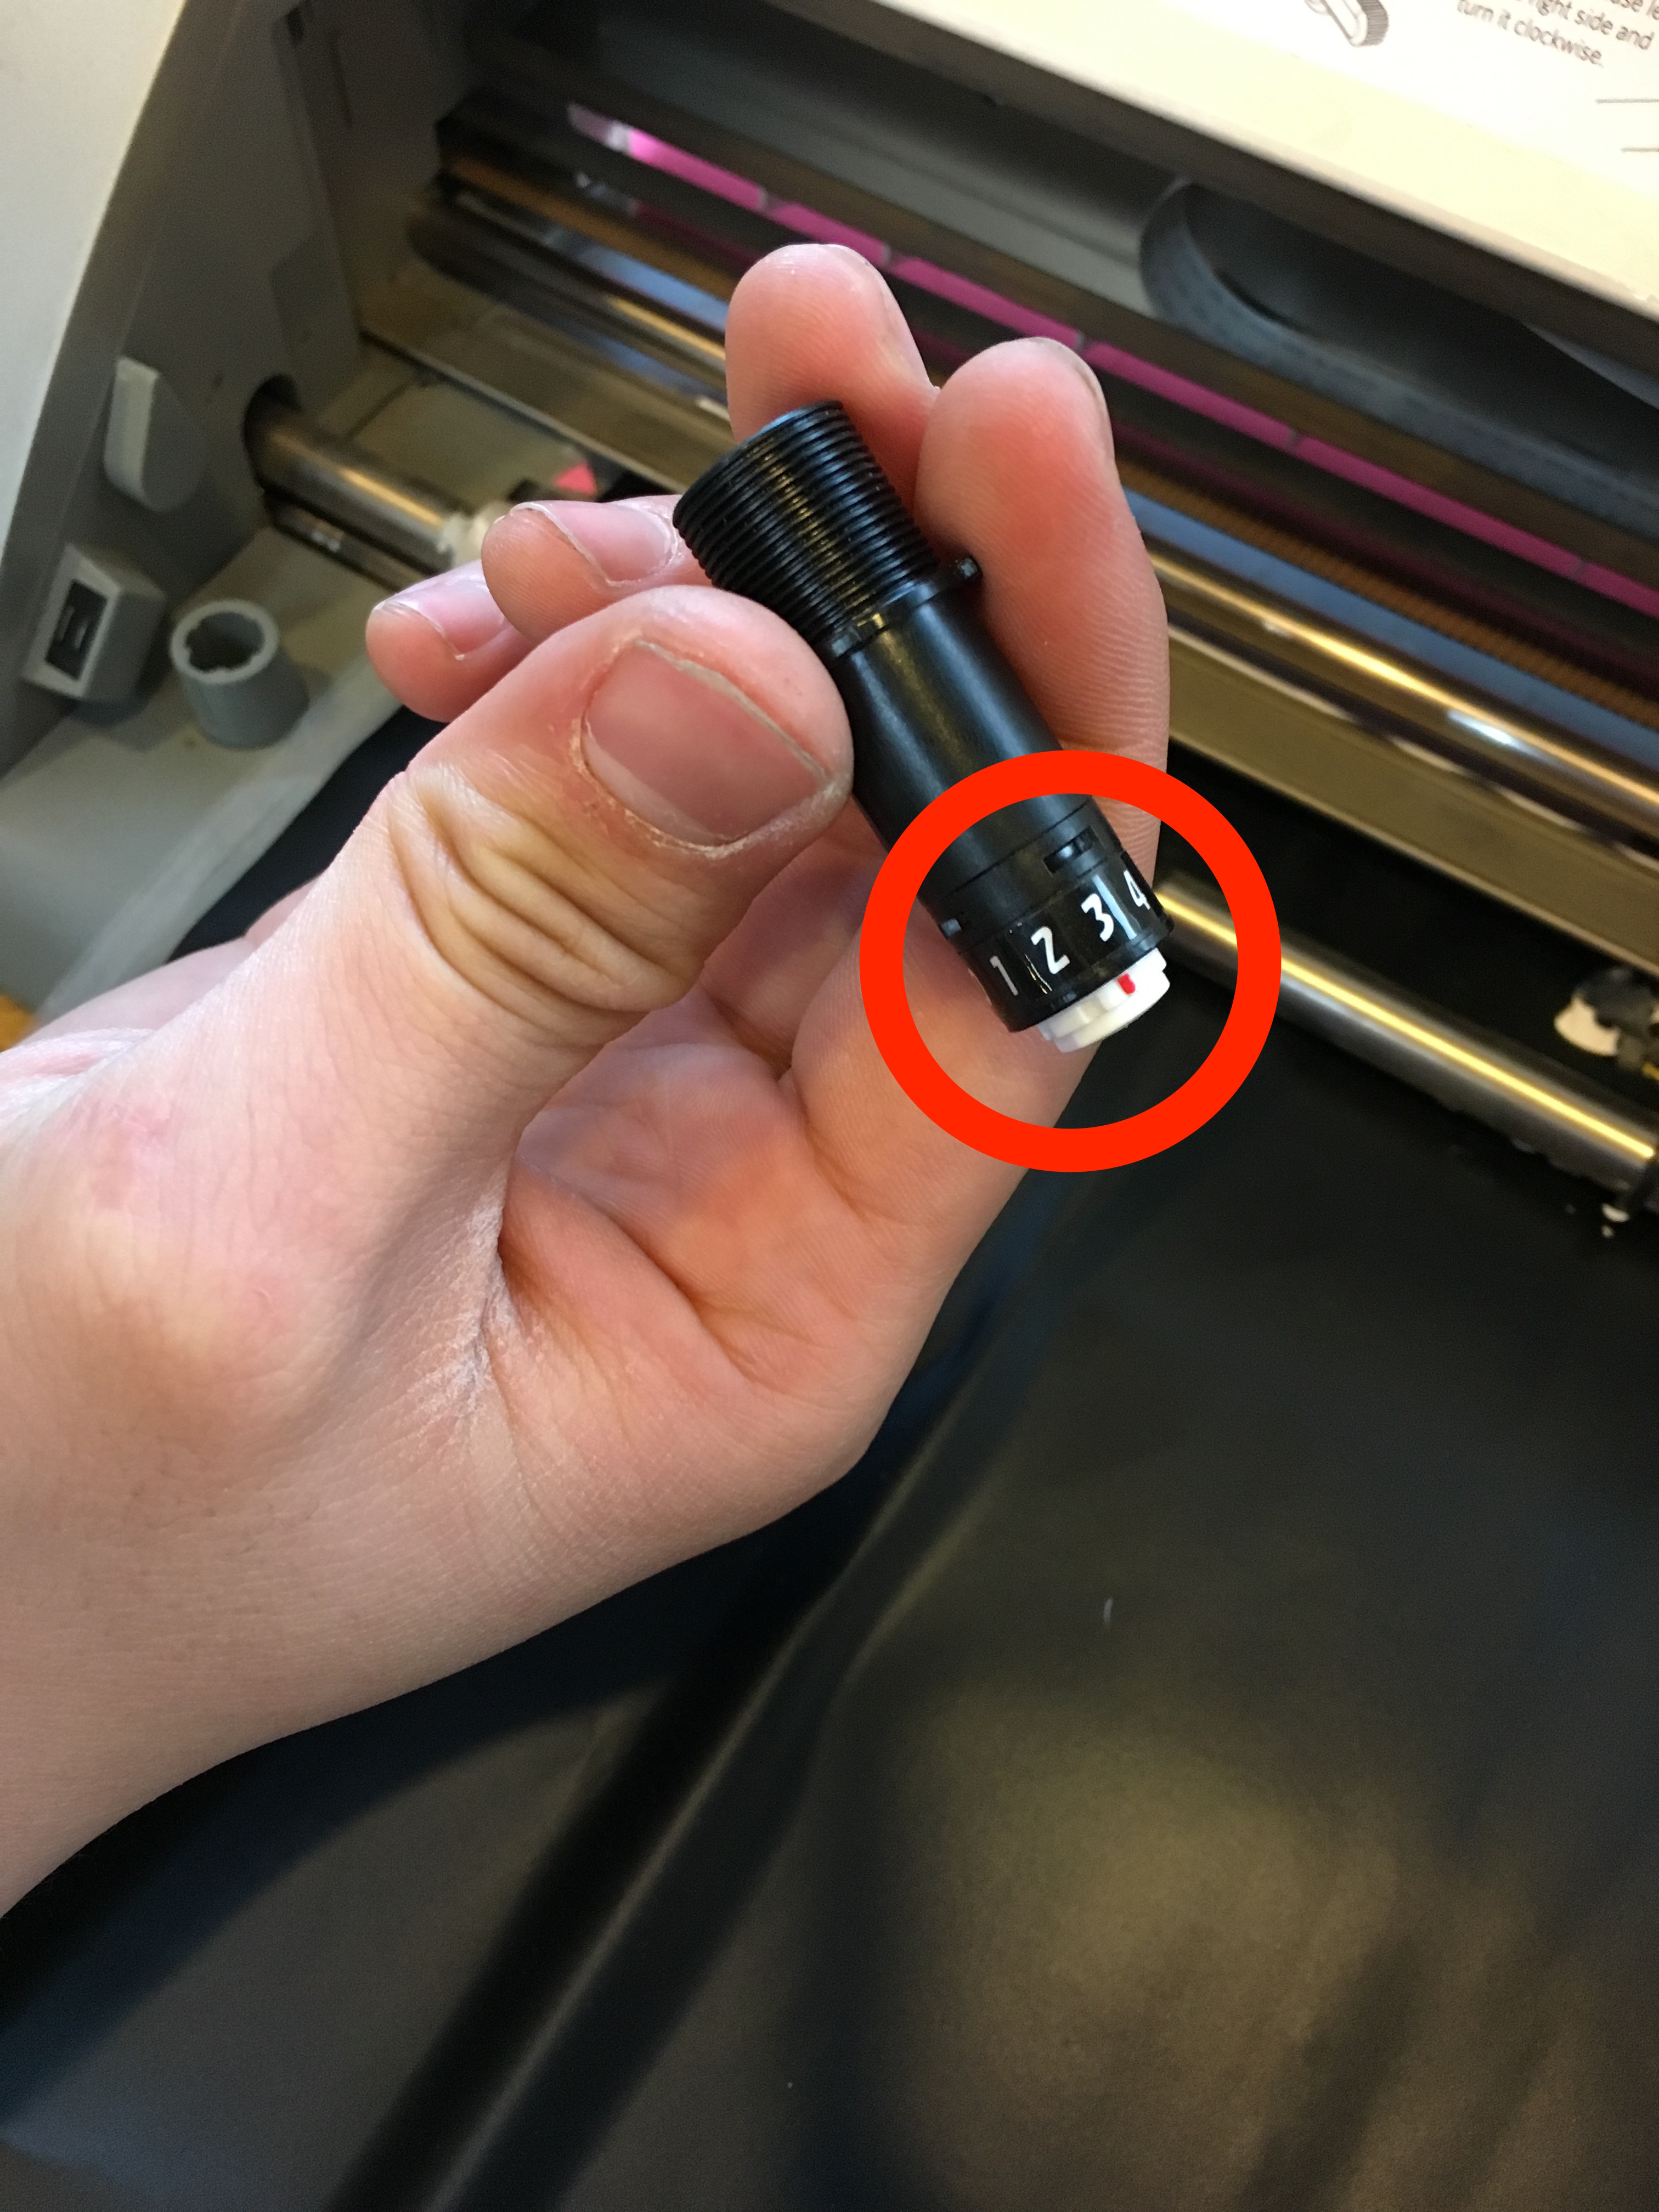
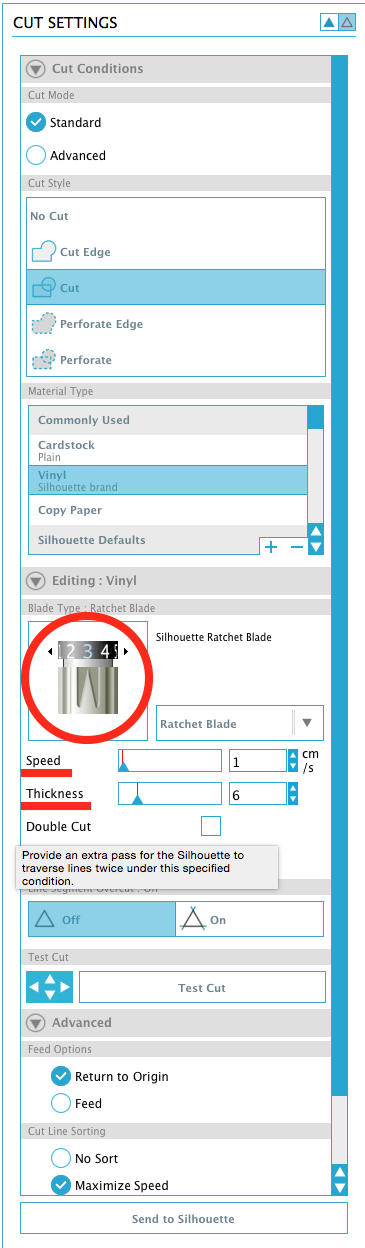 make sure that the blade setting is correct. And like laser cutter, cutting result depends on speed and thickness
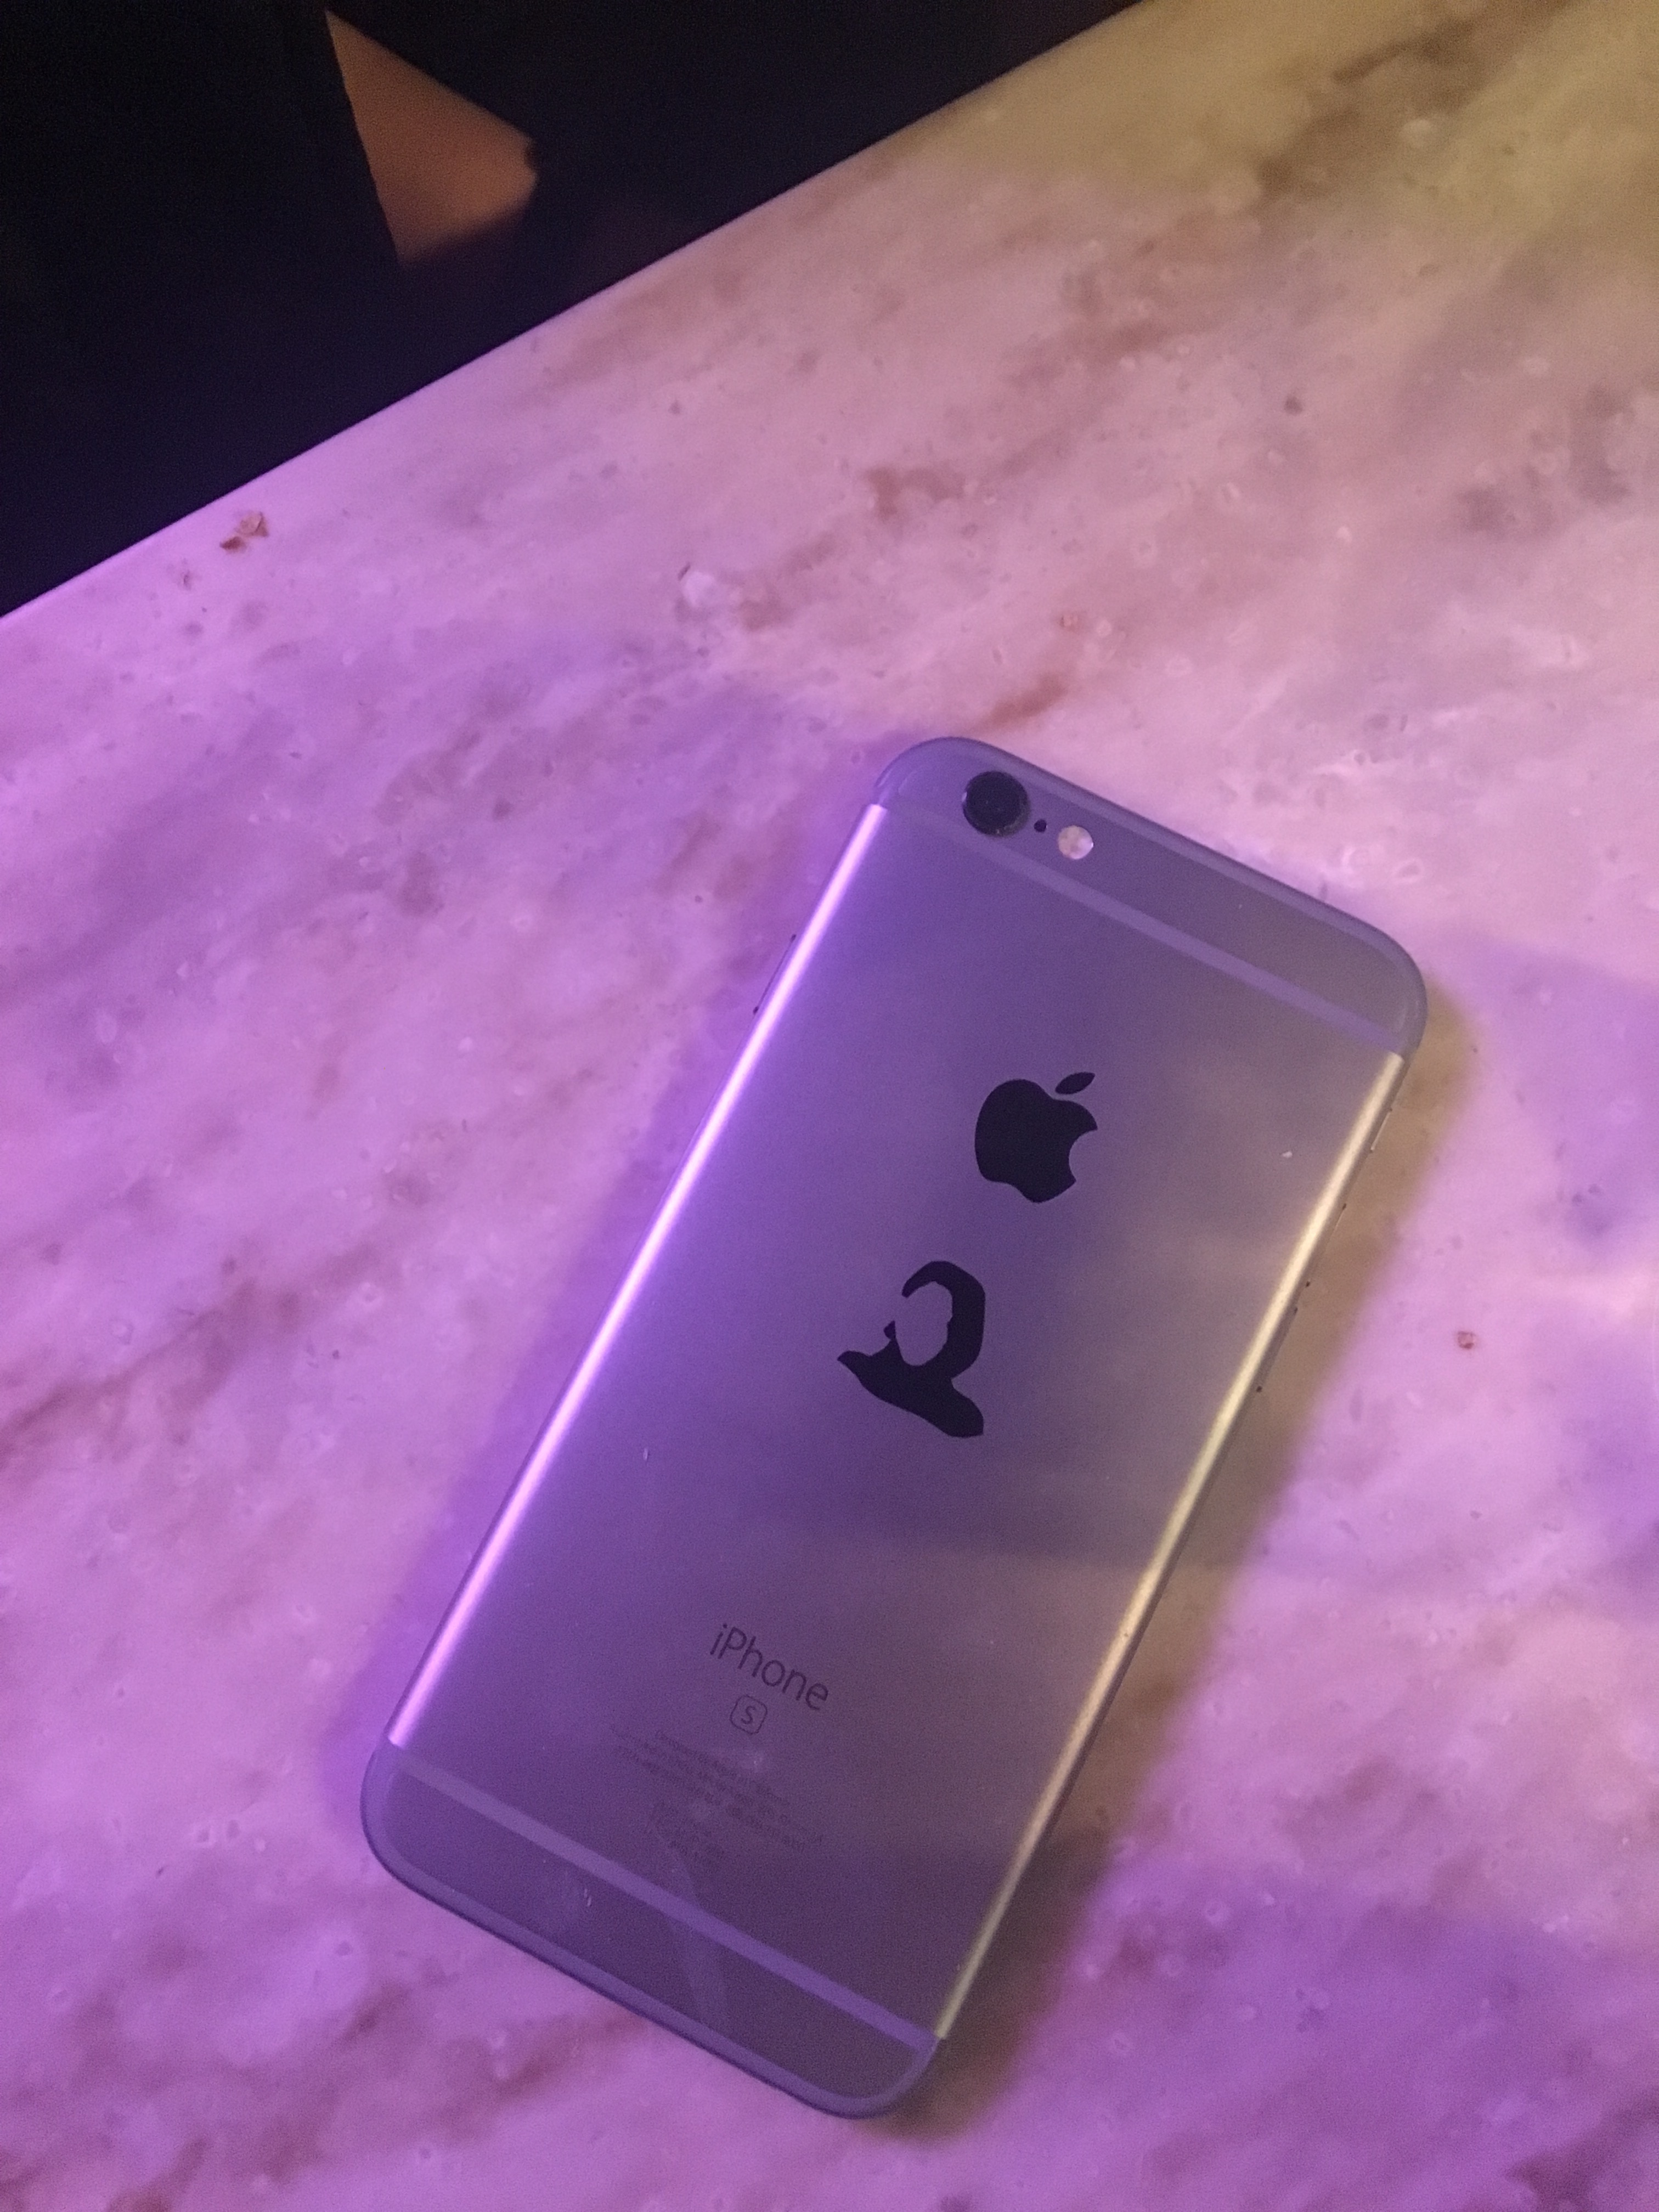
Always do test cut and find yourself the best setting for better result. Since every machine is differrent and also it depends on material. There is no general answer. Only practice and trial make you find the better answer.. And the real result is always different from expectation. So the easiest way is just try, see the result and found out the best one. And following is my favourite
Design Files
downloadConclusion
What I succeeded
- Use a laser cutter
- Make a simple press-fit structure
- Use a vinyl cutter
- Become narcissistic
What I failed
- Parametric design
- Complex & strong press-fit kit
| ← week 2 | computer-aided design | week 4 | electronics production → |
|---|