
Embedded Programming
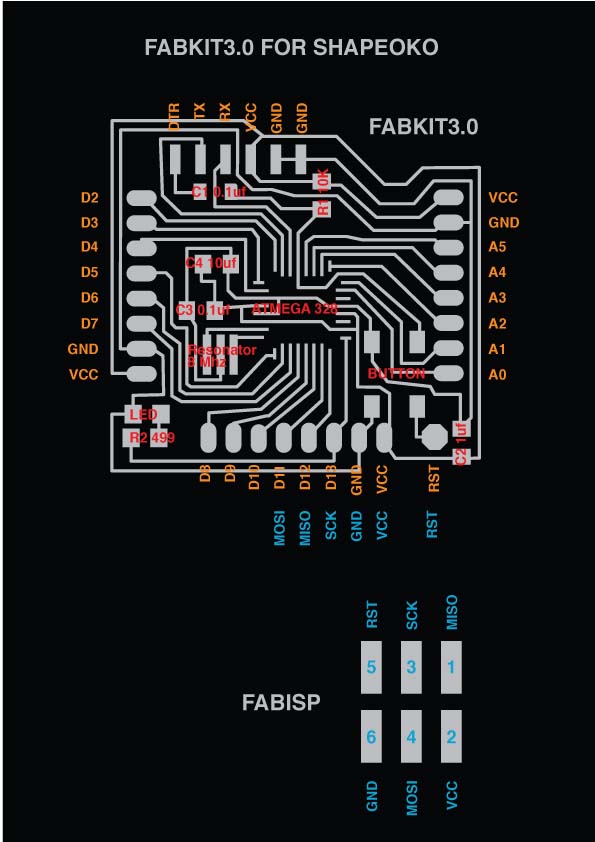
FabKit
-
References used in the development of the assignement
https://github.com/satshas/satshakit http://fabacademy.org/archives/2015/doc/projects/fabkit-0.4.html http://fabacademy.org/archives/2015/eu/students/barcucci.sabina/exercise13.html http://fabacademy.org/archives/2015/eu/students/bianchini.massimo/exercise10.html http://fab.cba.mit.edu/content/projects/fabkit/ http://fab.cba.mit.edu/classes/863.14/people/tout_wang/proj11.html http://danchen.work/using-atmega328p-8-16-20mhz/
-
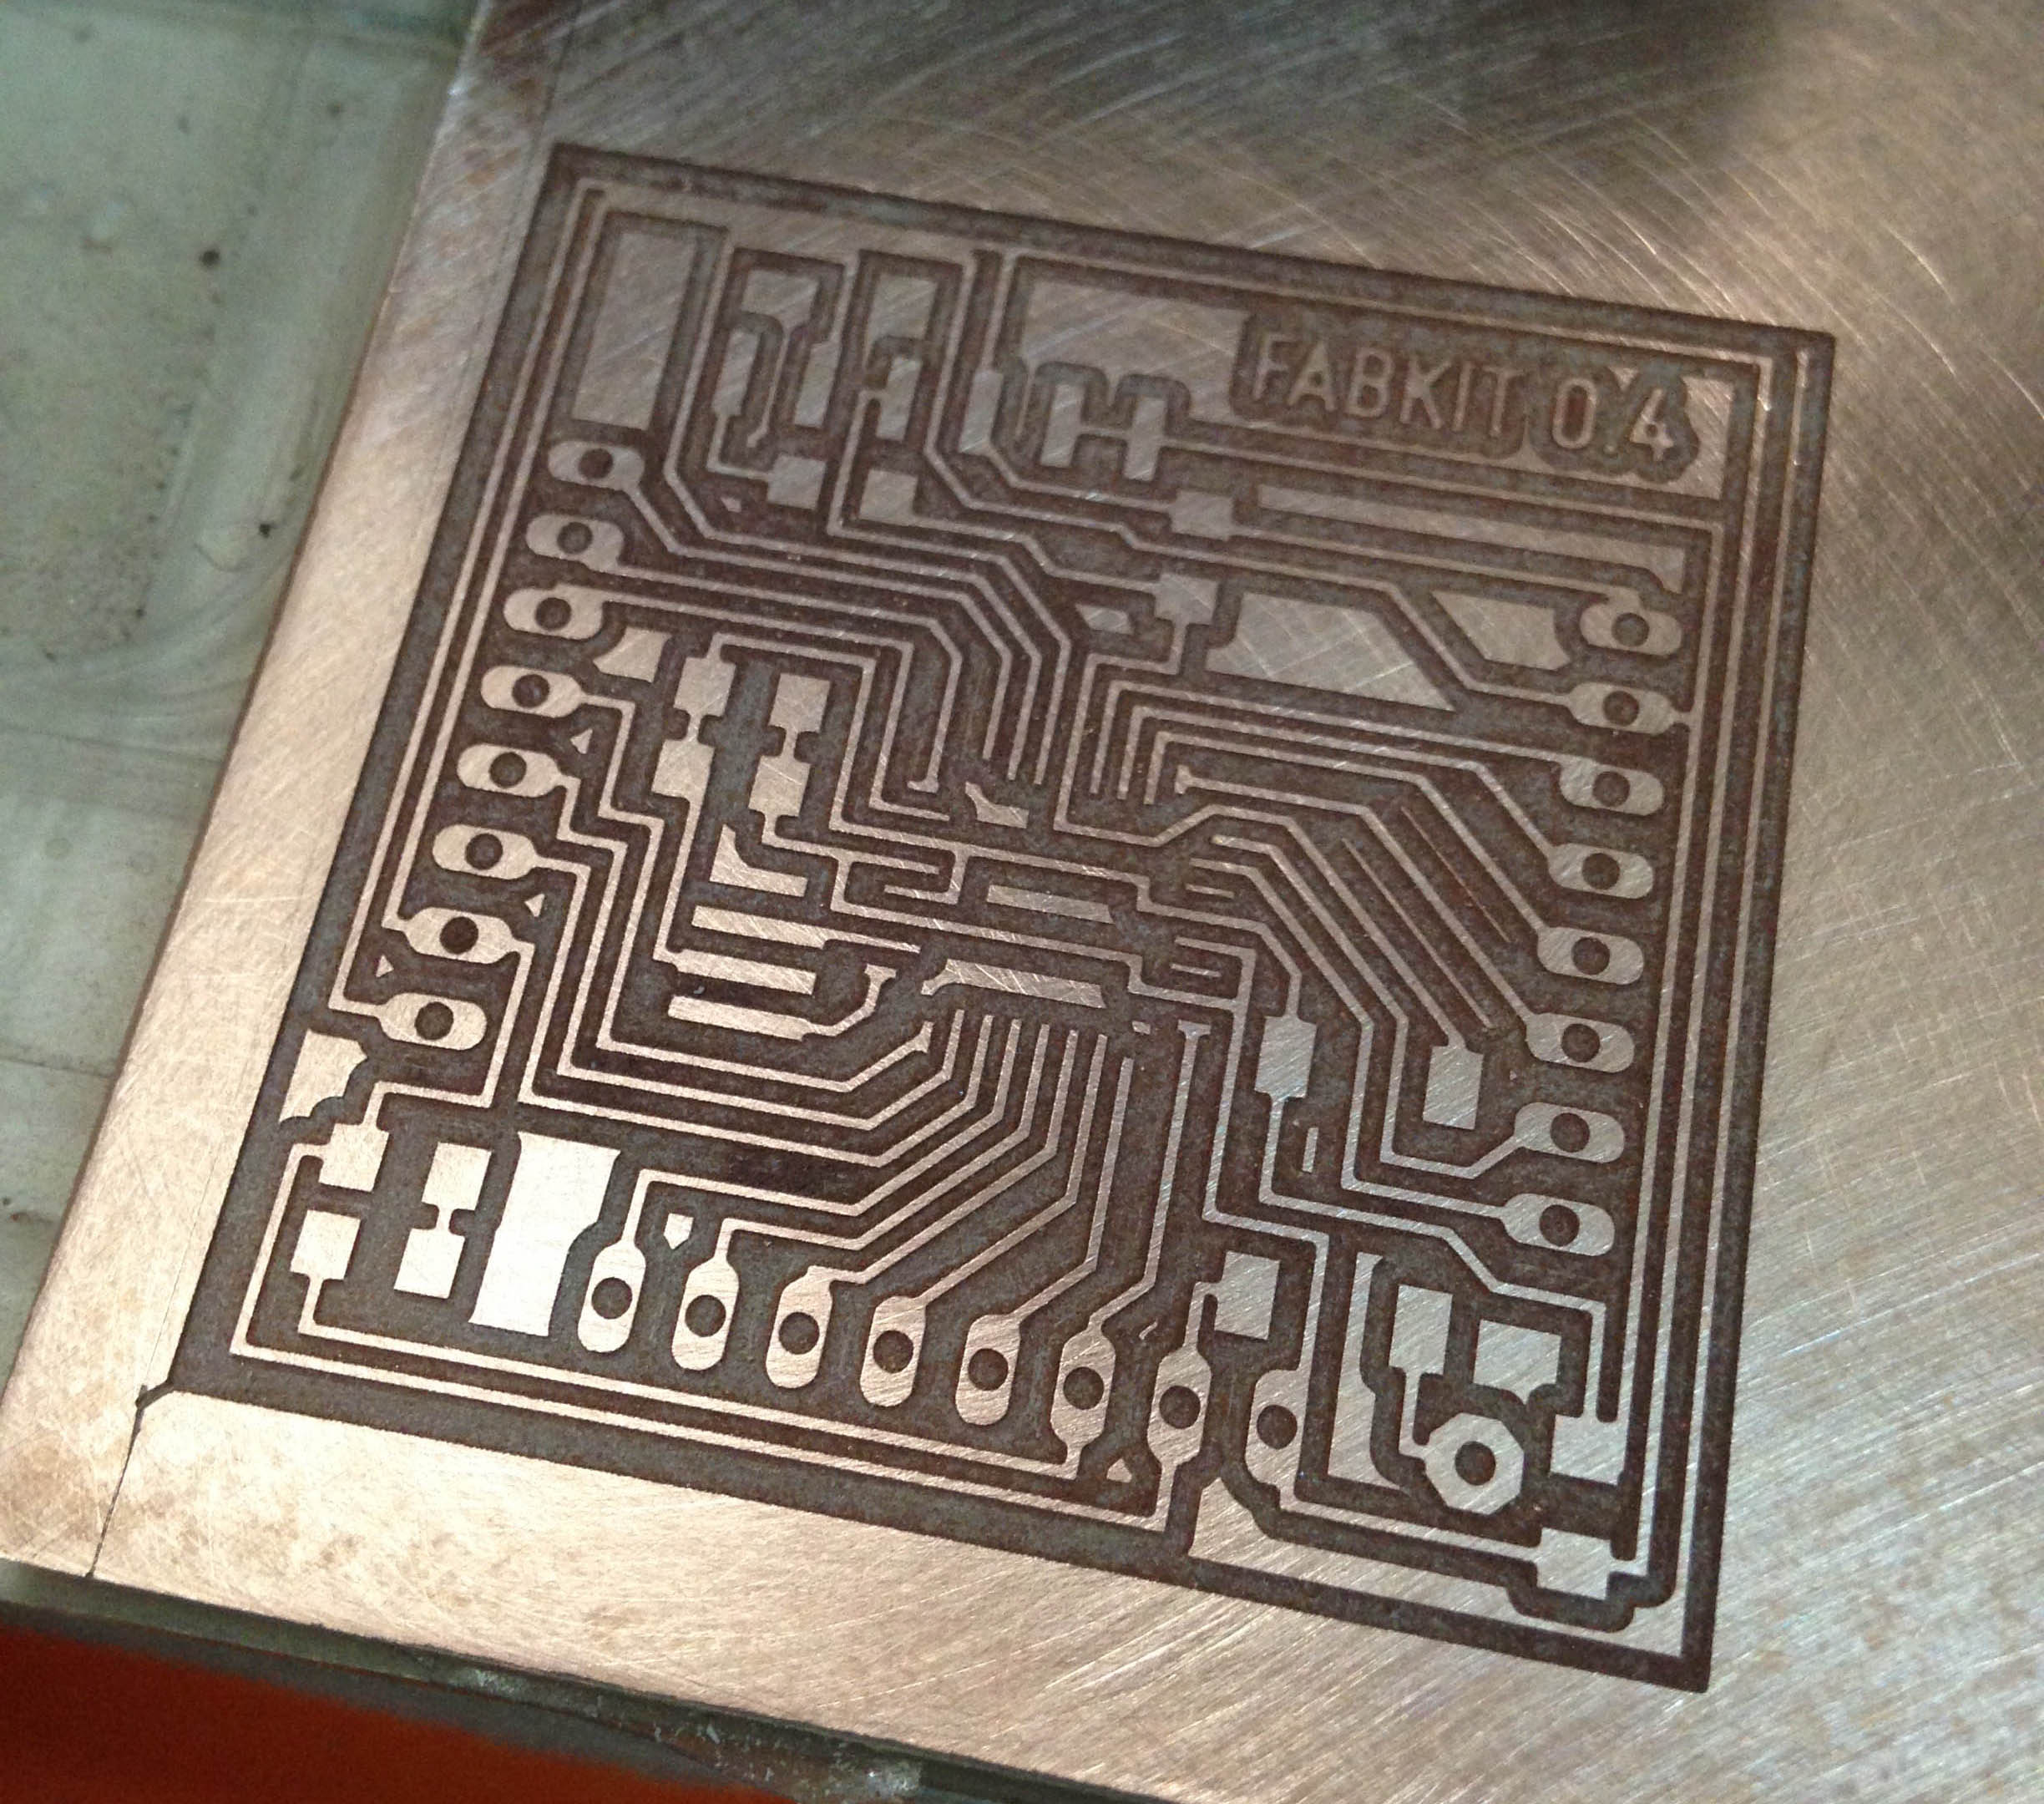
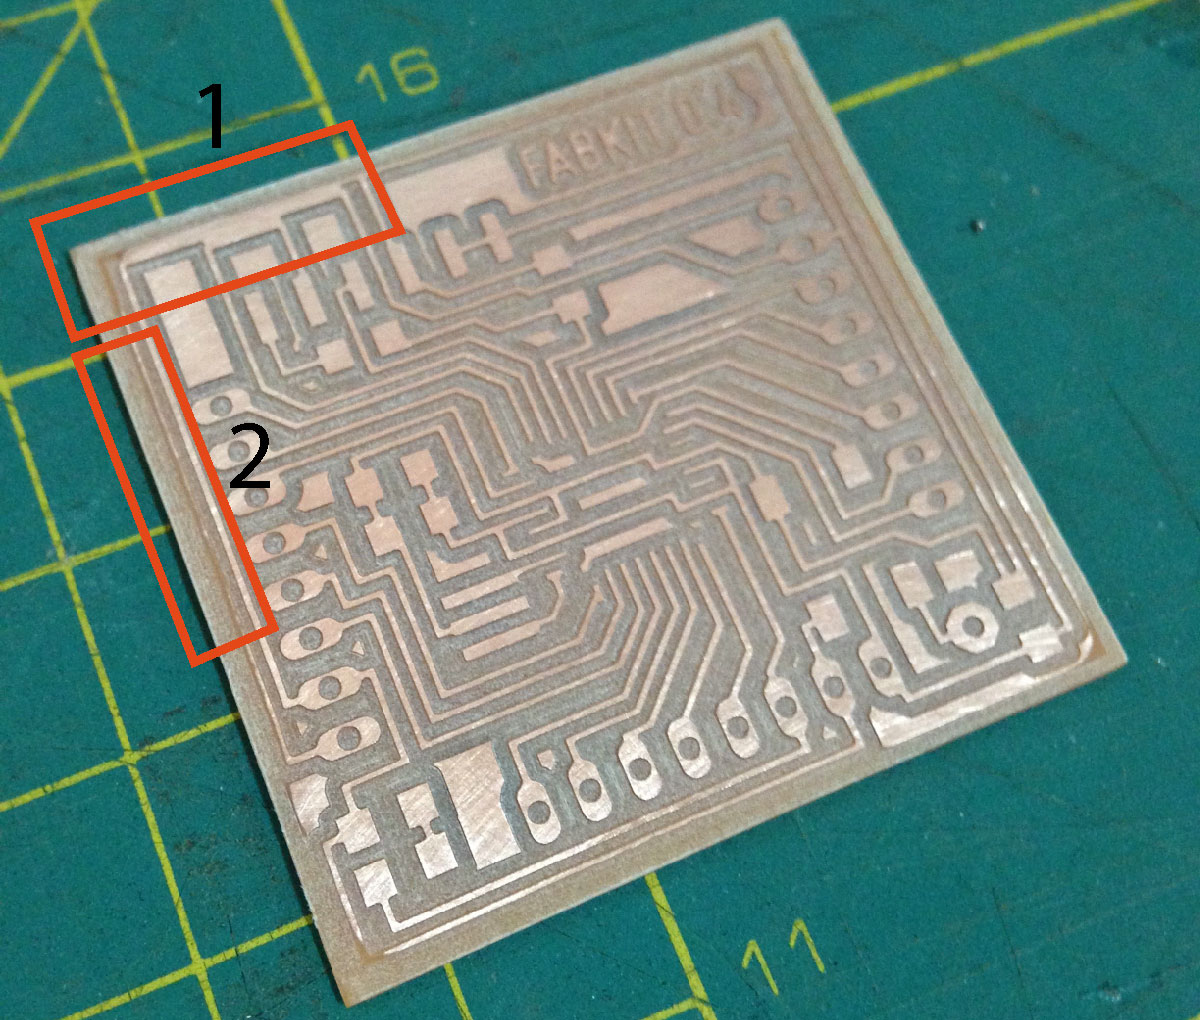
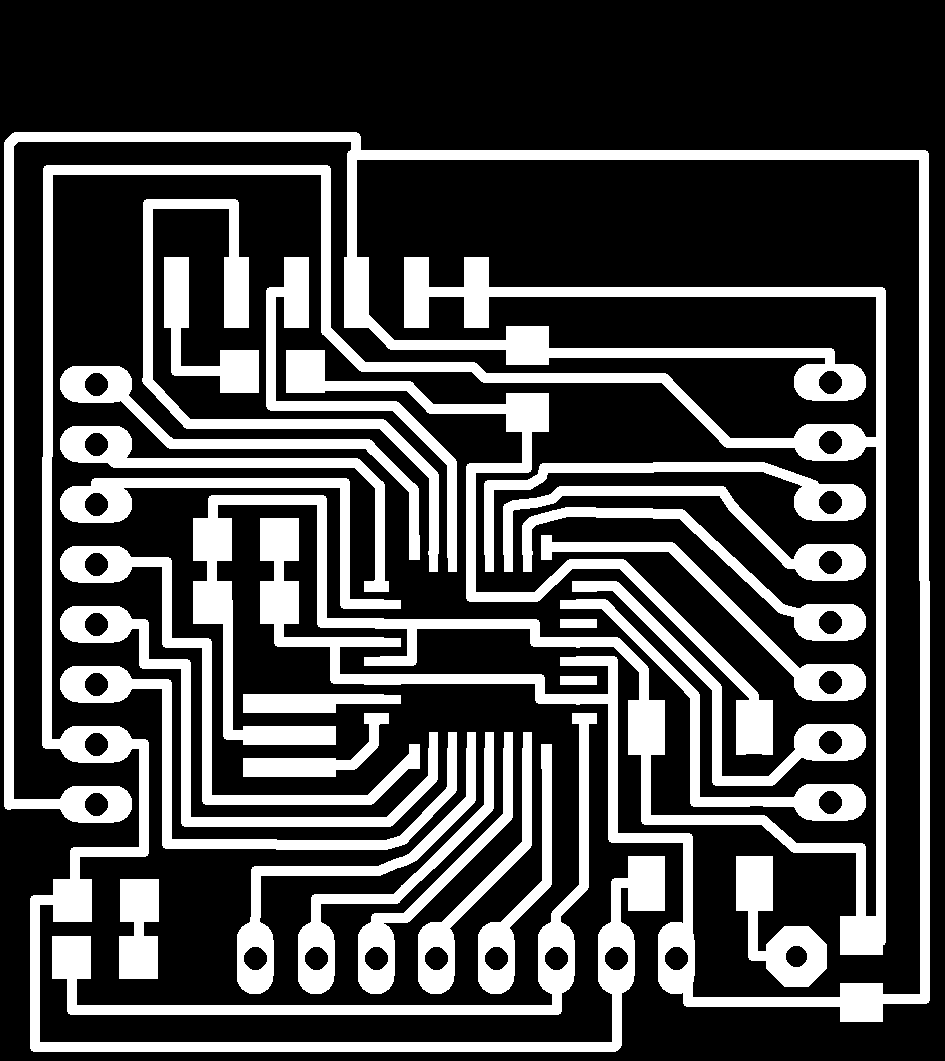
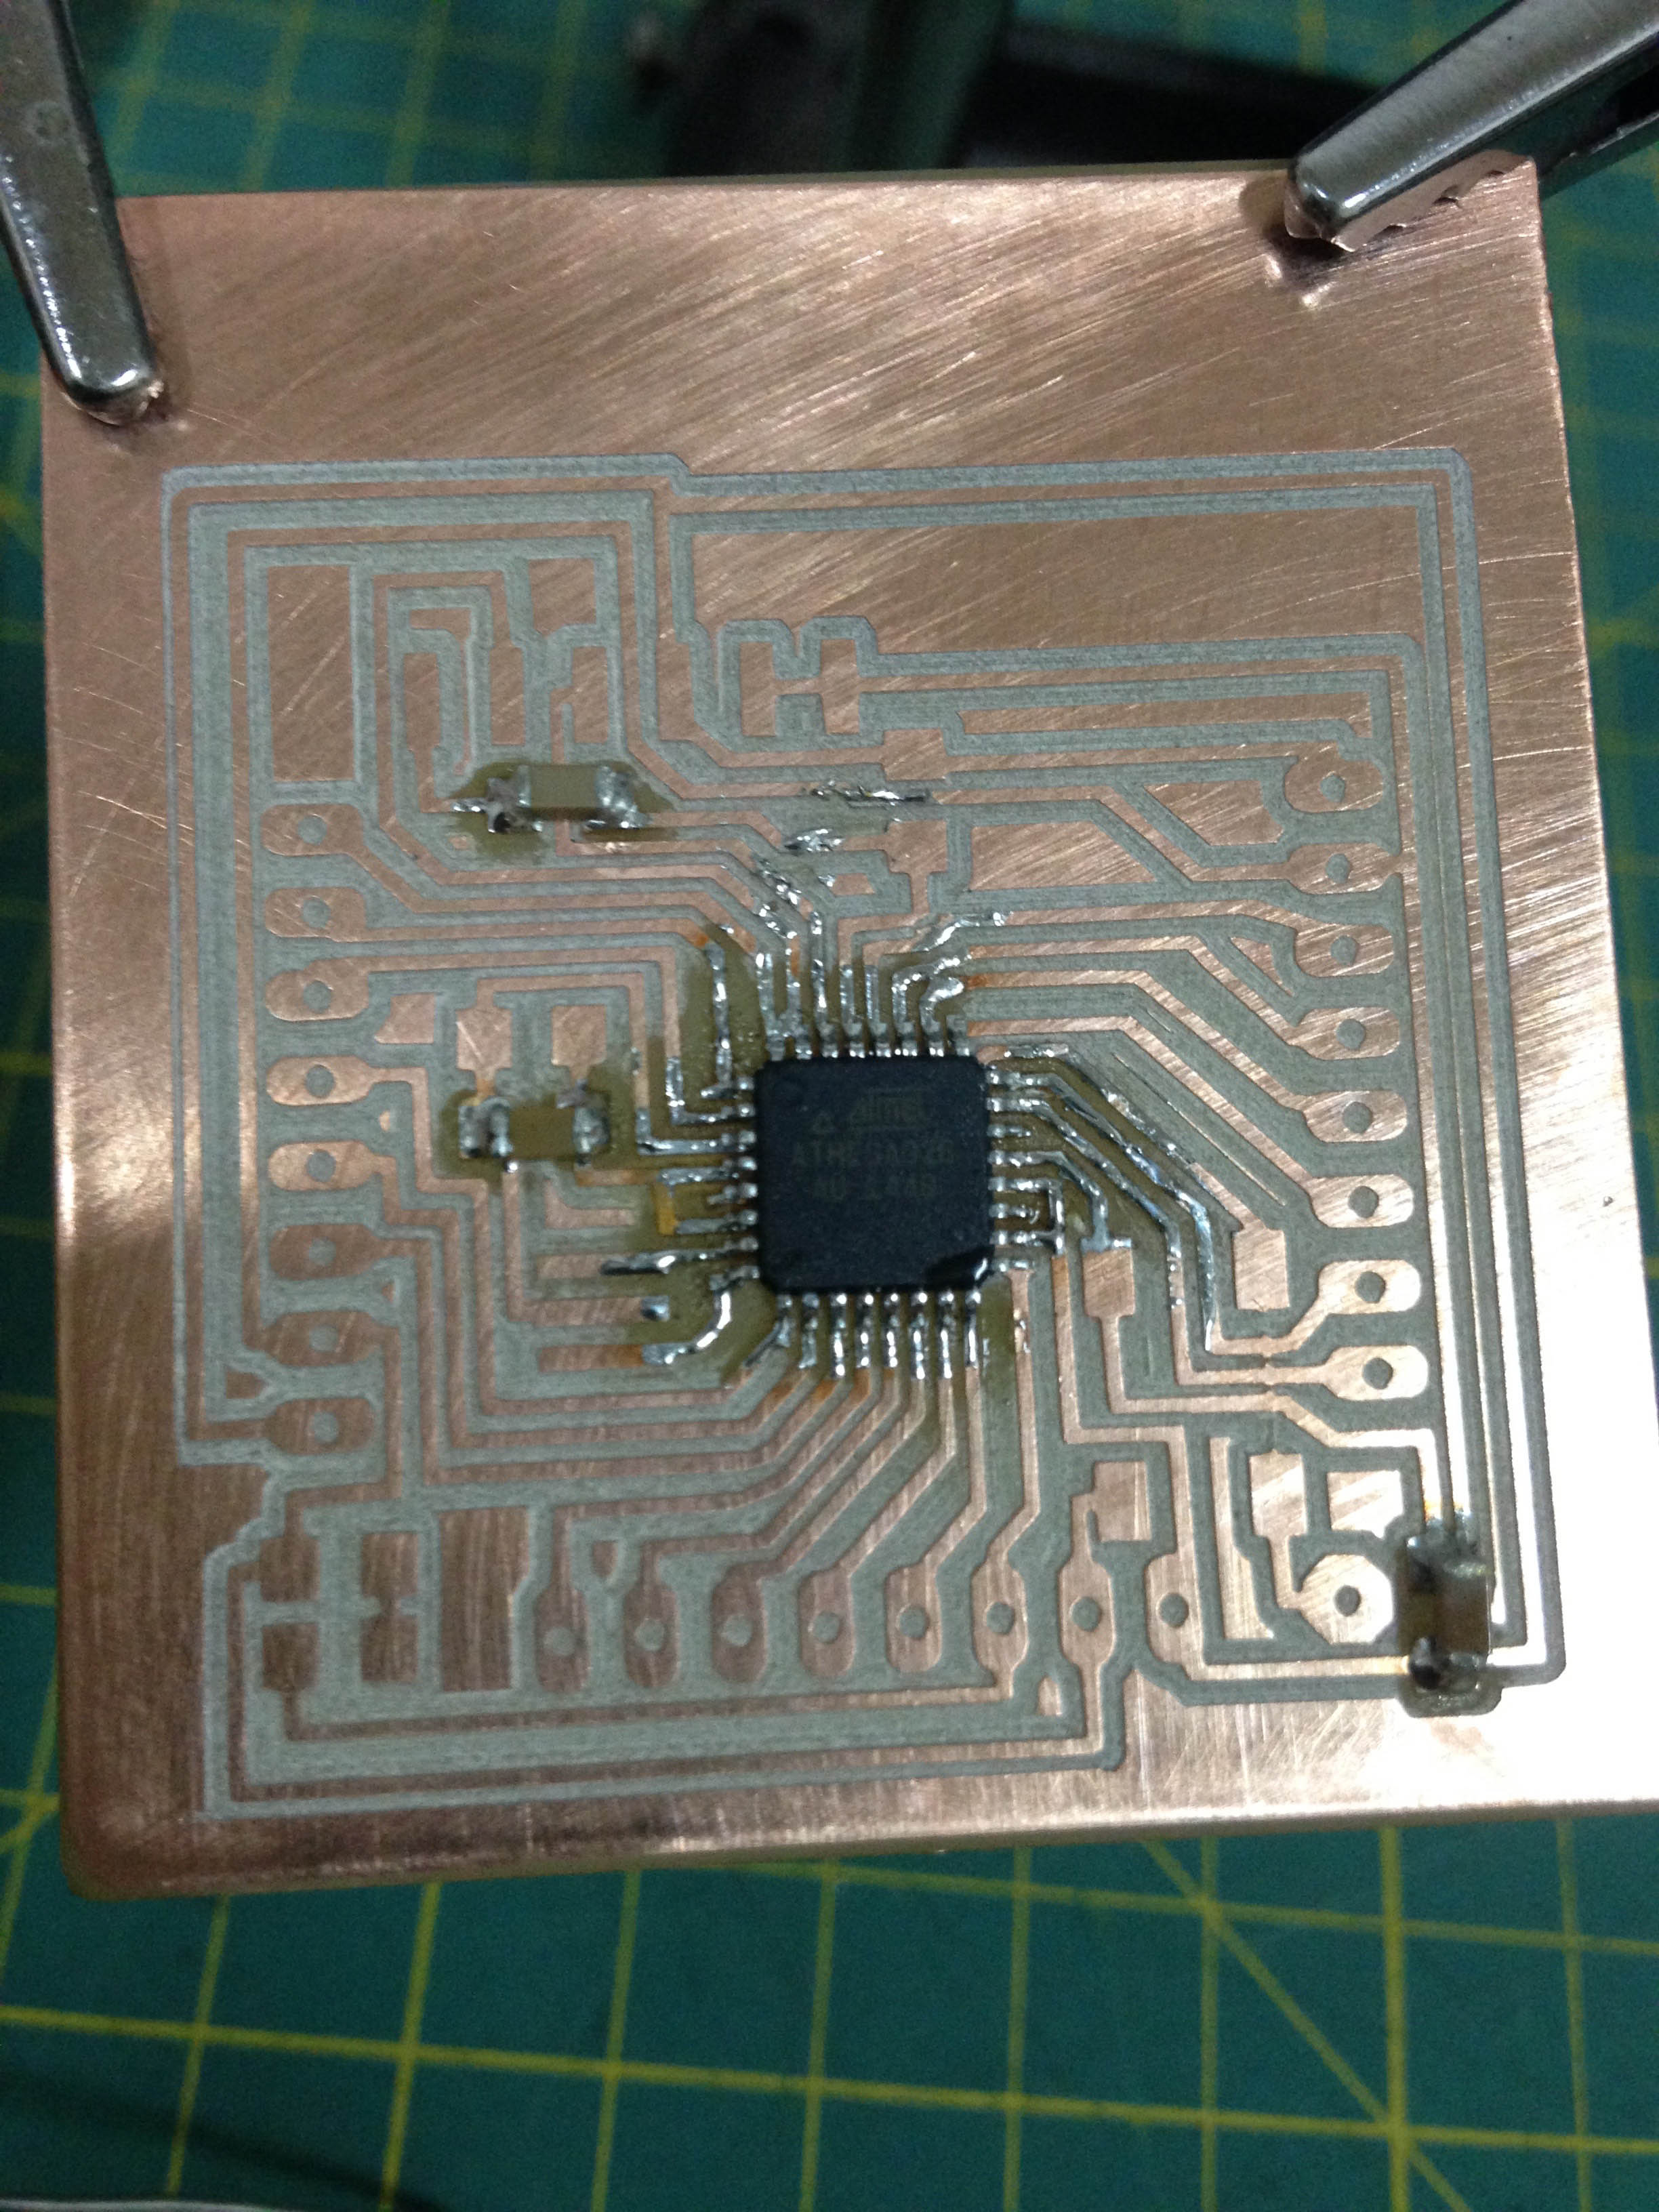
The first try has a couple errors
1. You can see the two nets together
2. The net is too thin. So I download the eagle file and make some changes then export the PNGs again.
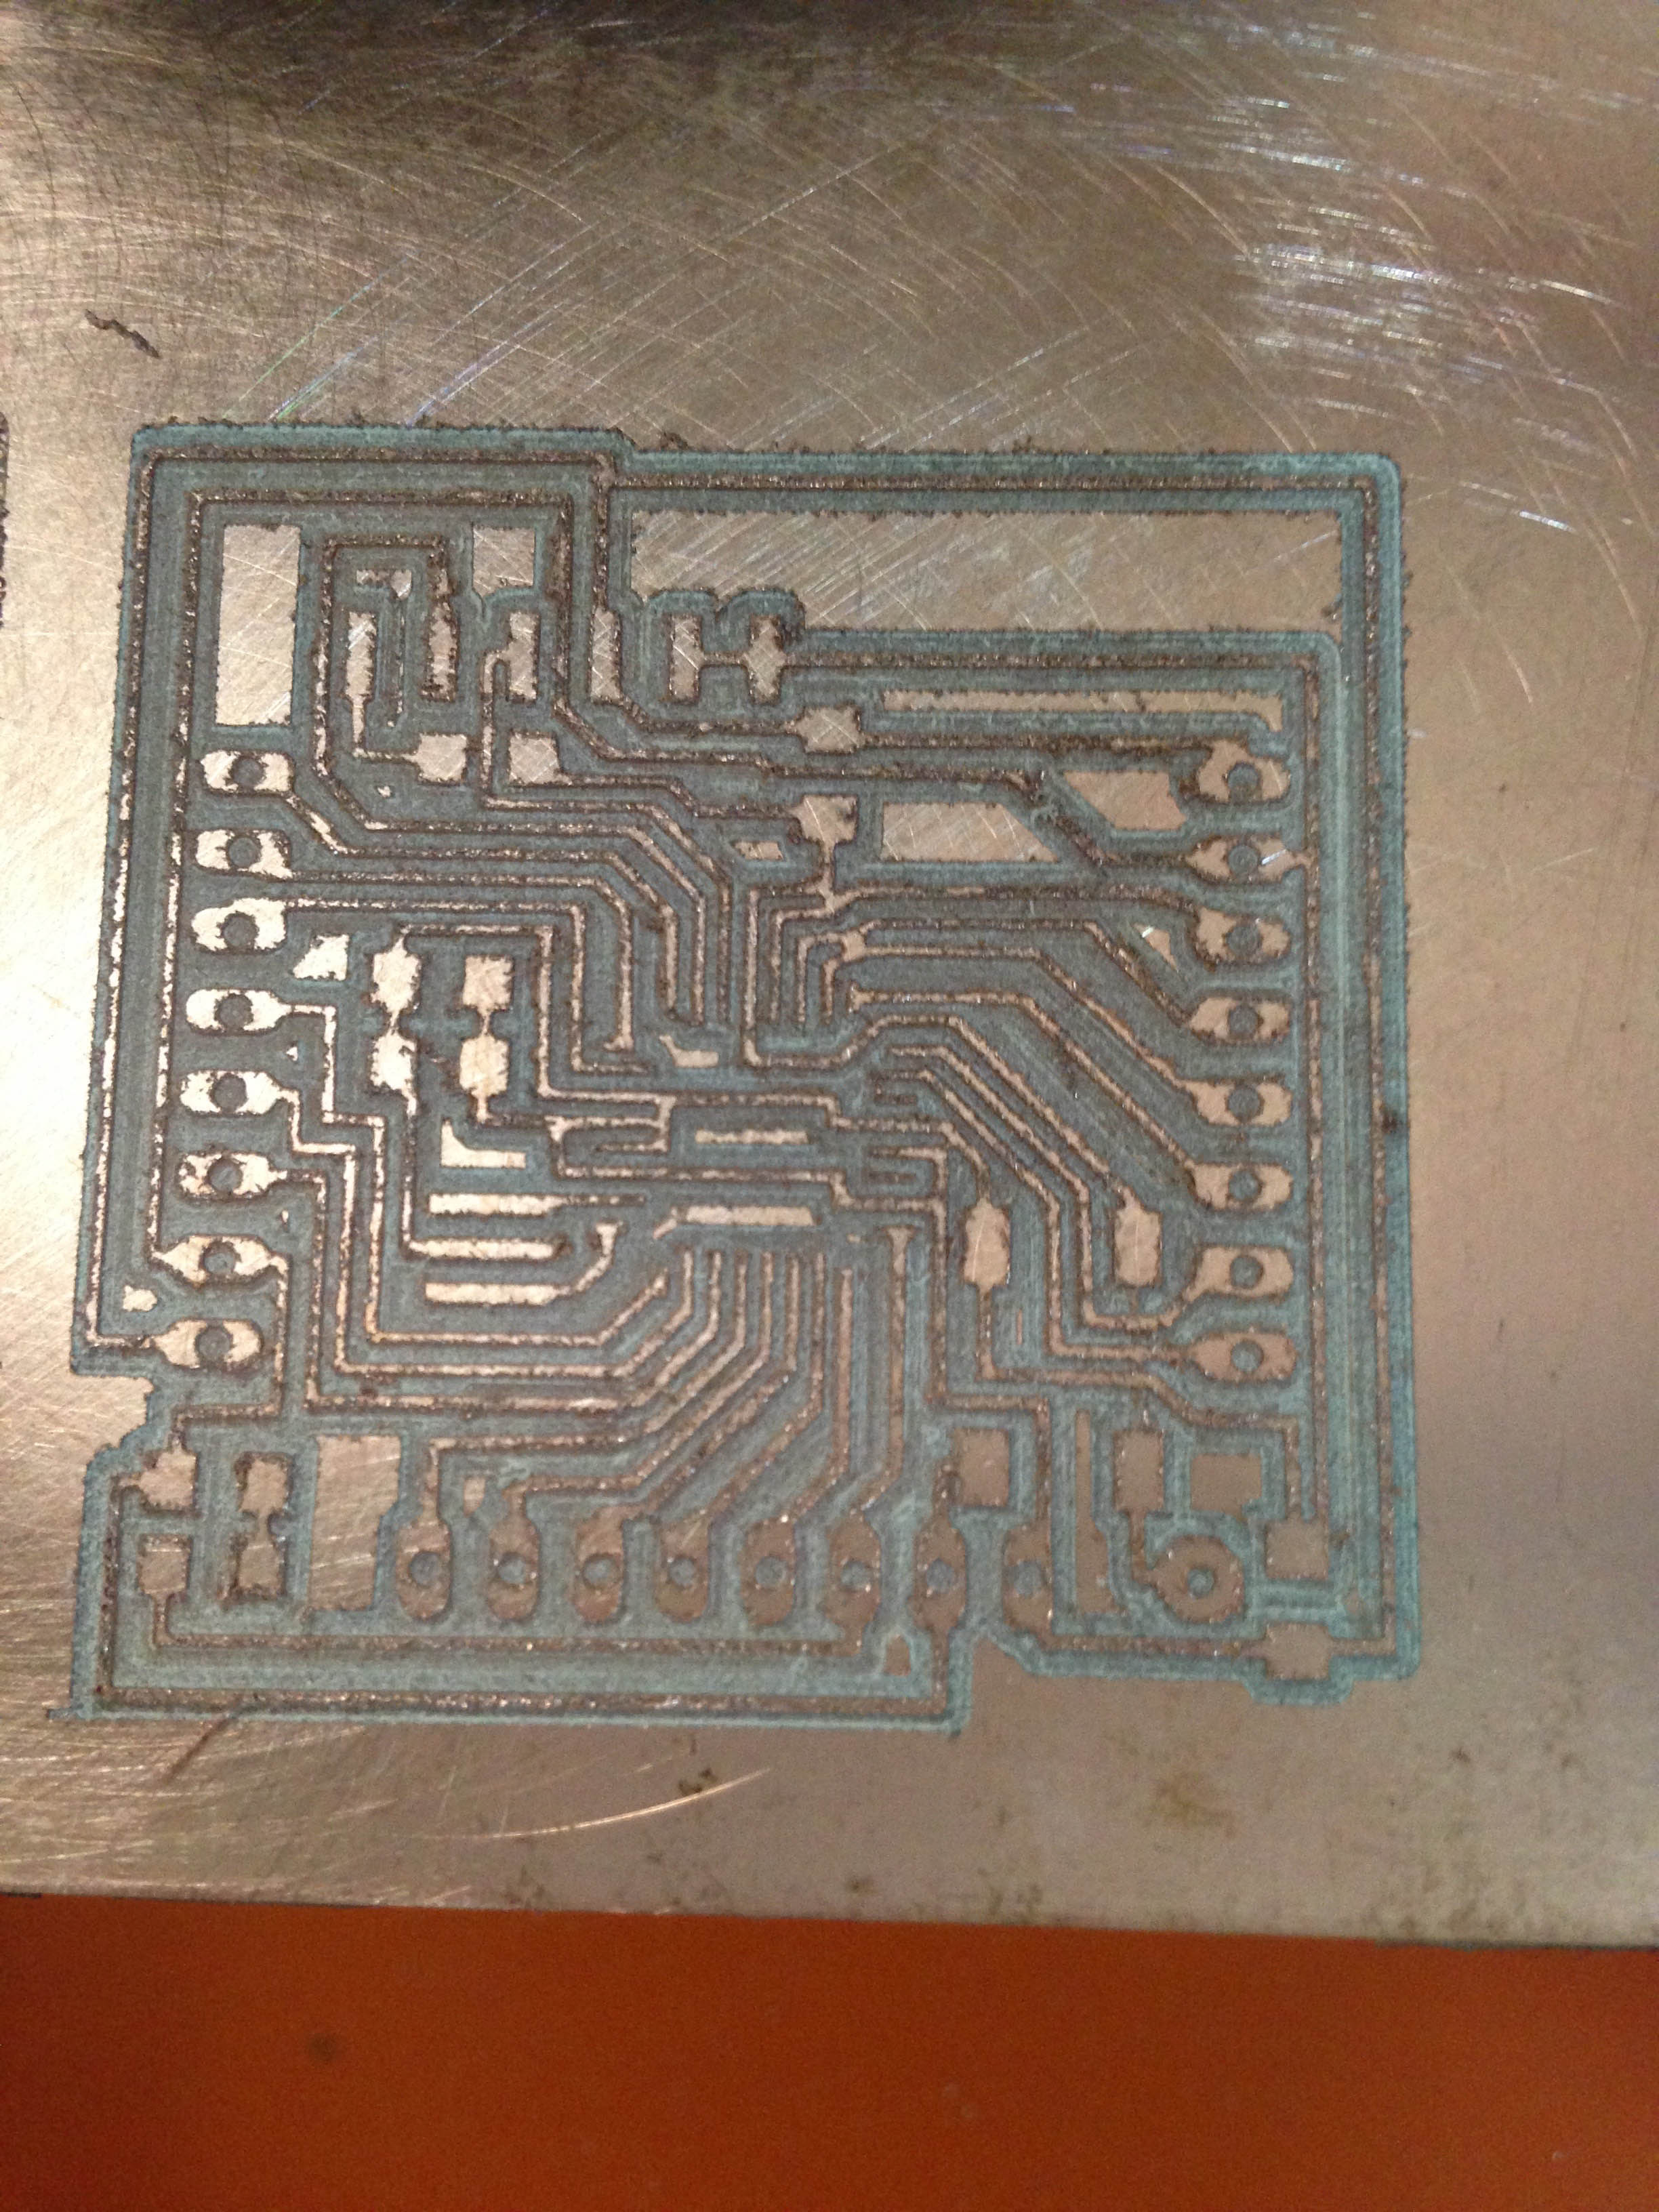
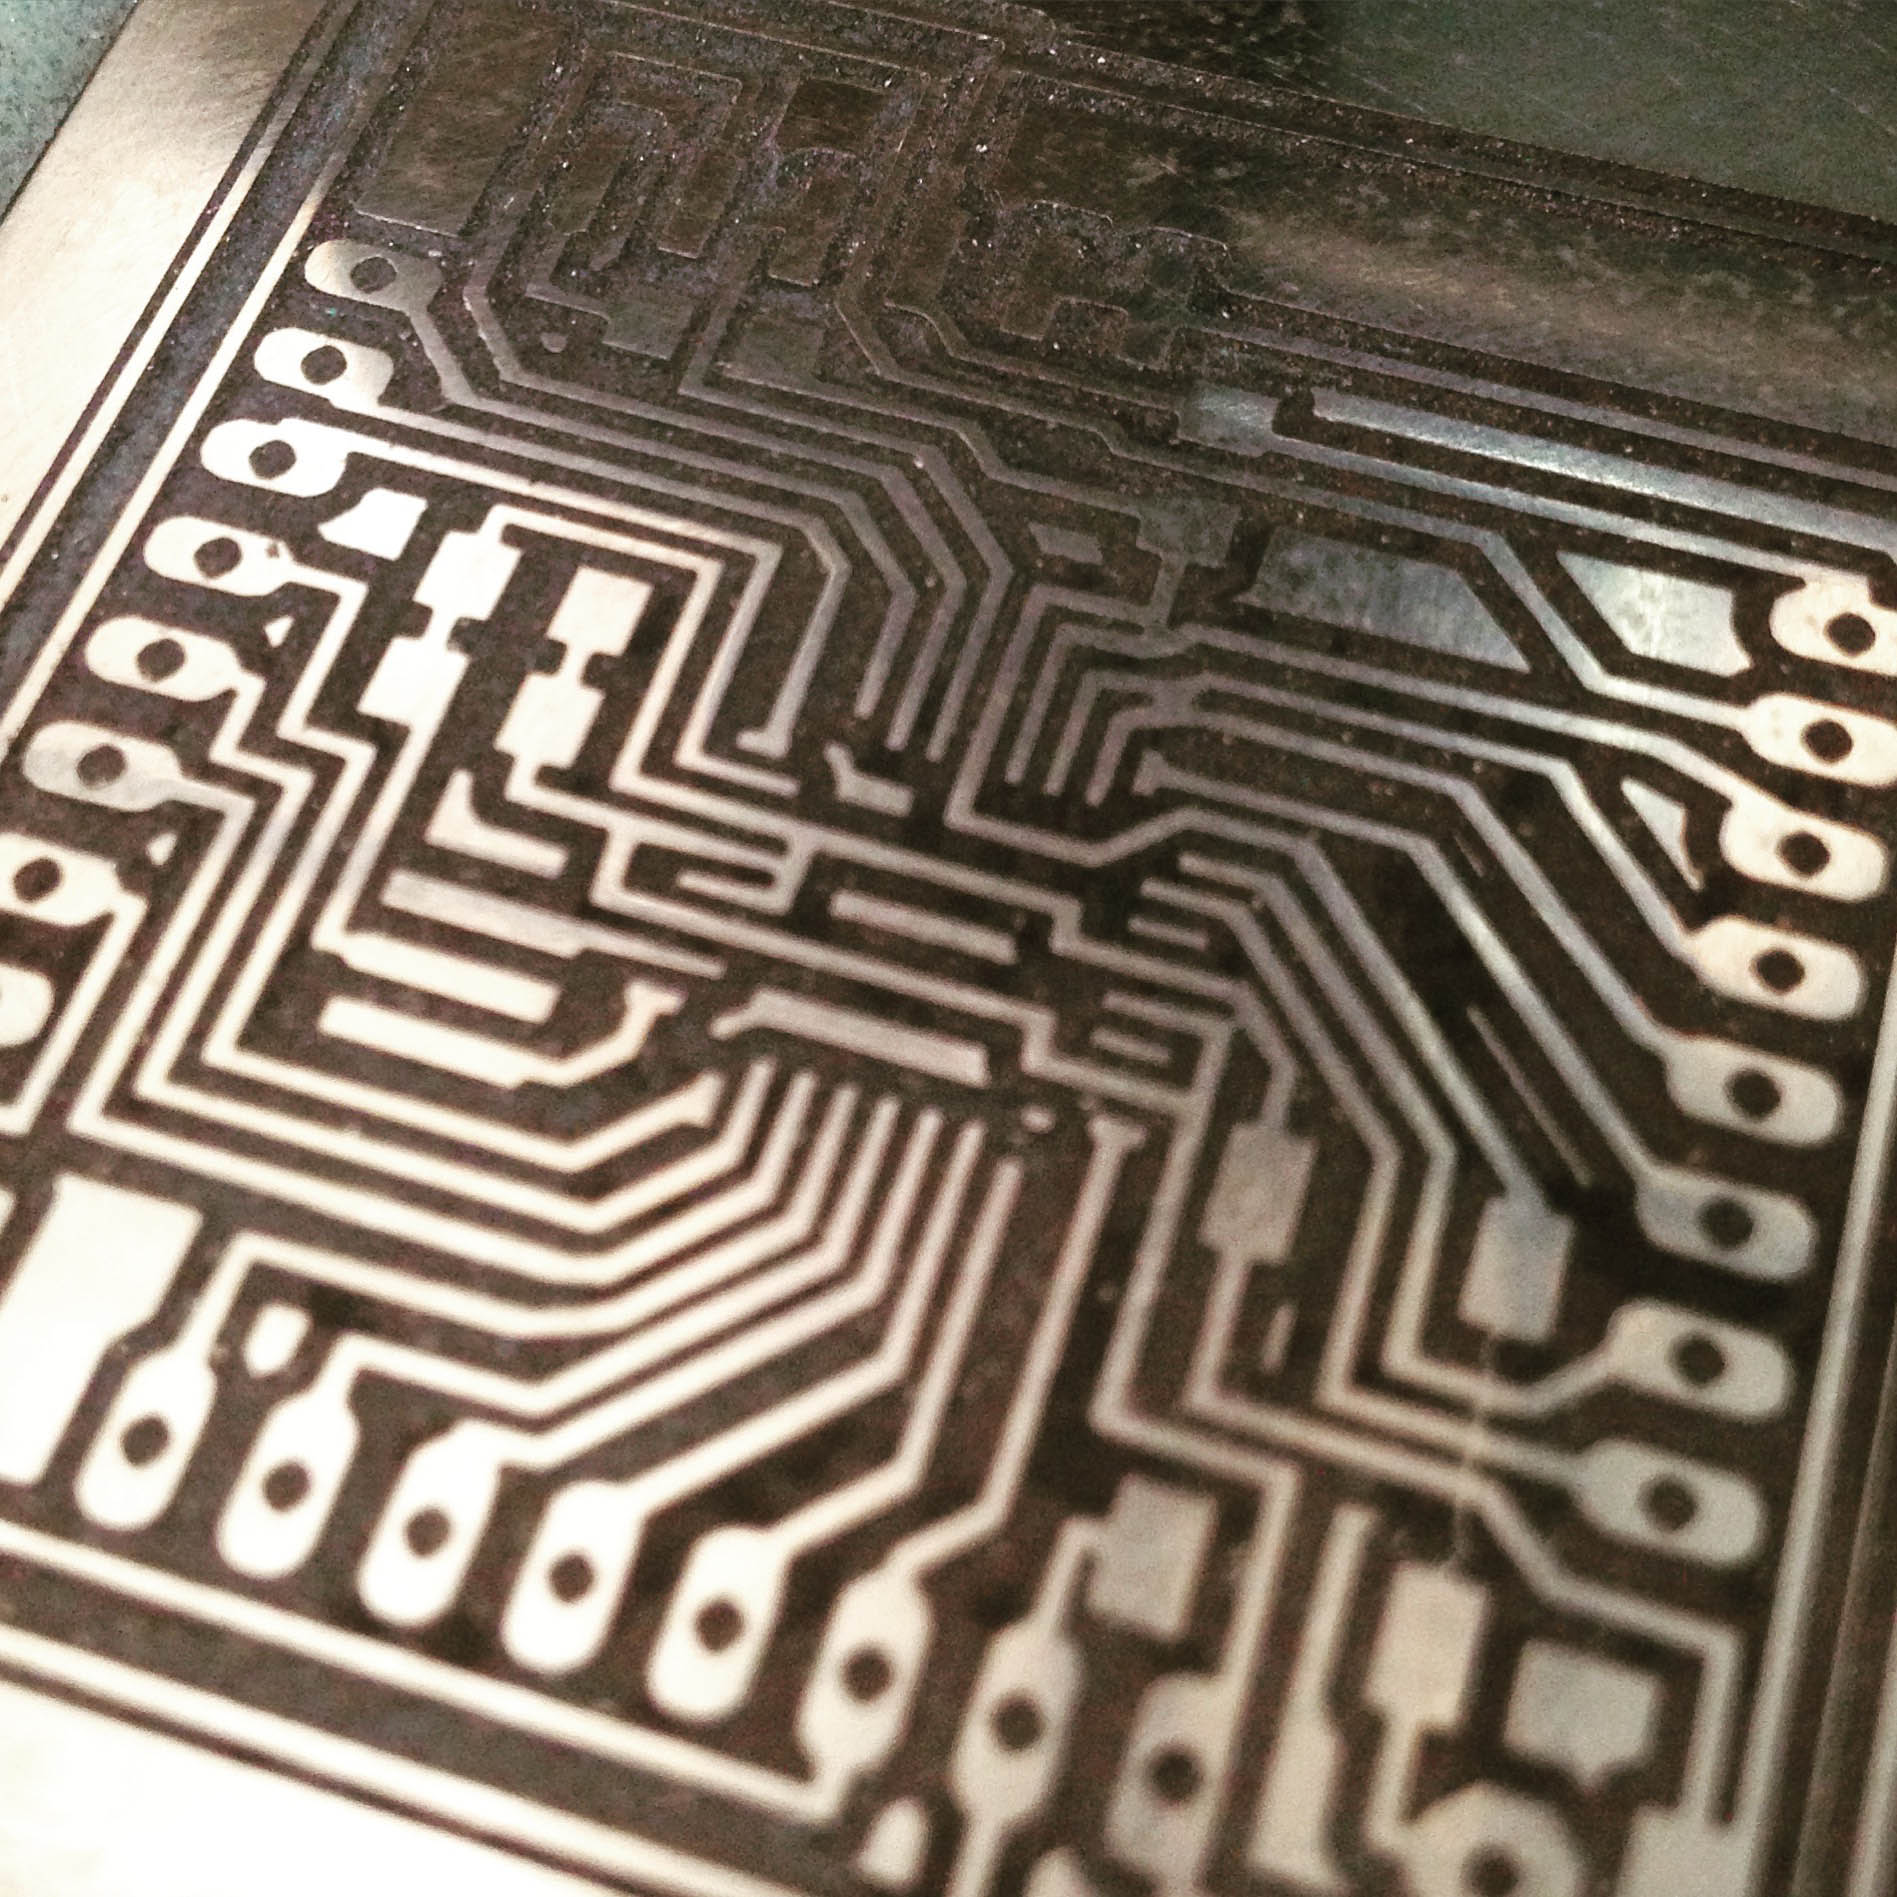
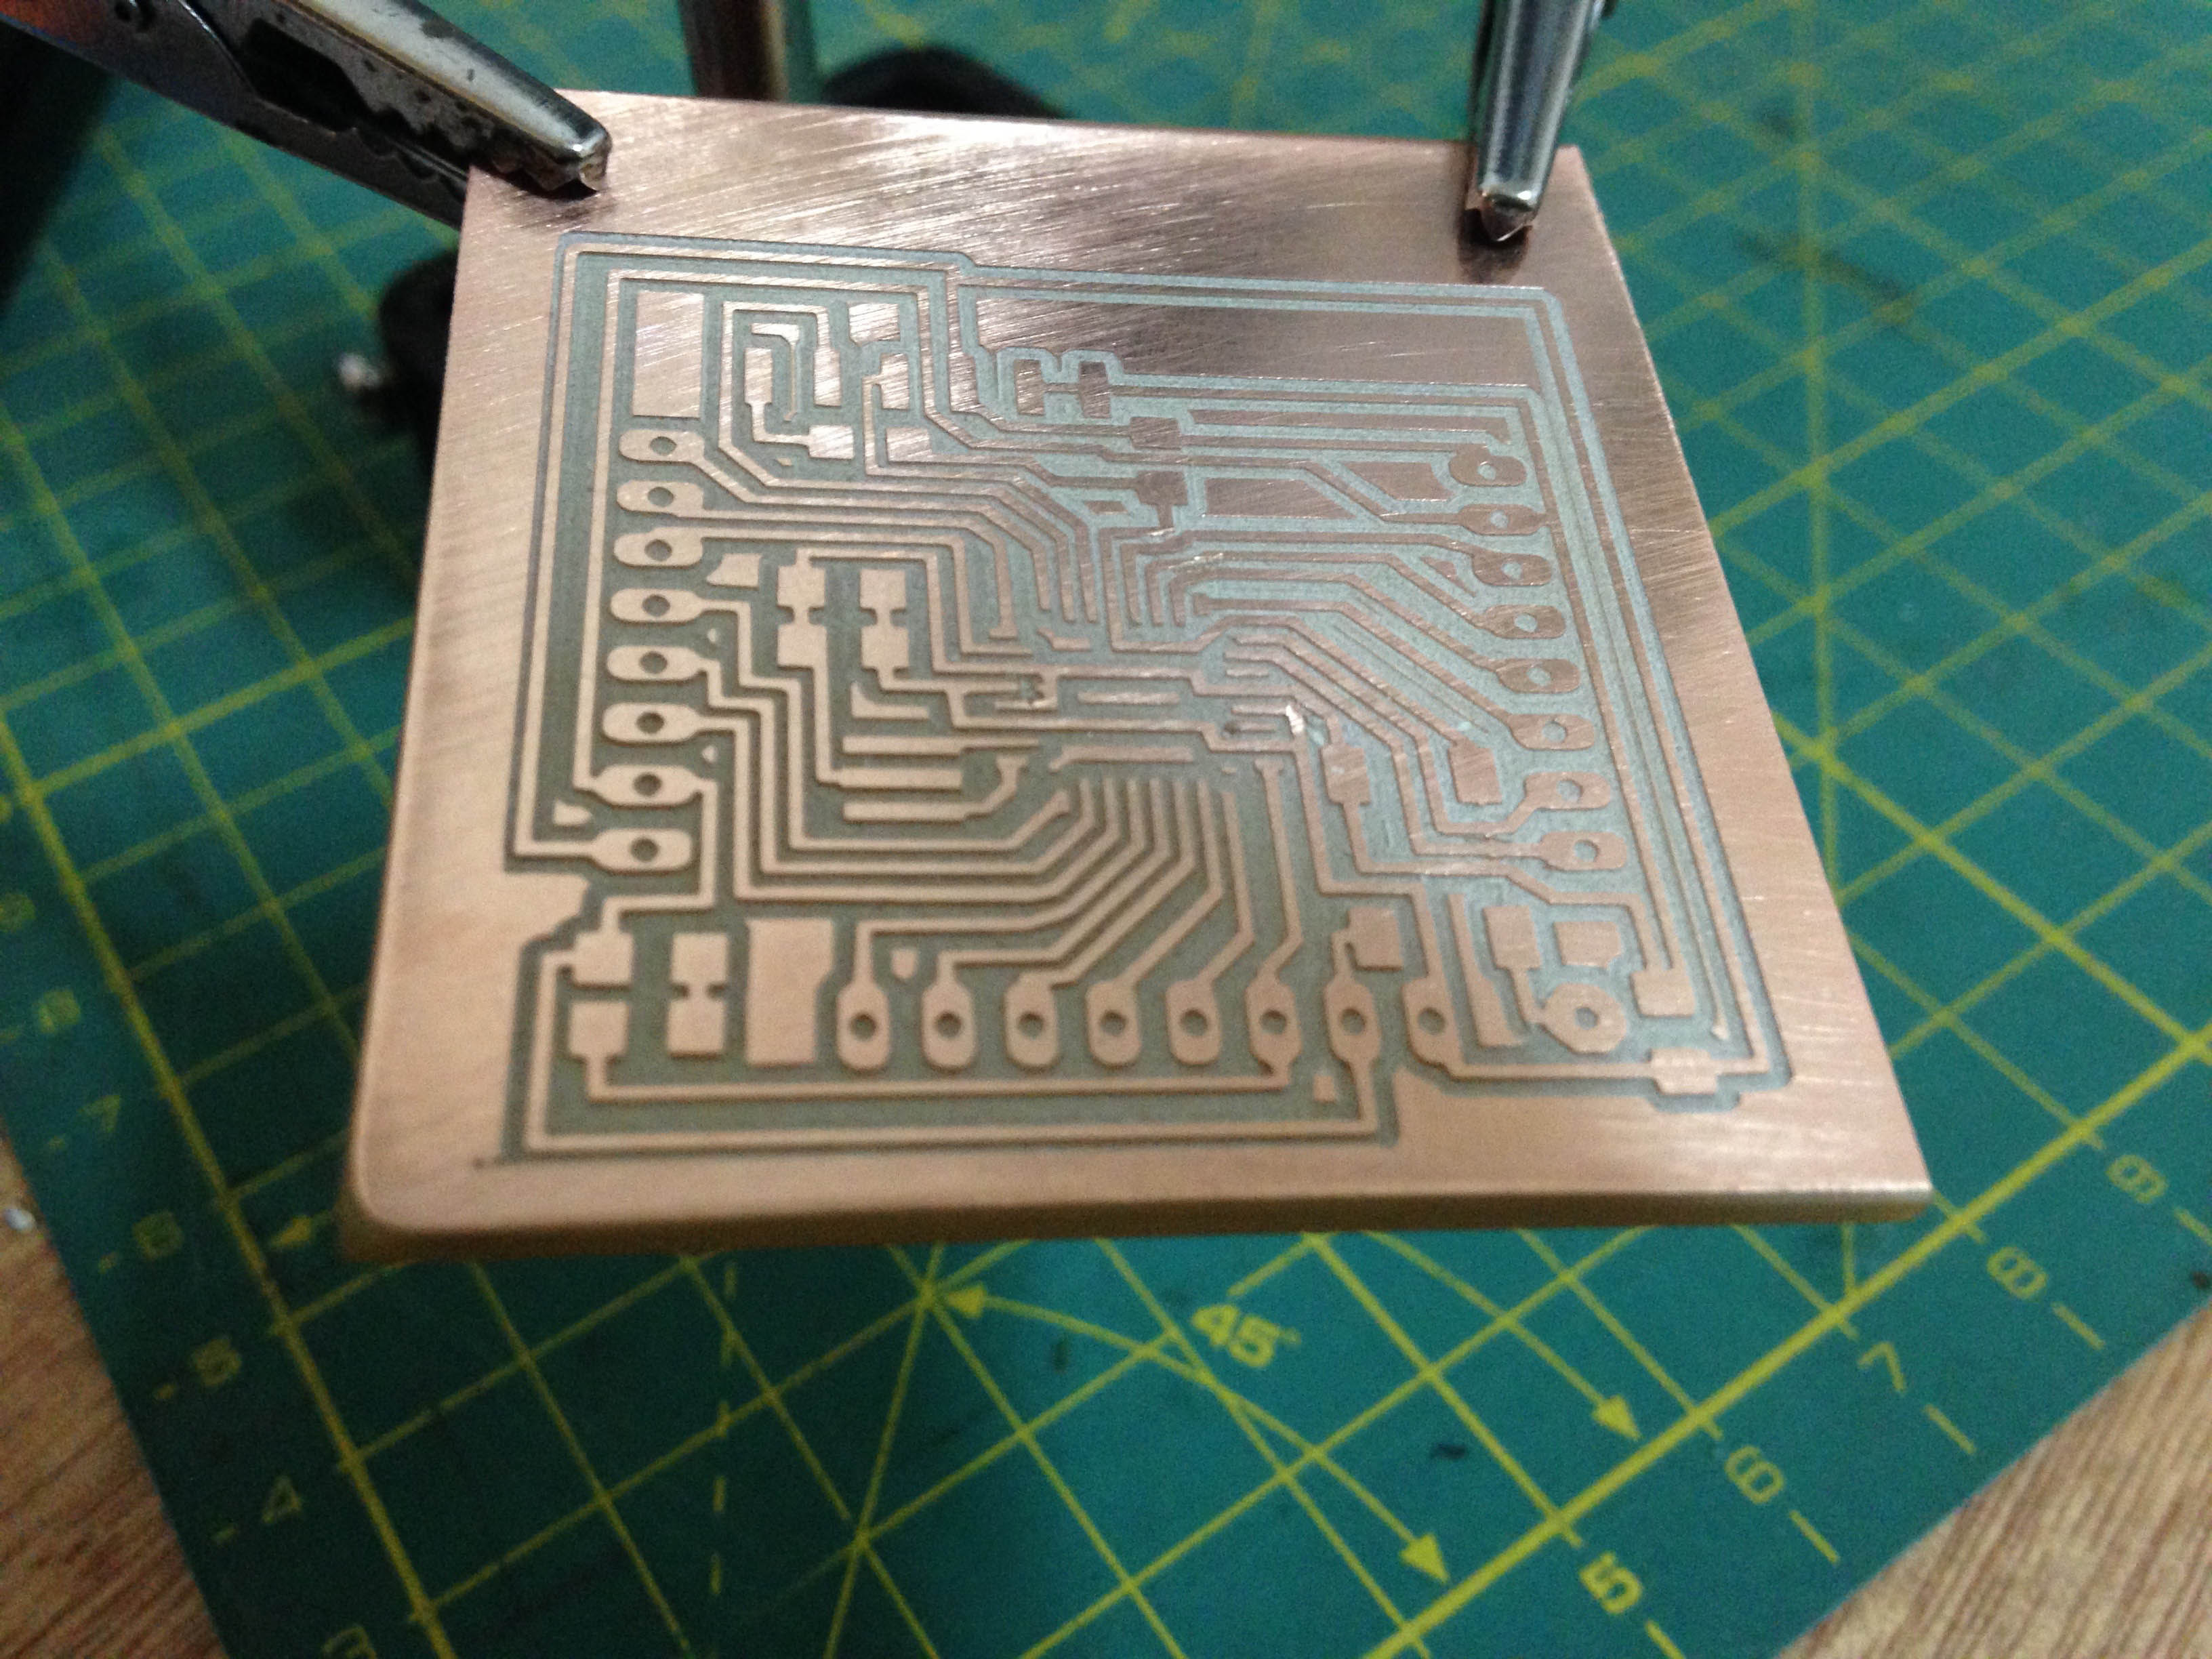
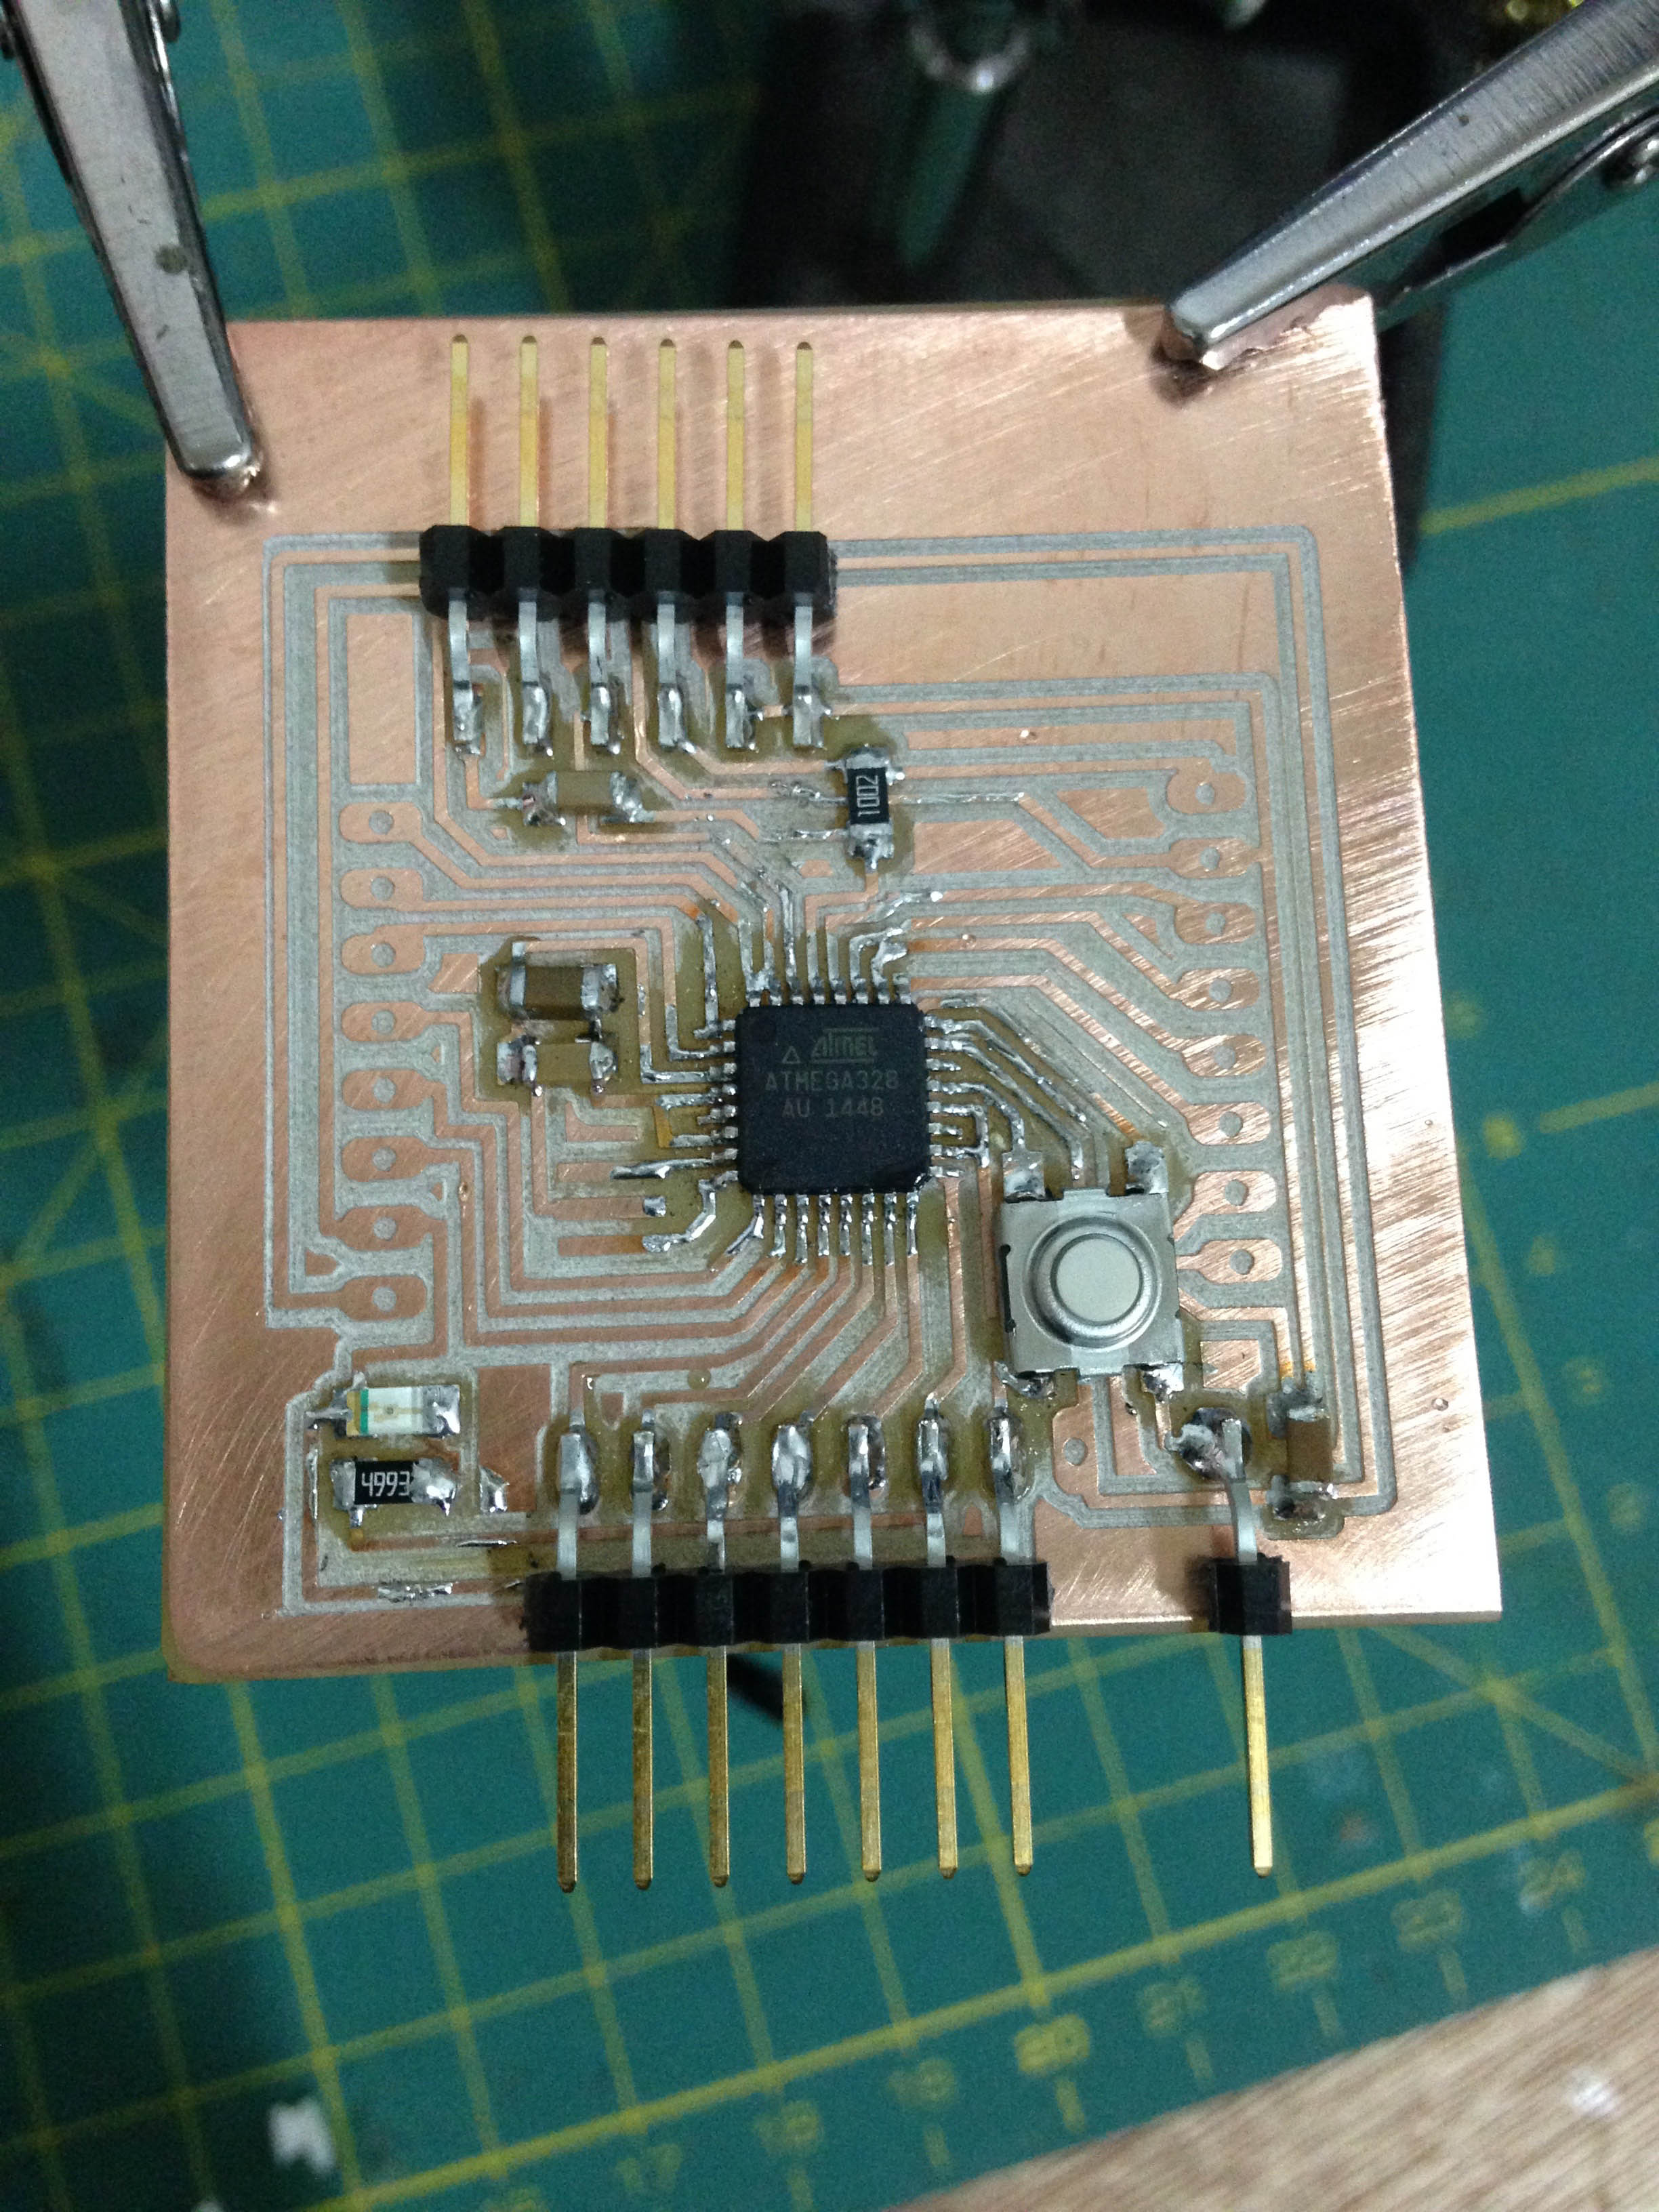
With a Knife I repair the nets that joint. But In general terms it looks good. With a tester y check all the nets that comes from the Atmega 328.
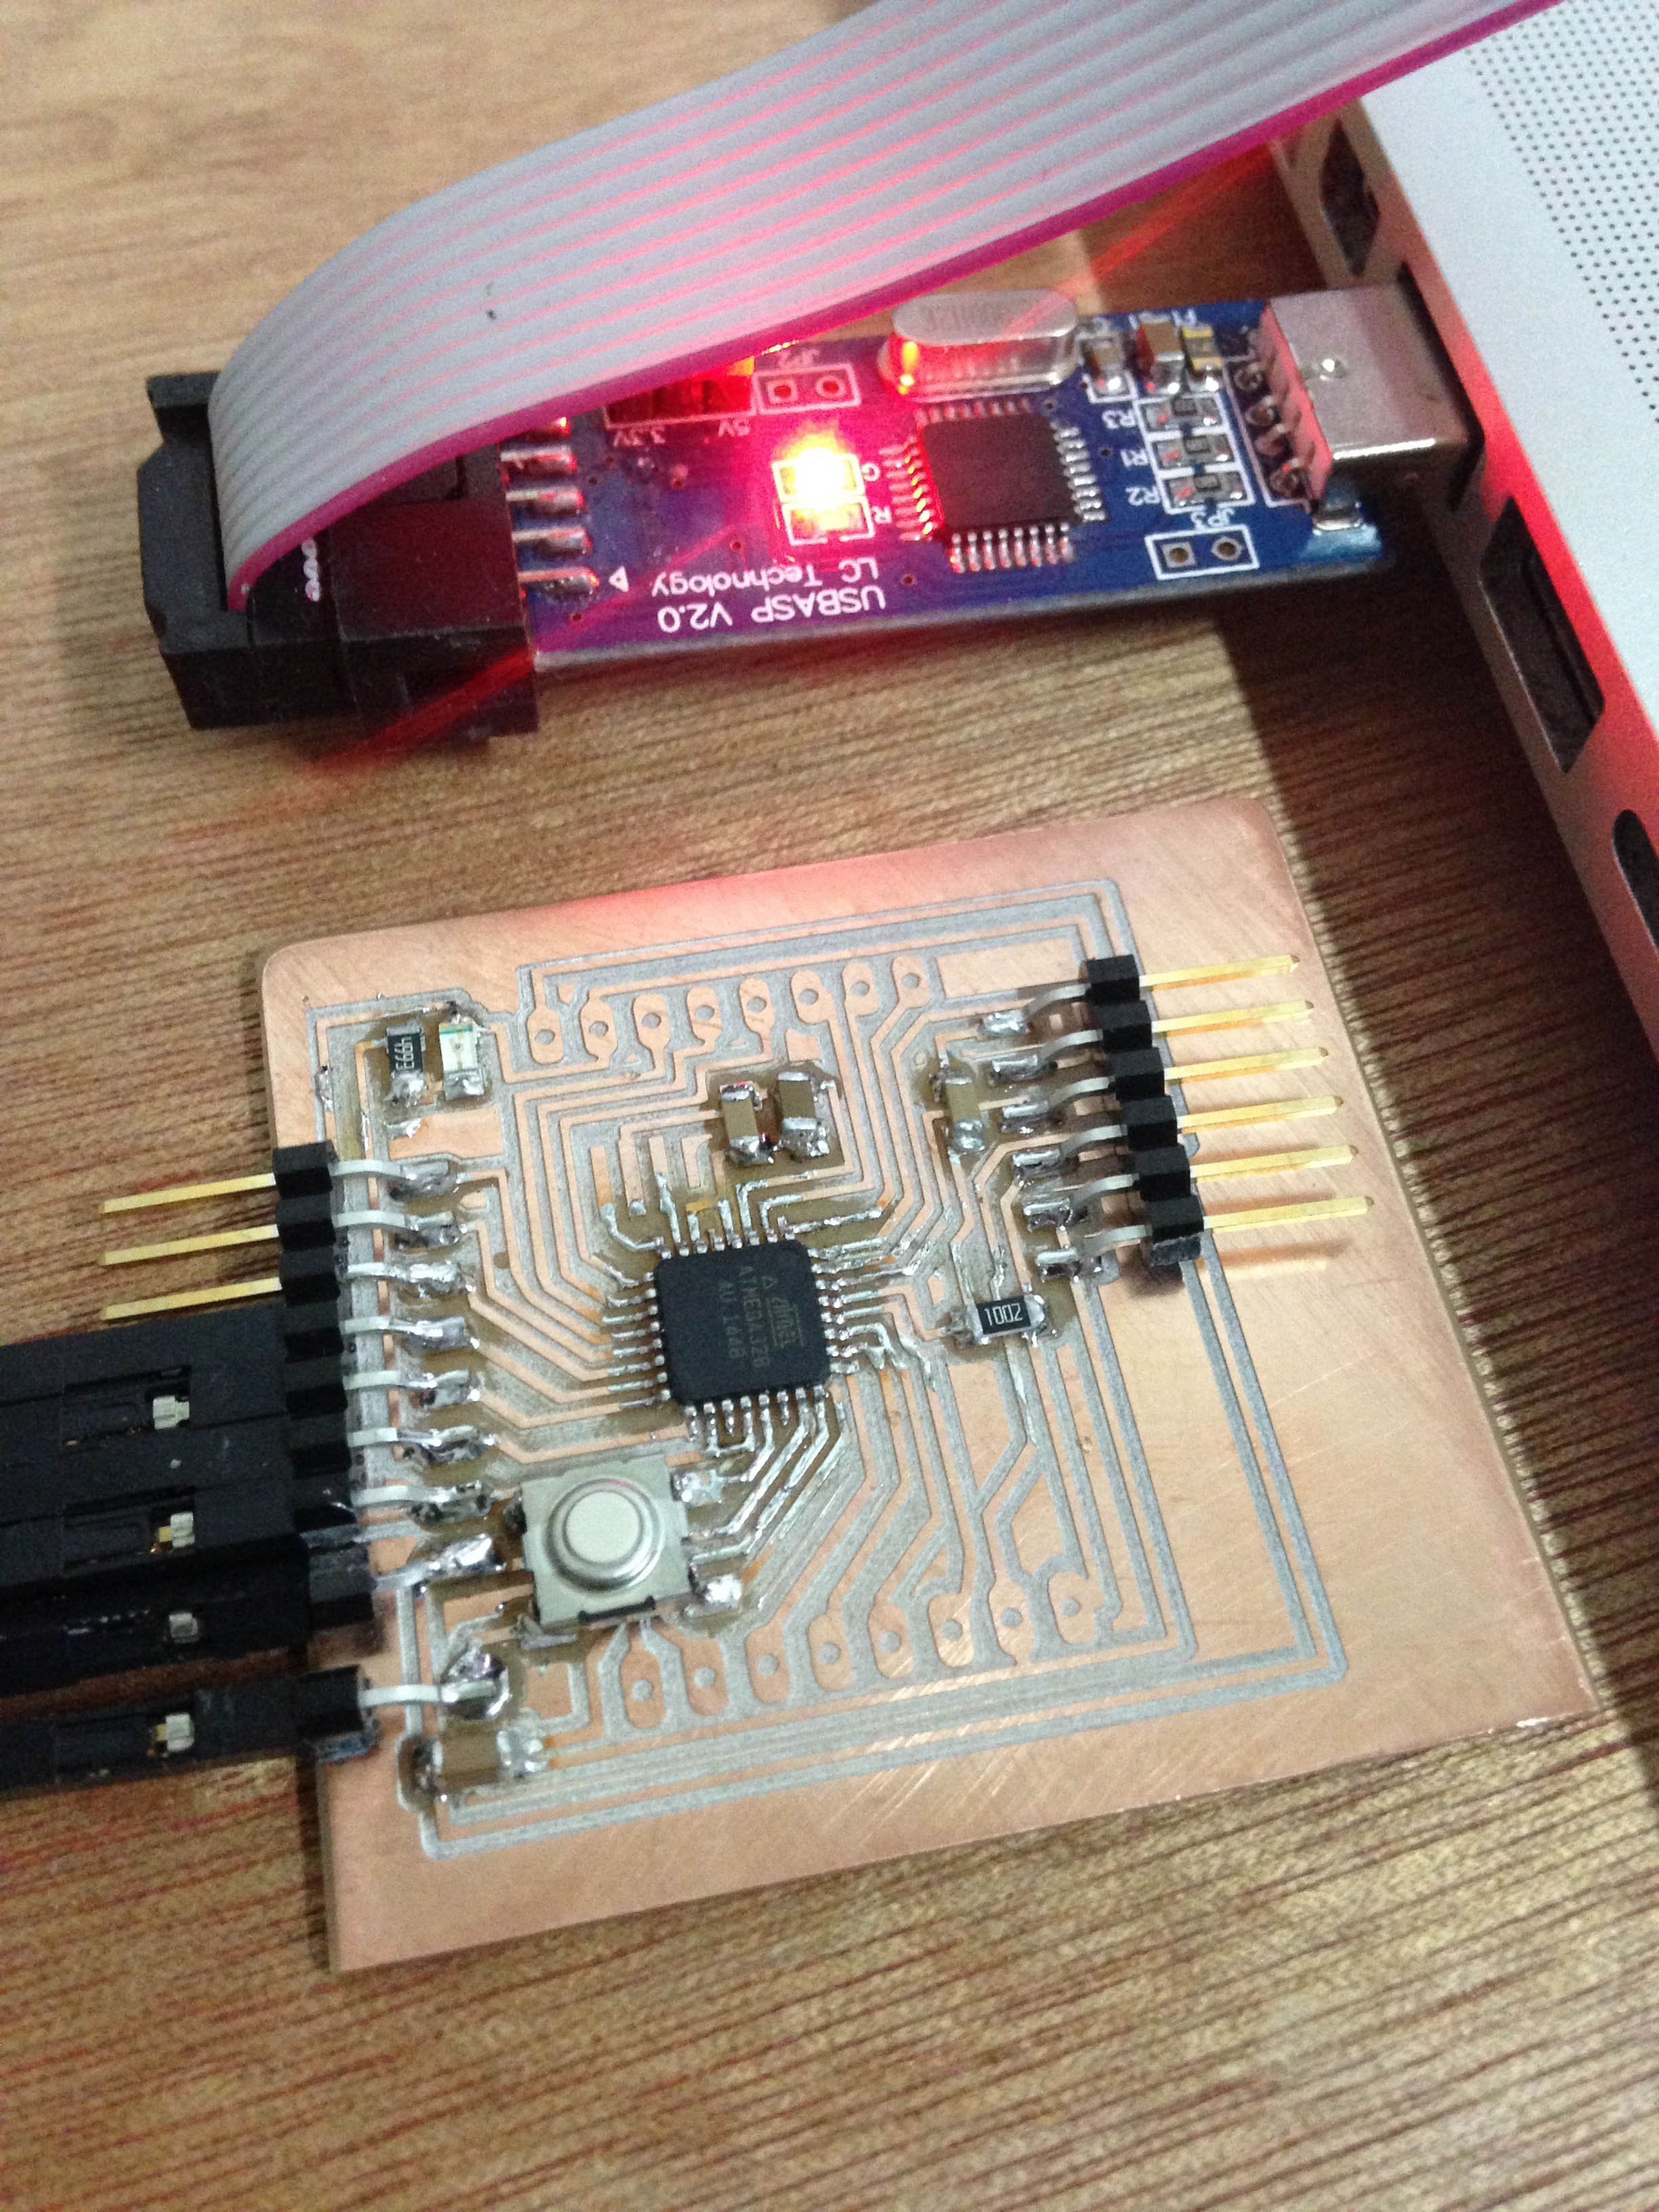
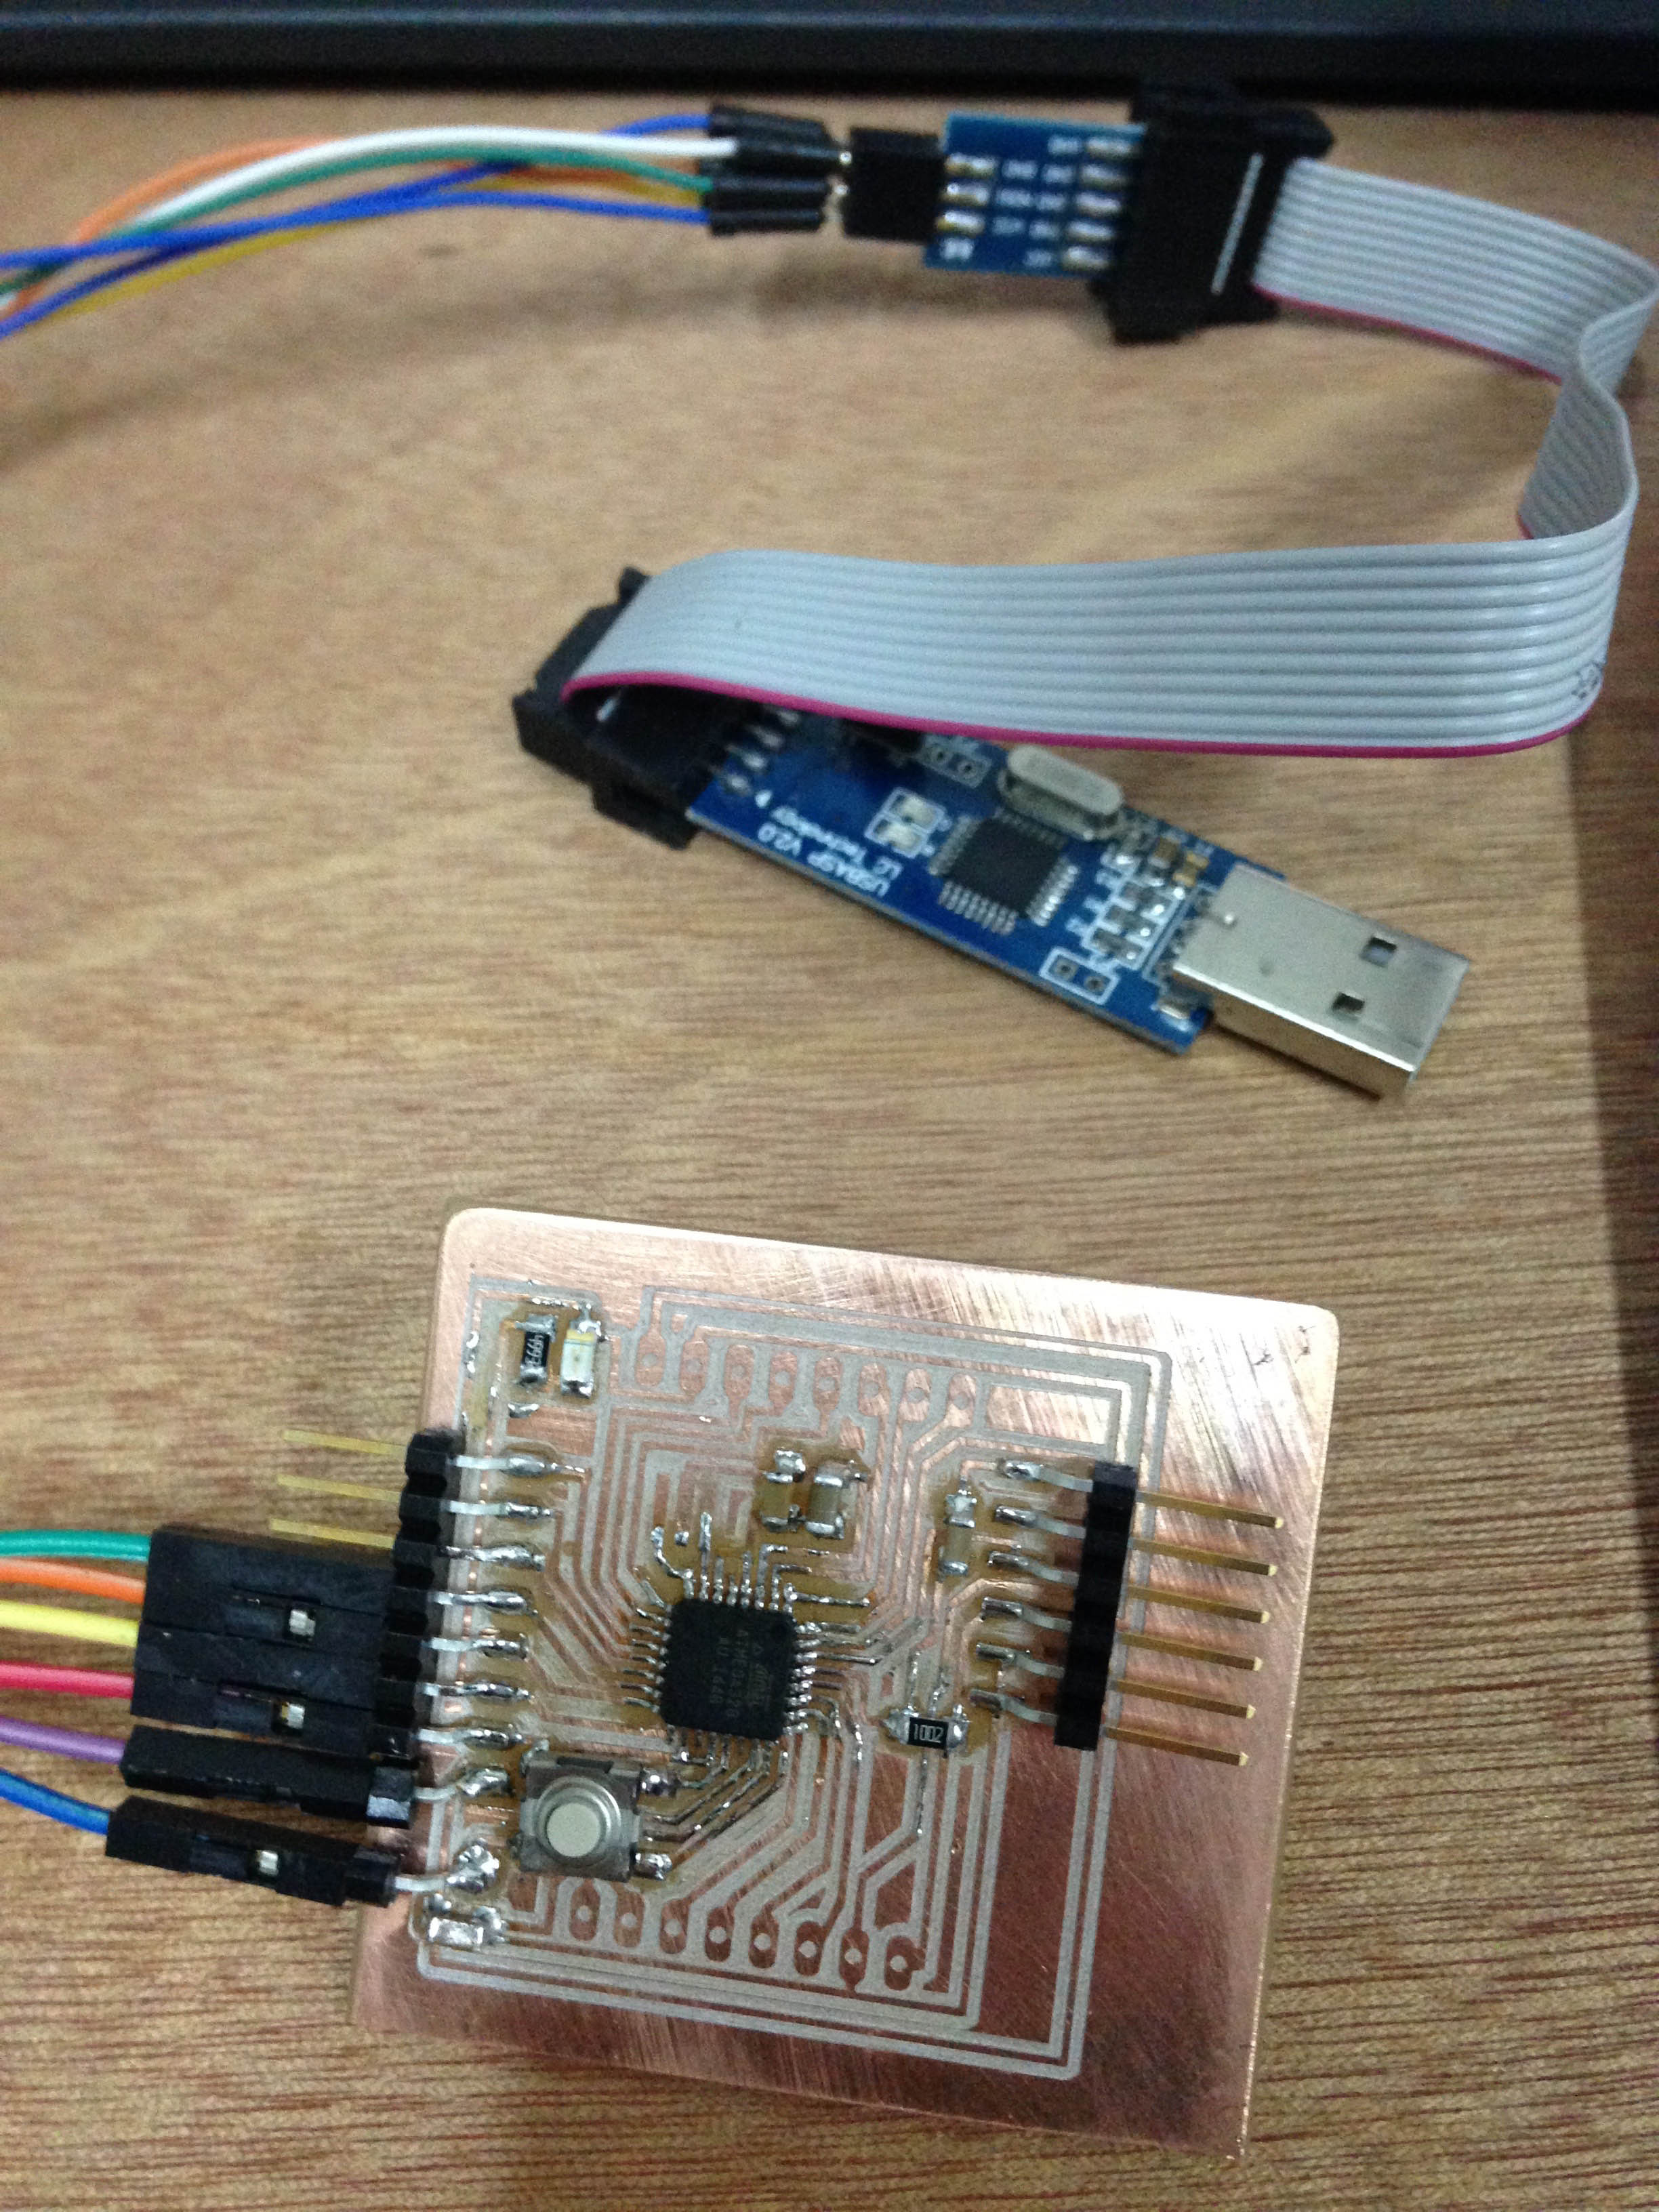
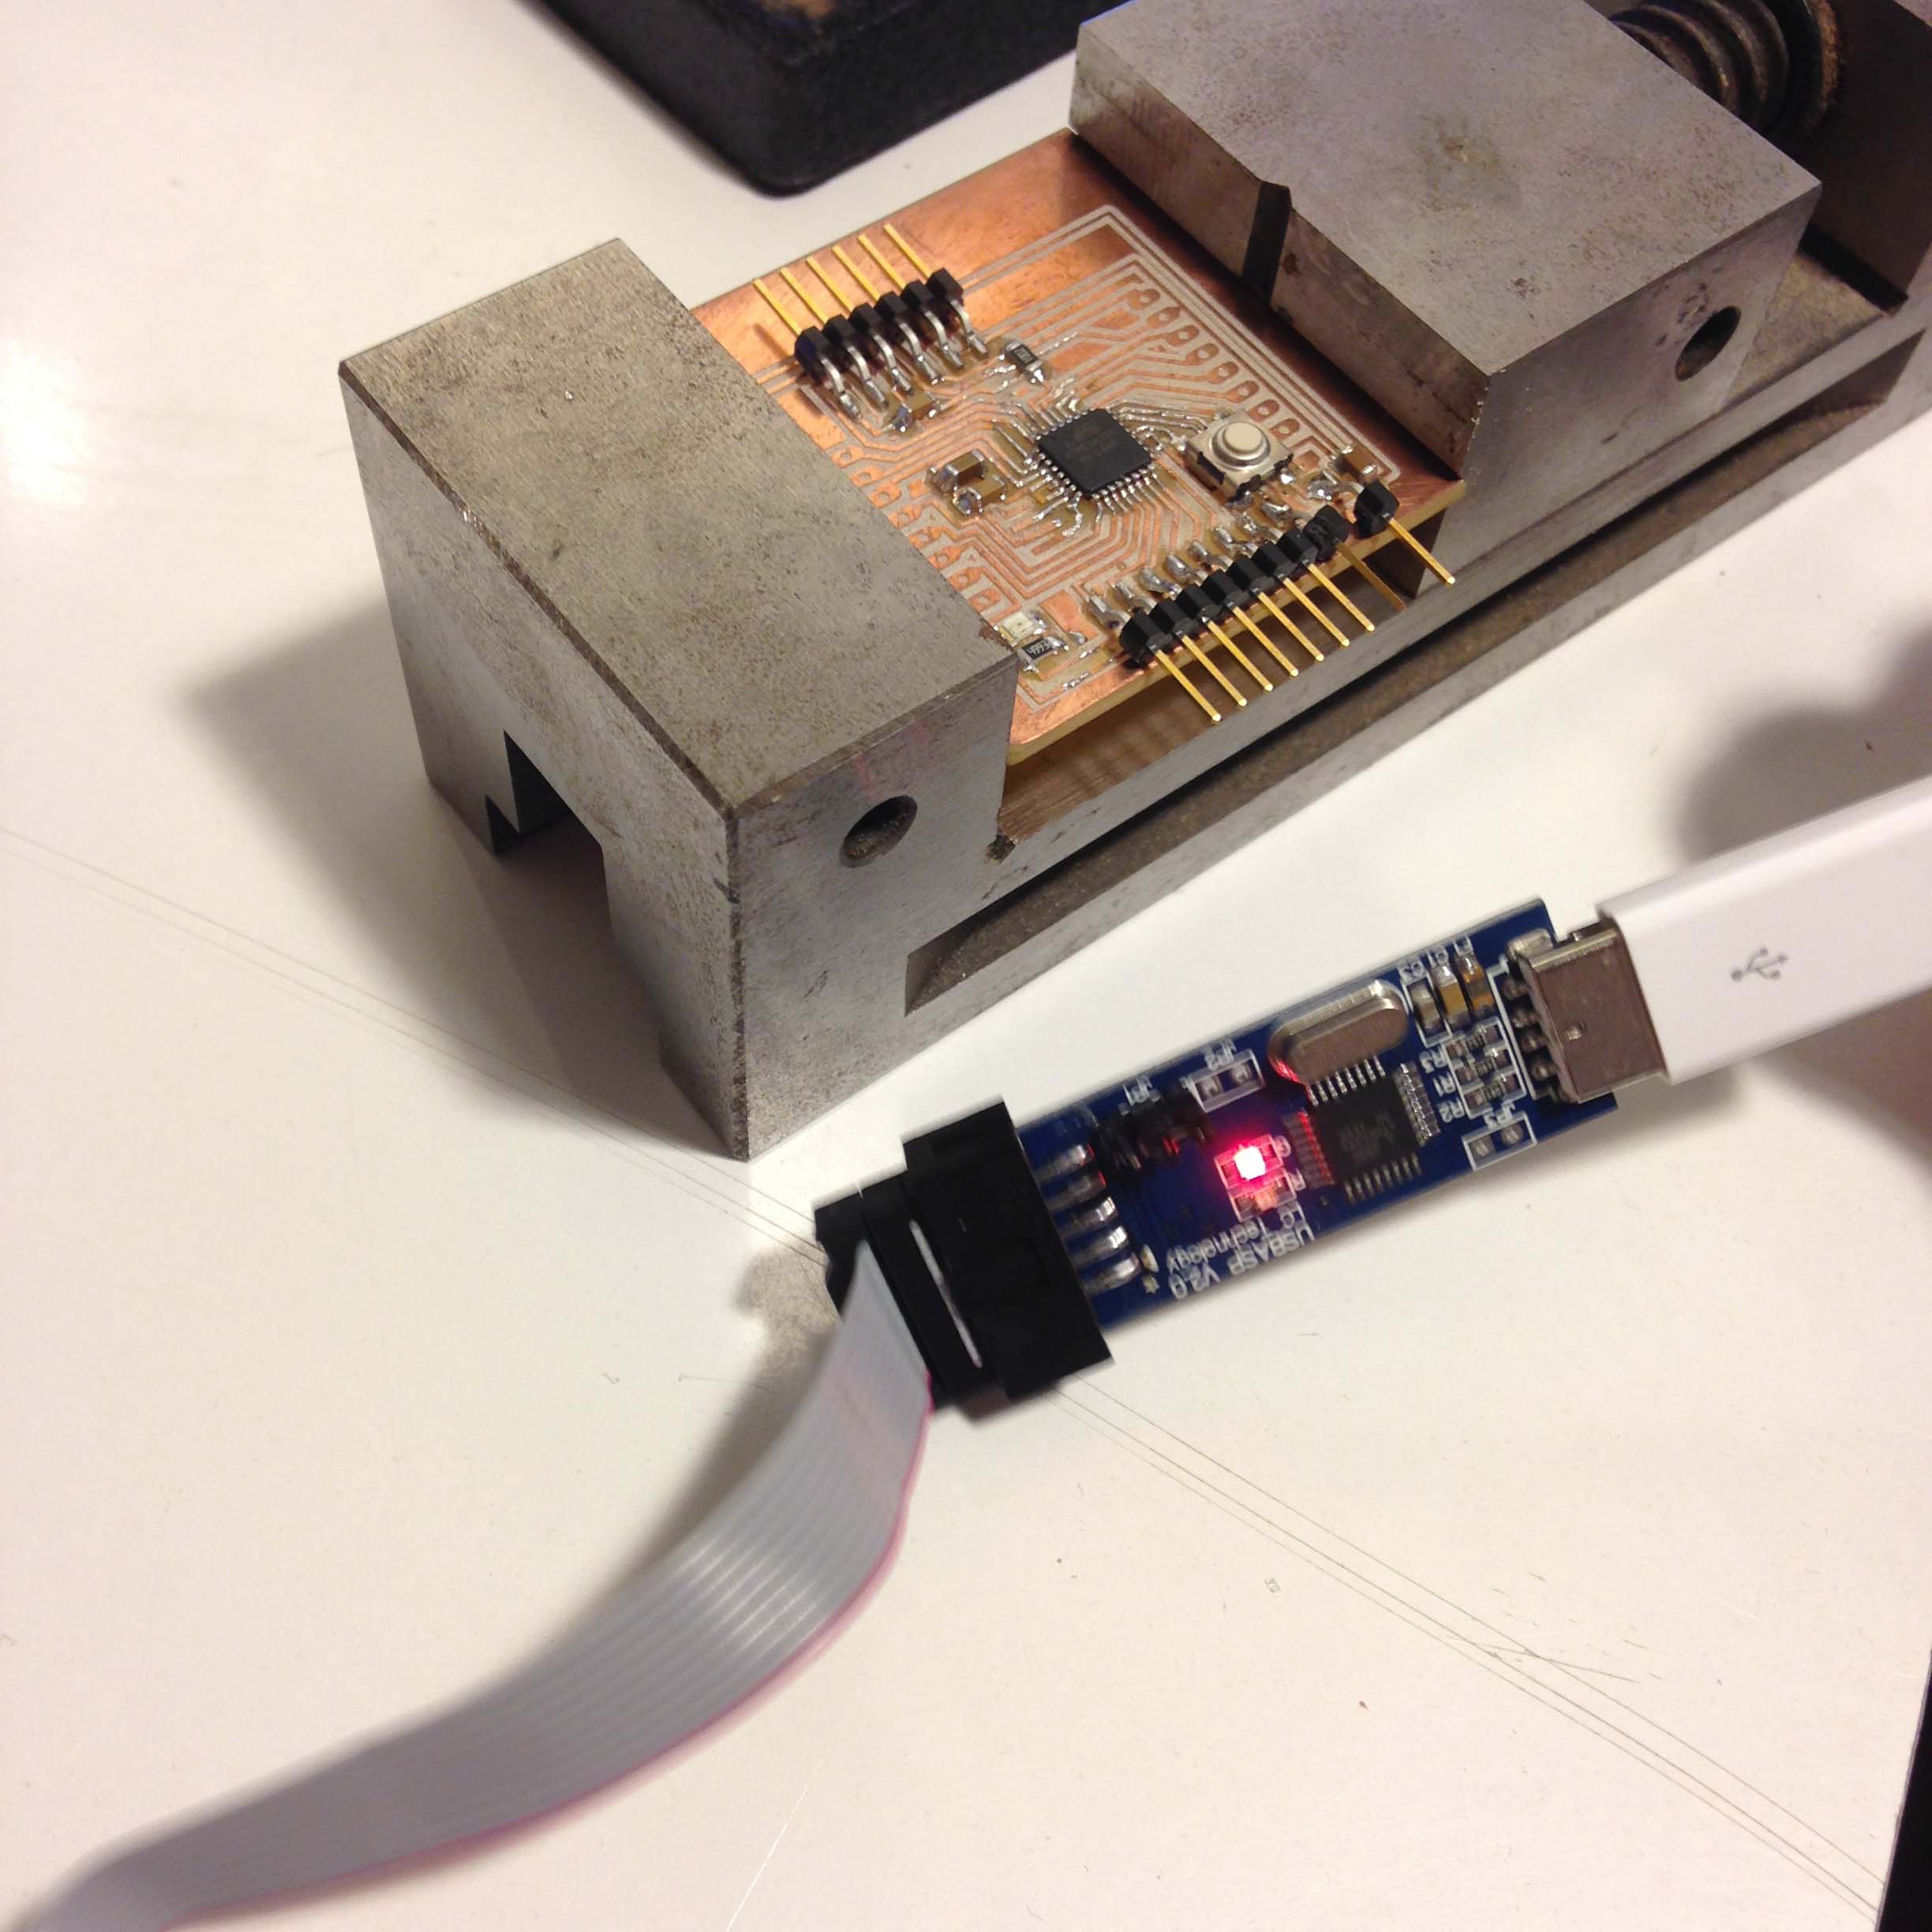
Programing with Arduino IDE and USBASP ISP
I add the boards in the Arduino IDE with the JSON of James Sleeman with this you can use ATmega8, ATmega48, ATmega88, ATmega168, ATmega328 directly from the IDE.
https://raw.githubusercontent.com/sleemanj/optiboot/master/dists/package_gogo_diy_atmega8_series_index.json

picture reference credits
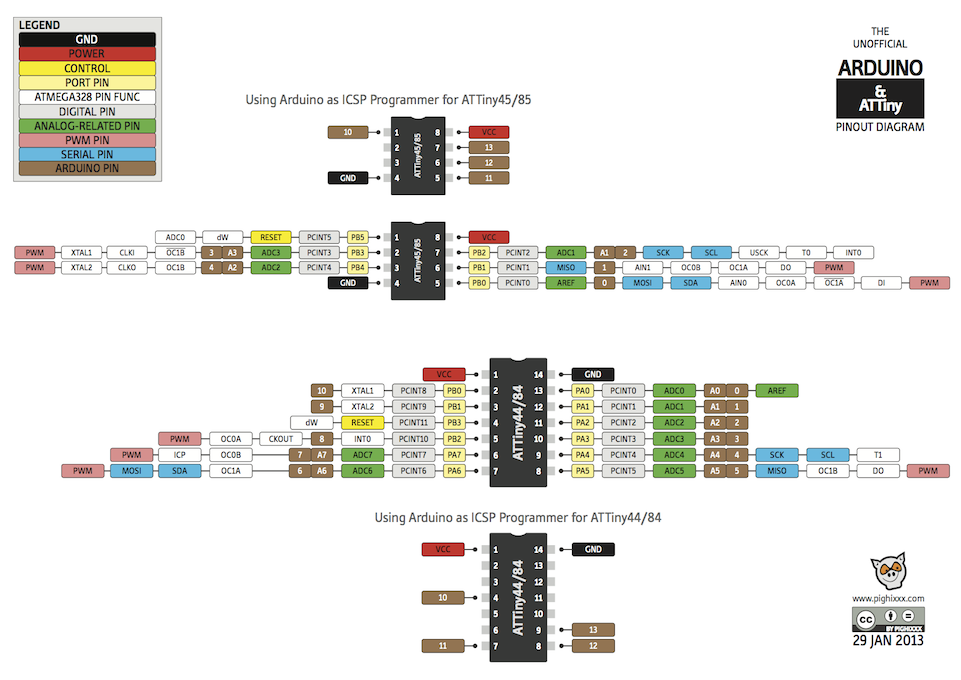
I use this picture for reference.
Uploading Blink with Arduino IDE
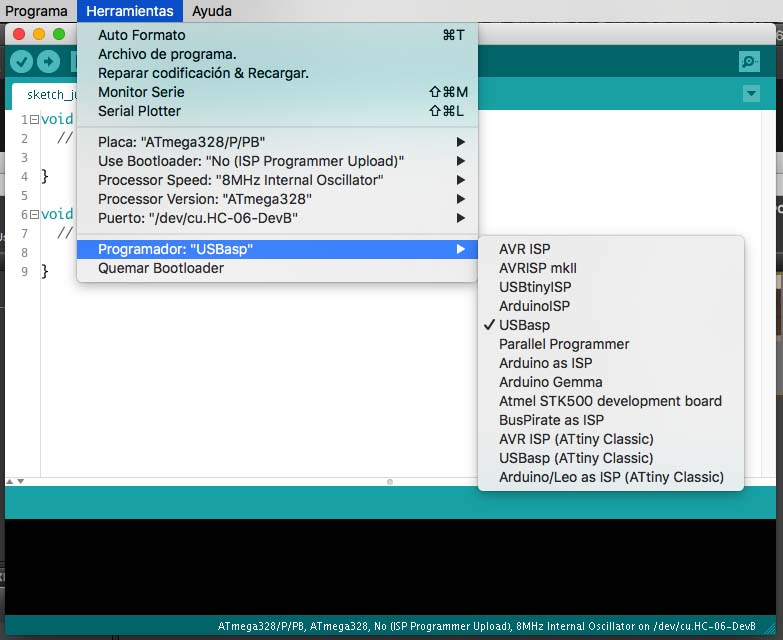
I select the options that fit my setup. Atmega 328, ISP programmer, 8Mhz Internal Oscillator, and USBasp programer. With all this done you can write any code from Arduino IDE. I suggest burning the bootloader before uploading any code to the 328. Also, be sure what 328 are you using, cause you have 328, 328P, 328PB options. The best feature is that you can use different Oscillators.
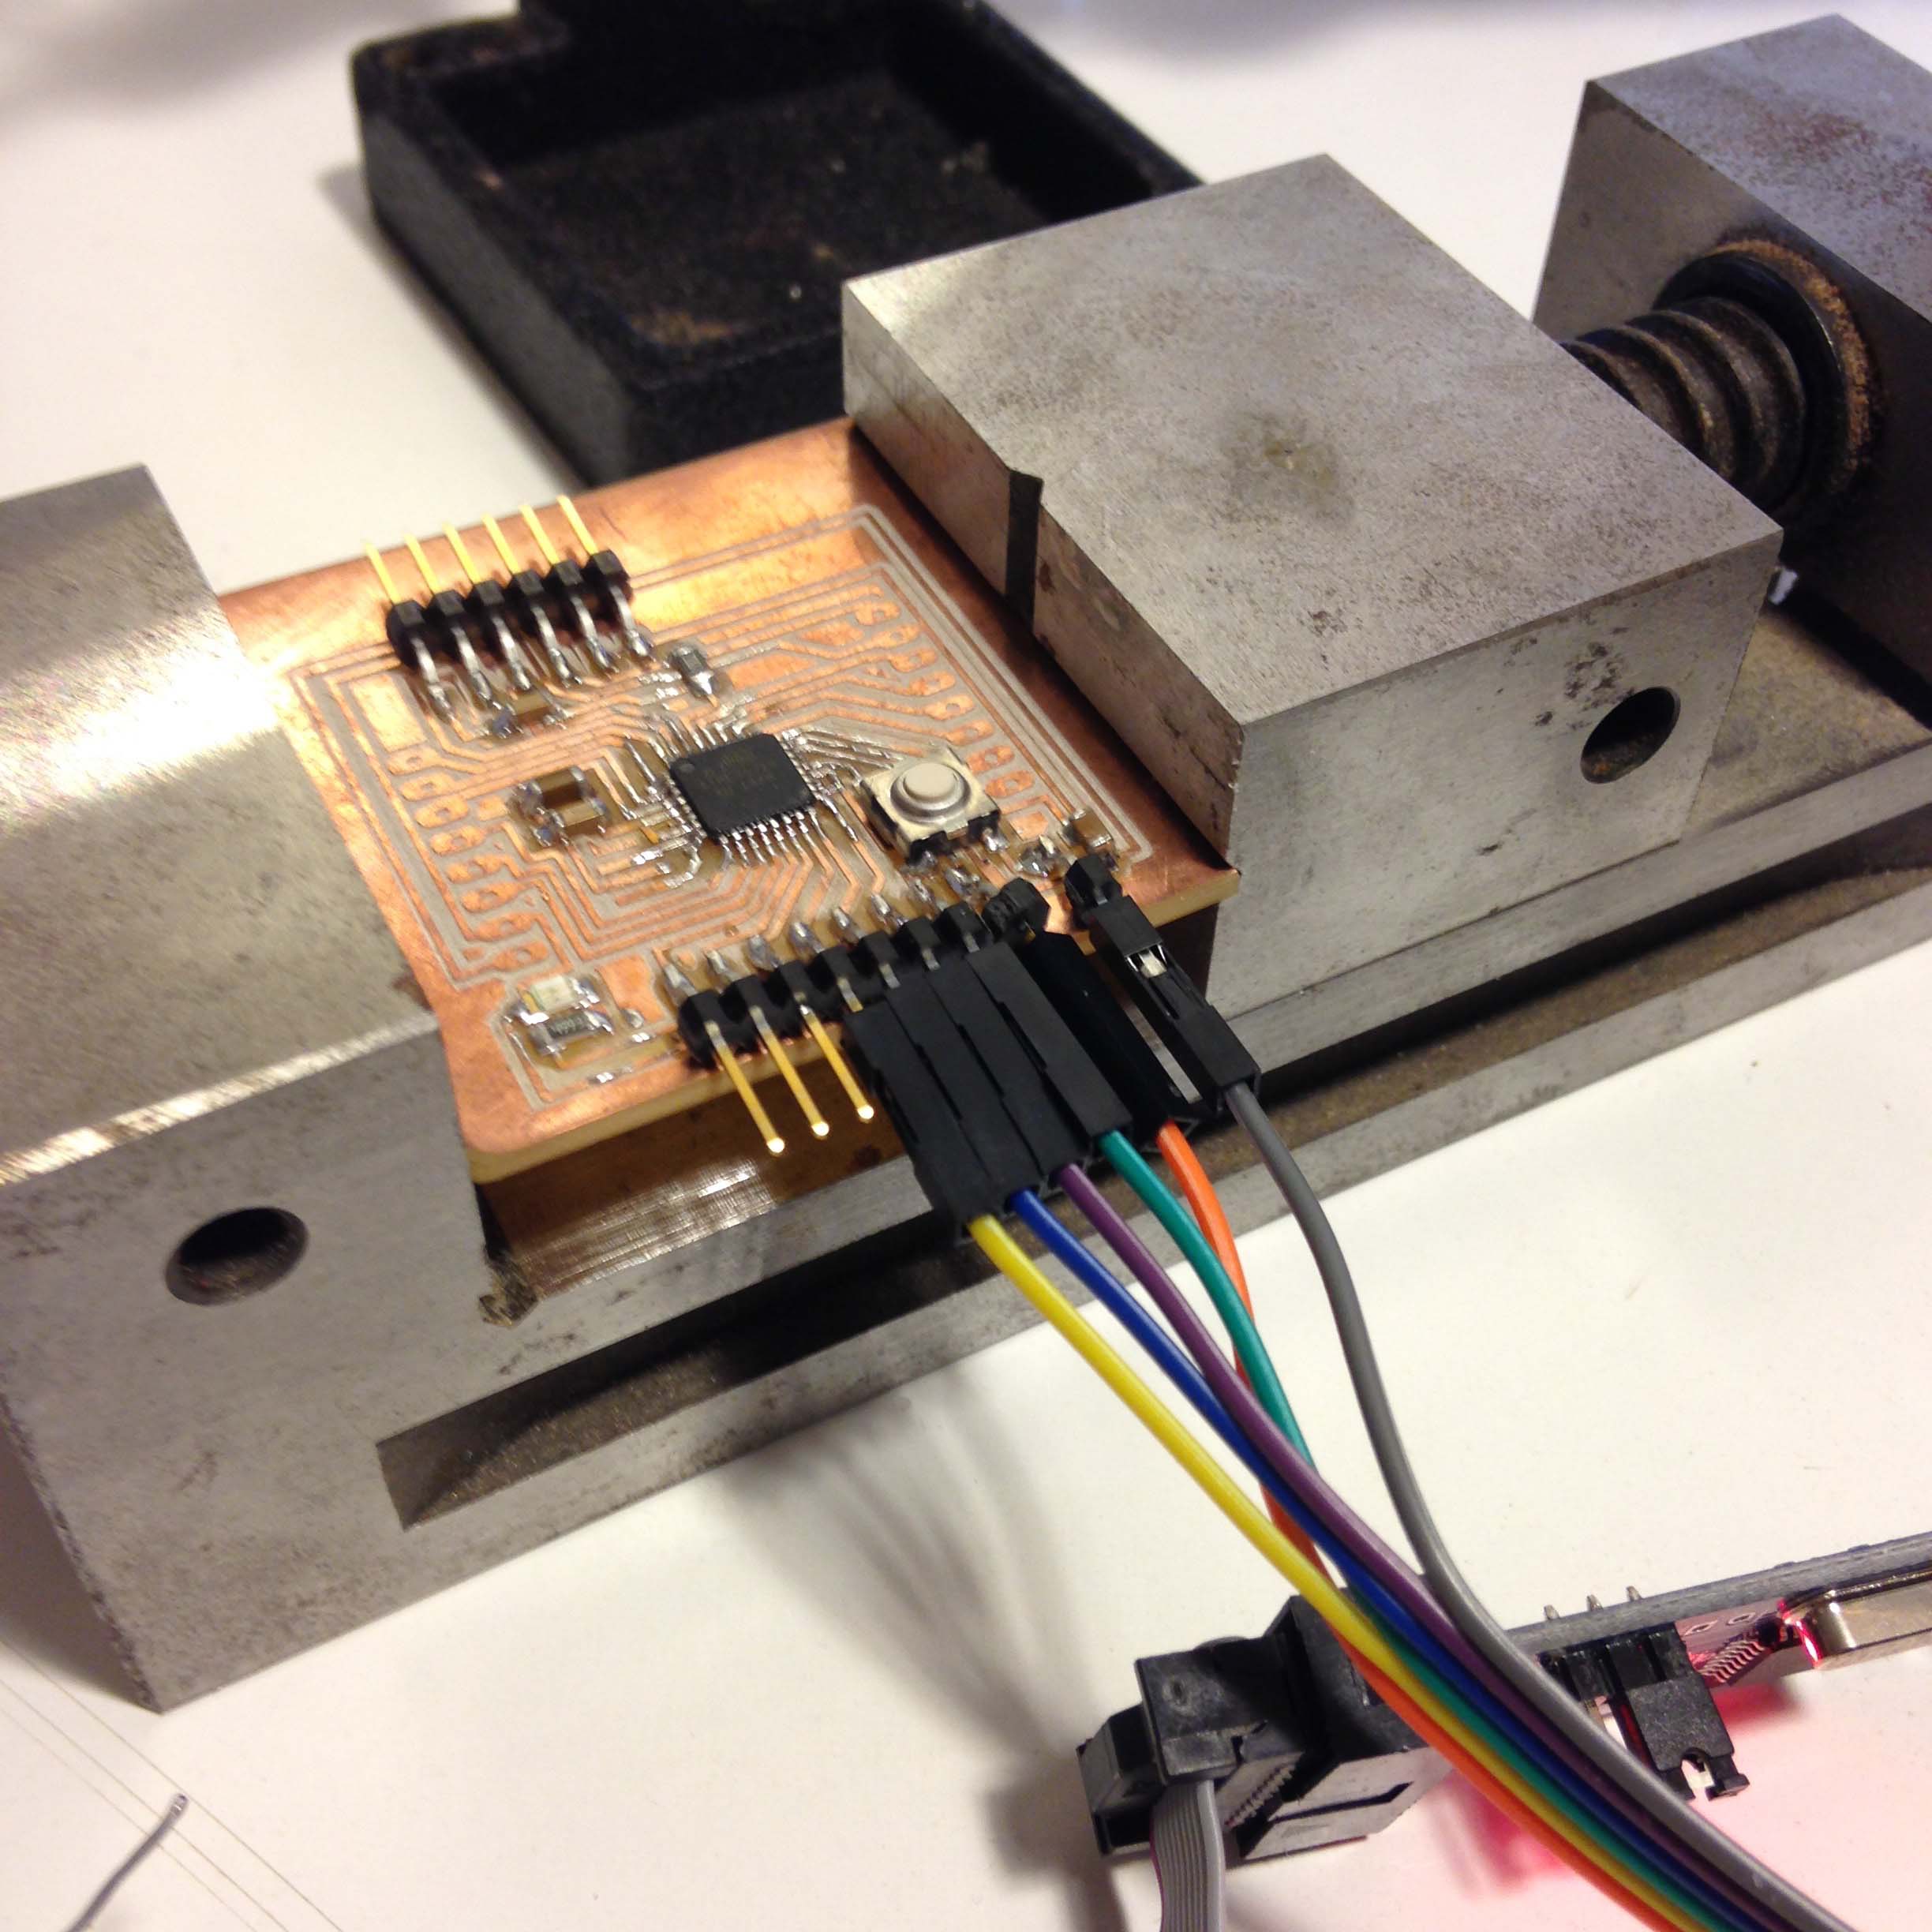
Uploading Serial example with HC-05 module attached to serial, the wiring is simply GND->GND, 5V->5V, RX-TX, TX->RX. The code is sending characters and their ASCII values to serial monitor, I changed the original code original code so it will send data forever, I do this cause I wanted to check the reliability of the hardware, and it`s work for hours without problems.
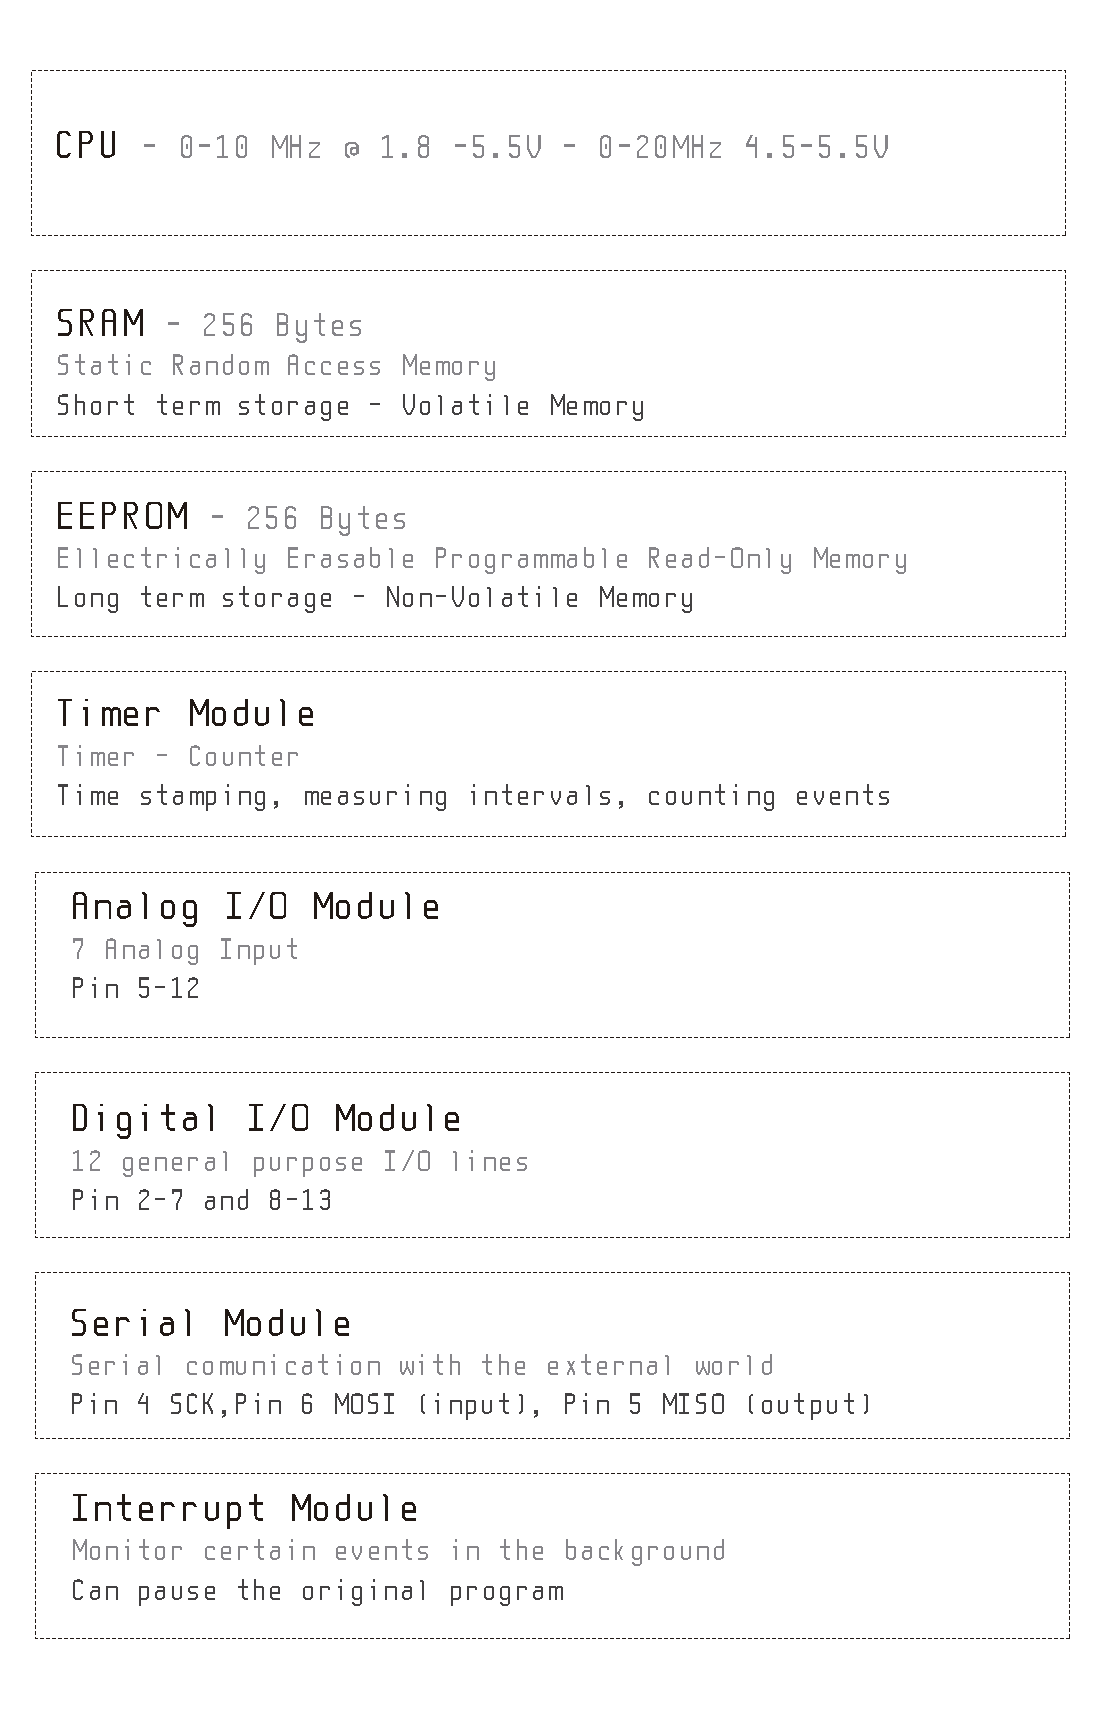
ATtiny44 study
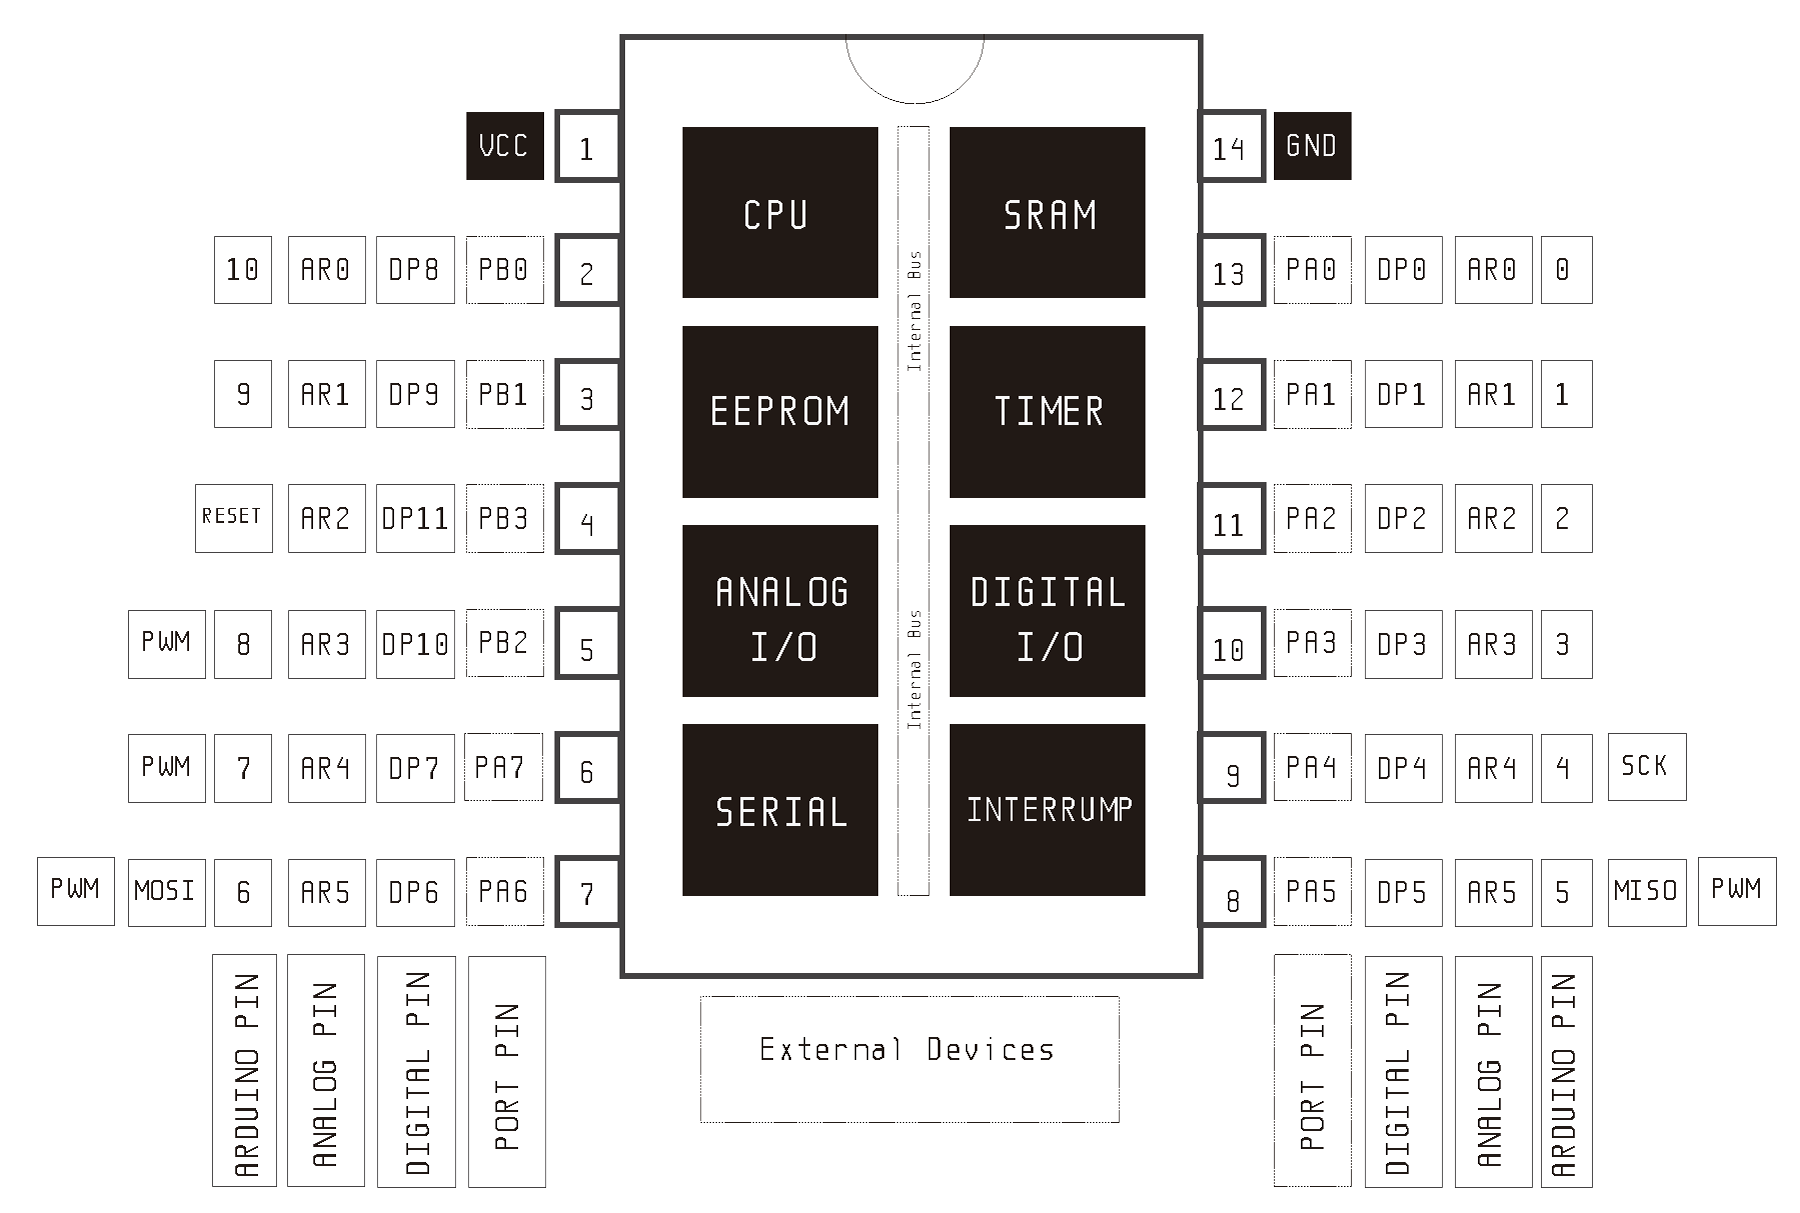
- Based on this picture for understand the IC parts and pins.
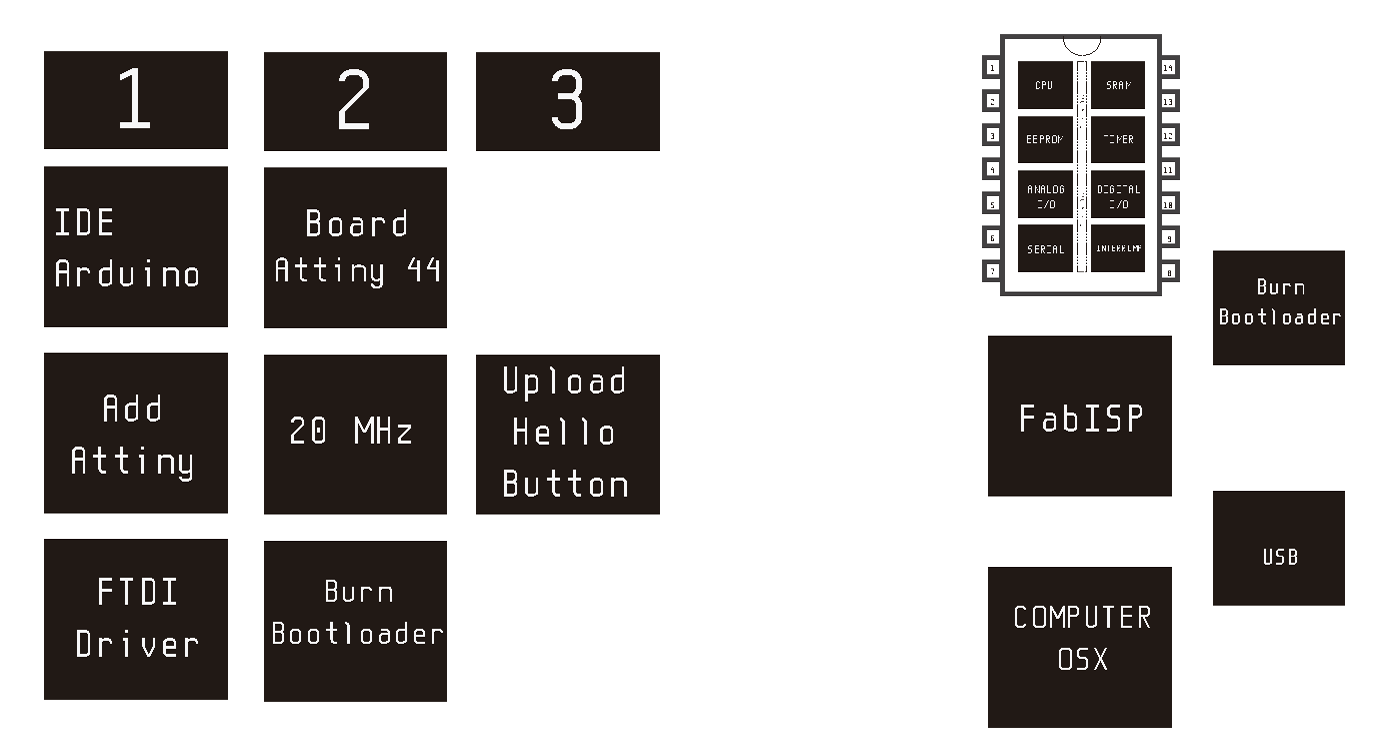
1. IDE with FabISP to burn Bootloader
I followed this TutorialMy first aproach to use ATtiny44 is Burn the bootloader, so I can upload Arduino Sketch. This scheme tries to show the parts of the process.
As shown in this tutorial I added this URL to "Additional Boards Manager URLs" in preferences on Arduino IDE.
https://raw.githubusercontent.com/damellis/attiny/ide-1.6.x-boards-manager/package_damellis_attiny_index.json
Work info:
References: Class, LadyAda, avr-tutorials, ATtiny44 Datasheet, FabISP, SyntaxHighlighter
Description:
I star this assignement by studying attiny44 and understanding the workflow from a C code to a hex then to the IC by ISP. Then I decided to make a FABKIT.