The ISP
The FabISP is an in-system programmer for AVR microcontrollers, designed for production within a FabLab. That is, it allows you to program the microcontrollers on other boards you make, using nothing but a USB cable and 6-pin IDC to 6-pin IDC cable.
Links to files used to make it
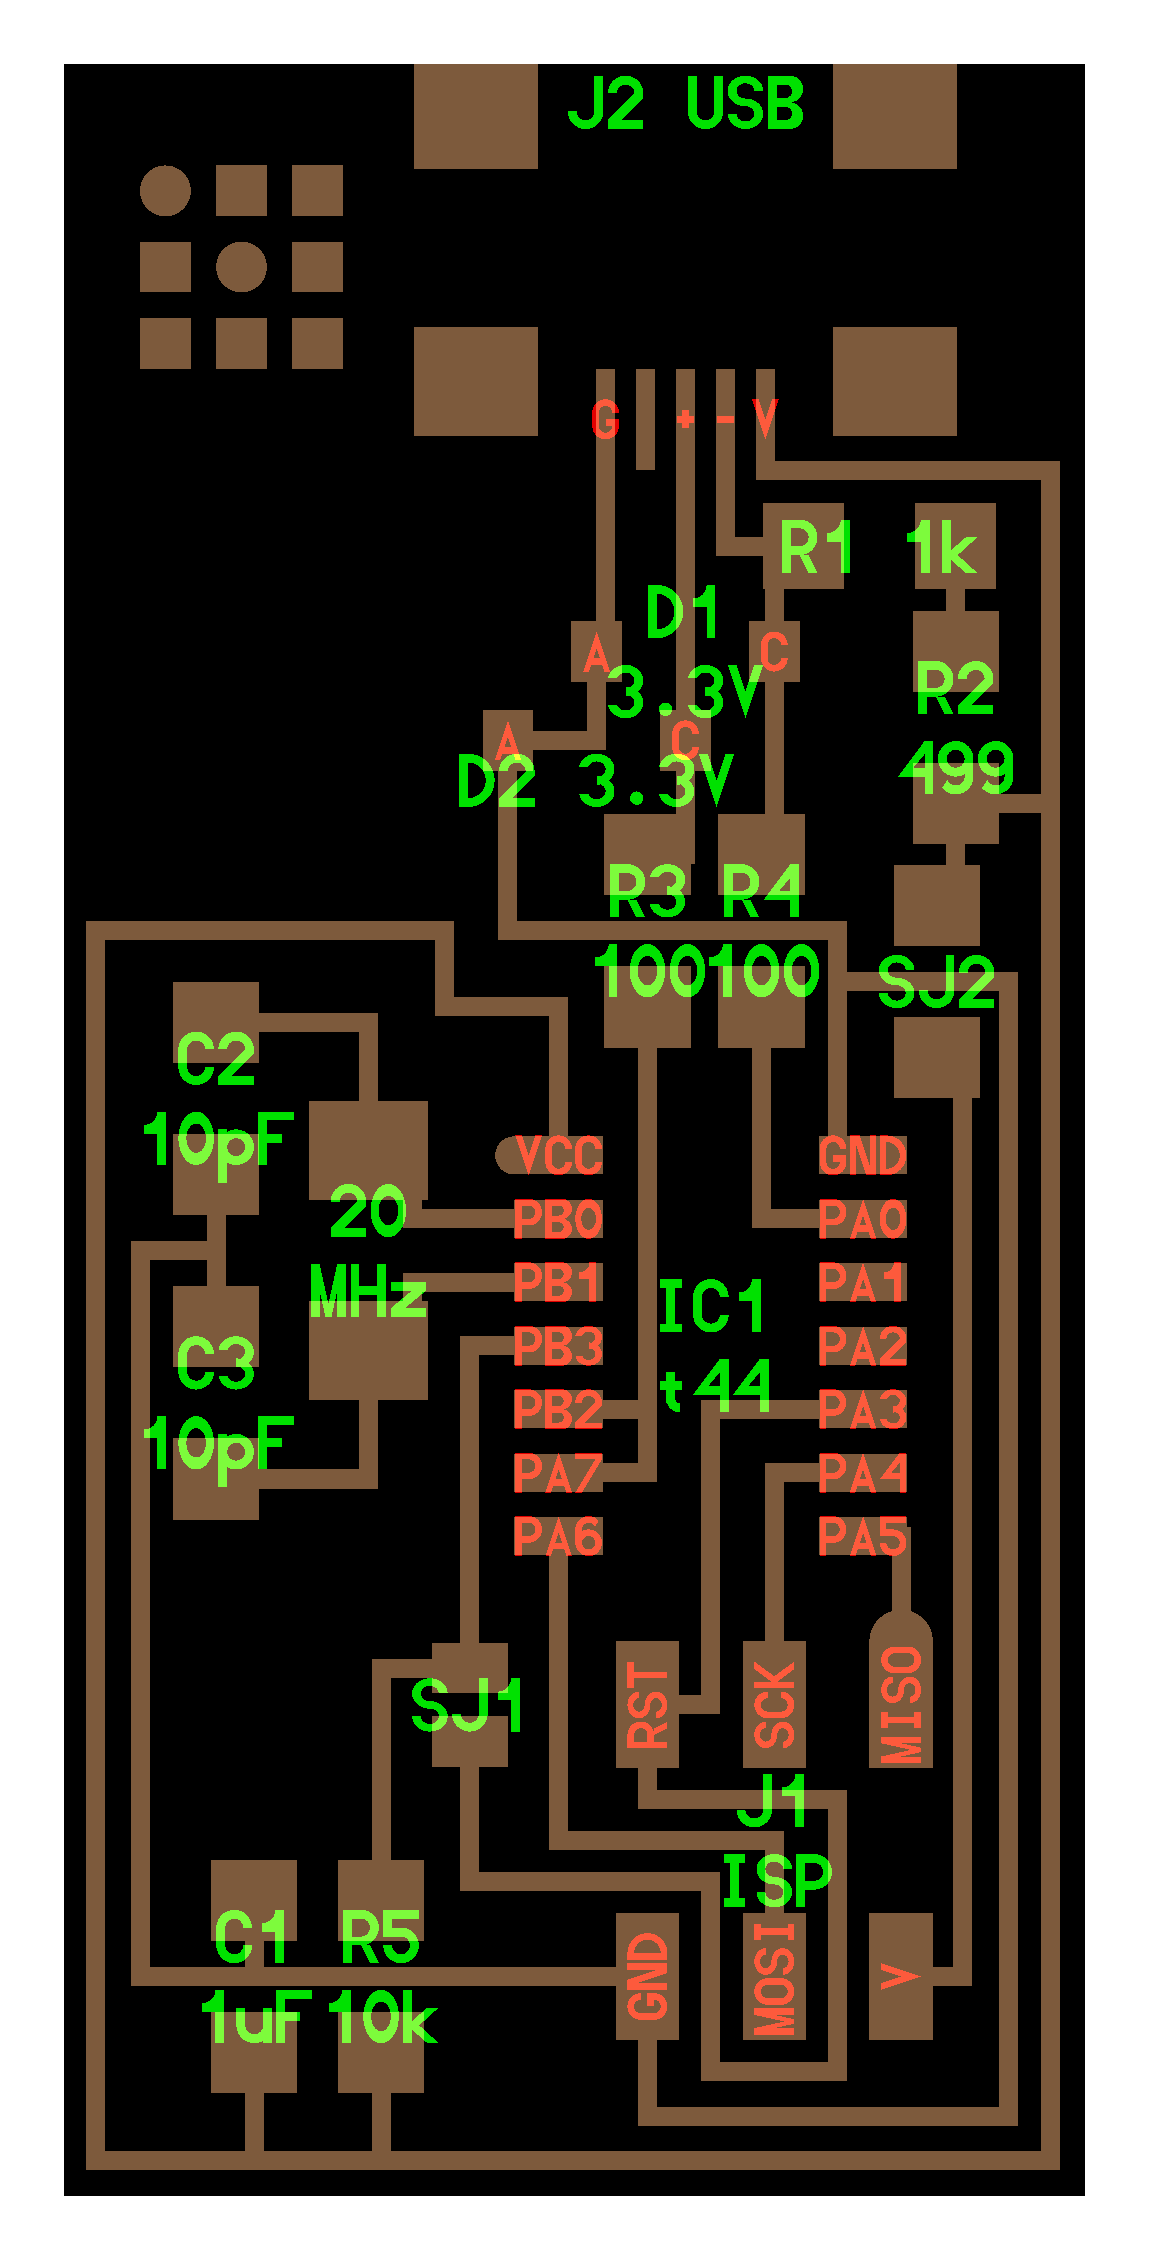
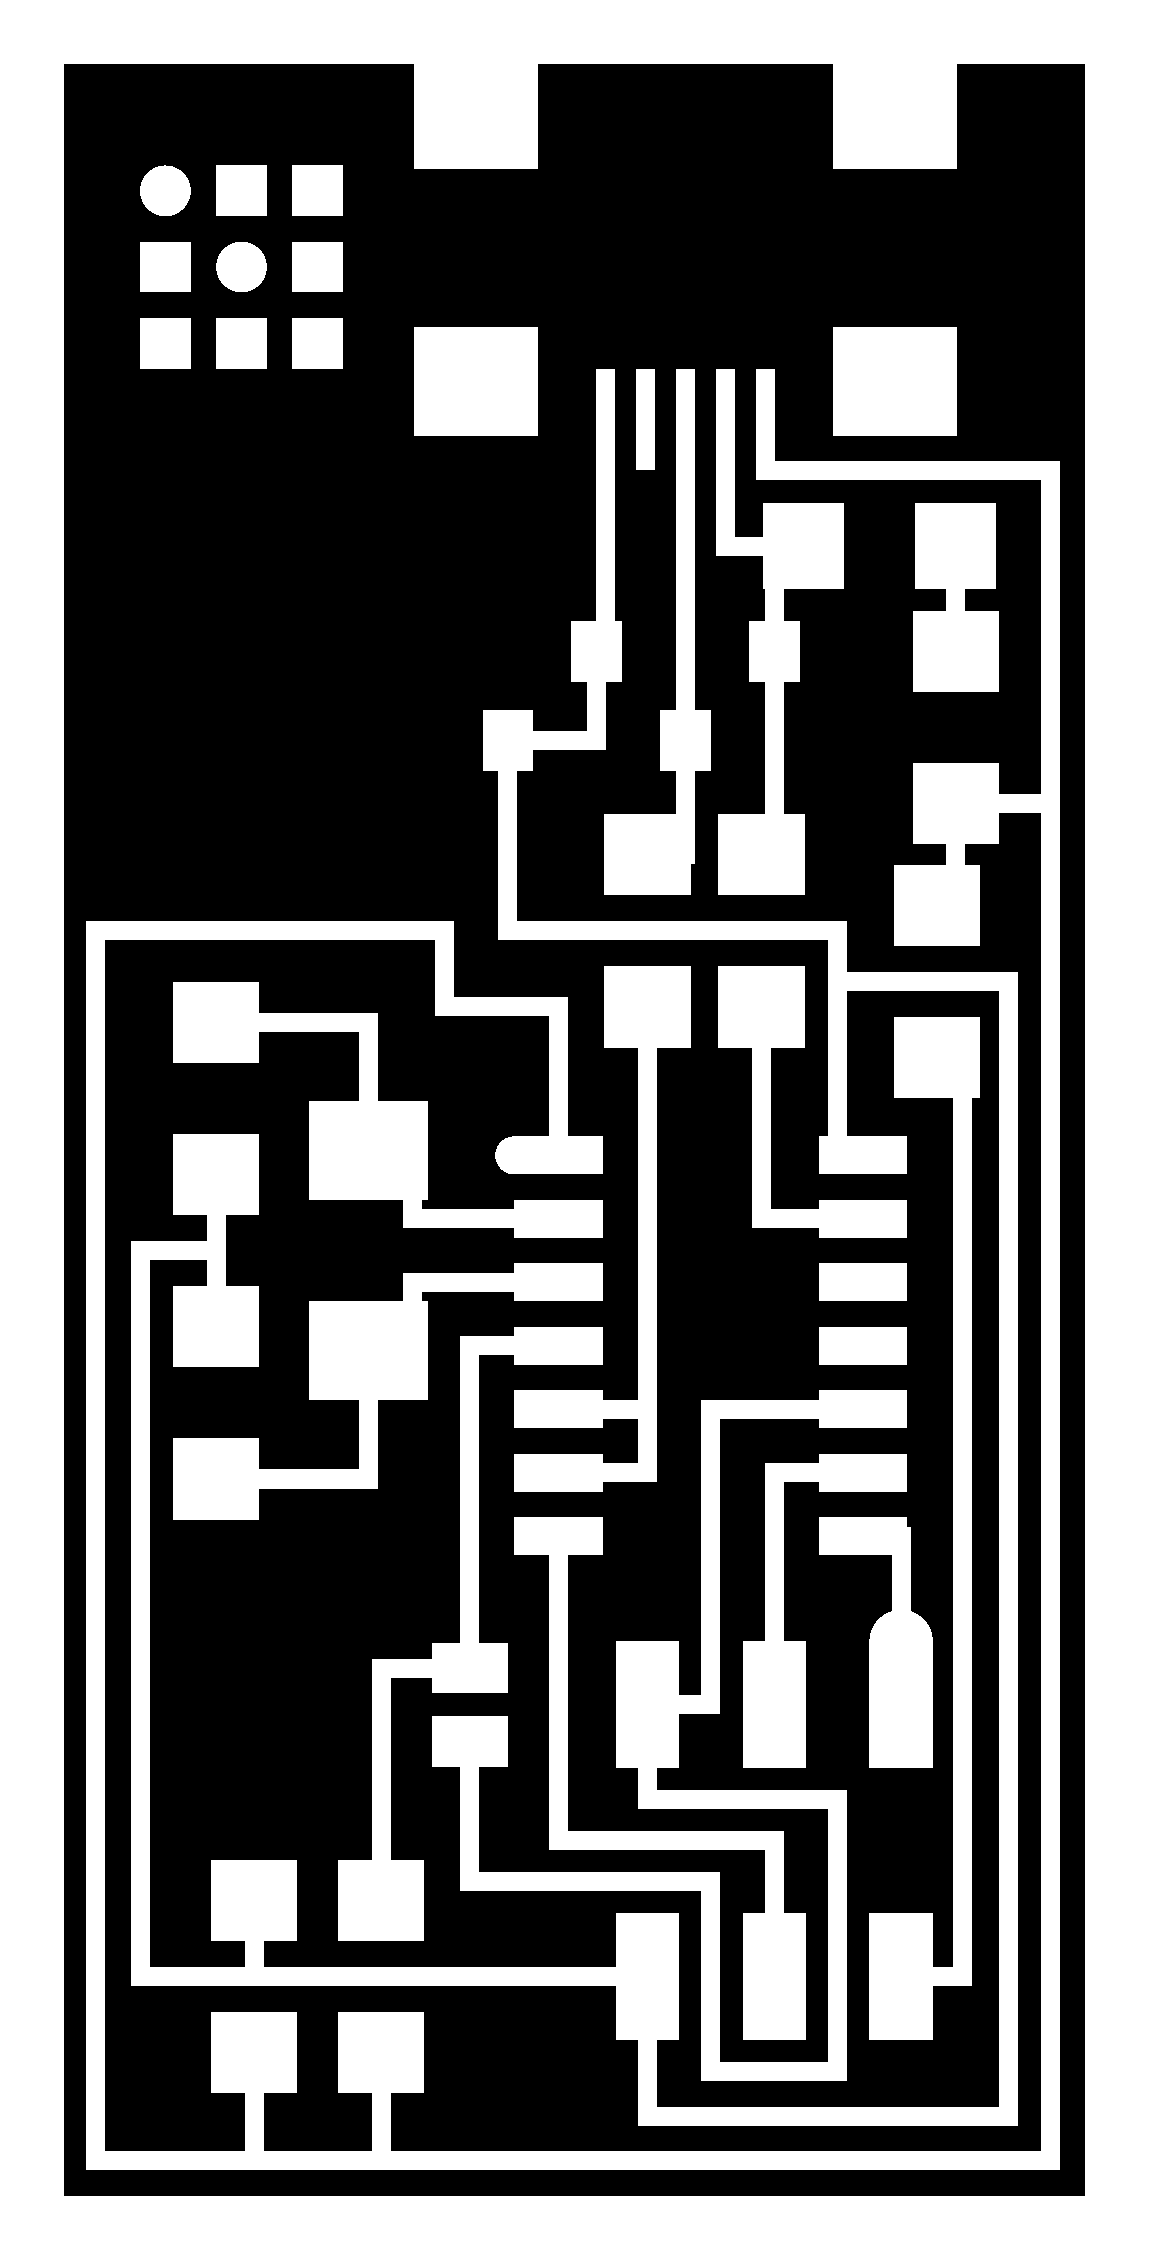
hello.ISP.44.cad board components traces interior firmware.zip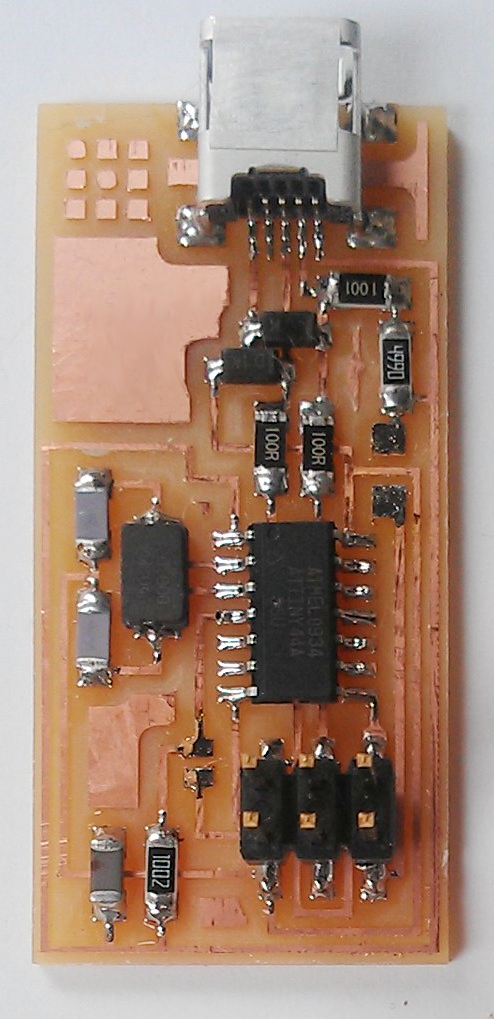
Milling the board
First of we needed to mill the board. For that we used a Roland Modela MDX-20 . Starting with prepairing FR1 PCB (phenolic paper) which is a compressed resin impregnated cardboard plated with copper which the circuit will be milled on.
The board should be rinsed with soap and water before hand to get rid off any surface dirt such as fingerprints that etch the board and can deteriorate it over time, then once clean and dry, turning on the machine then it gets placed on the machine using doublesided tape to affix the board on the sacrifical board.
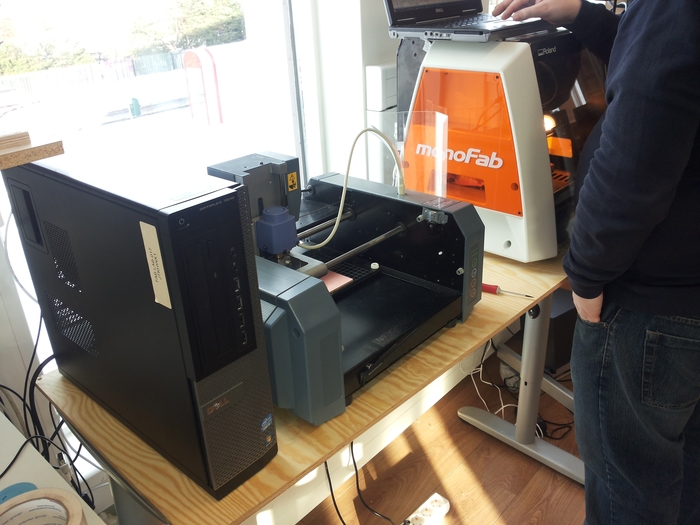
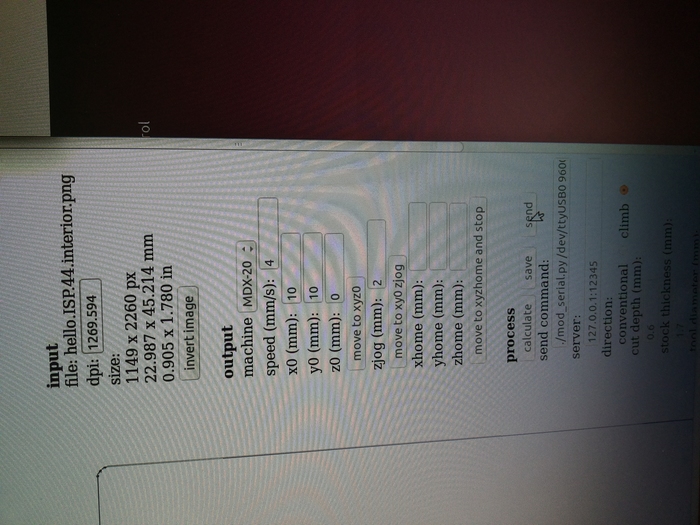
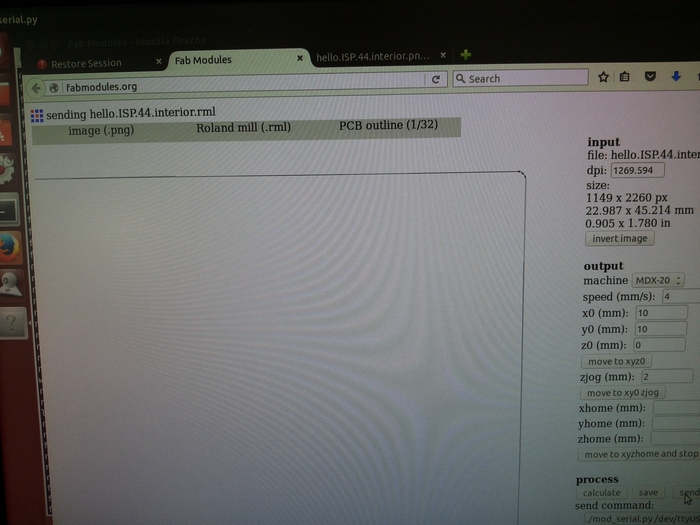
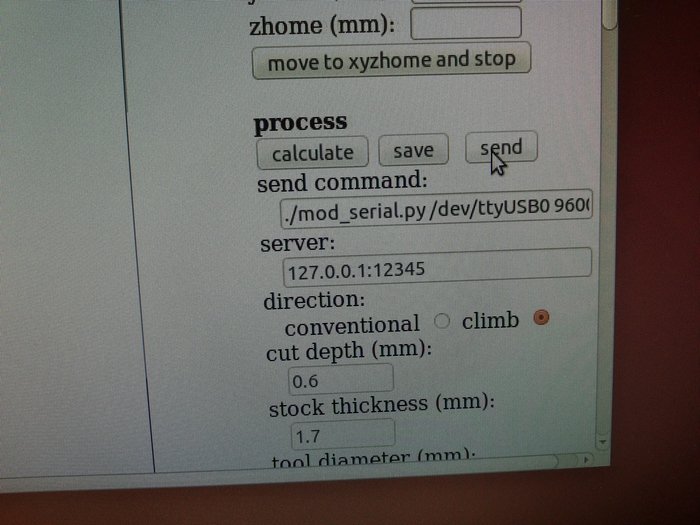
Making sure that the surface is pretty smooth and level so that the milling will go well and there will be a even cut. Then go online and connect with the Fabmodule the settings for the milling
Prepare and setup the machine by putting in it a 1/64 inch endmill bit to cut the traces carefully making sure not to drop the bit because it can break easily. Use an allen key to fasten it. Careful not to over tighten.
My piece of board was not started by me but Hafliði because he had milled the wrong board and needed to make a new one in a hurry since he was pressed for time. Halldór let him have his so he could finish sooner and I got Hafliðis board traced but only needing to mill the inside.
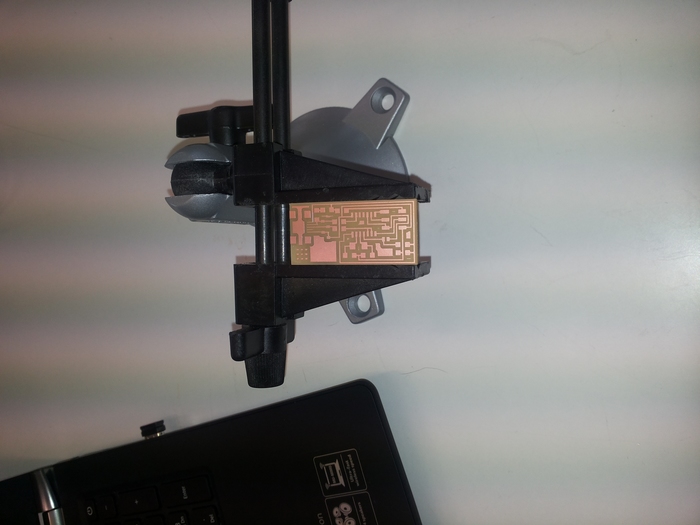
Once the milling of the traces is done you sweep away the debris and dust, then vacuum it to prepare for the milling of the interior which cuts the circuit from the board pretty much the same way as before, replace the bit for the 1/34 inch milling bit, set up the path with the fab module, make sure that the machine path is set because I forgot to to that so it started to do the traces again though no harm was done, it only left a deeper cut in a part of it. So remember to set calculate the cut path each time because the machine does not do it for you.
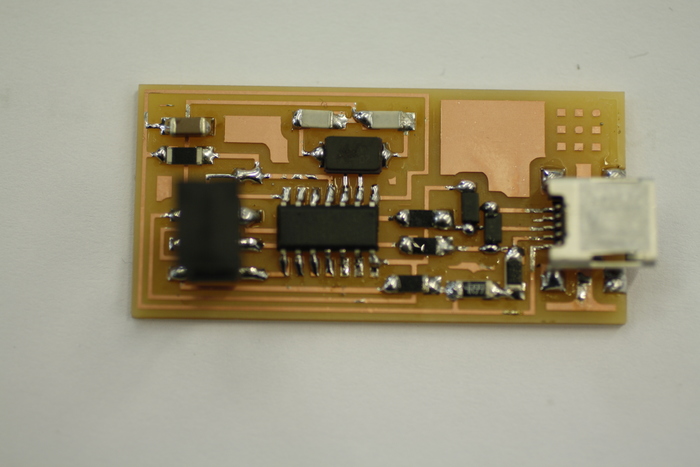
Soldering
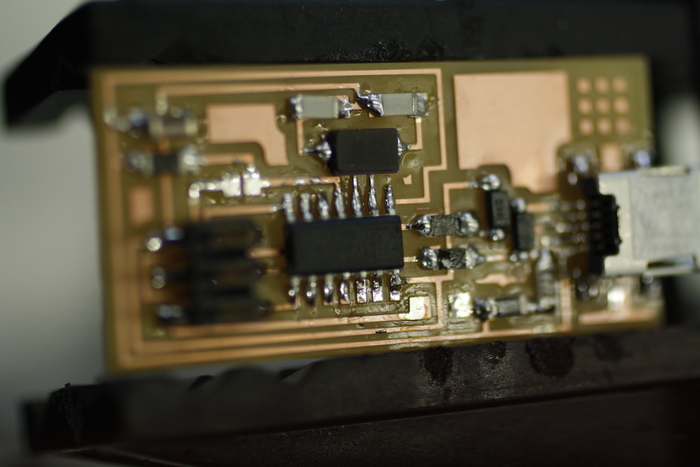
Soldering, lots of tiny parts. Soldering on the USB on circuit started off well then I got to know how useful the braid is, also how hot it gets since solder spilled over on to another connection.
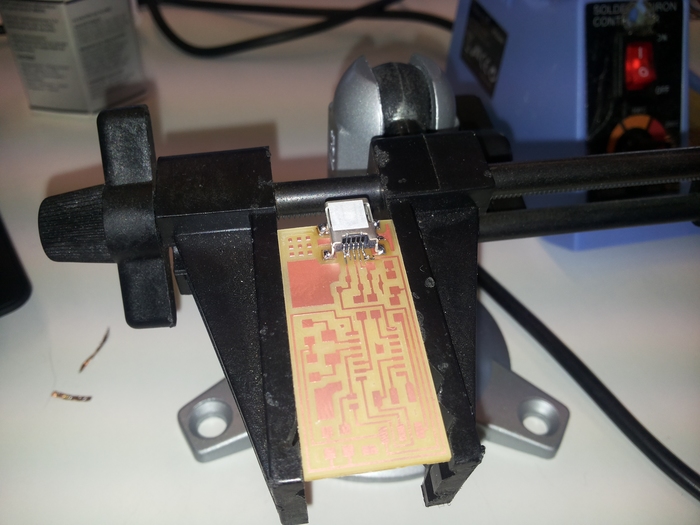
I also tend to use a little too much solder and I think I dont allow the solder to flow and I then pull it off a bit making points or it flows onto another part next to where I'm soldering making a connection
so using the braid to correct and remove excess solder.
Since the batch of resistors were not marked because they had recived an unmarked one it became a little difficult to be a 100% sure of taking the correct piece from the box so to clear the confusion the piece was measured using a micronomiter.
Testing and programming of the board will be done on Monday. Hopefully it wont short and not work.
Programming
Smoke test was successfull and it did not heat up.
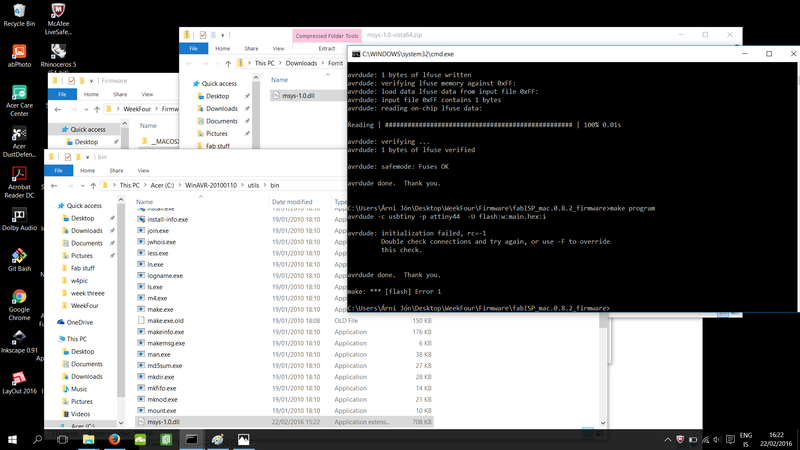
Programming it with another ISP I had to install Firmware and a WinAvr then fix the Winavr since it is not Windows 10 compatible fixing the makefile.
In this pic is how an error looks like if it is disconnected or the programming does not work.
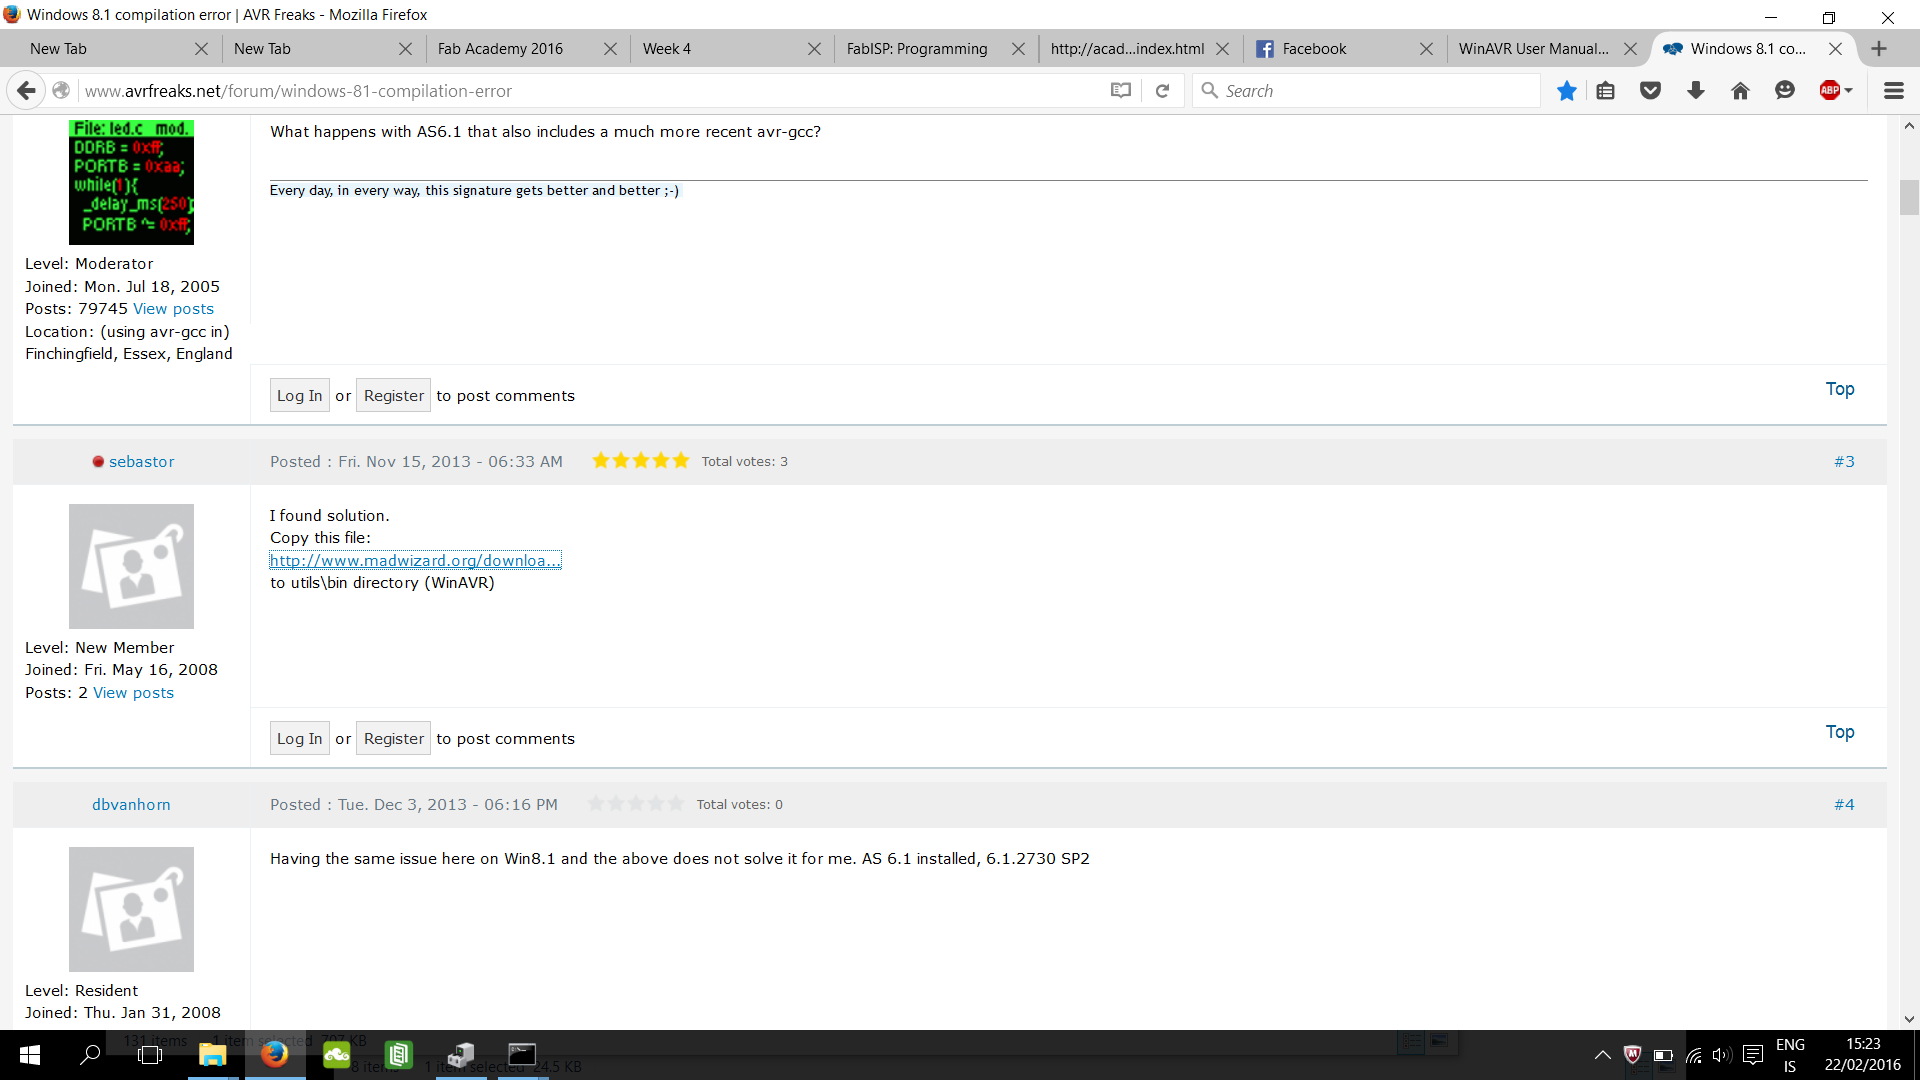
The site where the fix for WinAVR was found.
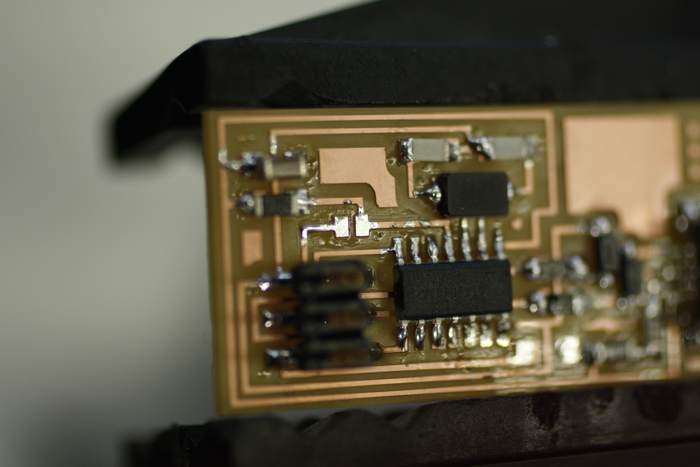
After programming I it did not register on the computer when plugged in so Bas assisted me in bug checking it and found out that I needed to solder a leed on the USB connector better.
Once the ISP was programmed I removed the solder jumper and 0.0 resistor jumper.
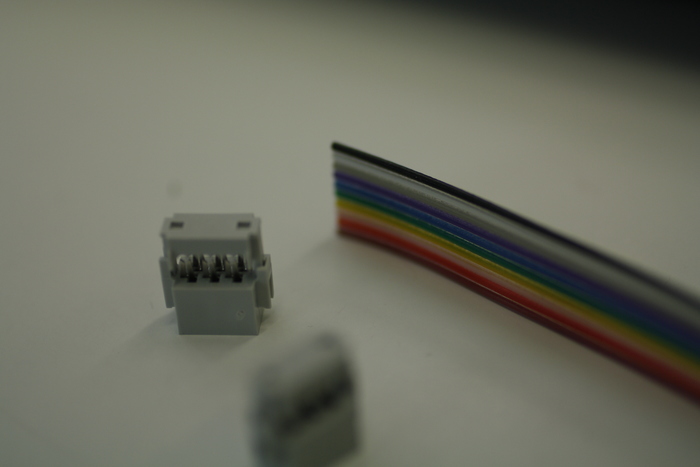
NOTE: making the ribbon connector make sure that it Keys in the same direction so when connecting two boards together the same color wire goes on the same pin on both boards. Facing the tiny44 chip
Troubleshooting
Looking at the board seeing if there are solderconnections that shouldn't be there if there are any gaps between parts and the board, looking at specific sectors like the USB, crystal, chip. One of the possible causes could have been that there was trouble with the clock so the ISP would not do anything because it would not receive any info from my computer to tell it to star. The soldering of the USB was not right
The last one was the cause and once it was fixed I heard the ding from the computer and it was functioning, so all I had to do was dissconnect the solder jumpers.
The finished ISP
Designfiles
Files from Eagle and the .png's also a pdf of the components with pictures made by a cosudent of mine Inger Le Gué-Pelt
Interior Parts Traces
ComponentsPDF