Assignment
- Test the limits for your 3D-printer (group project)
- Design and 3D print an object (small, few cm) that cannot be made subtractively
- 3D scan an object (and optionally print it) (extra credit: make your own scanner)
Testing the 3D Printer Limits
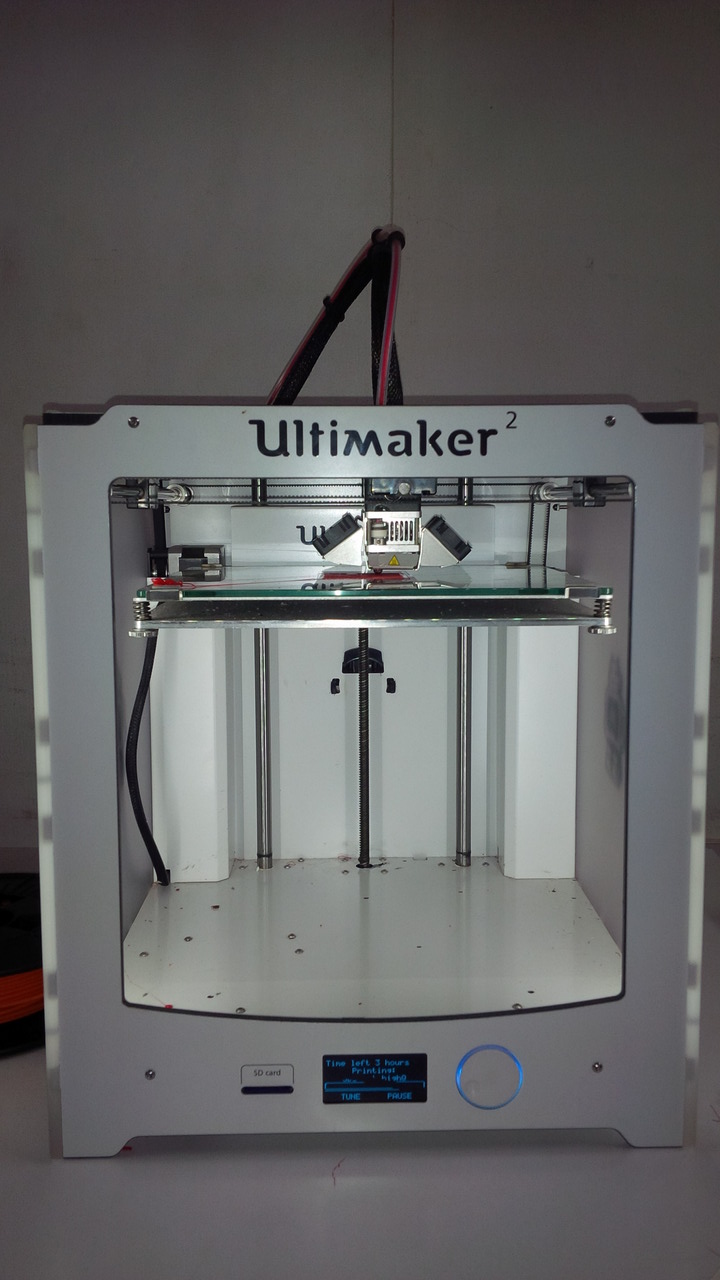
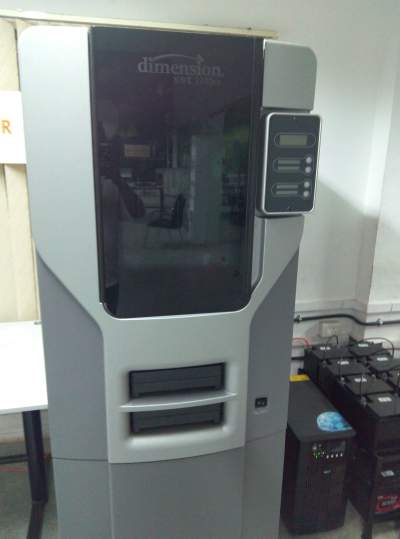
We have an Ultimaker 2 and a dimension sst 1200es in our FabLab. We decided to test the limit of ultimaker 2 because of the time limit and beacuse of the unavailability of the dimesion printer.
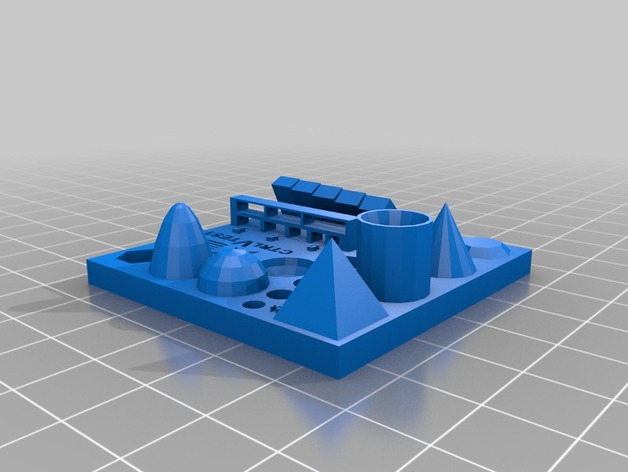
In order to test it we looked for test projects on Thingiverse and shortlisted a design which seemed complex enough.Here is an image of the design file as well as the link to the
site:
Link to Thinnkverse

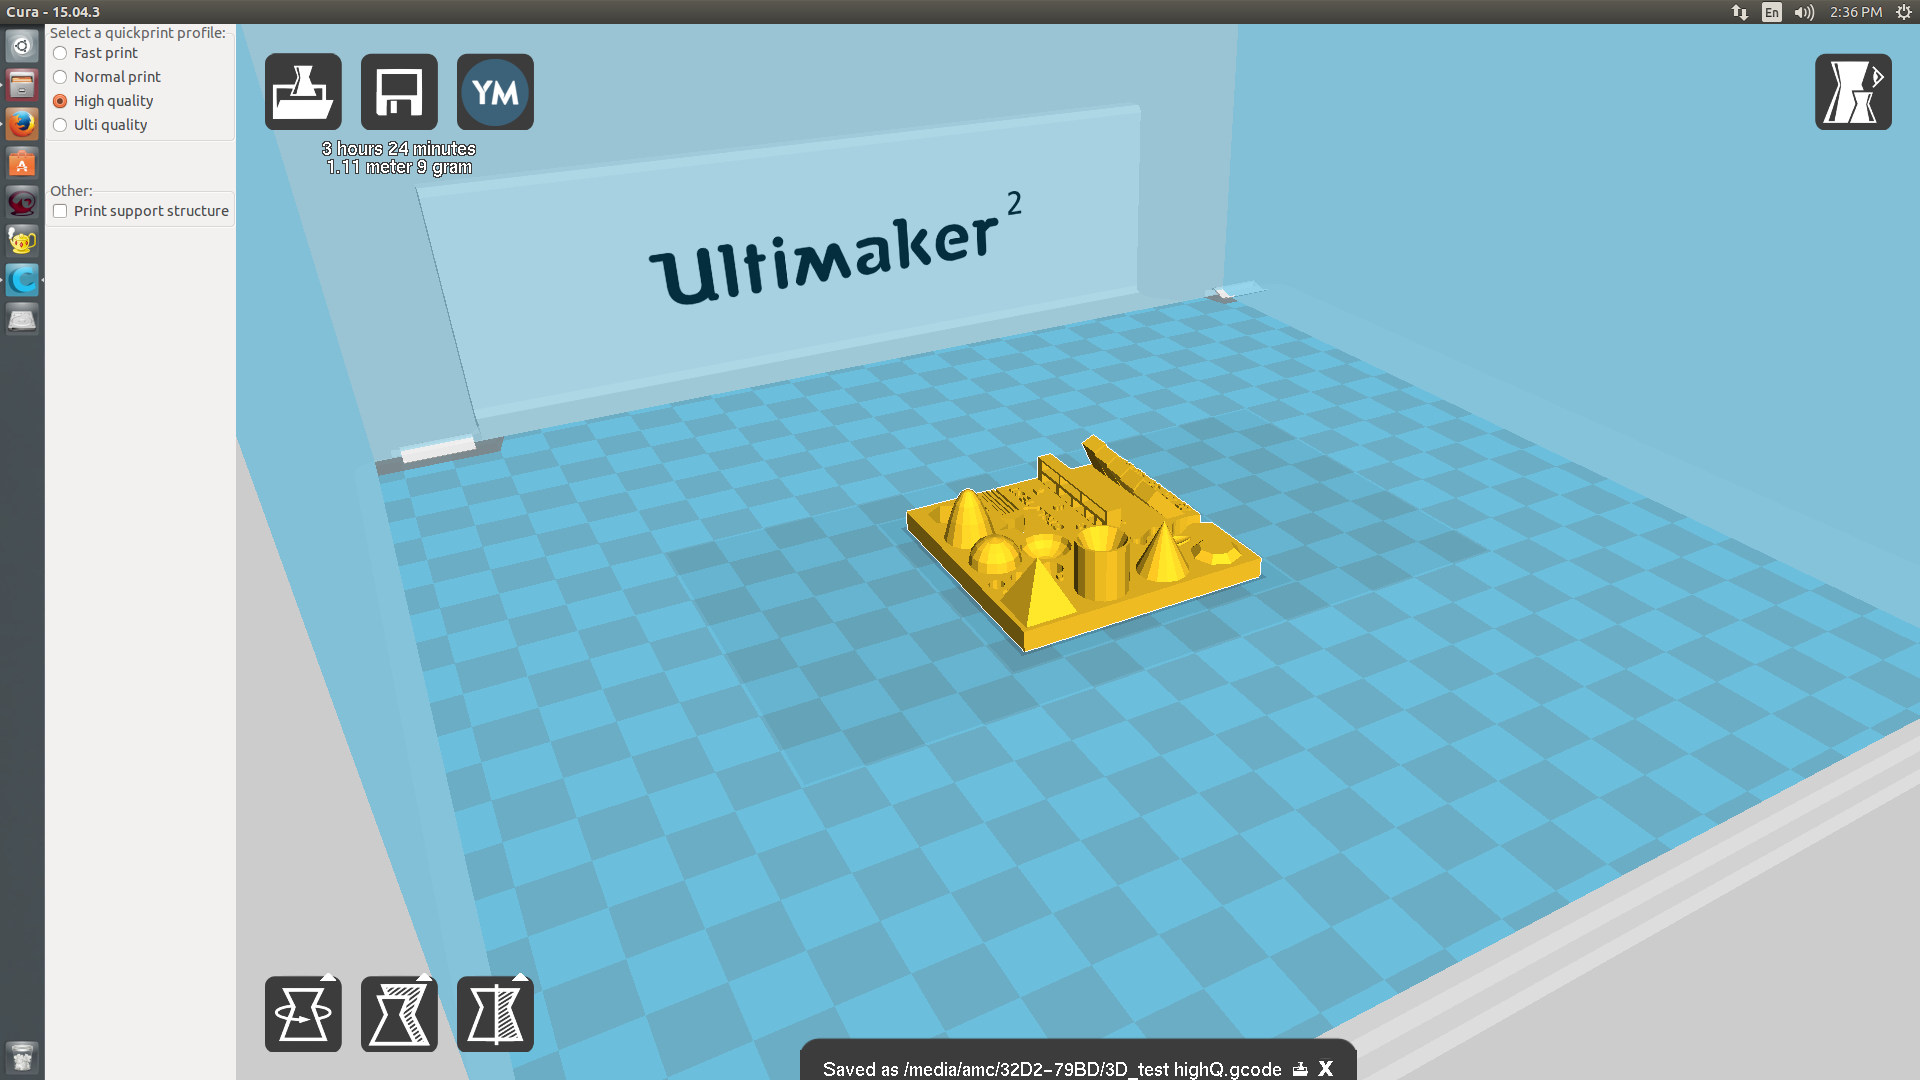
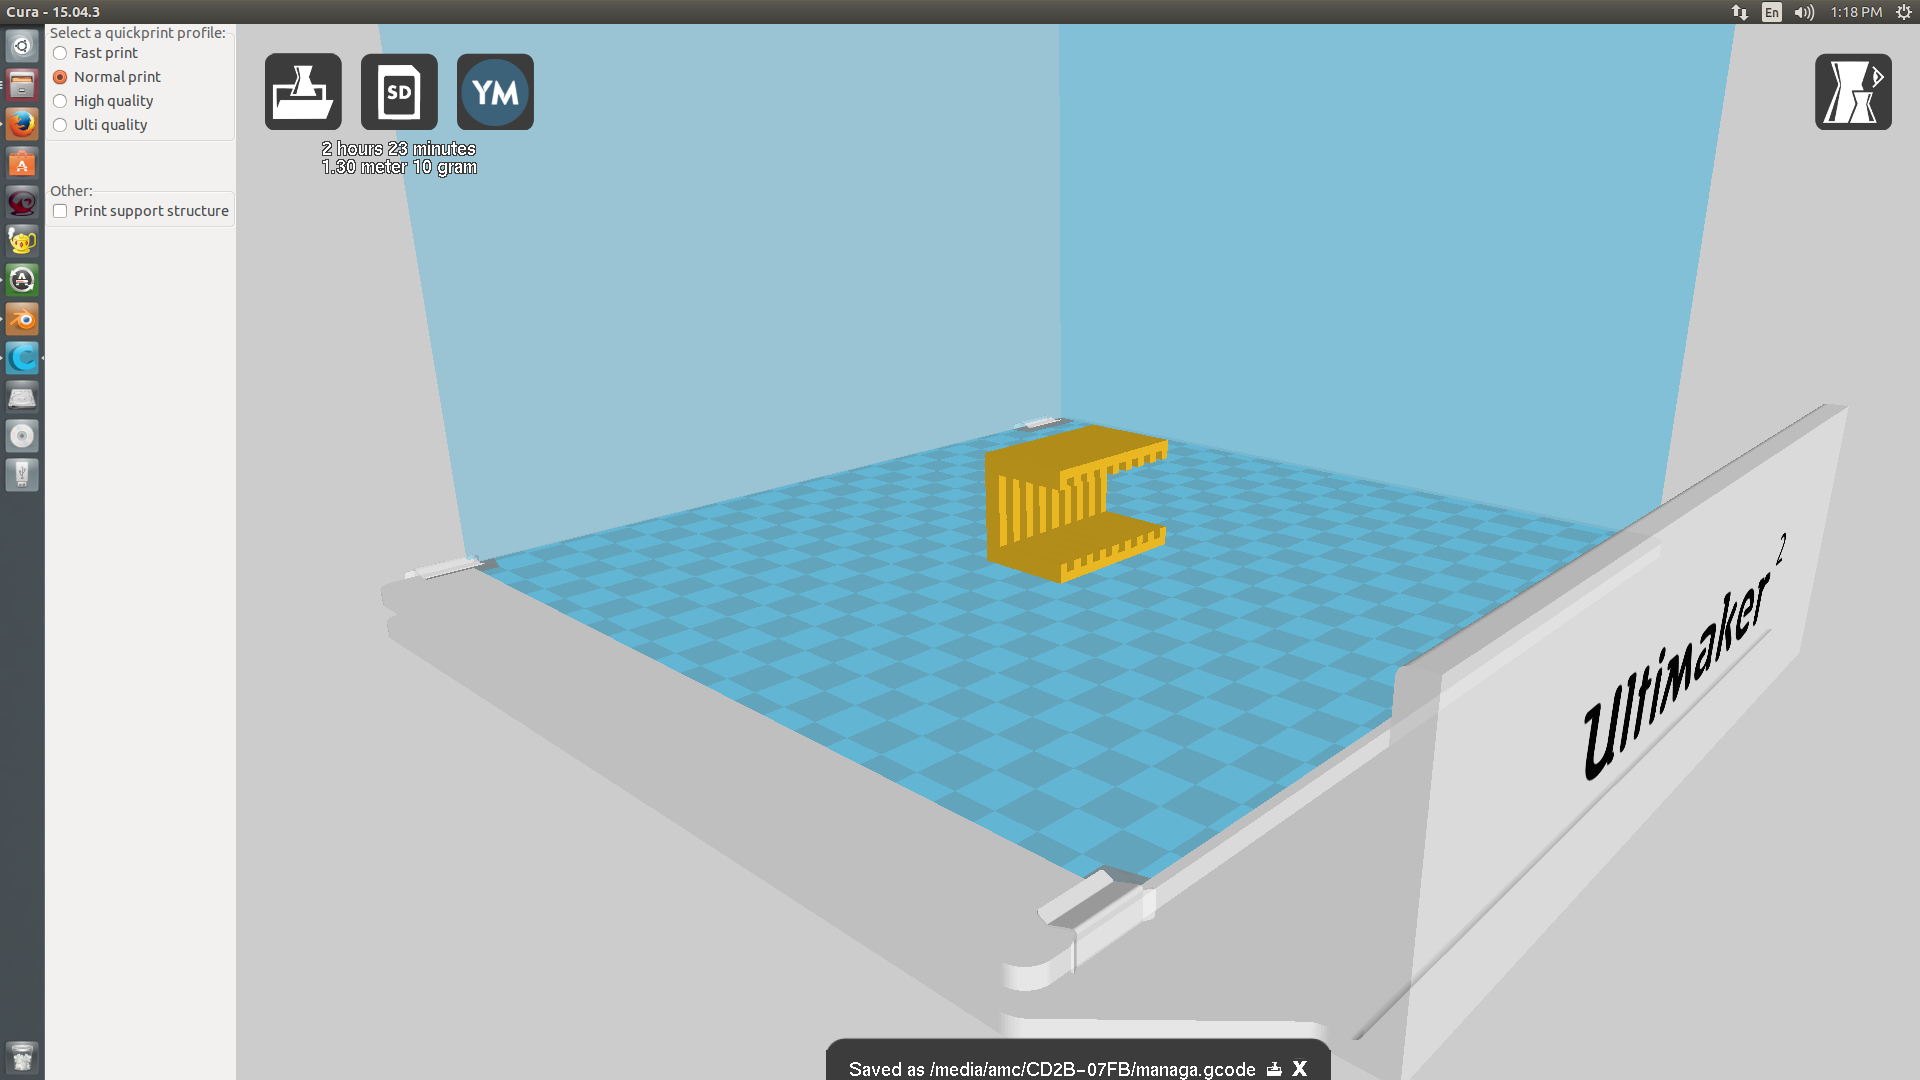
Here is the STL file opened in Cura, which is the software that Ultimaker provides to convert from STL to G-code.
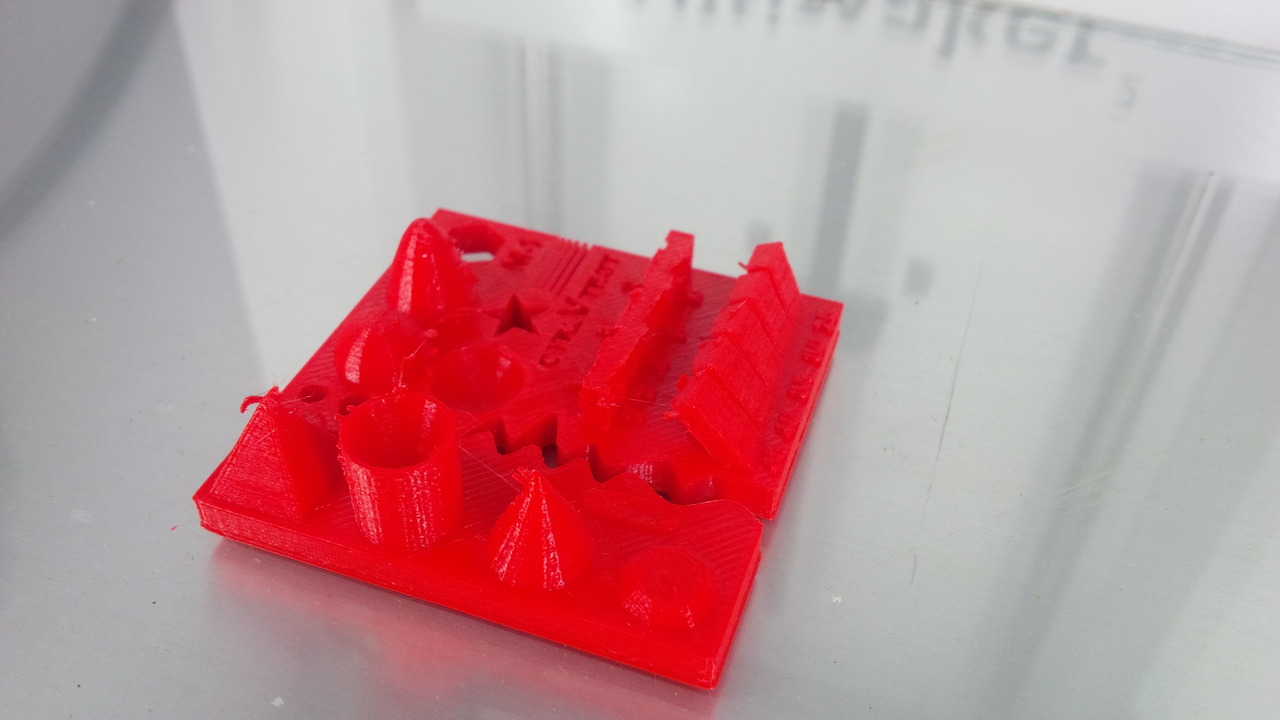
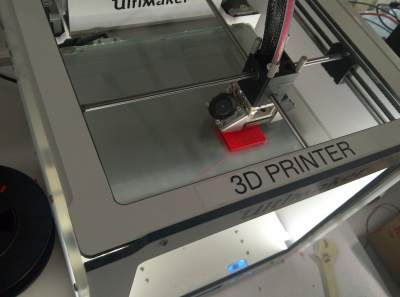
The print took about 1 hr to complete. Here is the finished product:
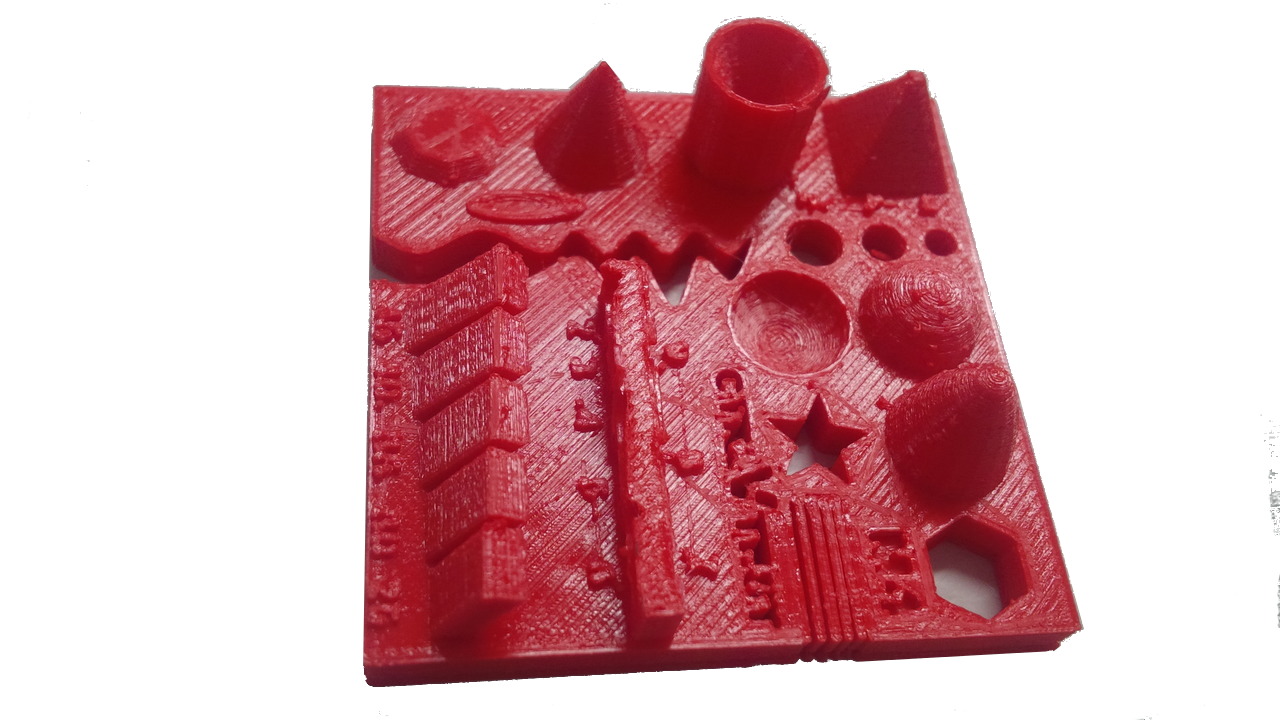
Here is how Ultimaker performed on all the tests:
|
|
3D Printing
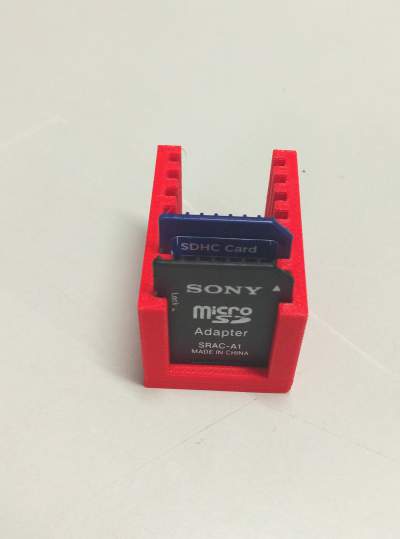
I was behind schedule and didnt have much time to design a file to 3d print. So i decided to downlload a file from the net and modify it according to my specifications. The design i ended up with was a SD card holder, very useful since i am always misplacing and forgetting where i put my card.
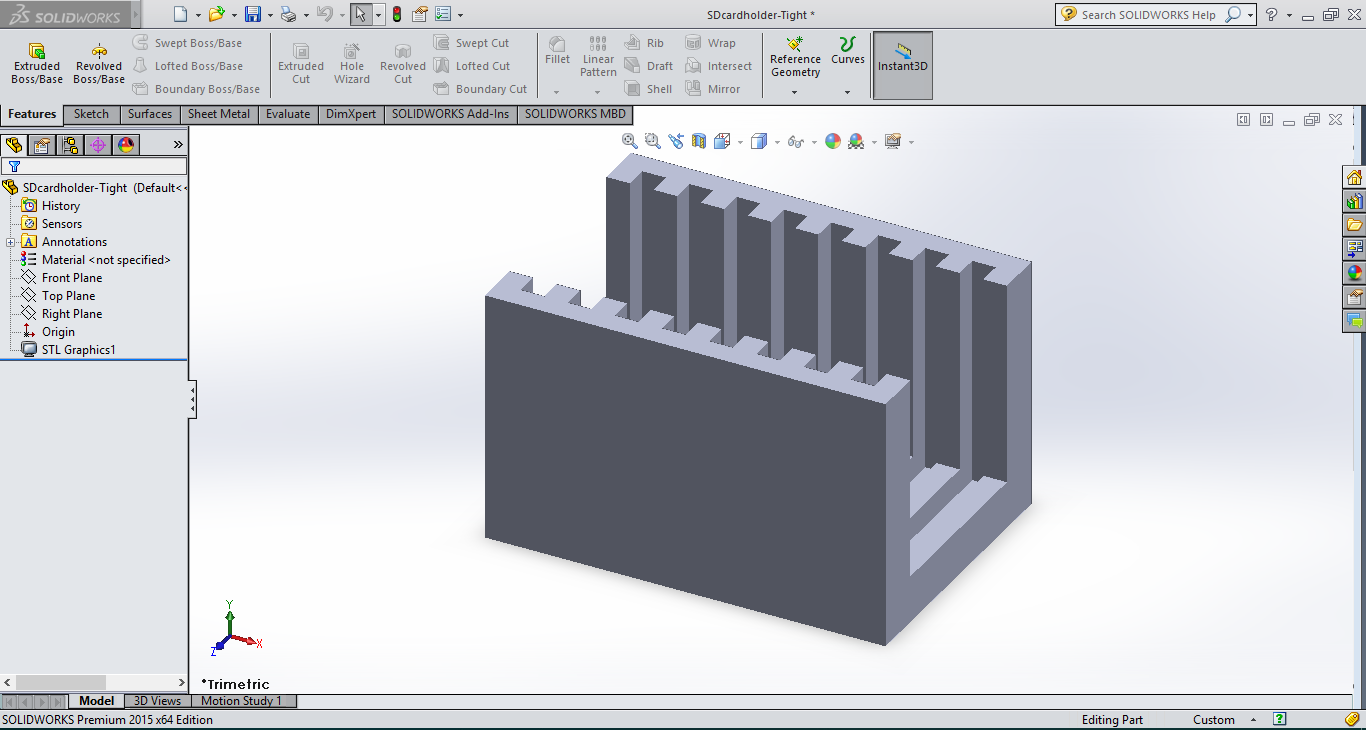
The design file needs to be exported to .STL format inorder to print.I used cura for making the gcode.
The orientation was wrong.so i fixed the orientation and next step was to print the design. The estimated time for completion was around 2Hrs.

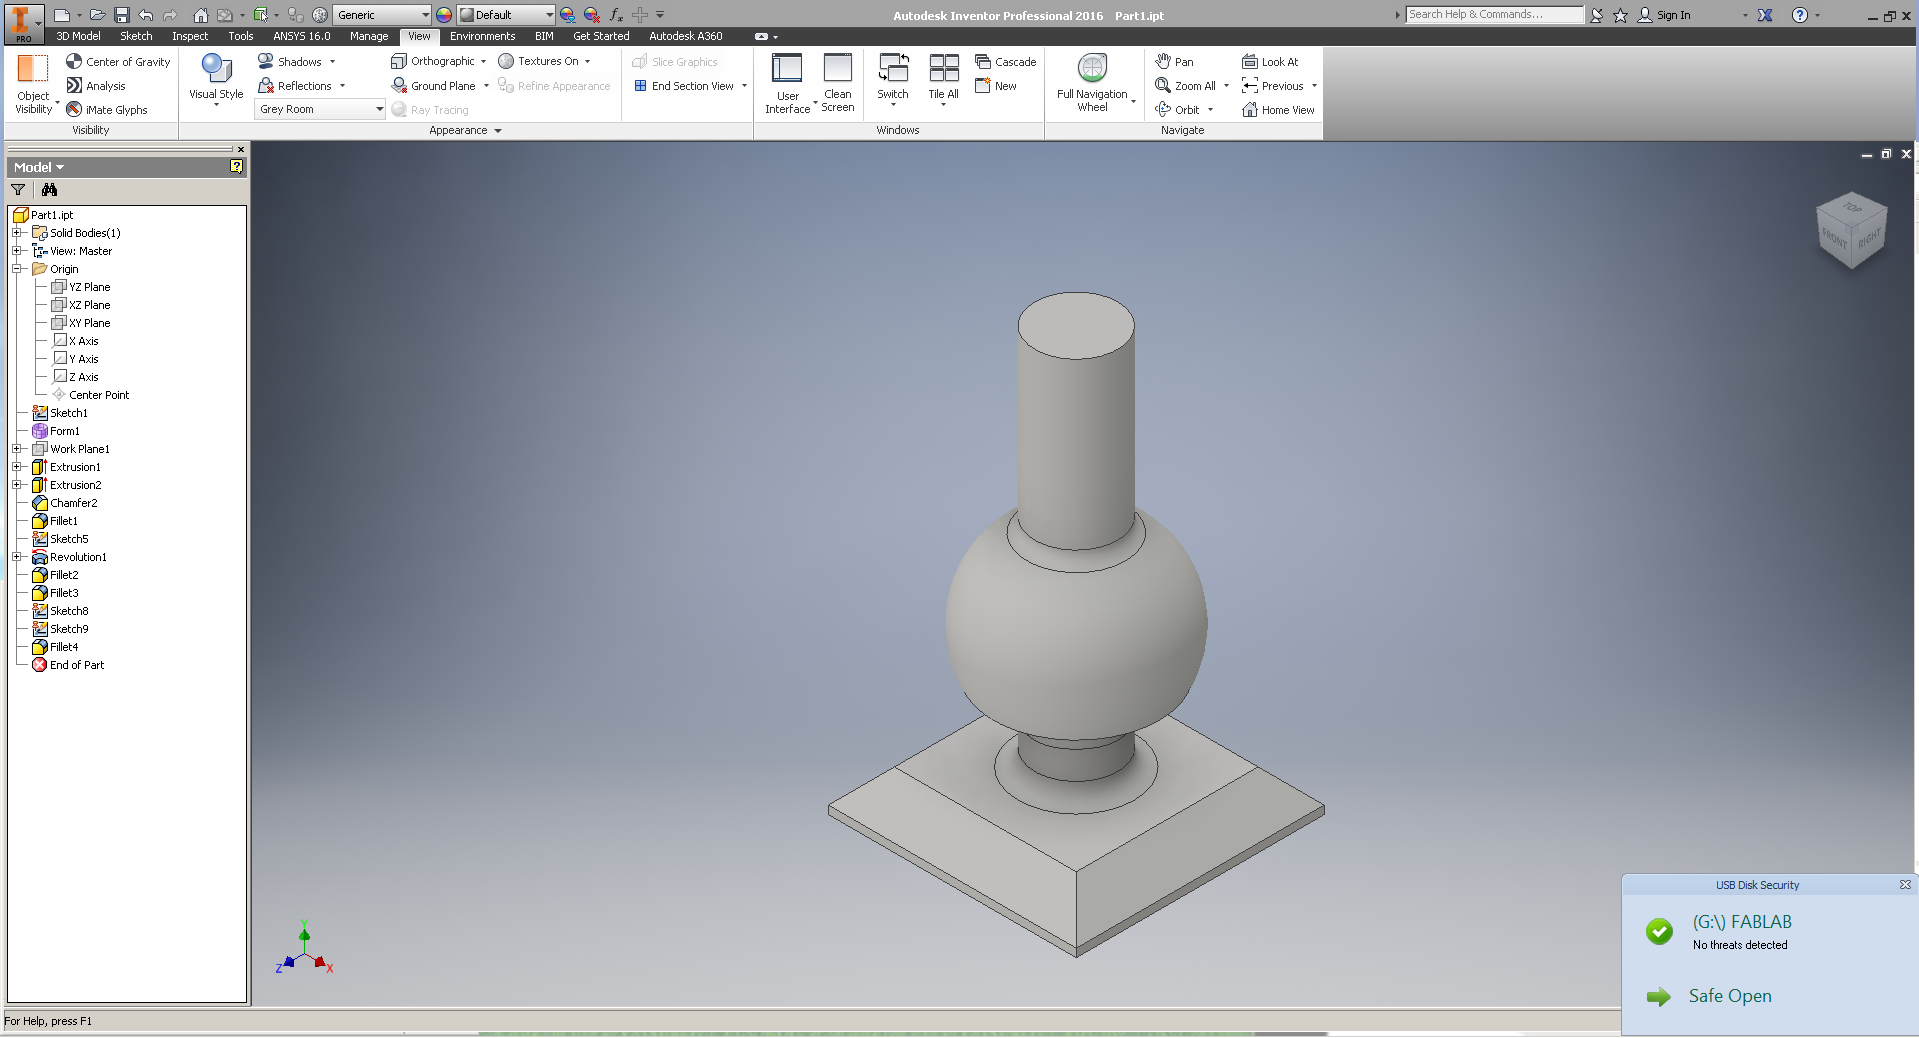
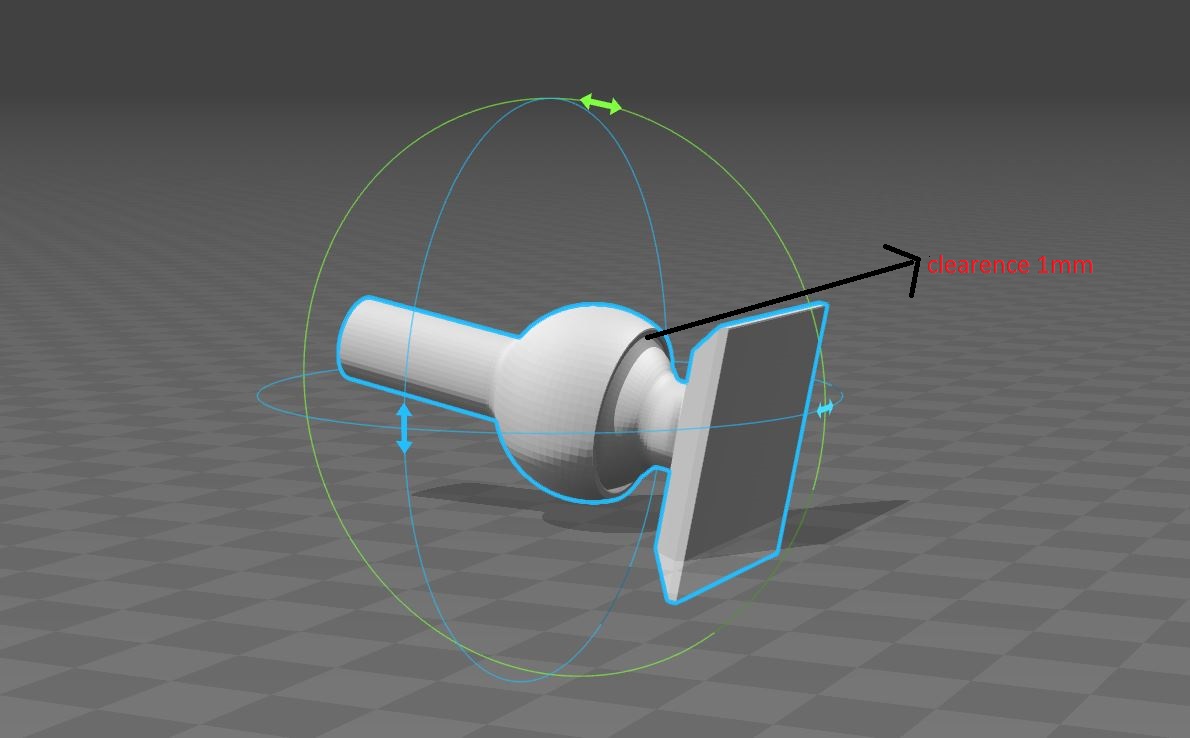
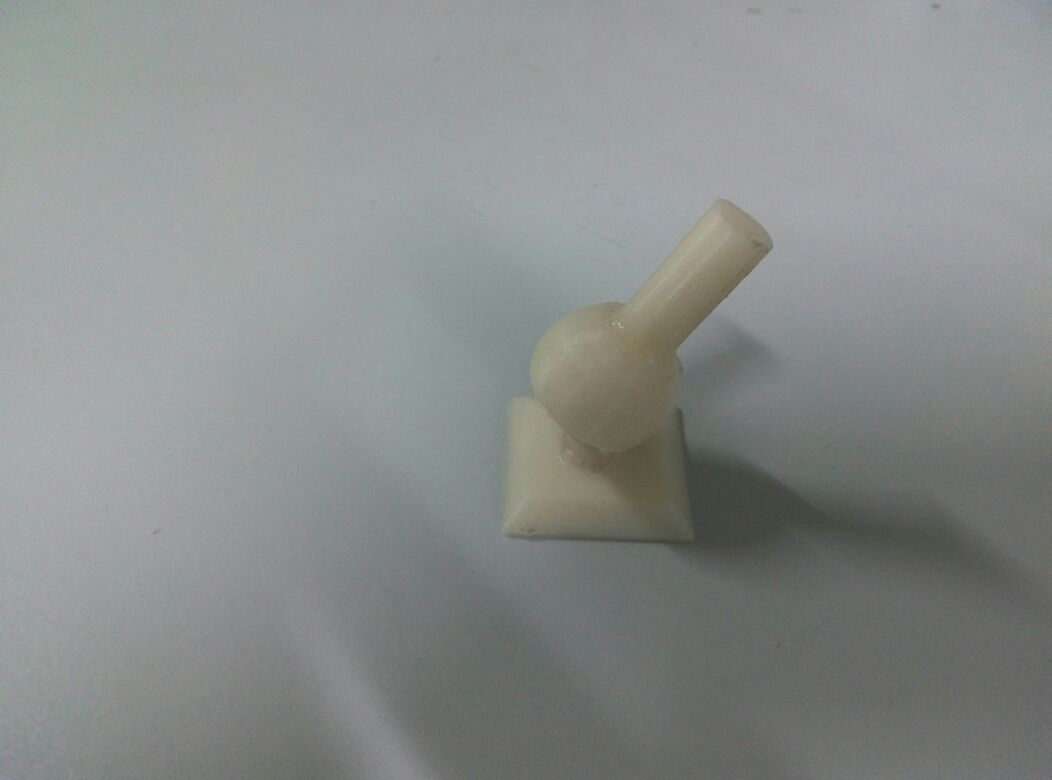
- Download:
- Ball joint design file
- Ball joint STL file
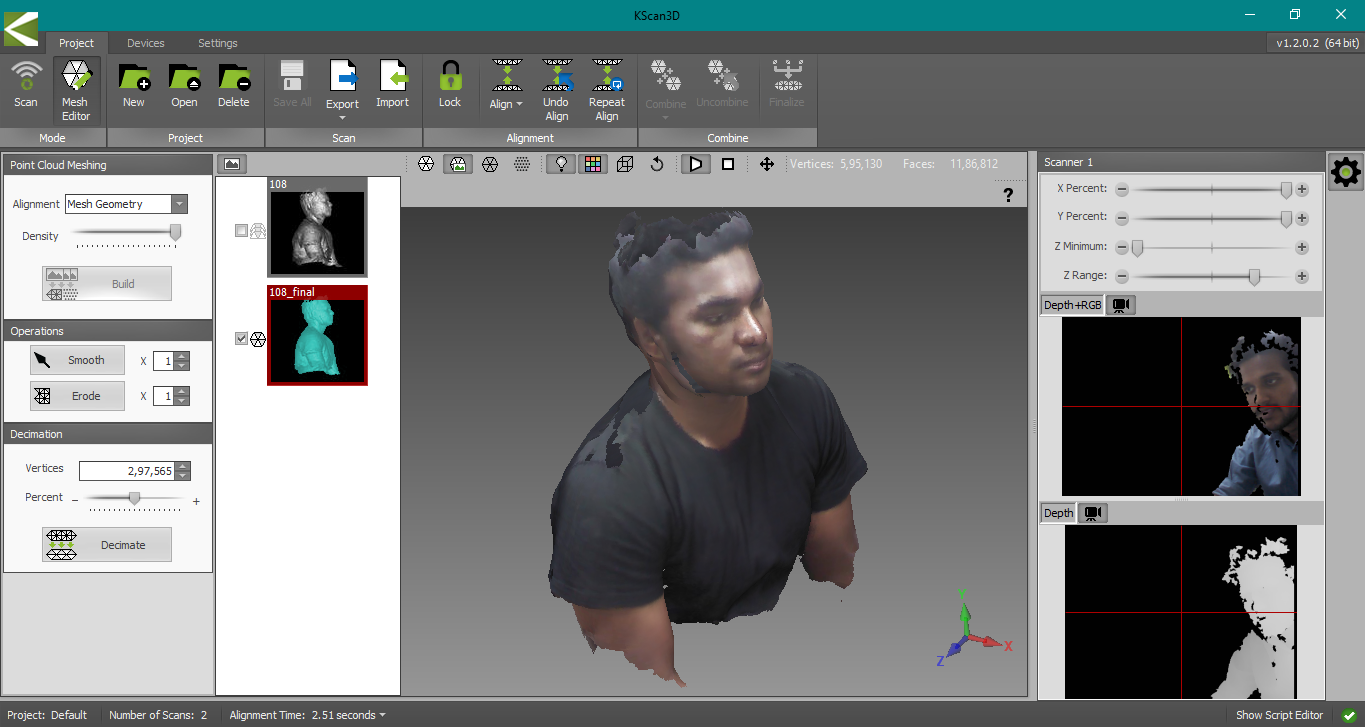
3D scanning
We have 2 scanners available here at fablab kochi- The Roland MDX-20 and the XBOX 360 kinect.
I decided to use the kinect since it was much less time consuming.
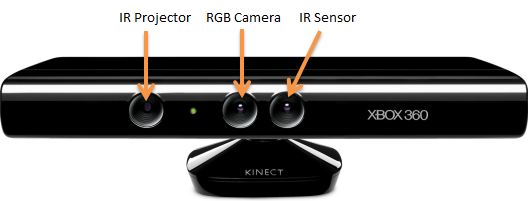
The software used for make the kinect into a scanner is kscan3d. Here is the download link- kscan3d
The best way to use the device for scanning is to place it in an optimal postion or platform and place the object to be scanned infront of it. the objects needs to be rotated in the appropriate intervals. Another method is to place object in a platform and move the device around it in appropriate intervals so that all the angles can be captured. We can set the required no of rotational settings as per our requirements. For me, i chose 12 rotations.
I scanned myself using the kinect device. I did this by sitting in a stool and placing the device parellel to my face. Each time the device beeped, i would change my seating position 30degrees so that my whole profile would be captured. The software created a pretty good 3D image of me.