Week - 7
Computer controlled mechining
Assignment:
Make something big using shopbot
This week want to make something that is not easily can make with a table saw or a bandsaw,iam planning to make a Beach bench for Fablab ,Kochi. , this is my frist experaince with CNC,i hope it would be a great experiance.
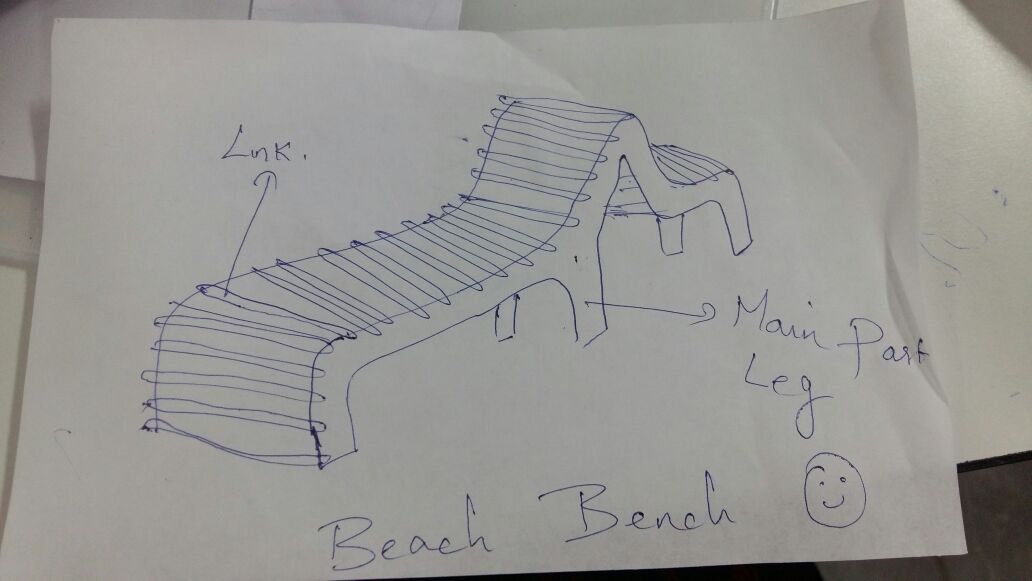
This is my plan,wish to make using shopbot
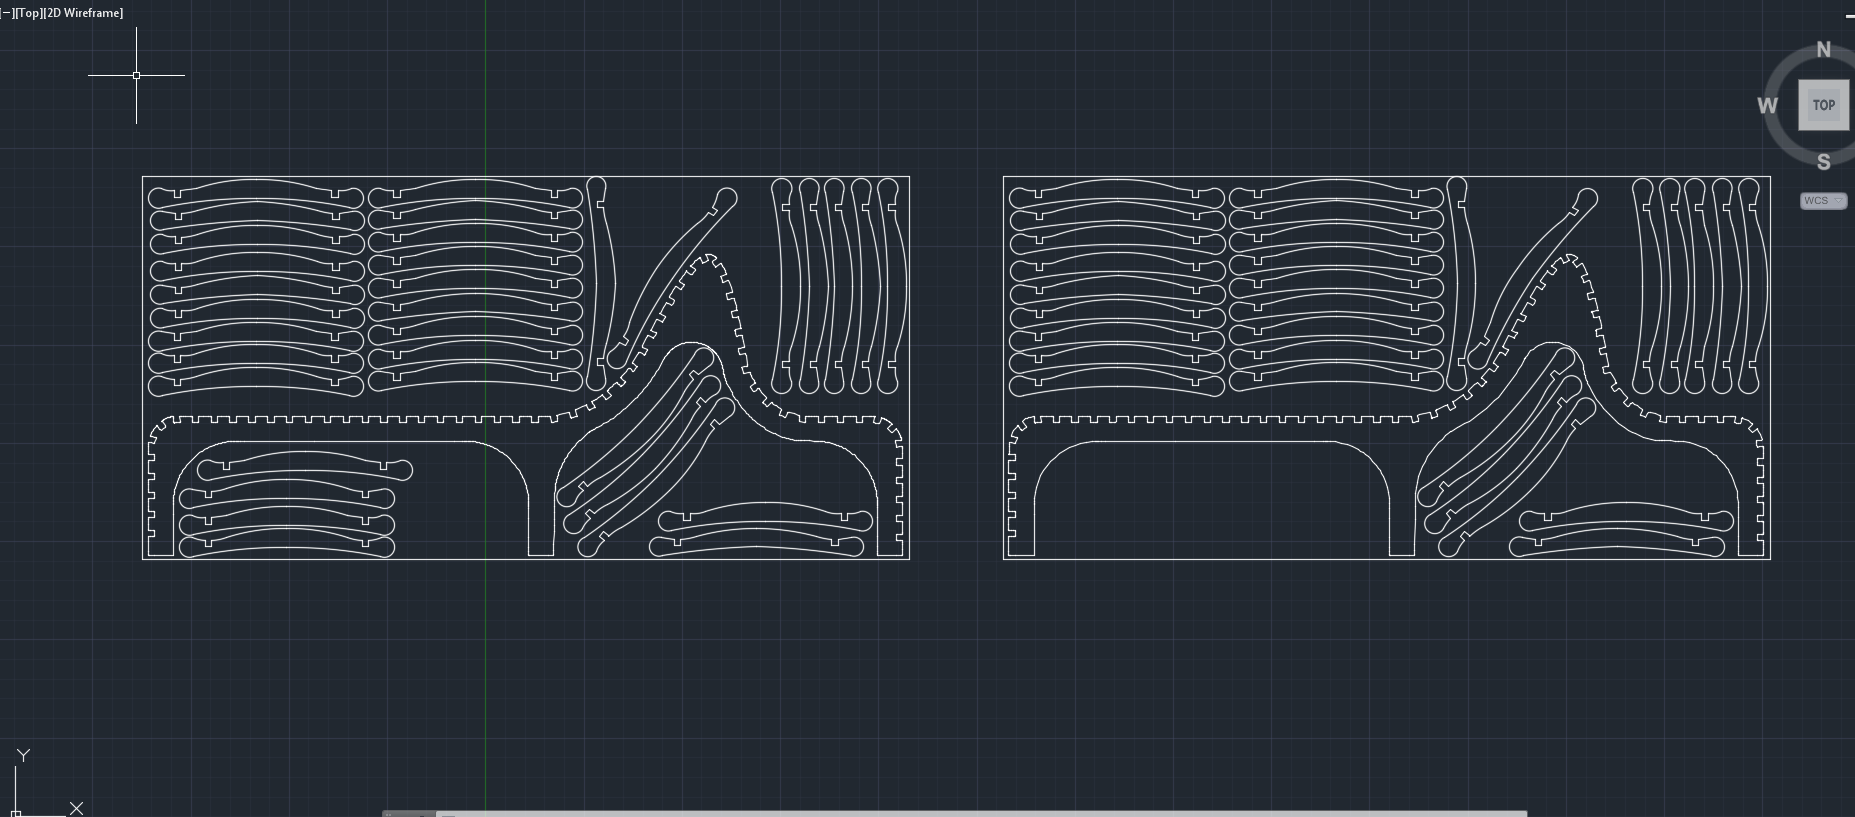
Designed parts and links,leg structure doubled it and link structure 64 times used two plywood sheets with diamension 2440x1220,software-Autocad.
process
- Shopbot setup
- Toolpath generating software
Step 1: Installing Bit
- Turn ON CNC
- ROUTINE WARM UP - NON FORGETTABLE STEP
Make sure the router bit is safely above the table (Can use MZ to adjust height ex. MZ 3 sets the router to a Z height of 3 inches above the table)
Move the router into the table, I prefer calling M2 10, 10 but you can also use the toggles in the yellow control panel
Unlock the Interlock Wrench and grab its counterpart
Loosen the vacuum hose brush
Loosen the collet using the two wrenches as shown
Change bit or hand tighten a new collet with a bit needing a different shaft size
Tighten collet
Retighten the vacuum hose brush
Choose the speed for your router based on what bit you’re using
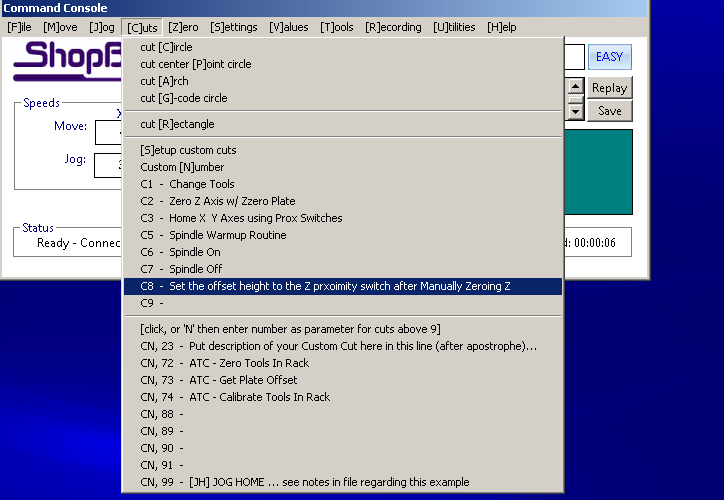
warm up session-its an important step and compulsory,my first step was warming up ,selected option ->cuts ->c8, 9 minuts warming up process total 3 sategs in 3 speeds after that shopbot spindle became turned off.
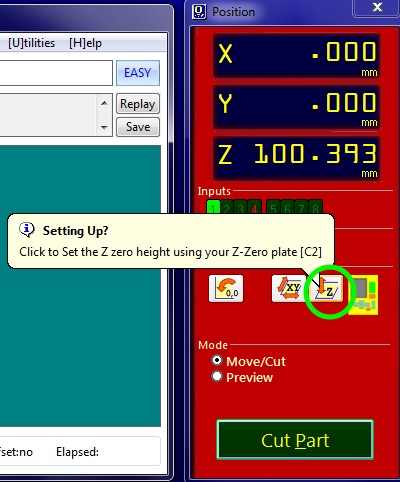
Step 2: Zero the Axis
Pull the Zeroing Plate and Alligator Clip off of the router
Attach the Alligator Clip to the Zeroing Screw on the CNC Router
Place the Zeroing Plate with a direct vertical path below the router bit
Call C2 on the control panel in Shopbot 3
A pop-up will appear in ShopBot 3 that asks you to make sure that the Alligator Clip and Plate are in position. You will need to agree to this for the zeroing process to begin.
Watch the Zeroing process to ensure the bit will hit the plate
Another pop-up will appear on the screen asking you to return the Alligator Clip and Plate.
The router should stay at a safe height above the table after being zeroed, however, if need be, raise the router safely above the table (ex. MZ2 or use the toggle control panel)-Call MH in Shopbot 3 to return the router to the X and Y home
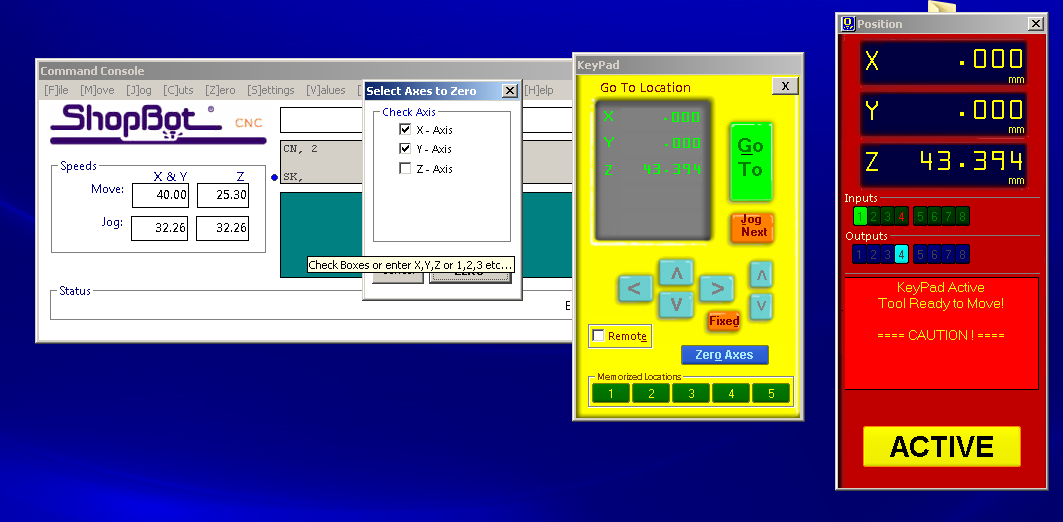
X Y setting session-this was the second step ,xy setting to start cutting process shopbot cnc positioning software ->keypad then manualyy set x direction y direction z direction ,using these 3 buttons i did located the spindle tip at right corner of the plywood board,after clicking zero axis option i did mark x axis and y axis ,as a result i got x and y zero,
next was z axis zero setting for that we are using "alligater key",
closed key pad,then clicked z setting up link
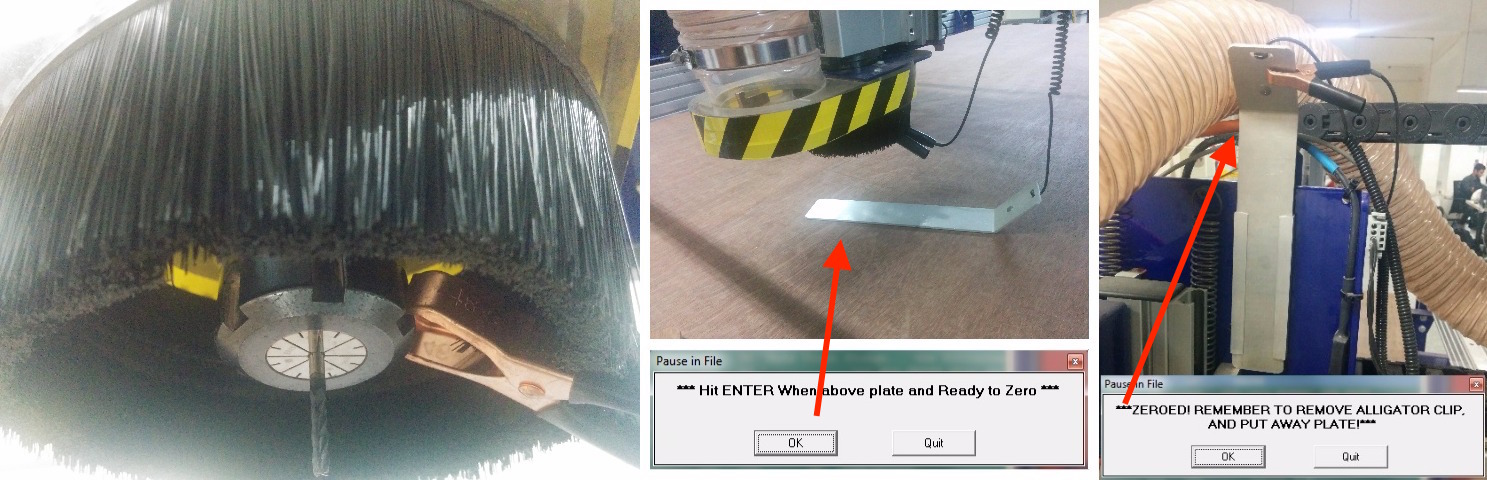
The machine makes the spindle move down and the mill bit touches the plate, this happens two times in order to figure out the exact Z axis height. After this, remove the alligator clip and place the metal plate back to its earlier position.
Step 3: Prepare Material for Cut
Raise the Z-axis if need be
Place your material to the X and Y home corner and screw the material to the CNC bed in safely out of the toolpaths way (refer to your VCarve Pro file to find safe spots to screw down)
Toolpath generating software -V curve
Opened the file using V -curve software,set width breadth and plywood thicknessd 12 mm.
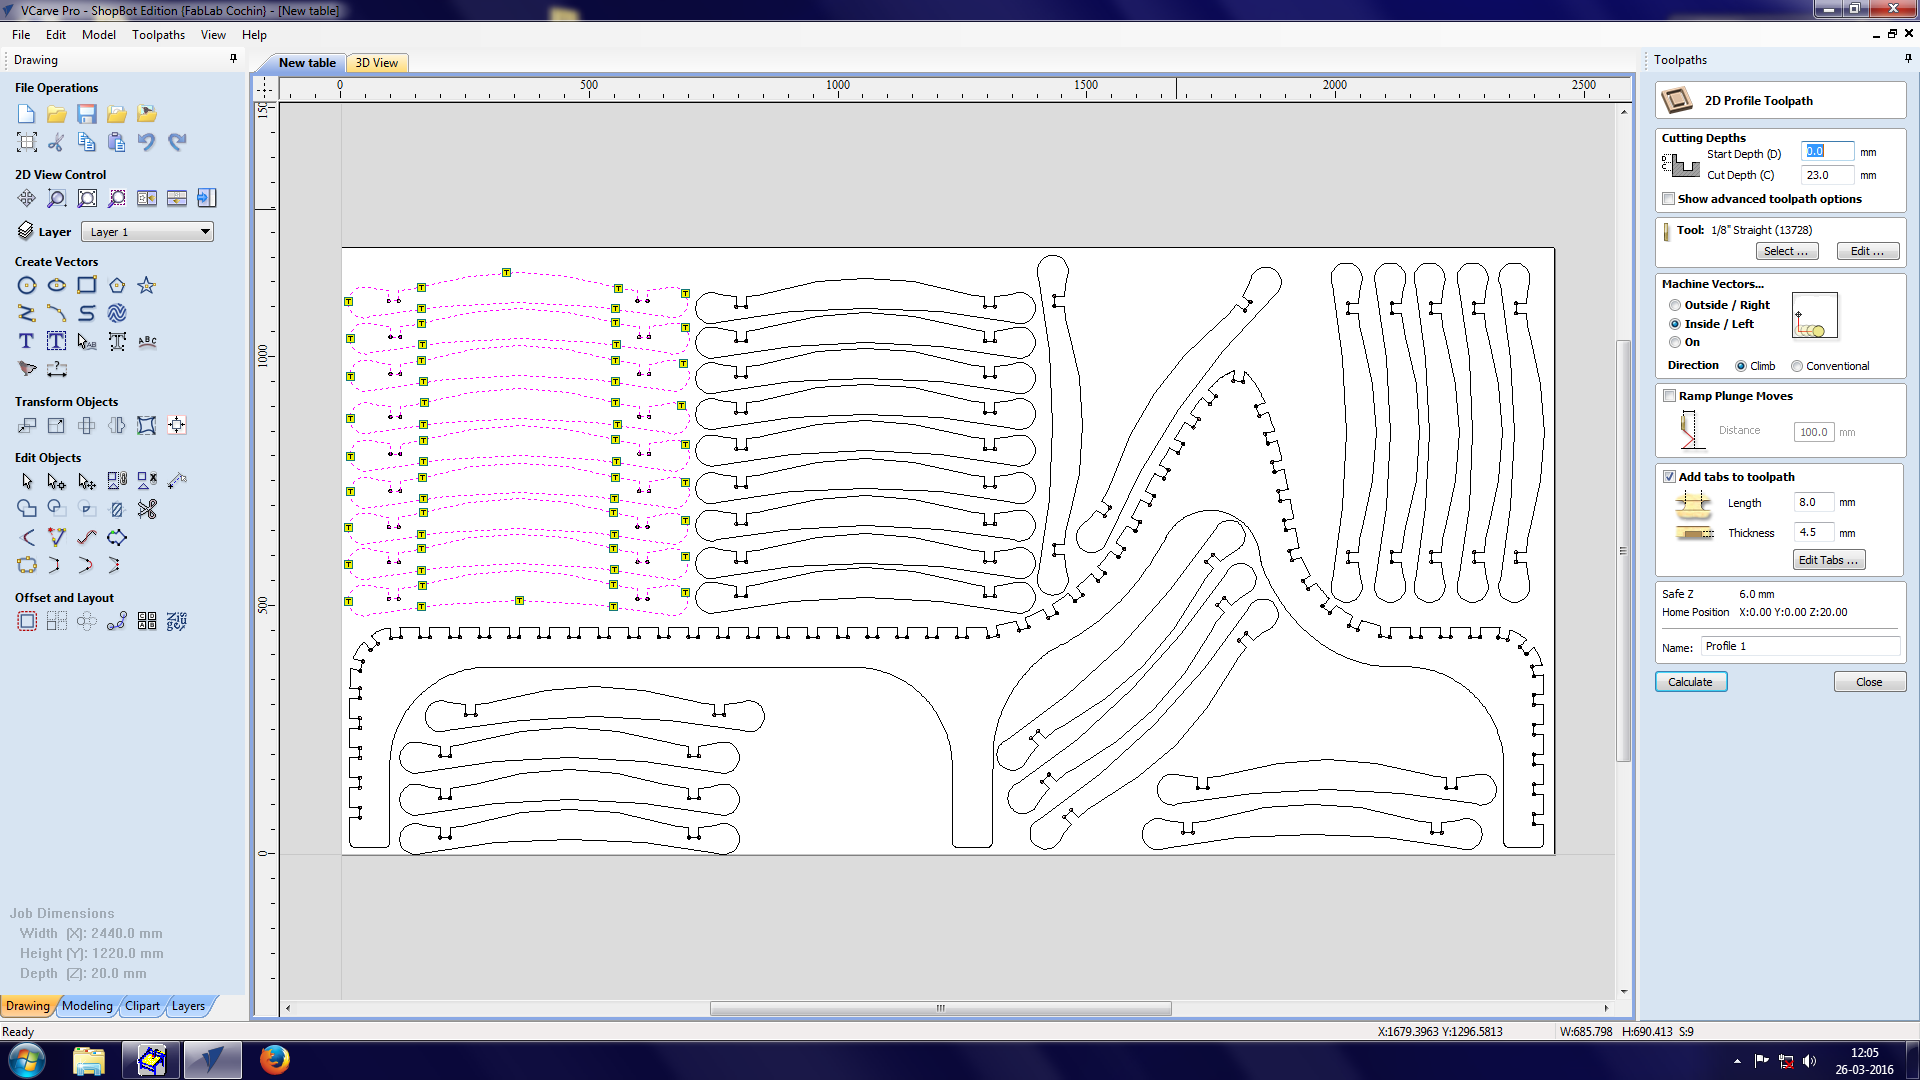
Then created drill holes by using the option "circle "to get a finished mode cutting,then selected the circles and opened the toolpath ,then calculated drill path,then selwected all link profiles specified outside cut and 8 tabs,then selected the profile 1 and proceed by selecting option calculate.

3d view of selected options-rendering i have to make sure links won't overlap,then only i will get a finished cutting,now i can see evrything is fine.
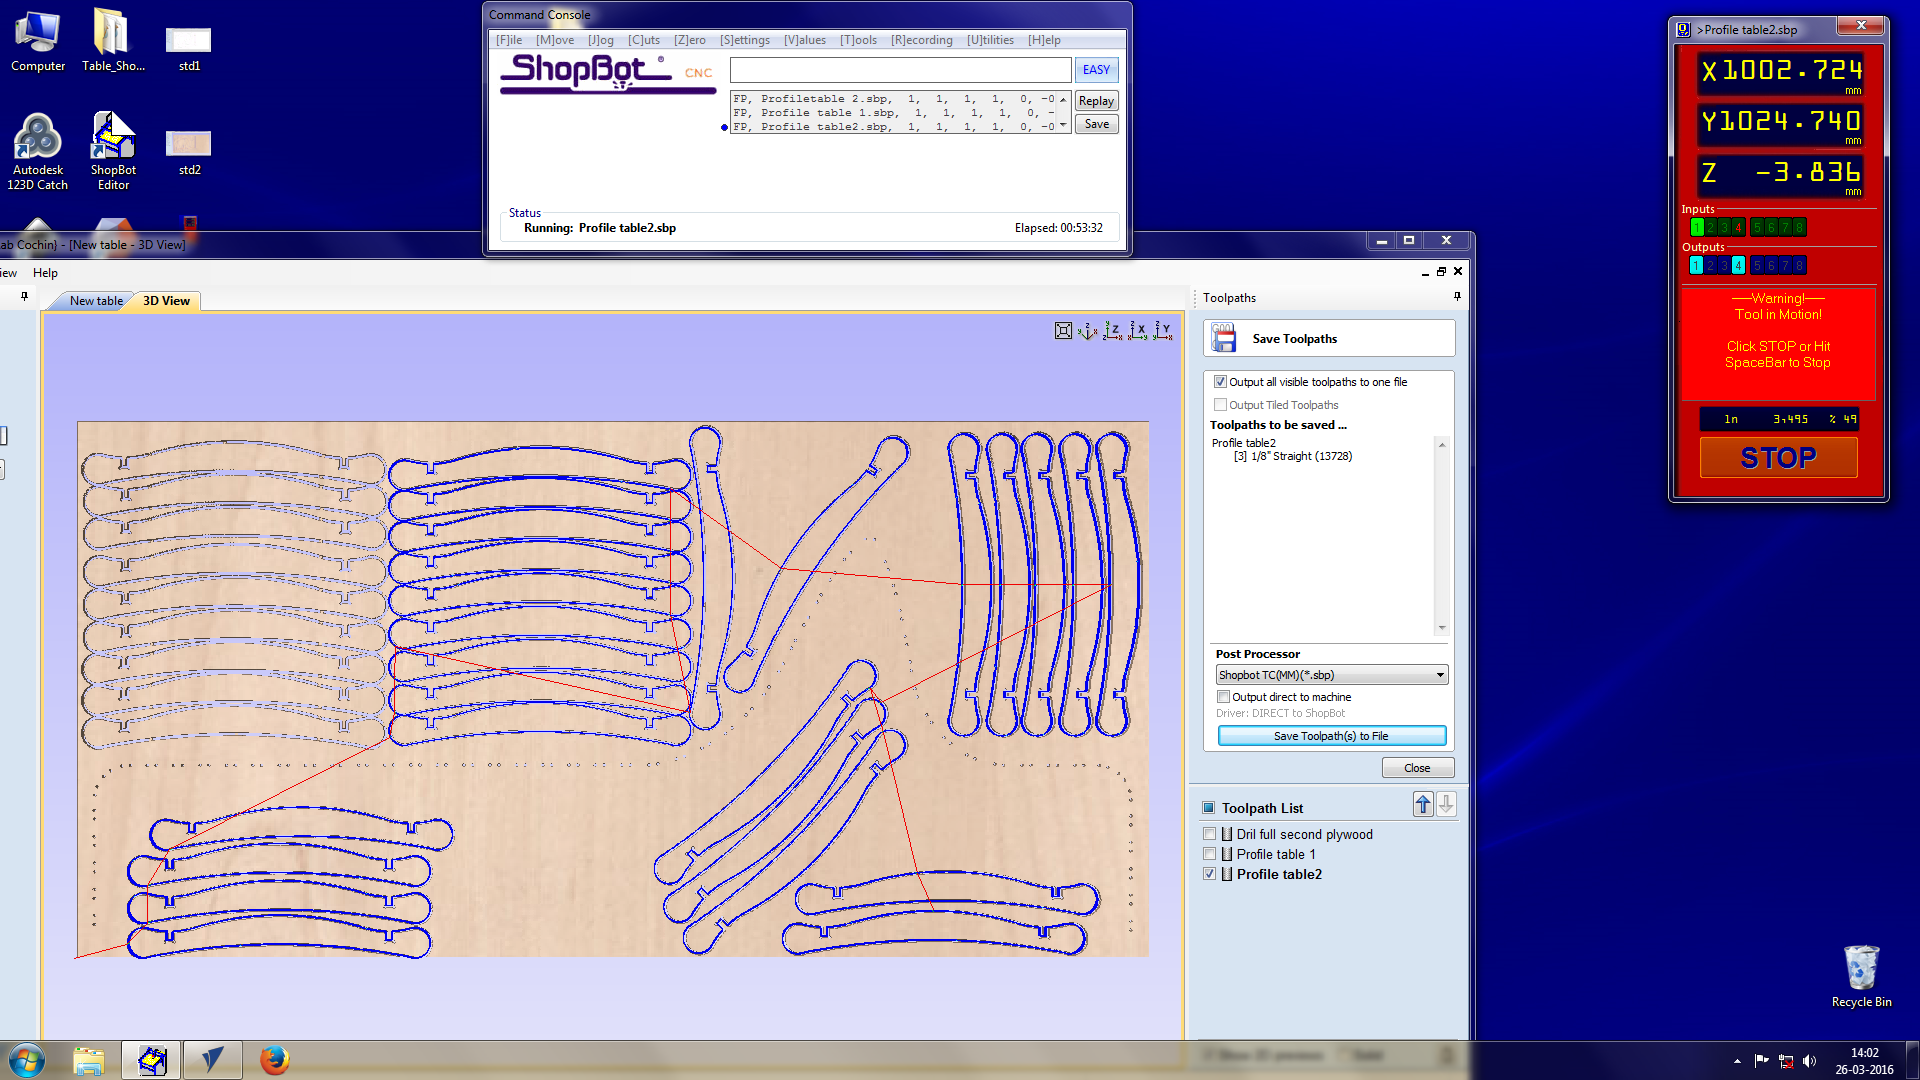
Toolpath list ->selected
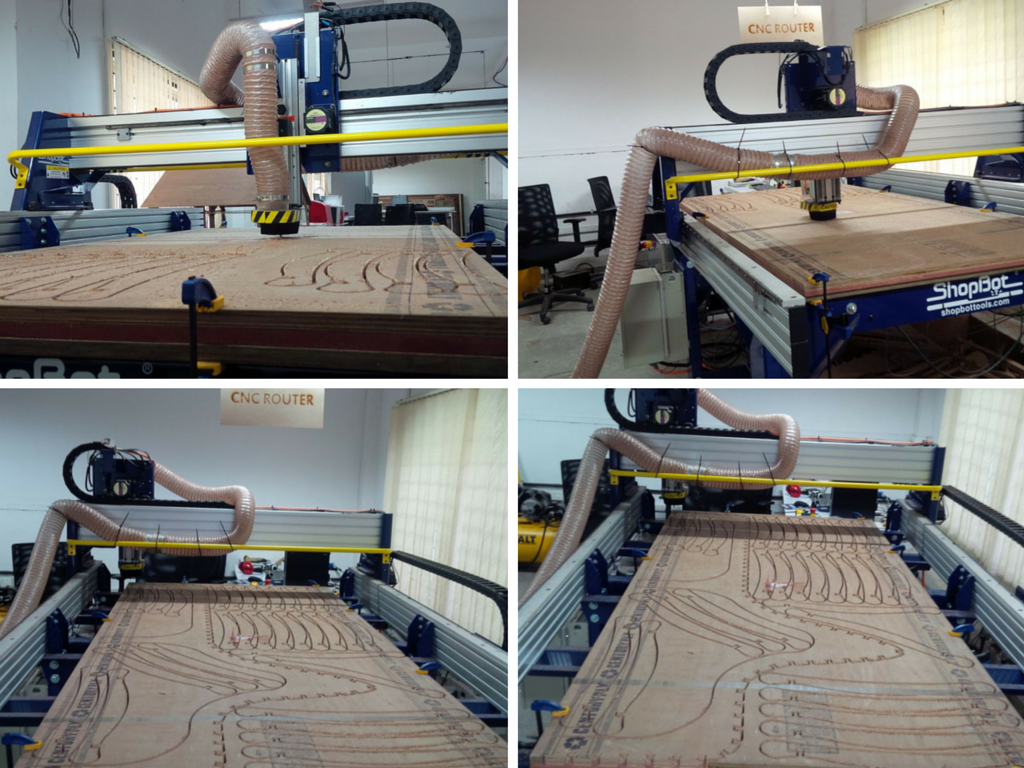
example pic for second plywood cutting
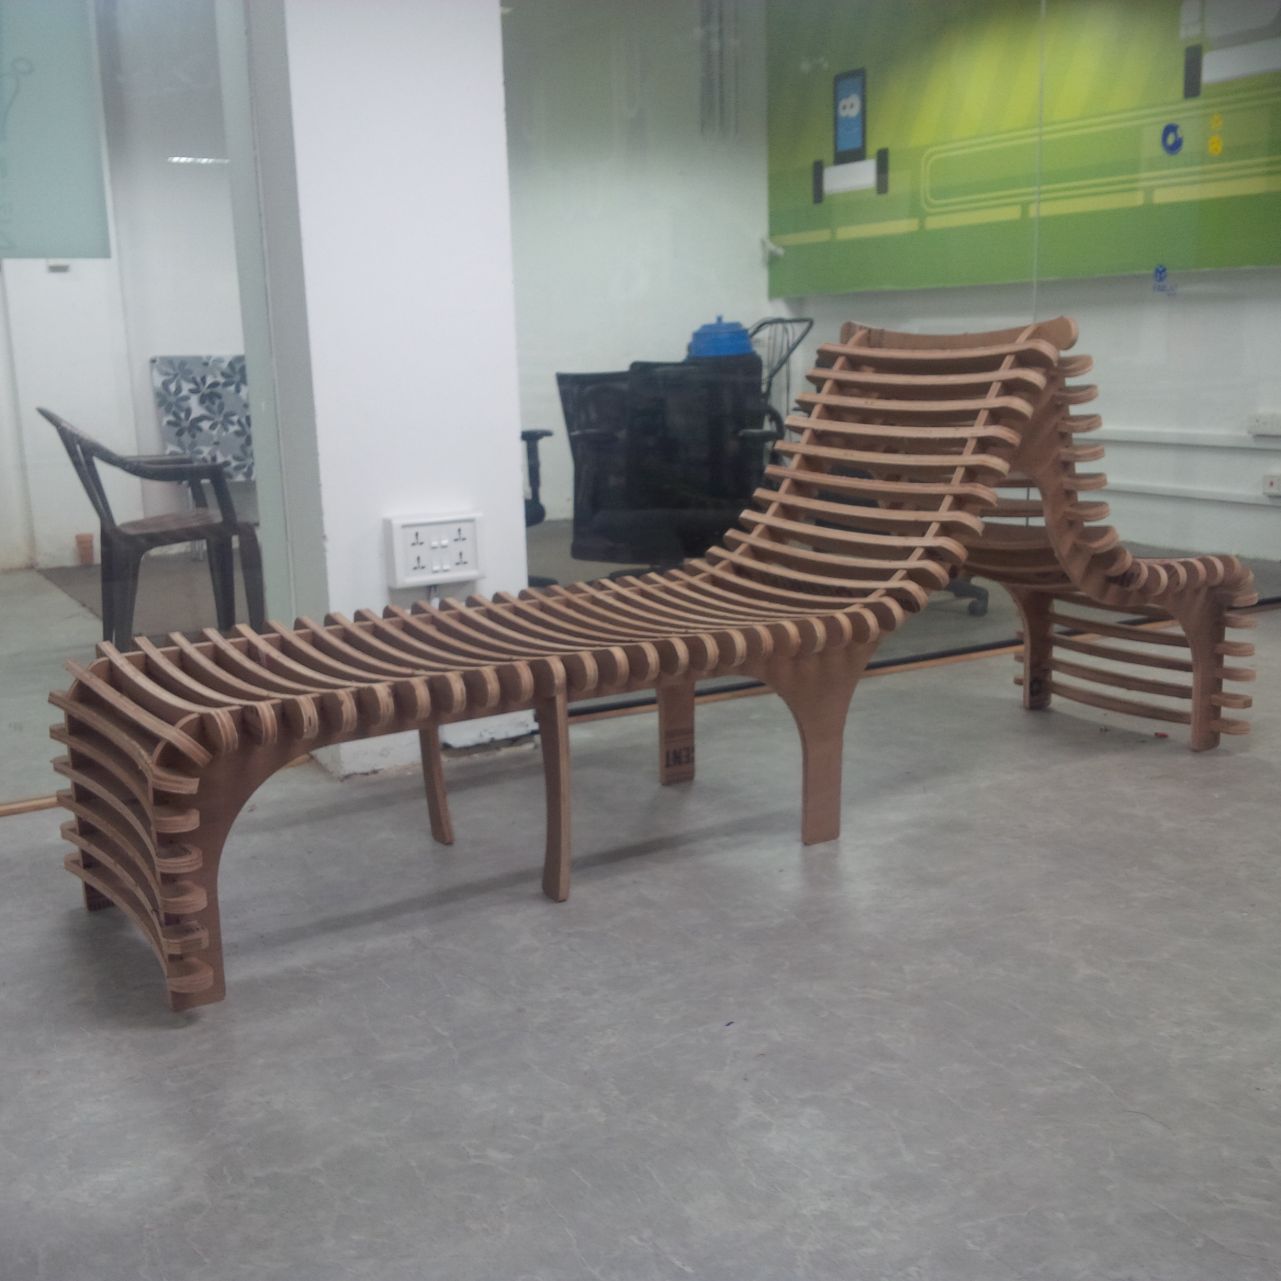
Final product,Assignment completed.