WEEK 9 + 10
mechanical design + machine design
Assignment
- make a machine, including the end effector
- build the passive parts and operate it manually
- document the group project and your individual contribution
- automate your machine
- document the group project and your individual contribution
Learning outcomes
- Work and communicate effectively in a team and independently
- Design, plan and build a system
- Analyse and solve technical problems
- Recognise opportunities for improvements in the design
Assignement's files
Work and communicate effectively in a team and independently
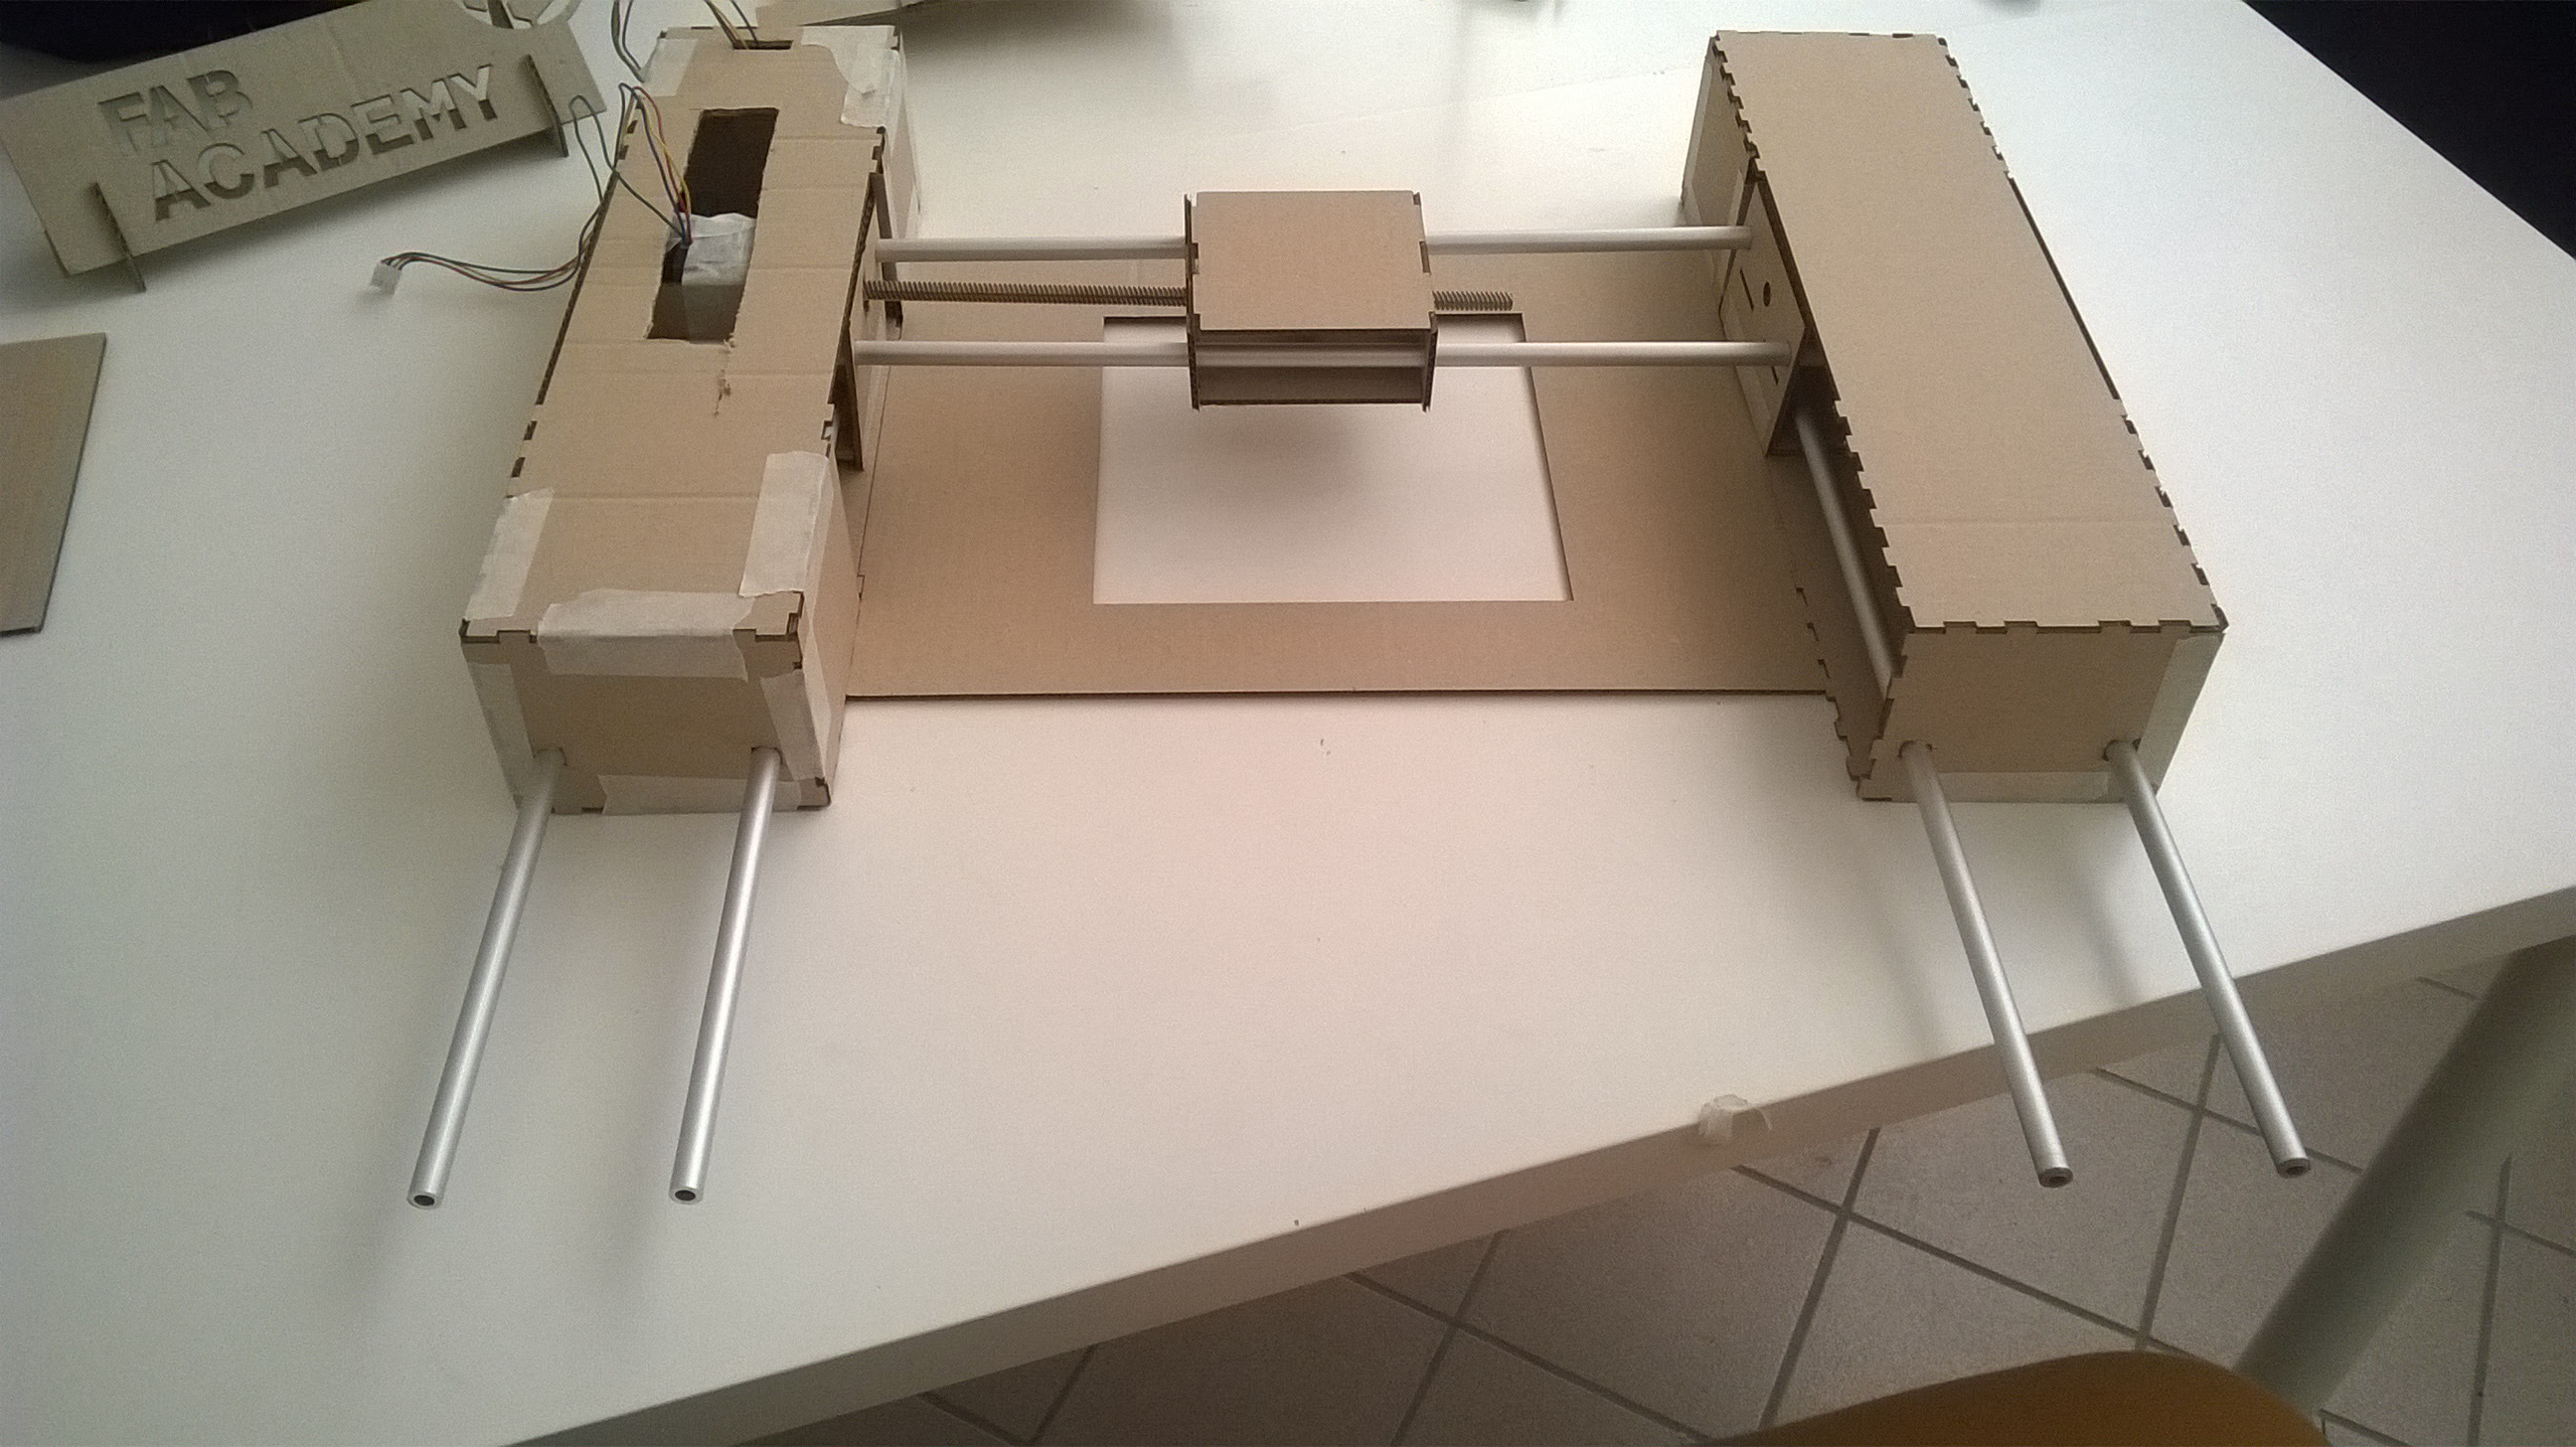
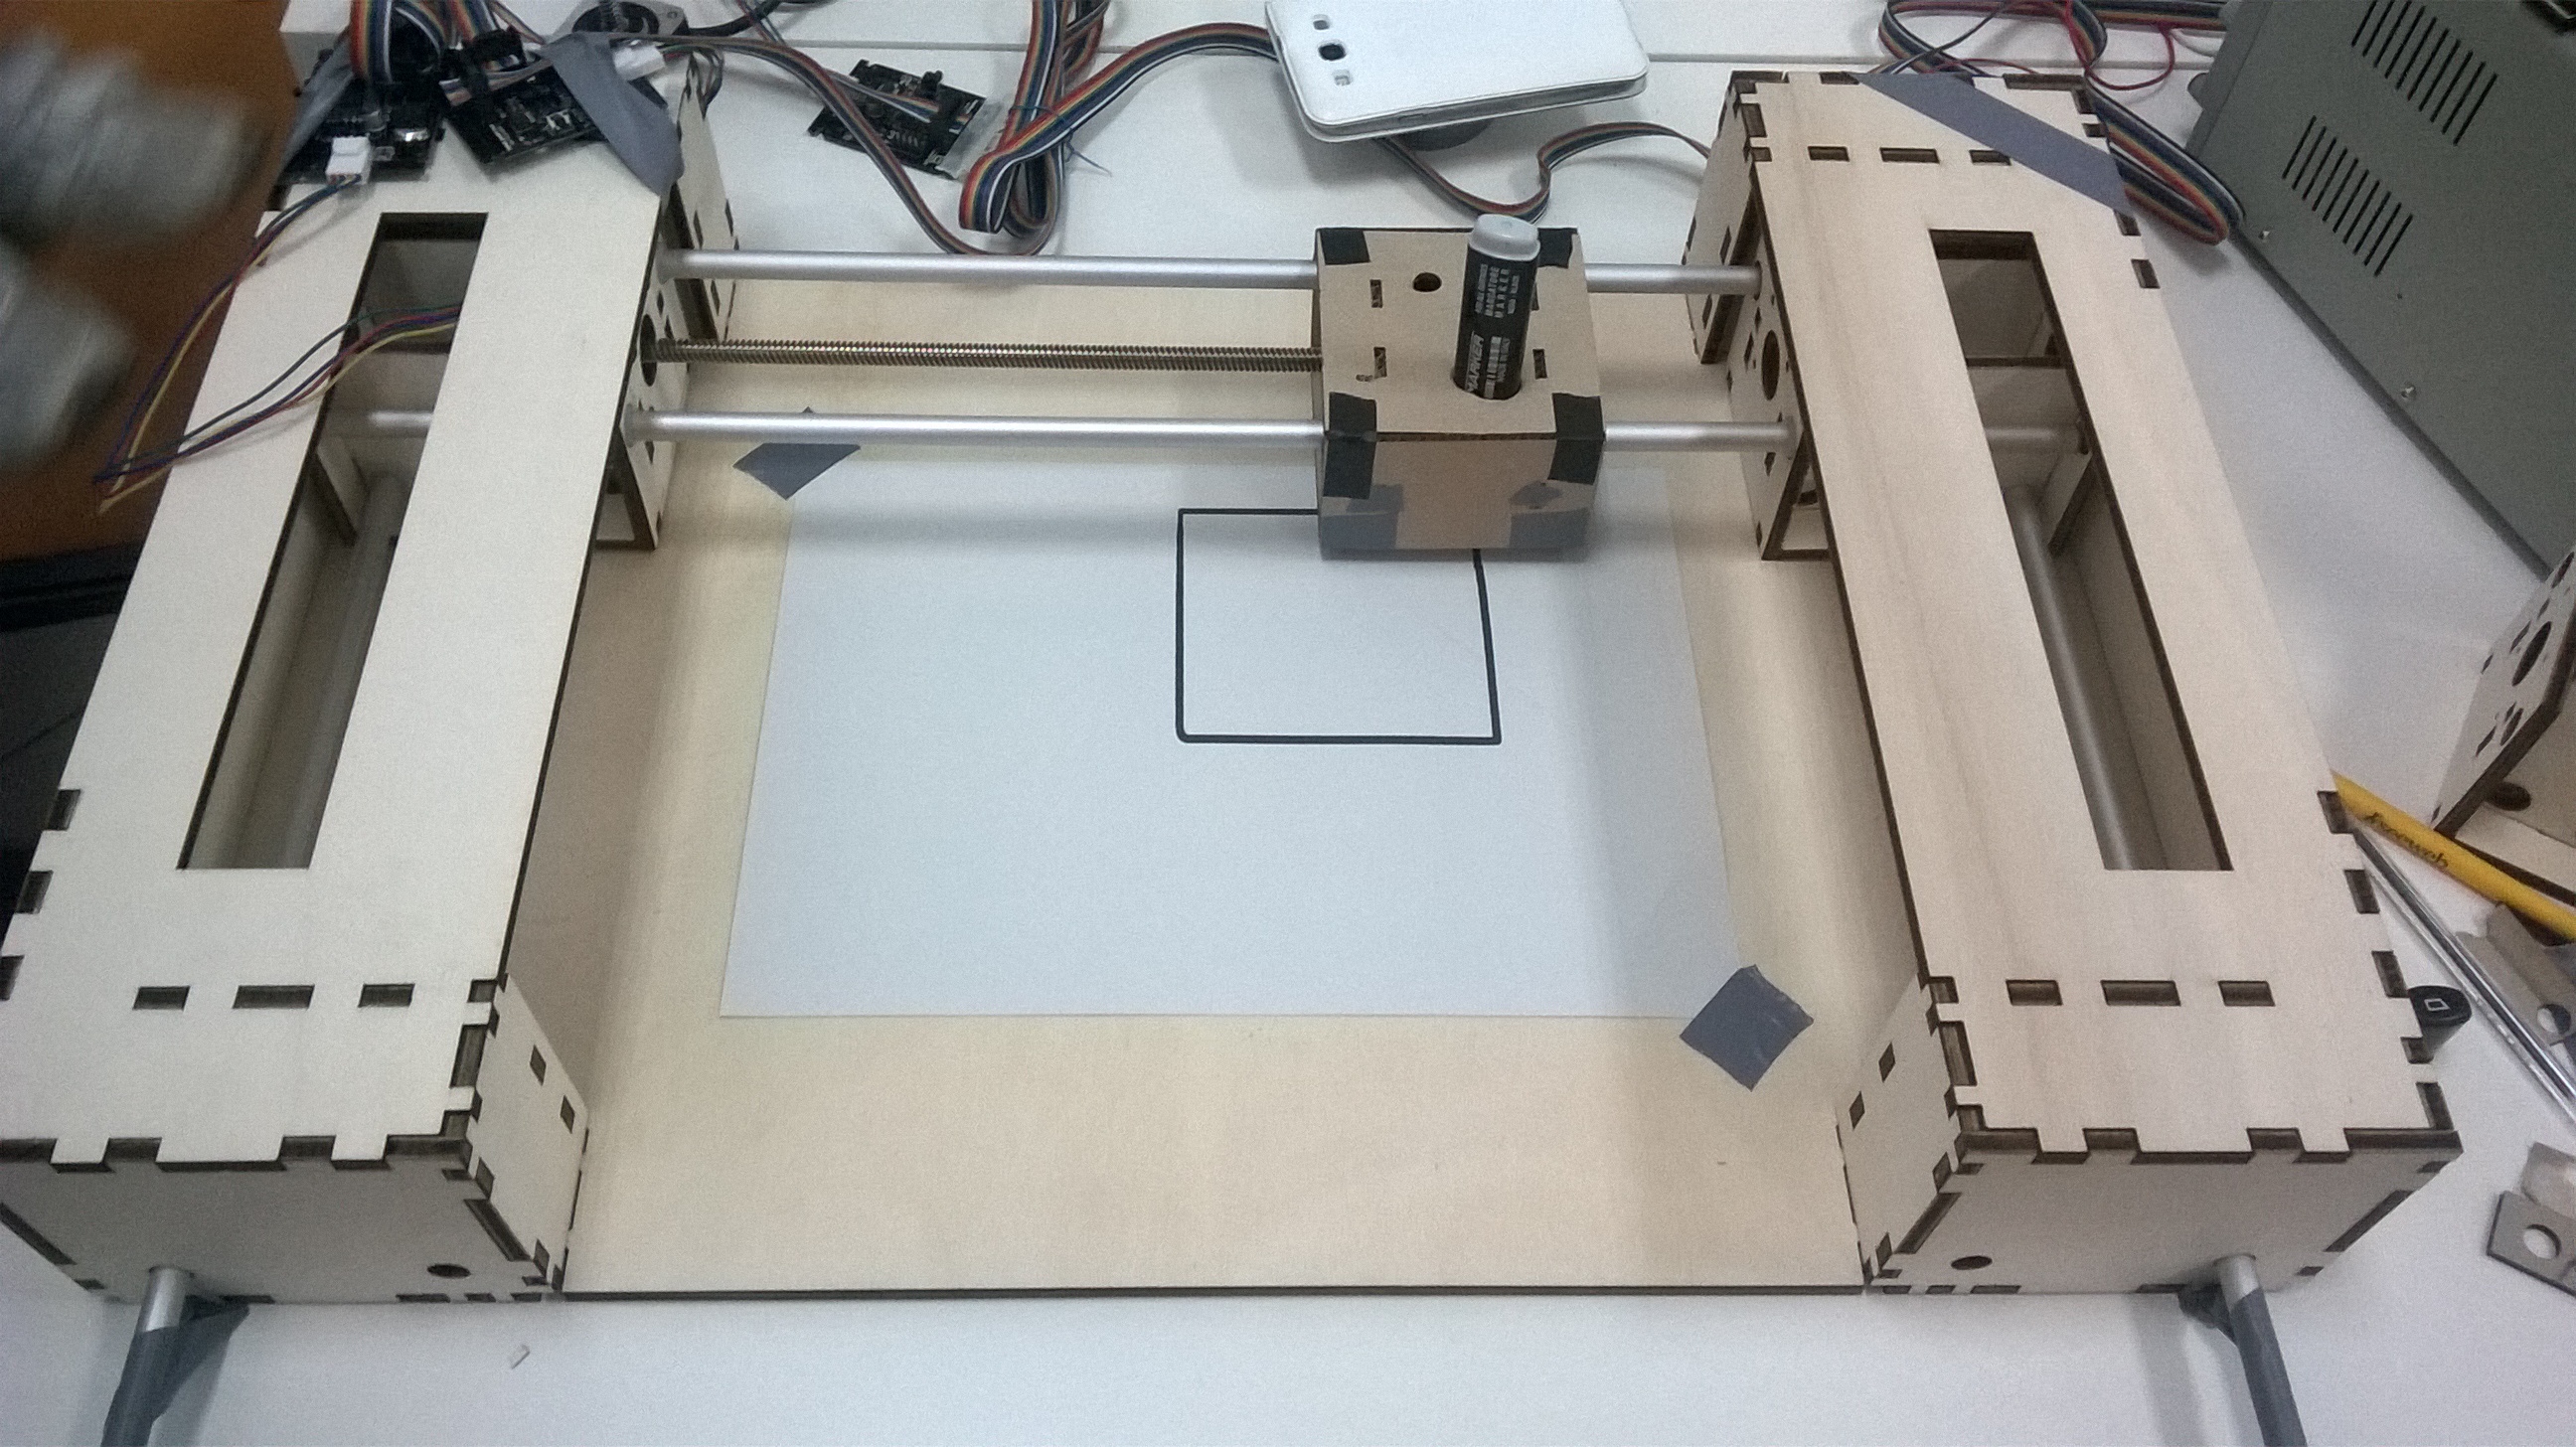
We decided to split the work in 2 main domains, Alessandro had designed and lasered the machine , he first made a cardoard version to try the mechanics and the after operatig it manually had he made a wooden version
My job focus was on coding the machine
Design, plan and build a system
With Alessandro we took a look to Ilan's thesis to get an idea on what machine to build, due to our non technical backgroung and because we are only 2 student at Frosinone FabLab, to be sure of completing successfully the assignement in the given time we choose to make a basic 2 axies machine
Analyse and solve technical problems
First of all a read completely the Ilan's thesis to undertand the Gestalt framework approach
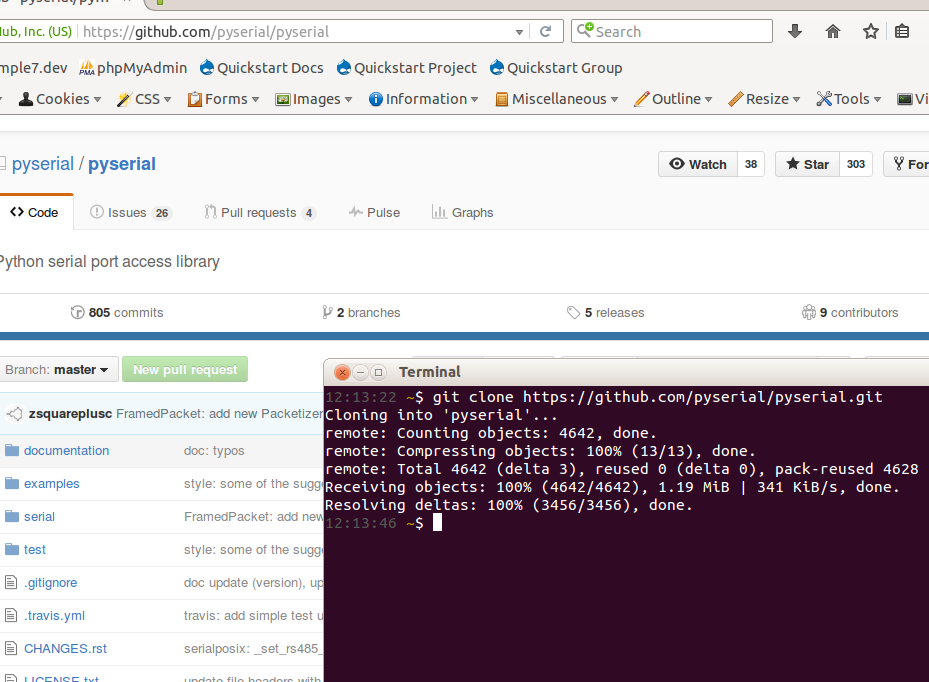
Then I downloaded the framework exploring its content
To learn better the Python language I used the Learn Python The Hard Way on-line book
To learn better the Python language I used the Learn Python The Hard Way on-line book
The Modular Machines that Make helped me to get confidence with Gestalt concept
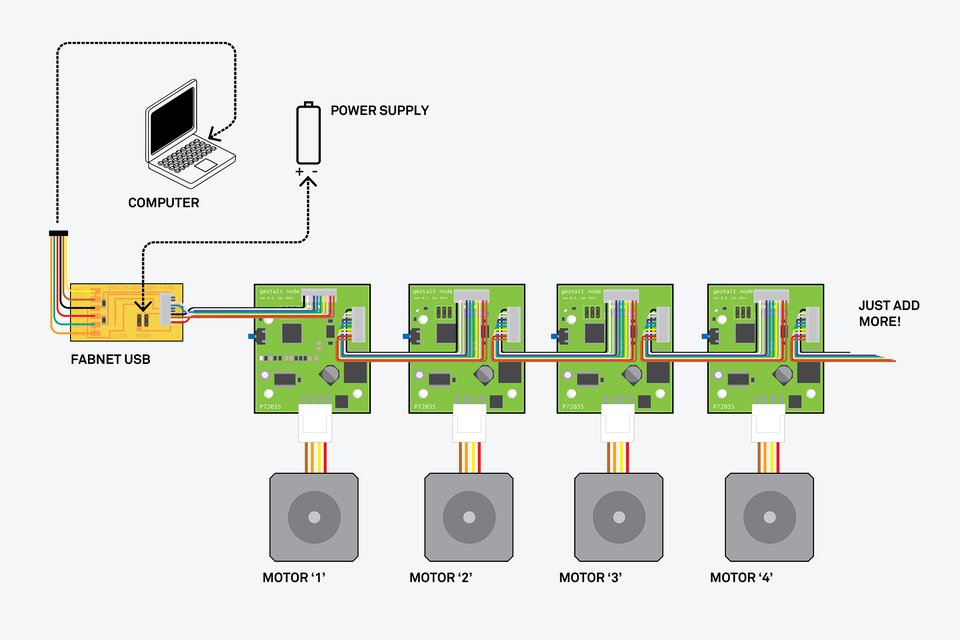
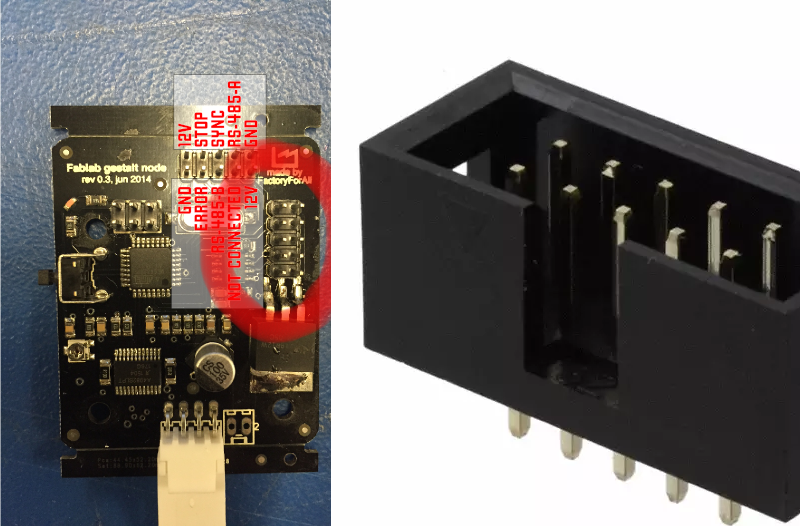
To make the machine work you need to install the gestalt library with python setup.py install If not installed, install pyserial. Indeed pygestalt need pyserial for serial communication with the nodes. It is important to do not hot plug the boards. So the correct procedure is connecting the boards together and to the Fabnet, connect them to the pc and then to the power supply. To connect the boards together you can use a ribbon cable. Pay attention to the two connectors on the board. One for in and one for out. Always check the polarity when plugging the cable. Moreover the power supply should be setted up to provide 12 V
To create new machine you have to import the Gestalt library
from pygestalt import nodes
from pygestalt import interfaces

from pygestalt import machines

from pygestalt import functions

from pygestalt.machines import elements

from pygestalt.machines import kinematics

from pygestalt.machines import state

from pygestalt.utilities import notice

from pygestalt.publish import rpc   #remote procedure call dispatcher

import time

import io
then you define the virtual machine class that is a set of functions and parameters that defines the machine (i.e. number of axis, kinematics etc)
from pygestalt import nodes
class virtualMachine(machines.virtualMachine):
then you tell to gestalt how to connect with the nodes. Here is important to change the name of the serial port used:
def initInterfaces(self):

        if self.providedInterface: self.fabnet = self.providedInterface     #providedInterface is defined in the virtualMachine class.

        else: self.fabnet = interfaces.gestaltInterface('FABNET', interfaces.serialInterface(baudRate = 115200, interfaceType = 'ftdi', portName = '/dev/ttyUSB0'))
Now is time to define axis
def initControllers(self):


        self.xAxisNode = nodes.networkedGestaltNode('X Axis', self.fabnet, filename = '086-005a.py', persistence = self.persistence)


        self.y1AxisNode = nodes.networkedGestaltNode('Y1 Axis', self.fabnet, filename = '086-005a.py', persistence = self.persistence)


        self.y2AxisNode = nodes.networkedGestaltNode('Y2 Axis', self.fabnet, filename = '086-005a.py', persistence = self.persistence)


        self.xyyNode = nodes.compoundNode(self.xAxisNode, self.y1AxisNode, self.y2AxisNode)
The kinematics properties of the nodes depends on the physical characteristics of the nodes used (step, microstep, pulleys etc). It is very important to correctly set up the parameters or it will result in an incorrect movement
    def initKinematics(self):


        self.xAxis = elements.elementChain.forward([elements.microstep.forward(4), elements.stepper.forward(1.8), elements.leadscrew.forward(8), elements.invert.forward(True)])


        self.y1Axis = elements.elementChain.forward([elements.microstep.forward(4), elements.stepper.forward(1.8), elements.leadscrew.forward(8), elements.invert.forward(False)])


        self.y2Axis = elements.elementChain.forward([elements.microstep.forward(4), elements.stepper.forward(1.8), elements.leadscrew.forward(8), elements.invert.forward(False)])


        self.stageKinematics = kinematics.direct(3) #direct drive on all axes
some testing
we decided to draw a square from the command line
moves = [[0,100,100],[100,100,100],[100,0,0],[0,0,0]]
The working machine
Recognise opportunities for improvements in the design
I spent a lot of time to find the right position of the ribbon cable connector, one way to make the connection of nodes faster may be to change the header with this header